Workspace projects
An Arcweave project is a self-contained unit that holds the structure, content, and assets of an interactive story. It allows you to design, test, share, and export your work. Projects include project items such as boards, elements, and components, and support both collaboration and external integration.
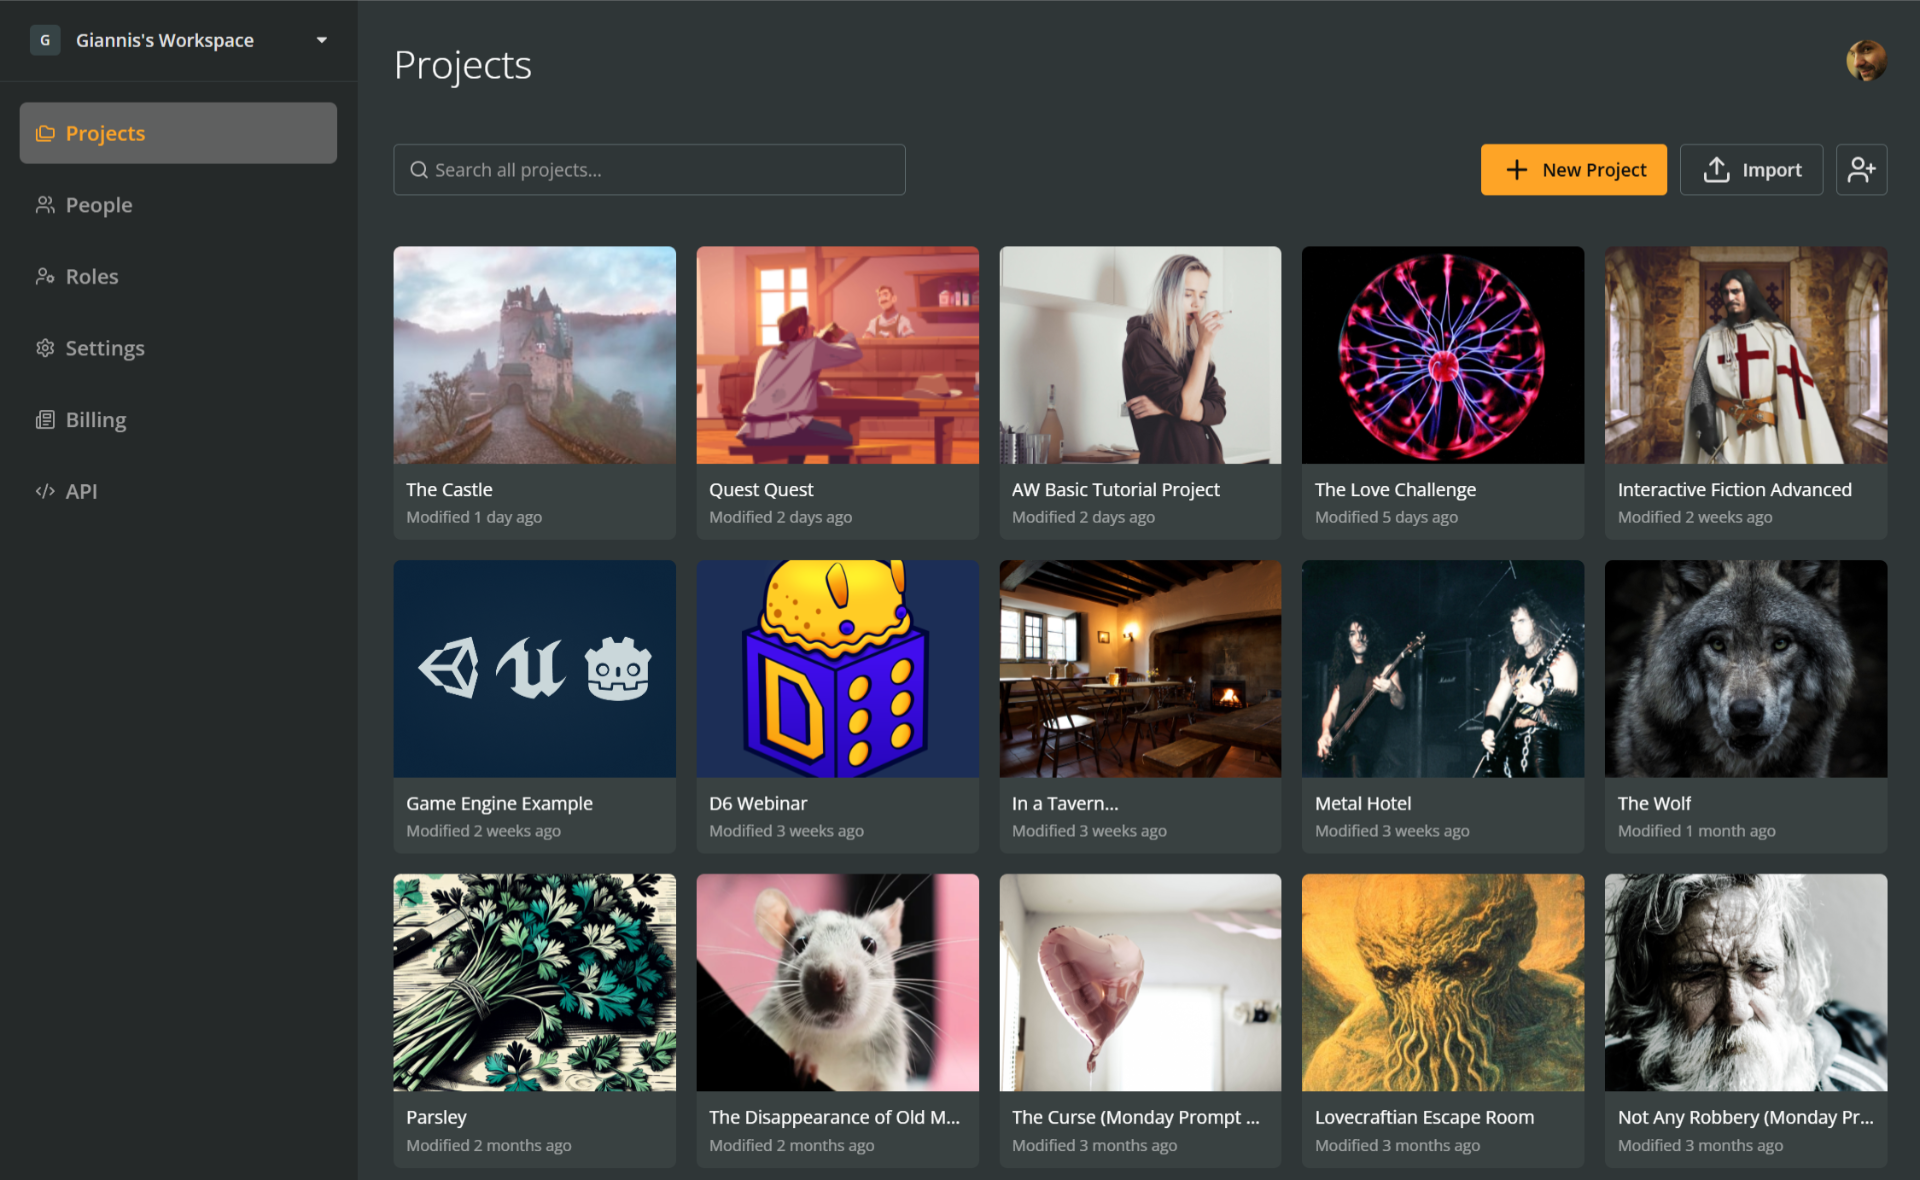
The Projects section displays the workspace's projects.
ℹ️ Guests and members with restricted permissions will only see the projects they have access to.
Project thumbnails
All the workspace projects are shown as thumbnails in a grid. You can access project-specific options through the menu on each thumbnail.
Search
Use the search field to quickly filter projects by title.
Create projects
To create a new project:
- Go to the Projects section of your workspace.
- Click the + New Project button.
- Select Blank Project.
A new project will be created and automatically opened.
ℹ️ Basic workspaces can have up to 3 projects.
Project templates
Arcweave includes built-in project templates that you can recreate to expand and learn from. To create a project from one of the templates:
- Go to the workspace's Projects section.
- Click the + New project button.
- Select a template from the menu.
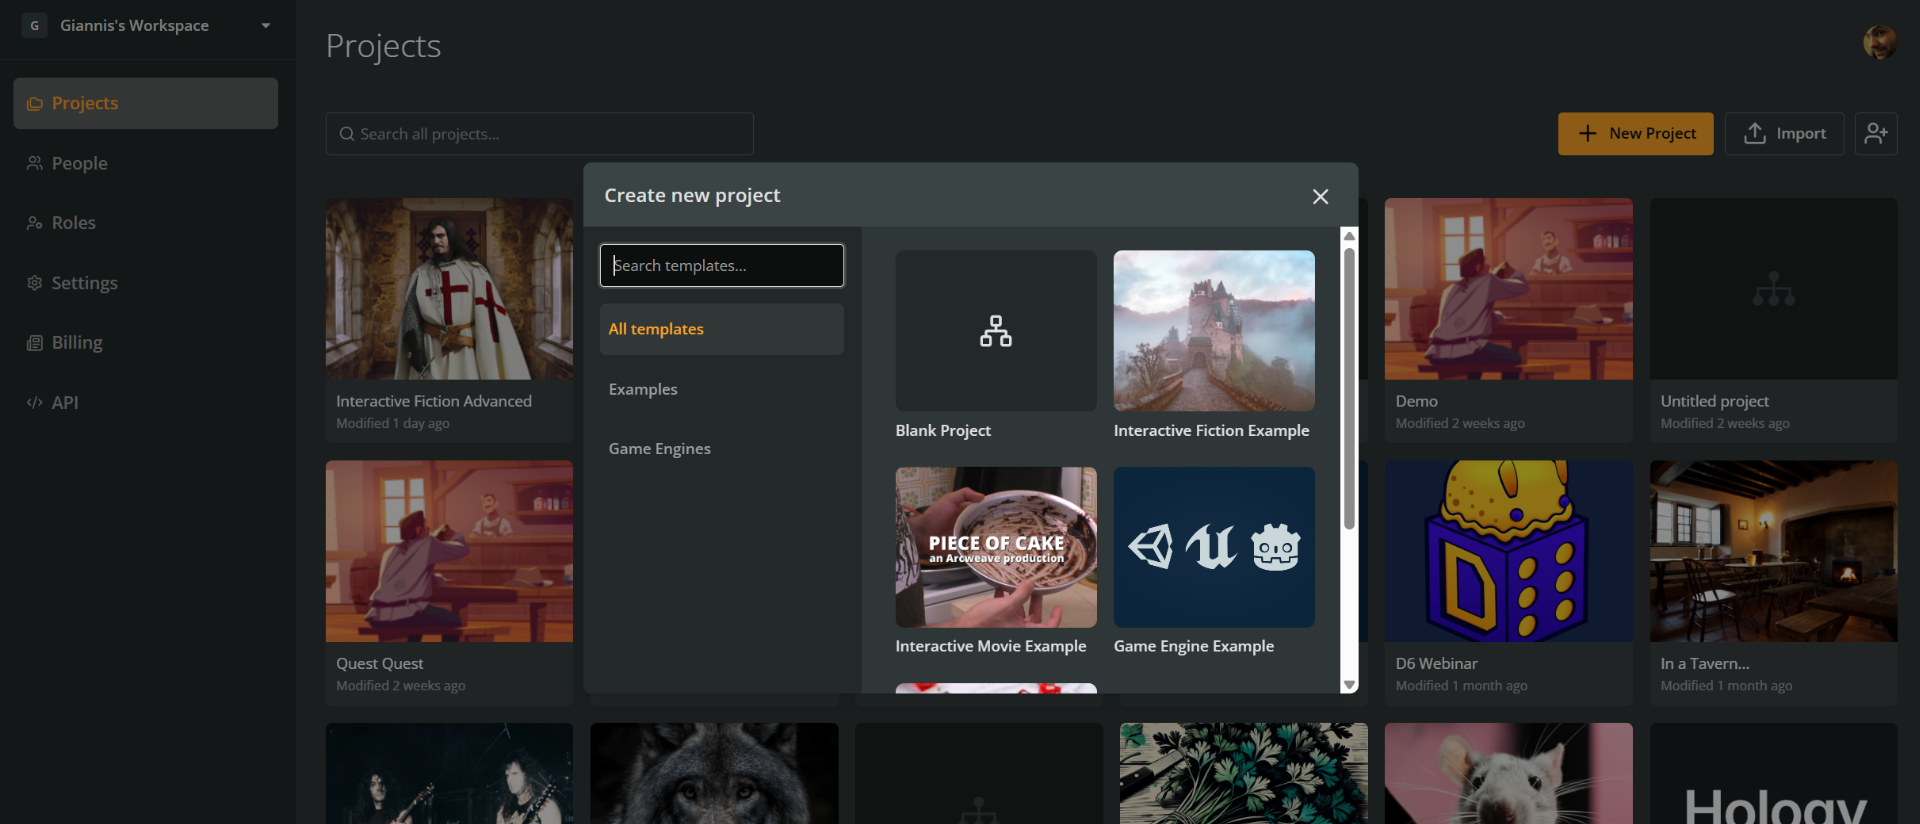
✅ Try the Game Engine Example to see how Arcweave integrates with popular game engines. Watch the video tutorials on the Unreal and Godot plugins to get a glimpse of such integrations.
Import projects
You can import projects into Pro and Team workspaces using the following file formats.
Arcweave file
An Arcweave file (.arcw) is the native backup format used by Arcweave. It contains the complete project data, including notes, comments, and assets, as well as positions of all board items.
To generate an Arcweave file, export a project as a backup.
Arcweave JSON
You can also import a project from an Arcweave JSON file (.json) that was either previously exported from Arcweave or otherwise generated, as long as it follows the Arcweave JSON format.
✅ If the JSON includes board item coordinates (e.g. it were exported with Include coordinates enabled), board items will be restored to their original positions and sizes upon import.
Import a project
To import a project into your workspace:
- Go to the Projects section of your workspace.
- Click the Import button at the top right.
- Choose the file format you want to import.
- Select the file from your device and upload it.
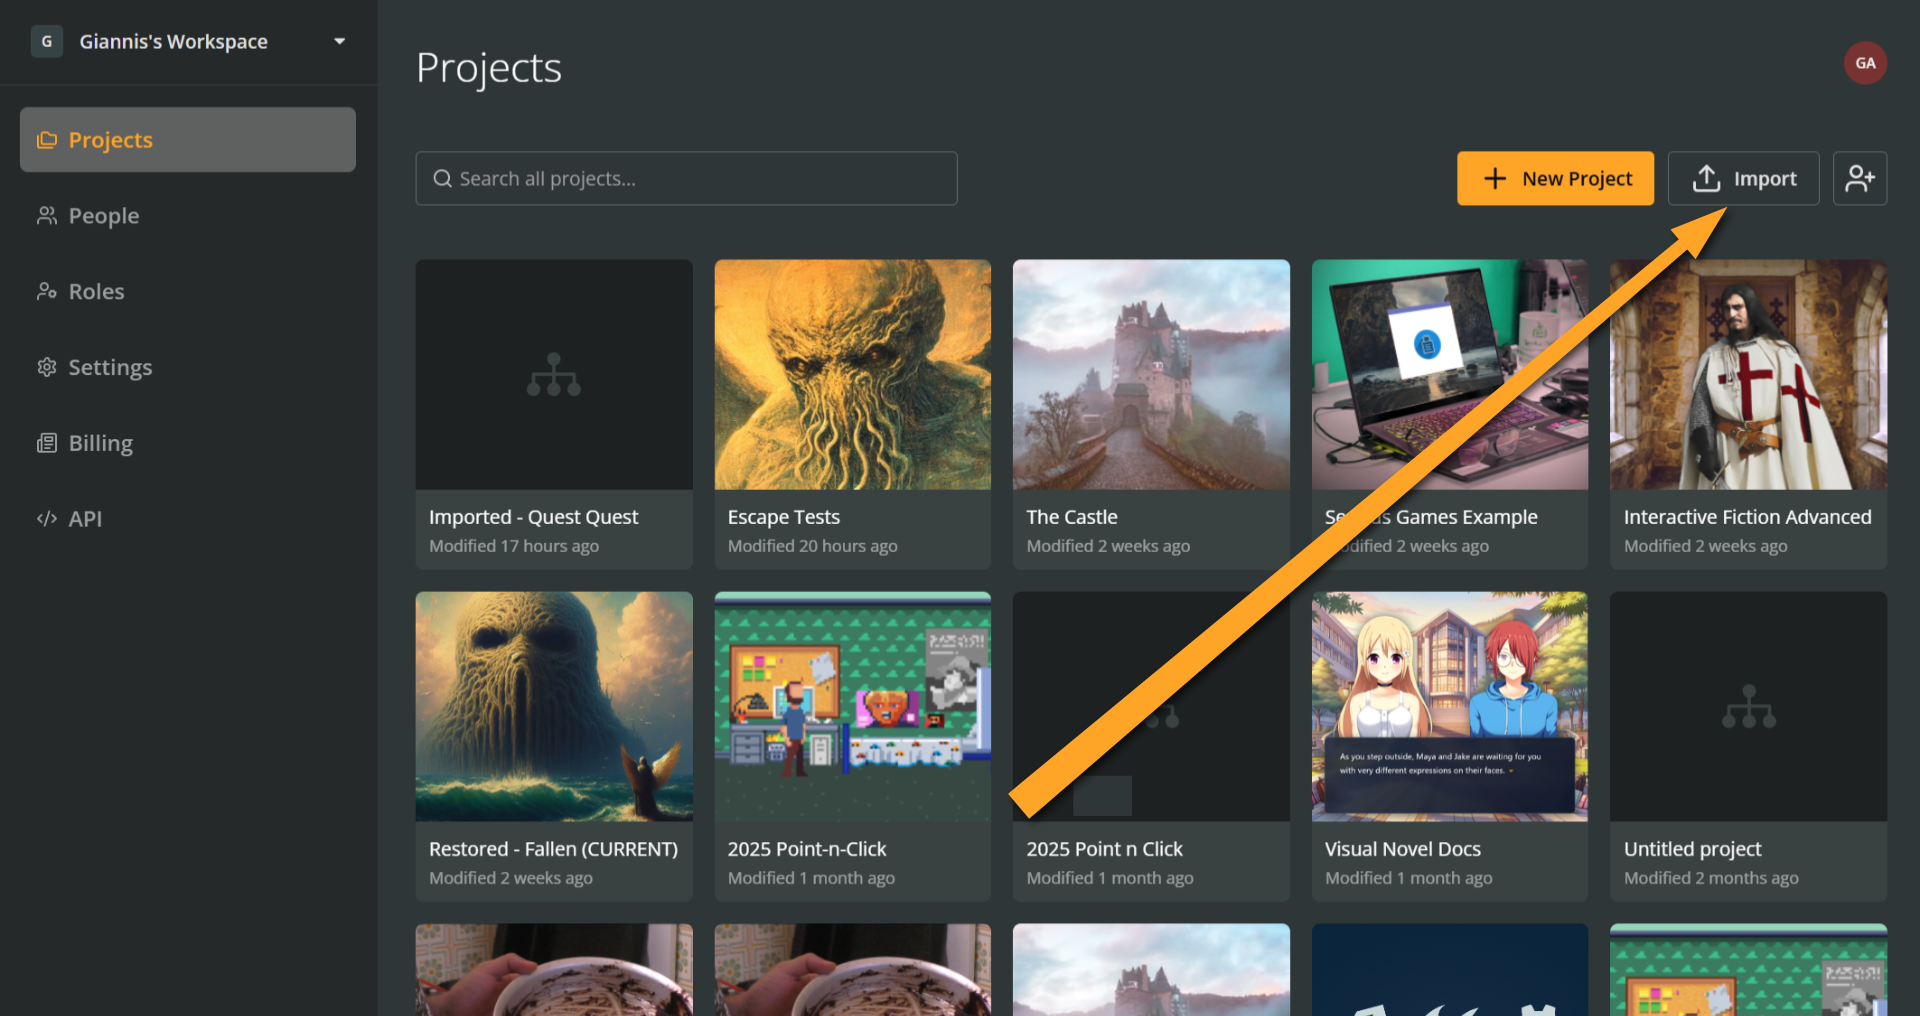
Once the import is complete, the project will appear in your workspace's Projects list.
Invite people
Click the Invite people button at the top right to invite team members to your workspace.
Project menu
From the Projects section, you can open the menu for any project to perform the following actions:
- Delete
- Duplicate (Pro and Team workspaces only)
- Rename
- Upload/Change cover
- Remove cover (if any)
- Move to workspace
Open project menu
Once in the Projects section, open the menu for a project as follows:
- Hover over the project's thumbnail.
- Click the ••• icon that appears at its top-right corner.
- Select the action you want to perform from the menu.
Or:
- Right-click the thumbnail.
- Select the action you want to perform from the menu.
Delete projects
To delete a project:
- Go to the workspace's Projects section.
- Open the project's menu using the ••• icon or by right-clicking the thumbnail.
- Select Delete.
⚠️ Deleting a project is permanent and cannot be undone.
Duplicate projects
Pro and Team workspaces include the feature of project duplication. To duplicate a project:
- Go to the workspace's Projects section.
- Open the project's menu using the ••• icon or by right-clicking the thumbnail.
- Select Duplicate.
Rename projects
To rename a project:
While the project is open: Click the project's name at the top left of the window.
From within the workspace:
- Go to the workspace's Projects section.
- Open the project's menu using the ••• icon or by right-clicking the thumbnail.
- Select Rename.
- Type a new name for the project and press Enter.
Project cover
You can add, change, or remove a project's cover image from the Projects section.
Add project covers
- Go to the workspace's Projects section.
- Open the project menu via ••• or right-click.
- Select Upload cover... and choose an image.
Change project covers
- Go to the workspace's Projects section.
- Open the project menu.
- Select Change cover... and choose a new image.
Remove project covers
- Go to the workspace's Projects section.
- Open the project menu.
- Select Remove cover.
Move projects
To move a project from one workspace to another:
- Go to the workspace's Projects section.
- Open the project menu.
- Select Move to workspace.
- Select the target workspace from the dropdown menu and press Move.
Open projects
From the Projects section, click a project's thumbnail to open the project.
Exit projects
From within a project, click the Workspace icon at the top left of the window (next to the project name) to return to the workspace.