Localization
✅ The Localization feature is currently in closed beta. Request access here to enable it for your workspace.
Arcweave includes built-in localization tools to manage translations of your project into multiple languages. It allows you to:
- Translate your project collaboratively and efficiently.
- Work safely: adding/removing project items is disabled while translating.
- Let players choose their preferred language in Play mode.
- Select which languages to include during export to JSON.
⚠️ A user must have project editing permissions to translate.
Main language & translations
By default, an Arcweave project has only one language, referred to as the project's Main language. By default, this is English, but you can set any language as main.
⚠️ When working in any language other than its main, the project enters Translation Mode. Once in Translation Mode, you cannot add or delete project items; you can only translate existing ones.
ℹ️ To return to Arcweve's default editing mode, you need to switch back to the project's main language.
Open localization
To open the localization menu, click the Localization icon on the right side of the top menu.
![]()
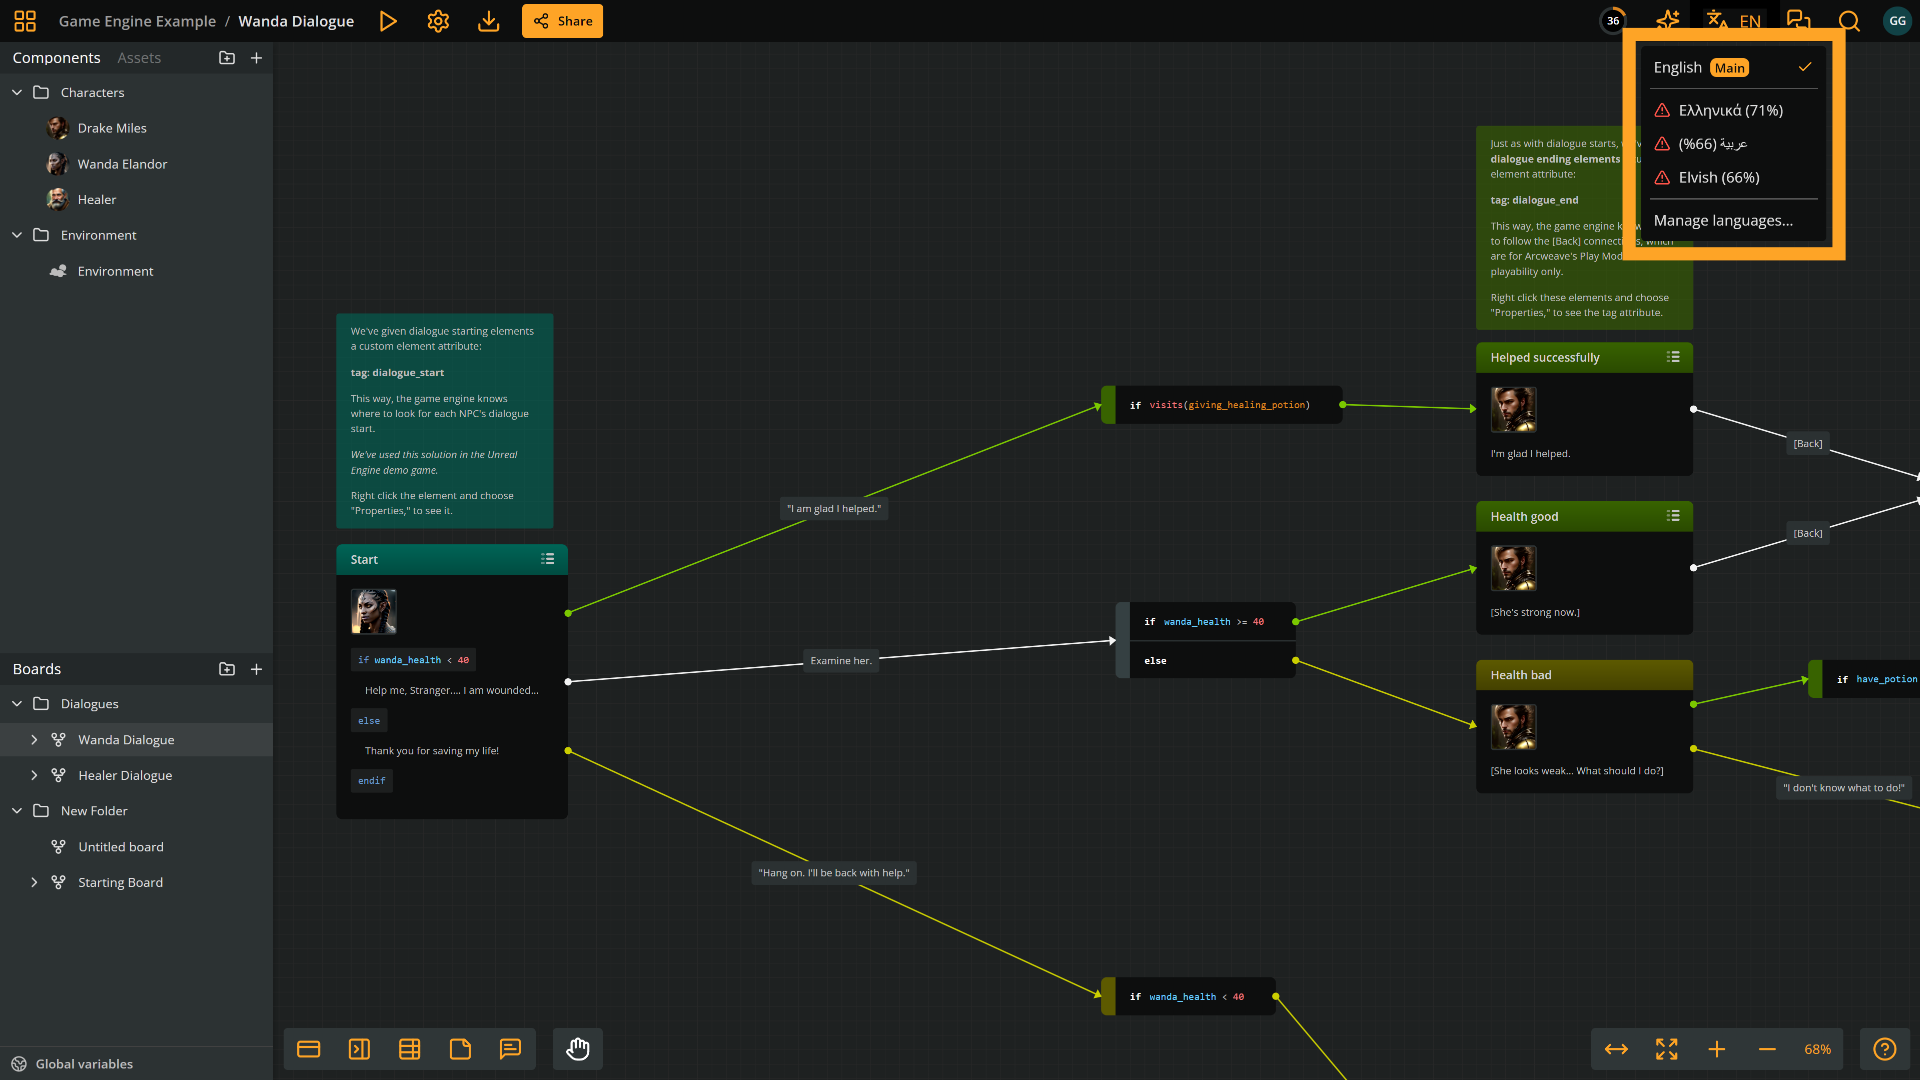
The drop-down menu shows:
- A list of all languages added to the project
- The project's main language (marked with an orange Main tag)
- The currently displayed language (marked with an orange tick)
- The translation status of each language (marked with the relevant icon)
- The translation progress percentage for each language
- An option to Manage languages...
Manage languages
To add, edit, and remove languages:
- Open the Localization drop-down menu.
- Select Manage languages.
- Perform any of the following actions.
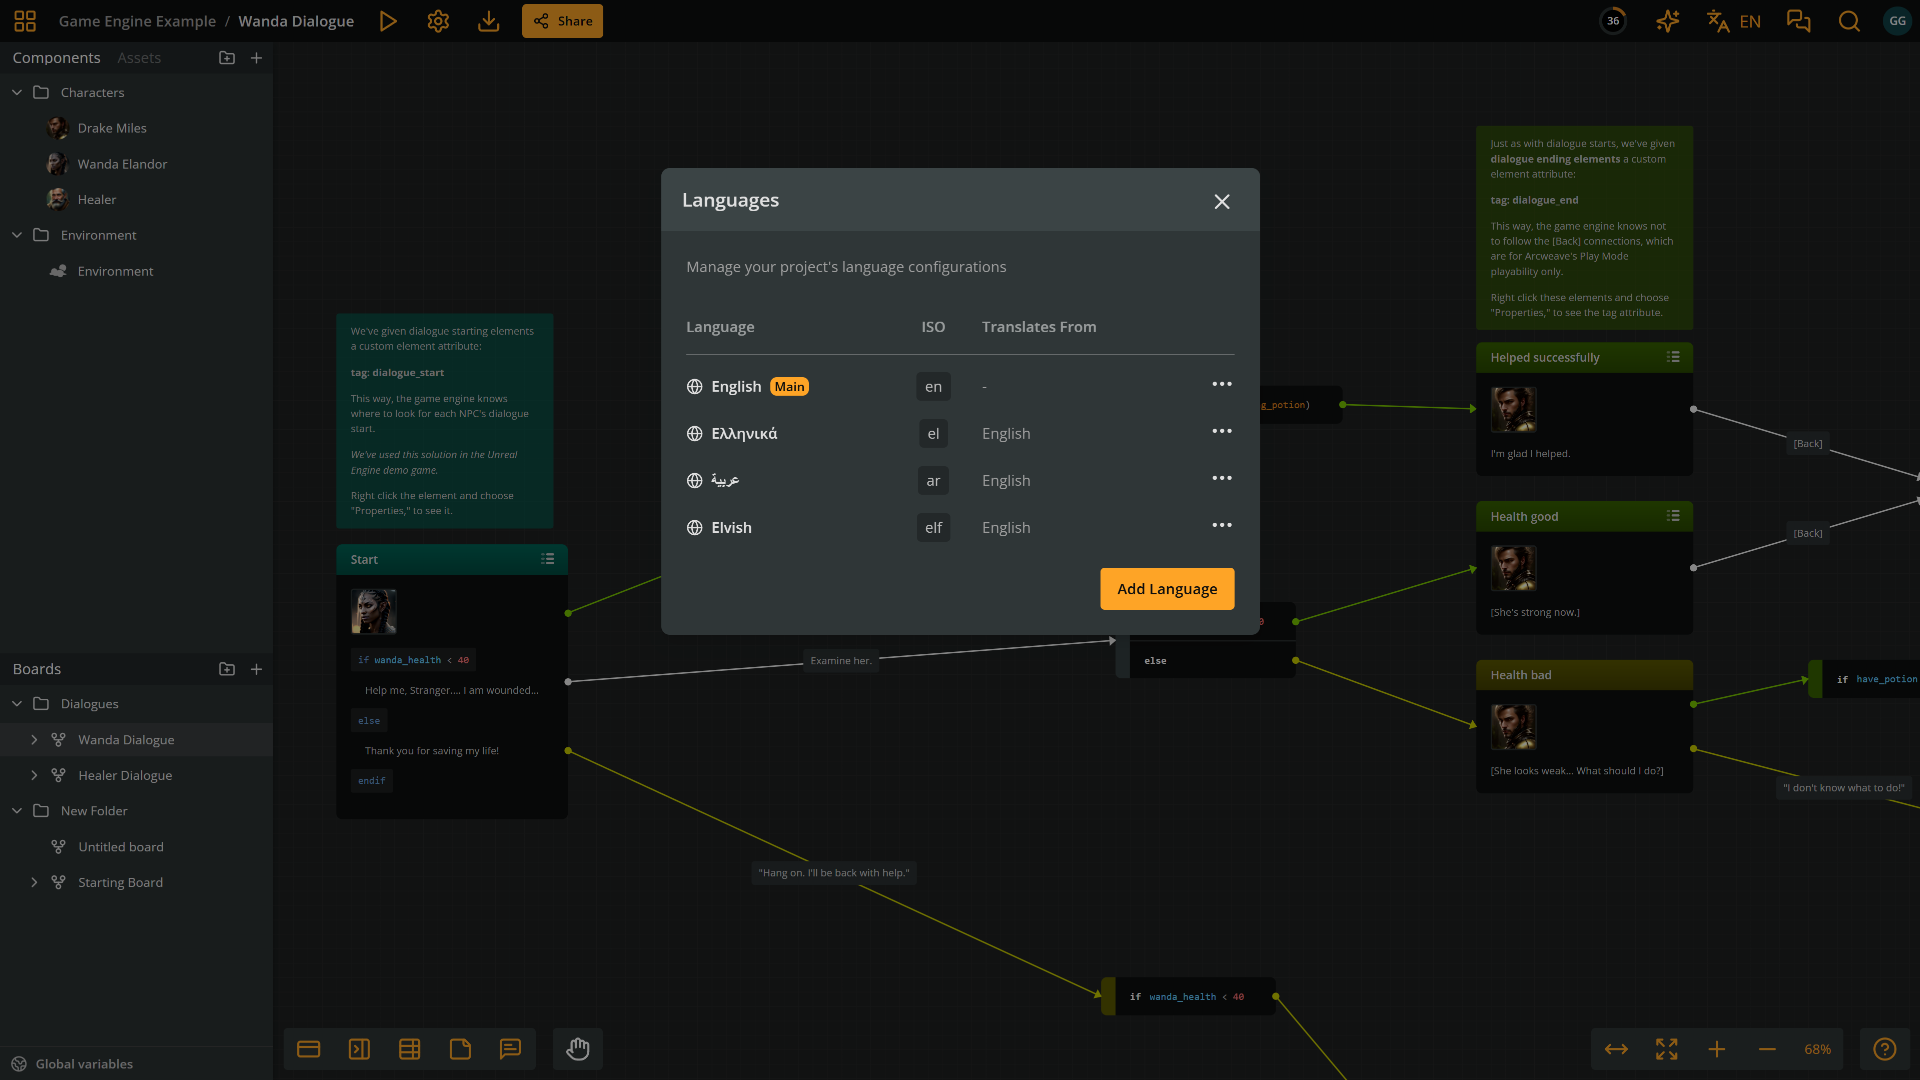
Set main language
By default, the project language is English. To set another language as the default:
- Open the Localization drop-down menu.
- Select Manage languages.
- Find the Main language; it is the first in the list.
- Click the three-dot (•••) icon on the right and select Edit.
- Update the main language's information:
- Language: e.g.
Spanish - ISO code: e.g.
es
- Language: e.g.
- Click Save.
Add language
To add a new language:
- Open the Localization drop-down.
- Select Manage languages...
- Click Add language.
- Enter the new language's information:
- Language: e.g.
Italian - ISO code: e.g.
it
- Language: e.g.
- Select a source language for the new language's translation in Translates from.
- Click Save.
✅ While translating to a language, the source content is displayed on the side, in the languages set in Translates from.
Edit language
To edit an existing language:
- Open the Localization drop-down.
- Select Manage languages...
- Find the language in the list.
- Click the three-dot (•••) icon on the right and select Edit.
ℹ️ You can update the Language name, ISO code, and Translates from fields.
Delete language
To delete a language:
- Open the Localization drop-down.
- Select Manage languages...
- Find the language in the list.
- Click the three-dot (•••) icon on the right and select Delete.
⚠️ You cannot delete the main language.
Switch language
To switch the working language:
- Open the Localization drop-down menu.
- Select the desired language.
The editor will now display content in the selected language.
Translation status
When working in translation mode, each board, element, label, and component has a translation status to indicate its progress. This makes it easier to track and manage the state of translations across the project.
The available statuses are:
- Untranslated (red)
- In progress (yellow)
- For review (blue)
- Final (green)
ℹ️ Translation status for elements, labels, and components must be set manually. Translation status for boards is generated automatically, according to the status of the containing elements and labels.
✅ Translation status is exported as part of Arcweave's JSON.
Set element status
To set the translation status of an element:
1. Locate the element in the current board.
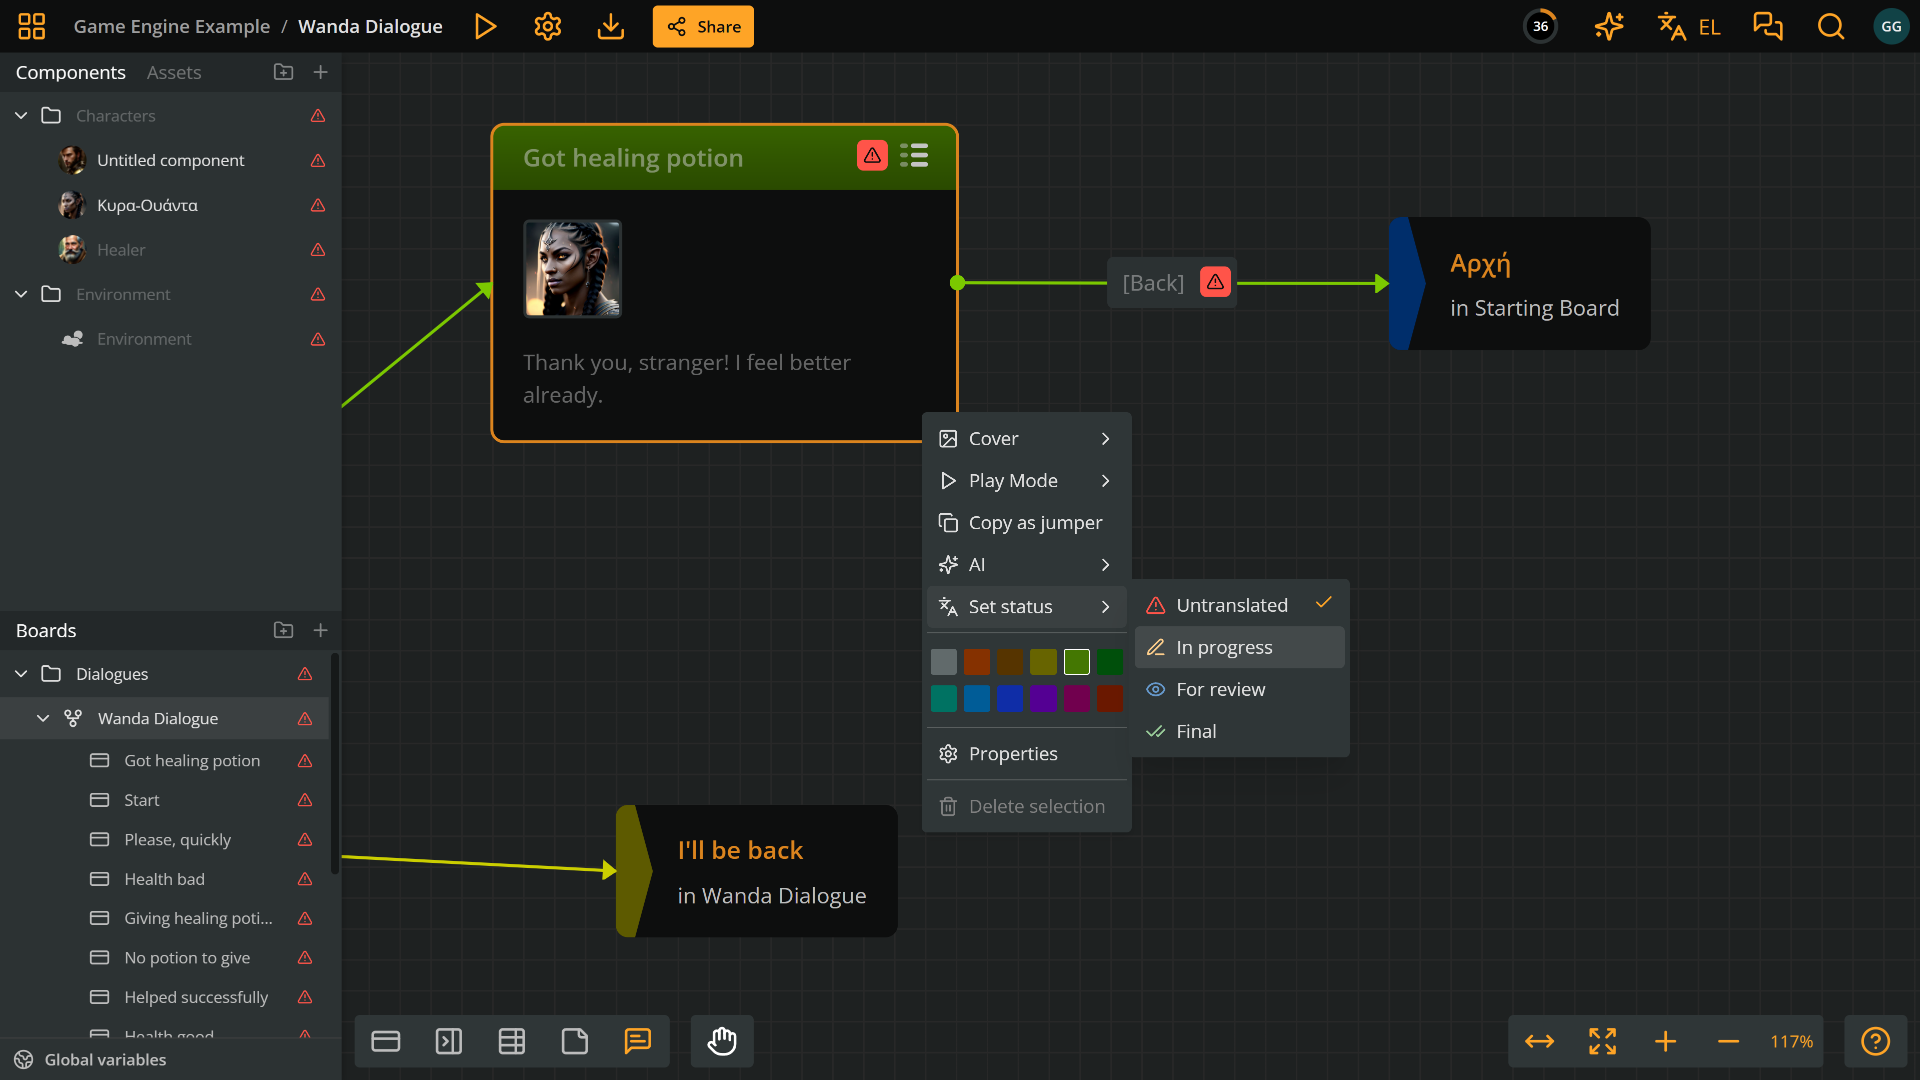
Alternatively, locate the element in the Boards section of the sidebar, as a child of the board it belongs to.
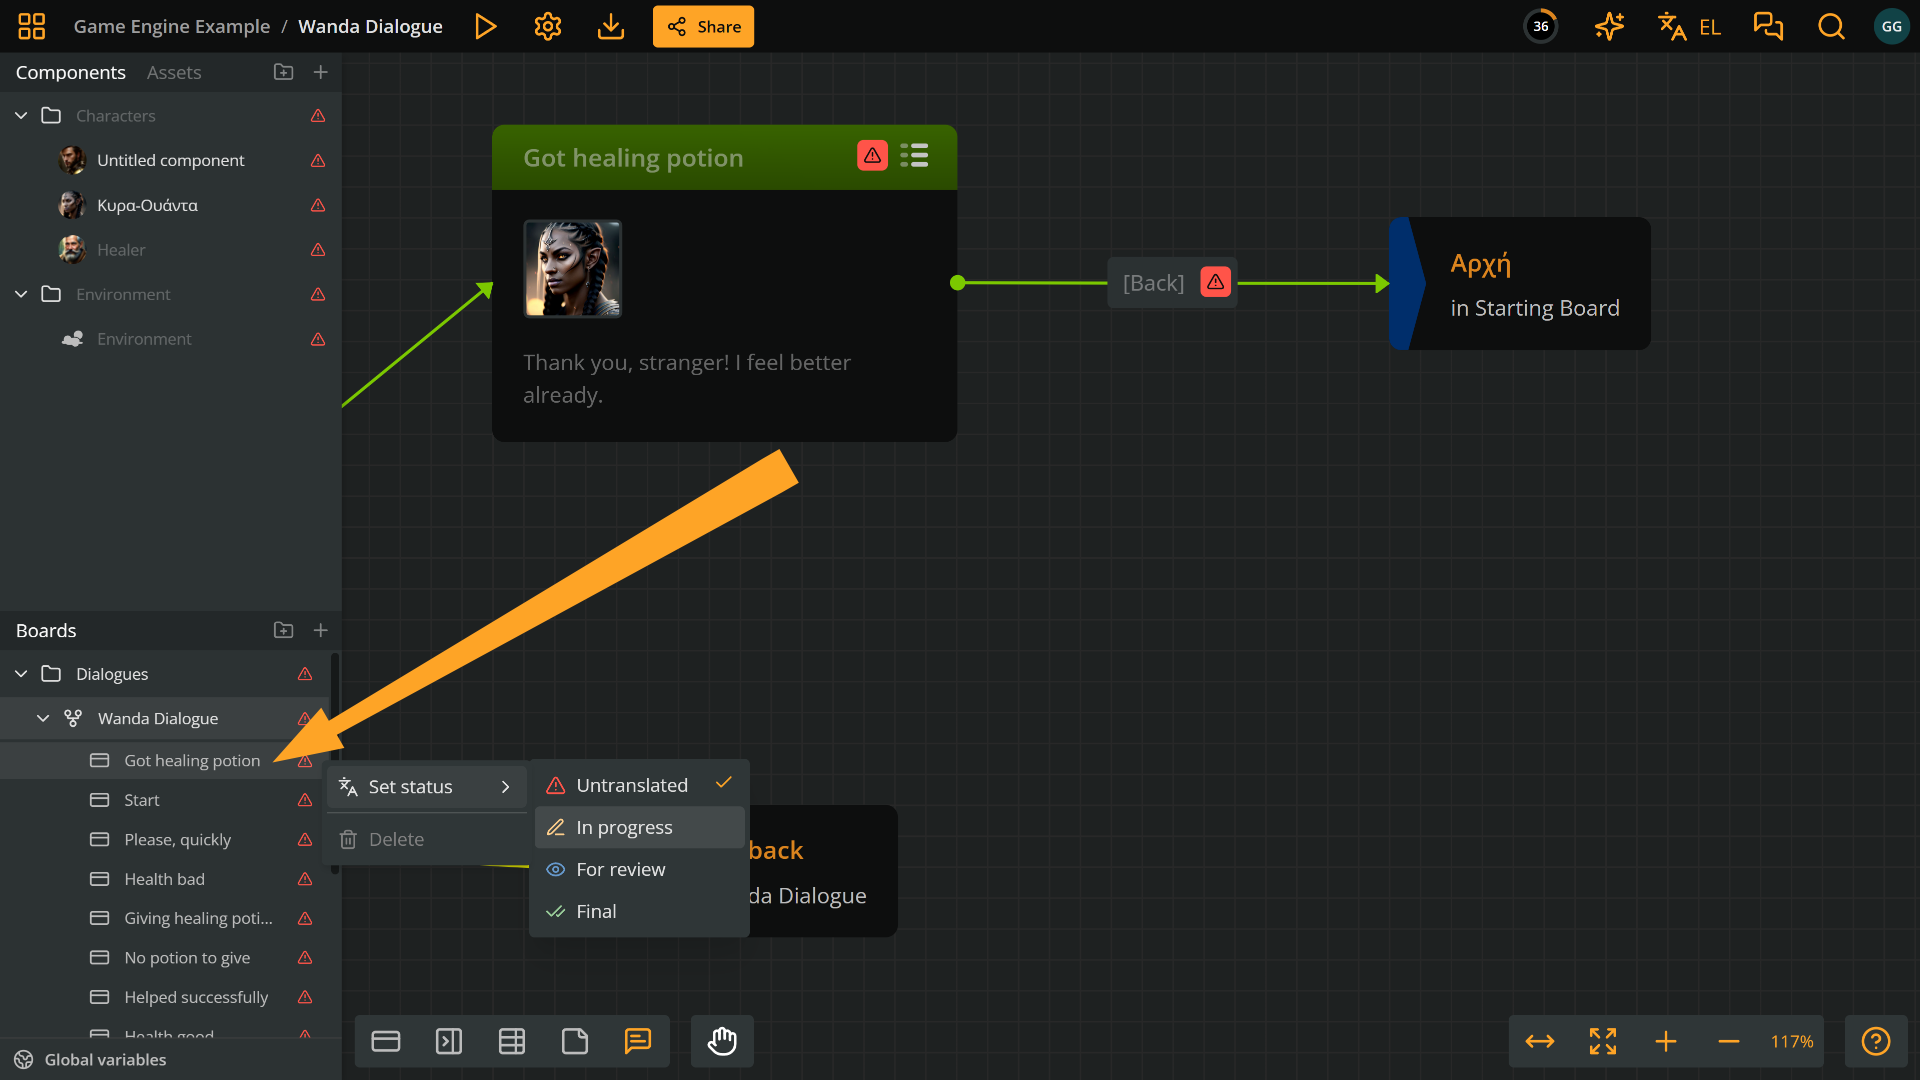
2. Right-click the element and select Set status.
Set label status
To set the translation status of a label, right click the label in the current board and select Set status.
Set component status
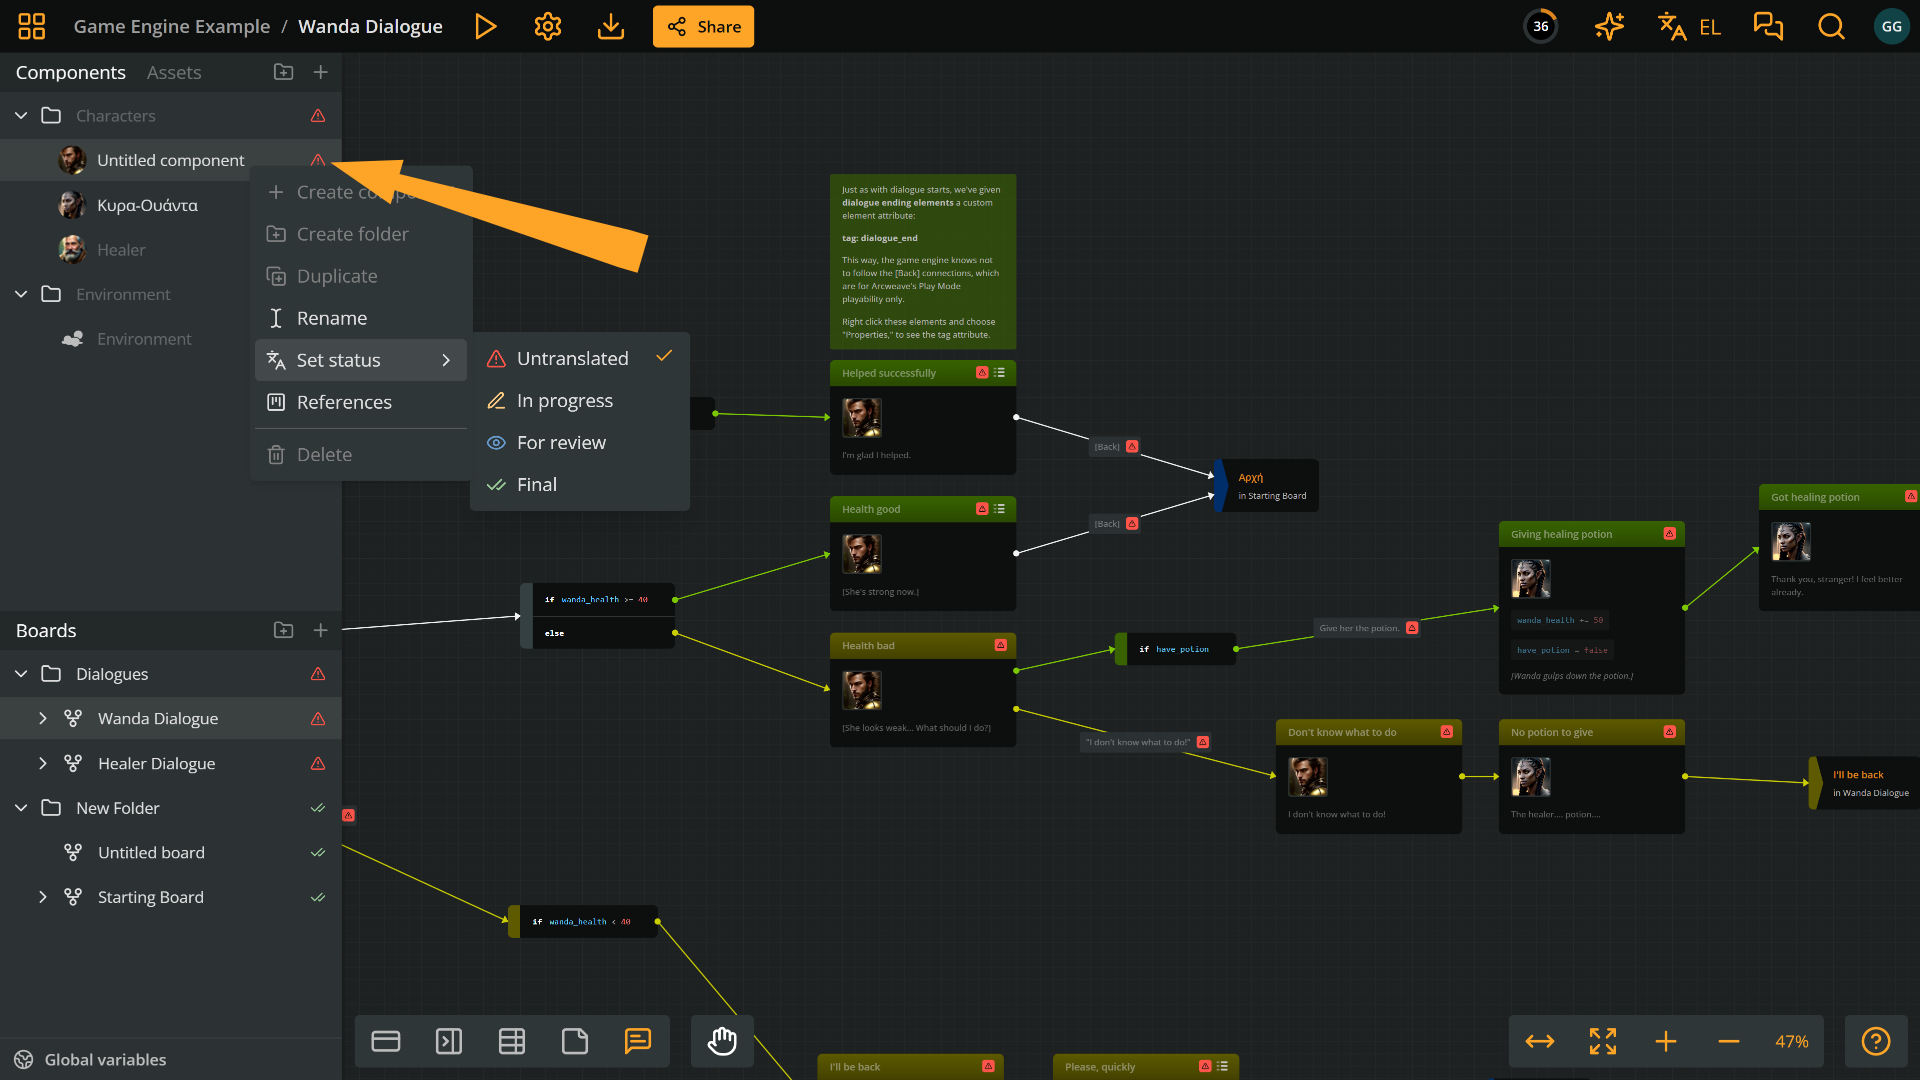
To set the translation status of a component, right click the component in the Components section of the left sidebar and select Set status.
Translation percentage
Items marked as Final count toward the project's overall translation completion percentage.
Translate elements
To translate an element:
1. Open the Localization drop-down and switch to the desired language.
2. Set the translation status of the element you want to translate from Untranslated to In progress.
![]()
3. Double-click the element you want to translate to start editing. The element's source text, in the language specified in the Translate from field, will appear as a reference.
![]()
![]()
4. After translating, press ESC or click outside the element, to exit editing.
![]()
5. Once done, set the translation status of the element to For review or Final, depending on your workflow.
Translate label
To translate a label:
1. Open the Localization drop-down and switch to the desired language.
2. Set the translation status of the label you want to translate from Untranslated to In progress.
3. Double-click the label you want to translate to start editing. The label's source text, in the language specified in the Translate from field, will appear as a reference.
4. After translating, press ESC or click outside the label, to exit editing.
5. Once done, set the translation status of the label to For review or Final, depending on your workflow.
Translate component
To translate a component:
1. Open the Localization drop-down and switch to the desired language.
2. In the left sidebar's Components section, set the translation status of the component you want to translate from Untranslated to In progress.
3. Click the component you want to translate to open it.
4. After translating, press ESC or click outside the element, to exit editing.
5. If you're done, set the translation status of the element to For review or Final, depending on your workflow.
⚠️ You can only translate the name of a component, not its attributes or their values.