Connections
Connections are arrows that connect flowchart items together (elements, branches, and jumpers), creating your project's flow.
ℹ️ Notes and comments are not part of the project's flow and cannot be connected.
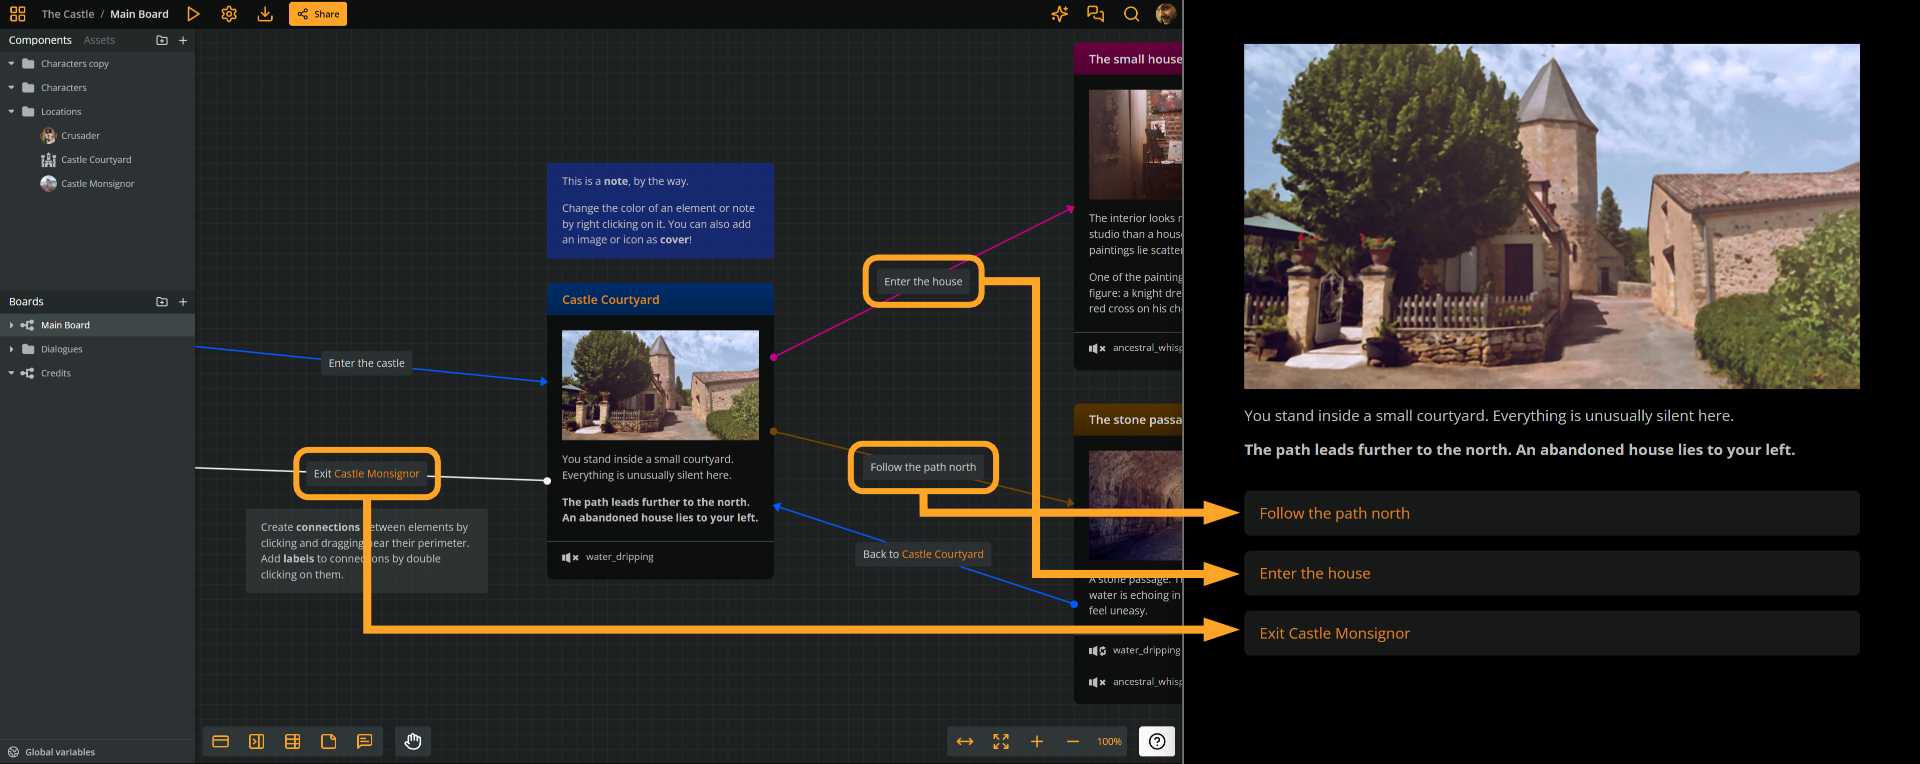
In Play Mode, connections render as option buttons, allowing the player to progress the story by making choices. Connections can also carry labels, which render as the option buttons' text.
Sources & targets
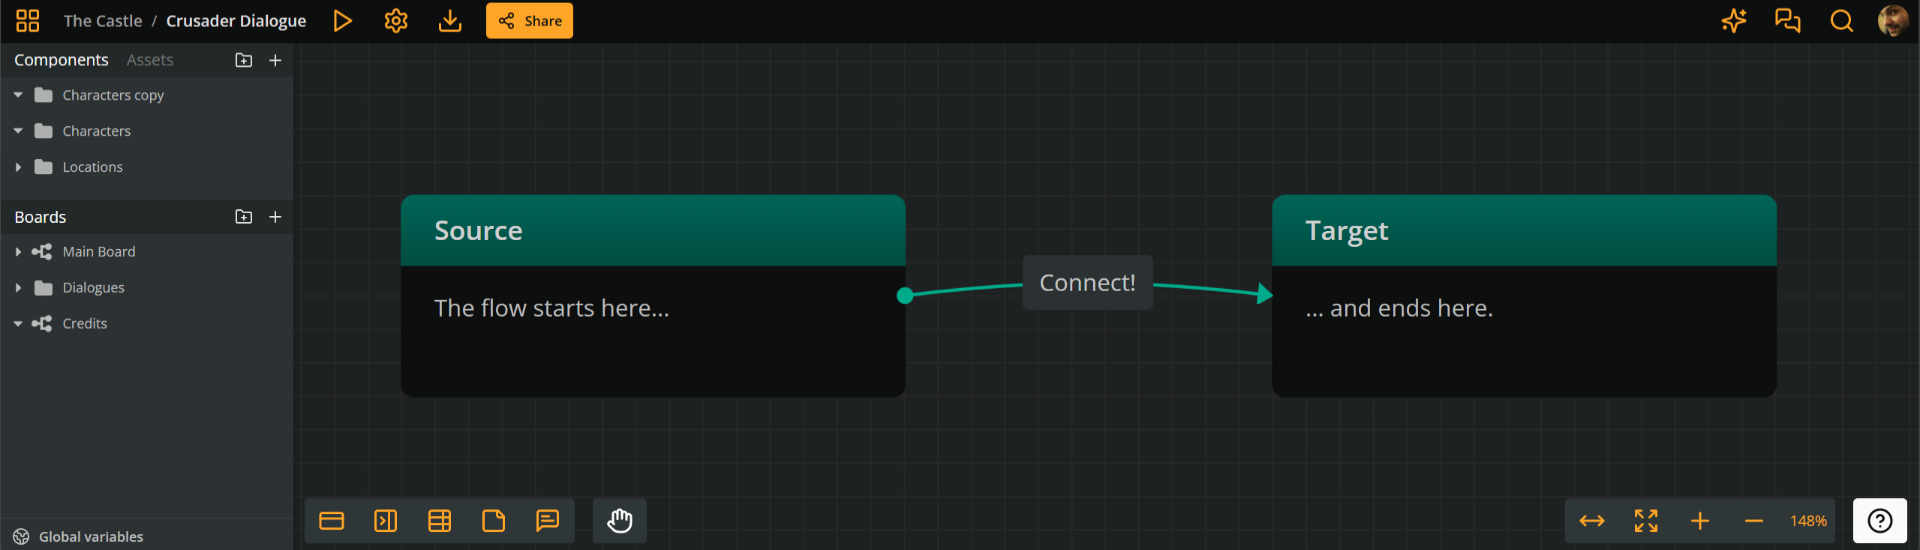
Connections progress the story flow from a source item (arrow-tail end) to a target item (arrow-head end).
Output connections
From the perspective of the source item, a connection is an output.
Only elements and branches can have output connections. Jumpers cannot act as connection sources.
Input connections
Conversely, from the perspective of the target item, a connection is an input.
All elements, branches, and jumpers can receive input connections.
Number of connections
Regarding the number of connections an item can take, the following rules apply:
- Elements, branches, and jumpers can have unlimited input connections.
- Elements can have unlimited output connections.
- Branches can have one output connection per condition.
- Jumpers can have no output connections.
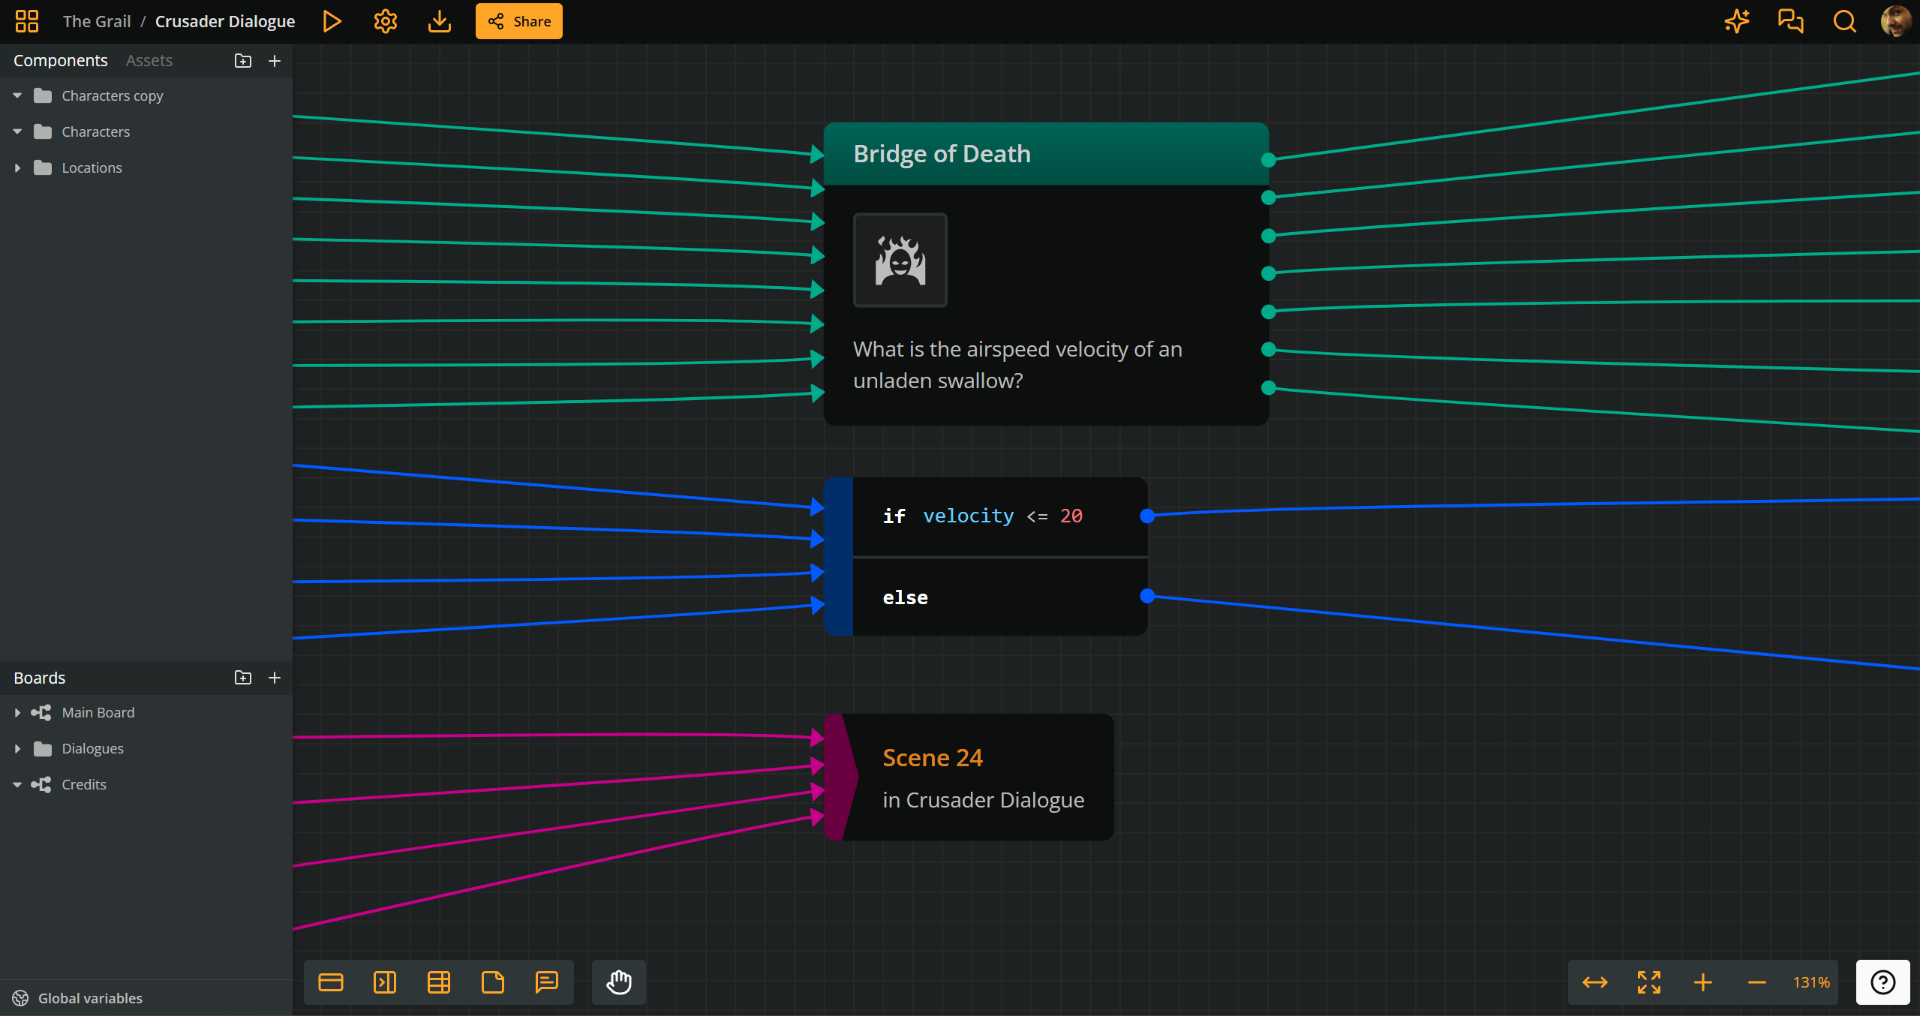
The screenshot below visually demonstrates the above rules.
Create connections
Creating connections is an intuitive process: you drag from the source and drop into a target. There are some variations, though.
To create a connection:
1. Drag from the source - Depending on what the connection's intended source is, do the following:
- Element: Drag from any edge
- Branch: Drag from one of its outputs
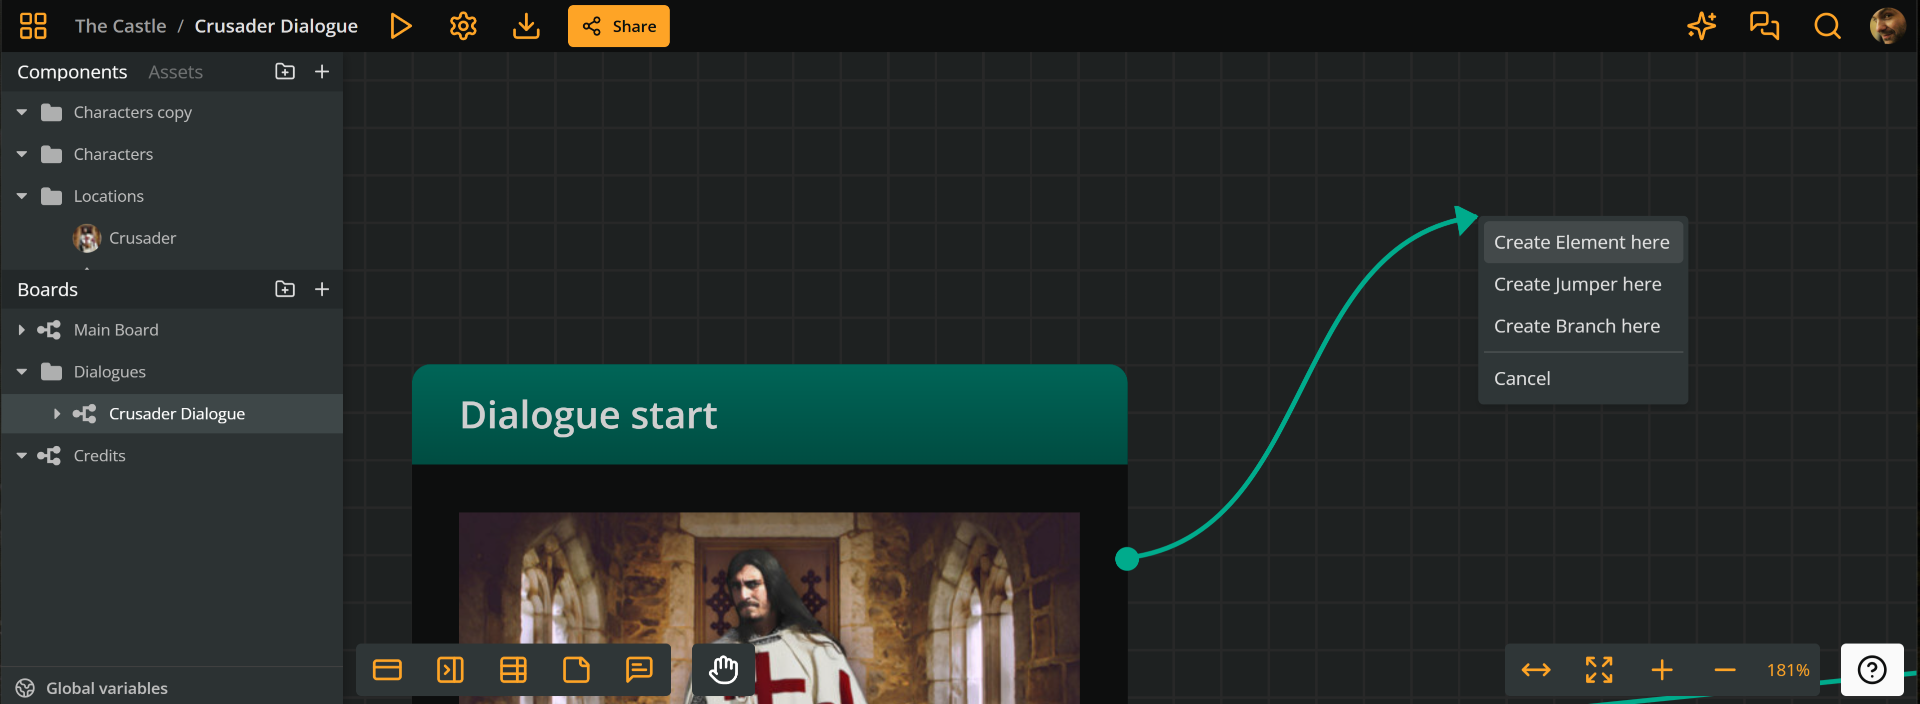
2. Drop to the target - Drop the connection's endpoint to either:
- Empty board space: You create a new item and immediatelly connect it as target. Choose Element, Jumper, or Branch from the menu.
- An existing item: The item becomes the connection's target.
When you drop a connection endpoint on an existing item, you have the two following options:
- Drop into the item's body: Create an automatic connection handle.
Before releasing, the target's perimeter gets an orange highlight. After releasing, the connection endpoint attaches automatically to the nearest edge, switching edges depending on the source and target's relative positions. - On a specific edge: Create a fixed connection handle.
Before releasing, that side gets an orange highlight. After releasing, the connection endpoint locks to that side, regardless of the source and target's relative positions.
By default, a connection's source handle is in automatic mode.
Delete connections
You can delete a connection in any of the 3 following ways:
- Select it and press Delete or Backspace.
- Right-click and choose Delete selection.
- Drag any of its two handles to empty board space.
Select connections
To select a connection, simply click on it. To select multiple connections, hold Shift or Ctrl/Cmd and do either of the following:
- Click each connection consecutively.
- Click and drag to create a selection rectangle.
Move connections
Each endpoint of a connection has a handle that you use to drag and drop with your mouse or trackpad.
Change source
To change a connection's source, drag the connection's source handle and drop it on a new flowchart item.
Change target
To change a connection's target, drag its target handle and drop it on a new flowchart item.
Reposition as to item side
As mentioned above in creating connections, a connection endpoint can be automatic or fixed:
- Automatic connection endpoint:
- Attaches to the nearest edge of the item.
- Automatically switches edges as the source and target items move.
- Fixed connection endpoint:
- Stays locked to a specific side of the item.
- Does not change sides, even if the items move.
Switch connection endpoint from automatic to fixed
- Drag the endpoint from its current position.
- Move the cursor close to the side you want to fix it to; that side will highlight in orange.
- Release to lock the endpoint to that side.
Switch connection endpoint from fixed to automatic
- Drag the endpoint from its current position.
- Move the cursor toward the center of the target item; the whole perimeter will highlight in orange.
- Release to set the endpoint back to automatic mode.
Reorder connections
As mentioned in this page's introduction, connections render as player options in Arcweave's Play Mode. Moreover, they render in the order they are added to the flowchart.
To reorder an element's output connections, you must do it in Play Mode.
Customize connections
Change color theme
To change a connection's color theme, right-click the connection and select one of the available colors from the menu.
Change type
Arcweave supports three connection types:
- Bezier (default): Smooth curve
- Straight: Straight line
- Flowchart: Right-angled line
To change the type, right-click the connection and choose from the available icons.
✅ Your last selected type becomes the default for new connections.