` block, with `<` written as `<`. An element passed to `visits()` is written as element mention markup; replace `ELEMENT_ID` with the element ID.
# Welcome
Source: https://docs.arcweave.com/
Section: Introduction
Description: Welcome to the Arcweave documentation, with guides, tutorials, integrations, and API references for designing interactive stories and games
[Arcweave](https://arcweave.com) is a browser-based tool for writing and designing interactive stories and games, such as branching narratives, dialogue trees, and quests. You map out your story as a visual flowchart of scenes and choices, add game logic with variables and conditions, and play-test it instantly in [Play Mode](https://docs.arcweave.com/introduction/quick-tour/play-mode). When it's ready, you can share it as a playable prototype or export it to game engines like Unity, Godot, and Unreal.
You can start for free: a new [Arcweave account](https://docs.arcweave.com/introduction/quick-tour/create-account) comes with a free workspace and a sample project to explore.

## About this guide
Context: Arcweave docs > Introduction > Welcome > About this guide
This guide is designed to provide you the following:
- **Quick Arcweave overview**
New to Arcweave or not sure if it's right for you? Start with this **Introduction** section. Click **Next Page** below, use the left sidebar to explore, or jump ahead to the [Quick Tour](https://docs.arcweave.com/introduction/quick-tour/overview).
- **Diverse tutorials collection**
The [Tutorials](https://docs.arcweave.com/tutorials/overview) section offers a range of hands-on examples to read and watch, that will help you deepen your skills and tackle real-world interactive storytelling challenges.
- **Solid reference guide**
A complete reference covering all of Arcweave's features. Use the search field (Ctrl/Cmd+K), look up a term in the [Glossary](https://docs.arcweave.com/introduction/glossary), or browse the following sections on the sidebar:
- [Project Items](https://docs.arcweave.com/project-items/overview) and [Project Tools](https://docs.arcweave.com/project-tools/overview) cover everything related to your projects.
- [Integrations](https://docs.arcweave.com/integrations/overview) shows how to use Arcweave with other platforms and game engines.
- [REST API](https://docs.arcweave.com/rest-api/overview) covers authentication, read and write access, and the endpoint reference for custom integrations.
- [Workspaces](https://docs.arcweave.com/workspaces/overview) covers workspaces, their members and roles, plans, and billing.
- [Account](https://docs.arcweave.com/account/overview) covers creating your Arcweave account and managing its settings.
## Users community
Context: Arcweave docs > Introduction > Welcome > Users community
If you have questions, join the [Arcweave community on Discord](https://discord.com/invite/atVXxAK), where you can get answers, share your work, and connect with other creators.
# What is Arcweave?
Source: https://docs.arcweave.com/introduction/what-is-arcweave
Section: Introduction
Description: What Arcweave is, its design philosophy, why teams use it, and how it works for interactive stories and games
Arcweave is a collaborative narrative engine for designing and prototyping immersive interactive experiences. It enables writers and designers to create complex projects intuitively, collaborate synchronously, and maintain a healthy and liberating distance from the development side.
Arcweave is a cloud-based app. You only need a browser and an internet connection to create and manage your projects.
## Arcweave's philosophy
Context: Arcweave docs > Introduction > What is Arcweave? > Arcweave's philosophy
Arcweave separates **design** from **development**.
- [Writers & Designers](https://docs.arcweave.com/introduction/whom-is-it-for/writers-designers) should be free to focus on story, without worrying about code.
- [Developers](https://docs.arcweave.com/introduction/whom-is-it-for/developers) should get clean, structured data ready for integration.
- [Team Leaders](https://docs.arcweave.com/introduction/whom-is-it-for/team-leaders) should have a clear overview, leave comments, and delegate.
Arcweave enables parallel workflows with live collaboration, reusable components (story objects such as characters and items), and export formats ready for engines like Unity, Godot, or Unreal.
## Why use Arcweave?
Context: Arcweave docs > Introduction > What is Arcweave? > Why use Arcweave?
Tools like spreadsheets or flowchart apps can help get ideas and dialogue lines down, but they quickly become cluttered, error-prone, and hard to manage as complexity grows.
Arcweave is purpose-built for interactive narrative design. It allows you to:
- Map out complex story structures visually and intuitively.
- Keep your story segments (be they chapters, scenes, or dialogue trees) organized in small, easy-to-read boards.
- Assign attributes to characters, items, and locations.
- Link logic and conditions directly into your story flow.
- Preview and test your project in Arcweave's integrated Play Mode or your game engine's build.
- Export structured data to your development environment.
> ✅ No more struggling to trace story flow in a tangle of cells or... spaghetti megagraphs.
## How Arcweave works
Context: Arcweave docs > Introduction > What is Arcweave? > How Arcweave works
Arcweave runs entirely in your browser, offering a cross-platform, consistent environment for you to design, collaborate, and manage your **projects** efficiently in your teams' **workspaces**.
### Projects
Context: Arcweave docs > Introduction > What is Arcweave? > How Arcweave works > Projects
A [project](https://docs.arcweave.com/workspaces/projects) is where you design your interactive experiences. Each story or game you create lives in its own project.

Within a project, you can do the following:
- Design your [story flow](https://docs.arcweave.com/introduction/quick-tour/flowchart), plot, and dialogue trees.
- Store your [story objects](https://docs.arcweave.com/introduction/quick-tour/flowchart#attached-components).
- [Play-test and debug](https://docs.arcweave.com/introduction/quick-tour/play-mode) your creation—immediately.
- [Collaborate](https://docs.arcweave.com/introduction/quick-tour/collaboration) with teammates in real time.
- Export your project for [integration](https://docs.arcweave.com/integrations/overview) with your platform or game engine.
> ℹ️ New to terms like boards, elements, and branches? See [Core concepts](https://docs.arcweave.com/introduction/core-concepts) for a short map of how they fit together.
### Workspaces
Context: Arcweave docs > Introduction > What is Arcweave? > How Arcweave works > Workspaces
A [workspace](https://docs.arcweave.com/workspaces/overview) is your team's collaborative environment. Each workspace can contain multiple projects and its own set of collaborators.

In a workspace, you can do the following:
- Manage your team's projects.
- Invite collaborators as workspace members.
- Manage the members' permission roles.
- Create custom roles (Team workspaces only).
- Manage your workspace's settings and billing preferences.
> ℹ️ Need help or want to connect? Join our [Discord community](https://discord.gg/atVXxAK)—we'd love to hear from you!
# Core concepts
Source: https://docs.arcweave.com/introduction/core-concepts
Section: Introduction
Description: A beginner's map of Arcweave's building blocks—boards, elements, connections, branches, jumpers, components, attributes, variables, and Arcscript—and how they fit together
Arcscript examples: Arcscript has no delimiters, so never wrap code in `${ }`, `{{ }}`, `<< >>` or similar markers. An `arcscript` code block contains only code: each line is one segment, and a branch condition is a single expression without `if` or `endif`. An `arcweave-html` code block is element or connection label content as Arcweave stores it, the HTML that the REST API and MCP server accept: `` for text, `
` for an empty line, and each Arcscript segment in its own `` block, with `<` written as `<`. An element passed to `visits()` is written as element mention markup; replace `ELEMENT_ID` with the element ID.
Arcweave uses a small set of building blocks to describe an interactive story. This page explains each one in plain terms and shows how they fit together, so the rest of the documentation makes sense. Each term links to its full reference page.
## The big picture
Context: Arcweave docs > Introduction > Core concepts > The big picture
Your work in Arcweave is organized like this:
- A **[workspace](https://docs.arcweave.com/workspaces/overview)** is your team's space. It holds your projects and the people who work on them.
- A **[project](https://docs.arcweave.com/workspaces/projects)** is one story or game. Inside a project you'll find:
- **[Boards](https://docs.arcweave.com/project-items/boards)**: the canvases where you draw your story as a flowchart: boxes for the story's moments, joined by arrows that show what can happen next. A board holds:
- **[Elements](https://docs.arcweave.com/project-items/elements)**: the story's moments, such as a scene, a location, or a line of dialogue.
- **[Connections](https://docs.arcweave.com/project-items/connections)**: the arrows between items. Their **[labels](https://docs.arcweave.com/project-items/labels)** become the choices the player clicks.
- **[Branches](https://docs.arcweave.com/project-items/branches)**: decision points that pick a path based on conditions.
- **[Jumpers](https://docs.arcweave.com/project-items/jumpers)**: shortcuts that continue the story at an element somewhere else.
- **[Notes](https://docs.arcweave.com/project-items/notes)**: annotations for you and your team. They aren't part of the story.
- **[Components](https://docs.arcweave.com/project-items/components)**: your story objects, such as characters, locations, and items. Each one stores its details in **[attributes](https://docs.arcweave.com/project-items/attributes)**.
- **[Variables](https://docs.arcweave.com/project-items/variables/overview)**: the story's memory, such as whether the player has found a key.
- **[Assets](https://docs.arcweave.com/project-items/assets/overview)**: images, audio, and video files.
Boards hold the **story flow**: what happens and in which order. Components, variables, and assets belong to the whole project, so you can use them on any board.
## Story flow
Context: Arcweave docs > Introduction > Core concepts > Story flow
You build the flow on a board by placing items and linking them with connections.
- **Elements** carry the story. An element has a title and content: the text the player reads. You can also attach images, audio, video, or components to it.
- **Connections** link one item to the next and set the order of events. An element's outgoing connections lead to the player's options, and a connection's label is the option's text.
- **Branches** let the story react. A branch checks conditions written as `if`, `elseif`, and `else`, and sends the flow down the first path whose condition is true.
- **Jumpers** keep large stories tidy. Instead of drawing a long arrow across a board—or to another board—you connect to a jumper, and the story continues at its target element.
Split a large story into several boards, for example one per chapter, scene, or conversation, and use jumpers to move between them.
## Story objects
Context: Arcweave docs > Introduction > Core concepts > Story objects
**Components** describe the things your story is about. A component for a character might hold their name, a portrait, and attributes such as their age or backstory.
**Attributes** are labeled values, such as text, numbers, true/false values, or lists of other components or assets. Components, elements, and boards can all have attributes. Game engines can read them when you [export](https://docs.arcweave.com/integrations/overview) your project.
## Story logic
Context: Arcweave docs > Introduction > Core concepts > Story logic
**Variables** let the story remember what happened. For example, a `has_key` variable can start as `false` and become `true` when the player finds the key. Variables can belong to the whole project ([global](https://docs.arcweave.com/project-items/variables/global)), to a [board](https://docs.arcweave.com/project-items/variables/board), or to a [component](https://docs.arcweave.com/project-items/variables/component).
**[Arcscript](https://docs.arcweave.com/project-items/arcscript)** is Arcweave's simple scripting language. You use it to change and read variables:
- In an element's content or a connection's label, a line of Arcscript can change a variable when the player reaches it:
```arcscript
has_key = true
```
- In a branch, an Arcscript condition reads variables to choose a path, for example `has_key`, which is true once the player has the key.
## How a story plays
Context: Arcweave docs > Introduction > Core concepts > How a story plays
[Play Mode](https://docs.arcweave.com/project-tools/play-mode/overview) lets you play your project as a choice-based game. It follows your flowchart like this:
1. The story begins at the **starting element** you choose.
1. Play Mode shows the current element's content, cover, and attached components.
1. Play Mode follows the element's outgoing connections to work out the player's **options**:
- A connection's label becomes the option's text.
- When a path goes through a **branch**, only the path of the first true condition counts, so branches decide which options the player sees.
- A path that ends at a **jumper** continues at the jumper's target element, even on another board.
1. When the player picks an option, the element at the end of that path becomes the current one.
1. Along the way, Arcscript in elements and labels updates variables, so later branches can react to the player's choices.
For example, the player reaches a locked door. Earlier, an element where they searched the room set `has_key = true`. Now a branch after the door checks `has_key`: if it's true, the player sees the option "Unlock the door"; otherwise, they see "Walk away."
## Where to go next
Context: Arcweave docs > Introduction > Core concepts > Where to go next
- See these concepts in a real project in the quick tour's [Flowchart analysis](https://docs.arcweave.com/introduction/quick-tour/flowchart), which uses the sample project _The Castle._
- Build your first project step by step in the [Basic Arcweave tutorial](https://docs.arcweave.com/tutorials/basic/overview).
- Look up any Arcweave term in the [Glossary](https://docs.arcweave.com/introduction/glossary).
- For a detailed table of every item, where it lives, and what it connects to, see [Project items](https://docs.arcweave.com/project-items/overview#how-project-items-relate).
# Whom is Arcweave for?
Source: https://docs.arcweave.com/introduction/whom-is-it-for/overview
Section: Introduction
Description: An overview of Arcweave's application to various workflows
Arcweave is a collaborative narrative design tool used by a wide range of creative professionals who design nonlinear content and interactive experiences.
Professionals using Arcweave include:
- Game designers and developers
- Interactive fiction writers
- Instructional and learning experience designers
- Serious games developers
- Narrative and quest designers
- Escape room and puzzle creators
- TTRPG writers & referees
- UX and interaction designers
- Creative and marketing writers
Whether you're working solo or as part of a team, Arcweave helps you structure your ideas clearly, collaborate efficiently, and export your story data to your desired platform or game engine.
To see what changes in your day-to-day work, read the page for your role:
- [Writers & Designers](https://docs.arcweave.com/introduction/whom-is-it-for/writers-designers): you write the story, dialogue, and game logic.
- [Developers](https://docs.arcweave.com/introduction/whom-is-it-for/developers): you bring the story into a game engine or another platform.
- [Team Leaders](https://docs.arcweave.com/introduction/whom-is-it-for/team-leaders): you manage the people, projects, and plan.
> ✅ Already working in another tool? Arcweave supports a range of workflows, and it's easy to incorporate it into your process. [Contact us](https://arcweave.com/contact) to discuss a tailored migration solution for your team.
# Arcweave for Writers & Designers
Source: https://docs.arcweave.com/introduction/whom-is-it-for/writers-designers
Section: Introduction > Whom is it for?
Description: How Arcweave applies to the workflow of writers & designers
Arcweave is built with writers and narrative designers as its core users. It's purpose-built to support the creation of interactive experiences—whether that's branching dialogue, RPGs and adventure games, nonlinear quests, or immersive story-driven worlds.
This guide introduces the main benefits and tools available to writers, game designers, and interactive storytellers working in Arcweave.
## What changes for you
Context: Arcweave docs > Introduction > Whom is it for? > Arcweave for Writers & Designers > What changes for you
If you write branching stories in documents, spreadsheets, or general-purpose flowchart apps, here's what changes when you move to Arcweave:
| Without Arcweave | With Arcweave |
| ------------------------------------------------------------------------------ | --------------------------------------------------------------------------------------------------------------------------------------------------------------------------------------- |
| Dialogue trees live in spreadsheet rows, and following one branch is hard. | You draw each scene as a flowchart on a [board](https://docs.arcweave.com/project-items/boards) and see every choice and where it leads. |
| You wait for a build to find out whether a branch works. | You play your story in [Play Mode](https://docs.arcweave.com/project-tools/play-mode/overview) right away, or [start from any element](https://docs.arcweave.com/project-tools/play-mode/using-play-mode#quickstart-play-mode-from-here). |
| You track what the player has done ("Has the player found the key?") in notes. | [Variables](https://docs.arcweave.com/project-items/variables/overview) remember it, branches react to it, and the [Debugger](https://docs.arcweave.com/project-tools/play-mode/debugger) shows the values as you play. |
| Character sheets and lore sit in separate documents. | [Components](https://docs.arcweave.com/project-items/components) hold each character, item, or location, and you attach them to the story where they appear. |
| You send a document around and merge everyone's edits. | Your team edits the same project at the same time and leaves [comments](https://docs.arcweave.com/project-items/comments) on the boards. |
## Story-focused
Context: Arcweave docs > Introduction > Whom is it for? > Arcweave for Writers & Designers > Story-focused
Arcweave lets you map, organize, and test your narrative without diving into code or spreadsheets. You can:
- **Design your content visually** with flowcharts and see how your narrative flows at a glance.
- **Organize into multiple boards** to break your narrative into scenes, chapters, or content types for clarity.
- **Write dialogue and descriptions** in flexible elements.
- **Write without breaking focus** using keyboard shortcuts and real-time navigation.
- **Catch errors immediately** by editing while playtesting without leaving the preview.
- **Build logic with branches, variables, and Arcscript.** It's simple, no programming background needed.
- **Bring in existing stories** by [importing projects](https://docs.arcweave.com/workspaces/projects#import-projects) or through the [REST API](https://docs.arcweave.com/rest-api/overview) (Team workspaces), without starting from scratch.
> ✅ Everything stays visual and intuitive, so your focus remains on storytelling, pacing, and player experience.
## Reusable story objects
Context: Arcweave docs > Introduction > Whom is it for? > Arcweave for Writers & Designers > Reusable story objects
Arcweave lets you define structured, reusable objects—such as characters, items, locations, spells, or any other narrative elements your story requires. These are stored as **components**, one of Arcweave's most versatile tools.
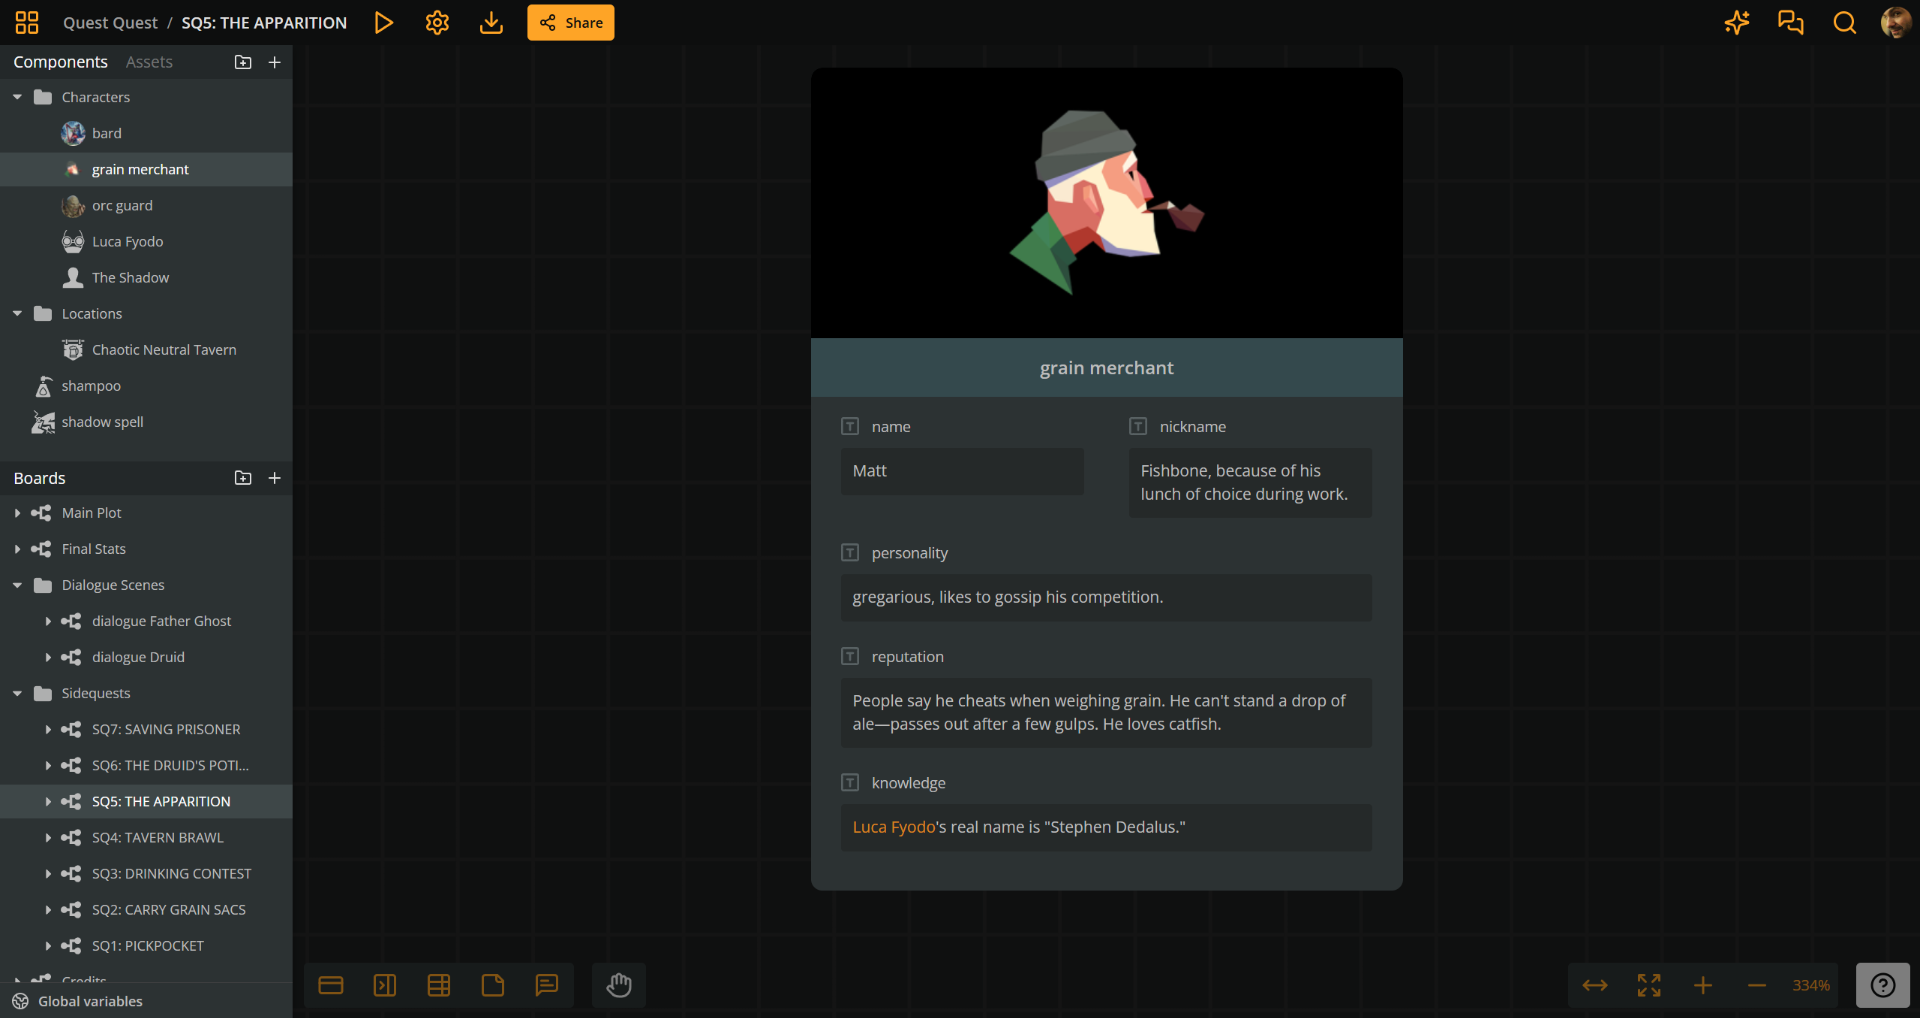
Use **component attributes** to organize and document key information: character backstories, lore, relationships, inventory, stats—anything relevant to your story or game systems.
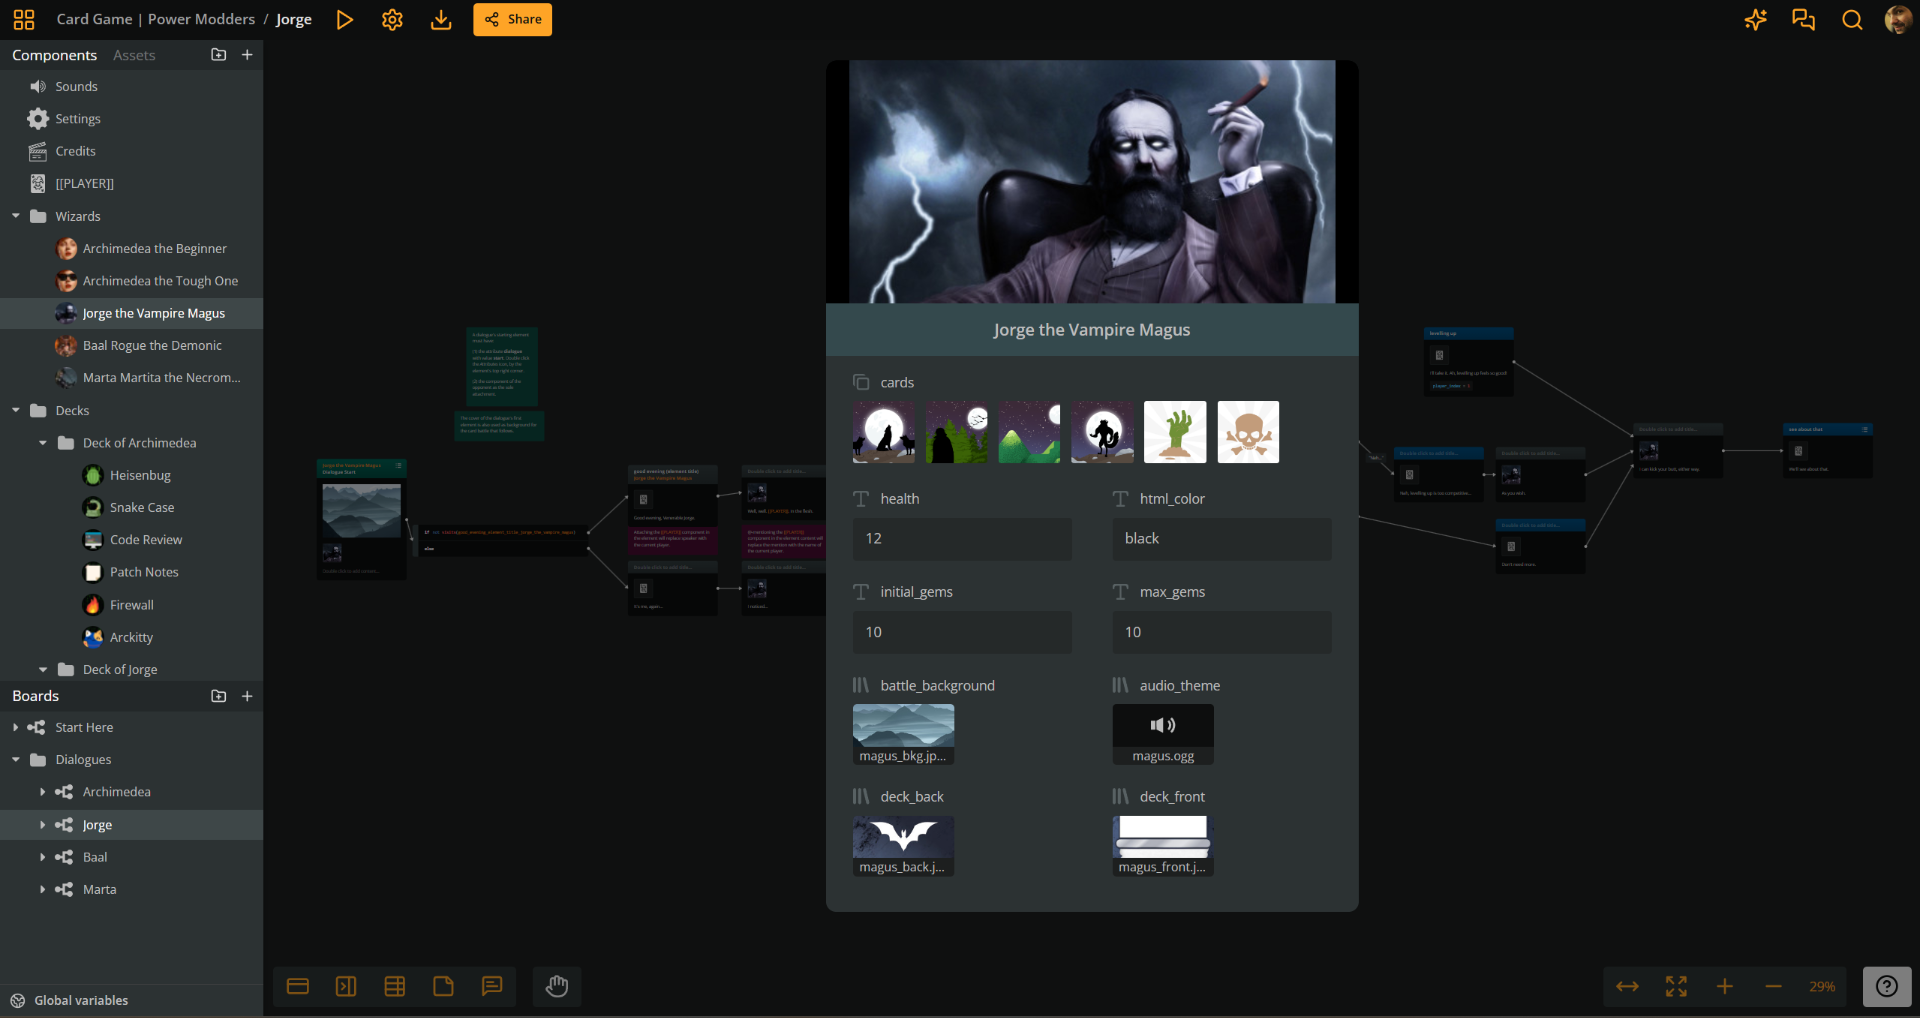
Component attributes also play a central role in integration with game engines—if your team uses one in its workflow. You can use them to add any metadata or technical values the engine needs to read directly from the narrative design. The image above shows an example component from the card game created by the Arcweave team for [Arcjam 2024: The Card Game Challenge](https://itch.io/jam/arcjam-2024-card-game-challenge).
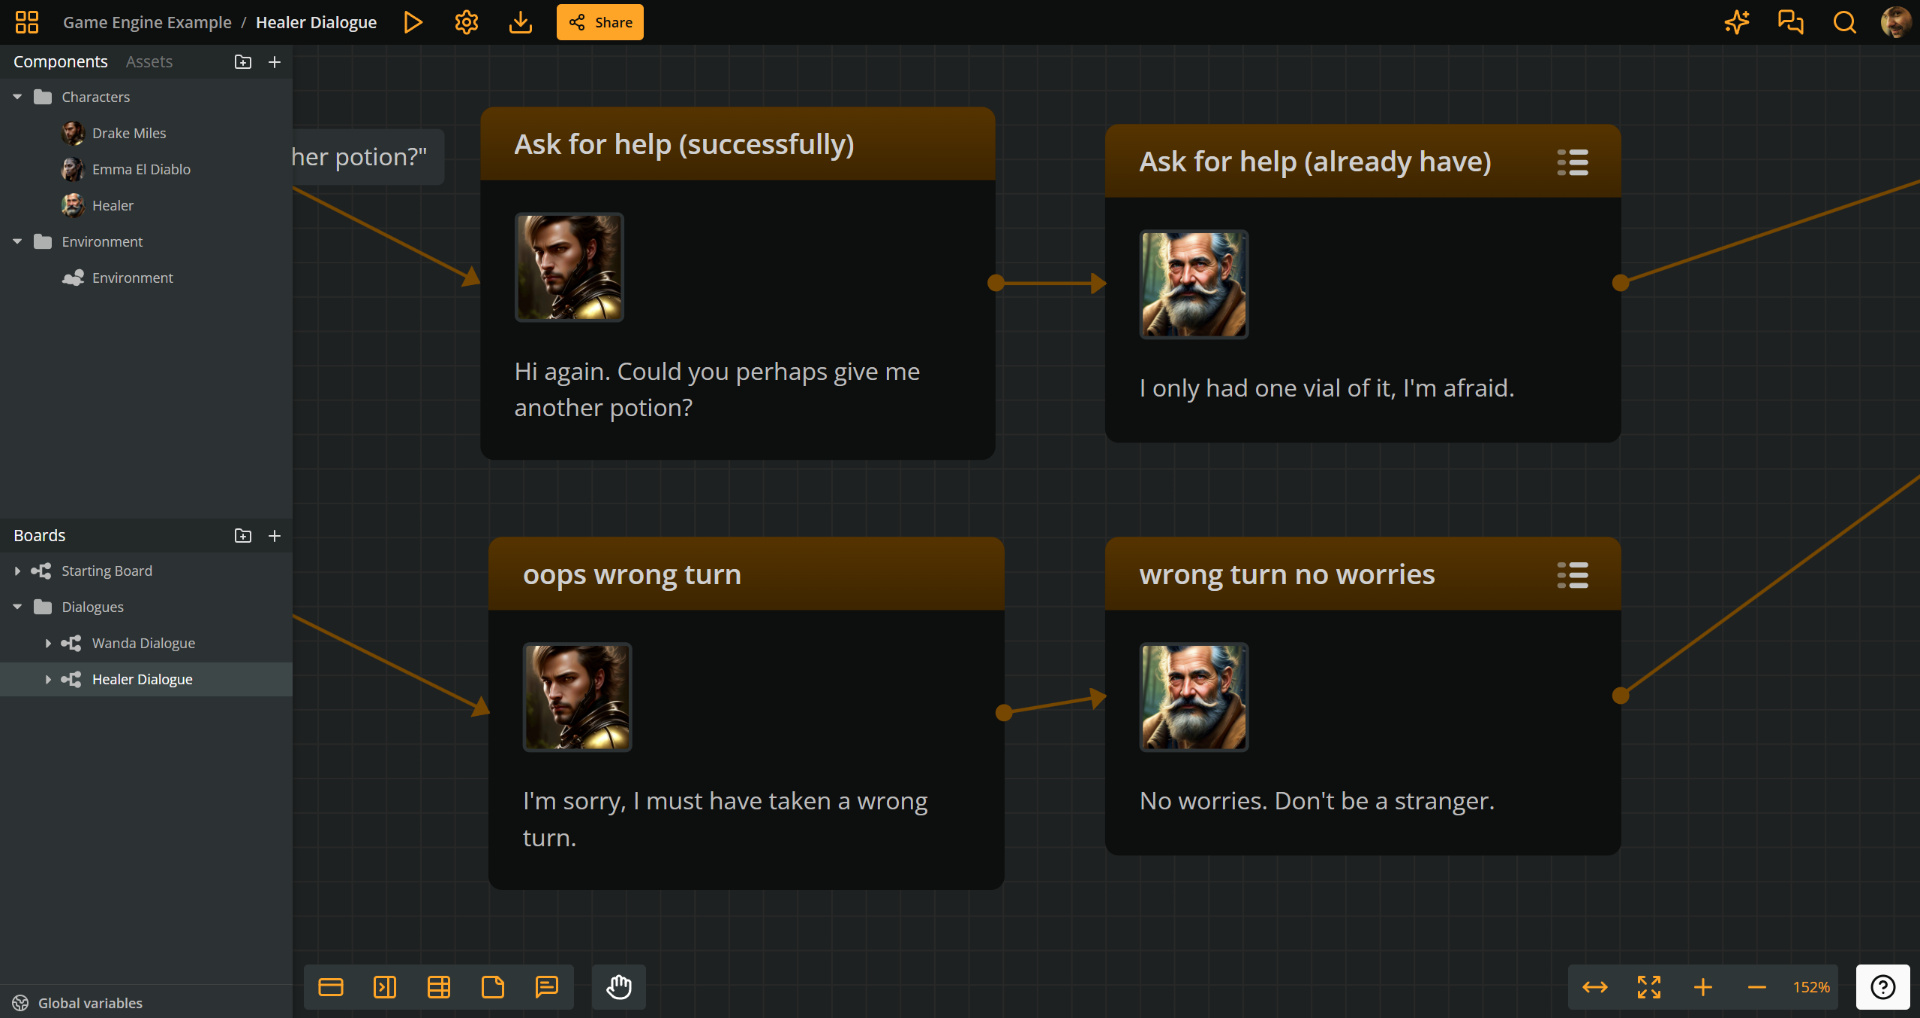
Attach components to elements in your story flow for visual reference or to trigger in-game events. In the dialogue extract above, components are used to indicate the speaker of each line.
## Test and debug as you write
Context: Arcweave docs > Introduction > Whom is it for? > Arcweave for Writers & Designers > Test and debug as you write
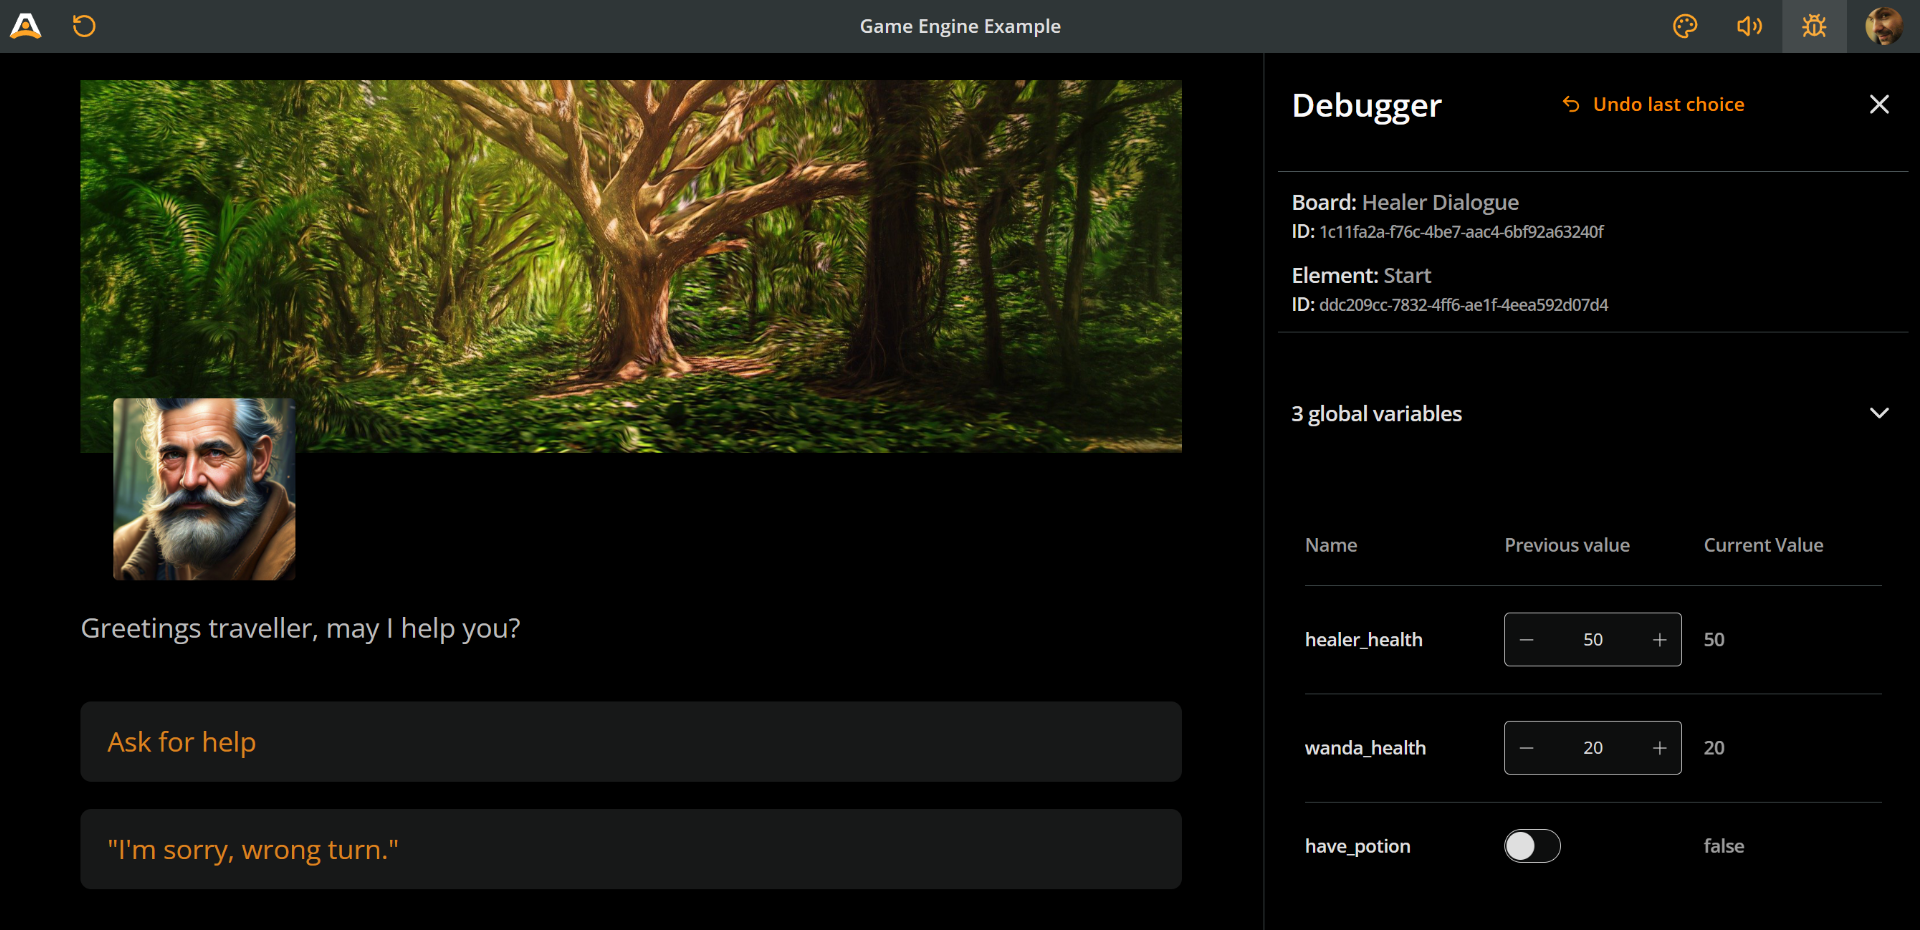
Arcweave includes a built-in **Play Mode** for previewing your story. With it you can do the following:
- Immediately playtest any segment of your project.
- Track variable changes and story logic using the **Debugger**.
- Run a prototype of your story with zero setup.
- Customize the look and feel with the built-in **Style Editor**.
- Share your prototype via a public or private link.
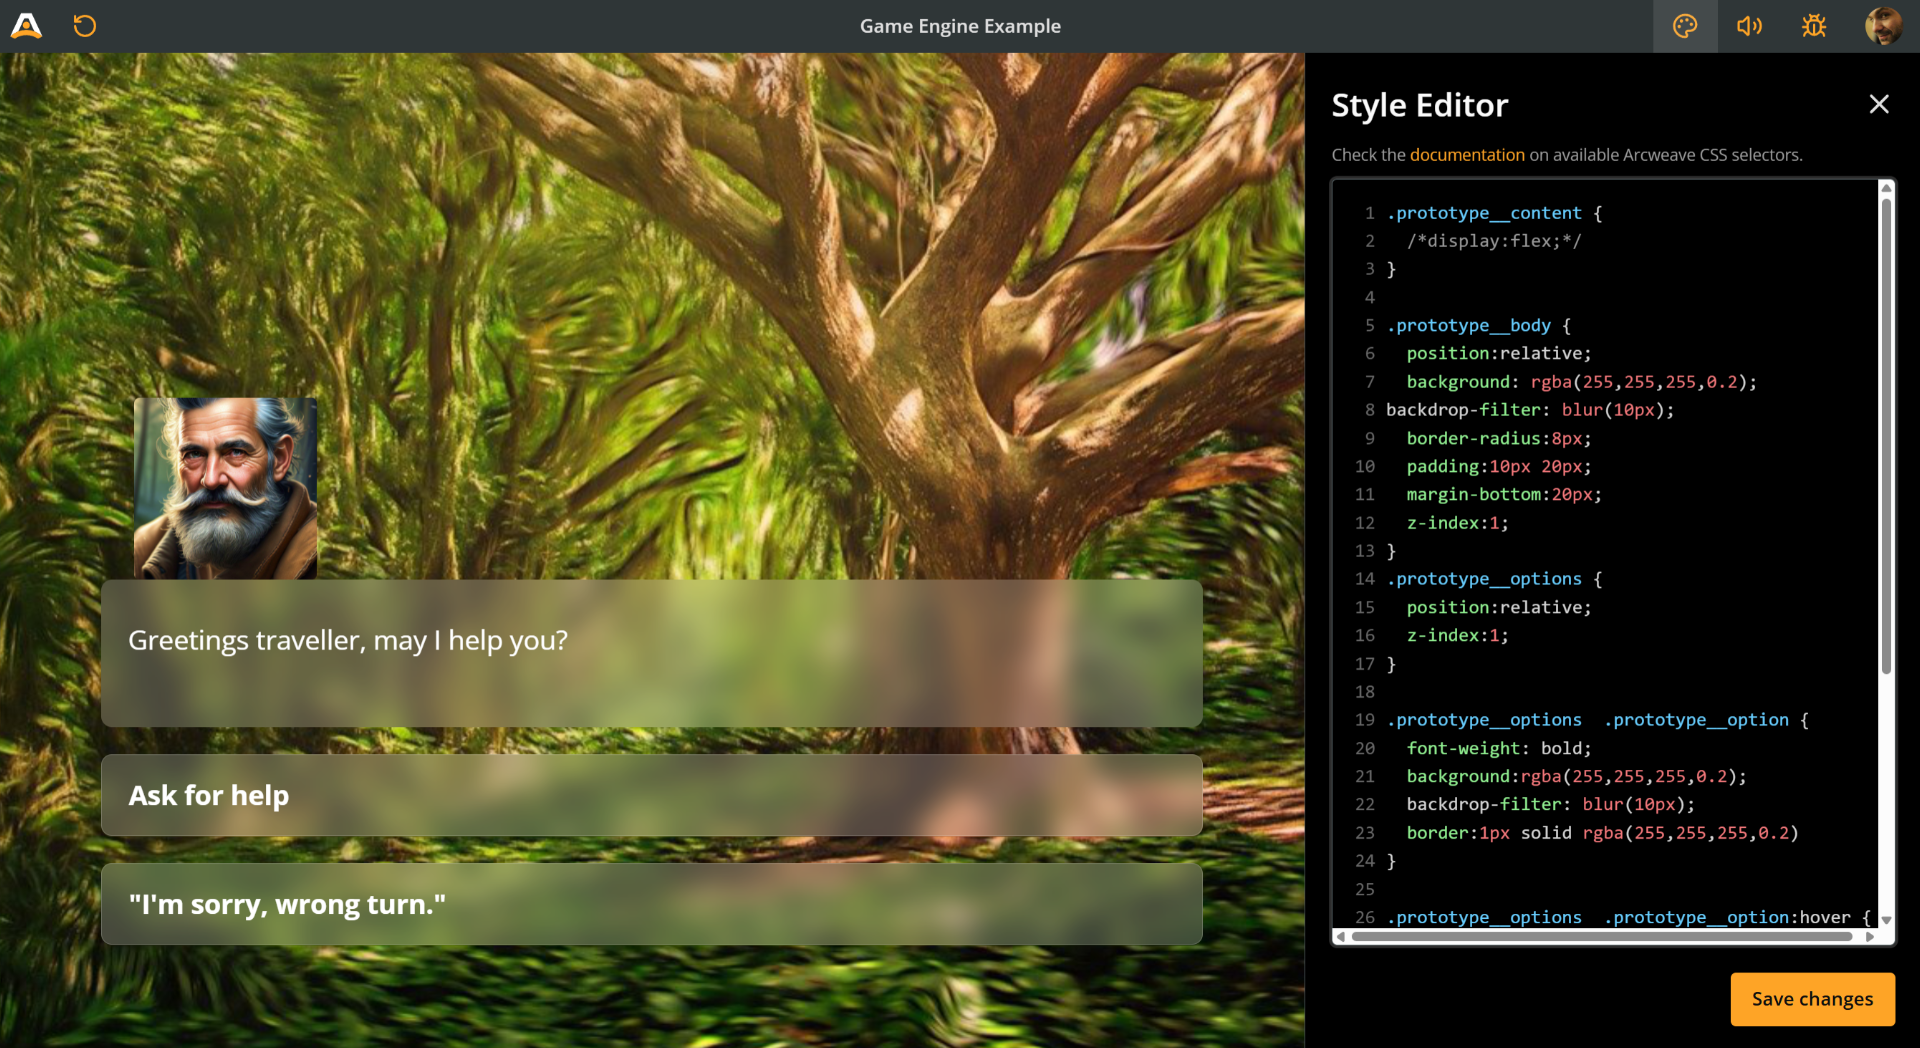
> ✅ Play Mode helps you iterate quickly and catch logic errors early—before your story reaches development.
## Real-time collaboration
Context: Arcweave docs > Introduction > Whom is it for? > Arcweave for Writers & Designers > Real-time collaboration
Whether you're working solo or with a writing team, Arcweave keeps everyone in sync:
- **Collaborate live** on the same project and see updates happen in real time.
- Manage access by inviting collaborators as **editors** or **commenters**.
- Leave **comments** on your boards and get notified of replies.
## From design to implementation
Context: Arcweave docs > Introduction > Whom is it for? > Arcweave for Writers & Designers > From design to implementation
Arcweave separates **creative design** from **technical development**. While you focus on the narrative, developers can transfer your story data via **JSON export** or use Arcweave's **[REST API](https://docs.arcweave.com/rest-api/overview)** for read and write access to project data in a Team workspace.
This division of labor helps teams work in parallel and stay productive without bottlenecks.
> ✅ Arcweave is ideal for visual novels, RPGs, narrative-driven games, educational tools, and more—anything where interactive storytelling is central.
# Arcweave for Developers
Source: https://docs.arcweave.com/introduction/whom-is-it-for/developers
Section: Introduction > Whom is it for?
Description: How Arcweave applies to the workflow of developers
Arcweave may be designed with writers and designers in mind, but its structured outputs and integration tools ensure a smooth handoff to developers.
Whether you're building a commercial game, an educational simulation, or a training environment, Arcweave helps your team separate creative development from technical implementation—while still giving you everything you need to turn branching stories into working systems.
## What changes for you
Context: Arcweave docs > Introduction > Whom is it for? > Arcweave for Developers > What changes for you
If you currently turn writers' scripts or spreadsheets into game data by hand, here's what changes when the narrative team works in Arcweave:
| Without Arcweave | With Arcweave |
| -------------------------------------------------------------------------- | ------------------------------------------------------------------------------------------------------------------------------------------------------------------------- |
| You copy dialogue from documents into code, and again after every rewrite. | You [export](https://docs.arcweave.com/project-tools/export) structured data, or load it with the [Unity, Unreal, or Godot plugins](https://docs.arcweave.com/integrations/overview), and re-export when the story changes. |
| You write a new parser for each writer's format. | Every project uses the same documented [JSON structure](https://docs.arcweave.com/integrations/json), so you write your import tools once. |
| Writers ask you for a build to test a branch. | Writers test their own logic in [Play Mode](https://docs.arcweave.com/project-tools/play-mode/overview) before it reaches you. |
| Story conditions live in code that writers can't read. | Conditions are written in [Arcscript](https://docs.arcweave.com/project-items/arcscript) in the project, where writers and developers both see them. |
| Moving content in and out of your pipeline is a manual step. | In Team workspaces, the [REST API](https://docs.arcweave.com/rest-api/overview) reads and writes project data from your own tools. |
## Export-ready structure
Context: Arcweave docs > Introduction > Whom is it for? > Arcweave for Developers > Export-ready structure
Arcweave projects can be exported in [structured JSON](https://docs.arcweave.com/integrations/json), providing you with:
- Full story flow data: elements, connections, branches, jumpers
- Variables and logic conditions
- Component data (characters, items, etc.) and their attributes
- References to attached assets (e.g. images, audio files)
- Metadata for custom use in your runtime system
You can treat Arcweave as a source of narrative truth and parse its output into Unity, Unreal, Godot—or any custom engine or scripting system you use.
> ✅ Arcweave's JSON structure is stable and documented. You can write import tools once and reuse them across multiple projects.
## Smarter workflows
Context: Arcweave docs > Introduction > Whom is it for? > Arcweave for Developers > Smarter workflows
Arcweave offers more than just raw JSON exports. It provides complete [integration solutions and plugins](https://docs.arcweave.com/integrations/overview) for popular game engines, reducing the time spent on boilerplate integration work and enabling faster iterations between teams. You minimize manual content updates in code, even as the narrative evolves. This reduces developer overhead while keeping the game logic tightly synced with the writing.
## Localization
Context: Arcweave docs > Introduction > Whom is it for? > Arcweave for Developers > Localization
In Team workspaces, Arcweave includes [localization tools](https://docs.arcweave.com/project-tools/localization) for multi-language projects. Teams can add languages, translate elements, connection labels, and component names, track translation status, import localized spreadsheets, and choose which language data to include in JSON, spreadsheet, image, PDF, and engine exports.
## Story versioning
Context: Arcweave docs > Introduction > Whom is it for? > Arcweave for Developers > Story versioning
In Team workspaces, the [History](https://docs.arcweave.com/project-tools/history) panel lets teams inspect previous project states and restore work when needed, reducing the need to build in-house recovery tooling around every content iteration.
## API access
Context: Arcweave docs > Introduction > Whom is it for? > Arcweave for Developers > API access
For custom integrations, Arcweave provides a **[REST API](https://docs.arcweave.com/rest-api/overview)** with **read and write access** to projects in Team workspaces. You can:
- Fetch the latest state of a project at runtime.
- Build tools that read project data and send content updates back to Arcweave.
- Import projects and create or update content such as boards, elements, branches, variables, components, attributes, and assets.
- Automate workflows like previewing or regression testing against narrative logic.
This is ideal for live environments, interactive installations, or collaborative pipelines where the narrative is still evolving while the platform is already in use.
## Clean collaboration
Context: Arcweave docs > Introduction > Whom is it for? > Arcweave for Developers > Clean collaboration
Arcweave allows your writing and design team to work independently from the implementation team, reducing bottlenecks and freeing up developers from creative iteration cycles.
As a developer, you can:
- Access the project directly, to inspect logic and structure.
- Leave comments on boards, to flag technical concerns or integration questions.
- Help define naming conventions or metadata structures in components for cleaner parsing.
You don't need to learn Arcweave's design interface, but you'll appreciate how structured and readable the narrative system is.
## Migrating to Arcweave
Context: Arcweave docs > Introduction > Whom is it for? > Arcweave for Developers > Migrating to Arcweave
Already working in another tool? Arcweave supports a range of workflows, and it's easy to incorporate it into your process.
We can help you:
- Import data and convert story structures
- Integrate Arcweave into your development pipeline
- Maintain consistency with your current tools
> ✅ Every project is different. [Contact us](https://arcweave.com/contact) to discuss a tailored migration solution for your team.
# Arcweave for Team Leaders
Source: https://docs.arcweave.com/introduction/whom-is-it-for/team-leaders
Section: Introduction > Whom is it for?
Description: How Arcweave applies to the workflow of team leaders
If you're leading a narrative design team, game studio, or any collaborative creative effort, Arcweave provides the structure and tools to manage your team efficiently, while keeping the creative workflow seamless.
This guide introduces the capabilities you have as a **workspace owner** and team leader in Arcweave.
## What changes for you
Context: Arcweave docs > Introduction > Whom is it for? > Arcweave for Team Leaders > What changes for you
If your team's story is spread across documents, spreadsheets, chat threads, and a game build, here's what changes when it lives in Arcweave:
| Without Arcweave | With Arcweave |
| ---------------------------------------------------------------------------------- | ------------------------------------------------------------------------------------------------------------------------------------------------ |
| The story is split across several tools, and nobody is sure which copy is current. | Writing, logic, and assets live in one shared [project](https://docs.arcweave.com/workspaces/projects) that everyone edits in real time. |
| Feedback arrives in chat or email, away from the content it refers to. | Reviewers leave [comments](https://docs.arcweave.com/project-items/comments) on the boards and mention teammates, who get notified. |
| Giving someone access means sharing files and hoping they don't break them. | You invite people with a [role](https://docs.arcweave.com/workspaces/roles), such as editor or commenter, and add outside collaborators as guests on specific projects. |
| Writers wait on developers to test the story, and developers wait on writers. | Writers playtest in [Play Mode](https://docs.arcweave.com/project-tools/play-mode/overview) while developers work from the exported data, so both sides move in parallel. |
| A bad edit means digging through backups. | In Team workspaces, [History](https://docs.arcweave.com/project-tools/history) lets you view and restore earlier versions of a project. |
## Management
Context: Arcweave docs > Introduction > Whom is it for? > Arcweave for Team Leaders > Management
Arcweave's [workspaces](https://docs.arcweave.com/workspaces/overview) are the foundation of collaboration and team management.
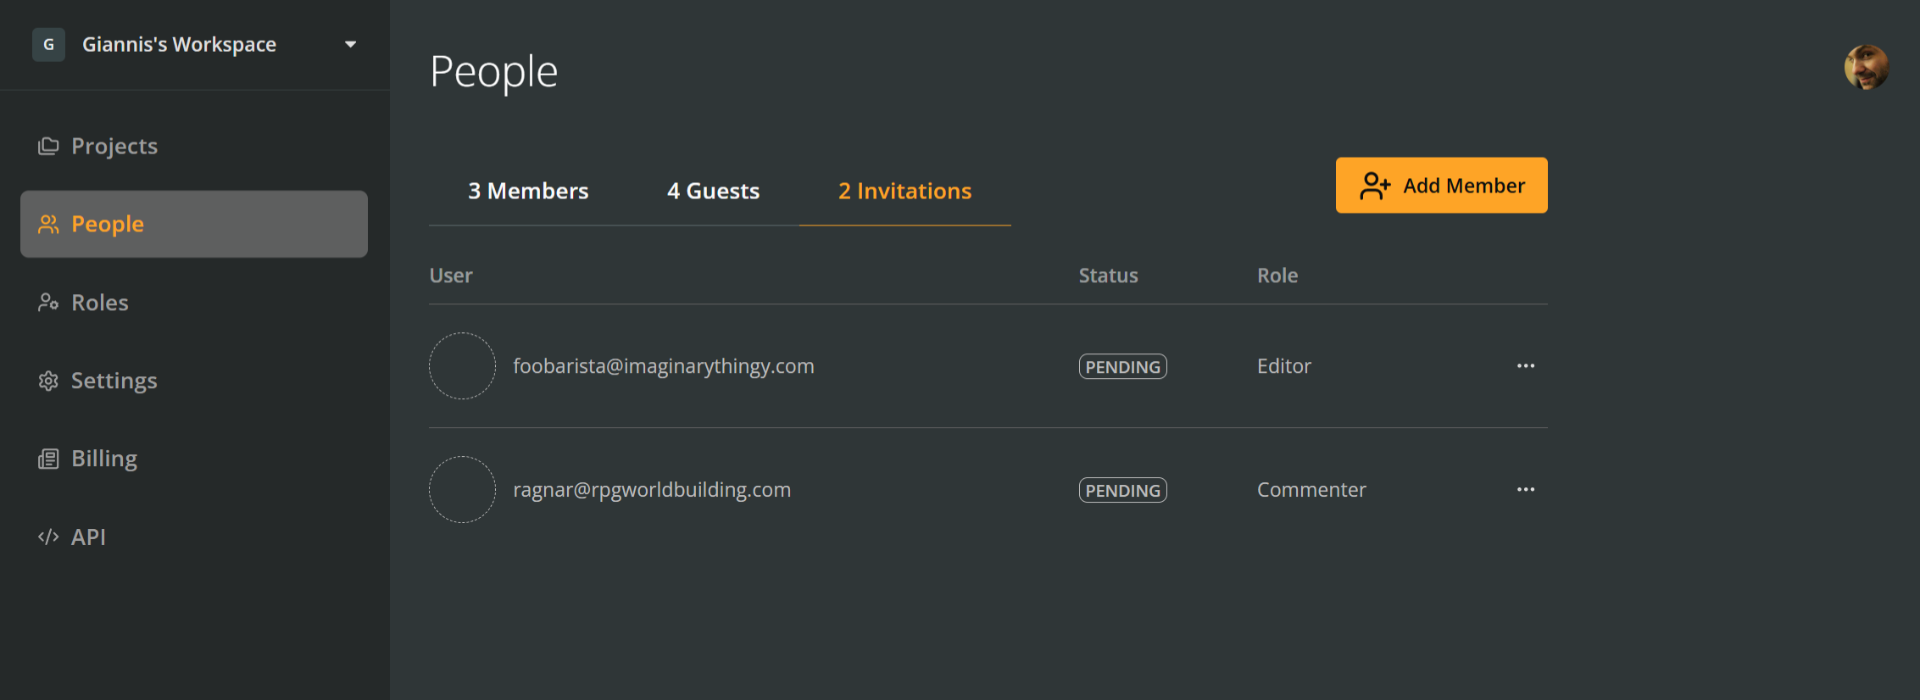
As a workspace owner, you have full control over your team's environment and permissions. You can:
- Invite team members to the workspace.
- Assign, change, or revoke member roles and permissions.
- Maintain a clear overview of your team's projects—you can create, view, comment on, edit, and delete any of them.
- Manage workspace settings and billing.
> ✅ Owners have full administrative rights, including role assignments and all project management tasks.
## Efficiency
Context: Arcweave docs > Introduction > Whom is it for? > Arcweave for Team Leaders > Efficiency
Arcweave helps reduce overhead by consolidating writing, logic design, collaboration, and asset management into a **single unified tool**. This eliminates the need for multiple apps or custom integrations, cutting down on both licensing costs and coordination time.
## Autonomy
Context: Arcweave docs > Introduction > Whom is it for? > Arcweave for Team Leaders > Autonomy
Each department—writing, design, development—can work **comfortably and independently** within Arcweave. Writers don't need to wait on developers for logic testing, and developers don't have to manually track narrative updates.
This separation of concerns speeds up production, minimizes miscommunication, and helps everyone stay aligned without interrupting each other's flow.
## Choosing the right plan
Context: Arcweave docs > Introduction > Whom is it for? > Arcweave for Team Leaders > Choosing the right plan
Workspaces come in various plans (see Arcweave's [Pricing](https://arcweave.com/pricing) page), and you can configure the number of seats to match your team's size and requirements. For detailed guidance on subscription management and different upgrade scenarios, see [Manage your subscriptions](https://docs.arcweave.com/introduction/quick-tour/manage-subscriptions).
Select the plan that provides the right balance of features, assets storage, and tools for collaboration & integration. Each plan is designed to grow with your team, ensuring you only pay for what you need while maintaining the flexibility to expand as your projects evolve.
## Pipeline automation
Context: Arcweave docs > Introduction > Whom is it for? > Arcweave for Team Leaders > Pipeline automation
If your studio has an established production pipeline, Arcweave can become part of it. The **Team** plan includes access to the [REST API](https://docs.arcweave.com/rest-api/overview), which lets your scripts and tools read and write project data programmatically.
With the REST API, you can:
- **Import** content into Arcweave from your own tools and sources, instead of entering it by hand.
- **Export** project data on demand and feed it into your build process, game engine, or other tools.
- **Keep working in Arcweave** while your pipeline stays in sync, so writers and designers don't have to wait for manual import and export steps.
Automation reduces repetitive work and the errors that come with it, and it keeps your team focused on the narrative instead of on moving files around.
> ℹ️ REST API access is available only in **Team** workspaces. See [workspace billing plans](https://docs.arcweave.com/workspaces/billing-plans).
## Customized solutions
Context: Arcweave docs > Introduction > Whom is it for? > Arcweave for Team Leaders > Customized solutions
If you have questions or want to explore how Arcweave can fit your team's unique workflow, [contact us](https://arcweave.com/contact). We'll be happy to help you tailor Arcweave to your team's needs.
# Quick tour of Arcweave
Source: https://docs.arcweave.com/introduction/quick-tour/overview
Section: Introduction
Description: Start the Arcweave quick tour by creating an account, exploring The Castle sample project, and meeting the main tools
Welcome! This quick tour is designed to give you a fast and hands-on introduction to Arcweave, so you can immediately see how it can power your interactive projects.

In just a few minutes, you'll learn how to create your account, explore a sample project (_The Castle_—pictured above), and get a first look at the tools that will help you build your own interactive experiences. All you need is a browser and an internet connection.
## What the tour covers
Context: Arcweave docs > Introduction > Quick tour of Arcweave > What the tour covers
The tour has short stops, in the order you'll likely need them:
1. [Create your free account](https://docs.arcweave.com/introduction/quick-tour/create-account): Sign up with your email or Google account.
1. [Arcweave interface](https://docs.arcweave.com/introduction/quick-tour/ui): Find your way around the Projects section, the board area, the left sidebar, and the top and bottom menus.
1. [Flowchart analysis](https://docs.arcweave.com/introduction/quick-tour/flowchart): See how _The Castle_ is built from elements, connections, jumpers, and branches, with attached assets and components.
1. [Play Mode](https://docs.arcweave.com/introduction/quick-tour/play-mode): Play the story as a player would.
1. [AI tools](https://docs.arcweave.com/introduction/quick-tour/ai): Meet the Design Assistant, Element Generator, Element Enhancer, and Image Generator.
1. [Collaboration](https://docs.arcweave.com/introduction/quick-tour/collaboration): Work with teammates and guests in real time, and use notes and comments.
1. [Share & export](https://docs.arcweave.com/introduction/quick-tour/share-export): Share your project to collaborate or to let others play it, and export it to other formats and game engines.
1. [Your workspace](https://docs.arcweave.com/introduction/quick-tour/workspace): Invite people to your workspace and change its settings.
1. [Manage subscriptions](https://docs.arcweave.com/introduction/quick-tour/manage-subscriptions): Upgrade a workspace and add users to it.
> ✅ Short on time? Stops 2–4 show how a story is built and played. Stops 6–9 matter once you work with a team or need a paid plan.
If terms like _element_ or _branch_ are new to you, read [Core concepts](https://docs.arcweave.com/introduction/core-concepts) first, or keep it open as you go.
> ✅ Start by reading how to [create your Arcweave account](https://docs.arcweave.com/introduction/quick-tour/create-account), on the next page. If you already have an Arcweave account, jump to exploring the [Arcweave interface](https://docs.arcweave.com/introduction/quick-tour/ui).
# Create your free account
Source: https://docs.arcweave.com/introduction/quick-tour/create-account
Section: Introduction > Quick tour
Description: Sign up for a free Arcweave account with email or Google and verify your email address
> ✅ Creating an Arcweave account is free—now and forever. No strings attached.
To create an Arcweave account:
1. Visit the [Arcweave sign-up page](https://arcweave.com/register).
1. Enter your first name, last name, email, and a secure password, then click **Create account**.
1. Check your inbox for our verification email.
1. Click the link in the email to verify your account. Arcweave signs you in and opens your workspace.
You can also select **Continue with Google** on the sign-up page to create your account with Google. Google sign-up does not require the email verification step.
> ℹ️ Didn't receive the email? Check your spam folder. Still no luck? Reach out to us on Arcweave's [Discord](https://discord.gg/atVXxAK).
# Arcweave interface
Source: https://docs.arcweave.com/introduction/quick-tour/ui
Section: Introduction > Quick tour
Description: Quick tour of the Arcweave interface, including the Projects section, board area, left sidebar, top menu, and bottom menu
Arcweave's interface is clean and intuitive. This section provides a quick tour of the main areas you'll interact with while working on your projects.
## Projects section
Context: Arcweave docs > Introduction > Quick tour > Arcweave interface > Projects section
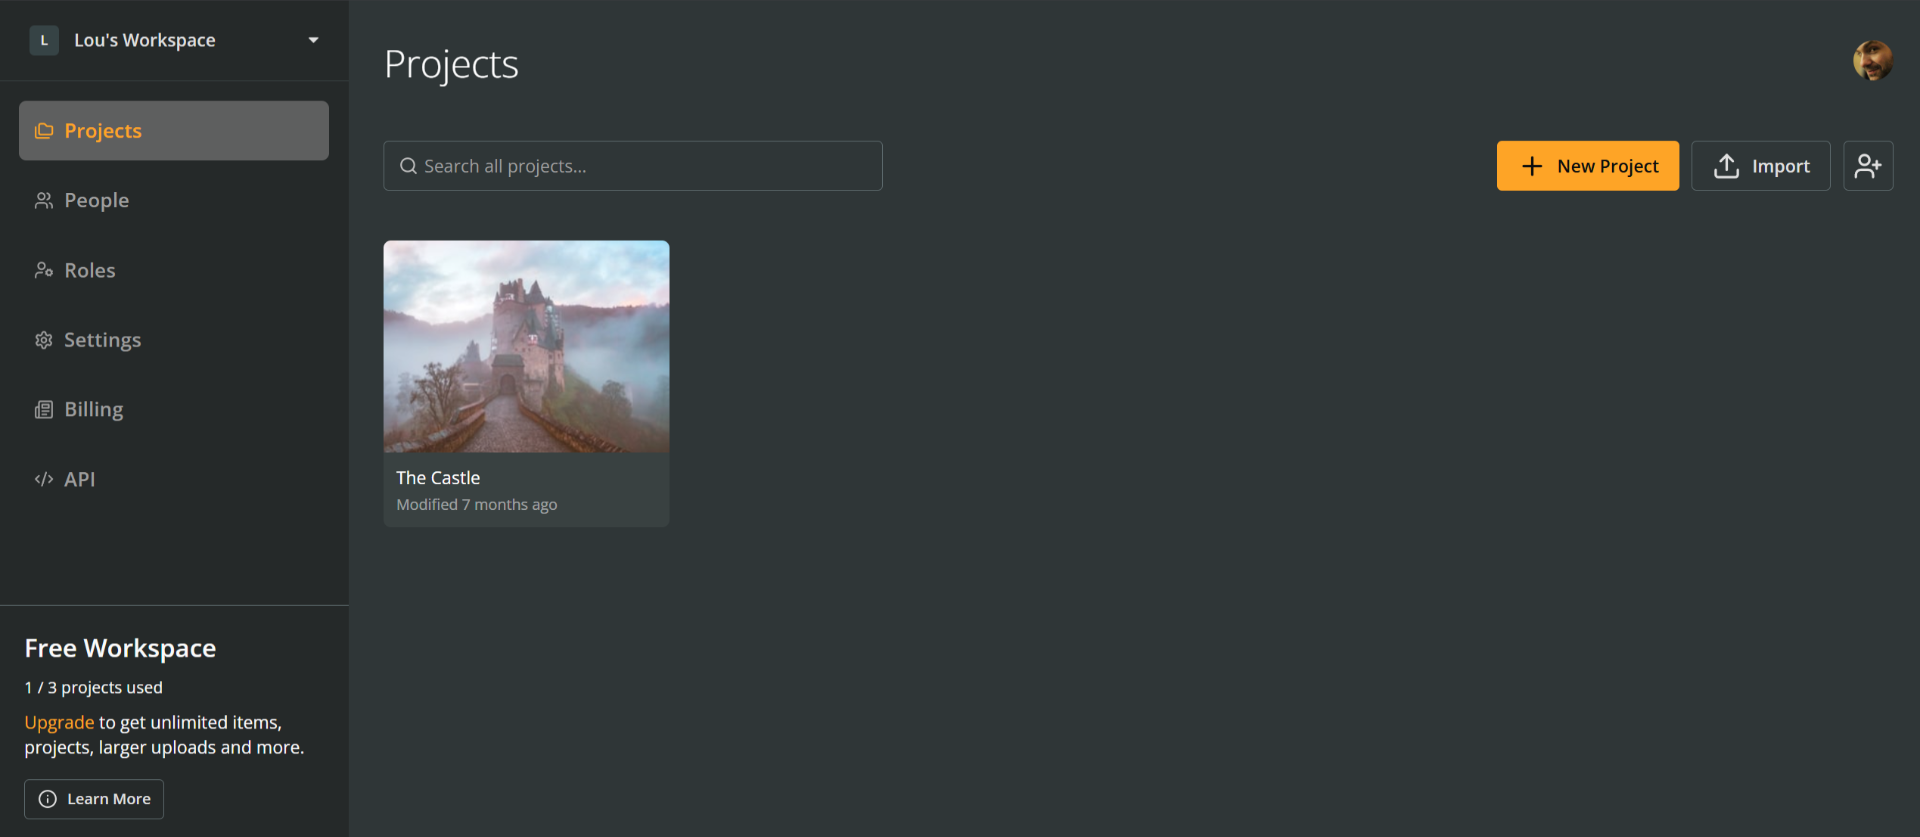
After logging in, you'll land on the **Projects** section of your first (free) **workspace**. You'll see a sample project titled _The Castle._ This is Arcweave's _Interactive Fiction Example,_ one of its built-in project templates.
Click on the project thumbnail to open it.
> ✅ Arcweave provides a handful of project templates you can study and expand. Just click **+ New Project** to explore them!
> ℹ️ Revisit previous sections on [projects](https://docs.arcweave.com/introduction/what-is-arcweave#projects) and [workspaces](https://docs.arcweave.com/introduction/what-is-arcweave#workspaces) if you need a reminder of what they are and what they enable you to do.
## Inside the project
Context: Arcweave docs > Introduction > Quick tour > Arcweave interface > Inside the project

Once inside _The Castle,_ you can see the main parts of Arcweave's interface:
## Current board area
Context: Arcweave docs > Introduction > Quick tour > Arcweave interface > Current board area

The largest area of the window is taken up by the **current board**, where a portion of its **flowchart** is visible.
To explore more of the flowchart do one of the following:
- **Zoom in and out**:
- On touch devices: Pinch in and out.
- On desktop: Use your mouse scroll wheel, or pinch on your trackpad.
- **Pan**:
- On touch devices: Drag empty board space with one finger.
- On desktop: Hold SPACE and drag with your mouse, drag with your mouse's middle button, or scroll with two fingers on your trackpad.
- Click the **Fit to screen** icon (bottom right): This automatically scales the board to fit your window.
> ℹ️ How Arcweave interprets scrolling depends on the [Input device](https://docs.arcweave.com/project-tools/settings#input-device) setting in **Project Settings**.
## Left sidebar
Context: Arcweave docs > Introduction > Quick tour > Arcweave interface > Left sidebar
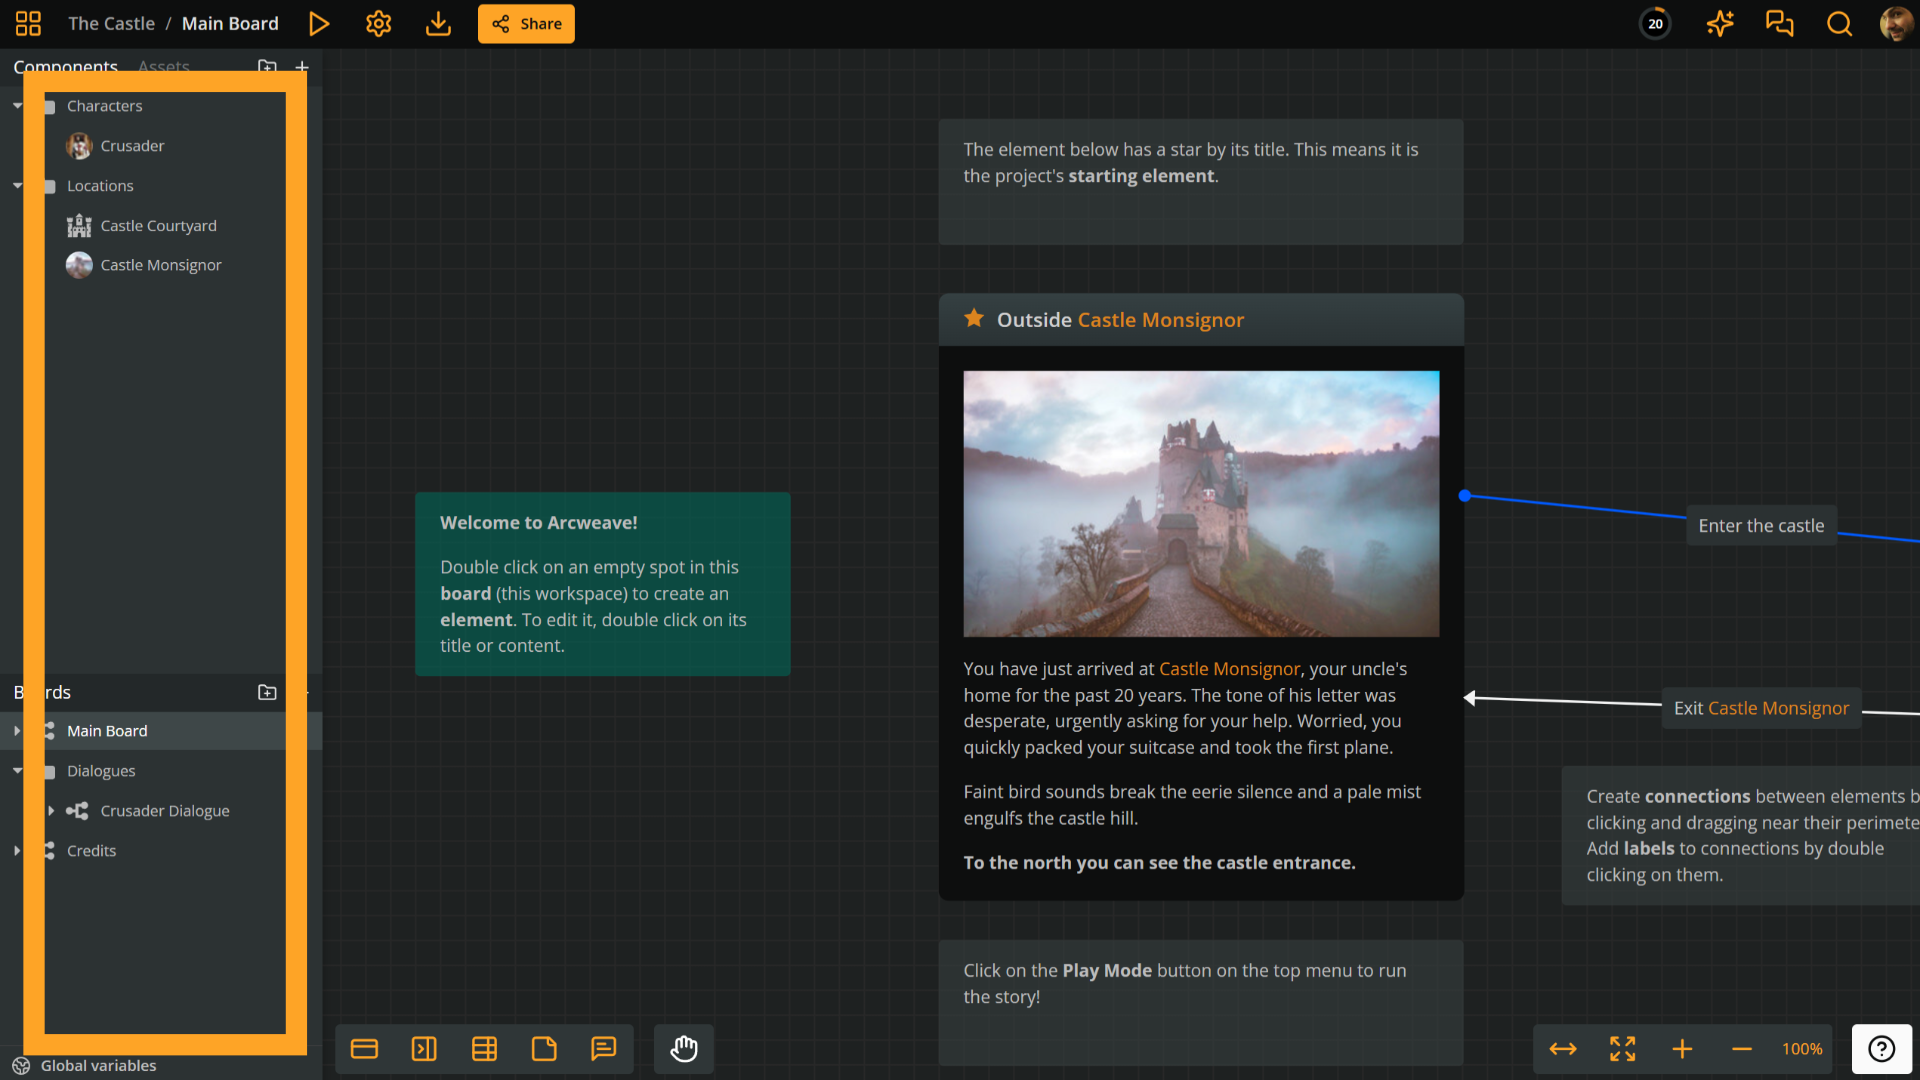
The sidebar on the left side of your window provides access to important items of your project:
- **Components** (top half, tab): Define reusable story objects like characters, items, or locations.
- **Assets** (top half, tab): Upload and manage image, audio, and video files.
- **Boards** (bottom half): Organize your narrative into separate canvases for different scenes or sections. This is where you'll find the current board as well, titled _Main Board._
- **Global variables** (bottom): Set variables to use across your project and drive logic and conditions.
Feel free to explore each sidebar section to get a sense of how you can manage your project and its content.
## Top menu
Context: Arcweave docs > Introduction > Quick tour > Arcweave interface > Top menu
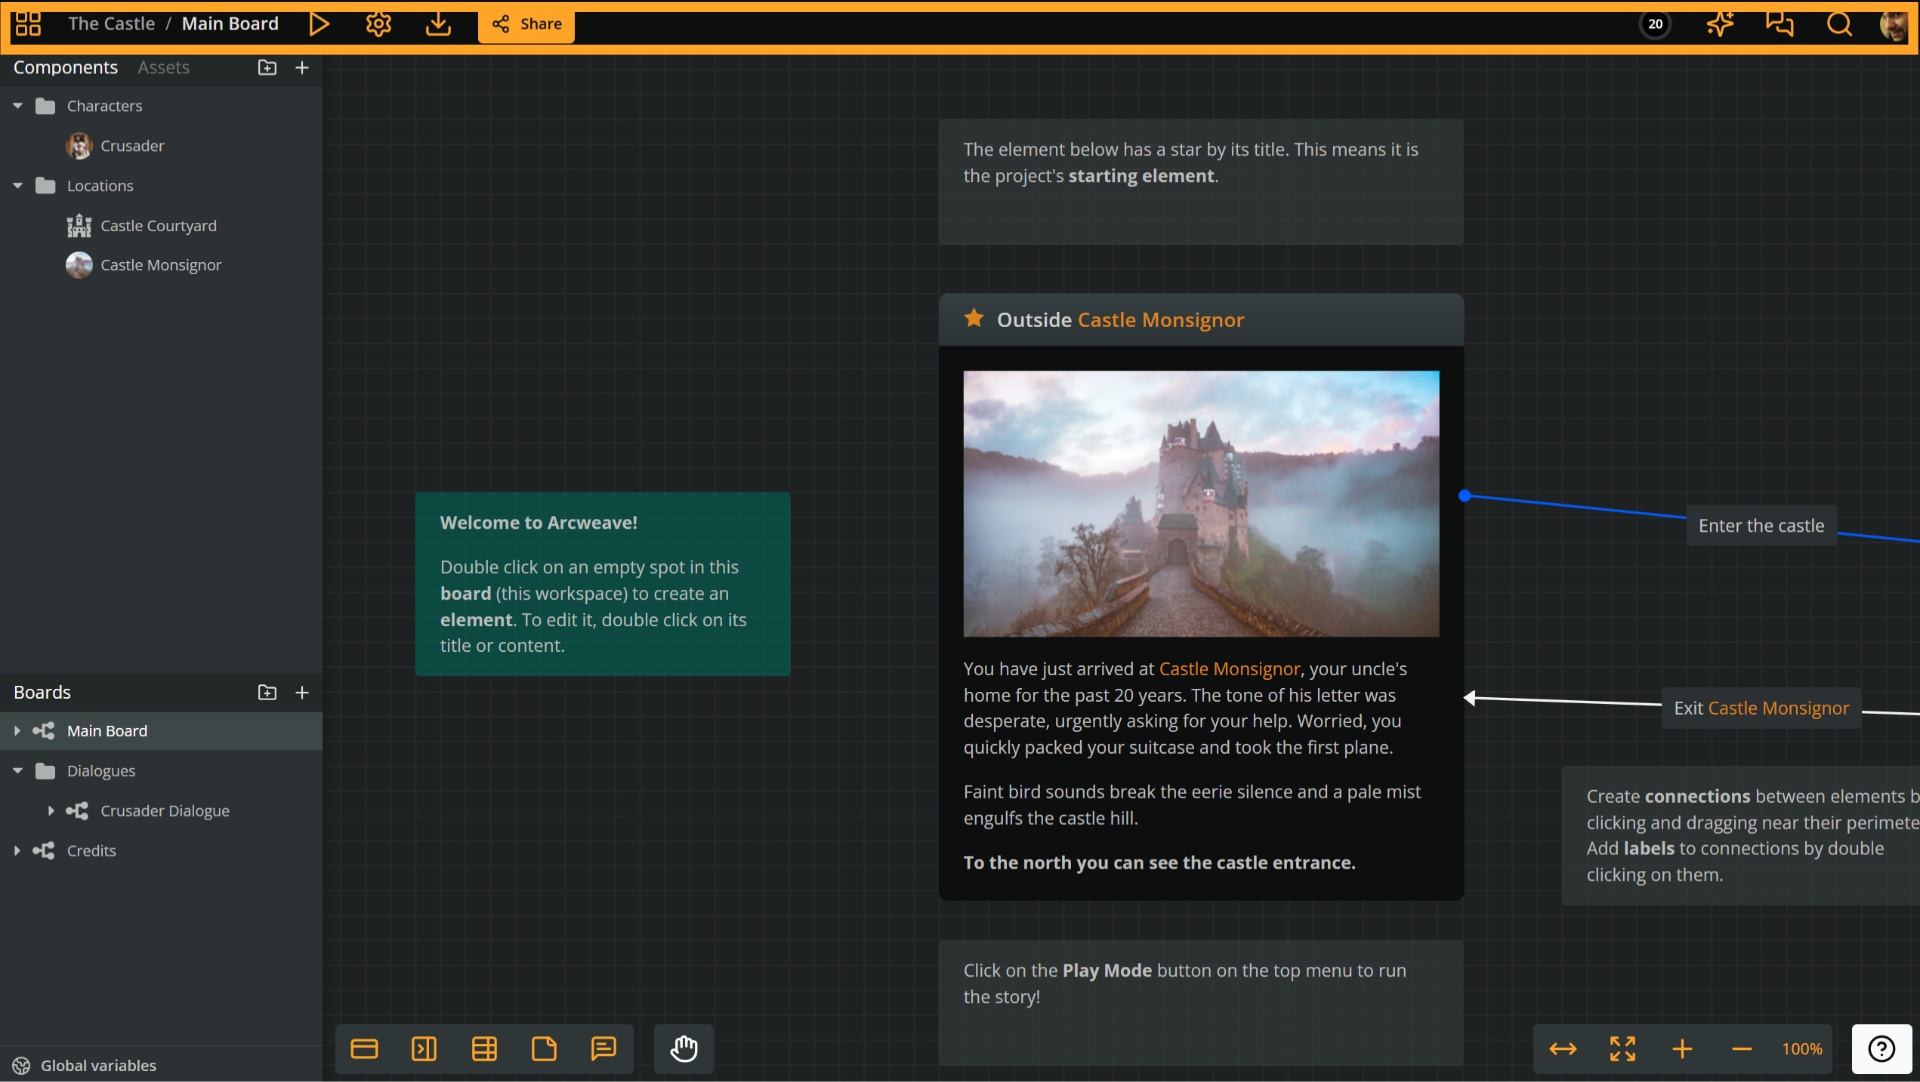
The top menu provides access to key [project tools](https://docs.arcweave.com/project-tools/overview). On the left, you'll find [Play Mode](https://docs.arcweave.com/project-tools/play-mode/overview), [Project Settings](https://docs.arcweave.com/project-tools/settings), [Export](https://docs.arcweave.com/project-tools/export), and [Share](https://docs.arcweave.com/project-tools/share). On the right, you can see active collaborators and access the [Design Assistant](https://docs.arcweave.com/project-tools/ai-features/design-assistant), [History](https://docs.arcweave.com/project-tools/history), [Localization](https://docs.arcweave.com/project-tools/localization), [Comments](https://docs.arcweave.com/project-items/comments), and [Search](https://docs.arcweave.com/project-tools/search), depending on your plan and permissions.
On narrow screens, these actions are grouped into dropdown menus on the left and right. Play Mode and your profile remain directly accessible in the top bar.
## Bottom menu
Context: Arcweave docs > Introduction > Quick tour > Arcweave interface > Bottom menu
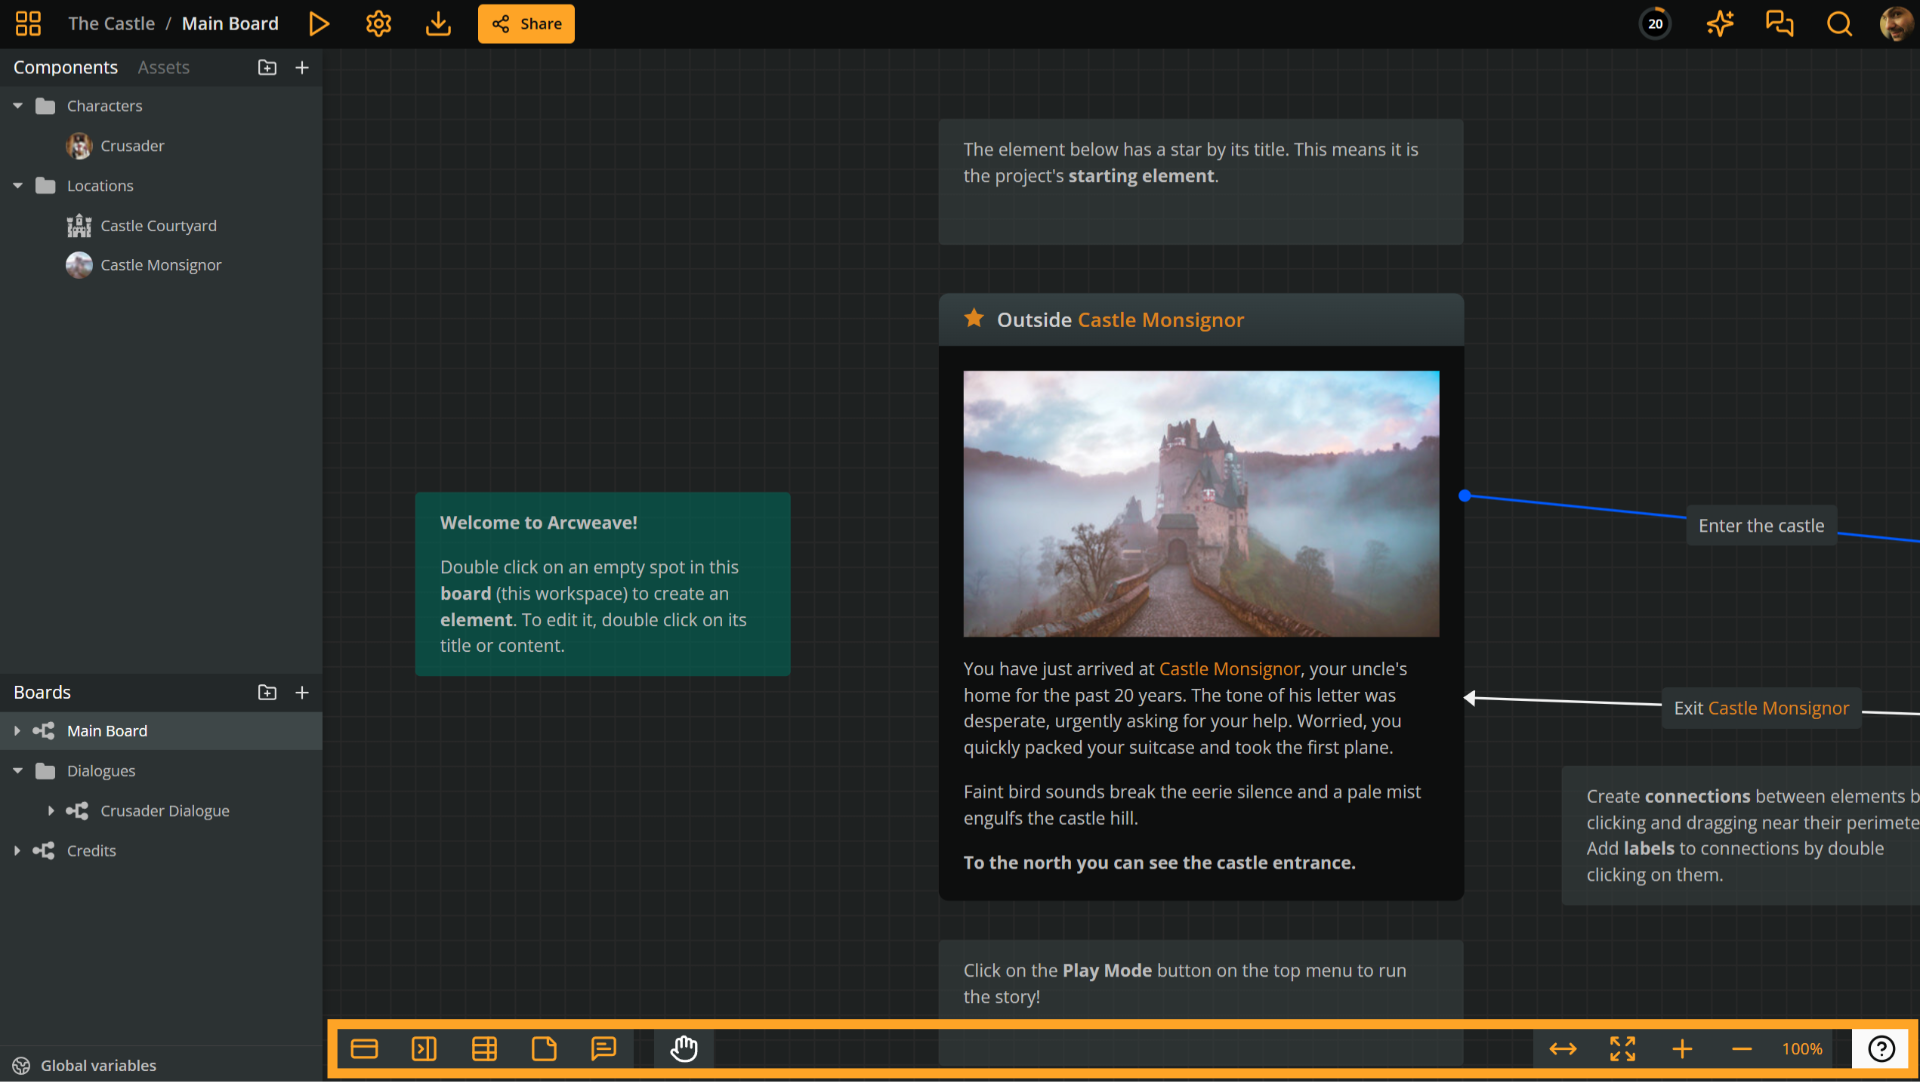
The bottom menu contains tools for creating [project items](https://docs.arcweave.com/project-items/overview) (on the left) and adjusting your board view with zooming and panning (on the right). On narrow screens, use the **+** button to expand the creation tools and the bottom-right chevron to expand the zoom and help tools.
# Flowchart analysis
Source: https://docs.arcweave.com/introduction/quick-tour/flowchart
Section: Introduction > Quick tour
Description: How Arcweave flowcharts work, with elements & attachments, connections, jumpers, and branches
The heart of any Arcweave project is its **flowchart**, a visual representation of your story, with its branching flow, player choices, and logic. [Play Mode](https://docs.arcweave.com/introduction/quick-tour/play-mode) follows the structure of your flowchart and lets you prototype your project as a choice-based game.
This section walks you through the key building blocks of the flowchart using _The Castle,_ the built-in example project in Arcweave.
## Elements & connections
Context: Arcweave docs > Introduction > Quick tour > Flowchart analysis > Elements & connections
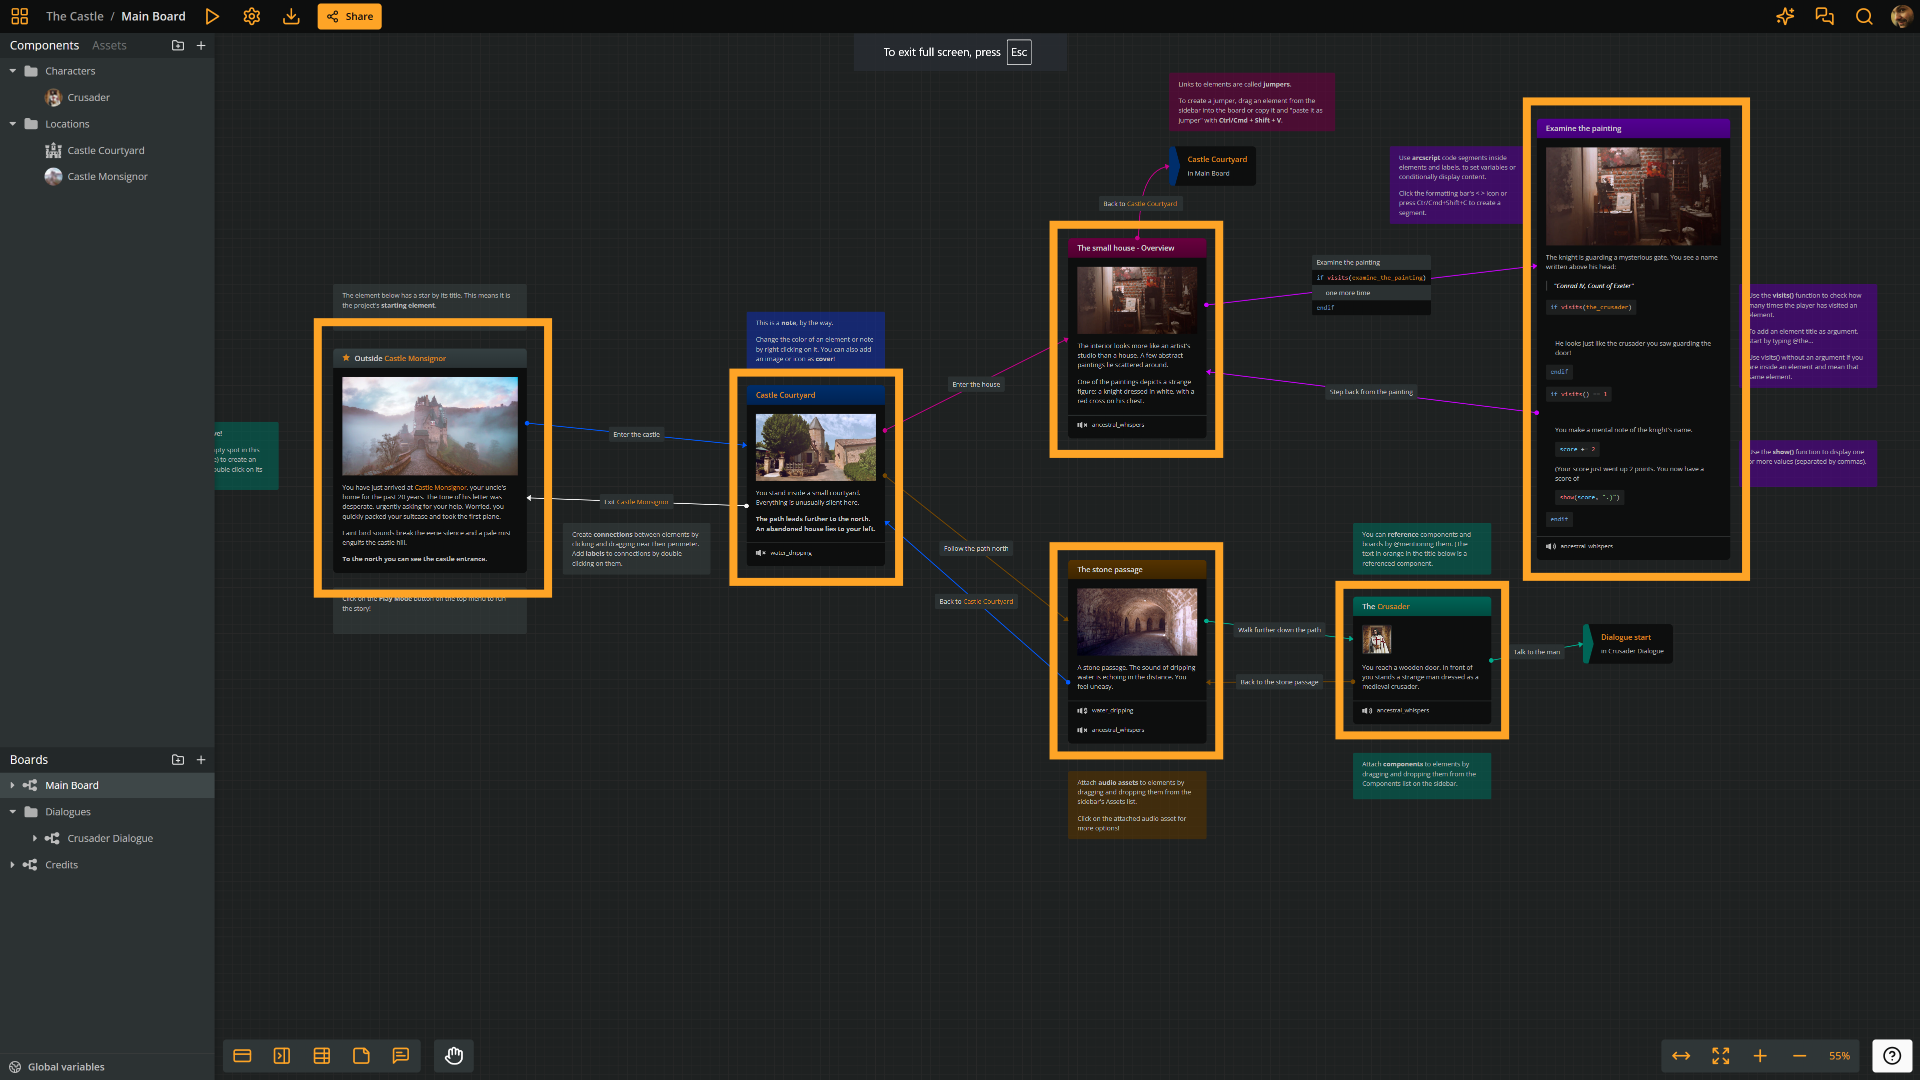
In the screenshot above, notice how the example's main flowchart consists mostly of [elements](https://docs.arcweave.com/project-items/elements) linked together with arrow [connections](https://docs.arcweave.com/project-items/connections). You design your story so it progresses from element to element, as the player clicks on **options**.
> ✅ You can use **keyboard shortcuts** to [navigate your project](https://docs.arcweave.com/project-tools/interface/keyboard-shortcuts#navigation-view) and [create connected elements](https://docs.arcweave.com/project-tools/interface/keyboard-shortcuts#element-creation-connection).
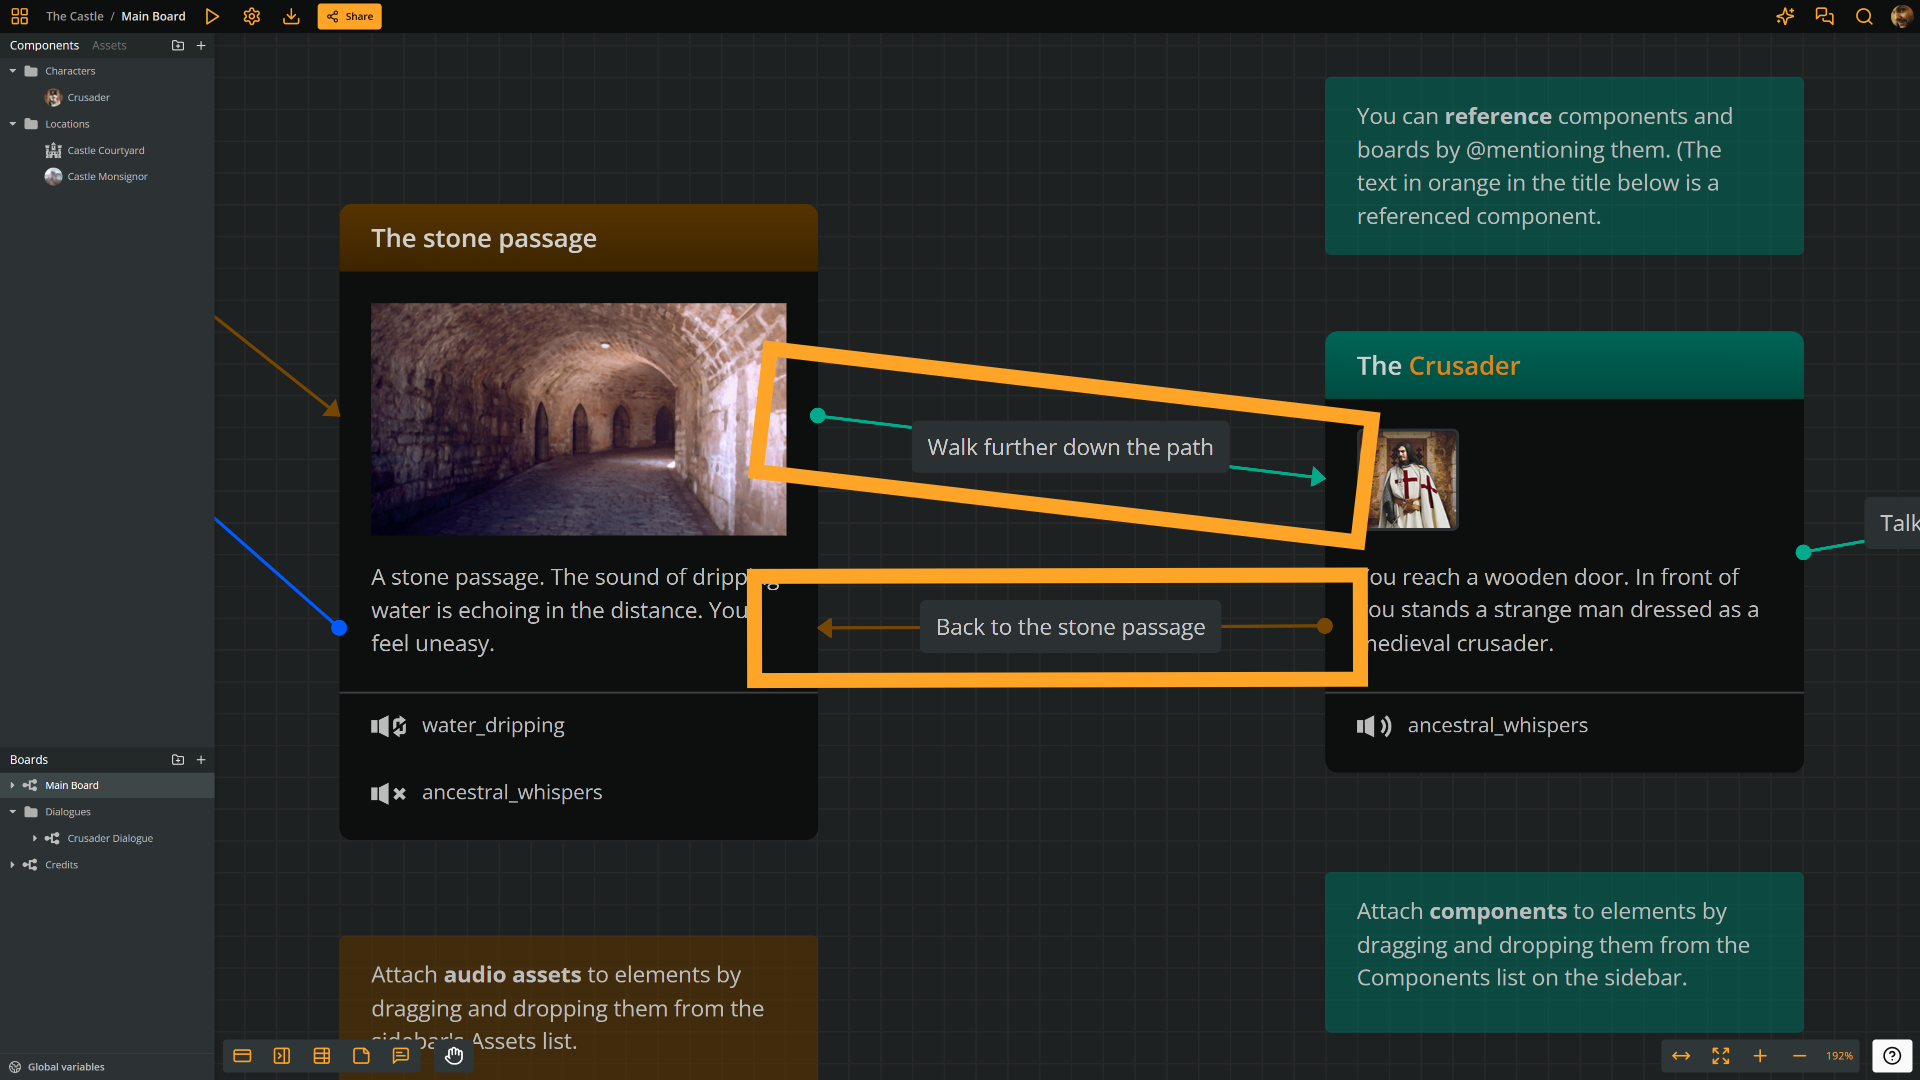
Connections can have [labels](https://docs.arcweave.com/project-items/labels), as shown in the screenshot above. It is not mandatory, but it is the best way to write clear text for the player's options.
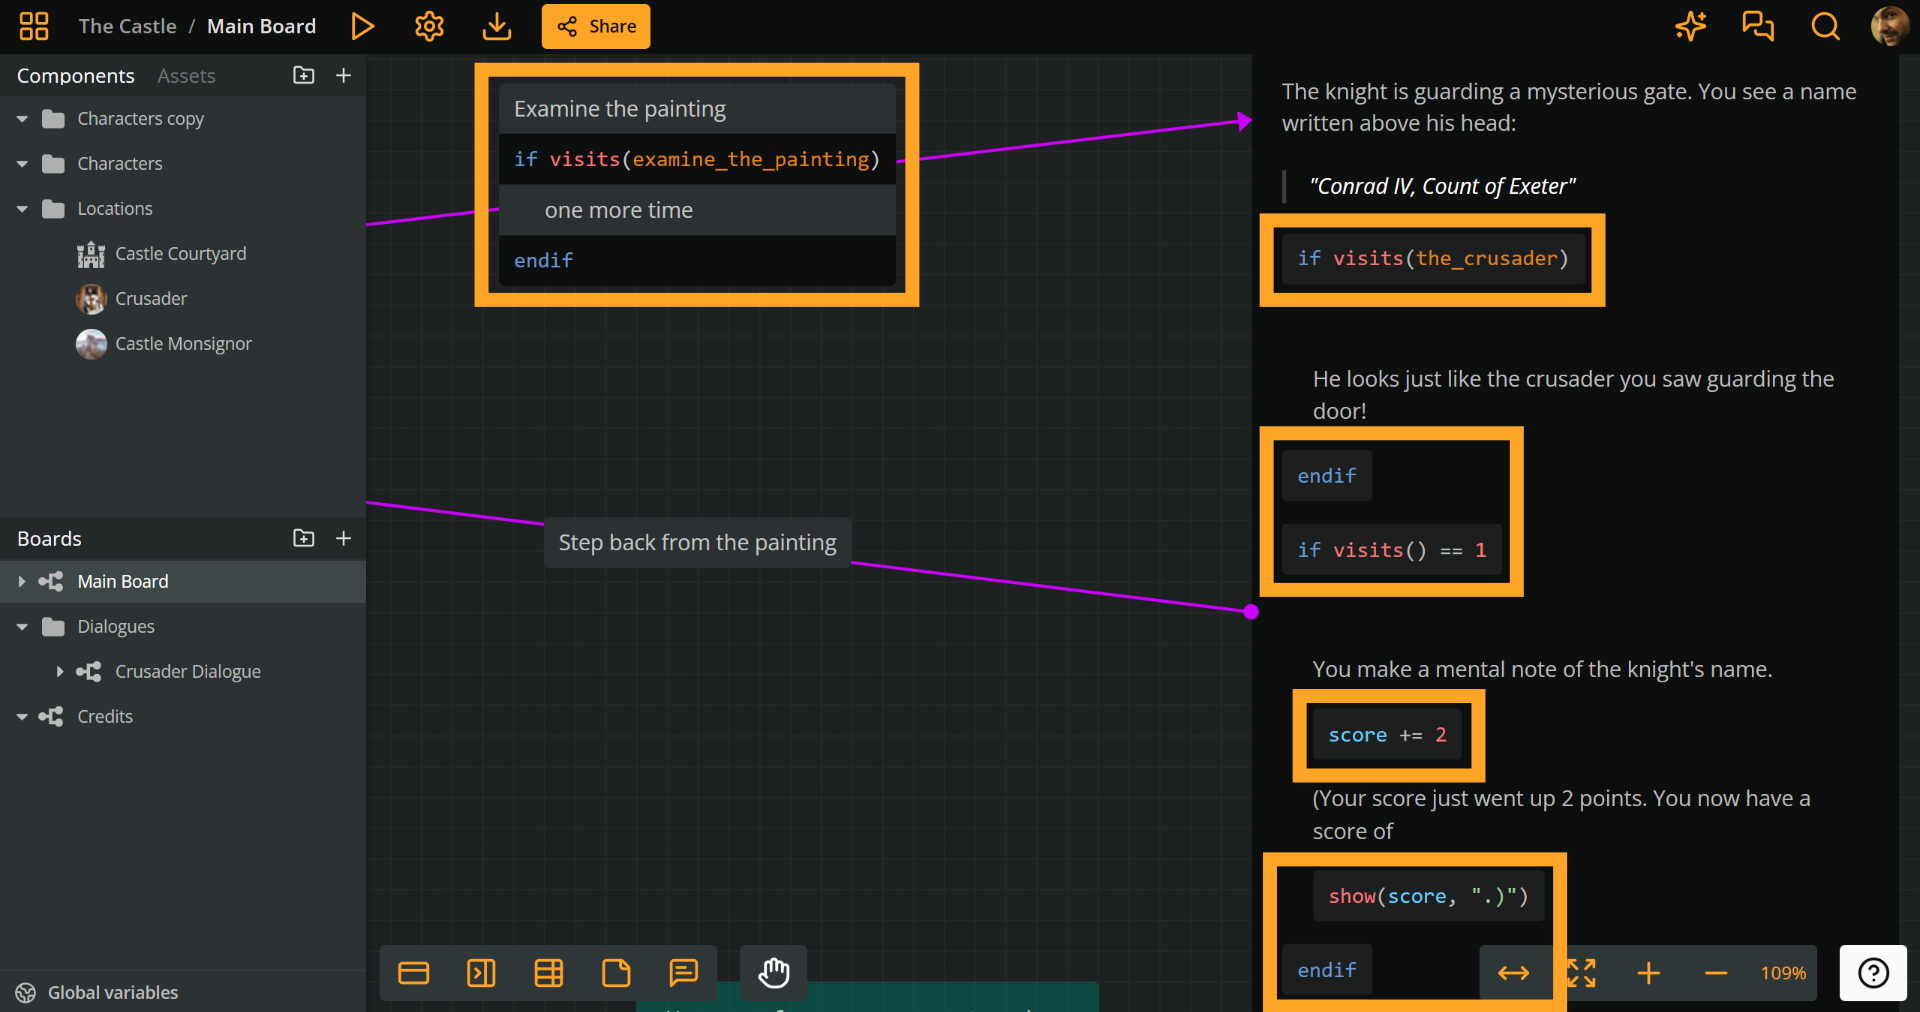
Both elements and connection labels can include [Arcscript](https://docs.arcweave.com/project-items/arcscript), Arcweave's simple scripting language for story logic. Don't be surprised if you come across snippets of code, like the examples shown in the image below.
## Attached assets
Context: Arcweave docs > Introduction > Quick tour > Flowchart analysis > Attached assets
[Assets](https://docs.arcweave.com/project-items/assets/overview) allow you to prototype the interactive experience with rich audiovisual feedback. By attaching **images**, **audio**, and **video assets** to your flowchart's elements, they appear in [Play Mode](https://docs.arcweave.com/introduction/quick-tour/play-mode), when each element loads.
### Images
Context: Arcweave docs > Introduction > Quick tour > Flowchart analysis > Attached assets > Images
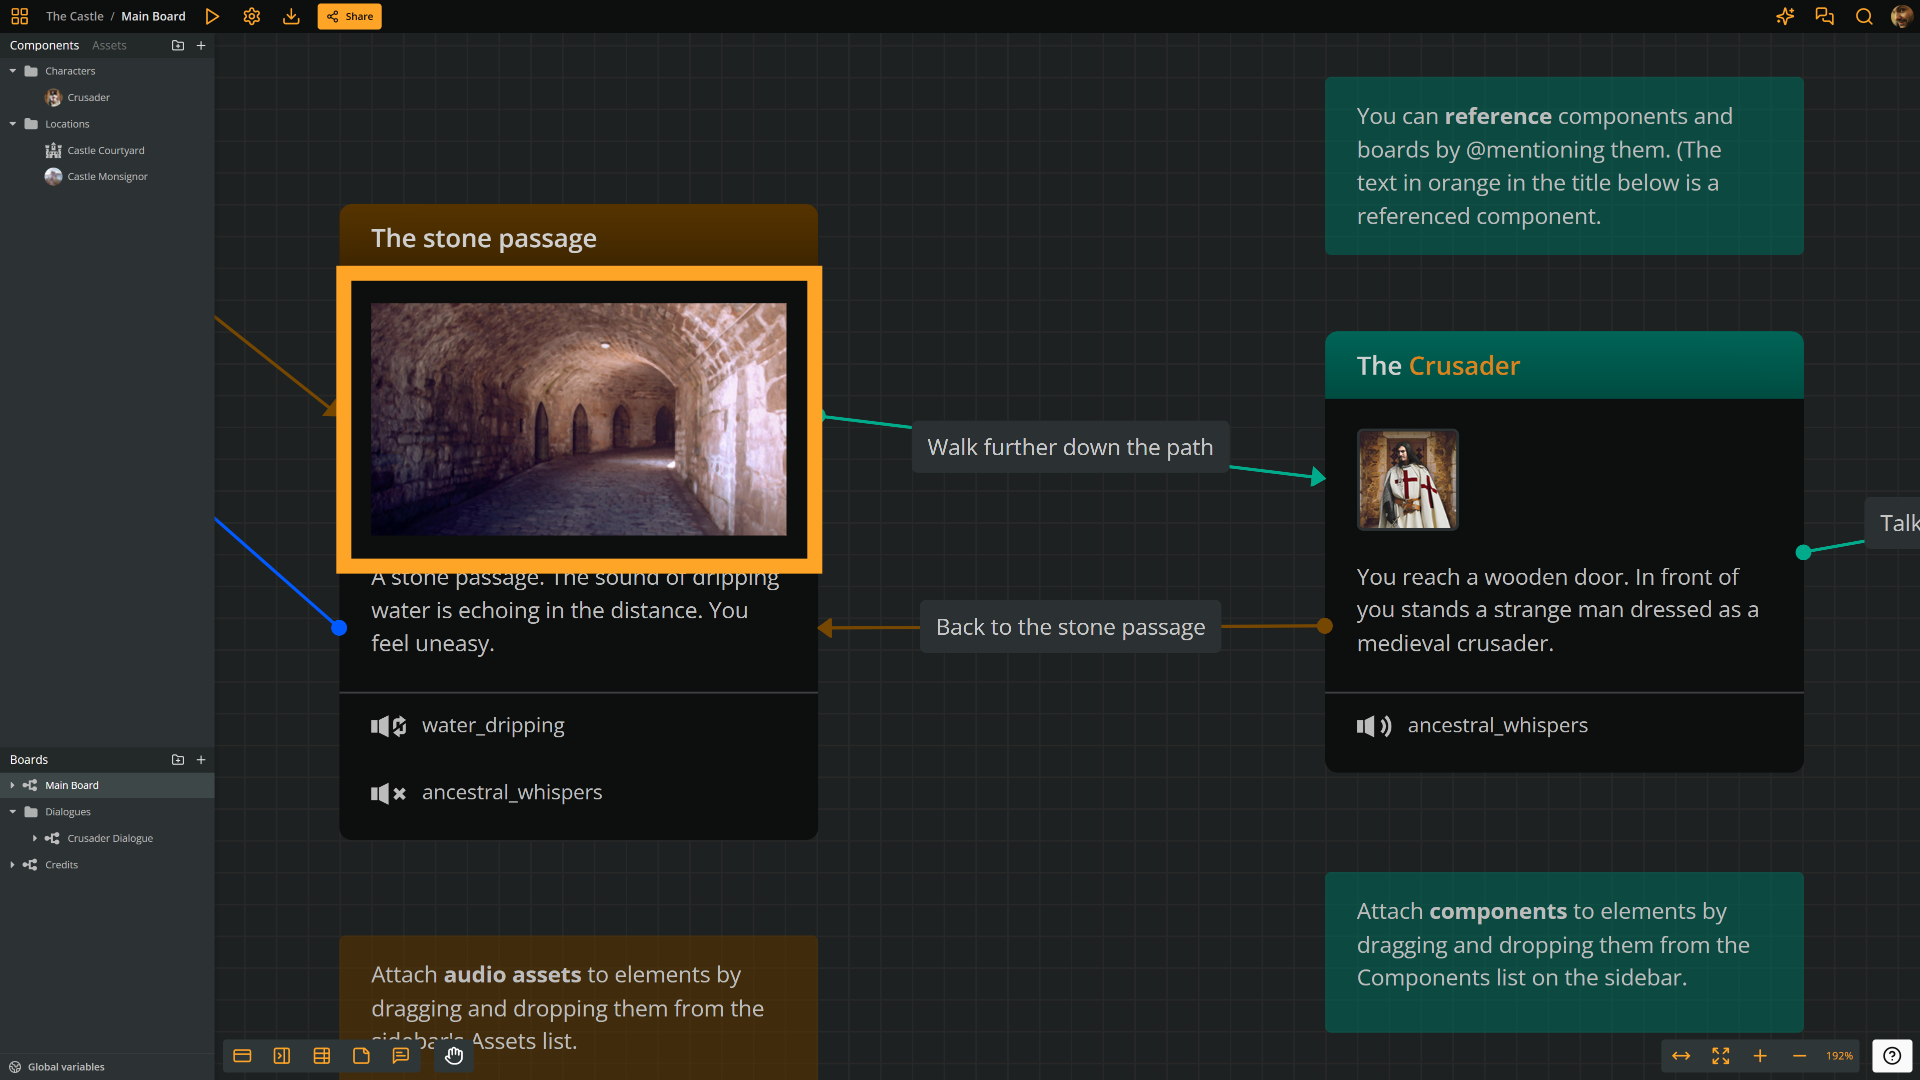
In _The Castle,_ many elements have an attached [image asset](https://docs.arcweave.com/project-items/assets/images) that serves as a [cover](https://docs.arcweave.com/project-items/elements#element-covers): a visual that spans the full width of the element, helping set the tone or context, as shown in the screenshot below.
### Audio
Context: Arcweave docs > Introduction > Quick tour > Flowchart analysis > Attached assets > Audio
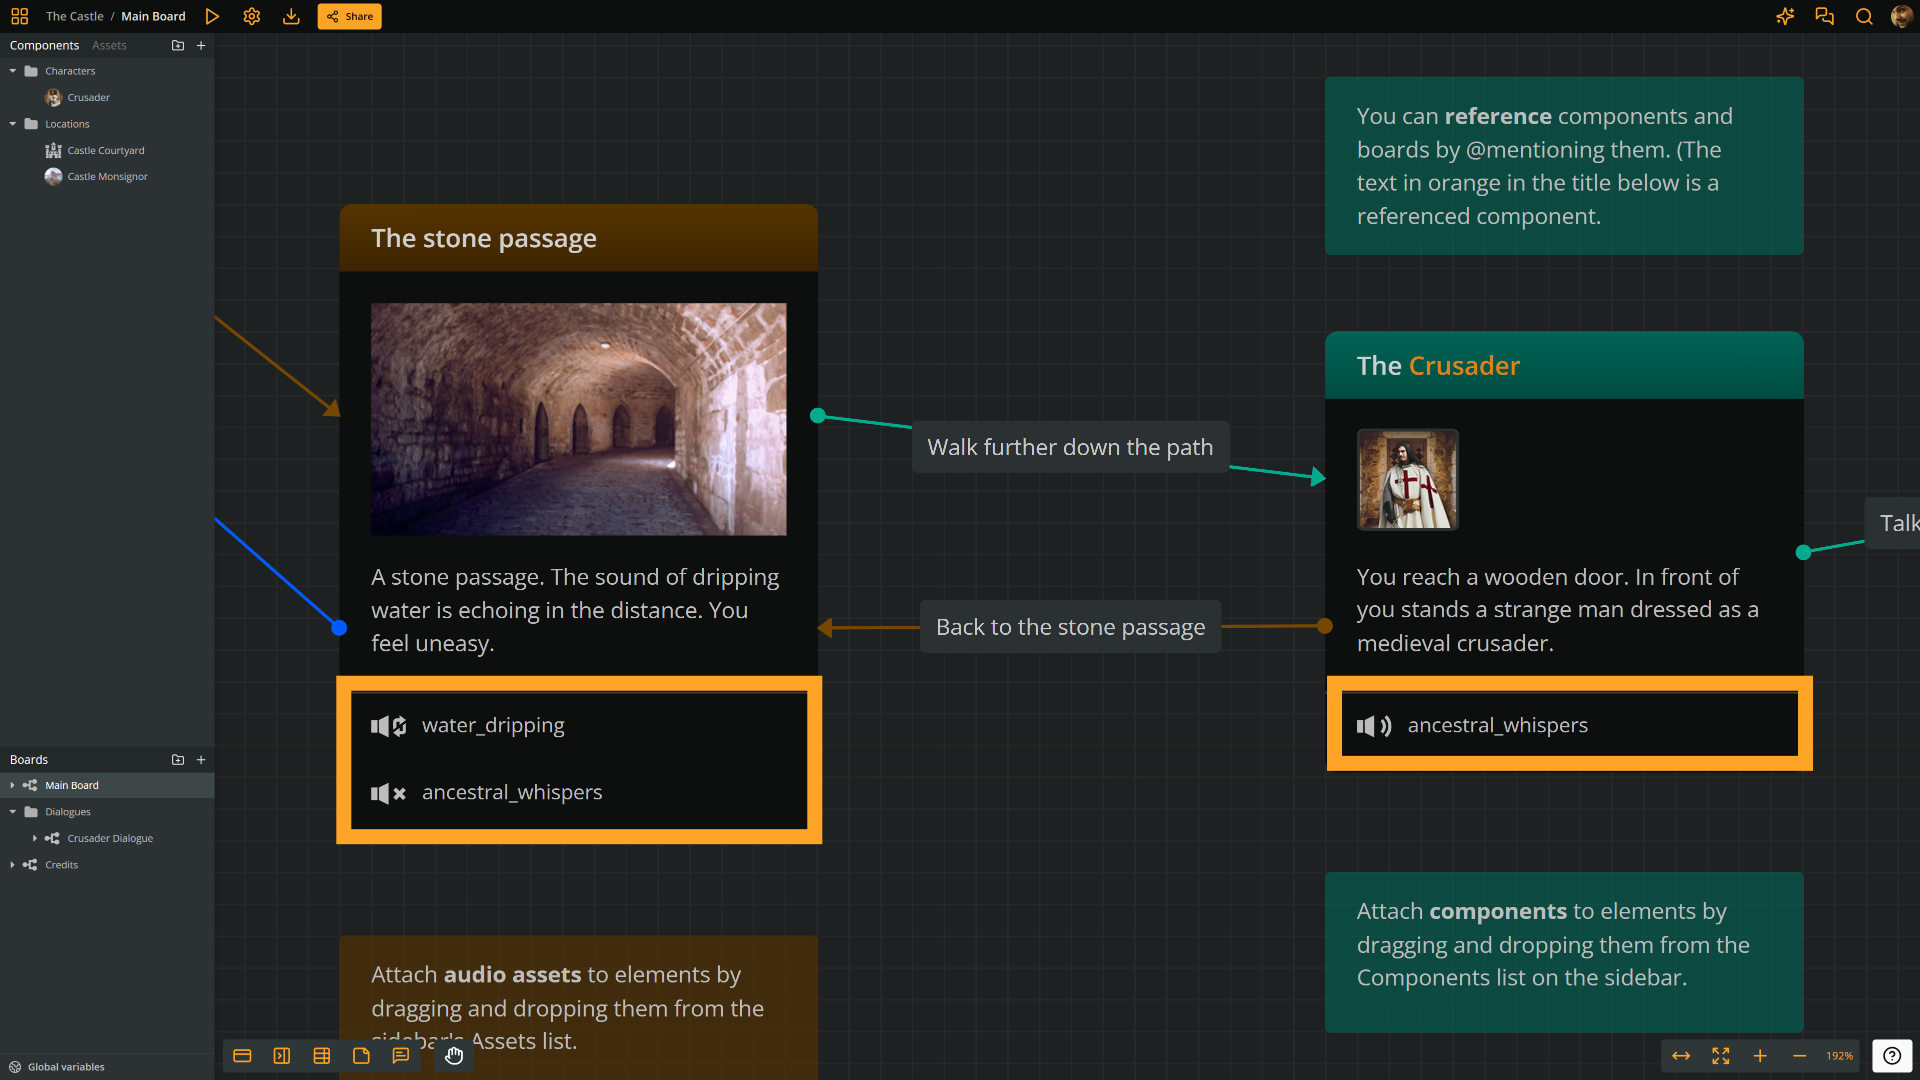
Some elements can also include one or more [audio assets](https://docs.arcweave.com/project-items/assets/audio). These may be music clips, ambience tracks, or sound effects that play or stop when the flow reaches the element.
### Video
Context: Arcweave docs > Introduction > Quick tour > Flowchart analysis > Attached assets > Video
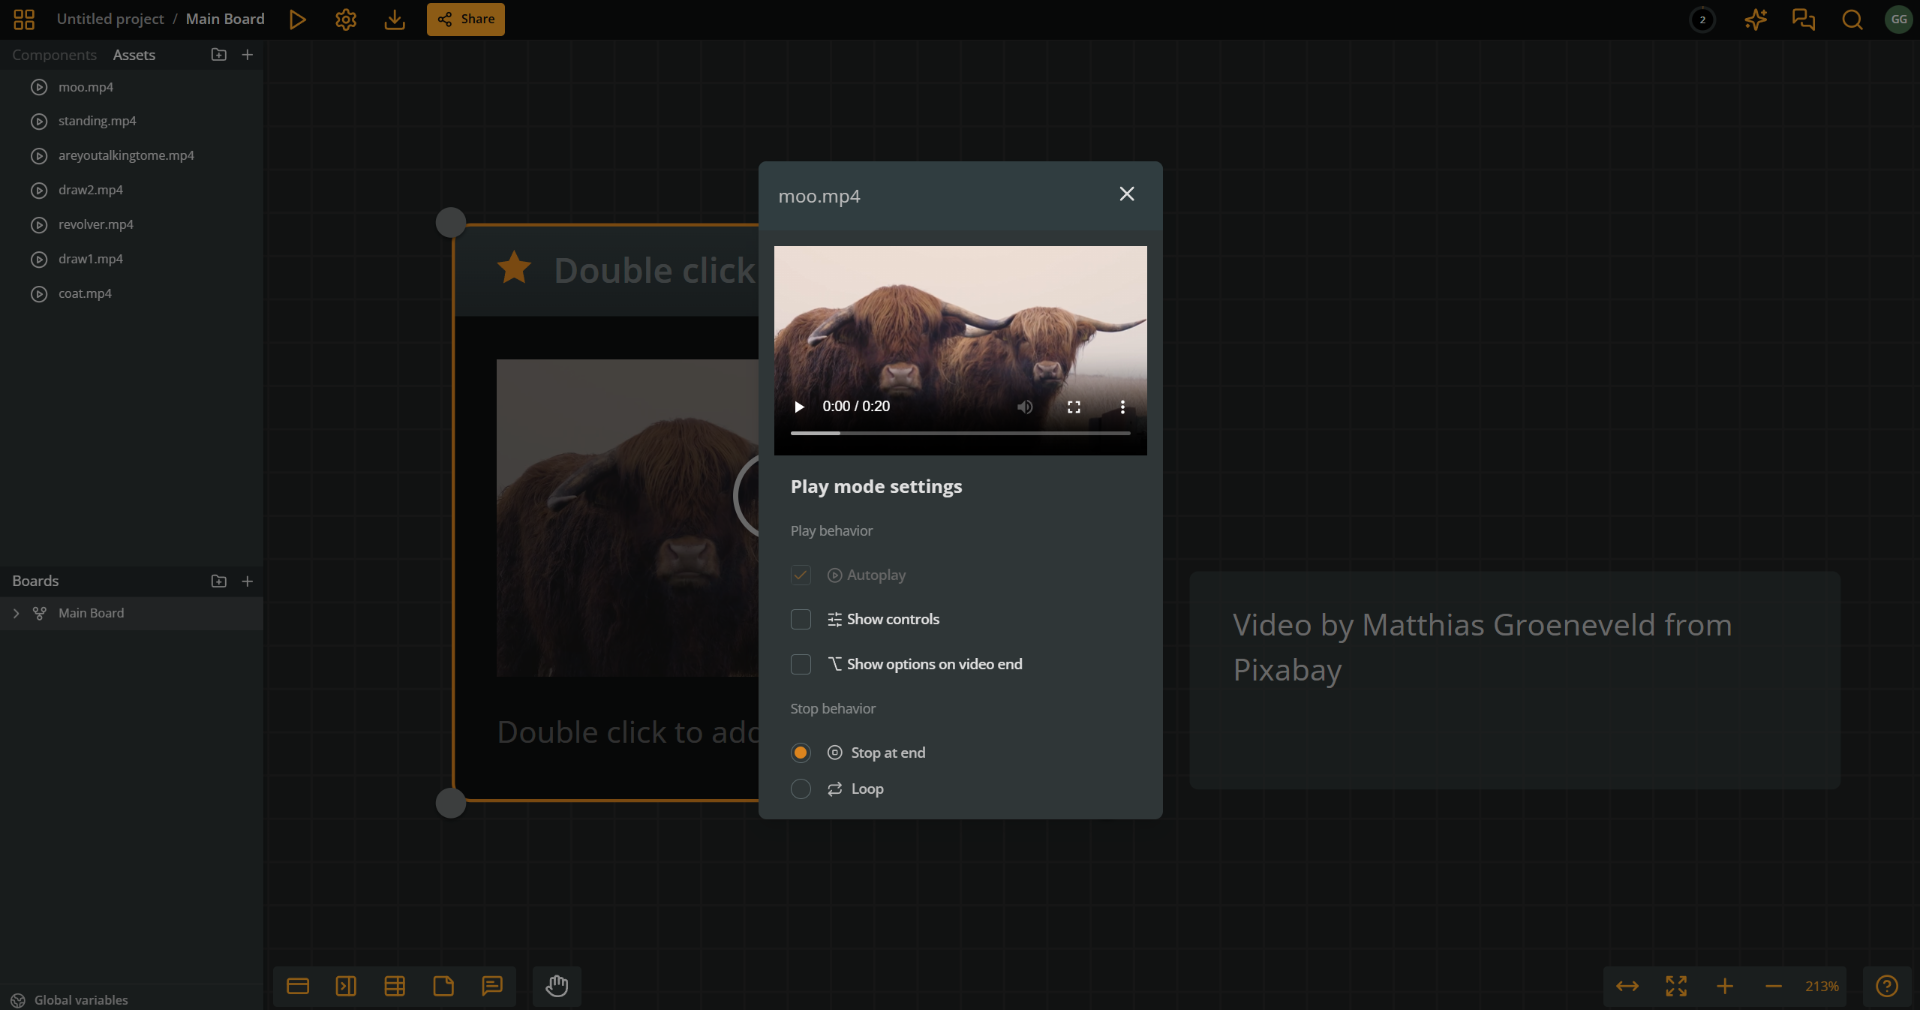
Finally, instead of an image, you can attach a [video asset](https://docs.arcweave.com/project-items/assets/video) to an element. The video occupies the same area an image would and, by default, begins playing when the element loads in Play Mode. You can change this in the video's [playback settings](https://docs.arcweave.com/project-items/assets/video#playback-behavior).
## Attached components
Context: Arcweave docs > Introduction > Quick tour > Flowchart analysis > Attached components
Elements can also take [components](https://docs.arcweave.com/project-items/components) as attachments. Components are great for keeping information about your story objects organized.
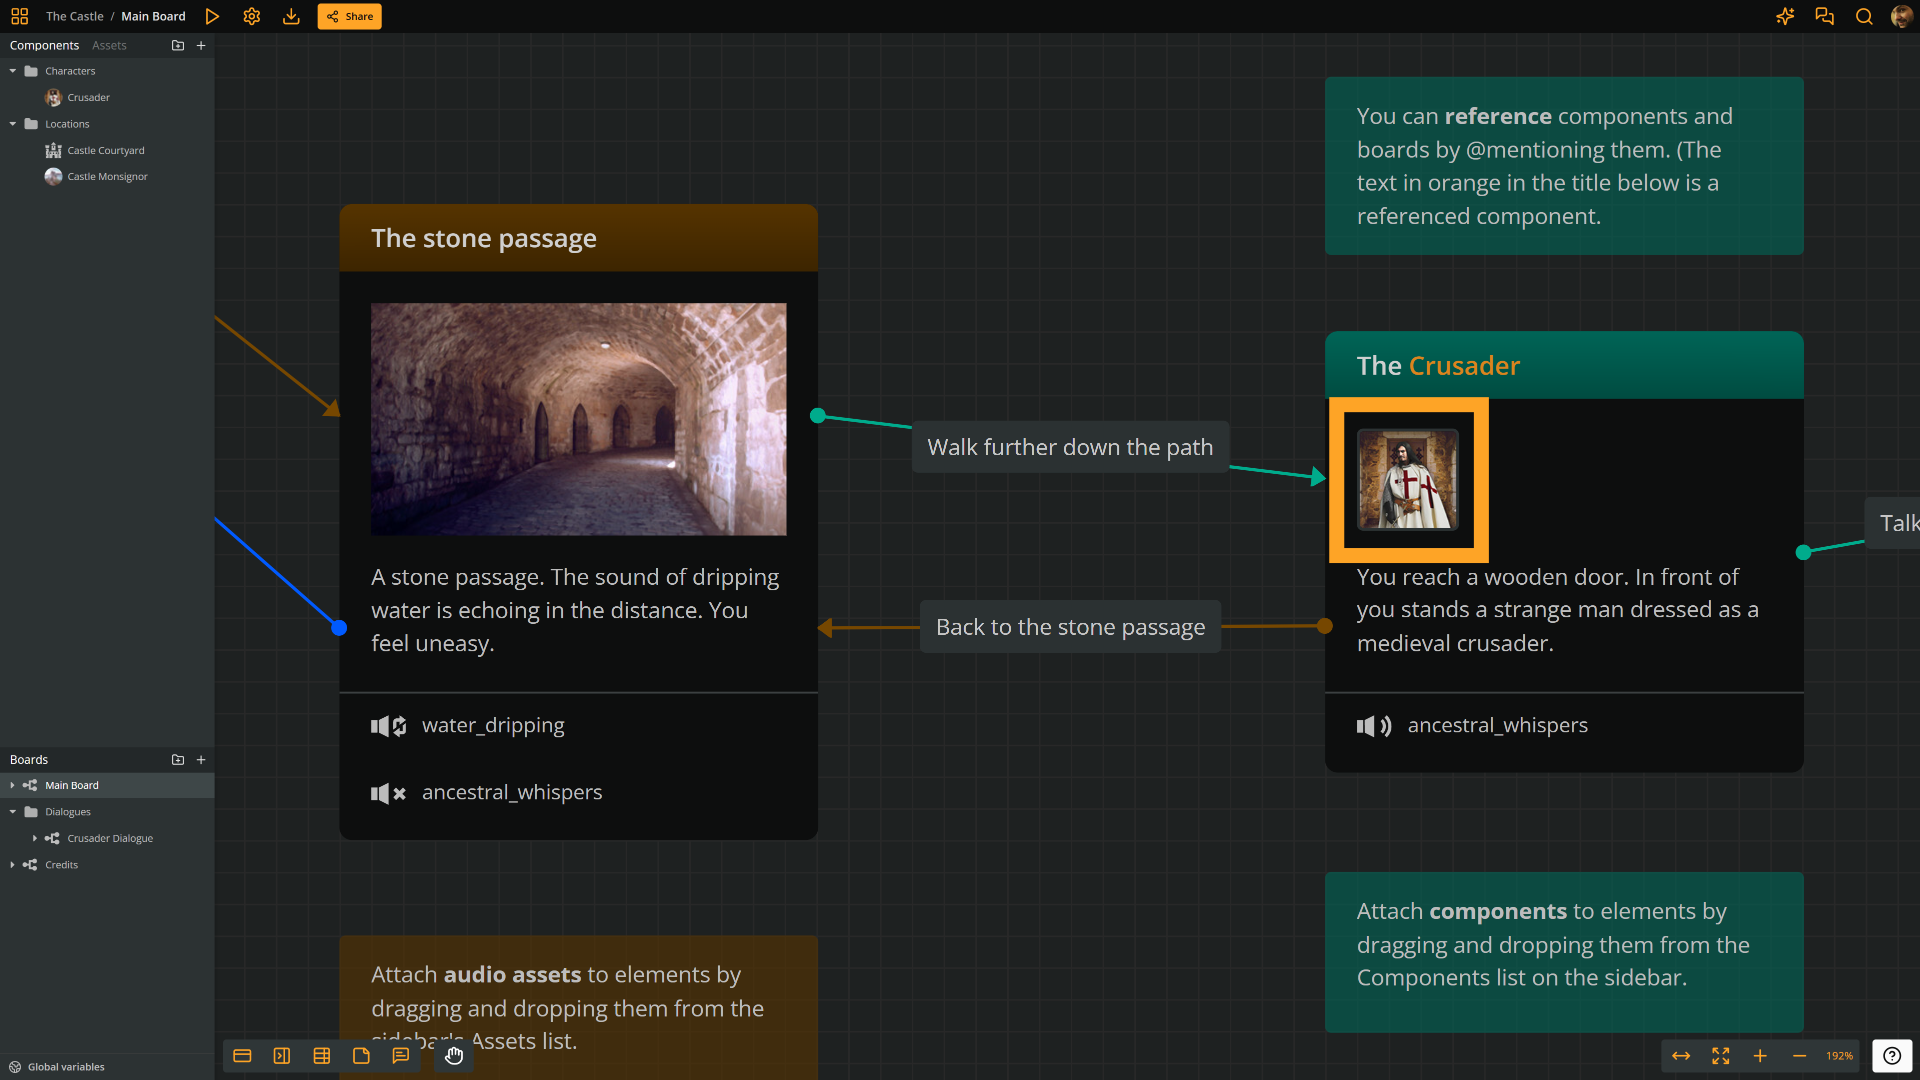
In the screenshot above, the attached component represents one of the story's characters. Click the component to open it.
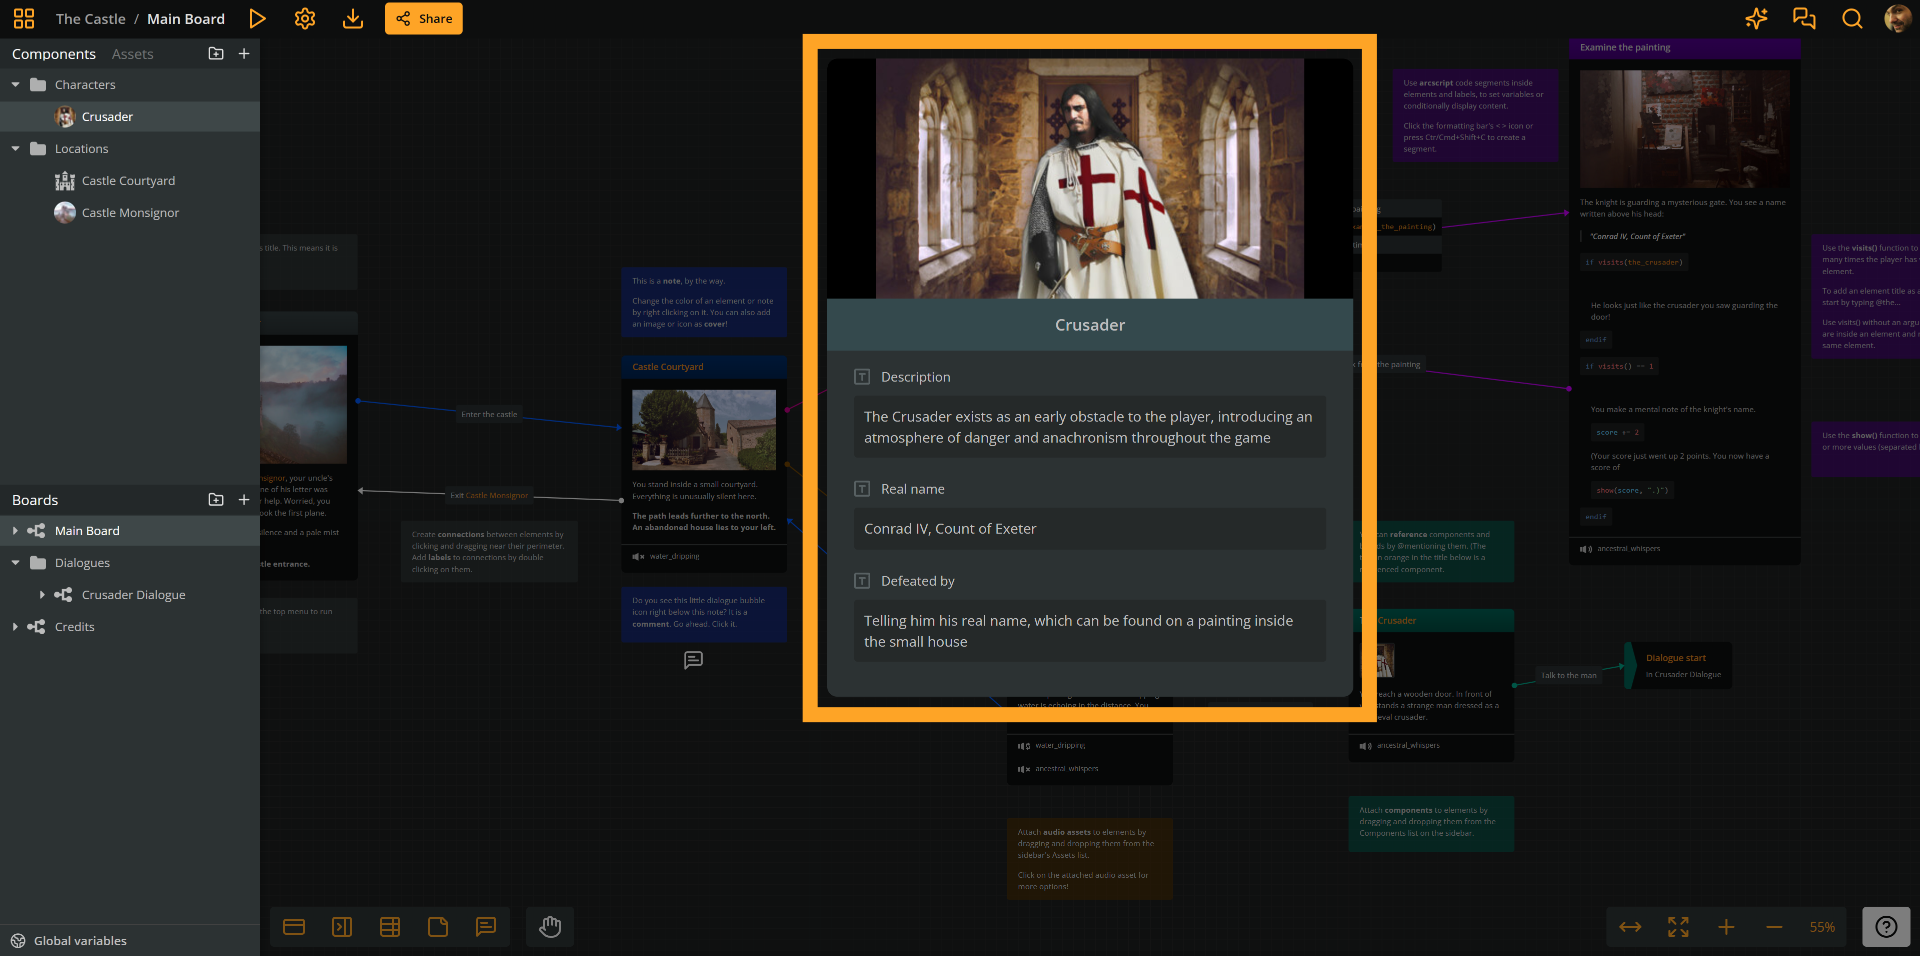
When opening a component for editing, you can also add and edit its [attributes](https://docs.arcweave.com/project-items/attributes).
> ✅ Components can be very useful when [integrating](https://docs.arcweave.com/integrations/overview) Arcweave with game engines.
## Jumpers
Context: Arcweave docs > Introduction > Quick tour > Flowchart analysis > Jumpers
[Jumpers](https://docs.arcweave.com/project-items/jumpers) let you connect elements that are either on different boards or too far apart on the same board. Use them to keep your flowchart tidy and easy to follow.

In the screenshot above, the jumper sends the flow to an element that is in the board Crusader Dialogue, as shown on the [sidebar](https://docs.arcweave.com/introduction/quick-tour/ui#left-sidebar).
## Branches
Context: Arcweave docs > Introduction > Quick tour > Flowchart analysis > Branches
[Branches](https://docs.arcweave.com/project-items/branches) add logic to your flow. They route the story based on conditions using `if`, `elseif`, and `else`. This makes your narrative responsive to player actions or [variables](https://docs.arcweave.com/project-items/variables/overview): values the story remembers, such as whether the player has found a key.
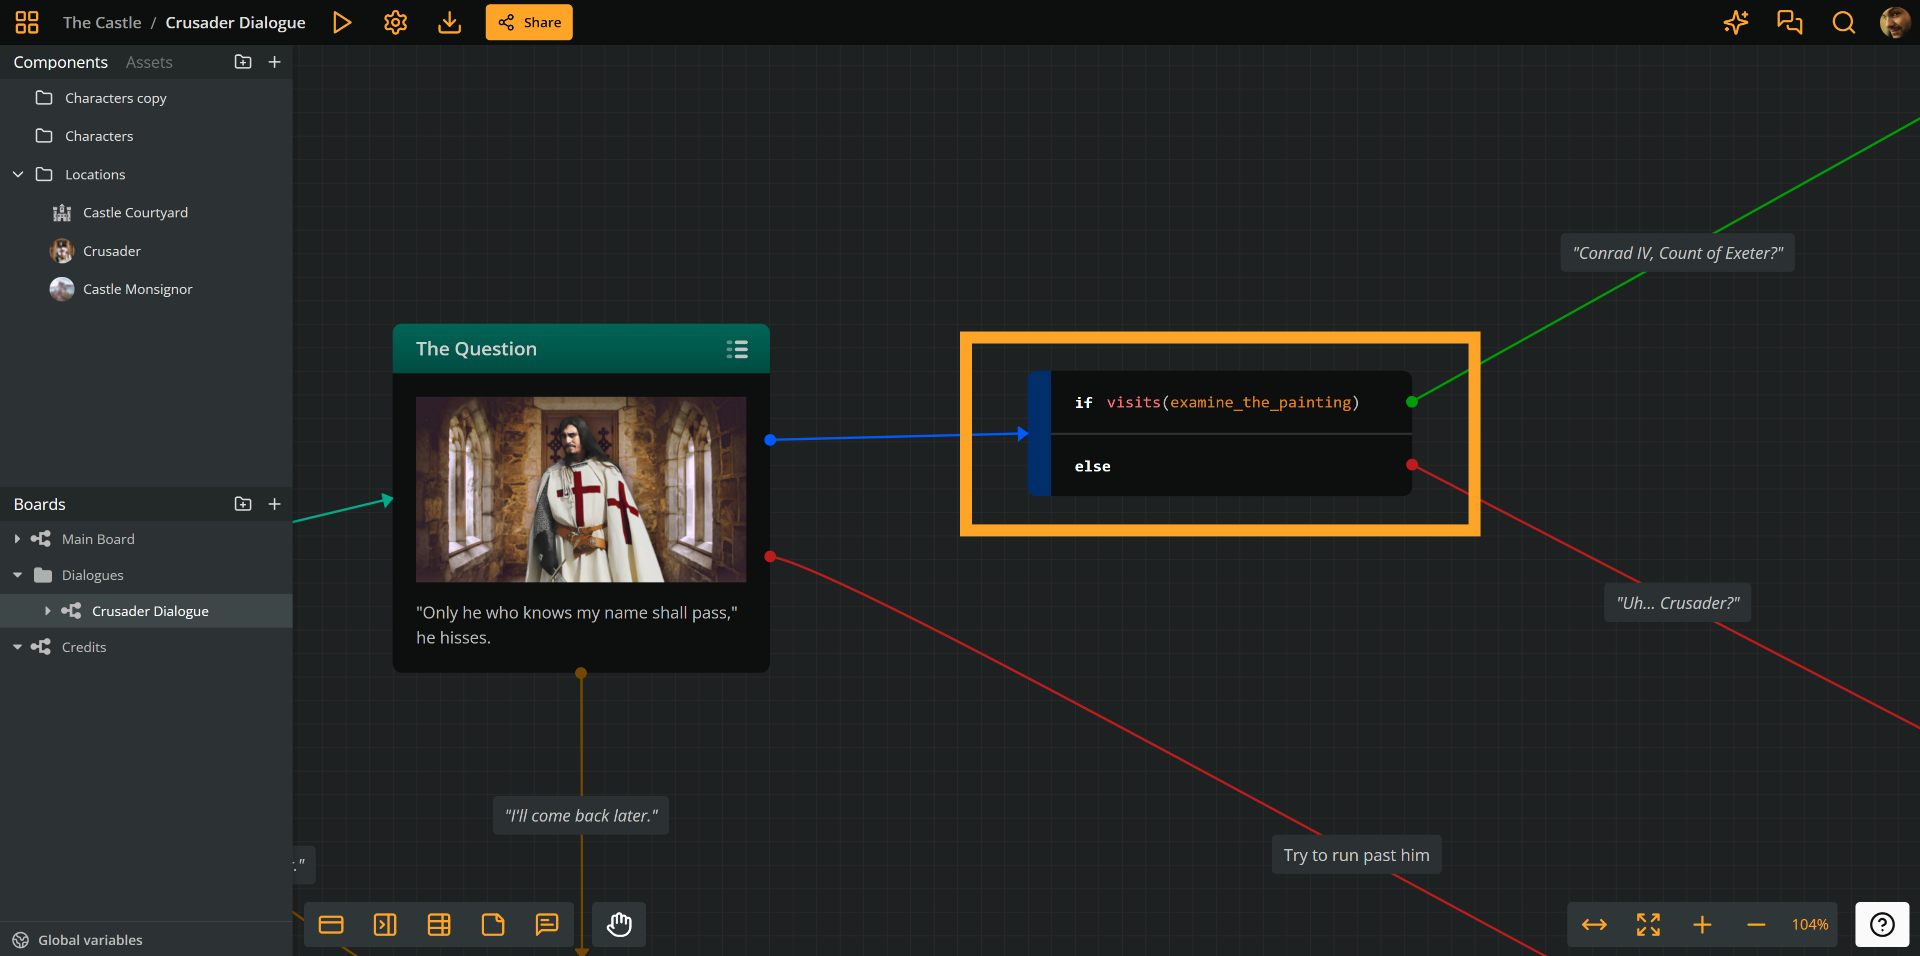
The screenshot above shows a branch in the example project, which includes an `if` and an `else` condition.
# Play Mode
Source: https://docs.arcweave.com/introduction/quick-tour/play-mode
Section: Introduction > Quick tour
Description: Quick tour of Play Mode, where you play through your story as a player would and use its top menu
Arcweave includes a built-in **Play Mode** to simulate your interactive experience directly.

While still in _The Castle,_ click the ▶️ **Play Mode** button in the top menu (left side, right after the project and current board name) to enter Play Mode.

Play Mode opens in a separate browser tab and **updates automatically** with any edits you make. If your screen size permits it, you can place the two browser tabs side by side for more control.
## Play
Context: Arcweave docs > Introduction > Quick tour > Play Mode > Play
You can now play through the example story.
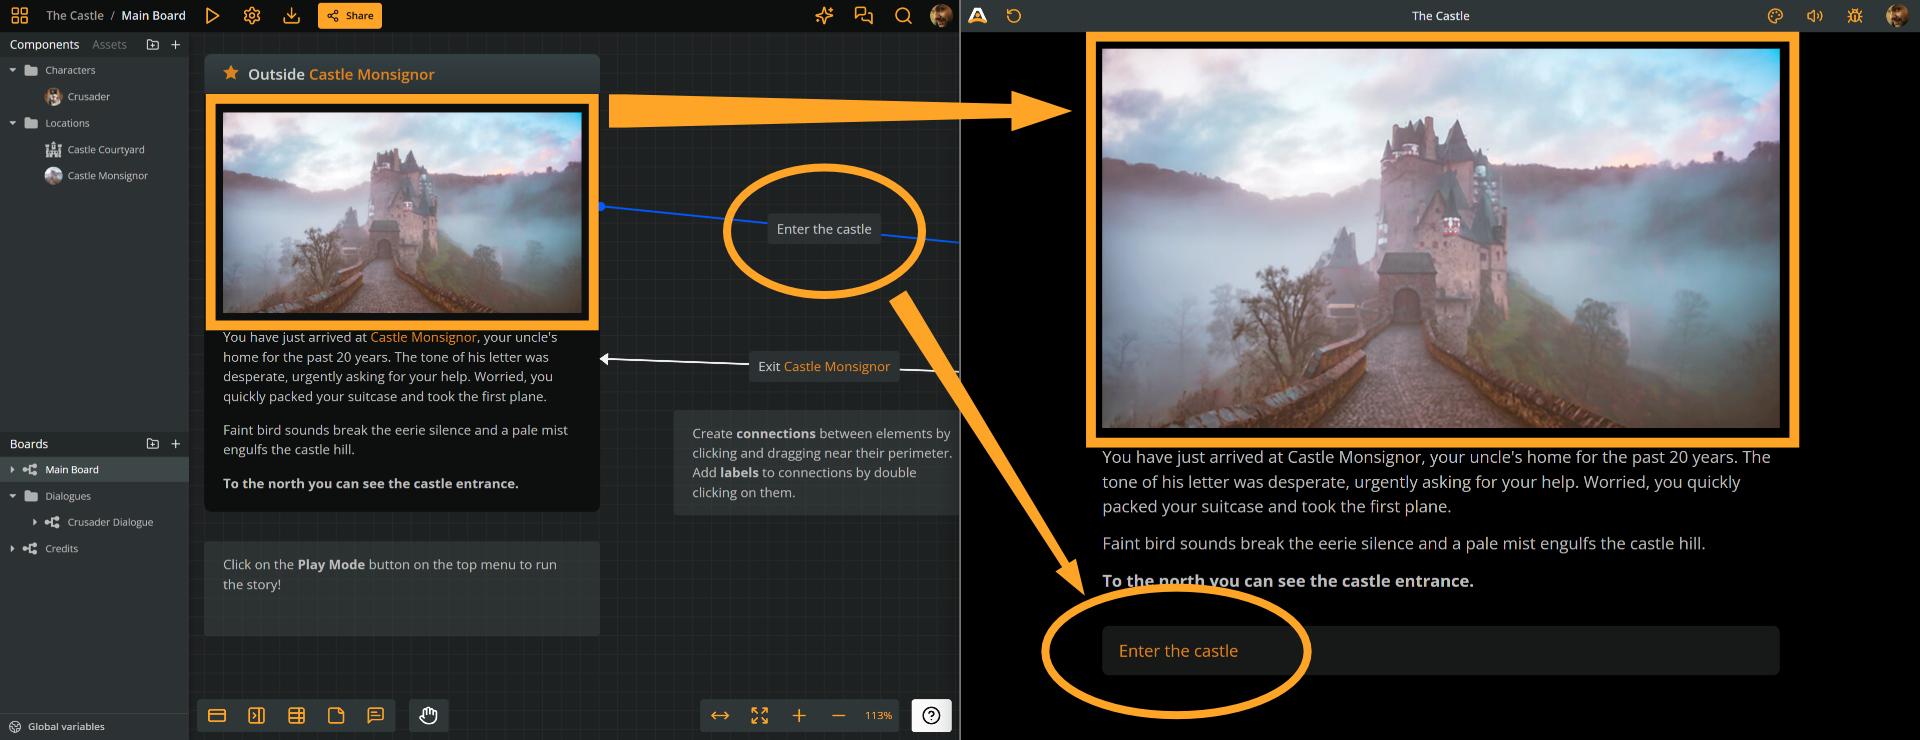
As the story flow moves from element to element, you'll notice the following:
- The current element's **cover** appears as a prominent image above the **text content**.
- The **connection labels** render as **option buttons** below the text.
- The **audio attachments** play when their element loads.
Click the option buttons to progress the story.
## Top menu
Context: Arcweave docs > Introduction > Quick tour > Play Mode > Top menu
Play Mode holds more features, but it's too early to go through them all. If you're feeling curious, explore its **top menu**, which includes the following. On desktop, the menu hides a few seconds after your cursor leaves it; hover near the top of the window to show it again.
- **Restart**: Resets everything and restarts the story.
- **Enter full screen**: Shows Play Mode in full screen.
- **Share**: Lets you [share](https://docs.arcweave.com/project-tools/share) your project and control its public access.
- **Audio**: Controls the [playback volume](https://docs.arcweave.com/project-tools/play-mode/using-play-mode#control-audio-volume) of your project's audio.
- **Localization**: Lets you [choose the story's language](https://docs.arcweave.com/project-tools/play-mode/using-play-mode#choose-language) (Team workspaces only).
- **Edit content**: Lets you [edit element and option text, as well as reorder option buttons](https://docs.arcweave.com/project-tools/play-mode/using-play-mode#edit-content-in-play-mode) while playtesting. Changes are saved automatically.
- **Style Editor**: Lets you [style](https://docs.arcweave.com/project-tools/play-mode/style-editor) Play Mode's appearance through direct CSS editing.
- **Debug**: Opens the [Debugger](https://docs.arcweave.com/project-tools/play-mode/debugger), where you can inspect the current board, current element, and variable changes.
**Edit content**, **Style Editor**, and **Debug** are available only to owners and editors.
# Arcweave's AI tools
Source: https://docs.arcweave.com/introduction/quick-tour/ai
Section: Introduction > Quick tour
Description: Quick tour of Arcweave's AI tools, including the Design Assistant, Element Generator, Element Enhancer, and Image Generator
Arcweave includes a suite of AI-powered tools designed to assist your creative process.
- [Design Assistant](https://docs.arcweave.com/project-tools/ai-features/design-assistant): Answers questions about your project and Arcweave, offers suggestions, and makes the changes you ask for, such as creating elements, connecting them, or reorganizing boards.
- [Element Generator](https://docs.arcweave.com/project-tools/ai-features/element-generator): Generates the next element from any existing one, offering ideas and plot suggestions to inspire your story.
- [Element Enhancer](https://docs.arcweave.com/project-tools/ai-features/element-enhancer): Rewrites or improves an element based on your prompt, allowing you to edit content, adjust mood or style, and fix grammar errors.
- [Image Generator](https://docs.arcweave.com/project-tools/ai-features/image-generator): Creates images from your prompts to enrich your prototypes with custom visuals.

The above image shows an example of using the Design Assistant.
To use AI tools, you need permission to edit the project, and each action consumes [AI credits](https://docs.arcweave.com/project-tools/ai-features/overview#monthly-ai-credits) from your workspace's monthly allowance.
> ℹ️ You can [enable or disable all AI tools](https://docs.arcweave.com/project-tools/ai-features/overview#toggle-ai-features) in your workspace settings. Read the [AI tools overview](https://docs.arcweave.com/project-tools/ai-features/overview) for more information.
# Collaboration
Source: https://docs.arcweave.com/introduction/quick-tour/collaboration
Section: Introduction > Quick tour
Description: Quick tour of collaboration in Arcweave, with workspace members and guests, real-time co-editing, notes, and comments
Arcweave is built for teams, keeping every member aligned throughout the creative process. Its collaboration features operate at two levels:
- **Workspaces**:
Manage members, guests, access levels, and permissions.
- **Projects**:
Co-create in real time, leave notes on boards, and exchange comments with your team.
## Workspaces
Context: Arcweave docs > Introduction > Quick tour > Collaboration > Workspaces
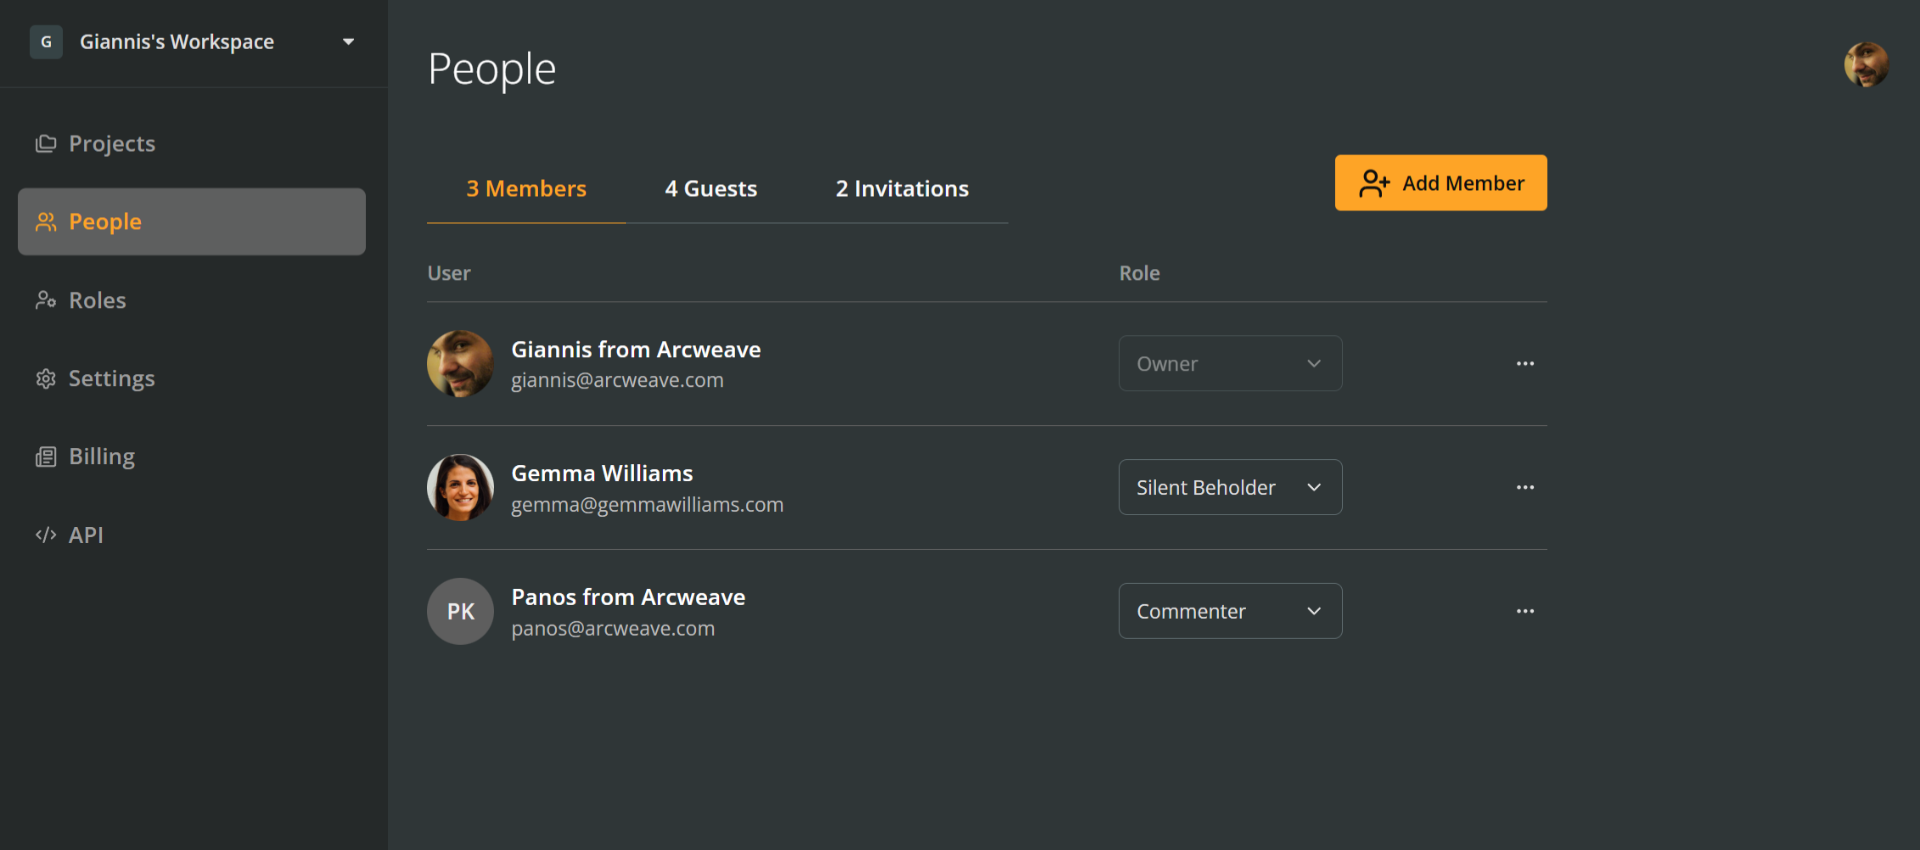
Arcweave's workspace tools let you control who has access to your projects and what they can do. It distinguishes between workspace **members** and **guests**, each with different access levels and permissions.
### Members
Context: Arcweave docs > Introduction > Quick tour > Collaboration > Workspaces > Members
Members are users with workspace-wide access.
### Guests
Context: Arcweave docs > Introduction > Quick tour > Collaboration > Workspaces > Guests
Guests are users with access to one or more specific projects, without full workspace access.
See [Your workspace](https://docs.arcweave.com/introduction/quick-tour/workspace) for details.
## Projects
Context: Arcweave docs > Introduction > Quick tour > Collaboration > Projects
Arcweave offers two in-project tools for team communication and feedback: notes and comments.
### Notes
Context: Arcweave docs > Introduction > Quick tour > Collaboration > Projects > Notes
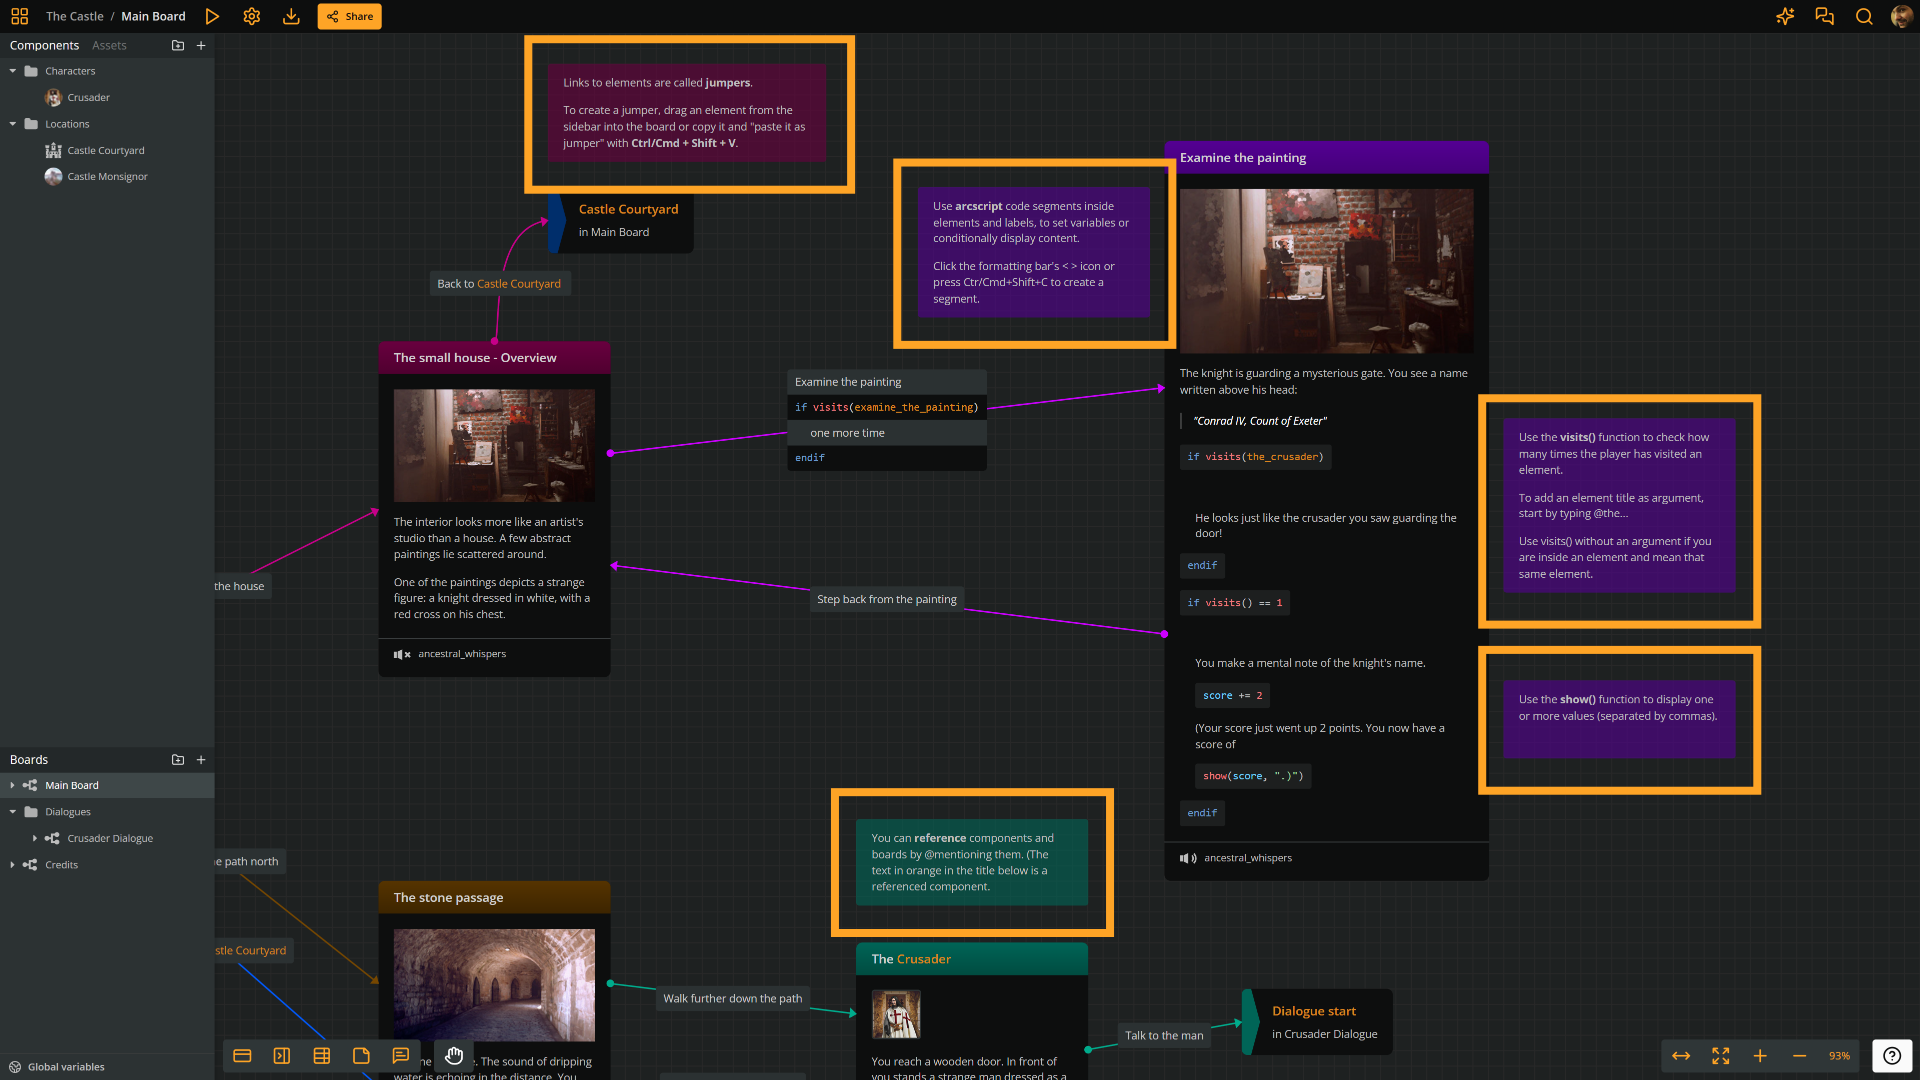
**Notes** are colorful, rich text boxes you can place anywhere on a board — ideal for leaving context, flagging areas for review, or guiding collaborators through your project structure.
> Read all about [notes](https://docs.arcweave.com/project-items/notes) under **Project Items**.
### Comments
Context: Arcweave docs > Introduction > Quick tour > Collaboration > Projects > Comments
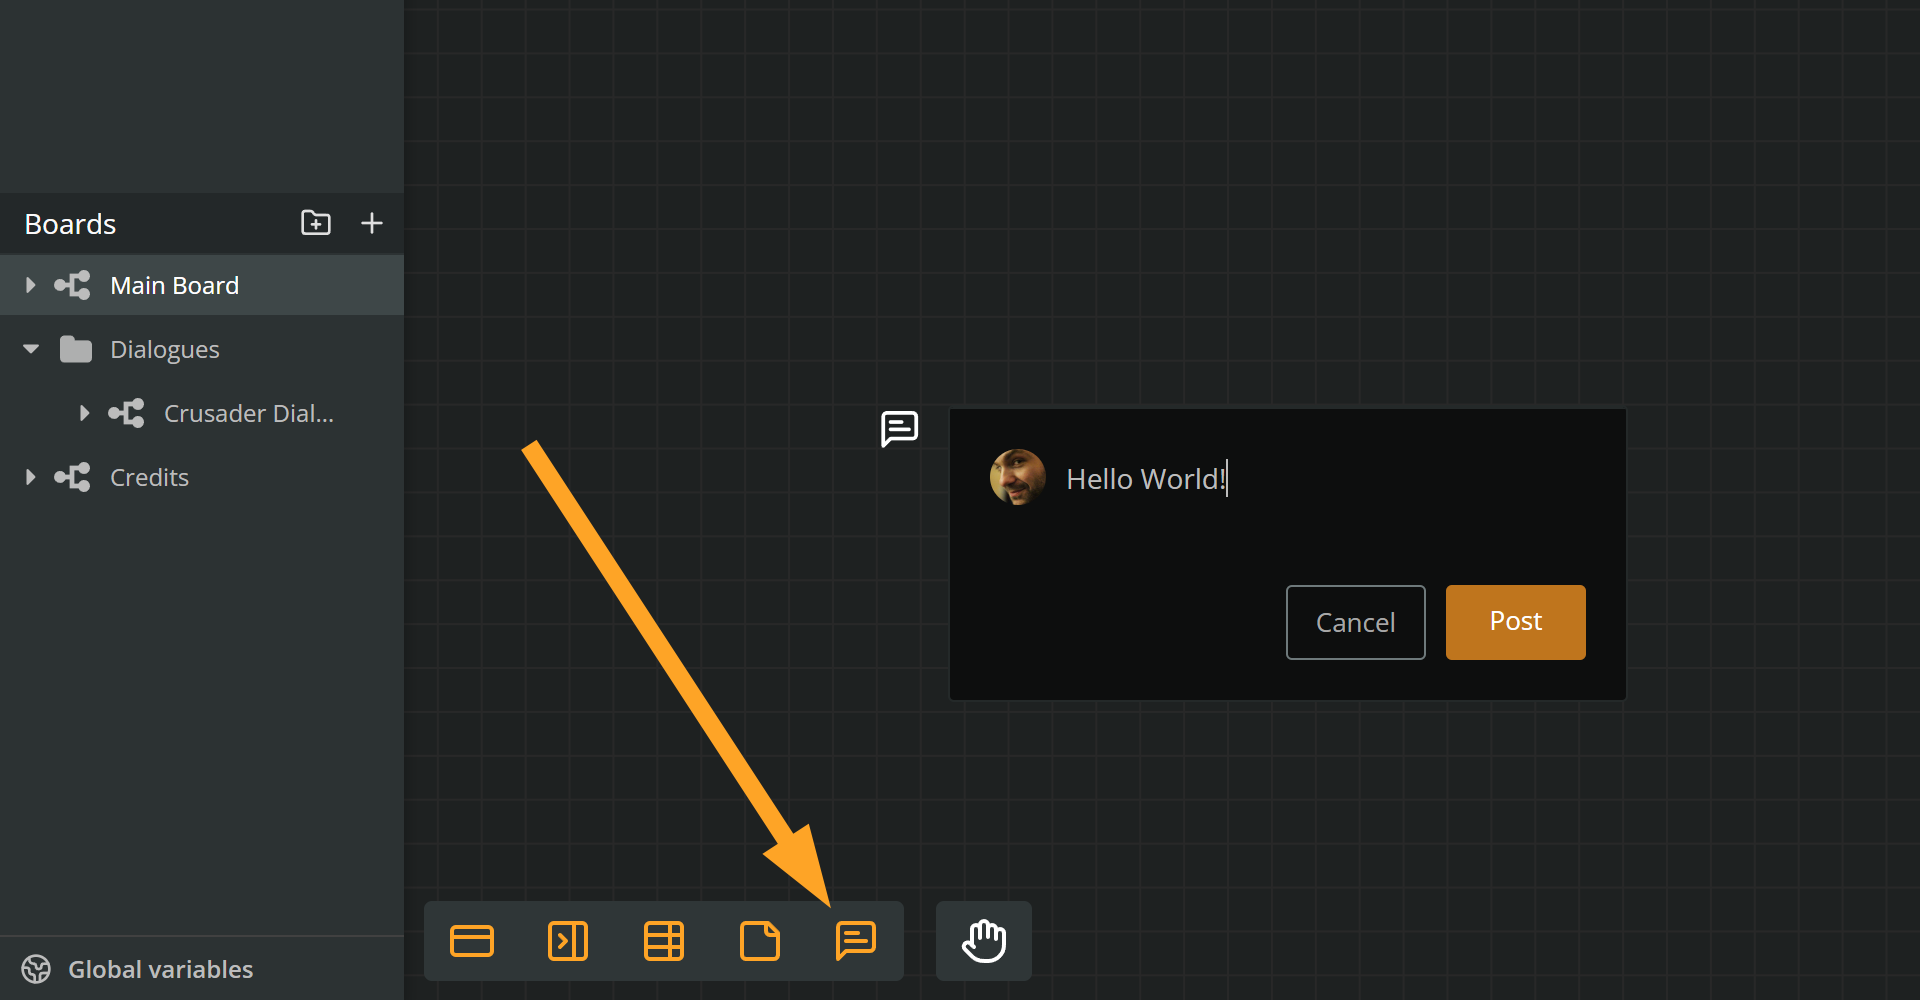
For direct team communication, **comments** offer a more focused channel. Drag the **Comment** icon from the bottom menu onto any board area to place one.
Comments support **replies** and **@mentions**, and the comments sidebar can [filter](https://docs.arcweave.com/project-items/comments#filters) them, for example to show only comments you are involved in. Users receive **email notifications** according to their [email notification settings](https://docs.arcweave.com/project-items/comments#email-notification-settings), which can include all comments, mentions and replies only, or none.
> Read all about [comments](https://docs.arcweave.com/project-items/comments) under **Project Items**.
# Share & export
Source: https://docs.arcweave.com/introduction/quick-tour/share-export
Section: Introduction > Quick tour
Description: Quick tour of sharing projects with collaborators or viewers and exporting them to other formats and game engines
Arcweave makes it easy to share your work with others to review and collaborate.
## Share to collaborate
Context: Arcweave docs > Introduction > Quick tour > Share & export > Share to collaborate
The simplest way to collaborate in Arcweave is by sharing just one project.
> ℹ️ For advanced team management features like role control and workspace-wide visibility, see [Workspaces](https://docs.arcweave.com/introduction/quick-tour/workspace). (Next page)

To collaborate with others on your project:
1. Click the **Share** button in the top menu.
2. Enter the email address of the person you want to invite.
3. Choose their role: **Commenter** or **Editor**.
4. Click **Invite**. Repeat these steps to invite more people.
Inviting people requires the [**Manage memberships**](https://docs.arcweave.com/workspaces/roles#list-of-permissions) permission, which workspace owners have by default. In Pro and Team workspaces, the **Editor** role is marked **Billable**, because guest editors occupy a paid [seat](https://docs.arcweave.com/workspaces/billing-plans#seats). Commenters are free.
Your collaborators will receive an email invitation to join the project. Once they accept, you'll be able to work together in real time. Your updates will sync instantly across all team members.
To point a collaborator to a specific board or item, use its **Copy link** menu action. The link opens that destination in the language you are currently viewing. See [Share an item or board position](https://docs.arcweave.com/project-tools/share#share-an-item-or-board-position) for supported items and menu locations.
## Share to view & play
Context: Arcweave docs > Introduction > Quick tour > Share & export > Share to view & play
You can generate a public, **read-only link** to share your project externally:
1. Click the **Share** button in the top menu.
2. In the dropdown next to **Anyone with the link**, choose one of the following:
- **Can play only**: Allows people to play your project without viewing its design.
- **Can view & play**: Also grants read-only access to the project's design: its boards, components, and variables.
3. Click **copy link** under **Anyone with the link** to copy the project's link.
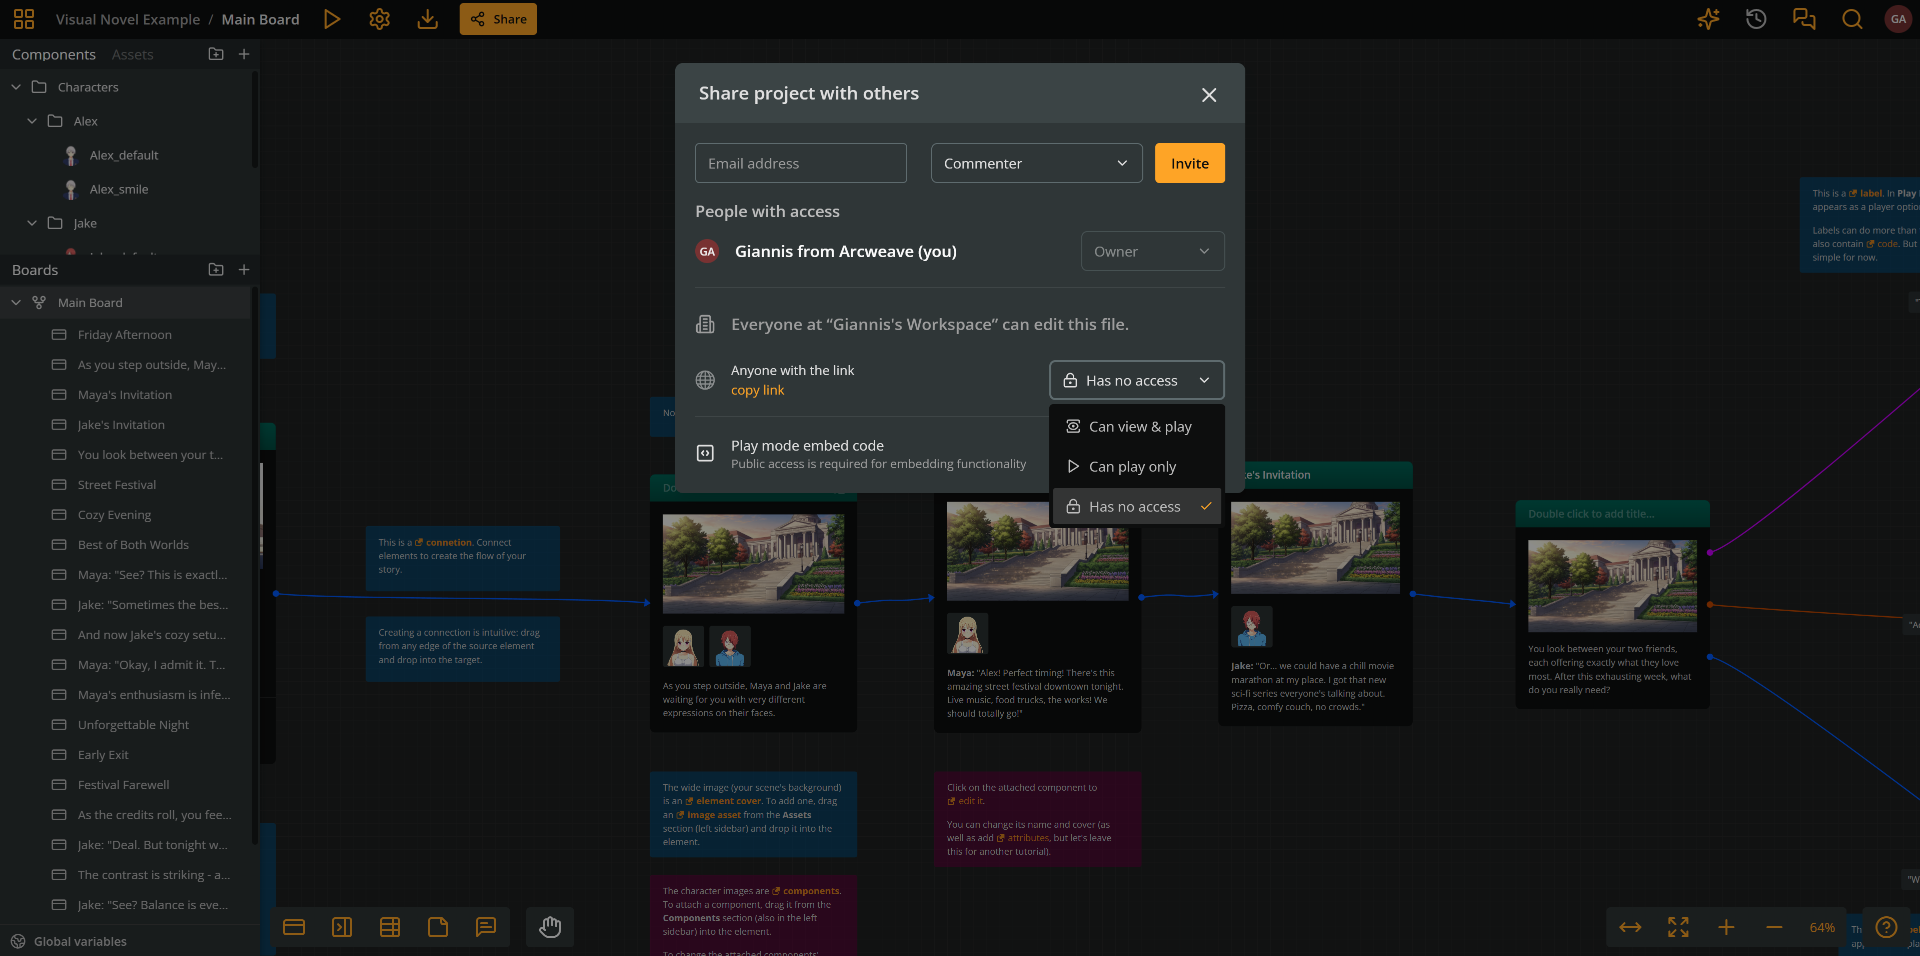
This makes it easy to share progress with testers or clients without inviting them as collaborators. It also lets you distribute your project in a playable form while keeping the design private.
> ✅ You can also [embed your project's Play Mode in HTML](https://docs.arcweave.com/project-tools/share#embed-play-mode-in-html), allowing users to play it in its own window on a webpage.
## Export
Context: Arcweave docs > Introduction > Quick tour > Share & export > Export
Arcweave supports multiple export formats to help you share, present, or integrate your narrative data into other platforms and game engines.

To export your project:
1. Click the **Export project** icon in the top menu.
2. Choose from the available formats:
- **JSON**: Fully structured data for integration into any platform.
- **Spreadsheet**: Your project's data as CSV files or, in Pro/Team workspaces, an XLSX file, for review, analysis, or translation.
- **Image**: Printable version of your project's boards for presentations or reviews.
- **Engine**: JSON exports that work with our official Unity, Unreal Engine, and Godot Engine [integrations](https://docs.arcweave.com/integrations/overview).
- **Markdown**: A text document of your story, for proofreading or sharing dialogue with voice actors (Pro/Team workspaces only).
- **PDF**: Lossless printable version of your project's boards (Pro/Team workspaces only).
- **Backup**: Save your project on your drive as a backup (Pro/Team workspaces only).
These export formats make it easy to adapt your Arcweave project to different workflows.
> ℹ️ You can bring exported JSON files, and backup files in Pro/Team workspaces, back into Arcweave by [importing projects](https://docs.arcweave.com/workspaces/projects#import-projects) in your workspace.
> ✅ To **automate import and export** as part of your pipeline, use the [REST API](https://docs.arcweave.com/rest-api/overview) (Team workspaces only).
# Your workspace
Source: https://docs.arcweave.com/introduction/quick-tour/workspace
Section: Introduction > Quick tour
Description: Quick tour of Arcweave workspaces, including inviting workspace users and changing workspace settings
As mentioned at the beginning of this tour, upon creating your Arcweave account you also get your first **workspace**. [Workspaces](https://docs.arcweave.com/workspaces/overview) are collaborative spaces that hold your projects and allow your team to work efficiently.
## Workspace users
Context: Arcweave docs > Introduction > Quick tour > Your workspace > Workspace users
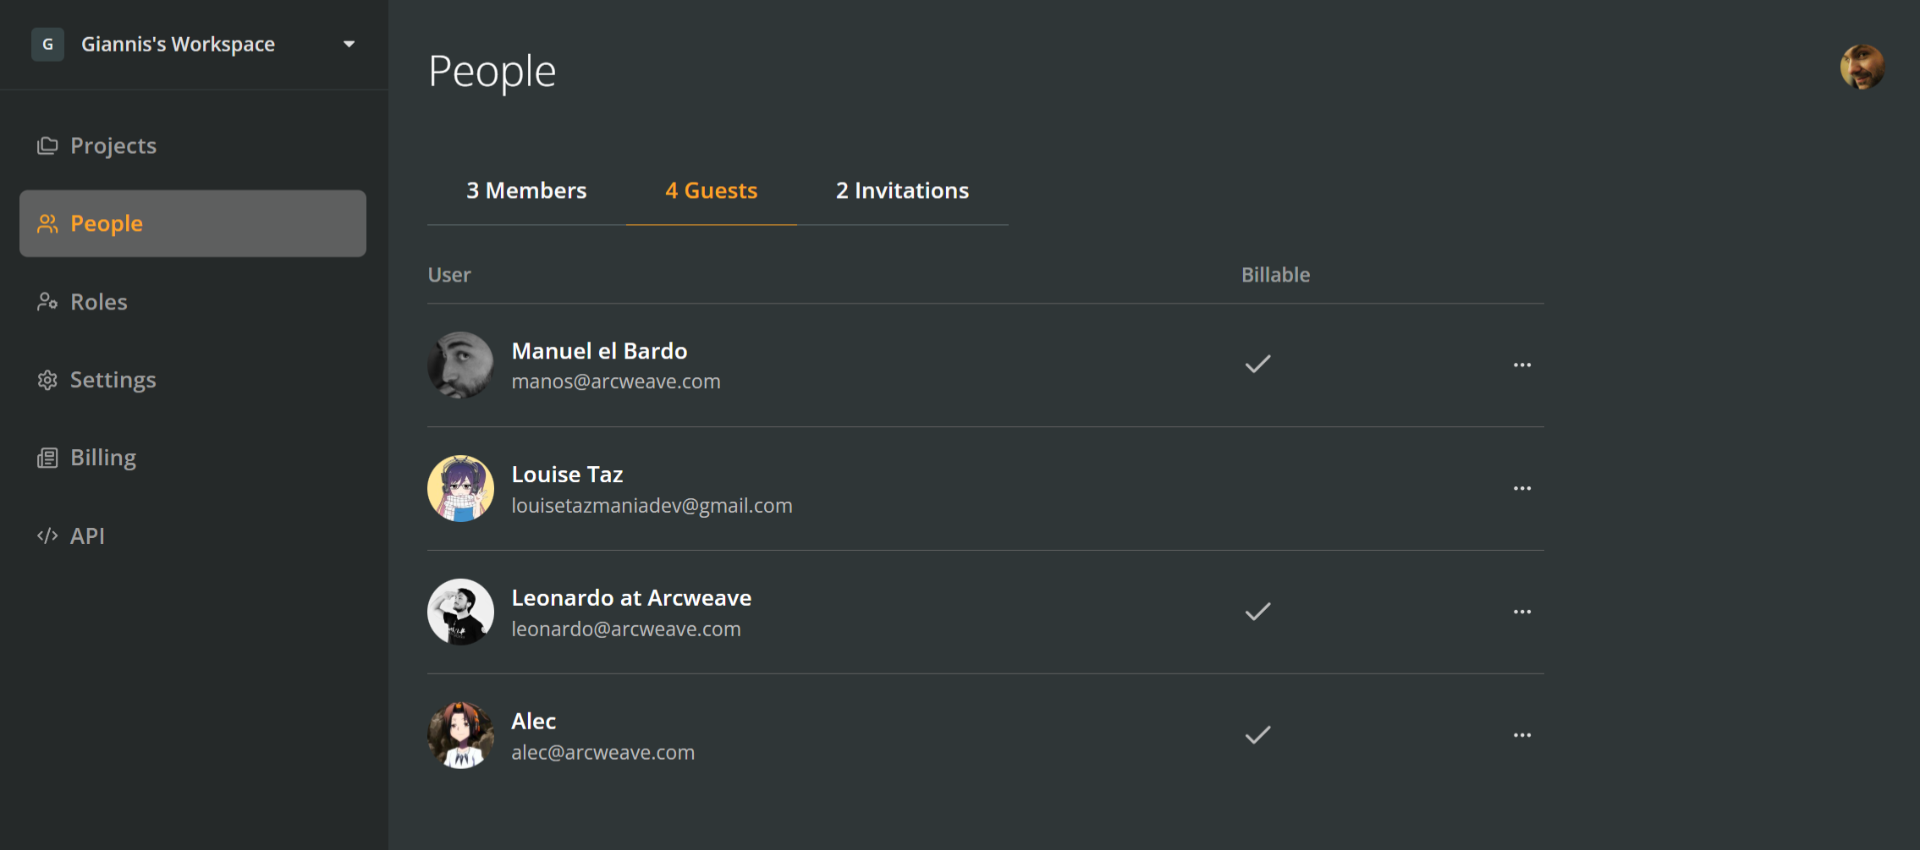
In the [People](https://docs.arcweave.com/workspaces/people) section of your workspace, you can see all its users. A workspace's users can be of the following kinds.
### Workspace members
Context: Arcweave docs > Introduction > Quick tour > Your workspace > Workspace users > Workspace members
**Members** are users with workspace-wide access:
- Workspace owners
- Workspace editors
- Workspace commenters
- Members with [custom roles](https://docs.arcweave.com/workspaces/roles#add-new-roles) (Team workspaces only)

### Workspace guests
Context: Arcweave docs > Introduction > Quick tour > Your workspace > Workspace users > Workspace guests
**Guests** are users with access to one or more specific projects, without full workspace access:
- Project editors
- Project commenters
## Workspace settings
Context: Arcweave docs > Introduction > Quick tour > Your workspace > Workspace settings
To navigate your workspace's settings, you must exit _The Castle._ Click the **Workspace** icon at the very top left of your Arcweave window, in your browser, to return to the **Projects** page of your workspace.
Workspaces, their pages, and their settings will be thoroughly analyzed in the [Workspaces](https://docs.arcweave.com/workspaces/overview) section of this documentation.
# Manage your subscriptions
Source: https://docs.arcweave.com/introduction/quick-tour/manage-subscriptions
Section: Introduction > Quick tour
Description: Common subscription scenarios, such as upgrading a Basic or Pro workspace and adding users to a workspace
This page provides a first glance on managing your workspaces and subscription changes, with links to the relevant pages.
> ✅ For a detailed overview of subscription options and practical examples (including how to change plans and adjust the number of users), visit [Workspace plans](https://docs.arcweave.com/workspaces/billing-plans) in the **Workspaces** section of this documentation.
## Arcweave subscriptions
Context: Arcweave docs > Introduction > Quick tour > Manage your subscriptions > Arcweave subscriptions
Arcweave [accounts](https://docs.arcweave.com/account/overview) are free. An Arcweave account can be associated with any number and combination of workspaces, each of which has its own subscription.
Arcweave workspaces can fall under one of the following subscription plans:
- **Basic**: Free workspace with content and feature limitations.
- **Pro**: Removes most limitations and increases the [upload size limit](https://docs.arcweave.com/project-items/assets/overview#asset-upload-limits).
- **Team**: Unlocks all features and further increases the upload size limit.
To compare the three workspace types, see **Workspace comparison** on the [Workspace plans](https://docs.arcweave.com/workspaces/billing-plans#workspace-comparison) or visit the [Pricing page](https://arcweave.com/pricing) on Arcweave's website.
## Upgrade from Basic
Context: Arcweave docs > Introduction > Quick tour > Manage your subscriptions > Upgrade from Basic
As your projects and teams grow, it is likely that a Basic workspace will no longer meet your needs; the plan is designed for small-scale use and early exploration. Upgrading ensures you have room to scale your content and unlock essential workflow tools.
To upgrade your Basic workspace see [Workspace plans](https://docs.arcweave.com/workspaces/billing-plans) > [Upgrade Basic](https://docs.arcweave.com/workspaces/billing-plans#upgrade-basic) in the **Workspaces** section of this documentation.
## Upgrade from Pro
Context: Arcweave docs > Introduction > Quick tour > Manage your subscriptions > Upgrade from Pro
The Pro plan unlocks most of Arcweave's tools, but a Team workspace offers access to the advanced features of [history](https://docs.arcweave.com/project-tools/history), [localization](https://docs.arcweave.com/project-tools/localization), [REST API access to read and write project data](https://docs.arcweave.com/workspaces/api), and [custom workspace roles](https://docs.arcweave.com/workspaces/roles#add-new-roles).
To upgrade your Pro workspace to Team see [Workspace plans](https://docs.arcweave.com/workspaces/billing-plans) > [Upgrade Pro to Team](https://docs.arcweave.com/workspaces/billing-plans#upgrade-pro-to-team) in the **Workspaces** section of this documentation.
## Add workspace users
Context: Arcweave docs > Introduction > Quick tour > Manage your subscriptions > Add workspace users
You can add new users to your workspace at any time and see all of them in the workspace's [People](https://docs.arcweave.com/workspaces/people) section, under **Members** and **Guests**.

To add [workspace members](https://docs.arcweave.com/workspaces/roles#workspace-members) (workspace-level collaborators), navigate to **People** → **Add Member**, enter the collaborator's email, and assign a role.
To add [workspace guests](https://docs.arcweave.com/workspaces/roles#workspace-guests) (project-level collaborators), open the relevant project, go to **Share**, and assign project-specific roles directly.
> ✅ In a Basic workspace, adding users is for free. Basic workspace limitations apply regardless of the number of users.
> ℹ️ Pro and Team workspaces are billed based on the number of their **billable seats**.
# Glossary
Source: https://docs.arcweave.com/introduction/glossary
Section: Introduction
Description: Glossary of Arcweave terms—such as board, element, connection, branch, jumper, component, attribute, variable, and Arcscript—with short definitions and links to their full pages
Many Arcweave terms are everyday words with a specific meaning in Arcweave. This page defines each one in a sentence and links to its full documentation. For how the main building blocks fit together, see [Core concepts](https://docs.arcweave.com/introduction/core-concepts).
## A
Context: Arcweave docs > Introduction > Glossary > A
- **AI credits**: The monthly allowance your workspace spends when you use AI tools. See [Monthly AI credits](https://docs.arcweave.com/project-tools/ai-features/overview#monthly-ai-credits).
- **Arcscript**: Arcweave's simple scripting language, used to change and check variables in branches, element content, and connection labels. See [Arcscript](https://docs.arcweave.com/project-items/arcscript).
- **Arcscript segment**: A single line of Arcscript inside an element's content or a connection's label. See [Arcscript segments](https://docs.arcweave.com/project-items/arcscript#arcscript-segments).
- **Asset**: An image, audio, or video file you upload to a project. See [Assets](https://docs.arcweave.com/project-items/assets/overview).
- **Attribute**: A labeled piece of data stored in a board, component, or element, such as a character's age. See [Attributes](https://docs.arcweave.com/project-items/attributes).
## B
Context: Arcweave docs > Introduction > Glossary > B
- **Board**: A canvas where you draw part of your story as a flowchart. A project can have many boards. See [Boards](https://docs.arcweave.com/project-items/boards).
- **Board folder**: A folder that groups boards in the project's **Boards** section. See [Board folders](https://docs.arcweave.com/project-items/boards#board-folders).
- **Board variable**: A variable stored as an attribute on a board and used in Arcscript as `board_id.variable_id`. See [Board variables](https://docs.arcweave.com/project-items/variables/board).
- **Branch**: A board item that chooses which path the story takes, using `if`, `elseif`, and `else` conditions. See [Branches](https://docs.arcweave.com/project-items/branches).
## C
Context: Arcweave docs > Introduction > Glossary > C
- **Comment**: A message thread that workspace members and guests leave on a board to discuss the project. Comments aren't part of the story. See [Comments](https://docs.arcweave.com/project-items/comments).
- **Component**: A reusable story object, such as a character, location, or item. Components don't sit on boards; you attach them to elements or mention them in text. See [Components](https://docs.arcweave.com/project-items/components).
- **Component variable**: A variable stored as an attribute on a component and used in Arcscript as `component_id.variable_id`. See [Component variables](https://docs.arcweave.com/project-items/variables/component).
- **Connection**: An arrow from an element or branch to the next item (an element, branch, or jumper), setting the order of the story. See [Connections](https://docs.arcweave.com/project-items/connections).
- **Cover**: The image shown at the top of an element or component. Elements can also use a video. See [Element covers](https://docs.arcweave.com/project-items/elements#element-covers).
- **Custom ID**: The name you use to refer to a board, component, or attribute in Arcscript. See [Custom ID](https://docs.arcweave.com/project-items/components#custom-id).
## D
Context: Arcweave docs > Introduction > Glossary > D
- **Debugger**: A Play Mode panel where project owners and editors track variables while playtesting. See [Debugger](https://docs.arcweave.com/project-tools/play-mode/debugger).
- **Design Assistant**: Arcweave's AI assistant. It answers questions about your project and makes changes you ask for. See [Design Assistant](https://docs.arcweave.com/project-tools/ai-features/design-assistant).
## E
Context: Arcweave docs > Introduction > Glossary > E
- **Element**: A box on a board that holds one moment of your story, such as a scene or a line of dialogue, in a title and content. See [Elements](https://docs.arcweave.com/project-items/elements).
- **Export**: Downloading your project's data in another format, such as JSON, a spreadsheet, PDF, or game engine files. See [Export](https://docs.arcweave.com/project-tools/export).
## F
Context: Arcweave docs > Introduction > Glossary > F
- **Flowchart**: Your story drawn on a board as boxes (elements) joined by arrows (connections). See [Flowchart analysis](https://docs.arcweave.com/introduction/quick-tour/flowchart).
## G
Context: Arcweave docs > Introduction > Glossary > G
- **Global variable**: A variable that belongs to the whole project rather than to a board or component. See [Global variables](https://docs.arcweave.com/project-items/variables/global).
- **Guest**: A person invited to specific projects without joining the workspace. See [Workspace guests](https://docs.arcweave.com/workspaces/roles#workspace-guests).
## H
Context: Arcweave docs > Introduction > Glossary > H
- **History**: The record of your project's previous versions, which you can view and restore. See [History](https://docs.arcweave.com/project-tools/history).
## J
Context: Arcweave docs > Introduction > Glossary > J
- **Jumper**: A shortcut on a board. When the story reaches a jumper, it continues at the jumper's target element, on the same board or another one. See [Jumpers](https://docs.arcweave.com/project-items/jumpers).
## L
Context: Arcweave docs > Introduction > Glossary > L
- **Label**: Text on a connection. In Play Mode, it becomes the text of the option the player clicks. See [Labels](https://docs.arcweave.com/project-items/labels).
- **Localization**: Translating your project into other languages with Arcweave's built-in tools. See [Localization](https://docs.arcweave.com/project-tools/localization).
## M
Context: Arcweave docs > Introduction > Glossary > M
- **Member**: A person who belongs to a workspace and can access its projects, with permissions set by their role. See [Workspace members](https://docs.arcweave.com/workspaces/roles#workspace-members).
- **Mention**: A link to a component or board inside rich text, created by typing `@`. See [Mentions](https://docs.arcweave.com/project-tools/mentions).
## N
Context: Arcweave docs > Introduction > Glossary > N
- **Note**: A sticky note on a board for ideas, instructions, or reminders. Notes aren't part of the story. See [Notes](https://docs.arcweave.com/project-items/notes).
## O
Context: Arcweave docs > Introduction > Glossary > O
- **Option**: A choice the player clicks in Play Mode. Options come from the current element's outgoing connections; a connection's label is the option's text. See [Play Mode](https://docs.arcweave.com/project-tools/play-mode/overview#breakdown).
## P
Context: Arcweave docs > Introduction > Glossary > P
- **Play Mode**: Arcweave's built-in player, where you play your project as a choice-based game. See [Play Mode](https://docs.arcweave.com/project-tools/play-mode/overview).
- **Project**: One story or game, with its boards, components, assets, and variables. See [Projects](https://docs.arcweave.com/workspaces/projects).
- **Project template**: A ready-made project to start from, such as the _Interactive Fiction Example_ (_The Castle_). See [Project templates](https://docs.arcweave.com/workspaces/projects#project-templates).
## R
Context: Arcweave docs > Introduction > Glossary > R
- **Role**: A set of permissions, such as Owner, Editor, or Commenter, that decides what a person can do in a workspace or project. See [Workspace roles](https://docs.arcweave.com/workspaces/roles).
## S
Context: Arcweave docs > Introduction > Glossary > S
- **Starting element**: The element where Play Mode begins the story. See [Set Play Mode start](https://docs.arcweave.com/project-tools/play-mode/using-play-mode#set-play-mode-start).
## T
Context: Arcweave docs > Introduction > Glossary > T
- **Target element**: The element a jumper points to. See [Jumpers](https://docs.arcweave.com/project-items/jumpers).
## V
Context: Arcweave docs > Introduction > Glossary > V
- **Variable**: A value the story remembers and can change during play, such as whether the player has found a key. Variables can be global, board, or component variables. See [Variables](https://docs.arcweave.com/project-items/variables/overview).
- **Visitor**: Someone who views a public project or its Play Mode through a link, without needing an Arcweave account. See [Project visitors](https://docs.arcweave.com/workspaces/roles#project-visitors).
## W
Context: Arcweave docs > Introduction > Glossary > W
- **Workspace**: Your team's space in Arcweave. It holds projects and the people who work on them, and has its own plan (Basic, Pro, or Team). See [Workspaces](https://docs.arcweave.com/workspaces/overview).
# Arcweave tutorials
Source: https://docs.arcweave.com/tutorials/overview
Section: Tutorials
Description: Tutorials in video and text introducing you to Arcweave's core and advanced features and integrations
This collection of tutorials is designed to:
- Help beginners get started.
- Support advanced users in solving specific design and narrative challenges.
This section includes the following tutorials:
- [Basic Arcweave](https://docs.arcweave.com/tutorials/basic/overview): Ease into mastering Arcweave's core features, progressing towards more advanced techniques and logic workflows.
- [Style Editor](https://docs.arcweave.com/tutorials/style-editor/overview): Learn how to use Arcweave's [Style Editor](https://docs.arcweave.com/project-tools/play-mode/style-editor) to customize and style your story with CSS.
- **Game engine integration**: Follow step-by-step instructions to integrate Arcweave with your game engine of choice:
- [Unity](https://docs.arcweave.com/tutorials/unity/overview)
- [Unreal Engine](https://docs.arcweave.com/tutorials/unreal/overview)
- [Godot Engine](https://docs.arcweave.com/tutorials/godot/overview).
- [AI tools](https://docs.arcweave.com/tutorials/ai-tools/overview): Explore Arcweave's AI-powered tools.
> ✅ In the **REST API** section you can find a short tutorial on how to [make your first write](https://docs.arcweave.com/rest-api/overview#make-your-first-write) using Arcweave's REST API. This feature is available in Team workspaces only.
# Basic Arcweave tutorial
Source: https://docs.arcweave.com/tutorials/basic/overview
Section: Tutorials
Description: A beginner's essential, this series of text and video tutorials covers Arcweave's core features
This collection of tutorials is designed to help beginners get started with Arcweave's core features and to guide them toward mastering more advanced techniques and logic workflows.
> ✅ You can play the finished version of the Tutorial Project [here](https://arcweave.com/app/project/Qz0PXOZ0Ya/play) or in the embed window below, while you can explore its diagrams and structure [here](https://arcweave.com/app/project/Qz0PXOZ0Ya).
Embedded content: https://arcweave.com/embed/Qz0PXOZ0Ya/play
## Tutorial contents
Context: Arcweave docs > Tutorials > Basic Arcweave tutorial > Tutorial contents
1. [Arcweave overview](https://docs.arcweave.com/tutorials/basic/pt-1)
2. [Your first project](https://docs.arcweave.com/tutorials/basic/pt-2)
3. [Format text](https://docs.arcweave.com/tutorials/basic/pt-3)
4. [Play Mode functionalities](https://docs.arcweave.com/tutorials/basic/pt-4)
5. [Components & icons](https://docs.arcweave.com/tutorials/basic/pt-5)
6. [Mentions](https://docs.arcweave.com/tutorials/basic/pt-6)
7. [Notes](https://docs.arcweave.com/tutorials/basic/pt-7)
8. [Image assets](https://docs.arcweave.com/tutorials/basic/pt-8)
9. [Jumpers](https://docs.arcweave.com/tutorials/basic/pt-9)
10. [Global variables](https://docs.arcweave.com/tutorials/basic/pt-10)
11. [Branches](https://docs.arcweave.com/tutorials/basic/pt-11)
12. [Text with logic](https://docs.arcweave.com/tutorials/basic/pt-12)
13. [Functions show & roll](https://docs.arcweave.com/tutorials/basic/pt-13)
14. [Share & export](https://docs.arcweave.com/tutorials/basic/pt-14)
15. [Polish the project](https://docs.arcweave.com/tutorials/basic/pt-15)
16. [Import & export project](https://docs.arcweave.com/tutorials/basic/pt-16)
17. [More project features](https://docs.arcweave.com/tutorials/basic/pt-17)
18. [Comments](https://docs.arcweave.com/tutorials/basic/pt-18)
19. [Function visits](https://docs.arcweave.com/tutorials/basic/pt-19)
20. [Advanced connections & labels](https://docs.arcweave.com/tutorials/basic/pt-20)
21. [Audio assets](https://docs.arcweave.com/tutorials/basic/pt-21)
# Basic Arcweave tutorial | Part 1: Arcweave overview
Source: https://docs.arcweave.com/tutorials/basic/pt-1
Section: Tutorials > Basic Arcweave
Description: A short overview of the Arcweave project environment in text and video formats
Welcome to the first part of the Arcweave Basics tutorial series. On this page, we'll use the [Interactive Fiction Example](https://docs.arcweave.com/workspaces/projects#project-templates) as a walkthrough of Arcweave's environment. We will see our first items and features: [boards](https://docs.arcweave.com/project-items/boards), [elements](https://docs.arcweave.com/project-items/elements), and [connections](https://docs.arcweave.com/project-items/connections), as well as the [Play Mode](https://docs.arcweave.com/project-tools/play-mode/overview), where you run your project as a choice-based game.
## Video tutorial
Context: Arcweave docs > Tutorials > Basic Arcweave > Basic Arcweave tutorial | Part 1: Arcweave overview > Video tutorial
Watch this tutorial as a video:
Video: https://www.youtube.com/watch?v=Dfm6dKQH3I0
> ⚠️ This video does not reflect the latest updates to Arcweave's UI.
> ✅ On this page we'll study the **Interactive Fiction Example** (aka _The Castle)._ On the following pages, we will be building a project step-by-step. You can play that project's finished version [here](https://arcweave.com/app/project/Qz0PXOZ0Ya/play) and explore its diagrams and structure [here](https://arcweave.com/app/project/Qz0PXOZ0Ya).
## Open the project
Context: Arcweave docs > Tutorials > Basic Arcweave > Basic Arcweave tutorial | Part 1: Arcweave overview > Open the project
The project template called **Interactive Fiction Example** is a great starting point for exploring Arcweave's features before building your own.

If your workspace does not have this project (its title is _The Castle),_ you can recreate it:
1. Go to the workspace's **Projects** section.
2. Click the **+ New Project** button.
3. Select the **Interactive Fiction Example** template from the menu.
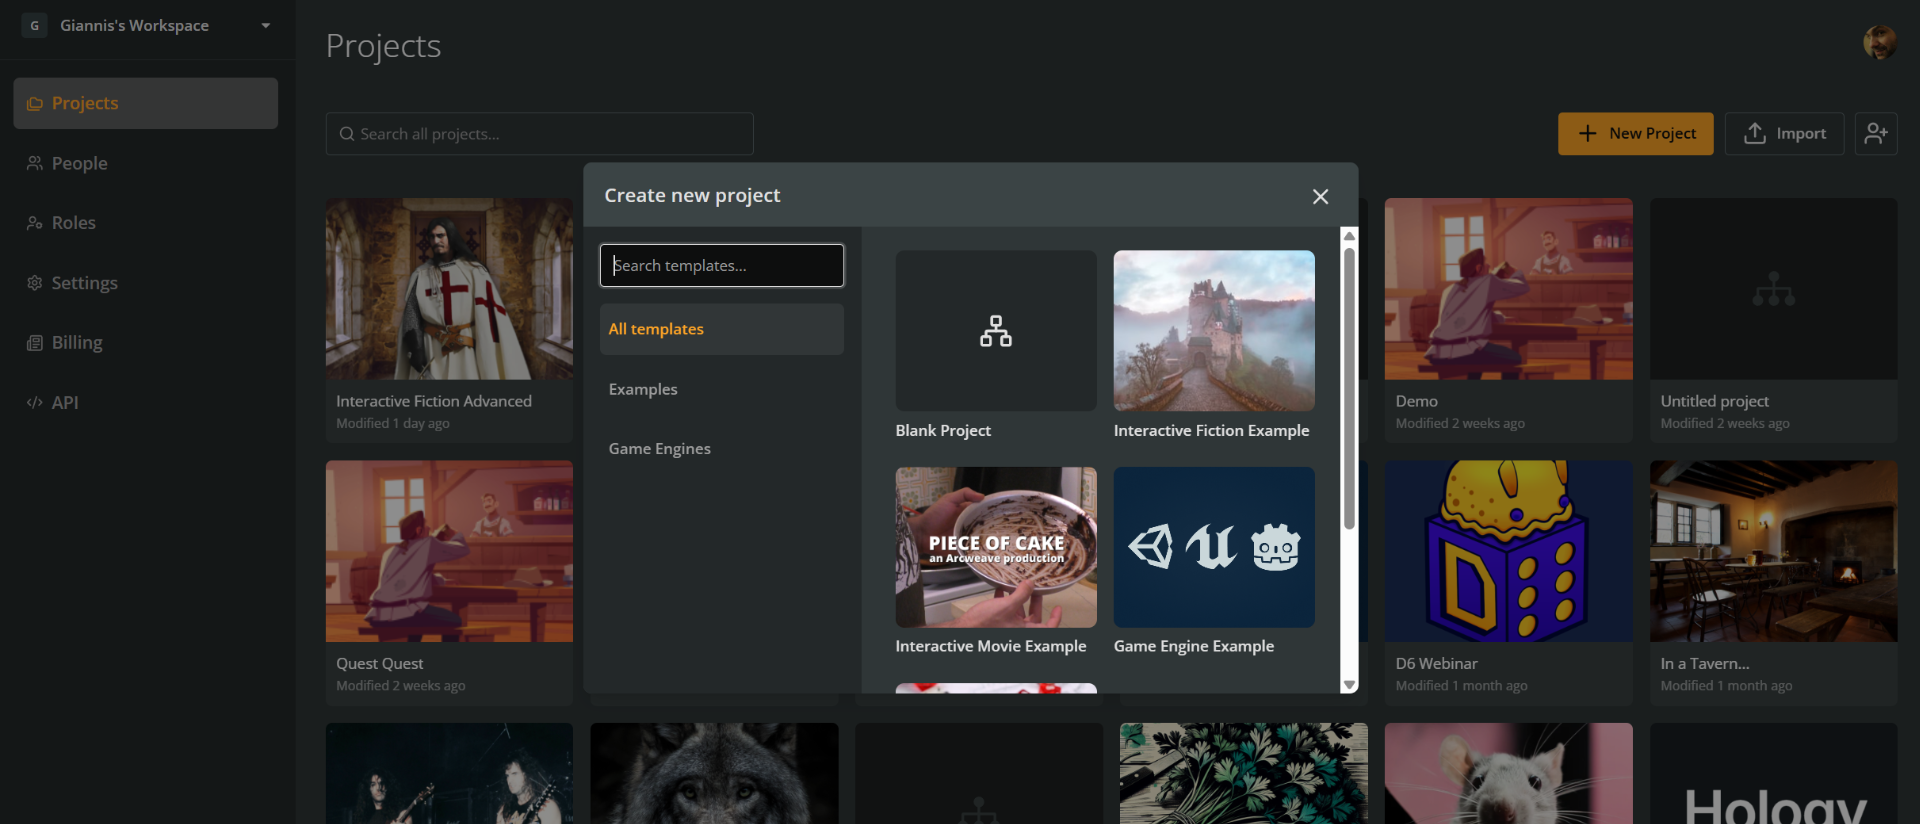
## Project environment
Context: Arcweave docs > Tutorials > Basic Arcweave > Basic Arcweave tutorial | Part 1: Arcweave overview > Project environment
The Arcweave interface is divided into two main areas: the **Board** and the **Sidebar**.
### Current board
Context: Arcweave docs > Tutorials > Basic Arcweave > Basic Arcweave tutorial | Part 1: Arcweave overview > Project environment > Current board
The Board is your main workspace.

It displays your story as a **diagram**, where **elements** (the building blocks of your narrative) are connected to each other via labeled **connections**.
### Sidebar
Context: Arcweave docs > Tutorials > Basic Arcweave > Basic Arcweave tutorial | Part 1: Arcweave overview > Project environment > Sidebar
The left sidebar sits alongside the current board.

It gives you access to four key sections:
- **Boards**: A list of all the boards you've created in your project. Complex projects can have multiple boards to keep things organized.
- **Components**: Entities you create to represent anything relevant to your game: characters, locations, items, and more. Components can be created once and reused across multiple diagrams.
- **Assets**: A collection of all the images, audio, and videos you've uploaded to use in your project.
- **Global variables**: This is where you define the global variables used throughout your project (e.g., for tracking player choices or game state).
We'll cover each of these sections in detail in later tutorials. For now, it's enough to know where to find them.
## Play Mode
Context: Arcweave docs > Tutorials > Basic Arcweave > Basic Arcweave tutorial | Part 1: Arcweave overview > Play Mode
Arcweave includes a built-in **Play Mode** that lets you run and test your project at any time. To enter Play Mode, click the **Play icon** at the top of the interface.

In Play Mode, you'll see:
1. The **cover image** of the current element (if one has been assigned).
2. The **text content** of the current element.
3. One or more **clickable choices**, which correspond to the labeled connections leading out of that element.
### How Play Mode maps to the board
Context: Arcweave docs > Tutorials > Basic Arcweave > Basic Arcweave tutorial | Part 1: Arcweave overview > Play Mode > How Play Mode maps to the board
Switching back to the Board, you can see how Play Mode elements correspond to what's on the diagram.

- The **cover image** comes from an image assigned to the element.
- The **text content** is authored directly inside the element.
- Each **labeled connection** (arrow) leading out of an element becomes a **clickable choice** in Play Mode.
## Set Play Mode start
Context: Arcweave docs > Tutorials > Basic Arcweave > Basic Arcweave tutorial | Part 1: Arcweave overview > Set Play Mode start
When you enter Play Mode, the story always begins at a designated **starting element**. You can identify the starting element by the **star icon** displayed on it. Hovering over the star icon shows a tooltip identifying the element as the Play Mode start.
A project has a single starting element, regardless of how many boards it has.
### Changing the starting element
Context: Arcweave docs > Tutorials > Basic Arcweave > Basic Arcweave tutorial | Part 1: Arcweave overview > Set Play Mode start > Changing the starting element
You can reassign the starting element at any time:
1. Right-click on any element in the Board.
2. Select **Play Mode > Set Play Mode start** from the context menu.
The next time you enter Play Mode, the story will begin from the newly designated element.
## What's next
Context: Arcweave docs > Tutorials > Basic Arcweave > Basic Arcweave tutorial | Part 1: Arcweave overview > What's next
You now have a high-level overview of the Arcweave environment: the Board, the Sidebar, Play Mode, and how the starting element works. In the next tutorial, we'll start building things from the ground up by **creating a new project from scratch**.
In the meantime, feel free to explore _The Castle_ example project on your own — play through the story, inspect the elements and connections, and poke around the Sidebar sections to get comfortable with the interface.
# Basic Arcweave tutorial | Part 2: Your first project
Source: https://docs.arcweave.com/tutorials/basic/pt-2
Section: Tutorials > Basic Arcweave
Description: Text & video tutorial on creating your first Arcweave project
This tutorial walks you through creating a new Arcweave project from scratch, setting up boards, adding elements, and connecting them to build a simple interactive story.
> ✅ You can play the finished version of the Tutorial Project [here](https://arcweave.com/app/project/Qz0PXOZ0Ya/play) and explore its diagrams and structure [here](https://arcweave.com/app/project/Qz0PXOZ0Ya).
## Video tutorial
Context: Arcweave docs > Tutorials > Basic Arcweave > Basic Arcweave tutorial | Part 2: Your first project > Video tutorial
Watch this tutorial as a video:
Video: https://www.youtube.com/watch?v=PhDZmmVnOis
> ⚠️ This video does not reflect the latest updates to Arcweave's UI.
## Create a new project
Context: Arcweave docs > Tutorials > Basic Arcweave > Basic Arcweave tutorial | Part 2: Your first project > Create a new project
Let's first create a new project. To do this:
1. Close any open projects. From inside your open project, click the **Workspace** button at the top left corner of the project environment.
2. Go to your workspace's **Projects** section.
3. From the projects list, click the big orange button that says **+ New Project**, near the top right of your window.
4. From the templates list, choose **Blank Project**.
Your new project opens automatically. Click the default project name at the top and rename it — for example, _Tutorial._
## Work with boards
Context: Arcweave docs > Tutorials > Basic Arcweave > Basic Arcweave tutorial | Part 2: Your first project > Work with boards
Every new project comes with one board called _Main Board_. You can create additional boards from the sidebar.
To add a new board, go to the sidebar, find the **Boards** section, and click **Create board** (the **+** icon in the section header).
To rename it, right-click the board and choose **Rename**.
## Add elements
Context: Arcweave docs > Tutorials > Basic Arcweave > Basic Arcweave tutorial | Part 2: Your first project > Add elements
Elements are the building blocks of your story in Arcweave. They live on boards and hold the content the player encounters. There are three ways to add an element to a board:
- Double-click on an empty area of the board.
- Right-click an empty area of the board and choose **Create > Element**.
- Drag the element icon (**Drag new element**) from the bottom menu onto the board.
### Delete elements
Context: Arcweave docs > Tutorials > Basic Arcweave > Basic Arcweave tutorial | Part 2: Your first project > Add elements > Delete elements
To delete an element, select it and press `Delete` or `Backspace`, or right-click and choose **Delete selection**.
To select multiple elements at once, switch to [Select mode](https://docs.arcweave.com/project-tools/interface/bottom-menu#pan-select-icon), then click and drag from empty board space to draw a selection rectangle. This replaces the current selection.
See [Select board items](https://docs.arcweave.com/project-tools/interface/mouse-actions#select-board-items) for ways to add or remove individual items or groups from the selection.
### Snap to grid
Context: Arcweave docs > Tutorials > Basic Arcweave > Basic Arcweave tutorial | Part 2: Your first project > Add elements > Snap to grid
If you prefer your elements aligned to a grid, click the cog icon in the top menu to open [Project Settings](https://docs.arcweave.com/project-tools/settings#snap-to-grid) and select **Snap to grid**.
## Write element content
Context: Arcweave docs > Tutorials > Basic Arcweave > Basic Arcweave tutorial | Part 2: Your first project > Write element content
To write in an element:
1. Double-click its title area (the colored top part) and type a title (for example, _Wake up)._
2. Press `Tab` to move to the content area and type some text (for example, _You wake up from a nightmare, gasping for breath.)_
3. Press `Escape` when done.
## Set starting element
Context: Arcweave docs > Tutorials > Basic Arcweave > Basic Arcweave tutorial | Part 2: Your first project > Set starting element
The starting element is the first thing the player sees when the story runs. To set it, right-click your first element and choose **Play Mode > Set Play Mode start**. A star icon marks the starting element.
## Run the project in Play Mode
Context: Arcweave docs > Tutorials > Basic Arcweave > Basic Arcweave tutorial | Part 2: Your first project > Run the project in Play Mode
To preview your story, click the **Play** icon (**Play Mode**) in the top menu. Play Mode opens in a new browser tab and displays your starting element's content.
> ✅ Once Play Mode is open in its own browser tab, you don't need to click the play icon again after making changes. Simply switch back to that tab; Arcweave will have already refreshed the current element.
## Connect elements
Context: Arcweave docs > Tutorials > Basic Arcweave > Basic Arcweave tutorial | Part 2: Your first project > Connect elements
A single element with no connections is a dead end. To continue the story, create a second element (for example, titled _Get up_) and connect the two.
To connect elements, hover over the edge of an element until the cursor changes to a crosshair, then drag from that edge to the target element.
Now when you run the project, the first element will display a clickable link to the second.
> ✅ When an element is selected, you can use [keyboard shortcuts](https://docs.arcweave.com/project-tools/interface/keyboard-shortcuts#element-creation-connection) to instantly create a new connected element. Press **Ctrl + Alt/Option/Cmd + an arrow key** to create the new element in the direction of the arrow.
### Reassign and remove connections
Context: Arcweave docs > Tutorials > Basic Arcweave > Basic Arcweave tutorial | Part 2: Your first project > Connect elements > Reassign and remove connections
- To reassign a connection, grab either end of it and drag it to a different element.
- To remove a connection, select it and press `Delete` or `Backspace`, or right-click and choose **Delete selection**.
## Create choices
Context: Arcweave docs > Tutorials > Basic Arcweave > Basic Arcweave tutorial | Part 2: Your first project > Create choices
The real power of interactive fiction comes from giving players meaningful choices. To create a branching path, add two new elements and connect them both from the same source element.
For example, from _Get up,_ you could connect to:
- _Go to the office_
- _Take a shower_
When the player reaches the _Get up_ element in Play Mode, both options will appear as clickable choices. By default, the text shown for each choice is the title of the destination element.
## Add labels to connections
Context: Arcweave docs > Tutorials > Basic Arcweave > Basic Arcweave tutorial | Part 2: Your first project > Add labels to connections
Labels let you display different choice text to the player without changing element titles. This is useful when you want the clickable option to read differently from the element name.
To add a label, double-click on a connection. A label field appears — type your text, then press `Escape` or `Tab` to confirm.
You can also right-click a connection and choose **Add label**.
Once labels are set, Play Mode will display the label text instead of the element title for each choice.
> ✅ Labels can contain as much text as you need, including line breaks; there is no practical length restriction.
## What's next
Context: Arcweave docs > Tutorials > Basic Arcweave > Basic Arcweave tutorial | Part 2: Your first project > What's next
You now have a working Arcweave project with multiple elements, connections, and player choices. In the next tutorial, you'll learn how to format text in elements and connections to give your story more visual structure.
# Basic Arcweave tutorial | Part 3: Format text
Source: https://docs.arcweave.com/tutorials/basic/pt-3
Section: Tutorials > Basic Arcweave
Description: Text & video tutorial on formatting your project's rich text
In this tutorial, you will learn how to format text inside elements, apply color themes to elements and connections, and change the visual style of connections in Arcweave.
## Video tutorial
Context: Arcweave docs > Tutorials > Basic Arcweave > Basic Arcweave tutorial | Part 3: Format text > Video tutorial
Watch this tutorial as a video:
Video: https://www.youtube.com/watch?v=xEb3JKh4vls
> ⚠️ This video does not reflect the latest updates to Arcweave's UI.
> ✅ You can play the finished version of the Tutorial Project [here](https://arcweave.com/app/project/Qz0PXOZ0Ya/play) and explore its diagrams and structure [here](https://arcweave.com/app/project/Qz0PXOZ0Ya).
## Format element text
Context: Arcweave docs > Tutorials > Basic Arcweave > Basic Arcweave tutorial | Part 3: Format text > Format element text
Arcweave uses formatted text throughout the editor, giving you rich text controls directly inside elements.
To open the text editor, double-click on any element. A formatting toolbar will appear at the element's top (or bottom, if there is not enough space).
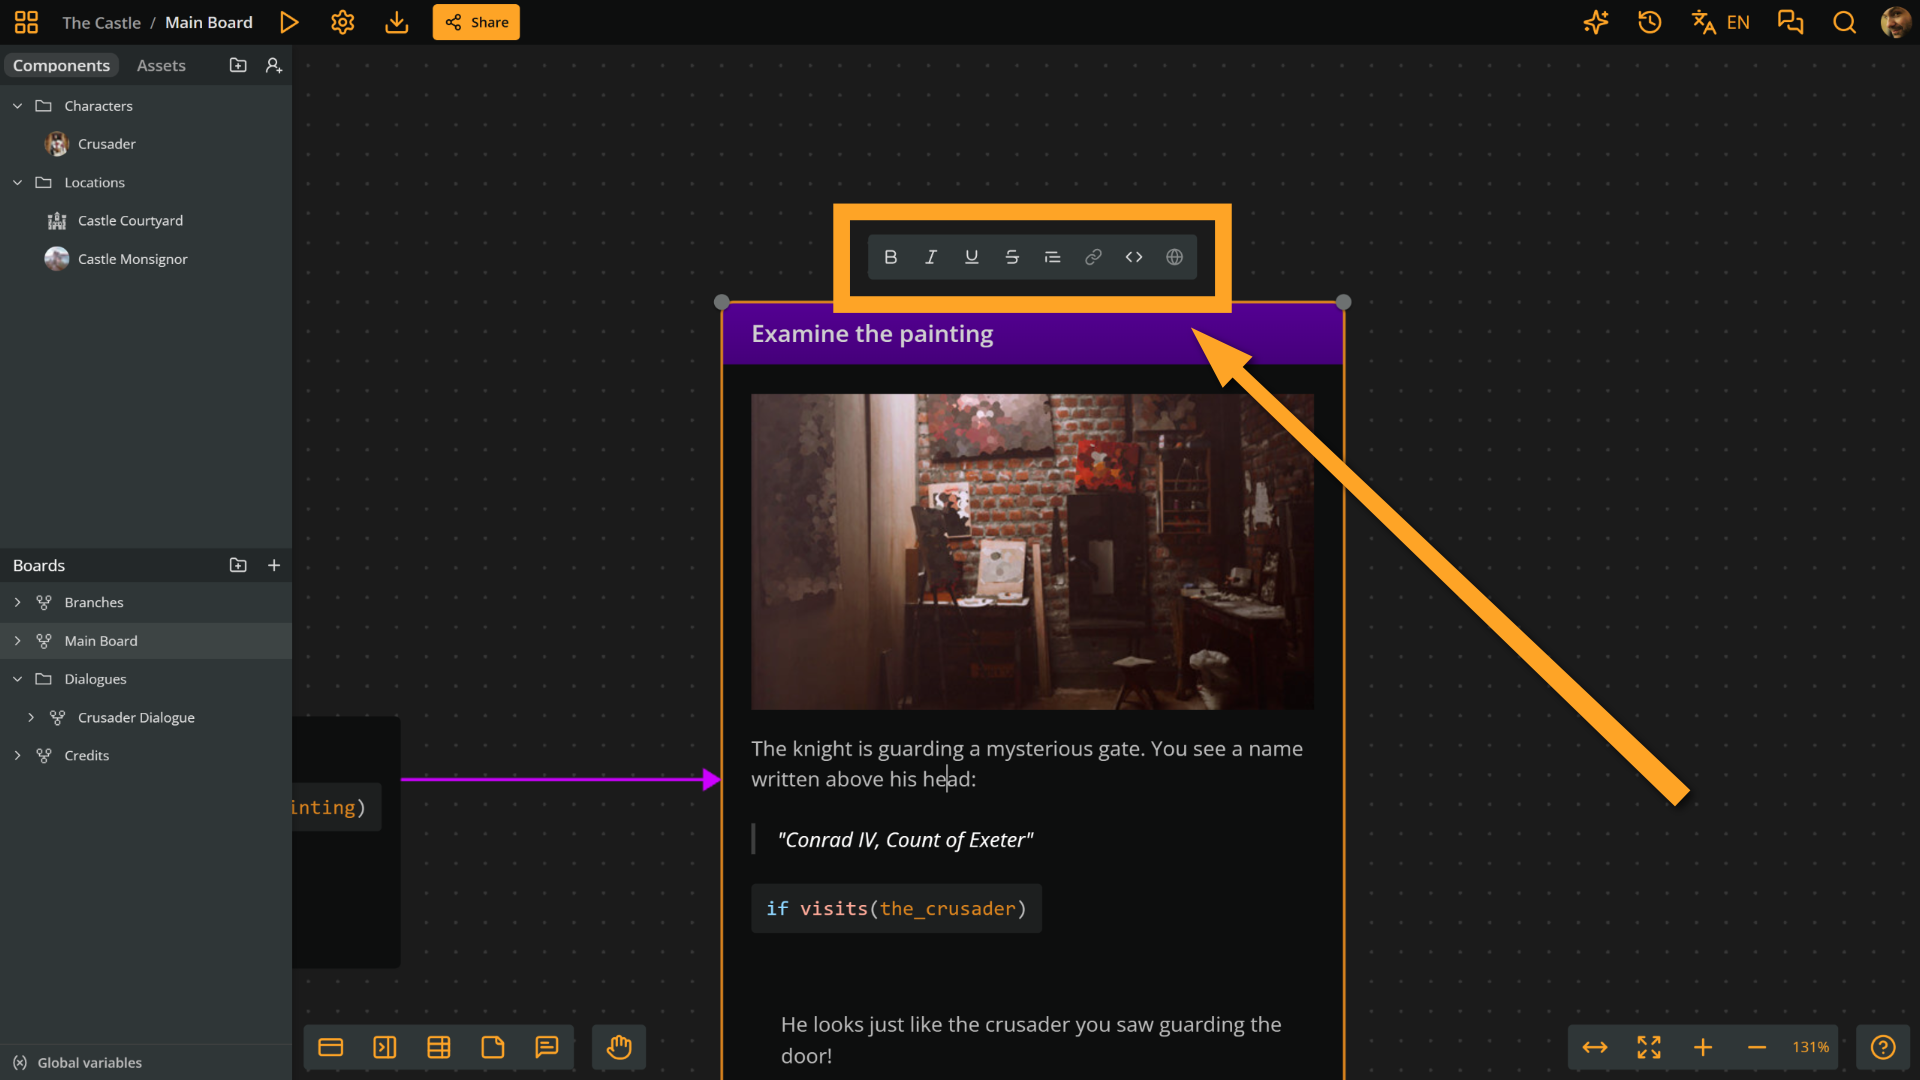
With text selected, you can apply the following formatting:
- **Bold** — emphasize key terms or names.
- _Italic_ — use for titles, foreign words, or subtle stress.
- Underline — draw attention to specific phrases.
- **Block quote** — make a paragraph stand out as a quote or a descriptive aside. Use this format for in-world signs, notes, or flavour text.
## Add and remove links
Context: Arcweave docs > Tutorials > Basic Arcweave > Basic Arcweave tutorial | Part 3: Format text > Add and remove links
You can attach hyperlinks to any selected text inside an element — useful for research notes, world-building references, or external resources.
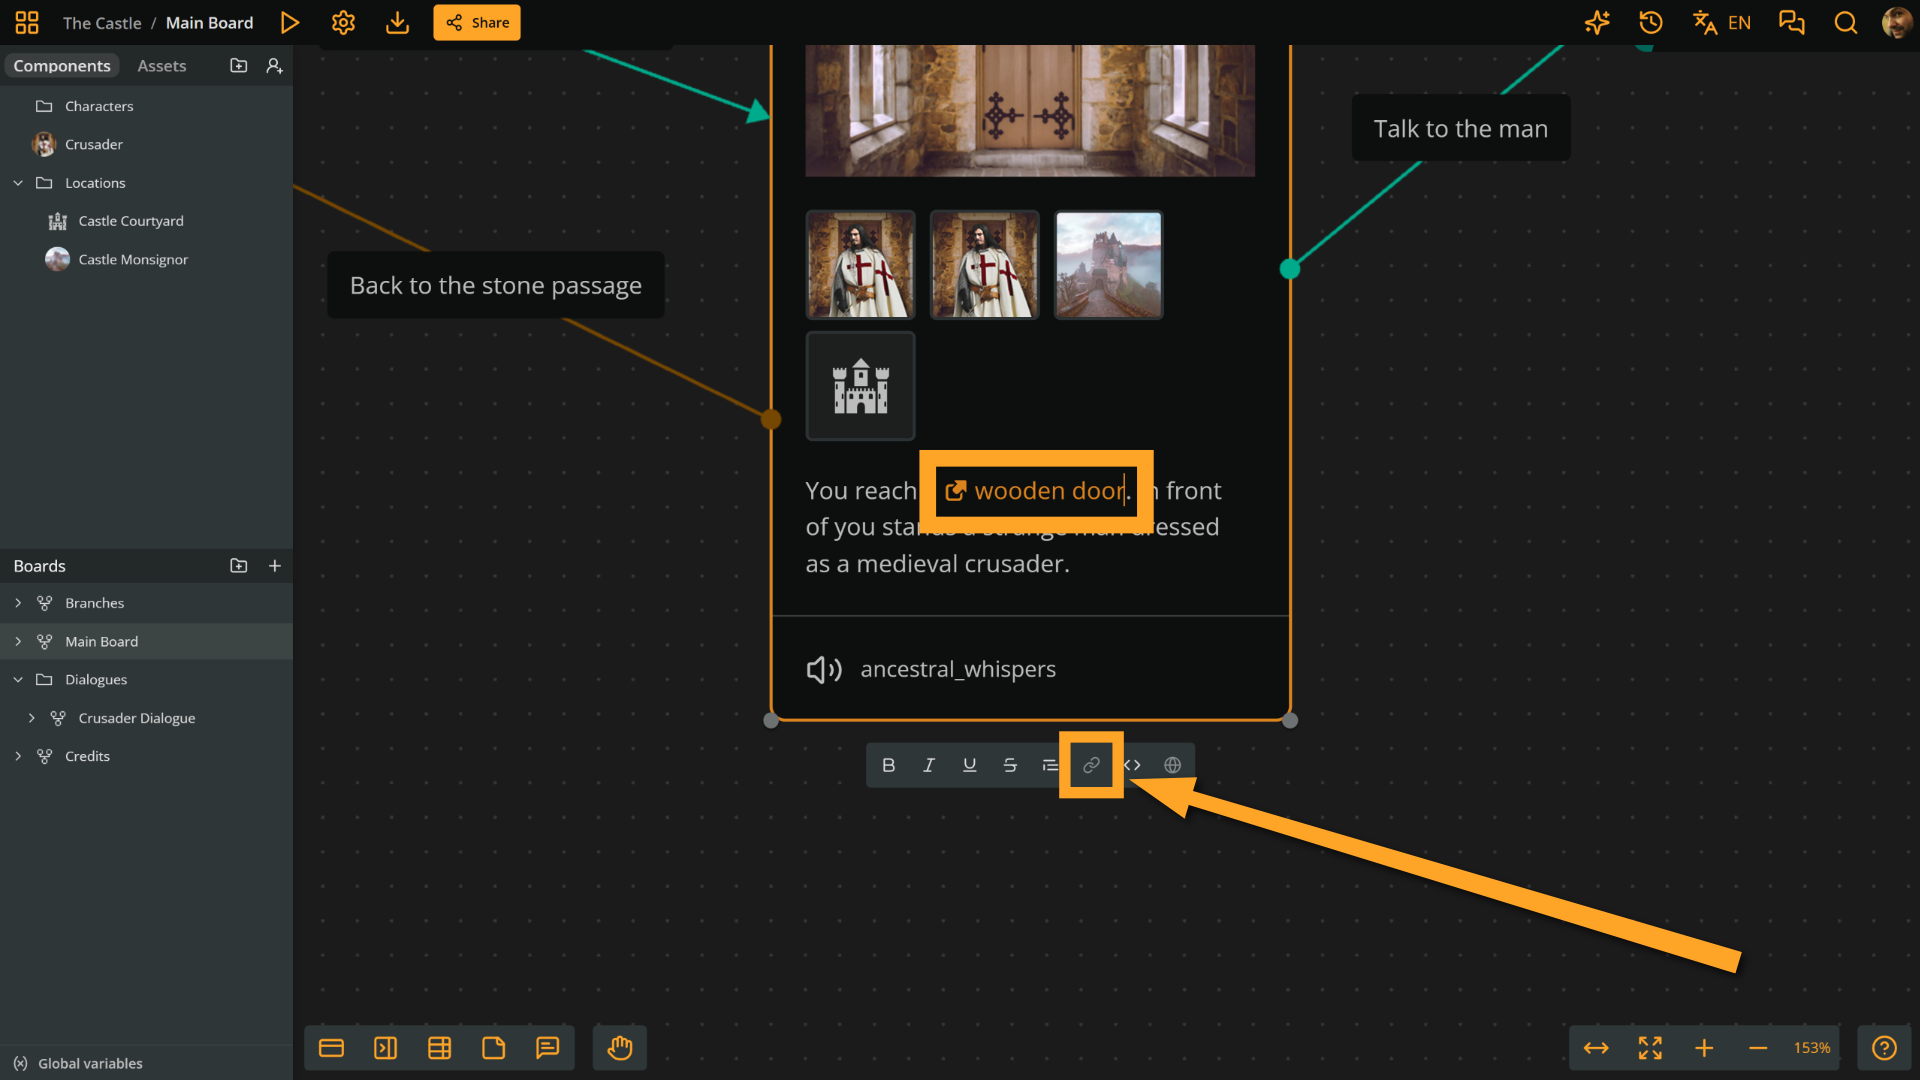
### Add links
Context: Arcweave docs > Tutorials > Basic Arcweave > Basic Arcweave tutorial | Part 3: Format text > Add and remove links > Add links
1. Select the text you want to turn into a link.
2. Click the **link** button in the formatting toolbar.
3. Enter the URL.
4. Press **Enter** to confirm.
### Remove links
Context: Arcweave docs > Tutorials > Basic Arcweave > Basic Arcweave tutorial | Part 3: Format text > Add and remove links > Remove links
1. Select the linked text again.
2. Click the **link** button.
3. Delete the URL from the field.
4. Press **Enter** to confirm.
## Apply element color themes
Context: Arcweave docs > Tutorials > Basic Arcweave > Basic Arcweave tutorial | Part 3: Format text > Apply element color themes
Color coding is a powerful and intuitive way to visually organize your project at a glance.
You can assign color themes to elements to communicate meaning, e.g. to mark important plot points in blue, or negative outcomes in red.
To apply a color theme to an element:
1. Right-click the element on the board.
2. Select the desired **theme color** from the context menu.
> ✅ Color coding is personal; there is no universal convention.
> ℹ️ Whichever color theme you choose last becomes the default for the **next** element you create. This means you can set your preferred color and keep working without changing it each time.
To verify this, try the following:
1. Change an element's theme to any color.
2. Create another element. It will automatically use the last color theme you selected.
## Apply connection color themes
Context: Arcweave docs > Tutorials > Basic Arcweave > Basic Arcweave tutorial | Part 3: Format text > Apply connection color themes
Connections can also be color-coded, following the same logic as elements.
To apply a color to a connection:
1. Right-click the connection on the board.
2. Select the desired **theme color** from the context menu.
> ℹ️ Whichever color theme you choose last becomes the default for the **next** connection you create. This means you can set your preferred color and keep working without changing it each time.
## Change connection styles
Context: Arcweave docs > Tutorials > Basic Arcweave > Basic Arcweave tutorial | Part 3: Format text > Change connection styles
Beyond color, you can also change the visual form of a connection. Arcweave offers three styles:
| Style | Description |
| ------------- | -------------------------------------------------- |
| **Bezier** | The default curved style. |
| **Straight** | A direct line between two elements. |
| **Flowchart** | Right-angle lines, similar to a flowchart diagram. |
To change a connection's style:
1. Right-click the connection on the board.
2. Choose the desired style icon among **Bezier**, **Straight**, or **Flowchart**.
> ℹ️ Whichever connection style you choose last becomes the default for the **next** connection you create. This means you can set your preferred style and keep working without changing it each time.
## What's next
Context: Arcweave docs > Tutorials > Basic Arcweave > Basic Arcweave tutorial | Part 3: Format text > What's next
Now that your elements and connections are formatted and color-coded, you're ready to explore Play Mode. The next tutorial covers essential Play Mode functionalities that will help you playtest your project efficiently.
# Basic Arcweave tutorial | Part 4: Play Mode functionalities
Source: https://docs.arcweave.com/tutorials/basic/pt-4
Section: Tutorials > Basic Arcweave
Description: Text and video tutorial on Arcweave Play Mode features
This part of the tutorial covers the following Play Mode features:
- [Restart](https://docs.arcweave.com/tutorials/basic/pt-4#restart): Replay a story from the beginning.
- [Edit in Play Mode](https://docs.arcweave.com/tutorials/basic/pt-4#edit-in-play-mode): Edit text and reorder option buttons directly in Play Mode.
- [Components](https://docs.arcweave.com/tutorials/basic/pt-4#components-in-play-mode): See how attached components appear in Play Mode.
- [Debugger](https://docs.arcweave.com/tutorials/basic/pt-4#debugger): Inspect and test variable values during a playthrough.
- [Undo last choice](https://docs.arcweave.com/tutorials/basic/pt-4#undo-last-choice): Step back to the previous element.
- [Quickstart from any element](https://docs.arcweave.com/tutorials/basic/pt-4#quickstart-from-any-element): Start a playthrough from any element.
- [Next element](https://docs.arcweave.com/tutorials/basic/pt-4#next-element): Advance through linear passages without option buttons.
## Video tutorial I
Context: Arcweave docs > Tutorials > Basic Arcweave > Basic Arcweave tutorial | Part 4: Play Mode functionalities > Video tutorial I
Watch this part of the tutorial as a video:
Video: https://www.youtube.com/watch?v=ibUmh3VLsR0
> ⚠️ This video does not reflect the latest updates to Arcweave's UI.
> ✅ You can [play the finished Tutorial Project](https://arcweave.com/app/project/Qz0PXOZ0Ya/play) and [explore its boards and structure](https://arcweave.com/app/project/Qz0PXOZ0Ya).
## Enter Play Mode
Context: Arcweave docs > Tutorials > Basic Arcweave > Basic Arcweave tutorial | Part 4: Play Mode functionalities > Enter Play Mode
In your project, press **Play** to enter Play Mode. Alternatively, right-click an element and select [**Play Mode > Quickstart Play Mode from here**](https://docs.arcweave.com/project-tools/play-mode/using-play-mode#quickstart-play-mode-from-here).
## Restart
Context: Arcweave docs > Tutorials > Basic Arcweave > Basic Arcweave tutorial | Part 4: Play Mode functionalities > Restart
To replay a story from the beginning, press **Restart**. It is on the left side of the Play Mode menu.
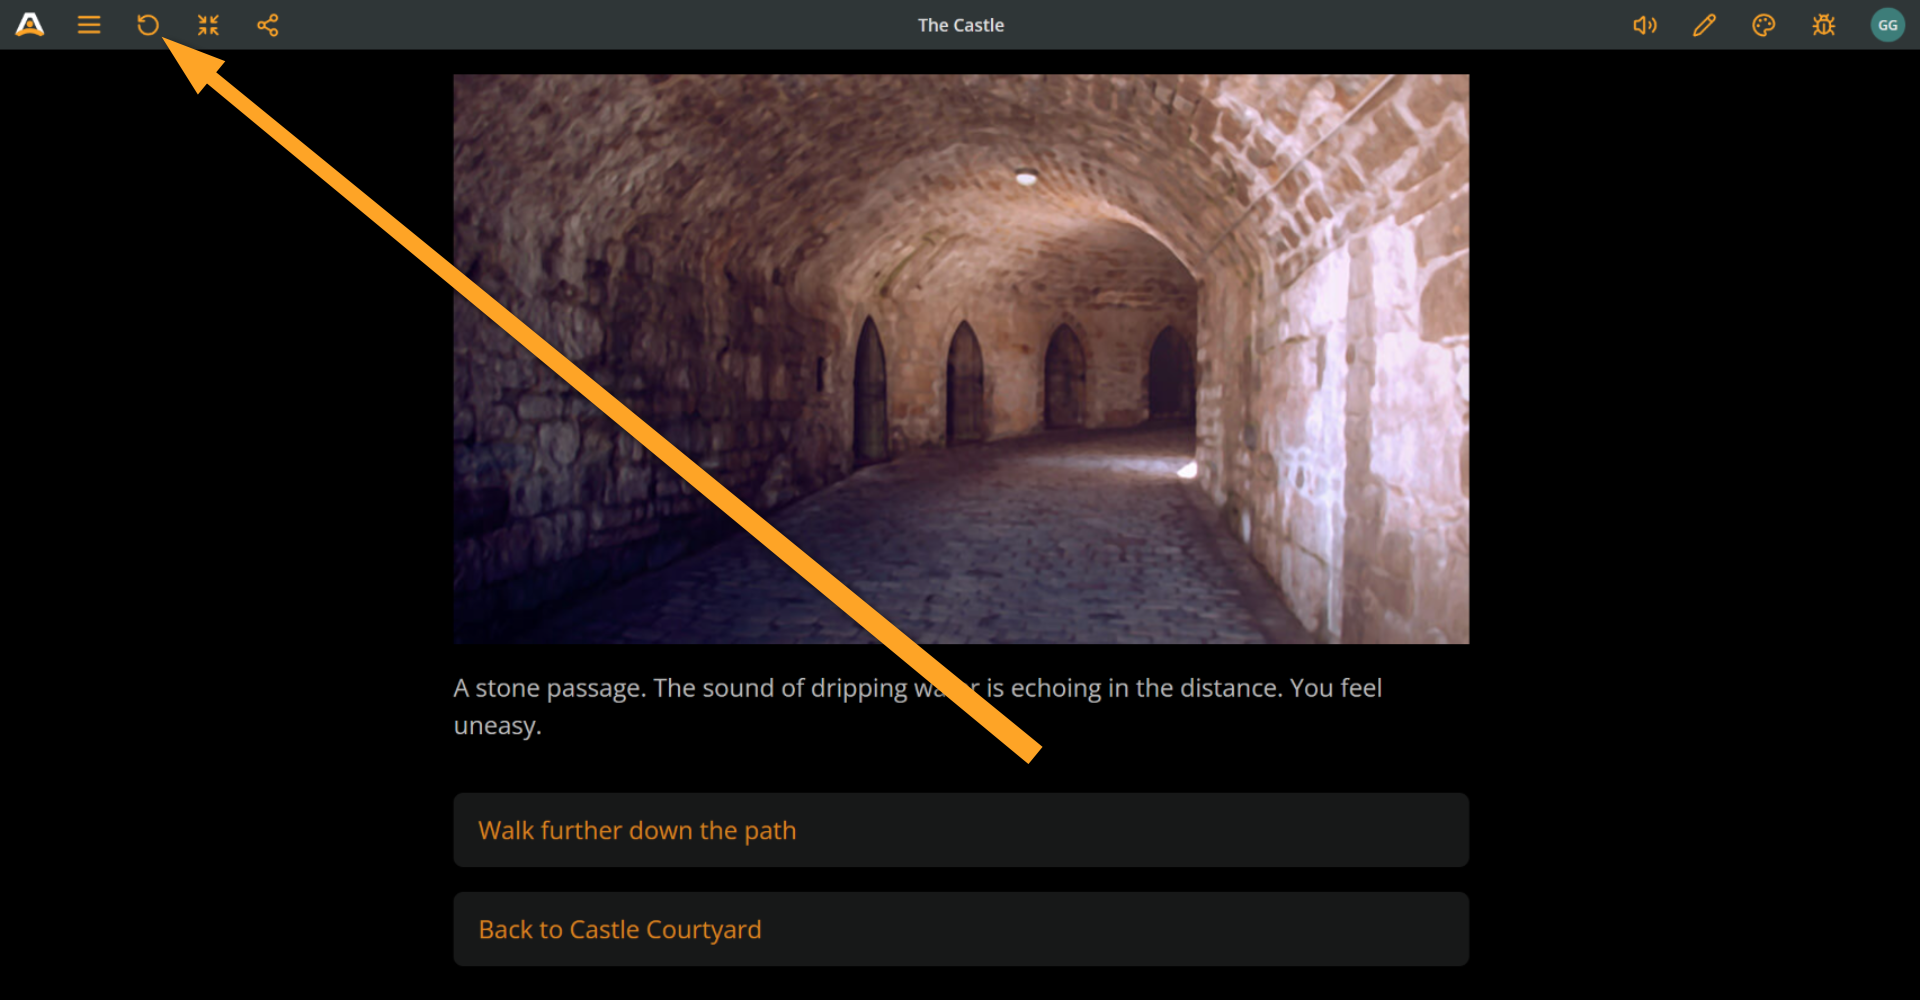
> ℹ️ Restarting a story with **Restart** resets all [global, board, and component variables](https://docs.arcweave.com/project-items/variables/overview#variable-scope) and all [element visits](https://docs.arcweave.com/tutorials/basic/pt-19).
## Edit in Play Mode
Context: Arcweave docs > Tutorials > Basic Arcweave > Basic Arcweave tutorial | Part 4: Play Mode functionalities > Edit in Play Mode
In Play Mode, click [**Edit content**](https://docs.arcweave.com/project-tools/play-mode/using-play-mode#edit-content-in-play-mode) (the pencil icon in the top menu) or double-click the text content to enter edit mode.
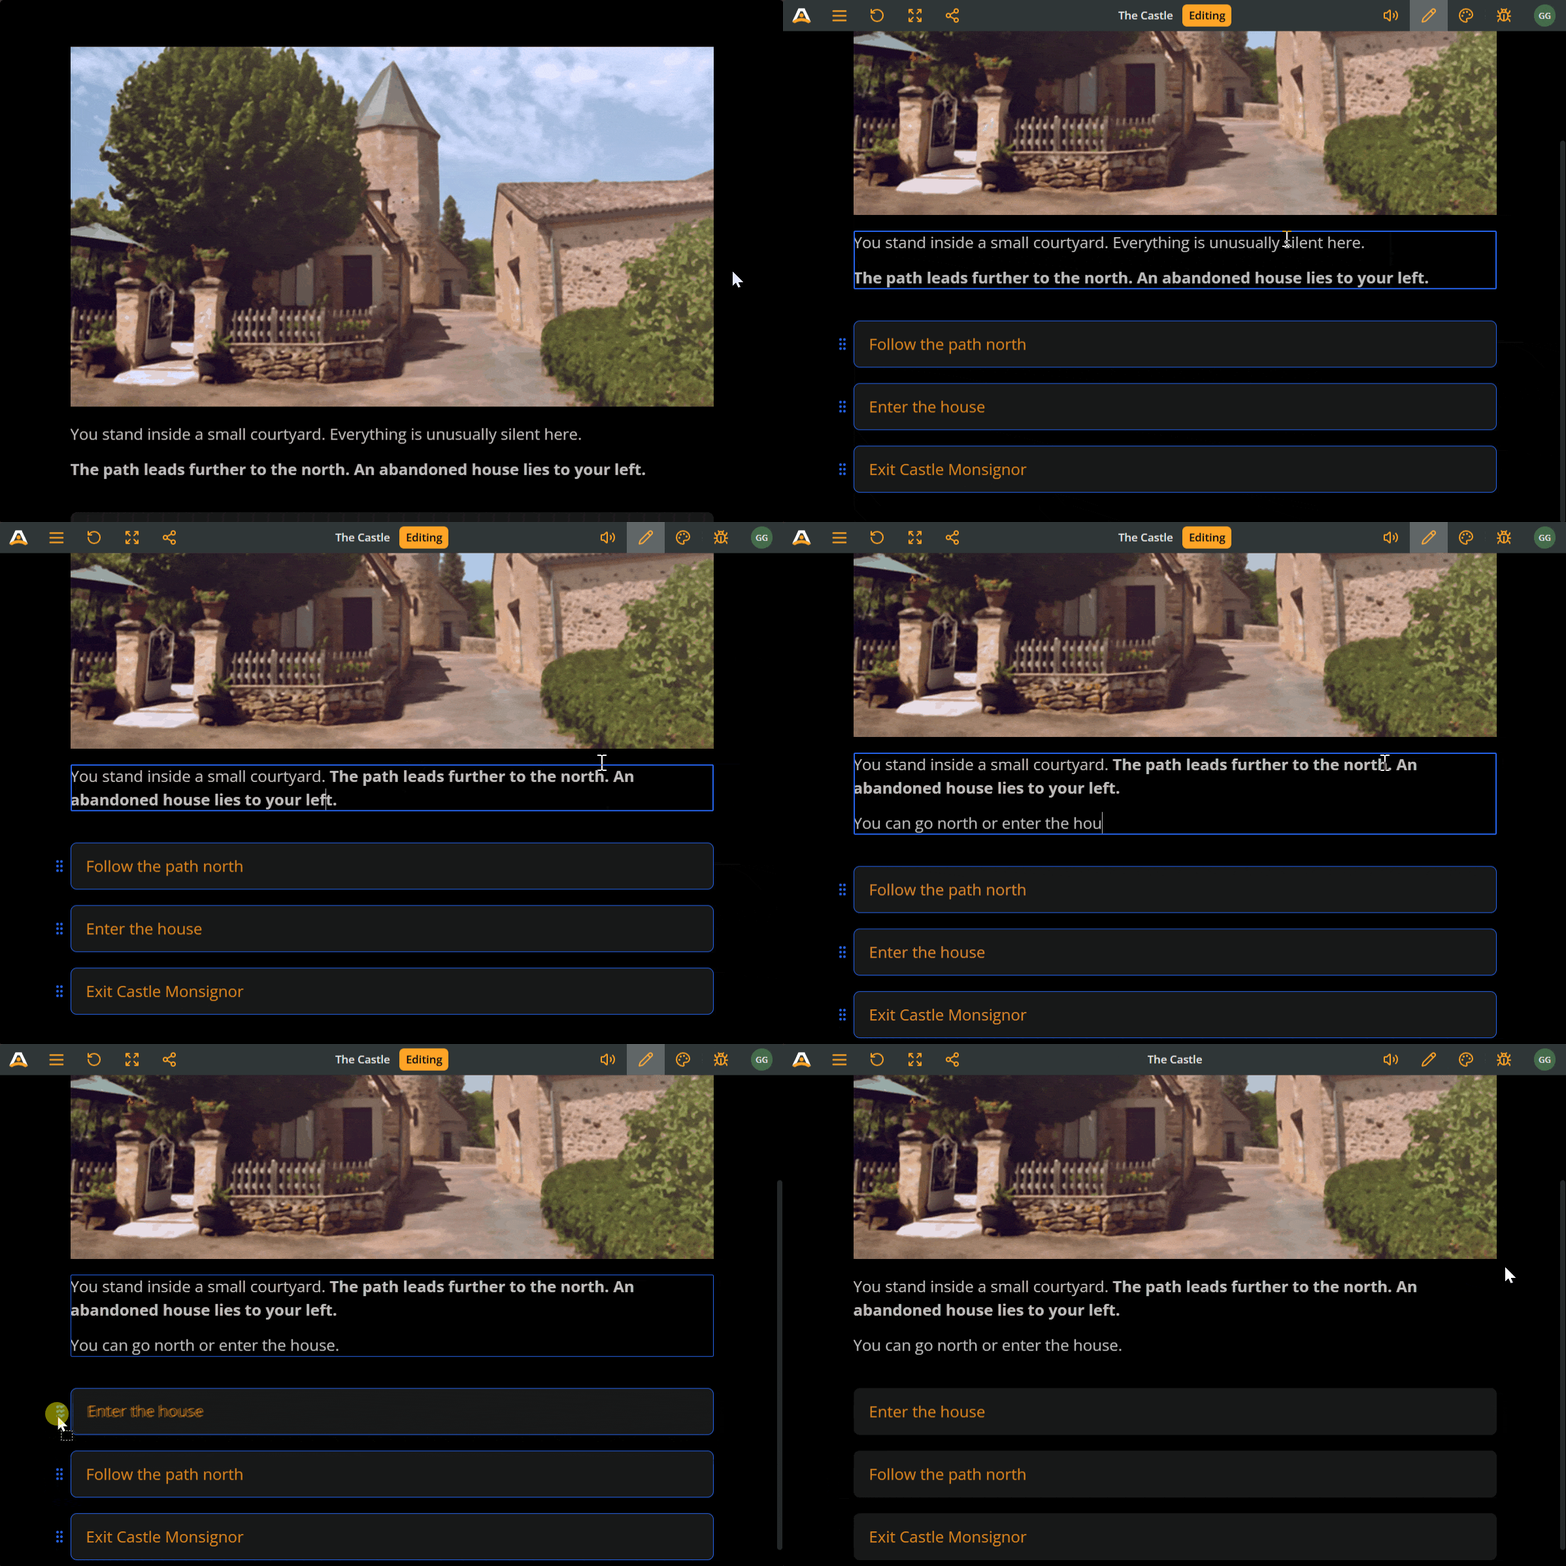
### Edit text
Context: Arcweave docs > Tutorials > Basic Arcweave > Basic Arcweave tutorial | Part 4: Play Mode functionalities > Edit in Play Mode > Edit text
In edit mode, click anywhere in the element's text or in an option's label to edit it.
Press **Esc** or click outside the text area to stop editing.
### Reorder options
Context: Arcweave docs > Tutorials > Basic Arcweave > Basic Arcweave tutorial | Part 4: Play Mode functionalities > Edit in Play Mode > Reorder options
In edit mode, drag an option by the grip handle on its left (or by its border) to reorder it. Changes are saved automatically.
Press **Esc** or click outside the text area to stop editing.
> ✅ For more details, see [Using Play Mode](https://docs.arcweave.com/project-tools/play-mode/using-play-mode).
## Video tutorial II
Context: Arcweave docs > Tutorials > Basic Arcweave > Basic Arcweave tutorial | Part 4: Play Mode functionalities > Video tutorial II
This video covers additional Play Mode features, described in the sections below.
Video: https://www.youtube.com/watch?v=MbX5IGGKHfY
> ⚠️ This video does not reflect the latest updates to Arcweave's UI.
## Components in Play Mode
Context: Arcweave docs > Tutorials > Basic Arcweave > Basic Arcweave tutorial | Part 4: Play Mode functionalities > Components in Play Mode
The first part of the video above explains how attached **components** appear in Play Mode.
> ✅ Components are covered in the [next part of this tutorial](https://docs.arcweave.com/tutorials/basic/pt-5), so you can skip this section for now and return to it later.
Displaying components in Play Mode is particularly useful for dialogue-heavy projects and brings Play Mode closer to a **visual novel style**: you can display a background image while characters (or other components) appear separately, layered on top.
> ✅ For a full visual novel look, see the [visual novel tutorial](https://docs.arcweave.com/tutorials/style-editor/css-visual-novel).
Components are not limited to characters. You can attach items, spells, weapons, clues, or any other entity your story needs, and they appear in Play Mode alongside the element's content.
If an element has no cover image, its components expand to fill the space normally reserved for the cover. When an element has multiple components, they share that space equally.
## Debugger
Context: Arcweave docs > Tutorials > Basic Arcweave > Basic Arcweave tutorial | Part 4: Play Mode functionalities > Debugger
To open the Debugger, click the **bug icon** in the Play Mode menu.
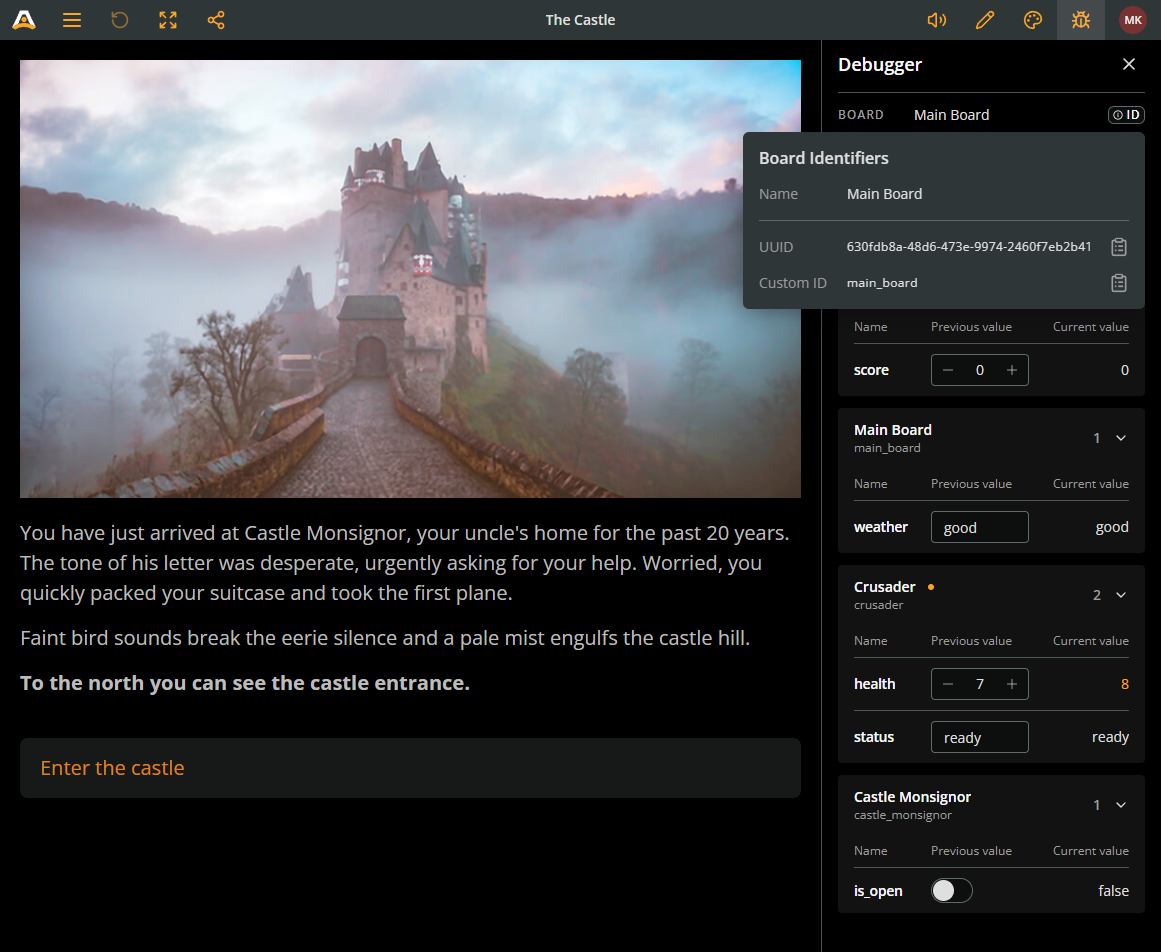
### Previous and current values
Context: Arcweave docs > Tutorials > Basic Arcweave > Basic Arcweave tutorial | Part 4: Play Mode functionalities > Debugger > Previous and current values
The Debugger groups your project's global, board, and component variables. Each variable is listed in a row with its name and two value columns:
- **Previous value**: The variable's value before the current element is rendered, that is, before any Arcscript in the element's content executes.
- **Current value**: The variable's value after the current element is rendered, that is, after any Arcscript in the element's content has executed.
When an element contains no Arcscript, both columns show the same value. When it contains an assignment or calculation, compare the two columns to see its exact effect.
### Color indicators
Context: Arcweave docs > Tutorials > Basic Arcweave > Basic Arcweave tutorial | Part 4: Play Mode functionalities > Debugger > Color indicators
The Debugger highlights a variable's value in **orange** when either of the following is true:
- You edited the value manually during the playthrough.
- The **Previous value** and **Current value** differ.
### Test variables
Context: Arcweave docs > Tutorials > Basic Arcweave > Basic Arcweave tutorial | Part 4: Play Mode functionalities > Debugger > Test variables
The **Previous value** column is editable. During a playthrough, you can click any value and change it to test how different states affect an element's outcome. The element's Arcscript still runs against the value you set, so the **Current value** column reflects the script's effect on your manual input.
This lets you test edge cases and alternative branches without replaying the story to reach the required state.
## Story navigation
Context: Arcweave docs > Tutorials > Basic Arcweave > Basic Arcweave tutorial | Part 4: Play Mode functionalities > Story navigation
### Undo last choice
Context: Arcweave docs > Tutorials > Basic Arcweave > Basic Arcweave tutorial | Part 4: Play Mode functionalities > Story navigation > Undo last choice
After making a choice, click **Undo last choice** in the Debugger header to return to the previous element with its saved variables, visits, and rendered content. See [Undo last choice](https://docs.arcweave.com/project-tools/play-mode/debugger#undo-last-choice) for details.
### Quickstart from any element
Context: Arcweave docs > Tutorials > Basic Arcweave > Basic Arcweave tutorial | Part 4: Play Mode functionalities > Story navigation > Quickstart from any element
As shown in [Part 1 of this tutorial](https://docs.arcweave.com/tutorials/basic/pt-1#set-play-mode-start), you can set the story's starting element by right-clicking an element and choosing **Play Mode > Set Play Mode start**. This marks the element with a star icon and makes it the entry point each time you press **Play**.
Changing the starting element repeatedly to test different parts of your story can be tedious. Instead, use **Quickstart Play Mode from here**:
1. In the board, right-click any element.
2. Select **Play Mode > Quickstart Play Mode from here**.
This opens a **new browser tab** and starts the playthrough from that element, without changing your project's designated starting element. The main **Play** button still starts from the original starting element, which makes Quickstart ideal for testing specific scenes or branches in isolation.
> ℹ️ If you started the playthrough with **Quickstart Play Mode from here**, **Restart** restarts it from that same element, regardless of the project's starting element.
### Next element
Context: Arcweave docs > Tutorials > Basic Arcweave > Basic Arcweave tutorial | Part 4: Play Mode functionalities > Story navigation > Next element
When only one option is available and its labels produce no text, Play Mode shows a **blinking arrow** instead of an option button. Click the element's content area to continue to the next element.
Arcweave checks this _after evaluating branches and label Arcscript,_ so multiple outgoing connections can still lead to a single available option. A label containing only variable assignments or conditional text that produces nothing in the current playthrough can still result in the arrow.
To force the creation of a button for a single option, give its path a label that produces text, such as "Continue".
> ℹ️ See [labels across branches](https://docs.arcweave.com/project-items/labels#labels-across-branches) for paths with several labels.
## What's next
Context: Arcweave docs > Tutorials > Basic Arcweave > Basic Arcweave tutorial | Part 4: Play Mode functionalities > What's next
The next part of this tutorial covers [components](https://docs.arcweave.com/tutorials/basic/pt-5) and introduces the built-in icon library you can use in your project.
# Basic Arcweave tutorial | Part 5: Components & icons
Source: https://docs.arcweave.com/tutorials/basic/pt-5
Section: Tutorials > Basic Arcweave
Description: Text & video tutorial on Arcweave components and the icon library
[Components](https://docs.arcweave.com/project-items/components) are one of Arcweave's most versatile features. They let you represent any meaningful object in your story (characters, locations, inventory items, abstract concepts like emotions or pieces of information) and then connect them to your board elements to make your narrative easier to navigate and manage.
The [icon library](https://docs.arcweave.com/project-tools/icon-library) is a built-in collection of symbols and icons that you can use as art for your Components.
## Video tutorial
Context: Arcweave docs > Tutorials > Basic Arcweave > Basic Arcweave tutorial | Part 5: Components & icons > Video tutorial
Watch this tutorial as a video:
Video: https://www.youtube.com/watch?v=BqkAUNv0q0M
> ⚠️ This video does not reflect the latest updates to Arcweave's attributes, which now support more types (and are not called "text fields" anymore). See [Attributes](https://docs.arcweave.com/project-items/attributes) for more details.
> ✅ You can play the finished version of the Tutorial Project [here](https://arcweave.com/app/project/Qz0PXOZ0Ya/play) and explore its diagrams and structure [here](https://arcweave.com/app/project/Qz0PXOZ0Ya).
## Why components
Context: Arcweave docs > Tutorials > Basic Arcweave > Basic Arcweave tutorial | Part 5: Components & icons > Why components
In a typical interactive story, you'll have characters, places, things, and ideas that recur across many scenes.
Components give these entities a home: a dedicated card where you can store their attributes, backstory, relationships, and inventory. Once created, components can be attached to board elements, dragged between them, and used to quickly locate every scene where a particular character or object appears.
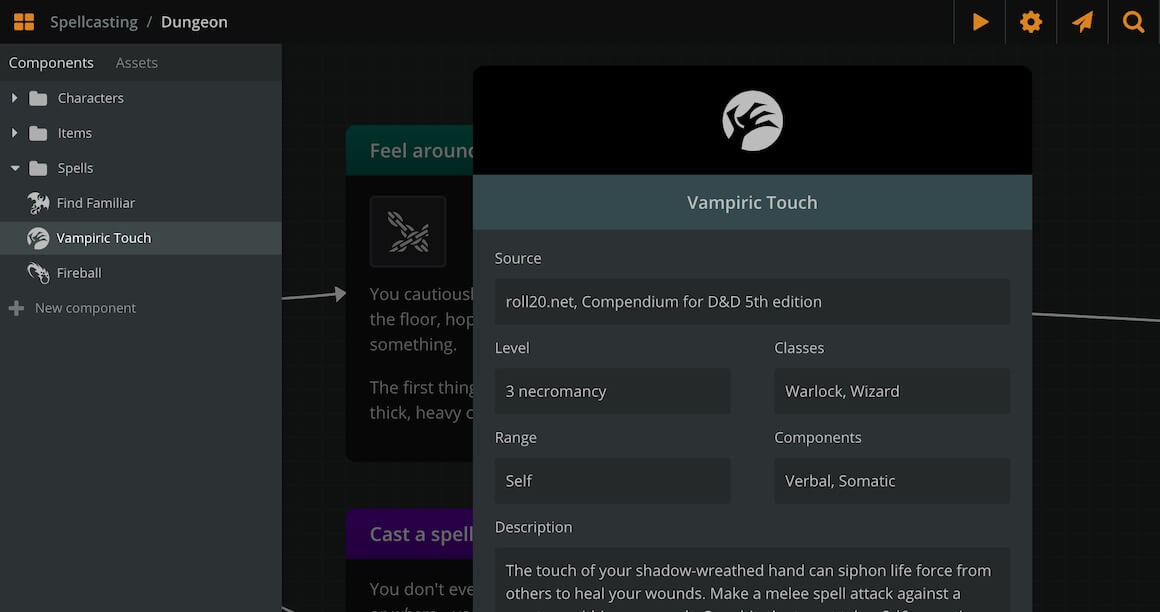
## Create components
Context: Arcweave docs > Tutorials > Basic Arcweave > Basic Arcweave tutorial | Part 5: Components & icons > Create components
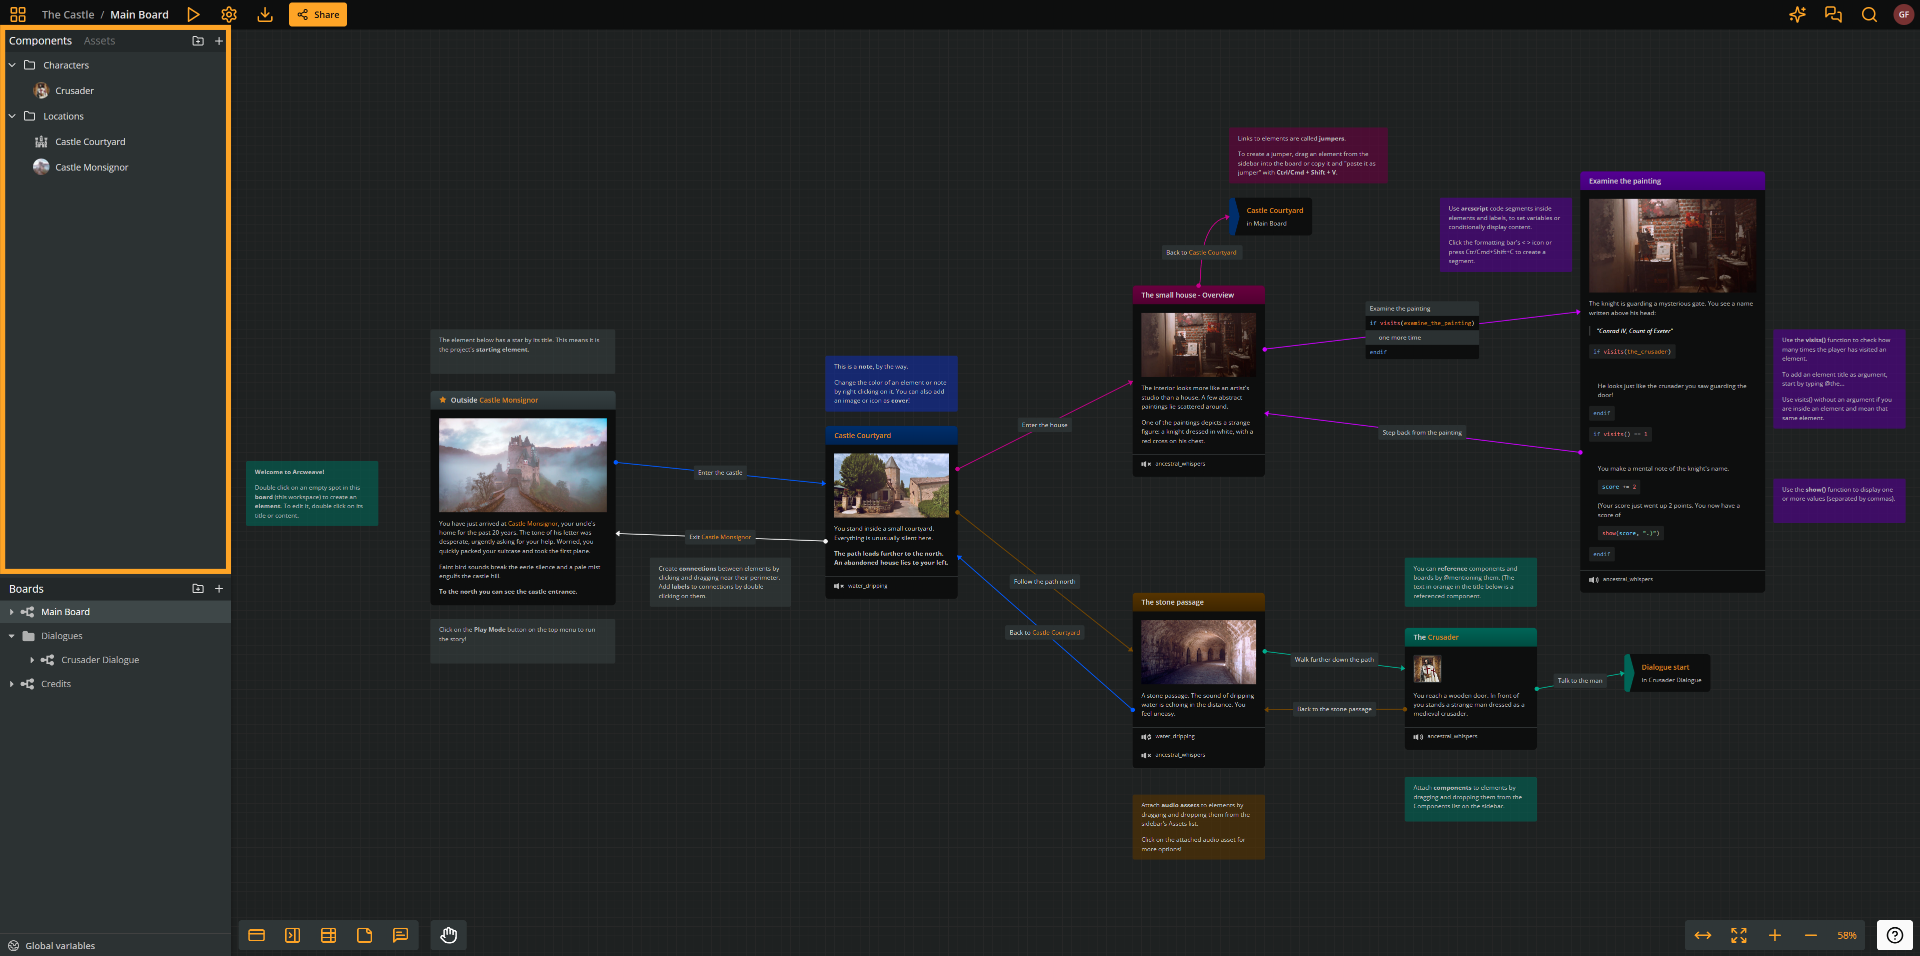
1. Go to the **Components** section in the sidebar.
2. Click **Create component** (the person icon with a **+** sign in the section header).
3. Click on the default title and replace it with your component's name (e.g. _Jillian Linetti)._
## Attributes
Context: Arcweave docs > Tutorials > Basic Arcweave > Basic Arcweave tutorial | Part 5: Components & icons > Attributes
In Arcweave, **attributes** are fields that let you store extra information inside [boards](https://docs.arcweave.com/project-items/boards), [components](https://docs.arcweave.com/project-items/components), and [elements](https://docs.arcweave.com/project-items/elements). See [Attributes](https://docs.arcweave.com/project-items/attributes) for more information.
All three item types support the following attributes:
- String Field
- Rich Text Field
- Component List
- Asset List
Boards and components additionally support **Boolean**, **Integer**, and **Float** attributes. On boards and components, these types and String Field appear in the **Variables** group and act as [scoped variables](https://docs.arcweave.com/project-items/variables/overview#variable-scope). Elements support only the four shared attribute types listed above.
### Add attributes
Context: Arcweave docs > Tutorials > Basic Arcweave > Basic Arcweave tutorial | Part 5: Components & icons > Attributes > Add attributes
You can enrich a component with as many custom attributes as you need.
1. In the component dialog, click **Add attribute**.
2. Select the type of attribute (see above).
3. Type the attribute name (e.g. _Dramatic function_ or _Backstory,_ etc.) and press **Tab**.
4. Enter the content for that attribute.
### Reorder and resize attributes
Context: Arcweave docs > Tutorials > Basic Arcweave > Basic Arcweave tutorial | Part 5: Components & icons > Attributes > Reorder and resize attributes
- To **reorder** attributes, drag them by the grip (dots) icon at their top left into the position you want.
- To **resize** an attribute between full and half width, open its three-dot menu (**•••**) and select **Resize**.
## Set component covers
Context: Arcweave docs > Tutorials > Basic Arcweave > Basic Arcweave tutorial | Part 5: Components & icons > Set component covers
To make a component more visually distinctive, you can use Arcweave's built-in icon library and pick an icon to set as **component cover**:
1. Hover over the component's icon area and click **Change cover**.
2. Choose the **Icon Library** tab.
3. Browse the icon library and select an icon to set as cover.
For example, searching _head_ returns a wide selection of face icons.
The new icon will appear both on the component card and in the sidebar.
> ℹ️ Besides **Icon Library**, you can also select **My Assets** (your own uploaded images) or **Generate** (use Arcweave's [AI Image Generator](https://docs.arcweave.com/project-tools/ai-features/image-generator) to generate an image cover.)
## Duplicate components
Context: Arcweave docs > Tutorials > Basic Arcweave > Basic Arcweave tutorial | Part 5: Components & icons > Duplicate components
If you need to create a similar component quickly, you can duplicate an existing one instead of starting from scratch.
1. Right-click the component in the sidebar.
2. Select **Duplicate**.
3. Open the duplicate and update its name and content as needed.
> ℹ️ To duplicate board elements, copy and paste them (**Ctrl/Cmd + C**, then **Ctrl/Cmd + V**).
## Attach components to components
Context: Arcweave docs > Tutorials > Basic Arcweave > Basic Arcweave tutorial | Part 5: Components & icons > Attach components to components
Components can contain references to other components. This is useful for modelling relationships (e.g. family members) or inventories (e.g. items a character carries).
### Link characters to each other
Context: Arcweave docs > Tutorials > Basic Arcweave > Basic Arcweave tutorial | Part 5: Components & icons > Attach components to components > Link characters to each other
1. Open a character component (e.g. _Horace Linetti)._
2. Click **Add attribute**, choose **Component List**, and give it a name (e.g. _Family_).
3. Drag another component (e.g. _Jillian Linetti)_ into the list.
4. Click the attached component to open it directly from within the parent.
### Create a character inventory
Context: Arcweave docs > Tutorials > Basic Arcweave > Basic Arcweave tutorial | Part 5: Components & icons > Attach components to components > Create a character inventory
1. First, create the item components you need (e.g. _Dice, Top hat, Gold watch)._
2. Open the character component you want to assign items to.
3. Click **Add attribute**, choose **Component List**, and name it _Inventory._
4. Drag the item components into the list.
5. Reorder items within the list by dragging them.
## Organize components with folders
Context: Arcweave docs > Tutorials > Basic Arcweave > Basic Arcweave tutorial | Part 5: Components & icons > Organize components with folders
As your project grows, you can keep the sidebar tidy by grouping components into folders.
1. In the **Components** section header, click **Create folder** (the folder icon with a **+** sign). Alternatively, hover over a component or folder, click its **+** icon, and choose **Create folder**.
2. Name the folder (e.g. _Characters)._
3. Drag components into the folder.
4. Repeat to create additional folders (e.g. _Items_).
You can also create **subfolders** by adding a folder inside an existing one.
## Attach components to elements
Context: Arcweave docs > Tutorials > Basic Arcweave > Basic Arcweave tutorial | Part 5: Components & icons > Attach components to elements
Attaching components to elements lets you see at a glance which characters, items, or locations are involved in a given scene.
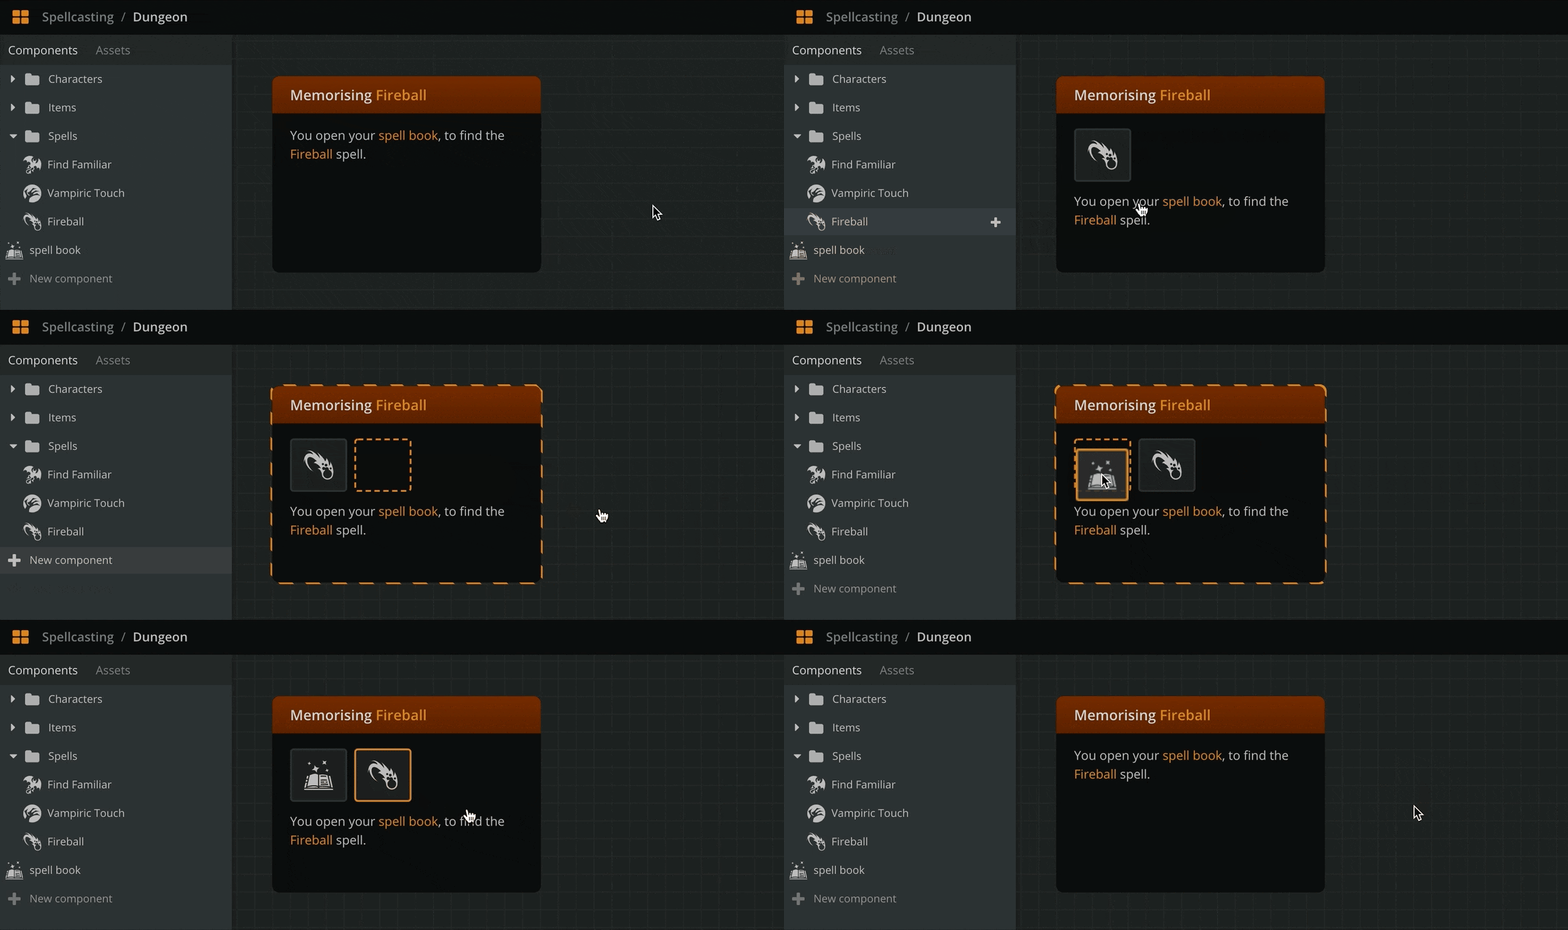
1. From the sidebar, drag a component directly onto an element on the board.
2. Repeat for any other components relevant to that scene.
Once attached, components appear visually on the element. If the element's layout looks off, adjust it:
1. Select the element.
2. Adjust its size. Either:
- Drag its sides or corners to manually adjust the element's height and width.
- Double-click the element's orange bounding rectangle. Arcweave will automatically resize the element to fit its content at the chosen width.
## (Re)move attached components
Context: Arcweave docs > Tutorials > Basic Arcweave > Basic Arcweave tutorial | Part 5: Components & icons > (Re)move attached components
- To **remove** a component from an element, drag it out of the element onto an empty area of the board.
- To **move** a component, drag it from one element to another.
- You can attach the **same component multiple times** to the same element if needed.
## Create elements from components
Context: Arcweave docs > Tutorials > Basic Arcweave > Basic Arcweave tutorial | Part 5: Components & icons > Create elements from components
You can quickly scaffold a new element around a component directly from the sidebar:
1. Drag a component from the sidebar onto an empty area of the board.
Arcweave creates a new element with the component's name as the title and the component attached automatically. This is a fast way to start building a scene around a specific character or object.
## What's next
Context: Arcweave docs > Tutorials > Basic Arcweave > Basic Arcweave tutorial | Part 5: Components & icons > What's next
After learning all there is about components, the next tutorial will teach you how to mention both components and boards in your project and why this is useful.
# Basic Arcweave tutorial | Part 6: Mentions
Source: https://docs.arcweave.com/tutorials/basic/pt-6
Section: Tutorials > Basic Arcweave
Description: Text & video tutorial on Arcweave components and board mentions
Mention components and boards to easily access them and keep them up to date with any changes of name.
> ℹ️ This tutorial does not refer to [mentioning users in comments](https://docs.arcweave.com/project-items/comments#user-mentions).
## Video tutorial
Context: Arcweave docs > Tutorials > Basic Arcweave > Basic Arcweave tutorial | Part 6: Mentions > Video tutorial
Watch this tutorial as a video:
Video: https://www.youtube.com/watch?v=BgLwvMyyDw8
> ⚠️ This video does not reflect the latest updates to Arcweave's UI.
> ✅ You can play the finished version of the Tutorial Project [here](https://arcweave.com/app/project/Qz0PXOZ0Ya/play) and explore its diagrams and structure [here](https://arcweave.com/app/project/Qz0PXOZ0Ya).
## Why mentions
Context: Arcweave docs > Tutorials > Basic Arcweave > Basic Arcweave tutorial | Part 6: Mentions > Why mentions
As a project grows, it can become increasingly difficult to keep track of all its parts. You may have boards for outlines, scenes, and dialogue trees, as well as components for characters, locations, items, and scenery. Navigating to a specific element or updating something (like a character's name) across the entire project can quickly turn into a manual and error-prone process.
Arcweave's [mentions](https://docs.arcweave.com/project-tools/mentions) feature solves this by creating a live, organic connection between the parts of your project. When you mention a component or a board in your text, that reference stays in sync automatically: rename the component or board and every mention updates with it.
## Search
Context: Arcweave docs > Tutorials > Basic Arcweave > Basic Arcweave tutorial | Part 6: Mentions > Search
Before diving into mentions, it's worth remembering that Arcweave has a built-in search tool.
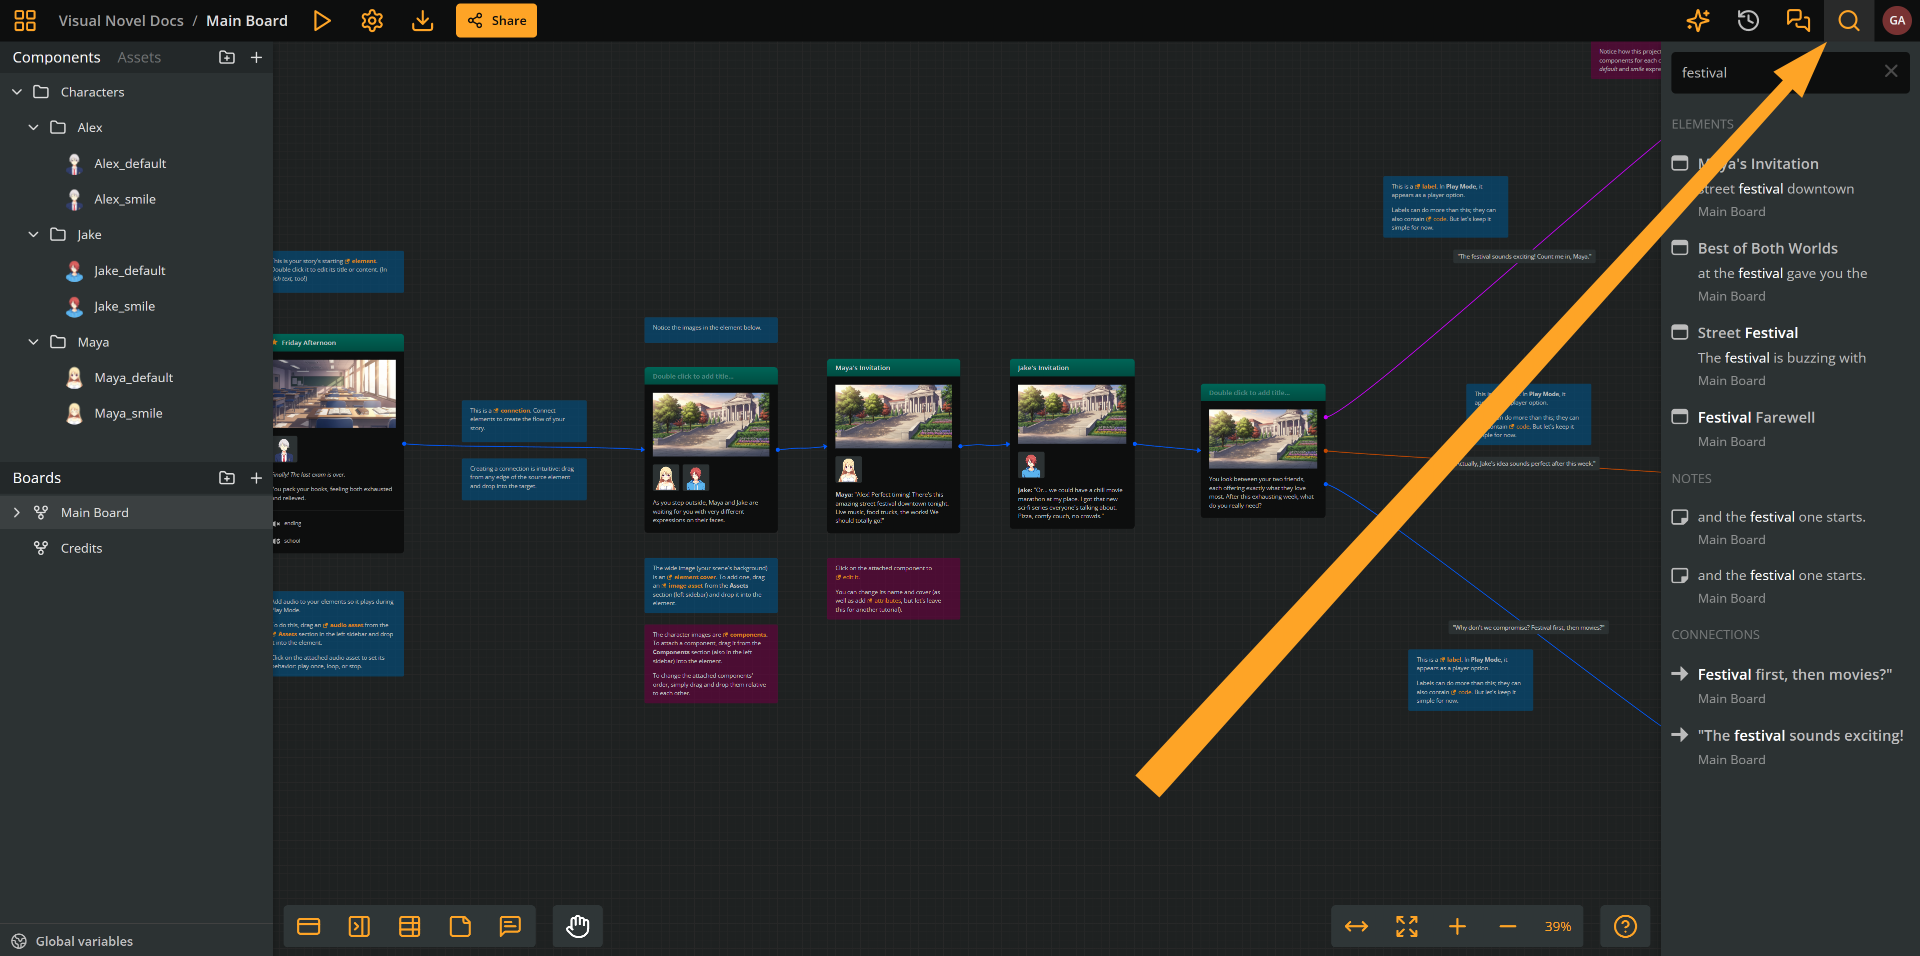
To search your project for any text occurrence:
1. Click **Search project** (the magnifying glass icon at the top right of your screen).
2. Type any word or phrase in the search field. Arcweave will list every item that contains it.
3. Click a search result to locate the respective item.
Search is useful for finding anything, including components by name, but it doesn't allow renaming.
For that, mentions are the appropriate tool.
## Mention components
Context: Arcweave docs > Tutorials > Basic Arcweave > Basic Arcweave tutorial | Part 6: Mentions > Mention components
### What they are
Context: Arcweave docs > Tutorials > Basic Arcweave > Basic Arcweave tutorial | Part 6: Mentions > Mention components > What they are
Mentioning a component links its name in your text with the component itself. In the rich text, names of mentioned components appear in **orange text**.

### What they do
Context: Arcweave docs > Tutorials > Basic Arcweave > Basic Arcweave tutorial | Part 6: Mentions > Mention components > What they do
Mentions:
- Act as **clickable links** to the component.
- Automatically reflect any name changes.
### Where they appear
Context: Arcweave docs > Tutorials > Basic Arcweave > Basic Arcweave tutorial | Part 6: Mentions > Mention components > Where they appear
You can insert mentions by typing in any field of rich text:
- Title or content of [elements](https://docs.arcweave.com/project-items/elements)
- [Notes](https://docs.arcweave.com/project-items/notes)
- Rich text [attributes](https://docs.arcweave.com/project-items/attributes)
- Connection [labels](https://docs.arcweave.com/project-items/labels)
> ℹ️ Mentions are not visually styled in Play Mode; they appear as regular text.
### Add mentions
Context: Arcweave docs > Tutorials > Basic Arcweave > Basic Arcweave tutorial | Part 6: Mentions > Mention components > Add mentions
To insert a component mention:
1. Open a field of rich text (element title or content, label, or note).
2. Place your cursor where you want the mention to appear.
3. Type the `@` character. A dropdown list of your project's components appears.
4. Start typing the component's name and select it from the list.

The mention is now embedded in your text. It renders as a highlighted, clickable link. Clicking it opens the referenced component directly.
### Rename mentioned component
Context: Arcweave docs > Tutorials > Basic Arcweave > Basic Arcweave tutorial | Part 6: Mentions > Mention components > Rename mentioned component
When you rename a component, every mention of it across the project updates its displayed text to match the new name. No need to manually find and replace.
To test this:
1. Open the component you have mentioned.
2. Edit the component's name.
3. Return to any rich text field that mentions it. The mention text reflects the new name immediately.
> ⚠️ Automatic updates only apply to text that uses mentions. Any occurrence where you typed the name manually will not update. Make sure to use mentions wherever you want changes to propagate.
## Mention boards
Context: Arcweave docs > Tutorials > Basic Arcweave > Basic Arcweave tutorial | Part 6: Mentions > Mention boards
Besides components, you can **also mention boards** in any rich text field of your project. This is useful for cross-referencing different areas of your project.
The process is identical to mentioning a component:
1. Place your cursor in a rich text field.
2. Type `@` and begin typing the board's name.
3. Select the board from the dropdown.
Just like component mentions, board mentions stay in sync: if you rename the board, the mention text updates everywhere it appears.
## What's next
Context: Arcweave docs > Tutorials > Basic Arcweave > Basic Arcweave tutorial | Part 6: Mentions > What's next
Using mentions is especially valuable when collaborating with a team. If one person renames a character or restructures a board, every reference in the project updates automatically. Nothing gets left behind and the whole project stays in sync.
The next tutorial will introduce Arcweave notes and suggest how they can help with your project collaboration and management.
# Basic Arcweave tutorial | Part 7: Notes
Source: https://docs.arcweave.com/tutorials/basic/pt-7
Section: Tutorials > Basic Arcweave
Description: Text & video tutorial on using Arcweave notes
Learn how [notes](https://docs.arcweave.com/project-items/notes) work in Arcweave.
Notes are a dedicated entity in Arcweave designed for communication between writers, designers, and developers. They are not for the players to experience.
While elements are the building blocks of your narrative, notes serve as the sticky pieces of paper in your project: a place to leave comments for collaborators, reminders for yourself, explanations of complex story logic, dialogue subtext, or the reasoning behind a particular design decision.
## Video tutorial
Context: Arcweave docs > Tutorials > Basic Arcweave > Basic Arcweave tutorial | Part 7: Notes > Video tutorial
Watch this tutorial as a video:
Video: https://www.youtube.com/watch?v=I1lopewUx84
> ⚠️ This video does not reflect the latest updates to Arcweave's UI.
> ✅ You can play the finished version of the Tutorial Project [here](https://arcweave.com/app/project/Qz0PXOZ0Ya/play) and explore its diagrams and structure [here](https://arcweave.com/app/project/Qz0PXOZ0Ya).
## Notes vs. elements
Context: Arcweave docs > Tutorials > Basic Arcweave > Basic Arcweave tutorial | Part 7: Notes > Notes vs. elements
Before creating a note, it's worth understanding what sets notes apart from elements. Unlike elements:
- Notes cannot have connections to other board items.
- They cannot have attachments like components or assets.
- They cannot contain code.
This is by design. Notes do not participate in the narrative tree; they exist purely as a communication tool for the people building the project.
## Create notes
Context: Arcweave docs > Tutorials > Basic Arcweave > Basic Arcweave tutorial | Part 7: Notes > Create notes
There are two ways to create a note on the board:
- Right-click an empty area of the board and select **Create > Note** from the context menu.
- Click and drag the **Drag new note** icon from the bottom menu onto the board.
Having created the note, double-click its body to edit its content.
## Change note colors
Context: Arcweave docs > Tutorials > Basic Arcweave > Basic Arcweave tutorial | Part 7: Notes > Change note colors
Notes support color customization, making it easy to visually organize them by type or topic.
For example, you can use one note color for story logic and another for technical reminders.
To change a note's color, right-click the note and select a color from the color picker in the context menu.
## Format notes text
Context: Arcweave docs > Tutorials > Basic Arcweave > Basic Arcweave tutorial | Part 7: Notes > Format notes text
Notes support **rich text formatting**, just like elements.
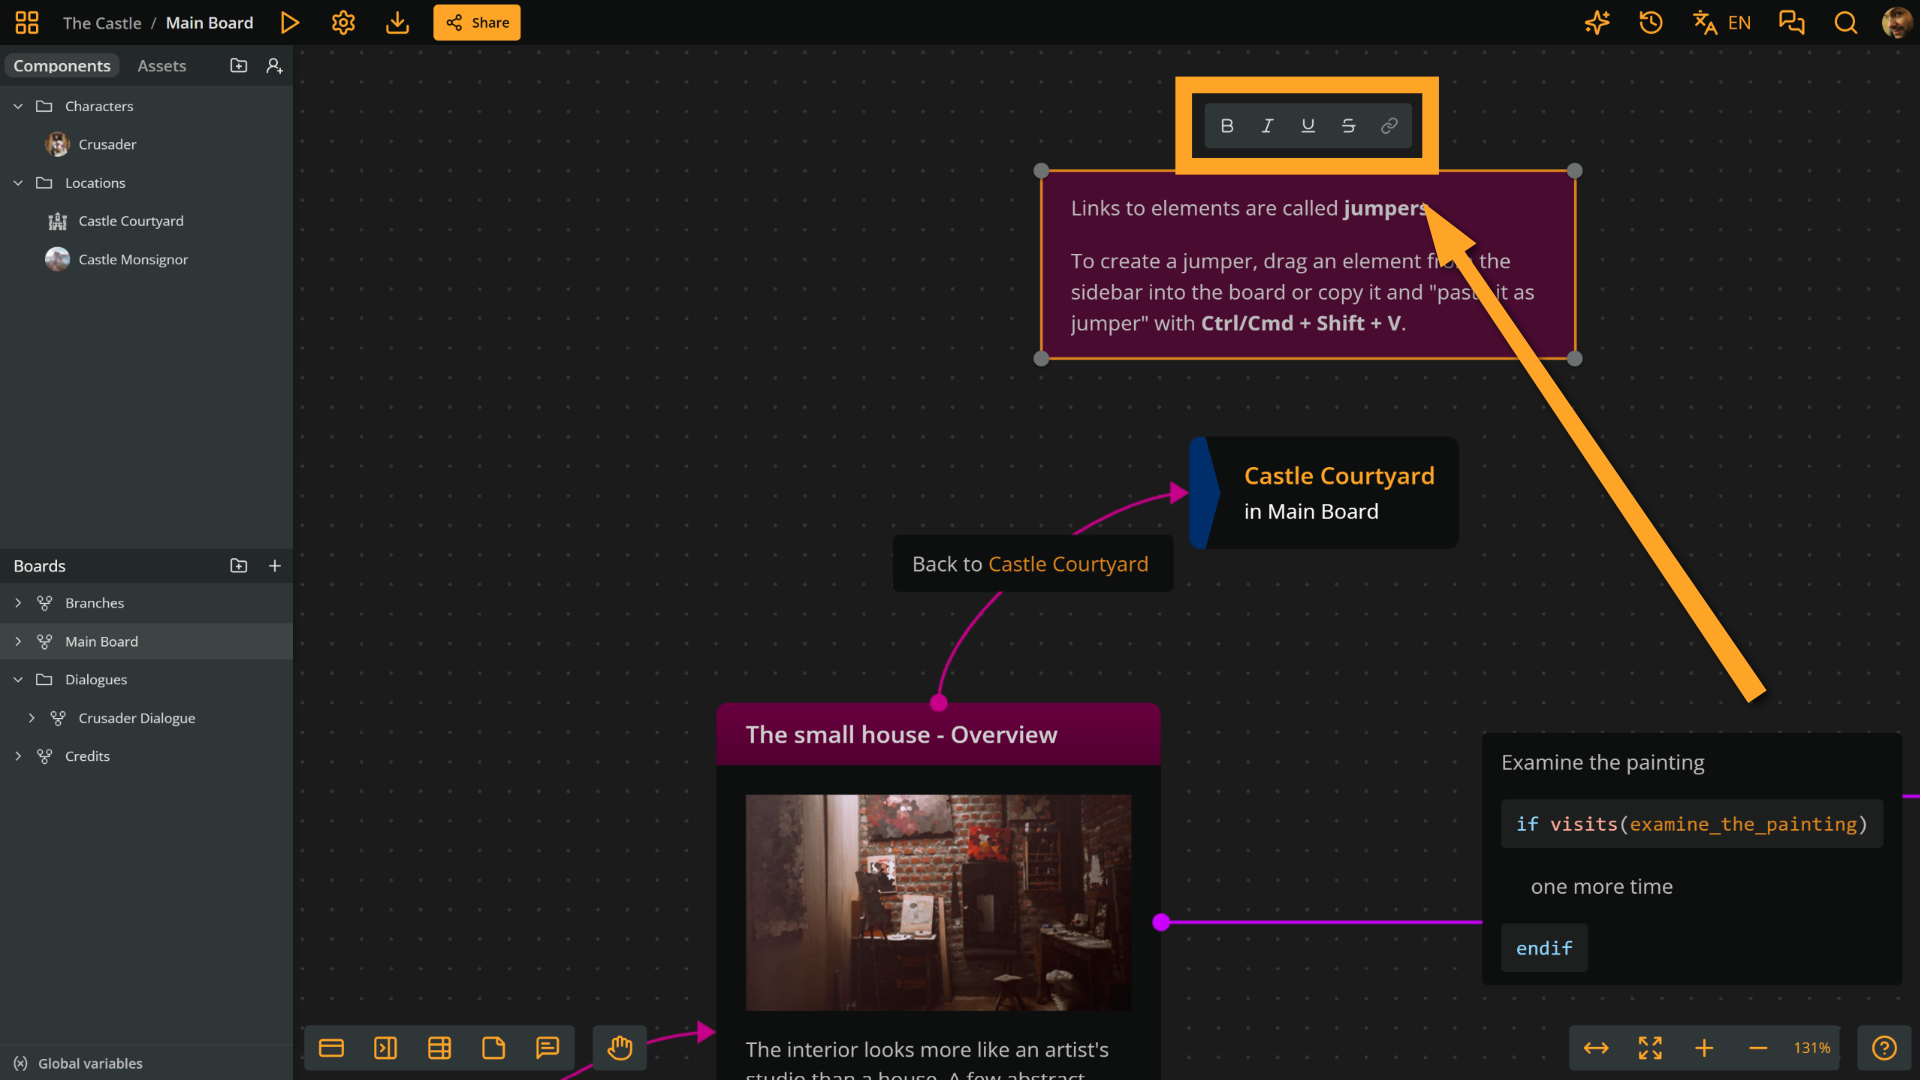
While editing a note, use the formatting menu to apply:
- Bold, italic, and underline formatting: Emphasize your text as you want.
- Links: Add URLs to web pages and attach references, research, or resources directly to notes for easy access.
- Mentions of components and boards (see [previous part](https://docs.arcweave.com/tutorials/basic/pt-6) of this tutorial): Cross-reference parts of your project directly from a note.
## What's next
Context: Arcweave docs > Tutorials > Basic Arcweave > Basic Arcweave tutorial | Part 7: Notes > What's next
Now that you know how to work with notes, the next tutorial covers how you can add and use images in your Arcweave project.
# Basic Arcweave tutorial | Part 8: Image assets
Source: https://docs.arcweave.com/tutorials/basic/pt-8
Section: Tutorials > Basic Arcweave
Description: Text & video tutorial on using images as assets in Arcweave projects
Learn how to upload and use [image assets](https://docs.arcweave.com/project-items/assets/images) in Arcweave. [Assets](https://docs.arcweave.com/project-items/assets/overview) are the media files you upload to use in your project.
> ℹ️ This tutorial page and the video tutorial below do not refer to video and audio assets. For audio assets, see [this tutorial page](https://docs.arcweave.com/tutorials/basic/pt-21).
> For video assets, refer to [their documentation](https://docs.arcweave.com/project-items/assets/video).
## Video tutorial
Context: Arcweave docs > Tutorials > Basic Arcweave > Basic Arcweave tutorial | Part 8: Image assets > Video tutorial
Watch this tutorial as a video:
> ℹ️ This older video does not include the more recent features of [audio](https://docs.arcweave.com/project-items/assets/audio) and [video assets](https://docs.arcweave.com/project-items/assets/video).
Video: https://www.youtube.com/watch?v=zBki8mSDtWY
> ⚠️ This video does not reflect the latest updates to Arcweave's UI.
> ✅ You can play the finished version of the Tutorial Project [here](https://arcweave.com/app/project/Qz0PXOZ0Ya/play) and explore its diagrams and structure [here](https://arcweave.com/app/project/Qz0PXOZ0Ya).
## Why assets
Context: Arcweave docs > Tutorials > Basic Arcweave > Basic Arcweave tutorial | Part 8: Image assets > Why assets
While the icon library is great for abstract or symbolic imagery, image assets let you bring your own pictures into Arcweave (photographs, illustrations, concept art, and more) and apply them as covers on elements and components.
## Assets section
Context: Arcweave docs > Tutorials > Basic Arcweave > Basic Arcweave tutorial | Part 8: Image assets > Assets section
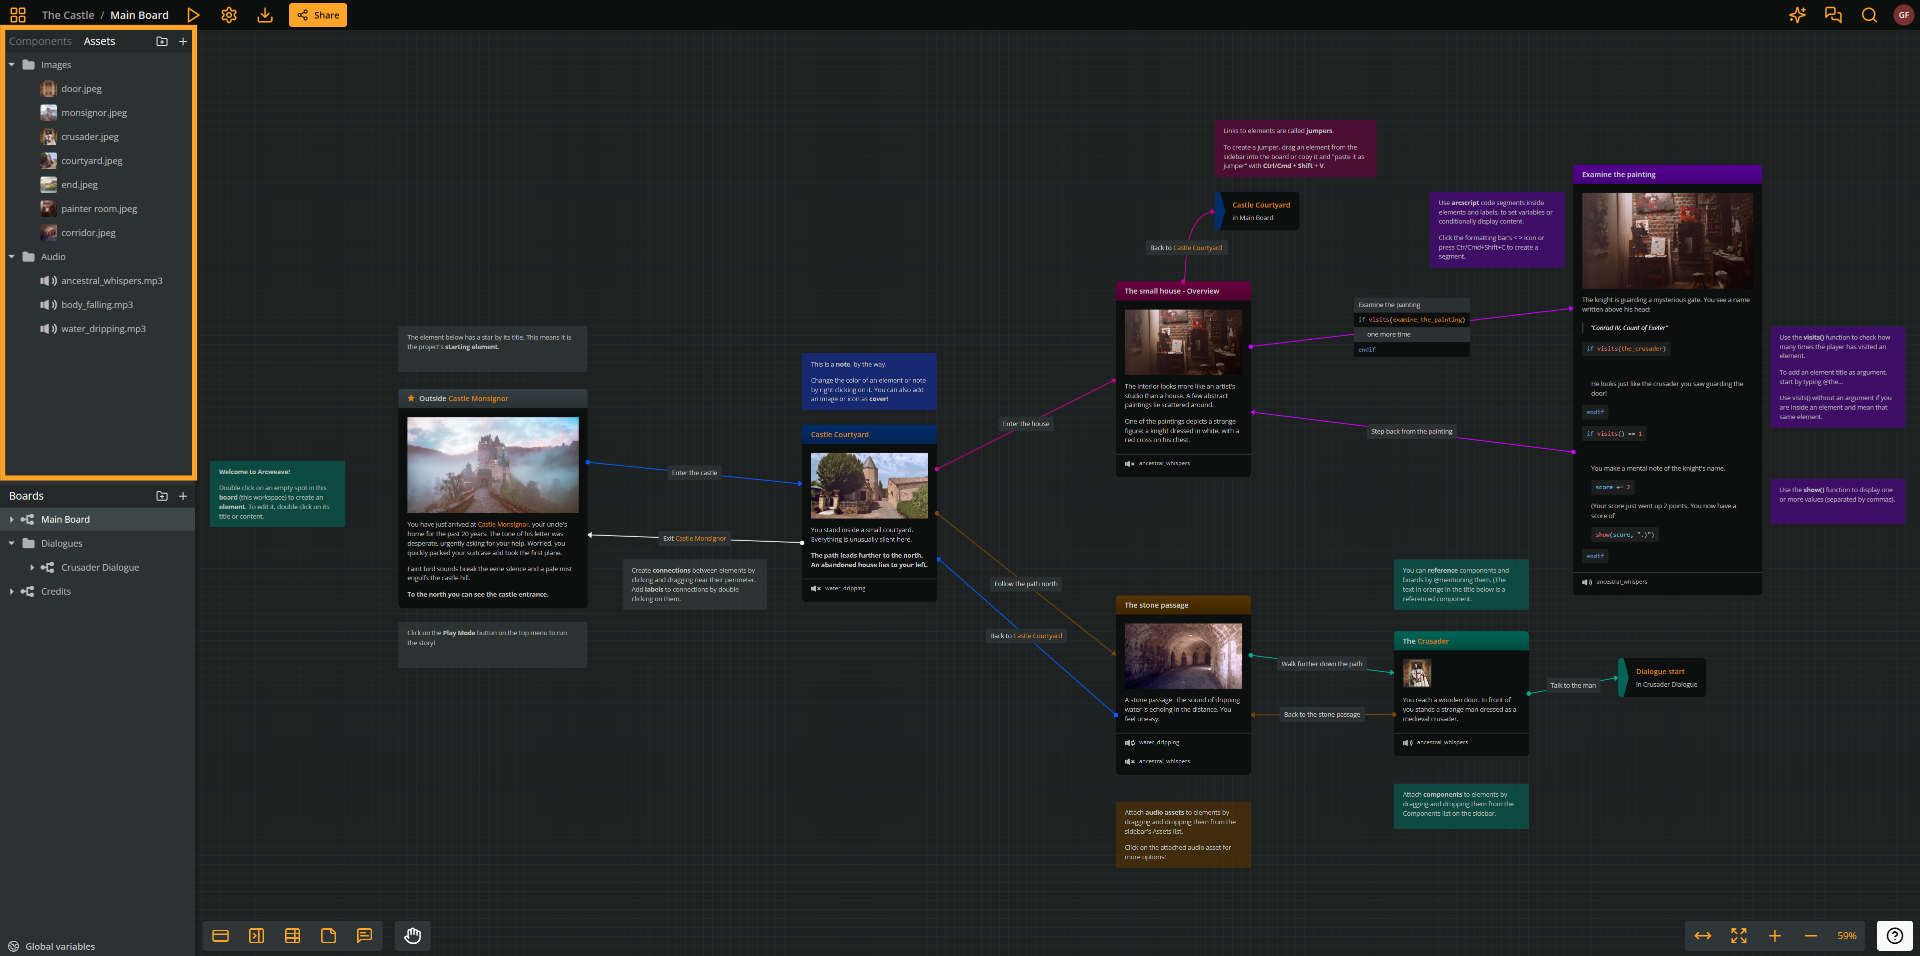
You can find your project's assets in the sidebar under **Assets**.
## Supported file types
Context: Arcweave docs > Tutorials > Basic Arcweave > Basic Arcweave tutorial | Part 8: Image assets > Supported file types
Arcweave supports the following image file types, which you can use as assets:
- `.jpg` / `.jpeg`
- `.png`
- `.gif`
- `.webp`
> ℹ️ `.gif` files animate in Play Mode only. In the board view, they appear as static images.
> ℹ️ Uploaded images can be up to **8192 x 8192 pixels**.
## Upload assets
Context: Arcweave docs > Tutorials > Basic Arcweave > Basic Arcweave tutorial | Part 8: Image assets > Upload assets
There are two easy ways to upload assets to your project.
### Use context menu
Context: Arcweave docs > Tutorials > Basic Arcweave > Basic Arcweave tutorial | Part 8: Image assets > Upload assets > Use context menu
The first way to upload one or more assets is by clicking the **Create asset** button found in the Assets section of your project.
1. In the sidebar, click the **Assets** tab.
2. Click **Create asset** (the **+** icon).
3. Click **Upload assets...** from the context menu.
4. Choose an image file from your computer.
The uploaded file will appear in your project's Assets section immediately after the upload completes.
### Drag and drop
Context: Arcweave docs > Tutorials > Basic Arcweave > Basic Arcweave tutorial | Part 8: Image assets > Upload assets > Drag and drop
The second, even easier way is to drag one or more images and drop them directly into the Arcweave browser tab.
- **Drop them anywhere**: The asset will be saved in the root of the Assets section.
- **Drop them into a specific asset folder**: The asset will be saved in that folder within the Assets section.
## Organize assets
Context: Arcweave docs > Tutorials > Basic Arcweave > Basic Arcweave tutorial | Part 8: Image assets > Organize assets
### Create asset folders
Context: Arcweave docs > Tutorials > Basic Arcweave > Basic Arcweave tutorial | Part 8: Image assets > Organize assets > Create asset folders
Just as with components, you can create folders (and subfolders) to keep your assets organized.
1. Click the **+** icon next to any asset or asset folder
2. Select **Create folder** from the menu that appears.
3. Give the folder a name (e.g., _Characters_ or _Locations)._
Repeat this process to create as many folders as you need.
> ✅ Nest subfolders inside other folders to build a deeper organizational structure.
### Move assets
Context: Arcweave docs > Tutorials > Basic Arcweave > Basic Arcweave tutorial | Part 8: Image assets > Organize assets > Move assets
To move an existing asset into a folder or a different position in the order, use drag and drop.
> ℹ️ You cannot select multiple assets for moving.
### Upload assets into folders
Context: Arcweave docs > Tutorials > Basic Arcweave > Basic Arcweave tutorial | Part 8: Image assets > Organize assets > Upload assets into folders
To save time, you can upload new assets straight into a specific folder instead of dragging them later.
1. Hover over the target folder row in the Assets panel.
2. Click the **+** icon that appears next to the folder name.
3. Select **Upload assets...** and choose your file.
The file will land directly inside that folder.
## Rename an asset
Context: Arcweave docs > Tutorials > Basic Arcweave > Basic Arcweave tutorial | Part 8: Image assets > Rename an asset
1. Right-click on the asset you want to rename.
2. Select **Rename** from the context menu.
3. Type the new name and confirm.
> **Note:** Renaming an asset does not affect the original file's extension. Only the display name changes.
## Set assets as element covers
Context: Arcweave docs > Tutorials > Basic Arcweave > Basic Arcweave tutorial | Part 8: Image assets > Set assets as element covers
You can assign an image asset as the cover image of an element on your board. There are two ways to do this.
### Use context menu
Context: Arcweave docs > Tutorials > Basic Arcweave > Basic Arcweave tutorial | Part 8: Image assets > Set assets as element covers > Use context menu
First, you can set an asset as element cover using the **Set cover** menu option:
1. Right-click on the element.
2. Select **Cover > Set cover**.
3. In the dialog that opens, go to the **My Assets** tab.
4. Browse to the image you want and click it to apply.
The image will appear as the element's cover. If the text is pushed down, resize the element's height to suit your layout.
### Drag and drop
Context: Arcweave docs > Tutorials > Basic Arcweave > Basic Arcweave tutorial | Part 8: Image assets > Set assets as element covers > Drag and drop
The second way to set an image asset as element cover is to drag the image directly from the Assets section and drop onto the element.
## Replace element covers
Context: Arcweave docs > Tutorials > Basic Arcweave > Basic Arcweave tutorial | Part 8: Image assets > Replace element covers
If you change your mind about an element's cover, just reset its cover using either of the two ways described above.
## Remove element covers
Context: Arcweave docs > Tutorials > Basic Arcweave > Basic Arcweave tutorial | Part 8: Image assets > Remove element covers
To remove a cover entirely, right-click the element and select **Cover > Remove cover**.
## Component covers
Context: Arcweave docs > Tutorials > Basic Arcweave > Basic Arcweave tutorial | Part 8: Image assets > Component covers
Image assets can also be used as component covers.
### Change component covers
Context: Arcweave docs > Tutorials > Basic Arcweave > Basic Arcweave tutorial | Part 8: Image assets > Component covers > Change component covers
Not sure if you've noticed, but components always come with a cover. Upon their creation, their default cover is the generic icon of a person.
This is why there is no **Set cover** option for components; only **Change cover**. To assign an image asset as component cover:
1. In the **Components** section, click on any component to open it.
2. Hover your mouse over the current cover (be it an icon or another asset) and click the orange button that appears, saying **Change cover**.
3. On the appearing panel, go to the **My Assets** tab, navigate to the correct folder, and select the image you want to use.
The updated cover will be reflected everywhere that component appears across the project.
## Replace assets
Context: Arcweave docs > Tutorials > Basic Arcweave > Basic Arcweave tutorial | Part 8: Image assets > Replace assets
Sometimes you need to swap out an image that is already in use. For example, to replace a placeholder sketch with the final artwork.
Arcweave lets you replace an asset globally in a project, updating all its occurrences in a single action.
1. In the **Assets** section, right-click on the asset you want to replace.
2. Select **Replace asset...**.
3. Choose the new image file.
The new image will immediately replace the old one everywhere it was used in the project.
## What's next
Context: Arcweave docs > Tutorials > Basic Arcweave > Basic Arcweave tutorial | Part 8: Image assets > What's next
In this tutorial you learned how to upload and organize assets in folders and apply them as element or component covers.
The next tutorial will teach you all there is to know about **jumpers**, which you will use to jump from one element to another within your project.
# Basic Arcweave tutorial | Part 9: Jumpers
Source: https://docs.arcweave.com/tutorials/basic/pt-9
Section: Tutorials > Basic Arcweave
Description: Text & video tutorial on using jumpers in Arcweave projects
Learn how to use [jumpers](https://docs.arcweave.com/project-items/jumpers) to connect board items that are far apart or in different [boards](https://docs.arcweave.com/project-items/boards).
Jumpers are a powerful tool that let you move from one element to another across different boards, without using arrow connections.
This tutorial shows you how to use jumpers to break a long story into manageable segments, each living on its own board.
## Video tutorial
Context: Arcweave docs > Tutorials > Basic Arcweave > Basic Arcweave tutorial | Part 9: Jumpers > Video tutorial
Watch this tutorial as a video:
Video: https://www.youtube.com/watch?v=gqOoSzDFrrg
> ⚠️ This video does not reflect the latest updates to Arcweave's UI.
> ✅ You can play the finished version of the Tutorial Project [here](https://arcweave.com/app/project/Qz0PXOZ0Ya/play) and explore its diagrams and structure [here](https://arcweave.com/app/project/Qz0PXOZ0Ya).
## Diagram types
Context: Arcweave docs > Tutorials > Basic Arcweave > Basic Arcweave tutorial | Part 9: Jumpers > Diagram types
Before adding jumpers, it helps to understand the two kinds of diagrams we'll work with in this tutorial.
**Event-based**: Used on boards like the _Beginning_ board (the board with your story's opening events, such as the one you built in [Part 2](https://docs.arcweave.com/tutorials/basic/pt-2); rename it _Beginning_ if you haven't already). The narrative starts on the left, progresses right, branches out, and reaches an ending. **Each element describes an event** and the story moves forward: as a rule, there are no arrows leading back to earlier elements.
**Location-based**: Used in the Apartment board (which we'll create right after), where the diagram represents a physical space, like an apartment. **Each element describes a room** or other **location** and the player can move back and forth between the room-elements. Because the player can move between rooms, connections generally go in both directions.
## The apartment board
Context: Arcweave docs > Tutorials > Basic Arcweave > Basic Arcweave tutorial | Part 9: Jumpers > The apartment board
So let's create our location-based diagram that represents the game's world: the apartment that you explore.
1. Create a new board and name it _Apartment._
2. Add one element per room: _Living room, Kitchen,_ and _Bathroom._
3. Give all room-elements the same color so they are visually grouped.
4. Assign a cover image to each element using the relevant assets from the asset panel.
5. Connect the rooms:
1. From the _Living room,_ draw connections to the Kitchen and to the Bathroom.
2. Draw return connections from the _Kitchen_ back to the _Living room_, and from the _Bathroom_ back to the _Living room_.
6. Add labels to each connection: _Go to kitchen_, _Go to bathroom_, _Back to living room_, etc.
7. Set _Living room_ as the starting element and run a quick test to confirm navigation works correctly.
> ⚠️ In a location-based diagram, always add **return connections**. Without them, the player reaches a room and gets stuck with no way to navigate back.
## Connect the boards
Context: Arcweave docs > Tutorials > Basic Arcweave > Basic Arcweave tutorial | Part 9: Jumpers > Connect the boards
Now connect the Beginning board to the Apartment board using a jumper.
1. Go to the _Beginning_ board.
2. Select the element where the player arrives at the apartment (for example, _Horace opens the door_) and polish it: add a cover image and a few lines of content.
3. Right-click on an empty area of the board and choose **Create > Jumper**, or drag a new jumper from the jumper icon (**Drag new jumper**) in the bottom menu.
4. Assign the _Living room_ element as the jumper's target element. You can do this in any of the following ways:
- Use **Search**: look up "living room" and, from the search results, drag the element with title _Living room_ and drop it into the empty jumper.
- From _Boards_ section: from the sidebar, find and expand the _Apartment_ board. Do not click the board itself, just click the expand arrow next to it. Then, find the _Living room_ element in the element list and drag it into the jumper.
5. Draw a connection from the apartment-arrival element to the jumper. Add a label such as _Look around_.
6. Set the first element of the _Beginning_ board as the starting element (**Play Mode > Set Play Mode start**) and run the story to confirm the jump works end-to-end.
> ✅ You don't need to first create an empty jumper: drag an element directly from the sidebar or the **Search** field onto an empty area of the board; Arcweave automatically creates a jumper pointing to that element.
> ✅ Another handy way to assign a target element to a jumper is to copy the desired element (right-click and **Copy**, or **Ctrl/Cmd + C**) and then use [Paste as jumper](https://docs.arcweave.com/project-items/jumpers#assign-jumper-targets) on an empty jumper or anywhere on the board.
## Jump to endings
Context: Arcweave docs > Tutorials > Basic Arcweave > Basic Arcweave tutorial | Part 9: Jumpers > Jump to endings
Jumpers are also useful for routing multiple story paths to a small set of shared destinations, such as all your game's endings.
### Endings board
Context: Arcweave docs > Tutorials > Basic Arcweave > Basic Arcweave tutorial | Part 9: Jumpers > Jump to endings > Endings board
You can keep all the endings of your story in one board:
1. Create a new board and name it _Endings_.
2. Add an element for each ending you need, for example:
- _Failure to enter the apartment_ (color: red)
- _Success!_ (color: green)
- _Defeated by the demon_ (color: red), etc.
### Connect to an ending
Context: Arcweave docs > Tutorials > Basic Arcweave > Basic Arcweave tutorial | Part 9: Jumpers > Jump to endings > Connect to an ending
Using one of the methods described in [Connect the boards](https://docs.arcweave.com/tutorials/basic/pt-9#connect-the-boards), above, create a jumper to the _Failure to enter the apartment_ element in the _Endings_ board.
You can lead the story to this abrupt ending if the player chooses not to take a shower before knocking the apartment's door. Connect that branch of the story flow to the _Failure to enter the apartment_ jumper and you're set.
## Replace target elements
Context: Arcweave docs > Tutorials > Basic Arcweave > Basic Arcweave tutorial | Part 9: Jumpers > Replace target elements
If you need to change the target element of a jumper, drag the new target element from the sidebar or search directly onto the existing jumper. The jumper updates immediately.
## Add restart jumpers
Context: Arcweave docs > Tutorials > Basic Arcweave > Basic Arcweave tutorial | Part 9: Jumpers > Add restart jumpers
To let the player restart the story from any ending:
1. Create a jumper that targets the **starting element** of the _Beginning_ board.
2. Connect all ending elements to this jumper.
> ⚠️ When you later introduce variables, remember to add code that resets them whenever the player restarts. For now, the jump itself is enough.
## What's next
Context: Arcweave docs > Tutorials > Basic Arcweave > Basic Arcweave tutorial | Part 9: Jumpers > What's next
You've now seen the use and benefits of jumpers. In the next tutorial, you'll add **variables** to your story, to give it logic and control its flow based on what has already happened.
# Basic Arcweave tutorial | Part 10: Global variables
Source: https://docs.arcweave.com/tutorials/basic/pt-10
Section: Tutorials > Basic Arcweave
Description: Text & video tutorial on using global variables in Arcweave projects
Arcscript examples: Arcscript has no delimiters, so never wrap code in `${ }`, `{{ }}`, `<< >>` or similar markers. An `arcscript` code block contains only code: each line is one segment, and a branch condition is a single expression without `if` or `endif`. An `arcweave-html` code block is element or connection label content as Arcweave stores it, the HTML that the REST API and MCP server accept: `` for text, `
` for an empty line, and each Arcscript segment in its own `` block, with `<` written as `<`. An element passed to `visits()` is written as element mention markup; replace `ELEMENT_ID` with the element ID.
Learn how to define [global variables](https://docs.arcweave.com/project-items/variables/global) and assign them values.
## Video tutorial
Context: Arcweave docs > Tutorials > Basic Arcweave > Basic Arcweave tutorial | Part 10: Global variables > Video tutorial
Watch this tutorial as a video:
Video: https://www.youtube.com/watch?v=SOfA486HIog
> ⚠️ This video does not reflect the latest updates to Arcweave's UI.
> ✅ You can play the finished version of the Tutorial Project [here](https://arcweave.com/app/project/Qz0PXOZ0Ya/play) and explore its diagrams and structure [here](https://arcweave.com/app/project/Qz0PXOZ0Ya).
## Why variables
Context: Arcweave docs > Tutorials > Basic Arcweave > Basic Arcweave tutorial | Part 10: Global variables > Why variables
In previous tutorials, we saw how to create choices that immediately lead to different outcomes: the player chooses A over B and reads the contents of element A and not B.
But what if you want choices that influence _later_ parts of the game? For example, what if there is a locked door that opens only when the player finds the appropriate key? How do you check whether the player has it?
To do this, you need **variables**.
Variables store pieces of information in the computer's memory so you can access them later in the game.
## Variable types
Context: Arcweave docs > Tutorials > Basic Arcweave > Basic Arcweave tutorial | Part 10: Global variables > Variable types
In Arcweave, variables can hold the following types of values:
- **Integer**: A whole number, e.g. `1`, `-200`, and `0`.
- **Float**: A decimal number, e.g. `5.34`, `1.0`, `-3.5`, and `0.0`.
- **String**: A word or sentence, like the name of a character, e.g. `Galandriel` or any combination of letters, numbers, and special characters like `1234%hello`.
- **Boolean**: A binary variable that can be either `true` or `false`.
## Variable scopes
Context: Arcweave docs > Tutorials > Basic Arcweave > Basic Arcweave tutorial | Part 10: Global variables > Variable scopes
Variables are always present in memory and can be accessed from anywhere in your project at any time.
Arcweave supports global and scoped variables:
- [Global variables](https://docs.arcweave.com/project-items/variables/global): variables accessed directly by their name, e.g. `score`.
- [Board variables](https://docs.arcweave.com/project-items/variables/board): variable attributes accessed by the board custom ID and attribute custom ID, e.g. `board_id.var_id`.
- [Component variables](https://docs.arcweave.com/project-items/variables/component): variable attributes using the same `component_id.var_id` syntax.
In this tutorial we will focus on global variables.
## Locked drawer mechanic
Context: Arcweave docs > Tutorials > Basic Arcweave > Basic Arcweave tutorial | Part 10: Global variables > Locked drawer mechanic
To demonstrate variables in action, we'll add a locked drawer in the kitchen and a hidden key in the bathroom.
### Add the drawer
Context: Arcweave docs > Tutorials > Basic Arcweave > Basic Arcweave tutorial | Part 10: Global variables > Locked drawer mechanic > Add the drawer
1. Go to the _Kitchen_ element of your _Apartment_ board.
2. Add a new element next to it, title it _Searching cabinets,_ and connect the _Kitchen_ element to it.
3. Label the connection _Search the cabinets_.
4. In the new element, write text describing what the player finds: a locked drawer with nothing else of interest.
5. Add a return connection back to the Kitchen element, so the player is not stuck in the _Searching cabinets_ element.
### Add the key
Context: Arcweave docs > Tutorials > Basic Arcweave > Basic Arcweave tutorial | Part 10: Global variables > Locked drawer mechanic > Add the key
1. Go to the _Bathroom_ element.
2. Add a new element titled _Bathroom mirrors_ and connect it to the Bathroom, labelling the connection _Examine the mirrors._
3. Add content to the mirrors element describing what the player sees: _When you stand at the centre of the room, both mirrors reflect the same corner: the top part of the door._
4. From the _Bathroom mirrors_ element, add another element, give it the title _Finding the key,_ and draw a connection to it from _Bathroom mirrors._ Label the connection: _Examine the corner above the door._
5. In the _Finding the key_ element, add the text that describes the player finding the key: _You run your fingertips along the door's top frame. You stop, as they touch something small and jagged. It's a key! You put it in your pocket._
6. Add a key image or icon as element cover, as we've described in the [Assets part](https://docs.arcweave.com/tutorials/basic/pt-8) of this tutorial.
7. Connect back to the _Bathroom_ element or, even better, use a jumper to keep the board cleaner.
### Test, but...
Context: Arcweave docs > Tutorials > Basic Arcweave > Basic Arcweave tutorial | Part 10: Global variables > Locked drawer mechanic > Test, but...
Set the _Living room_ as the starting element (**Play Mode > Set Play Mode start**), then run the project. You can navigate to the bathroom, examine the mirrors, examine the corner above the door, and find the key.
However, you'll notice a problem: you can repeat this sequence as many times as you want, finding the key over and over again.
This is because **we haven't stored the information** of having found the key anywhere. No matter how logical the intent, the game will not keep track of it unless we use variables.
## Create a global variable
Context: Arcweave docs > Tutorials > Basic Arcweave > Basic Arcweave tutorial | Part 10: Global variables > Create a global variable
1. Go to the lower-left side of the screen and click **Global variables**.
2. Click **+ New variable**.
3. Name it `has_key`.
4. Set the type to **Boolean**.
5. Set the initial value to `false`, since the player does not start the game with the key.
6. Press **Esc** or click outside the **Global variable dialog** to close it.
Now, all we need to do is use the variable in two points of the story:
1. **When the player finds the key**, the variable will change from `false` to `true`. This is called a **value assignment**.
2. When the player tries opening the locked drawer. This will be a **condition evaluation** that checks whether the player has the key.
Let's see these one by one.
## Assign the variable
Context: Arcweave docs > Tutorials > Basic Arcweave > Basic Arcweave tutorial | Part 10: Global variables > Assign the variable
### Insert the assignment
Context: Arcweave docs > Tutorials > Basic Arcweave > Basic Arcweave tutorial | Part 10: Global variables > Assign the variable > Insert the assignment
We need the `has_key` variable to change from `false` to `true` when the player picks up the key.
1. Go to the _Finding the key_ element.
2. Double click the element's body to edit its content, place your cursor at the end of the text, and press **Return** to create a new line.
3. In the formatting menu, click **Arcscript** (the **<>** icon) to insert an Arcscript code segment.
4. Inside the Arcscript segment, type: `has_key = true`.
> ✅ Arcweave's auto-complete will assist you when typing Arcscript.
The element should look like this:
```arcweave-html
You run your fingertips along the door's top frame. You stop, as they touch something small and jagged.
It's a key! You put it in your pocket.
has_key = true
```
### Test the assignment
Context: Arcweave docs > Tutorials > Basic Arcweave > Basic Arcweave tutorial | Part 10: Global variables > Assign the variable > Test the assignment
Arcweave has a built-in [debugger](https://docs.arcweave.com/project-tools/play-mode/debugger) you can use to inspect variable values as you play through a project.
The debugger shows all variables and their values:
- Previous value: The variable's value before visiting the current element.
- Current value: The variable's value after visiting the current element (and thus having executed any code included in it).
To open the debugger:
1. In the project environment, click the **Play** icon (**Play Mode**) in the top menu.
2. Once in Play Mode, hover at the top of your browser window; this causes the **Play Mode menu** to appear.
3. Click **Debug**, the orange bug icon at the right side of the menu.
At the start of the game, `has_key` shows as `false`. Navigate to the bathroom, examine the mirrors, examine the corner above the door, and pick up the key. The debugger panel refreshes and shows `has_key` is now `true`.
> ✅ The debugger is particularly useful when things don't go as expected and you need to track how variable values change as the player moves through the project.
## Prepare for branching
Context: Arcweave docs > Tutorials > Basic Arcweave > Basic Arcweave tutorial | Part 10: Global variables > Prepare for branching
We've now assigned the variable, but we still haven't prevented the player from repeatedly finding and refinding the key.
To do that, we need to show different content depending on the value of `has_key`:
- If `has_key` is `false` → let the player find the key.
- If `has_key` is `true` → show the mirror room again, but with no key to find.
To support these two outcomes, duplicate the _Bathroom mirrors_ element and update each version:
1. Copy and paste the mirrors element.
2. Rename the original to something like _Bathroom mirrors – first time._
3. Rename the copy to _Bathroom mirrors – has key._
4. In the "has key" version, remove any text or connection that leads to finding the key.
## What's next
Context: Arcweave docs > Tutorials > Basic Arcweave > Basic Arcweave tutorial | Part 10: Global variables > What's next
You now have two separate paths ready. In the next tutorial, we will add **branches** to control which version the player sees based on the value of `has_key`.
# Basic Arcweave tutorial | Part 11: Branches
Source: https://docs.arcweave.com/tutorials/basic/pt-11
Section: Tutorials > Basic Arcweave
Description: Text & video tutorial on using branches to divert the flow in Arcweave projects
Arcscript examples: Arcscript has no delimiters, so never wrap code in `${ }`, `{{ }}`, `<< >>` or similar markers. An `arcscript` code block contains only code: each line is one segment, and a branch condition is a single expression without `if` or `endif`. An `arcweave-html` code block is element or connection label content as Arcweave stores it, the HTML that the REST API and MCP server accept: `` for text, `
` for an empty line, and each Arcscript segment in its own `` block, with `<` written as `<`. An element passed to `visits()` is written as element mention markup; replace `ELEMENT_ID` with the element ID.
Learn how to use [branches](https://docs.arcweave.com/project-items/branches) with `if` / `elseif` / `else` statements to direct your story's flow.
In the previous tutorial, we created a variable to track whether the player has the key, and learned how to set it from `false` to `true` when the player discovers it.
Now we'll use Arcweave's **branches** to give the player different outcomes based on that variable's value.
## Video tutorial
Context: Arcweave docs > Tutorials > Basic Arcweave > Basic Arcweave tutorial | Part 11: Branches > Video tutorial
Watch this tutorial as a video:
Video: https://www.youtube.com/watch?v=k67gFLzUUWI
> ⚠️ This video does not reflect the latest updates to Arcweave's UI.
> ✅ You can play the finished version of the Tutorial Project [here](https://arcweave.com/app/project/Qz0PXOZ0Ya/play) and explore its diagrams and structure [here](https://arcweave.com/app/project/Qz0PXOZ0Ya).
## Create a branch
Context: Arcweave docs > Tutorials > Basic Arcweave > Basic Arcweave tutorial | Part 11: Branches > Create a branch
To create a branch, either:
- Right-click on the board and choose **Create > Branch**, or
- Drag the **branch icon** from the toolbar into the board.
The new branch already has an `if` statement waiting to be filled in.
## The `if` part
Context: Arcweave docs > Tutorials > Basic Arcweave > Basic Arcweave tutorial | Part 11: Branches > The `if` part
### Write the `if` condition
Context: Arcweave docs > Tutorials > Basic Arcweave > Basic Arcweave tutorial | Part 11: Branches > The `if` part > Write the `if` condition
An `if` statement checks whether a condition is **true** or **false**. Double-click the branch's `if` condition and type the expression below. The branch already displays the `if` keyword, so type only the expression after it:
```arcscript
has_key == true
```
> **Note:** Do not confuse `=` with `==`:
>
> - `=`: Assigns a value to a variable, e.g. `has_key = true` assigns the `true` value to the `has_key` variable.
> - `==`: Signals **comparison**, i.e. checks whether two things are equal, as in the above case.
There are alternative ways to write the same condition in Arcscript, for example:
```arcscript
has_key is true
```
Or, since `has_key` is a boolean that can only be `true` or `false`, you can omit the last part entirely:
```arcscript
has_key
```
When the variable is `true`, the whole condition is `true` and the `if` statement fires.
### Connect the `if` output
Context: Arcweave docs > Tutorials > Basic Arcweave > Basic Arcweave tutorial | Part 11: Branches > The `if` part > Connect the `if` output
Draw a connection from the branch's `if` output to the element _Bathroom mirrors – has key_ (created in [Part 10](https://docs.arcweave.com/tutorials/basic/pt-10#prepare-for-branching)). This is where the player will be sent when they already have the key.
## The `else` part
Context: Arcweave docs > Tutorials > Basic Arcweave > Basic Arcweave tutorial | Part 11: Branches > The `else` part
### Add an `else` condition
Context: Arcweave docs > Tutorials > Basic Arcweave > Basic Arcweave tutorial | Part 11: Branches > The `else` part > Add an `else` condition
Right-click the branch and choose **Add else**.
`else` conditions cannot be edited. They are implicitly defined as the alternative that applies when none of the preceding conditions are met.
### Connect the `else` output
Context: Arcweave docs > Tutorials > Basic Arcweave > Basic Arcweave tutorial | Part 11: Branches > The `else` part > Connect the `else` output
Connect the `else` output to the _Bathroom mirrors – first time_ element.
## Finish connections
Context: Arcweave docs > Tutorials > Basic Arcweave > Basic Arcweave tutorial | Part 11: Branches > Finish connections
### Connect the branch's input
Context: Arcweave docs > Tutorials > Basic Arcweave > Basic Arcweave tutorial | Part 11: Branches > Finish connections > Connect the branch's input
Update the _Examine the mirrors_ connection from the _Bathroom_ element so that it **now leads to the branch**: drag its arrowhead from the mirrors element onto the branch.
### Create returns
Context: Arcweave docs > Tutorials > Basic Arcweave > Basic Arcweave tutorial | Part 11: Branches > Finish connections > Create returns
Make sure both outcomes include an option to return to the main bathroom element.
## Review the logic
Context: Arcweave docs > Tutorials > Basic Arcweave > Basic Arcweave tutorial | Part 11: Branches > Review the logic
The full flow looks like this:
1. Player reaches the bathroom and chooses to examine the mirrors.
2. The branch checks the value of `has_key`.
3. If the player **has** the key → they see the "having the key" description, then can go back.
4. If the player **does not** have the key → they see the hiding place, can examine it, find the key, then go back.
## Another branch: the kitchen
Context: Arcweave docs > Tutorials > Basic Arcweave > Basic Arcweave tutorial | Part 11: Branches > Another branch: the kitchen
Let's apply the same logic to the kitchen.
Here, the goal is different: if the player has the key, an **extra choice** appears: _Unlock the drawer._ If they don't have the key, that choice doesn't appear at all.
1. Create a new element for the outcome of unlocking the drawer and title it _Find the diamond ring._
2. Connect the _Searching cabinets_ element (from [Part 10](https://docs.arcweave.com/tutorials/basic/pt-10#add-the-drawer)) to a new branch whose `if` condition is `has_key`, and connect the branch's `if` output to the _Find the diamond ring_ element.
3. Label that output connection: _Unlock the drawer._
There is no `else` expression here. If the `if` condition is not satisfied, the option to unlock the drawer doesn't appear to the player at all.
## Understand the two branch patterns
Context: Arcweave docs > Tutorials > Basic Arcweave > Basic Arcweave tutorial | Part 11: Branches > Understand the two branch patterns
You've now used branches in two distinct ways and it's worth understanding the difference:
- `if` / `else` (bathroom): The branch always diverts the flow somewhere: either the `if` path or the `else` path.
- `if` only (kitchen): If the condition is not met, nothing happens; the choice associated with the branch doesn't appear to the player.
Choose the pattern that fits the experience you want to create.
## Test the game
Context: Arcweave docs > Tutorials > Basic Arcweave > Basic Arcweave tutorial | Part 11: Branches > Test the game
Run the project in Play Mode from the beginning to verify both branches work correctly:
1. **Bathroom (no key):** Examine the mirrors → see the hiding spot → examine the corner → find the key.
2. **Bathroom (with key):** Examine the mirrors again → the hiding spot option is gone.
3. **Kitchen (no key):** Search the cabinets → no option to unlock the drawer appears.
4. **Kitchen (with key):** Search the cabinets → the _Unlock the drawer_ option appears → find the ring.
## Deeper dive into branches
Context: Arcweave docs > Tutorials > Basic Arcweave > Basic Arcweave tutorial | Part 11: Branches > Deeper dive into branches
In the following section of this page, we'll explore `elseif` statements and additional logic variants you can use to build more complex branching structures.
Video: https://www.youtube.com/watch?v=gUI5Dm_pG2Y
## Add alternative drawer action
Context: Arcweave docs > Tutorials > Basic Arcweave > Basic Arcweave tutorial | Part 11: Branches > Add alternative drawer action
In the sections above, we added the ability to unlock a drawer if the player carries a key. Now we'll add an alternative action, using brute force, for players who don't have the key.
There are two approaches to this, and which one you choose depends on the experience you want to create.
### Only if without key
Context: Arcweave docs > Tutorials > Basic Arcweave > Basic Arcweave tutorial | Part 11: Branches > Add alternative drawer action > Only if without key
In this approach, players who have the key can only unlock the drawer and players without the key can only attempt to force it open.
1. Add a new element to your board and give it the title _Brutally nothing._
2. Connect the _Searching cabinets_ element to a branch that checks whether the player carries the key: `if has_key`.
3. Add an `else` statement to that branch and connect it to the _Brutally nothing_ element.
4. Update your labels so the `if` path reads _Unlock the drawer_ and the `else` path reads _Use brute force._
### Brute force always available
Context: Arcweave docs > Tutorials > Basic Arcweave > Basic Arcweave tutorial | Part 11: Branches > Add alternative drawer action > Brute force always available
In this approach, brute force is always available to the player, but unlocking the drawer is only shown if they have the key.
Assuming you've first taken the previous steps:
1. Connect the _Brutally nothing_ element directly from _Searching cabinets,_ bypassing the key-checking branch entirely.
2. Remove the `else` statement from the branch. (Right-click the branch and select "Remove else.")
> ✅ It depends on the player experience you want to create: think about what you want the player to be able to do at each point in the story and place your branches accordingly.
## State machine
Context: Arcweave docs > Tutorials > Basic Arcweave > Basic Arcweave tutorial | Part 11: Branches > State machine
Now that the player can find a ring by unlocking the drawer, we need to track whether they've found it, otherwise they'll be able to keep searching and finding it indefinitely.
Instead of a simple boolean (`has_ring`, `true` or `false`), we'll use an **integer**, so the ring can have multiple meaningful states.
1. Go to **Global variables** and click **+ New variable**.
2. Name it `ring_state`.
3. Set the type to **Integer**.
4. Set the initial value to `0`.
Use the following values to represent each state:
| Value | State |
| ----- | ---------------------------------------- |
| `0` | The ring has not been found yet |
| `1` | The player has taken the ring |
| `2` | The player has given the ring to someone |
> ✅ You can keep this list of states on a note on your board, to remind your future self or other collaborators what each value means.
### Set ring state
Context: Arcweave docs > Tutorials > Basic Arcweave > Basic Arcweave tutorial | Part 11: Branches > State machine > Set ring state
When the player finds the ring, you need to update `ring_state` to `1`:
1. Select the element where the player discovers the ring.
2. Add an Arcscript segment using the **Arcscript** icon in the formatting menu (or press **Ctrl/Cmd+Shift+C**).
3. Type the following: `ring_state = 1`.
Your element may look like this:
```arcweave-html
You unlock the drawer and find...
Wow! This ring must be half a carat... Not that you know much about carats.
ring_state = 1
```
### Handle all ring states
Context: Arcweave docs > Tutorials > Basic Arcweave > Basic Arcweave tutorial | Part 11: Branches > State machine > Handle all ring states
Rather than simply blocking the search option once the ring is found, we can keep it available but have it return a different response depending on the ring state.
We can do this with an `elseif` statement:
1. Connect the _Kitchen_ element to a new branch and label the connection _Search the cabinets._
2. Set up the following conditions:
- **If** `ring_state == 0`
→ Proceed normally. The player searches and may find the ring.
- **Else if** `ring_state == 1`
→ Show a response like: _"You are already carrying the ring."_ Then return to the kitchen.
- **Else** (covers `ring_state == 2`)
→ Show a response like: _"You've given the ring away."_ Then return to the kitchen.
This branch covers all possible outcomes (`0`, `1`, or `2`), so the _Search the cabinets_ option is always visible to the player. It is the response that changes based on what has already happened in the story.
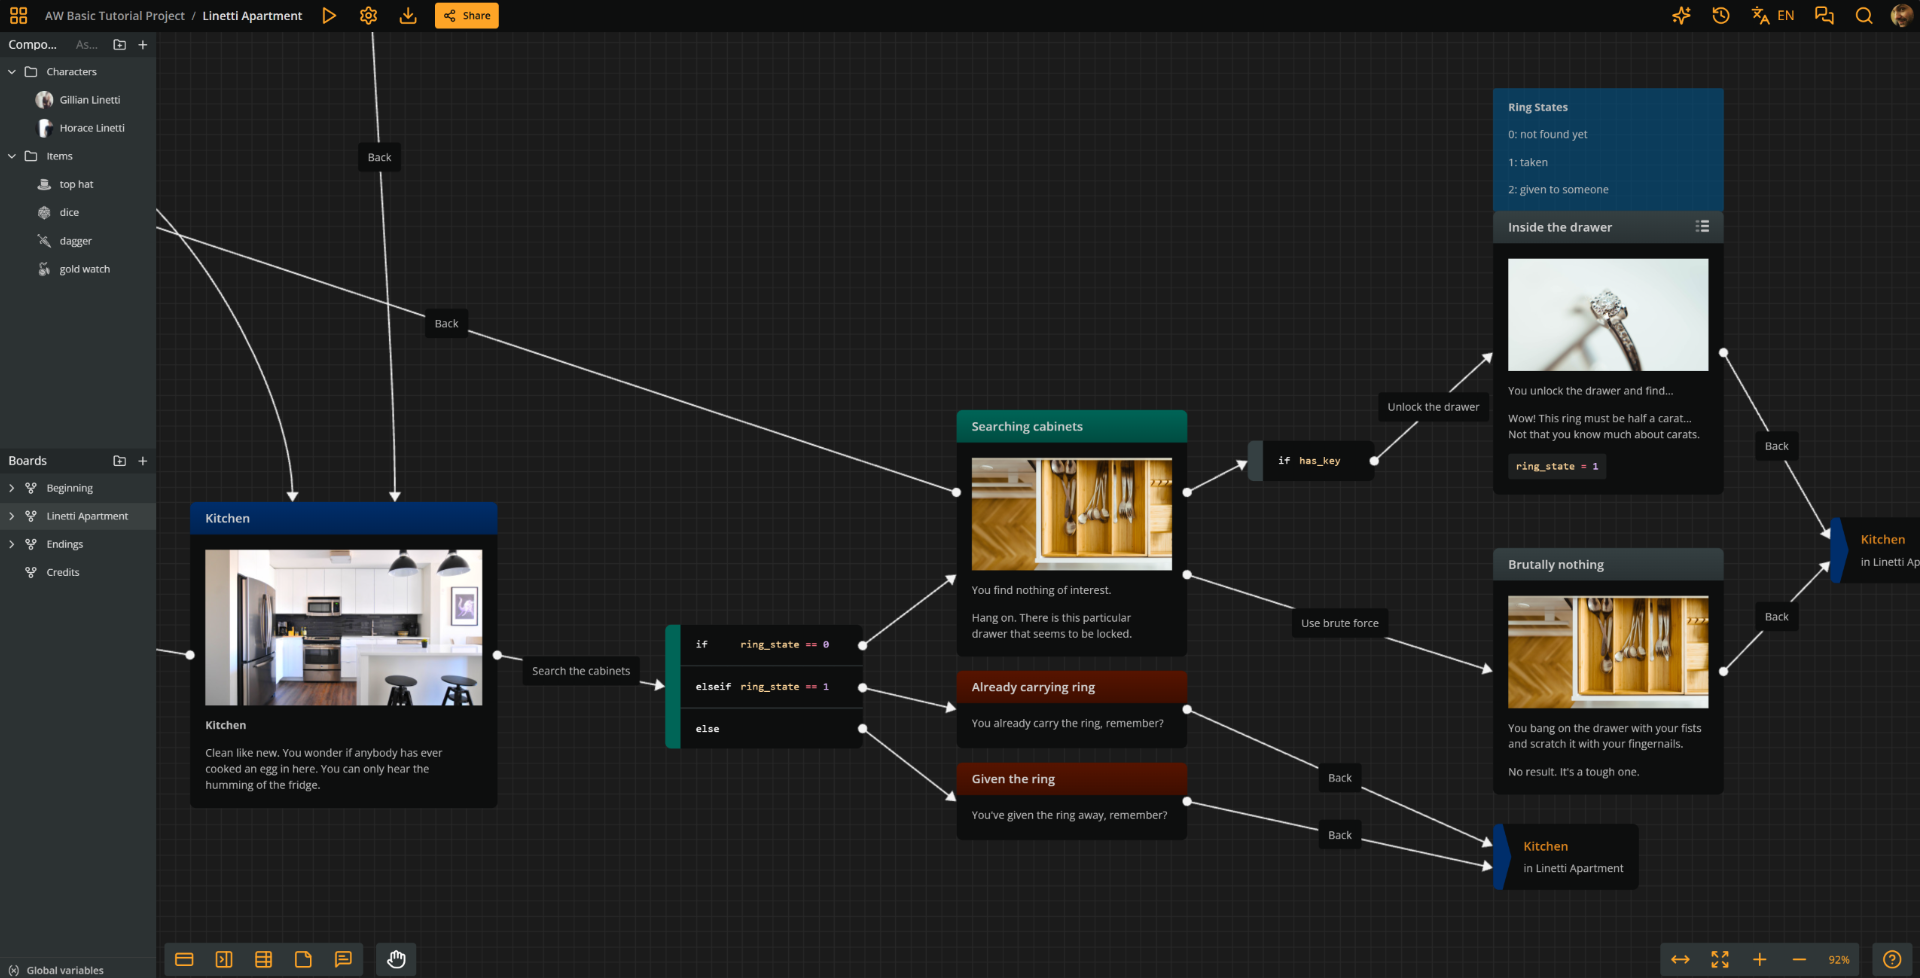
> ✅ Color-code your elements to make the flow easier to read at a glance: mark the outcomes of _already have ring_ and _ring given away_ in red, since they block action and don't advance the plot.
## Create ring-giving scene
Context: Arcweave docs > Tutorials > Basic Arcweave > Basic Arcweave tutorial | Part 11: Branches > Create ring-giving scene
Now let's set up a scene where the player can give the ring to a character. This switches the ring state to `2`.
### Create ring-giving element
Context: Arcweave docs > Tutorials > Basic Arcweave > Basic Arcweave tutorial | Part 11: Branches > Create ring-giving scene > Create ring-giving element
1. Create a new element next to the _Living room_ element: _Horace takes the ring._
2. Add Horace's picture as the element cover if you have one.
3. Add an Arcscript segment: `ring_state = 2`
The element can have content similar to the following:
```arcweave-html
Horace clears his throat, startling you. You didn't see him standing by the curtain.
"Um... Did you by any chance find my grandmother's ring?"
"I did," you reply and you give him the ancient heirloom.
He pockets it. "Thanks. Stick around for as long as you like," he says generously, "But do leave, eventually."
ring_state = 2
```
### Scene conditions
Context: Arcweave docs > Tutorials > Basic Arcweave > Basic Arcweave tutorial | Part 11: Branches > Create ring-giving scene > Scene conditions
The scene where the player gives the ring to Horace should only appear when the player is carrying the ring (i.e., `ring_state == 1`) and travels from the kitchen to the living room.
1. Add a **branch** on the path that goes from the kitchen to the living room.
2. Set up the conditions as follows:
- `if ring_state == 1`: Connect to the _Horace takes the ring_ element.
- `else`: Connect directly to _Living room._
3. Add an output connection from _Horace takes the ring_ to _Living room._
## Test the full flow
Context: Arcweave docs > Tutorials > Basic Arcweave > Basic Arcweave tutorial | Part 11: Branches > Test the full flow
Run the project from the beginning. Keep the Debugger open and verify the following:
1. Without the key, only the brute force option appears when searching the cabinets.
2. After finding the key, you get the option that you expect, based on your choice between the [suggestions above](https://docs.arcweave.com/tutorials/basic/pt-11#add-alternative-drawer-action).
3. After unlocking the drawer and taking the ring, `ring_state` becomes `1`.
4. Searching the cabinets again returns the _"already carrying the ring"_ message.
5. Returning to the living room with the ring triggers the scene where _Horace takes the ring,_ while `ring_state` becomes `2`.
6. Searching the cabinets after giving the ring away returns the _"you've given the ring away"_ message.
## What's next
Context: Arcweave docs > Tutorials > Basic Arcweave > Basic Arcweave tutorial | Part 11: Branches > What's next
You've now built a multi-state story variable with `elseif` logic that responds to everything the player has done.
In the next tutorial, you'll explore how to manipulate text responses with logic directly, without needing to create separate branches for each outcome.
# Basic Arcweave tutorial | Part 12: Text with logic
Source: https://docs.arcweave.com/tutorials/basic/pt-12
Section: Tutorials > Basic Arcweave
Description: Text & video tutorial on writing conditional text in Arcweave projects
Arcscript examples: Arcscript has no delimiters, so never wrap code in `${ }`, `{{ }}`, `<< >>` or similar markers. An `arcscript` code block contains only code: each line is one segment, and a branch condition is a single expression without `if` or `endif`. An `arcweave-html` code block is element or connection label content as Arcweave stores it, the HTML that the REST API and MCP server accept: `` for text, `
` for an empty line, and each Arcscript segment in its own `` block, with `<` written as `<`. An element passed to `visits()` is written as element mention markup; replace `ELEMENT_ID` with the element ID.
Add logic to an [element](https://docs.arcweave.com/project-items/elements)'s text content.
## Video tutorial
Context: Arcweave docs > Tutorials > Basic Arcweave > Basic Arcweave tutorial | Part 12: Text with logic > Video tutorial
Watch this tutorial as a video:
Video: https://www.youtube.com/watch?v=UkWDo_sZPP0
> ⚠️ This video does not reflect the latest updates to Arcweave's UI.
> ✅ You can play the finished version of the Tutorial Project [here](https://arcweave.com/app/project/Qz0PXOZ0Ya/play) and explore its diagrams and structure [here](https://arcweave.com/app/project/Qz0PXOZ0Ya).
## Text with logic
Context: Arcweave docs > Tutorials > Basic Arcweave > Basic Arcweave tutorial | Part 12: Text with logic > Text with logic
In the previous part of this tutorial, you learned how to use branches to control narrative flow with `if`, `elseif`, and `else` statements.
In this part, you'll learn how to write Arcscript logic **inside element content** to dynamically change the text a player sees.
This is a classic technique in interactive fiction. A location description can differ depending on whether it's day or night, or whether the player is visiting for the first time or not. This helps the game stay fresh and avoid annoying levels of repetition.
In our tutorial game, we'll use variables to shape NPC dialogue based on the player's earlier choices.
## New variable
Context: Arcweave docs > Tutorials > Basic Arcweave > Basic Arcweave tutorial | Part 12: Text with logic > New variable
We want to track whether the player has taken a shower before their appointment. To do this, we need a new variable.
1. Open the **Global variable dialog**.
2. Create a new variable named `shower_taken`.
3. Set its type to **Boolean**.
4. Set its initial value to **false**.
## Variable assignment
Context: Arcweave docs > Tutorials > Basic Arcweave > Basic Arcweave tutorial | Part 12: Text with logic > Variable assignment
Now we need to assign `true` to `shower_taken` when the player chooses to shower.
1. Navigate to the _Beginning_ board and locate the element where the player takes a shower (for example, _Take a shower_ from [Part 2](https://docs.arcweave.com/tutorials/basic/pt-2#create-choices)).
2. Open the element and add a code segment at its end: `shower_taken = true`
3. Connect the shower element to the element where the player arrives at the apartment (_Horace opens the door_ in [Part 9](https://docs.arcweave.com/tutorials/basic/pt-9#connect-the-boards)), so the player can proceed to the appointment after showering.
Also make sure that the path that skips the shower leads directly to the same apartment-arrival element. This way, both paths are available to the player: with shower or without.
## Conditional element text
Context: Arcweave docs > Tutorials > Basic Arcweave > Basic Arcweave tutorial | Part 12: Text with logic > Conditional element text
Now let's make the dialogue at the apartment door (the _Horace opens the door_ element) react to whether the player has showered.
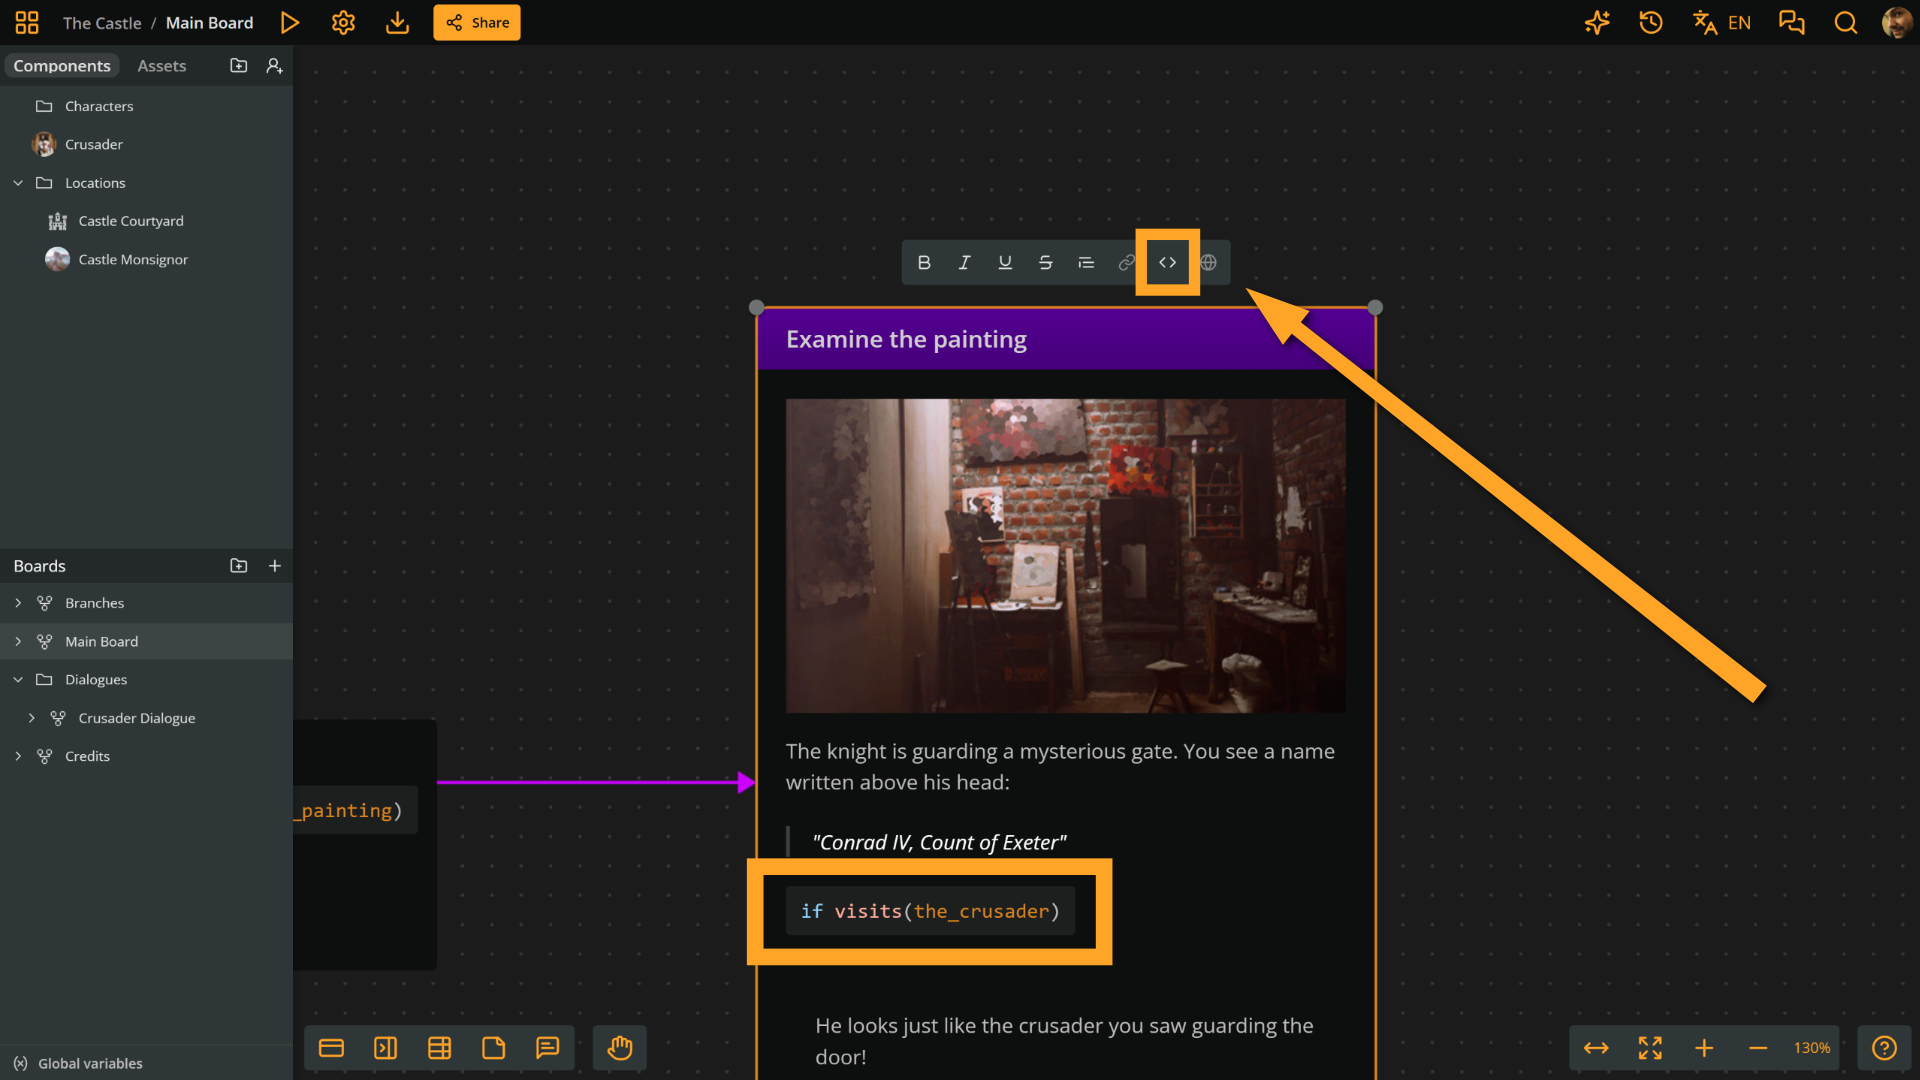
> ✅ You already know how to add Arcscript segments by clicking **Arcscript** (the **<>** icon in the formatting menu). You can do the same using the keyboard: press **Ctrl+Shift+C** or **Cmd+Shift+C**.
So, the content of the _Horace opens the door_ element can be:
```arcweave-html
Horace Linetti opens the door and lets you in.
if shower_taken
"You're late!" he says.
else
"Good Lord! You smell as if you've spent the night on an office floor," he says, fanning the air with his hand.
endif
You enter the apartment. As you marvel at the design of the living room, he disappears towards the bedrooms. "Let me know if you find my grandmother's ring," he hollers.
```
> ⚠️ Every `if` statement must be closed with a respective `endif` or Arcweave will display an error symbol at the element's bottom-right corner.
> ✅ Notice how Arcweave takes care of conditional text's indentation. Any rich text that is enclosed by `if` and `endif` is automatically indented.
## Test
Context: Arcweave docs > Tutorials > Basic Arcweave > Basic Arcweave tutorial | Part 12: Text with logic > Test
Let's test what we've built. Set the first element of the _Beginning_ board as the starting element (**Play Mode > Set Play Mode start**) and enter Play Mode.
Try both paths:
1. **Skip the shower**: Go straight to the appointment and knock the door. Horace lets you in, commenting on your odor.
2. **Shower first**: Take the shower, go to the appointment, and knock the door. Horace says _"You're late."_
## Paragraph breaks
Context: Arcweave docs > Tutorials > Basic Arcweave > Basic Arcweave tutorial | Part 12: Text with logic > Paragraph breaks
You may notice that text on either side of a code segment renders on the same line, forming one large paragraph. This happens because **code segments do not automatically insert a paragraph break**.
To control where breaks appear, manually press **Enter** before or after the `if` expression. Until you are more experienced, it will take some testing to see what works best for each case.
## Nested `if` statements
Context: Arcweave docs > Tutorials > Basic Arcweave > Basic Arcweave tutorial | Part 12: Text with logic > Nested `if` statements
Arcscript supports nested `if` statements: `if`/`endif` blocks placed inside other `if`/`endif` blocks. This allows you to combine multiple conditions.
> ✅ We call them `if`/`endif` blocks since `if` and `endif` are the absolutely essential statements of a conditional block. `elseif`/`else` can still be part of these blocks.
In this example, we'll add nested conditional text to the _Bathroom_ element:
```arcweave-html
Marble and gold. You never really understood some people's extravagance.
The bathtub is huge.
if shower_taken
It must be such a different experience from showering in one's office.
if not has_key
But you need to focus, see if you can find anything, here.
endif
else
Mmm... You wonder if it's too much asking the Linettis if you could take a quick shower, here. You'd do them a favour, after all.
endif
```
> ⚠️ Notice how the inner `if` block closes with its `endif` statement, before the outer `else` comes. If the inner block is left open, the `else` will be treated as belonging to the inner `if`, not the outer one.
## Logical operators
Context: Arcweave docs > Tutorials > Basic Arcweave > Basic Arcweave tutorial | Part 12: Text with logic > Logical operators
You can combine multiple conditions in a single `if` statement using the logical operators `and` and `or`.
### `and`
Context: Arcweave docs > Tutorials > Basic Arcweave > Basic Arcweave tutorial | Part 12: Text with logic > Logical operators > `and`
The following code shows text only if _the player has not showered_ AND _is carrying the ring_ (i.e., `ring_state` equals `1`):
```arcweave-html
if not shower_taken and ring_state == 1
You may stink, but look at that ring!
endif
```
_Both_ conditions must be true for the block to render.
> ℹ️ The `and` keyword can also be written as `&&`.
### `or`
Context: Arcweave docs > Tutorials > Basic Arcweave > Basic Arcweave tutorial | Part 12: Text with logic > Logical operators > `or`
The following code shows text only if EITHER _the player has not showered_ OR _is carrying the ring:_
```arcweave-html
if not shower_taken or ring_state == 1
...
endif
```
The block renders if _either_ condition is true.
> ℹ️ The `or` keyword can also be written as `||`.
## What's next
Context: Arcweave docs > Tutorials > Basic Arcweave > Basic Arcweave tutorial | Part 12: Text with logic > What's next
In this tutorial you learned how to assign variable values and create conditional, dynamic text.
In the next tutorial, we'll explore two built-in functions that make your text and outcomes even more dynamic.
# Basic Arcweave tutorial | Part 13: Functions `show` & `roll`
Source: https://docs.arcweave.com/tutorials/basic/pt-13
Section: Tutorials > Basic Arcweave
Description: Text & video tutorial on Arcscript's show and roll functions for displaying text and rolling dice
Arcscript examples: Arcscript has no delimiters, so never wrap code in `${ }`, `{{ }}`, `<< >>` or similar markers. An `arcscript` code block contains only code: each line is one segment, and a branch condition is a single expression without `if` or `endif`. An `arcweave-html` code block is element or connection label content as Arcweave stores it, the HTML that the REST API and MCP server accept: `` for text, `
` for an empty line, and each Arcscript segment in its own `` block, with `<` written as `<`. An element passed to `visits()` is written as element mention markup; replace `ELEMENT_ID` with the element ID.
Learn more about manipulating outcomes using two [Arcscript functions](https://docs.arcweave.com/project-items/arcscript#built-in-functions):
- [`show`](https://docs.arcweave.com/project-items/arcscript#show): Render the value of a variable as text for the player to see.
- [`roll`](https://docs.arcweave.com/project-items/arcscript#roll): Generate random integer numbers, imitating die rolls.
The `show` and `roll` functions are two of Arcweave's core Arcscript tools for rendering dynamic content and introducing randomness into your stories.
This tutorial walks you through how each function works and how to combine them to create compelling, unpredictable narrative outcomes.
## Video tutorial
Context: Arcweave docs > Tutorials > Basic Arcweave > Basic Arcweave tutorial | Part 13: Functions `show` & `roll` > Video tutorial
Watch this tutorial as a video:
Video: https://www.youtube.com/watch?v=Vxj0kyzBt8g
> ⚠️ This video does not reflect the latest updates to Arcweave's UI.
> ✅ You can play the finished version of the Tutorial Project [here](https://arcweave.com/app/project/Qz0PXOZ0Ya/play) and explore its diagrams and structure [here](https://arcweave.com/app/project/Qz0PXOZ0Ya).
## `show`
Context: Arcweave docs > Tutorials > Basic Arcweave > Basic Arcweave tutorial | Part 13: Functions `show` & `roll` > `show`
### Simple use
Context: Arcweave docs > Tutorials > Basic Arcweave > Basic Arcweave tutorial | Part 13: Functions `show` & `roll` > `show` > Simple use
The `show` function renders whatever is placed inside its parentheses, inline with any surrounding text.
For example:
```arcweave-html
gold = 100
You now have
show(gold)
gold coins in your purse.
```
This renders as: _You now have 100 gold coins in your purse._
### Multiple arguments
Context: Arcweave docs > Tutorials > Basic Arcweave > Basic Arcweave tutorial | Part 13: Functions `show` & `roll` > `show` > Multiple arguments
Multiple arguments of `show` must be separated by a comma. Study the following example:
```arcscript
name = "Burton"
times_said = 100
admits = true
show("My name is ", name, " and I've said it ", times_said, " times already: it is all ", admits, "!" )
```
This renders as: _My name is Burton and I've said it 100 times already: it is all true!_
> ⚠️ Notice the spaces needed in the above syntax to properly render the sentence (as in `"My name is "`). The space character is part of a **string**, so it must be included in quotation marks.
### Line breaks
Context: Arcweave docs > Tutorials > Basic Arcweave > Basic Arcweave tutorial | Part 13: Functions `show` & `roll` > `show` > Line breaks
If you need line breaks to be rendered before or after the `show` content, you can add them to the rich text that wraps the `show` Arcscript segment.
You may also add line breaks in `show`'s arguments using the `\n` character inside a string:
```arcweave-html
These are a few of my favorite things:
show(raindrops, "\n", roses, "\nand whiskers on kittens.")
```
Assuming `0` and `1.5` are the values of `raindrops` and `roses` respectively, the above element renders as follows:
_These are a few of my favorite things:_
_0_\
_1.5_\
_and whiskers on kittens._
## Add player morale
Context: Arcweave docs > Tutorials > Basic Arcweave > Basic Arcweave tutorial | Part 13: Functions `show` & `roll` > Add player morale
Let's now add `show` to our tutorial game.
Suppose we want to add a morale score to our player. To do this, we will follow these steps:
1. Create a `player_morale` variable (integer).
2. When the game starts, `player_morale` will be assigned a random value. We'll do this using `roll` (see next section on this page).
3. We will introduce the morale to the player in the first couple of elements with a smooth use of `show`.
### Create morale variable
Context: Arcweave docs > Tutorials > Basic Arcweave > Basic Arcweave tutorial | Part 13: Functions `show` & `roll` > Add player morale > Create morale variable
Create a new integer variable:
1. Go to **Global variables** and click **+ New variable**.
2. Name the new variable `player_morale`, make it an **Integer**, and give it any value to begin with. Since it will be assigned a new value at random, we won't care about the value filled in here.
### Introduce morale
Context: Arcweave docs > Tutorials > Basic Arcweave > Basic Arcweave tutorial | Part 13: Functions `show` & `roll` > Add player morale > Introduce morale
We can introduce the morale score to the player in one of the first elements, e.g. the _Office._ Moreover, we can add a short, conditional comment by the narrator, depending on whether the value of `player_morale` is high or mediocre.
> ✅ The Arcscript segment that includes the `roll` function will be explained a little further below.
```arcweave-html
You rub your eyes. You are on the floor. Your office. It's midday. And you have work to do.
You start with a morale of
player_morale = roll(6, 3)
show(player_morale, ".")
if player_morale < 12
It's not that great, to be honest, but you have to work with what you've got.
elseif player_morale >= 12 and player_morale < 18
It's a pretty good morale to start with.
else
You feel really elevated!
endif
Going through your diary, you see that you can barely make it on time for your appointment with the Linetti siblings. Something about a lost heirloom. You can read their folder while on the bus. But you must go, now!
Still, you stink...
```
### Reassign and `show`
Context: Arcweave docs > Tutorials > Basic Arcweave > Basic Arcweave tutorial | Part 13: Functions `show` & `roll` > Add player morale > Reassign and `show`
During the game, whenever `player_morale` changes, you can use an assignment expression followed by a call to `show`, to update the morale score and notify the player of the change. For example:
```arcscript
player_morale -= 2
show("Your morale is now ", player_morale, ".")
```
## `roll`
Context: Arcweave docs > Tutorials > Basic Arcweave > Basic Arcweave tutorial | Part 13: Functions `show` & `roll` > `roll`
The `roll` function generates a random integer in the style of tabletop RPG dice rolls.
### `roll(m)`
Context: Arcweave docs > Tutorials > Basic Arcweave > Basic Arcweave tutorial | Part 13: Functions `show` & `roll` > `roll` > `roll(m)`
`roll(m)` returns a random number between `1` and `m` (inclusive), equivalent to rolling an `m`-sided die (d`m`).
For example, `roll(6)` simulates rolling **1d6** (a 6-sided die).
### `roll(m, n)`
Context: Arcweave docs > Tutorials > Basic Arcweave > Basic Arcweave tutorial | Part 13: Functions `show` & `roll` > `roll` > `roll(m, n)`
`roll(m, n)` is equivalent to rolling `n` `m`-sided dice and adding the results together. Therefore, the number returned is between `n` and `m * n`.
Example: `roll(6, 3)` simulates rolling **3d6**, which is the classic roll for ability scores in _Dungeons & Dragons._
> ⚠️ Note that the probability distribution when rolling multiple dice is not uniform, but forms a bell curve, since most results cluster around the average.
### Assign initial morale
Context: Arcweave docs > Tutorials > Basic Arcweave > Basic Arcweave tutorial | Part 13: Functions `show` & `roll` > `roll` > Assign initial morale
As we saw in the element above, to randomly assign the initial morale value, we use:
```arcscript
player_morale = roll(6, 3)
```
Let's see a few more ways we can use `roll` in our game.
### Randomize stat changes
Context: Arcweave docs > Tutorials > Basic Arcweave > Basic Arcweave tutorial | Part 13: Functions `show` & `roll` > `roll` > Randomize stat changes
Instead of deducting a fixed number of morale points, you can deduct a random amount:
```arcscript
player_morale -= roll(4)
```
This deducts a random value between `1` and `4`.
If you want a minimum result of `0` instead of `1`, roll one die size higher and subtract `1`:
```arcscript
player_morale -= roll(5) - 1
```
### Store `roll` results
Context: Arcweave docs > Tutorials > Basic Arcweave > Basic Arcweave tutorial | Part 13: Functions `show` & `roll` > `roll` > Store `roll` results
To track the result of a roll in the debugger, assign it to a dedicated variable first:
```arcscript
roll_result = roll(5) - 1
player_morale -= roll_result
```
After you create `roll_result` as a global **Integer** variable (in **Global variables**, like `player_morale`), you can watch its value change in the debugger panel as you replay the project.
Moreover, storing the `roll` result in a `roll_result` variable lets you reuse it repeatedly in conditions, such as in branches.
## `roll` in branches
Context: Arcweave docs > Tutorials > Basic Arcweave > Basic Arcweave tutorial | Part 13: Functions `show` & `roll` > `roll` in branches
Beyond modifying stats, `roll` is useful for making events happen with some randomness. To do this, you need to roll and then check all possible results in a branch, diverting the flow accordingly.
### A warning
Context: Arcweave docs > Tutorials > Basic Arcweave > Basic Arcweave tutorial | Part 13: Functions `show` & `roll` > `roll` in branches > A warning
Consider the following branch:
- `if roll(4) == 1`...
- `elseif roll(4) == 2`...
- `elseif roll(4) == 3`...
- `else`...
Can you tell what is wrong with it?
The problem with the above branch is that, instead of rolling once and comparing the result with each of the possible numbers `1`, `2`, `3`, and `4`, each condition includes a _new call_ to `roll`, which generates a _new result._ This produces unpredictable branch behavior.
### Store the `roll` result
Context: Arcweave docs > Tutorials > Basic Arcweave > Basic Arcweave tutorial | Part 13: Functions `show` & `roll` > `roll` in branches > Store the `roll` result
This is where storing the `roll` result is important.
Instead of calling `roll` in the branch, call it in the content of any element _before_ the branch, storing the result in the `roll_result` variable. You can do this with just one Arcscript segment:
```arcscript
roll_result = roll(4)
```
Then, connect this element with the branch and check the value of `roll_result` against all possible roll outcomes:
- `if roll_result == 1`...
- `elseif roll_result == 2`...
- `elseif roll_result == 3`...
- `else`...
## What's next
Context: Arcweave docs > Tutorials > Basic Arcweave > Basic Arcweave tutorial | Part 13: Functions `show` & `roll` > What's next
Use `show` to display variable values to the player and `roll` to introduce chance for stat changes, character encounters, or any outcome you want to leave to fate.
The next tutorial will teach you how to share and export your project.
# Basic Arcweave tutorial | Part 14: Share & export
Source: https://docs.arcweave.com/tutorials/basic/pt-14
Section: Tutorials > Basic Arcweave
Description: Text & video tutorial on sharing and exporting your Arcweave project
Learn how to [share](https://docs.arcweave.com/project-tools/share) and [export](https://docs.arcweave.com/project-tools/export) your project and get a glimpse of Arcweave's real-time [collaboration](https://docs.arcweave.com/introduction/quick-tour/collaboration).
## Video tutorial
Context: Arcweave docs > Tutorials > Basic Arcweave > Basic Arcweave tutorial | Part 14: Share & export > Video tutorial
Watch this tutorial as a video:
Video: https://www.youtube.com/watch?v=x3wEiJdyaT8
> ⚠️ This video does not reflect the latest updates to sharing and exporting your project, as each of these two features now has its own button in the menu. See [Share](https://docs.arcweave.com/project-tools/share) and [Export](https://docs.arcweave.com/project-tools/export) pages for more details.
> ✅ You can play the finished version of the Tutorial Project [here](https://arcweave.com/app/project/Qz0PXOZ0Ya/play) and explore its diagrams and structure [here](https://arcweave.com/app/project/Qz0PXOZ0Ya).
## Project visibility
Context: Arcweave docs > Tutorials > Basic Arcweave > Basic Arcweave tutorial | Part 14: Share & export > Project visibility
By default, an Arcweave project is **private**, meaning it can only be accessed and played by the members of its workspace.
### Make a project public
Context: Arcweave docs > Tutorials > Basic Arcweave > Basic Arcweave tutorial | Part 14: Share & export > Project visibility > Make a project public
You can change a project's visibility, so it is accessible by anyone for play or study:
1. Click **Share** in the top menu.
2. In the Share modal, use the dropdown at the bottom next to "Anyone with the link..." to control public access. Select one of the following options:
- **Can view & play**: Grants access to both the project's boards and Play Mode.
- **Can play only**: Grants access only to the project's Play Mode.
- **Has no access**: Prevents any public access to the project.
3. Click **copy link**, under **Anyone with the link**, to copy the project's URL to your clipboard for sharing.

> ✅ The option **can play only** is especially useful if you want to let the public play your game without revealing what's under the hood.
> ℹ️ Users accessing a project through a public link are called [project visitors](https://docs.arcweave.com/workspaces/roles#project-visitors). They do _not_ need an Arcweave account to view or play the project.
### Share with collaborators
Context: Arcweave docs > Tutorials > Basic Arcweave > Basic Arcweave tutorial | Part 14: Share & export > Project visibility > Share with collaborators
If you'd rather keep the project private but share it with select people, you can invite them to become either **editors** or **commenters**.

To invite a user to a project:
1. Click **Share** in the top menu.
2. Enter their email under **Email address**.
3. Choose a role: **Commenter** or **Editor**.
4. Click **Invite**.
> ℹ️ Such project collaborators are called [guests](https://docs.arcweave.com/workspaces/roles#workspace-guests).
> ⚠️ Guest editors count toward billing (1 seat each). See more on [adding](https://docs.arcweave.com/workspaces/billing-plans#add-seats) and [removing seats](https://docs.arcweave.com/workspaces/billing-plans#remove-seats) on the **Workspace plans** page.
### Remove collaborators
Context: Arcweave docs > Tutorials > Basic Arcweave > Basic Arcweave tutorial | Part 14: Share & export > Project visibility > Remove collaborators
To remove someone's access, go back to the sharing panel and remove them from the project.
## Share a specific item
Context: Arcweave docs > Tutorials > Basic Arcweave > Basic Arcweave tutorial | Part 14: Share & export > Share a specific item
To point a collaborator to part of your story, right-click an element on the board and select **Copy link**. Make sure only that element is selected. Paste the copied URL into your message; opening it centers the element in the language you were viewing.
The recipient needs access to the project's boards. You can also copy links to boards, jumpers, notes, branches, connections, and components. See [Share an item or board position](https://docs.arcweave.com/project-tools/share#share-an-item-or-board-position) for their menu locations.
## Real-time collaboration
Context: Arcweave docs > Tutorials > Basic Arcweave > Basic Arcweave tutorial | Part 14: Share & export > Real-time collaboration
Editors can collaborate on a project in real time. While an invited editor is working, you'll see their cursor move around the board as they make changes. You're free to keep working elsewhere in the project at the same time.
## Export options
Context: Arcweave docs > Tutorials > Basic Arcweave > Basic Arcweave tutorial | Part 14: Share & export > Export options
To export your project, click **Export project** (the download icon) in the top menu. You'll find the following formats to choose from:
- [JSON](https://docs.arcweave.com/project-tools/export#export-as-json): Exports a JSON file of the project. JSON is a generic format for storing the project's data, and it's the way to go if you want to use the project further down the line. (Also see **Game engine JSON**, below.)
- [Spreadsheet](https://docs.arcweave.com/project-tools/export#export-as-spreadsheet): Exports the project in CSV or Excel (Pro & Team workspaces only) format.
- [Image](https://docs.arcweave.com/project-tools/export#export-as-image-file): Exports a board as image file.
- [Game engine JSON](https://docs.arcweave.com/project-tools/export#export-for-game-engines): Exports a JSON file for the popular game engines Unity, Unreal Engine, and Godot Engine.
- [Markdown](https://docs.arcweave.com/project-tools/export#export-as-markdown): Exports the project as a Markdown document (Pro & Team workspaces only).
- [PDF](https://docs.arcweave.com/project-tools/export#export-as-pdf): Exports a board as PDF (Pro & Team workspaces only).
- [Backup](https://docs.arcweave.com/project-tools/export#export-project-backup): Exports a backup of the project in `.arcw` format (Pro & Team workspaces only).
> ✅ The **JSON** and **Game engine JSON** exports provide the option to also export the project's **assets**.
## What's next
Context: Arcweave docs > Tutorials > Basic Arcweave > Basic Arcweave tutorial | Part 14: Share & export > What's next
You now know how to control who can access your project and how to export it for use elsewhere, whether that's sharing a playable link, bringing in collaborators, or pulling the project's data into another tool.
In the next part of this series, we'll do some housekeeping on our tutorial project and add its finishing touches.
# Basic Arcweave tutorial | Part 15: Polish the project
Source: https://docs.arcweave.com/tutorials/basic/pt-15
Section: Tutorials > Basic Arcweave
Description: Text & video tutorial on polishing the project and tying up loose ends
Arcscript examples: Arcscript has no delimiters, so never wrap code in `${ }`, `{{ }}`, `<< >>` or similar markers. An `arcscript` code block contains only code: each line is one segment, and a branch condition is a single expression without `if` or `endif`. An `arcweave-html` code block is element or connection label content as Arcweave stores it, the HTML that the REST API and MCP server accept: `` for text, `
` for an empty line, and each Arcscript segment in its own `` block, with `<` written as `<`. An element passed to `visits()` is written as element mention markup; replace `ELEMENT_ID` with the element ID.
Polish this tutorial's project: delete unused [boards](https://docs.arcweave.com/project-items/boards), merge [elements](https://docs.arcweave.com/project-items/elements), and make better use of the morale score system.
## Video tutorial
Context: Arcweave docs > Tutorials > Basic Arcweave > Basic Arcweave tutorial | Part 15: Polish the project > Video tutorial
Watch this tutorial as a video:
Video: https://www.youtube.com/watch?v=yJTKE05fMN8
> ⚠️ This video does not reflect the latest updates to Arcweave's UI.
> ✅ You can play the finished version of the Tutorial Project [here](https://arcweave.com/app/project/Qz0PXOZ0Ya/play) and explore its diagrams and structure [here](https://arcweave.com/app/project/Qz0PXOZ0Ya).
---
## Clean up the project
Context: Arcweave docs > Tutorials > Basic Arcweave > Basic Arcweave tutorial | Part 15: Polish the project > Clean up the project
To clean up the project, you can:
- Delete any "dummy" elements or boards used purely for demonstration.
- Delete any empty boards.
- Remove unused formatting.
- Delete unused variables. For example, the `roll_result` variable we used earlier to deduct from the player's morale is no longer needed once we change how morale is calculated (see below).
## Initial morale
Context: Arcweave docs > Tutorials > Basic Arcweave > Basic Arcweave tutorial | Part 15: Polish the project > Initial morale
If you followed [Part 13](https://docs.arcweave.com/tutorials/basic/pt-13#add-player-morale), your starting element already rolls the player's initial morale. This section puts that setup together. If your project still assigns a fixed value instead, replace it with a dice roll.
### Roll for initial morale
Context: Arcweave docs > Tutorials > Basic Arcweave > Basic Arcweave tutorial | Part 15: Polish the project > Initial morale > Roll for initial morale
In the element where morale is first set, replace the fixed value with a dice roll:
```arcscript
player_morale = roll(6,3)
```
This rolls **three six-sided dice** and assigns the result to `player_morale`.
### Show initial morale
Context: Arcweave docs > Tutorials > Basic Arcweave > Basic Arcweave tutorial | Part 15: Polish the project > Initial morale > Show initial morale
Next, let's render the result to the player. In the element's text, show the value and add some text that introduces it:
```arcweave-html
You start with a morale of
show(player_morale, ".")
```
### Morale commentary
Context: Arcweave docs > Tutorials > Basic Arcweave > Basic Arcweave tutorial | Part 15: Polish the project > Initial morale > Morale commentary
We can let the game comment on the player's initial morale, by adding some conditional text:
```arcweave-html
if player_morale < 12
It's not that great, to be honest, but you have to work with what you've got.
elseif player_morale >= 12 and player_morale <18
It's a pretty good morale score to start with.
else
Perfect morale score! You feel super elevated!
endif
```
### Put it all together
Context: Arcweave docs > Tutorials > Basic Arcweave > Basic Arcweave tutorial | Part 15: Polish the project > Initial morale > Put it all together
Putting all of the above together, the starting element looks like this:
```arcweave-html
You rub your eyes. You are on the floor. Your office. It's midday. And you have work to do.
You start with a morale of
player_morale = roll(6,3)
show(player_morale, ".")
if player_morale < 12
It's not that great, to be honest, but you have to work with what you've got.
elseif player_morale >= 12 and player_morale <18
It's a pretty good morale score to start with.
else
Perfect morale score! You feel super elevated!
endif
```
> ✅ Test this in Play Mode. Due to the initial value being randomized, you'll see different outcomes each time you restart the story.
## Add morale check
Context: Arcweave docs > Tutorials > Basic Arcweave > Basic Arcweave tutorial | Part 15: Polish the project > Add morale check
There's not much point in having a stat like morale if it never affects anything.
Let's add a **morale check** at a key moment in the story: when Horace opens the door and comments on the player being late (or dirty).
### Add a penalty
Context: Arcweave docs > Tutorials > Basic Arcweave > Basic Arcweave tutorial | Part 15: Polish the project > Add morale check > Add a penalty
First, let's add a penalty for not having showered. Inside the element where Horace opens the door, type:
```arcweave-html
Horace Linetti opens the door and lets you in.
if shower_taken
"You're late!" he says.
else
"Good Lord! You smell as if you've spent the night on an office floor," he says, fanning the air with his hand.
player_morale = player_morale - 2
endif
```
### Roll the check
Context: Arcweave docs > Tutorials > Basic Arcweave > Basic Arcweave tutorial | Part 15: Polish the project > Add morale check > Roll the check
Next, we add the actual check: we'll roll a 20-sided die and compare it against the player's morale. As an extra rule, if the player has maximum morale (18), the check is considered a success.
Add the following to the element content:
```arcweave-html
if player_morale >= roll(20) or player_morale == 18
You enter the apartment. As you marvel at the design of the living room, he disappears towards the bedrooms. "Let me know if you find my grandmother's ring," he hollers.
else
You freeze with shame. Without a word, you turn around and leave.
endif
```
### Store the result
Context: Arcweave docs > Tutorials > Basic Arcweave > Basic Arcweave tutorial | Part 15: Polish the project > Add morale check > Store the result
Right now, the outcome of the check only affects the text shown inside that one element; it does not affect the options or the rest of the story. To fix this, we need to store the result in a **variable** so we can evaluate it anywhere else needed.
1. Create a new **Boolean** variable called `morale_check_success`, with initial value set to `false`.
2. Inside the element content, plant accordingly the assignment of the `morale_check_success` variable:
```arcweave-html
if player_morale >= roll(20) or player_morale == 18
morale_check_success = true
You enter the apartment. As you marvel at the design of the living room, he disappears towards the bedrooms. "Let me know if you find my grandmother's ring," he hollers.
else
morale_check_success = false
You freeze with shame. Without a word, you turn around and leave.
endif
```
> ✅ For safety, explicitly set the variable to `false` in the `else` branch, even if `false` is also its initial value.
---
### Complete element content
Context: Arcweave docs > Tutorials > Basic Arcweave > Basic Arcweave tutorial | Part 15: Polish the project > Add morale check > Complete element content
So, the complete element content is now:
```arcweave-html
Horace Linetti opens the door and lets you in.
if shower_taken
"You're late!" he says.
else
"Good Lord! You smell as if you've spent the night on an office floor," he says, fanning the air with his hand.
player_morale = player_morale - 2
endif
if player_morale >= roll(20) or player_morale == 18
morale_check_success = true
You enter the apartment. As you marvel at the design of the living room, he disappears towards the bedrooms. "Let me know if you find my grandmother's ring," he hollers.
else
morale_check_success = false
You freeze with shame. Without a word, you turn around and leave.
endif
```
### Branch the outputs
Context: Arcweave docs > Tutorials > Basic Arcweave > Basic Arcweave tutorial | Part 15: Polish the project > Add morale check > Branch the outputs
After this element, add a **branch** that evaluates the `morale_check_success` variable and diverts the flow accordingly:
- If `true` → You continue to the living room.
- If `false` → You walk away.
> ✅ Test it in Play Mode with **Debug** mode turned on so you can watch the variables update in real time. Try it both with and without showering to confirm both outcomes work as expected.
## Reset variables on restart
Context: Arcweave docs > Tutorials > Basic Arcweave > Basic Arcweave tutorial | Part 15: Polish the project > Reset variables on restart
If your project has restart jumpers (see [Add restart jumpers](https://docs.arcweave.com/tutorials/basic/pt-9#add-restart-jumpers) in Part 9), be careful: once your project has several variables, jumping straight back to the start without resetting them can cause the story to behave incorrectly. (The **Restart** button in Play Mode's menu already resets all variables and visits.)
Not every variable should be reset, though. For example, a variable that counts how many times the player has died should usually persist across restarts, since that's the entire point of tracking it. In this project, however, we want a clean slate every time, so in the story's starting element we reset:
- `morale_check_success`: No need to reset; it gets recalculated before it's used.
- `player_morale`: No need to reset; it gets recalculated before it's used.
- `shower_taken`: Reset to `false`
- `ring_state`: Reset to `0`
- `has_key`: Reset to `false`
Since resetting the first two variables does no harm, you can reset all of them at once: add an Arcscript segment with `resetAll()` at the top of the starting element's content. `resetAll()` resets every global, board, and component variable to its initial value; to keep some of them unchanged, pass them as arguments, e.g. `resetAll(player_morale)`. It does not reset element visits; use `resetVisits()` for that.
## Simplify unnecessary branches
Context: Arcweave docs > Tutorials > Basic Arcweave > Basic Arcweave tutorial | Part 15: Polish the project > Simplify unnecessary branches
Branches are useful when they affect the **flow** of the story or the player's available actions. They're overkill, however, when their only job is to change which text gets rendered; that's a job for code _inside_ an element instead.
In the bathroom, for example, there is a branch diverting to two nearly identical elements. Their only difference is the displayed text depending on whether the player has picked up the key. We can simplify this by merging the two elements into one and using Arcscript in the element's content to create conditional text:
```arcweave-html
Two identical mirrors over two identical sinks. You wonder whether the siblings have to do everything simultaneously.
if !has_key
Hey, wait a second. These two mirrors are not positioned fully flat on the wall. They actually... When you stand at the centre of the room, they both reflect the same corner: the top part of the door.
endif
```
Afterwards, we need to fix the option of examining the door, so it doesn't happen again and again. Add a new branch after the above element that checks whether the player already has the key:
- `if not has_key` → Go to the element where the key is found.
> ✅ The branch only has an `if` statement. If the player already has the key, there is no other option than to go back.
Play through this section again to confirm that examining the mirrors behaves correctly whether or not the player has already found the key.
## Adding a project cover
Context: Arcweave docs > Tutorials > Basic Arcweave > Basic Arcweave tutorial | Part 15: Polish the project > Adding a project cover
As a final polishing touch, let's give the project a cover image:
1. Exit the project by clicking the **Workspace** icon at the top left of your window.
2. Find your project thumbnail in the list, click the three dots **•••**, and select **Upload cover**.
3. Select an image from your drive and upload it.
Your project now has a cover, which will be shown in your project list and when sharing the project with others.
## What's next
Context: Arcweave docs > Tutorials > Basic Arcweave > Basic Arcweave tutorial | Part 15: Polish the project > What's next
This project is now finished! The following pages and their videos demonstrate more features, the next one being importing & exporting projects in a [Pro or Team](https://docs.arcweave.com/workspaces/billing-plans) workspace.
# Basic Arcweave tutorial | Part 16: Import & export project
Source: https://docs.arcweave.com/tutorials/basic/pt-16
Section: Tutorials > Basic Arcweave
Description: Text & video tutorial on importing and exporting Arcweave projects
If you are an [owner or editor](https://docs.arcweave.com/workspaces/roles#workspace-members) in a [Pro or Team](https://docs.arcweave.com/workspaces/billing-plans) workspace, you can export any of its projects as an `.arcw` file. This format is a project backup, which you can later re-import into any Pro or Team workspace.
This page also includes some project exporting & sharing features not included in [Part 14: Share & export](https://docs.arcweave.com/tutorials/basic/pt-14) of this tutorial.
## Video tutorial
Context: Arcweave docs > Tutorials > Basic Arcweave > Basic Arcweave tutorial | Part 16: Import & export project > Video tutorial
Watch this tutorial as a video:
Video: https://www.youtube.com/watch?v=ElCzGpCzn-A
> ⚠️ This video does not reflect the latest updates to Arcweave's UI.
> ✅ You can play the finished version of the Tutorial Project [here](https://arcweave.com/app/project/Qz0PXOZ0Ya/play) and explore its diagrams and structure [here](https://arcweave.com/app/project/Qz0PXOZ0Ya).
## Export project backup
Context: Arcweave docs > Tutorials > Basic Arcweave > Basic Arcweave tutorial | Part 16: Import & export project > Export project backup
To save a backup of your project to your drive:
1. Open the project.
2. Click **Export project** (the download icon) in the top menu.
3. Choose **Backup**.
4. Click **Export** and save the file to your drive.
> ℹ️ This option is available to [owners and editors](https://docs.arcweave.com/workspaces/roles#workspace-members) of [Pro and Team](https://docs.arcweave.com/workspaces/billing-plans) workspaces only.
## Import project backup
Context: Arcweave docs > Tutorials > Basic Arcweave > Basic Arcweave tutorial | Part 16: Import & export project > Import project backup
To import a project as an `.arcw` file:
1. Go to the **Projects** section of your workspace.
2. Click the **Import** button at the top right.
3. Choose **Arcweave File**.
4. Select the `.arcw` file from your device and upload it.
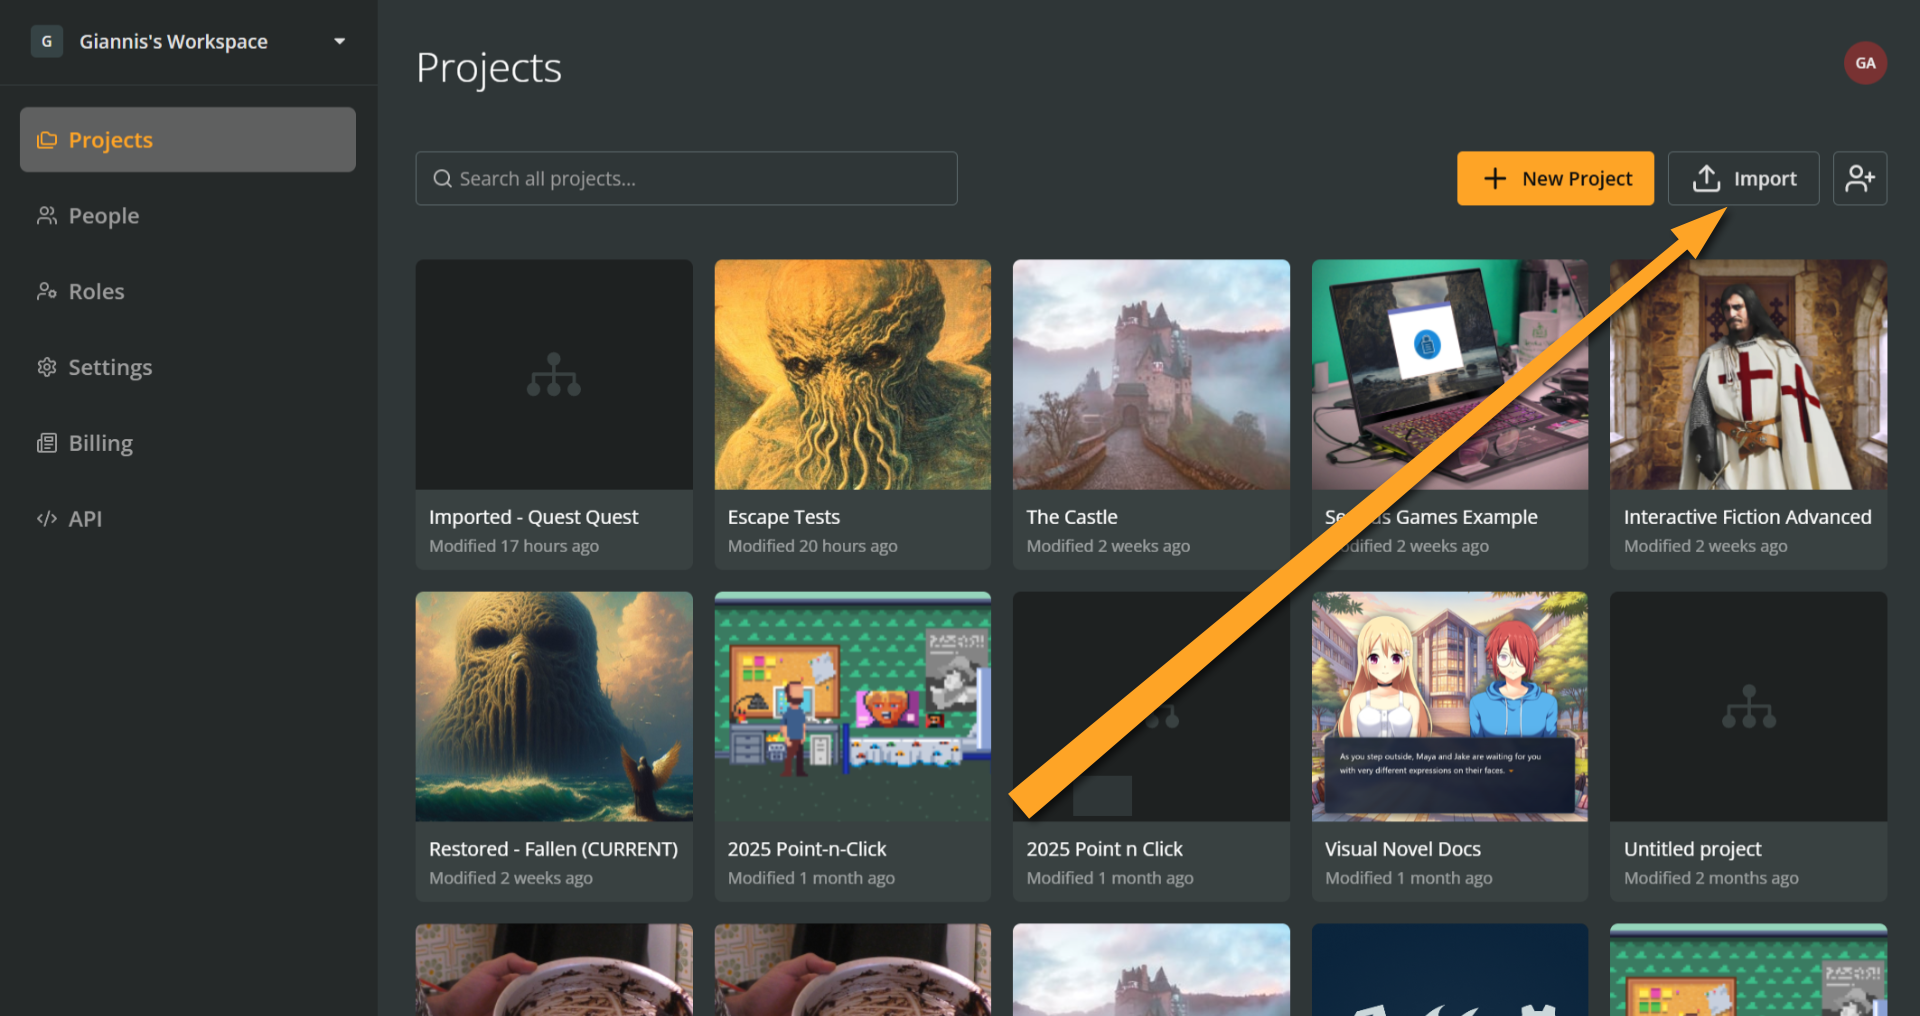
Once the import is complete, the project will appear in your workspace's **Projects** section, prefixed with _Restored -_. You can rename it as you wish.
> ℹ️ This option requires [Import projects permission](https://docs.arcweave.com/workspaces/roles#list-of-permissions) in a [Pro or Team](https://docs.arcweave.com/workspaces/billing-plans) workspace.
## Import JSON file
Context: Arcweave docs > Tutorials > Basic Arcweave > Basic Arcweave tutorial | Part 16: Import & export project > Import JSON file
To import a project as a JSON file:
1. Go to the **Projects** section of your workspace.
2. Click the **Import** button at the top right.
3. Choose **JSON File**.
4. Select the `.json` file from your device and upload it.
> ℹ️ This option requires [Import projects permission](https://docs.arcweave.com/workspaces/roles#list-of-permissions) and is available in all workspaces, subject to their project and item limits.
## Export JSON without assets
Context: Arcweave docs > Tutorials > Basic Arcweave > Basic Arcweave tutorial | Part 16: Import & export project > Export JSON without assets
A simple but convenient feature, available to all users including [owners and editors](https://docs.arcweave.com/workspaces/roles#workspace-members) of [Basic](https://docs.arcweave.com/workspaces/billing-plans) workspaces, is the ability to export your project data as a JSON file without also downloading all of the project's assets.
To do this:
1. Open the project.
2. Click **Export project** (the download icon) in the top menu.
3. Choose **JSON**.
4. Deselect the **Include assets** checkbox.
5. Click **Export** and save the file to your drive.
> ✅ If you export to JSON often, this saves you from the unnecessary asset downloads.
## What's next
Context: Arcweave docs > Tutorials > Basic Arcweave > Basic Arcweave tutorial | Part 16: Import & export project > What's next
You now know how to back up your projects via import and export, as well as how to export JSON files without assets. In the next tutorial, we'll continue exploring some features of project editing.
# Basic Arcweave tutorial | Part 17: More project features
Source: https://docs.arcweave.com/tutorials/basic/pt-17
Section: Tutorials > Basic Arcweave
Description: Text & video tutorial on quality-of-life improvements in Arcweave's project environment
This tutorial covers several quality-of-life improvements available in Arcweave's project environment:
- Alternative [ways to create jumpers](https://docs.arcweave.com/tutorials/basic/pt-17#ways-to-create-jumpers)
- [Component references](https://docs.arcweave.com/tutorials/basic/pt-17#component-references)
- [Creating components by mentioning](https://docs.arcweave.com/tutorials/basic/pt-17#create-components-by-mentioning)
- [Sticky connections](https://docs.arcweave.com/tutorials/basic/pt-17#sticky-connections) (Connections that stick to a specific side of an element)
- [Automatic and manual height](https://docs.arcweave.com/tutorials/basic/pt-17#automatic-manual-item-height) of elements and notes
- [YouTube video embeds as element covers](https://docs.arcweave.com/tutorials/basic/pt-17#youtube-embeds-as-element-covers)
## Video tutorial
Context: Arcweave docs > Tutorials > Basic Arcweave > Basic Arcweave tutorial | Part 17: More project features > Video tutorial
Watch this tutorial as a video:
Video: https://www.youtube.com/watch?v=qAyNvVja90s
> ⚠️ This video does not reflect the latest updates to Arcweave's UI.
> ✅ You can play the finished version of the Tutorial Project [here](https://arcweave.com/app/project/Qz0PXOZ0Ya/play) and explore its diagrams and structure [here](https://arcweave.com/app/project/Qz0PXOZ0Ya).
## Ways to create jumpers
Context: Arcweave docs > Tutorials > Basic Arcweave > Basic Arcweave tutorial | Part 17: More project features > Ways to create jumpers
There are 3 ways to create a non-empty jumper in Arcweave.
### Create jumpers from Boards section
Context: Arcweave docs > Tutorials > Basic Arcweave > Basic Arcweave tutorial | Part 17: More project features > Ways to create jumpers > Create jumpers from Boards section
The first way to create a jumper (and the way we've already mentioned) is to drag an element from the **Boards section** of the left sidebar into an empty area of the board. Use this method when you have located the target element in the left sidebar.
1. Go to the **Boards** section of the left sidebar.
2. Find the board where the desired element is.
3. Expand the board by clicking on the drop-down arrow next to its icon.
4. Find the element by its name.
5. Drag and drop the element into the empty jumper (or an empty area of the board).
### Create jumpers from Search field
Context: Arcweave docs > Tutorials > Basic Arcweave > Basic Arcweave tutorial | Part 17: More project features > Ways to create jumpers > Create jumpers from Search field
If you don't know where the target element is, look it up in Arcweave's **Search**. Then, you can drag it from the search results into the board:
1. Click **Search project** at the right side of the top menu.
2. Look up the desired element, typing part of its text content or title in the search field.
3. From the search results, drag the element into an empty area of the board.
### Create jumpers by pasting
Context: Arcweave docs > Tutorials > Basic Arcweave > Basic Arcweave tutorial | Part 17: More project features > Ways to create jumpers > Create jumpers by pasting
When you can easily access the target element in a board, you don't need to search for it again. Instead, you can copy and paste it as jumper:
1. In the board, click the element to **select** it.
2. Copy the element:
- Press **Ctrl/Cmd + C** or
- Right-click and select **Copy** from the menu.
3. Paste as jumper:
- Right-click an empty area of the board and select **Paste as jumper** from the menu or
- Press **Ctrl/Cmd + Shift + V**.
> ✅ Arcweave has a long list of [keyboard shortcuts](https://docs.arcweave.com/project-tools/interface/keyboard-shortcuts). Make sure you check them out!
## Component references
Context: Arcweave docs > Tutorials > Basic Arcweave > Basic Arcweave tutorial | Part 17: More project features > Component references
In [Part 5 of this tutorial](https://docs.arcweave.com/tutorials/basic/pt-5), you learned how to attach components to elements and other components. In [Part 6](https://docs.arcweave.com/tutorials/basic/pt-6) you learned how to mention a component in rich text content.
Overall, you can attach or mention components in the following items:
- **Elements**
- Attach to element
- Mention in element content
- Mention in element title
- **Components**
- Attach to component list attribute
- Mention in content of rich text attribute
- **Labels**
- Mention in label text
- **Notes**
- Mention in note content
As the component attachments and mentions increase, it can be useful to see a report of everywhere a given component appears:
1. Go to the **Components** list in the left sidebar.
2. Right-click a component and select **References**.
This shows every element, component, connection label, and note where the selected component is attached or mentioned. Clicking any entry in the list takes you directly to the item that includes the reference.
## Create components by mentioning
Context: Arcweave docs > Tutorials > Basic Arcweave > Basic Arcweave tutorial | Part 17: More project features > Create components by mentioning
You already know how to mention an existing component in the rich text of an element, note, label, or attribute.
What you may not know is that **mentioning a non-existing component will create it**.
For example, typing `@dead_frog` in an element's text shows an option to create a new component called **dead frog**.
Pressing Enter creates the component automatically, and it becomes immediately available in your Components list.
> ✅ Use an underscore in place of a space when typing a multi-word mention.
## Sticky connections
Context: Arcweave docs > Tutorials > Basic Arcweave > Basic Arcweave tutorial | Part 17: More project features > Sticky connections
By default, connections between board items automatically reposition themselves, moving from side to side, or top to bottom, when you reposition the items in relation to each other.
### Make connections sticky
Context: Arcweave docs > Tutorials > Basic Arcweave > Basic Arcweave tutorial | Part 17: More project features > Sticky connections > Make connections sticky
To make a connection **stick to a specific side** of an element, a jumper, or a branch instead:
1. Grab the connection's arrowhead or tail.
2. Drag it **close to the edge** of the item (not into the body of the item), until you see an **orange border highlighting that side**.
3. Drop it there.
The connection now stays fixed to that side of the item, regardless of how you reposition the connected items.
### Revert connections to auto
Context: Arcweave docs > Tutorials > Basic Arcweave > Basic Arcweave tutorial | Part 17: More project features > Sticky connections > Revert connections to auto
To revert a connection to its default, automatic behavior:
1. Grab the connection's arrowhead or tail.
2. Drag it **into the body** of the item (not just the side) until the **entire border is highlighted in orange**.
3. Drop it there.
The connection returns to its automatic state.
## Automatic / manual item height
Context: Arcweave docs > Tutorials > Basic Arcweave > Basic Arcweave tutorial | Part 17: More project features > Automatic / manual item height
New elements and notes automatically adjust their height to fit their text content.
You can however manually resize an element or note to a specific height:
- Drag the top or bottom side.
- Drag a corner in a way that also changes the height.
> ✅ A scroll bar appears if the content exceeds the visible area.
To revert to automatic height, **double-click the orange border** of the element or note. This resizes the item to fit its content and returns it to "auto" height behavior.
## YouTube embeds as element covers
Context: Arcweave docs > Tutorials > Basic Arcweave > Basic Arcweave tutorial | Part 17: More project features > YouTube embeds as element covers
You can embed a YouTube video directly as an element's cover.
1. Right-click the element and choose **Cover > Set cover**.
2. Select the **Embed** tab.
3. Paste the YouTube video's link in the respective field.
4. Select whether the video should **Autoplay** when the element loads and whether player controls should be available to the viewer (**Show controls**).
5. Click **Embed Video**.
The video's YouTube thumbnail is used as the element's cover. In Play Mode, the video plays directly over the element's content and any attached components.
This feature can be used to include a video reference alongside your content, or to build a fully interactive movie that takes advantage of Arcweave's state handling (variables and conditions) to drive the story.
> ✅ Arcweave also supports [video assets](https://docs.arcweave.com/project-items/assets/video), allowing you to assign videos as element covers. Among its project templates, see **Interactive Movie Example**, which demonstrates this feature.
# Basic Arcweave tutorial | Part 18: Comments
Source: https://docs.arcweave.com/tutorials/basic/pt-18
Section: Tutorials > Basic Arcweave
Description: Text & video tutorial on posting and replying to Arcweave user comments
Learn how to use [comments](https://docs.arcweave.com/project-items/comments) in Arcweave projects, to collaborate with your team.
## Video tutorial
Context: Arcweave docs > Tutorials > Basic Arcweave > Basic Arcweave tutorial | Part 18: Comments > Video tutorial
Watch this tutorial as a video:
Video: https://www.youtube.com/watch?v=RQn9FRKmsM0
> ⚠️ This video does not reflect the latest updates to Arcweave's UI.
> ✅ You can play the finished version of the Tutorial Project [here](https://arcweave.com/app/project/Qz0PXOZ0Ya/play) and explore its diagrams and structure [here](https://arcweave.com/app/project/Qz0PXOZ0Ya).
## Create a comment
Context: Arcweave docs > Tutorials > Basic Arcweave > Basic Arcweave tutorial | Part 18: Comments > Create a comment
There are two ways to create a comment:
1. Right-click anywhere on a board and choose **Create > Comment**.
2. Drag the comment icon (which looks like a speech balloon) from the bottom toolbar into anywhere inside your board.
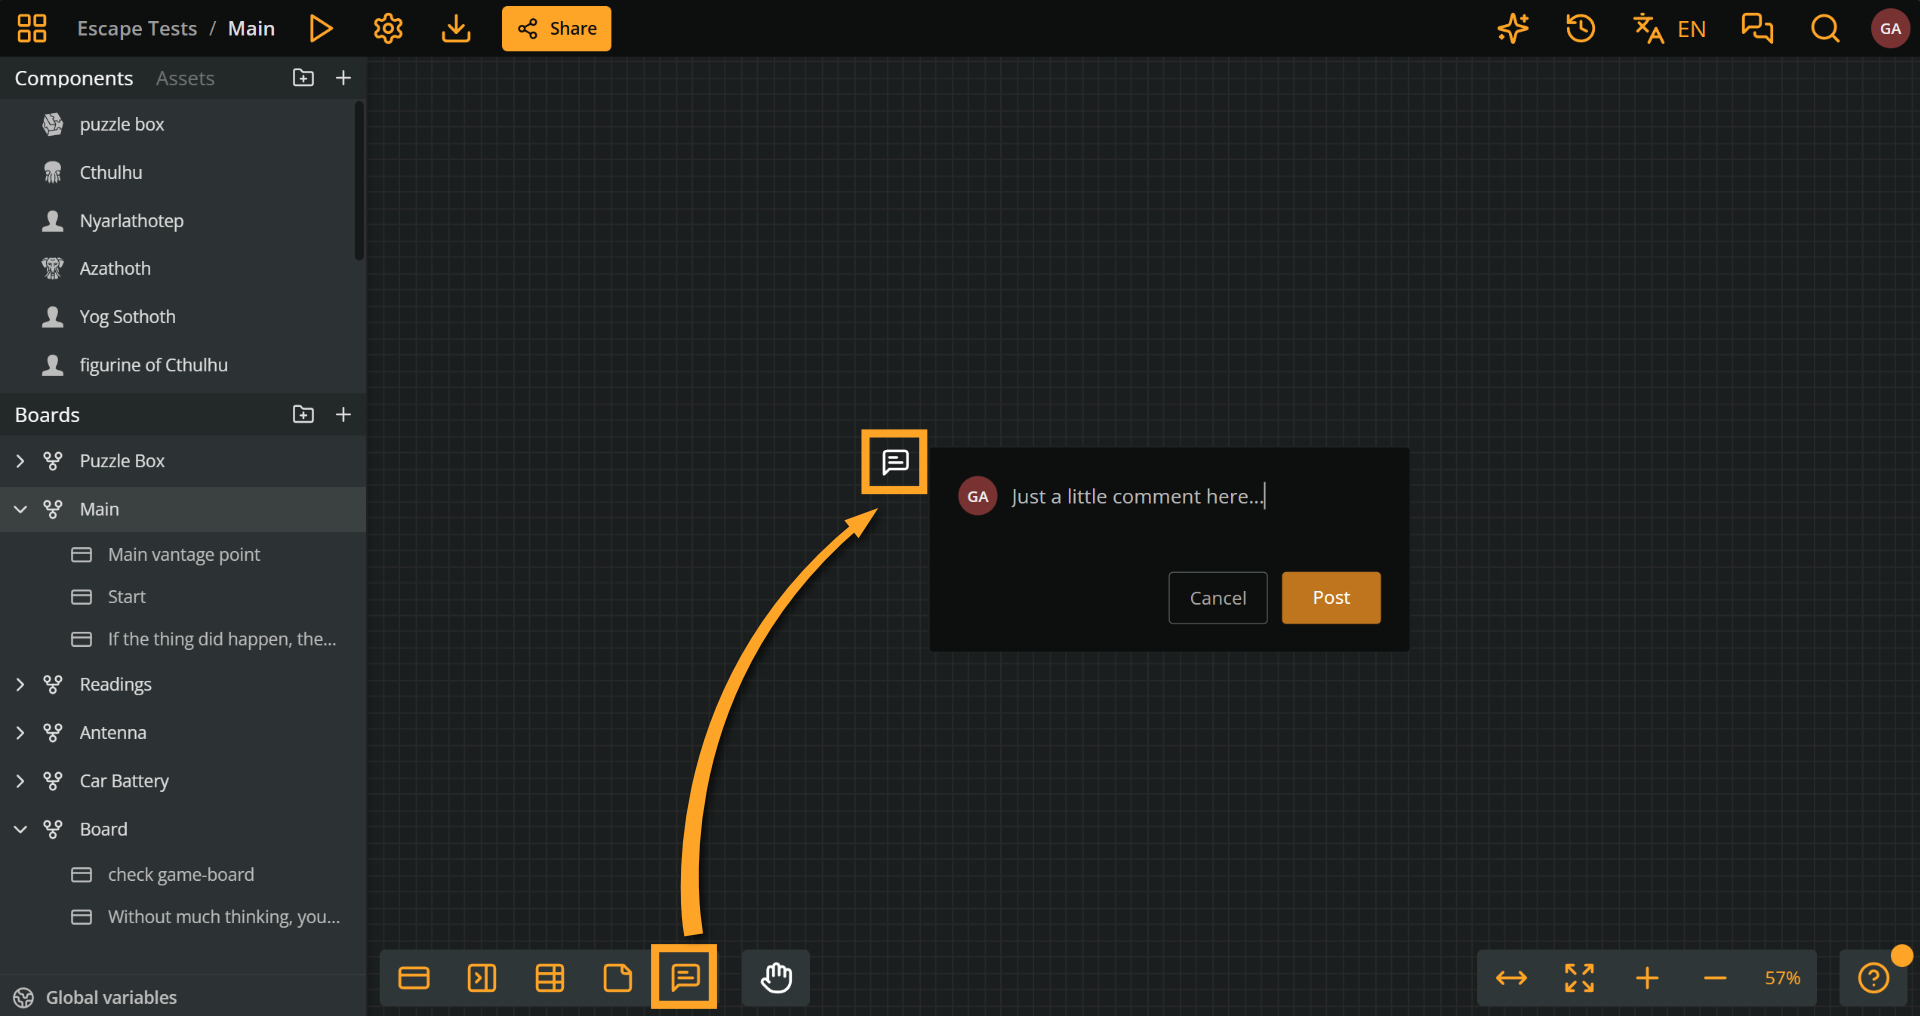
Once created, you can start typing your comment right away. When you're done, either click **Post**, or press **Ctrl+Enter** (Windows) / **Cmd+Enter** (Mac).
## Manage comments
Context: Arcweave docs > Tutorials > Basic Arcweave > Basic Arcweave tutorial | Part 18: Comments > Manage comments
Comments are flexible and can be managed directly on the board:
- **Open** a comment by clicking it on the board or the [Comments list](https://docs.arcweave.com/tutorials/basic/pt-18#comments-list).
- **Move** a comment by dragging it around the board.
- **Select** a comment with a rectangle selection. (Clicking opens it.)
- **Cut and paste** a comment to relocate it.
- **Reply** to a comment to keep a conversation going.
- **Edit** a comment or a reply at any time.
- **Delete** a reply, or an entire comment thread.
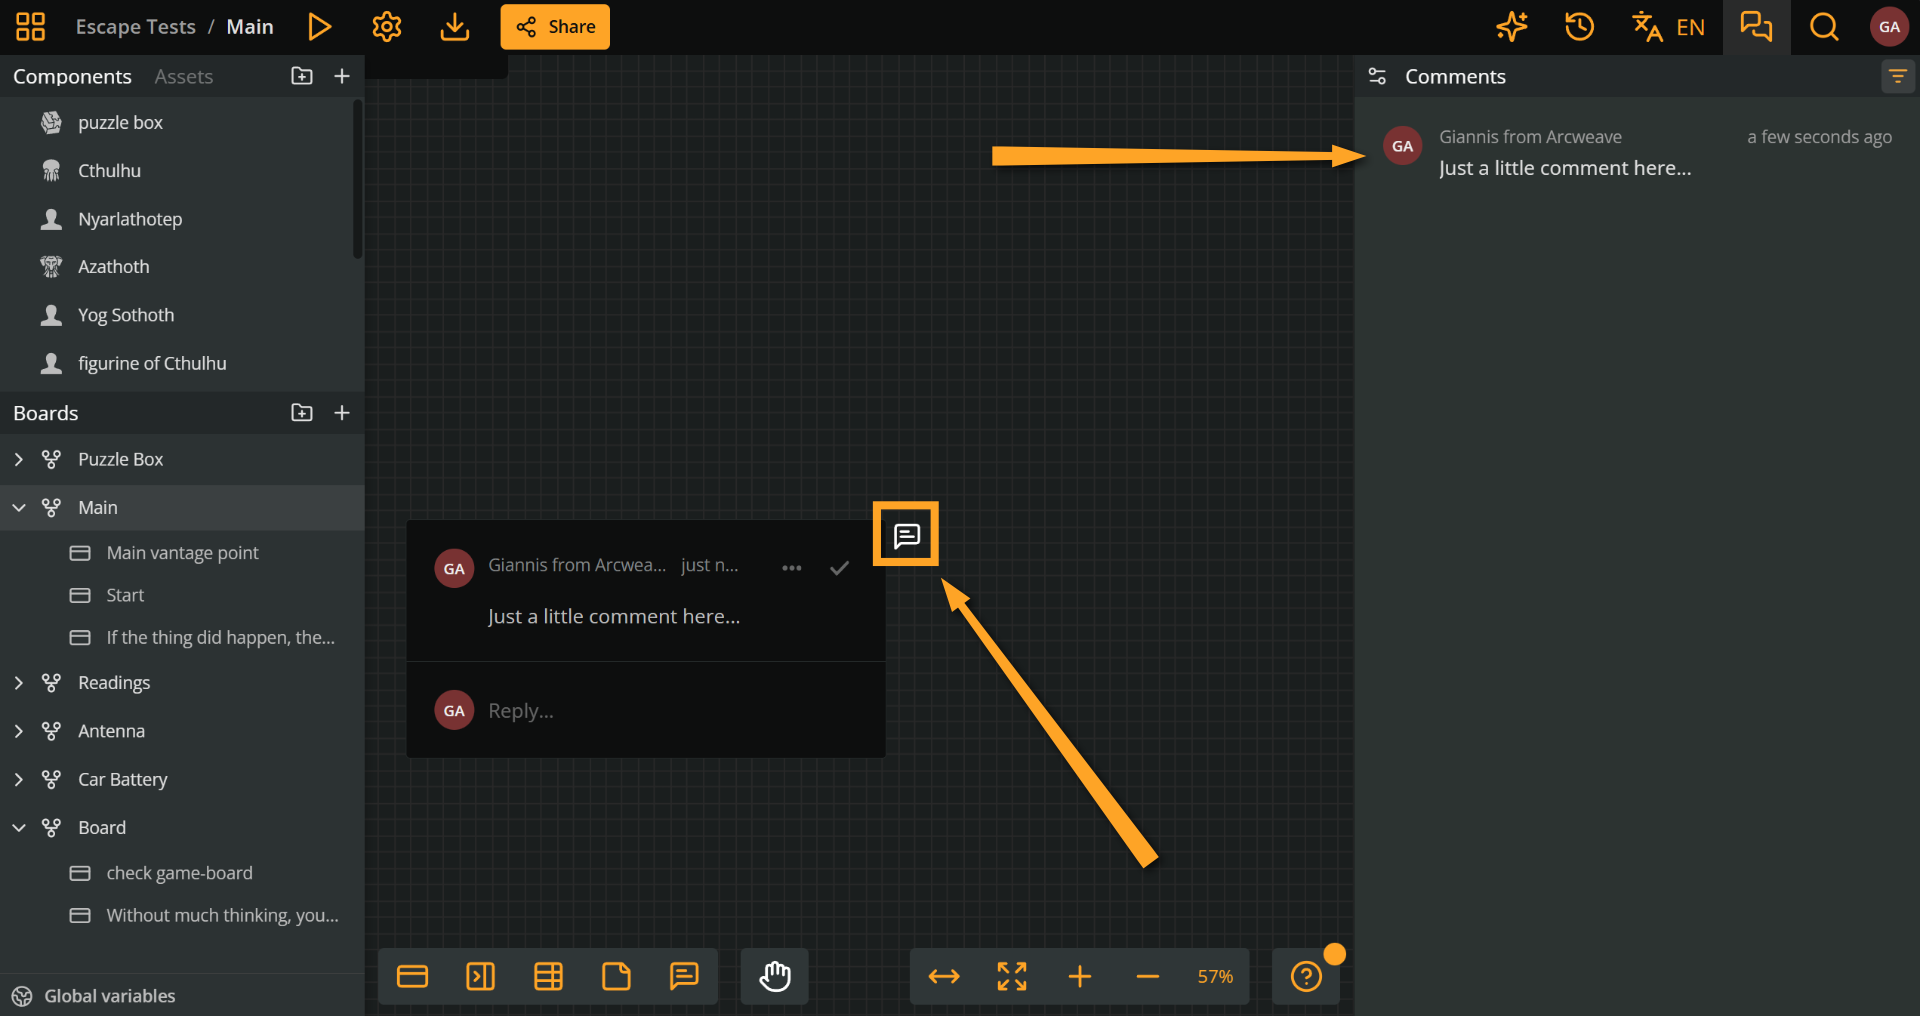
### Resolving a thread
Context: Arcweave docs > Tutorials > Basic Arcweave > Basic Arcweave tutorial | Part 18: Comments > Manage comments > Resolving a thread
Once a thread of comments has been addressed, you can mark it as resolved by ticking the **Resolve thread** icon. A checkmark will then appear on the comment's icon to indicate its resolved status.
## Comments list
Context: Arcweave docs > Tutorials > Basic Arcweave > Basic Arcweave tutorial | Part 18: Comments > Comments list
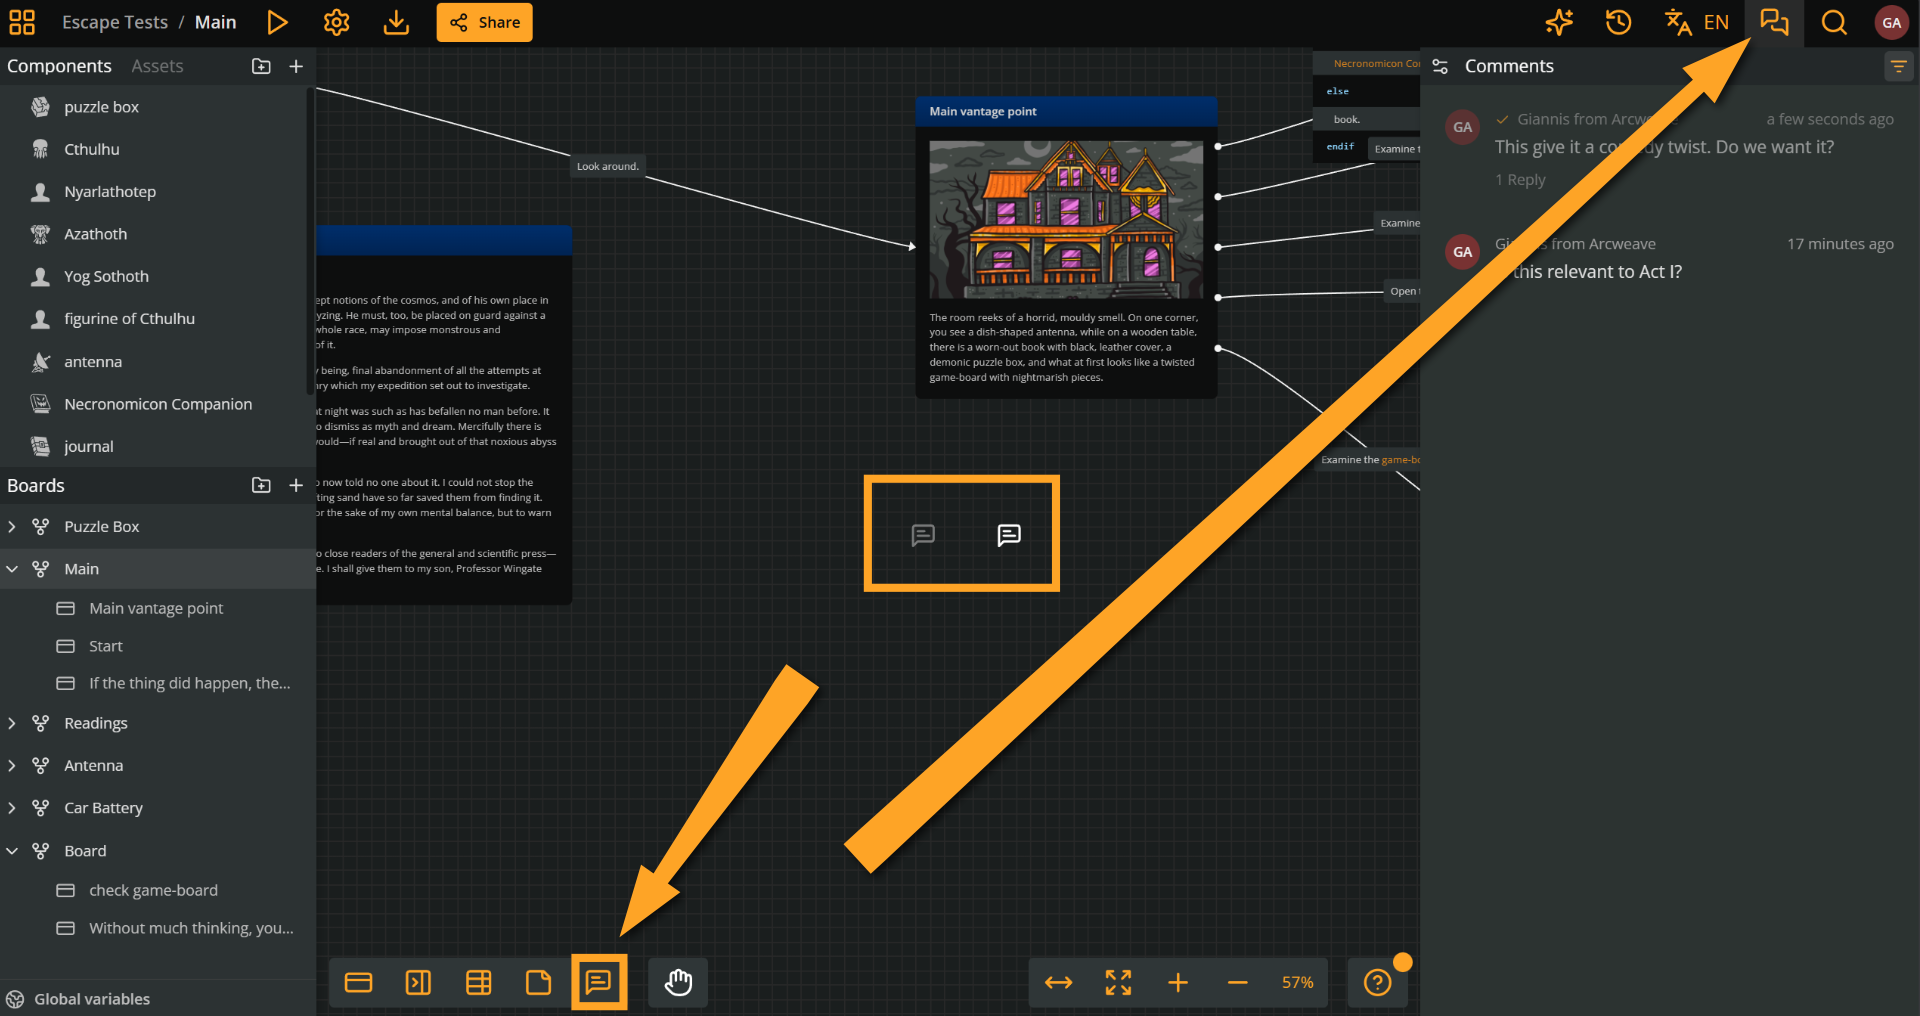
You can find a list of all the project's comments by clicking the comment icon in the top-right menu. Any comment you create will appear here.
Clicking on a comment from the list takes you directly to that comment's position on the board.
Resolved comments are marked with a tick symbol in the list as well. If you'd like to omit resolved comments from the list without deleting them:
1. Click the **Filters** button in the **Comments** panel (top right).
2. Untick **Show resolved comments**.
This setting also hides resolved comments on the board itself.
## Email notifications
Context: Arcweave docs > Tutorials > Basic Arcweave > Basic Arcweave tutorial | Part 18: Comments > Email notifications
The **Comment notifications** icon, at the top left of the **Comments** panel, manages your email notifications. Choose **All comments** to receive an email whenever a collaborator posts a comment or a reply, **Mentions and replies only**, or **None**.
> ℹ️ You can mention collaborators in comments. See the [Comments](https://docs.arcweave.com/project-items/comments#user-mentions) for details.
## What's next
Context: Arcweave docs > Tutorials > Basic Arcweave > Basic Arcweave tutorial | Part 18: Comments > What's next
After getting a taste of collaborating through comments, in the next part of the tutorial you will learn about `visits`, a function that counts how many times the player has visited an element during play.
# Basic Arcweave tutorial | Part 19: Function `visits`
Source: https://docs.arcweave.com/tutorials/basic/pt-19
Section: Tutorials > Basic Arcweave
Description: Text & video tutorial on the function that counts element visits
Arcscript examples: Arcscript has no delimiters, so never wrap code in `${ }`, `{{ }}`, `<< >>` or similar markers. An `arcscript` code block contains only code: each line is one segment, and a branch condition is a single expression without `if` or `endif`. An `arcweave-html` code block is element or connection label content as Arcweave stores it, the HTML that the REST API and MCP server accept: `` for text, `
` for an empty line, and each Arcscript segment in its own `` block, with `<` written as `<`. An element passed to `visits()` is written as element mention markup; replace `ELEMENT_ID` with the element ID.
Use [`visits`](https://docs.arcweave.com/project-items/arcscript#visits) to get the number of times an element has been loaded (i.e. _visited)_ in Play Mode.
## Video tutorial
Context: Arcweave docs > Tutorials > Basic Arcweave > Basic Arcweave tutorial | Part 19: Function `visits` > Video tutorial
Watch this tutorial as a video:
Video: https://www.youtube.com/watch?v=95zK_2vOlmk
> ⚠️ This video does not reflect the latest updates to Arcweave's UI.
> ✅ You can play the finished version of the Tutorial Project [here](https://arcweave.com/app/project/Qz0PXOZ0Ya/play) and explore its diagrams and structure [here](https://arcweave.com/app/project/Qz0PXOZ0Ya).
## Why track visits
Context: Arcweave docs > Tutorials > Basic Arcweave > Basic Arcweave tutorial | Part 19: Function `visits` > Why track visits
So far, to track whether the player has visited parts of the story (that is, whether they've performed specific actions or received specific pieces of information), we've been using **global variables**. The downside of this approach is that the global variables list can quickly get out of control: you end up with tons of variables, one for every story or dialogue case that needs to be checked later on, causing major clutter.
To solve this issue, Arcweave offers **visits**, a function that **returns how many times the player has visited a specific element**.
> ✅ For scoped alternatives to global variables, see [Board variables](https://docs.arcweave.com/project-items/variables/board) and [Component variables](https://docs.arcweave.com/project-items/variables/component).
## Demo project
Context: Arcweave docs > Tutorials > Basic Arcweave > Basic Arcweave tutorial | Part 19: Function `visits` > Demo project
As a demo, we'll be using a short project called _In a tavern._ You can see its boards [here](https://arcweave.com/app/project/7rEYzYG6P3) and play it below:
Embedded content: https://arcweave.com/embed/7rEYzYG6P3/play
## `visits` in elements
Context: Arcweave docs > Tutorials > Basic Arcweave > Basic Arcweave tutorial | Part 19: Function `visits` > `visits` in elements
We can call `visits` from an element's Arcscript segments.
### Demo study: element
Context: Arcweave docs > Tutorials > Basic Arcweave > Basic Arcweave tutorial | Part 19: Function `visits` > `visits` in elements > Demo study: element
In the demo project _In a tavern,_ go to the **Beginning** board and find the element titled _Sigh._
Here, we have used the `visits` function in a simple way: in the dialogue with the druid, we've added an `if` statement that checks whether the player has already asked the necromancer for money.
Notice the `if` statement included in its content:
```arcweave-html
"I see," you sigh.
if visits(asking_necromancer) > 0
"At least, I had _something_ in my pockets," says the druid, glaring at Solon.
endif
```
> ℹ️ Remember: `visits` tells you how many times an element has been visited. If the visits count of the element **Asking Necromancer** is greater than `0`, this means we've already spoken to the necromancer.
### Add `visits` to elements
Context: Arcweave docs > Tutorials > Basic Arcweave > Basic Arcweave tutorial | Part 19: Function `visits` > `visits` in elements > Add `visits` to elements
To recreate the above element:
1. Create a new element.
2. Double click its body and type its rich text content as usual.
3. Create a new line and start an Arcscript segment (**Ctrl/Cmd + Shift + C**).
4. Type in a conditional expression that uses `visits`: e.g. `if visits()`
5. Press Enter and type some rich text, e.g. "You've already spoken with the necromancer."
6. Close with an `endif`, as you already know from [Part 12](https://docs.arcweave.com/tutorials/basic/pt-12) of this tutorial.
7. Specify the argument of `visits`, i.e. what goes between the parentheses. This will be the title of the element you want to get the visits of. This is how you fill it in:
1. Place your cursor between the parentheses of `visits()`.
2. Type the `@` character (just as you would when mentioning a component or a board). This brings up a pop-up list of elements you can choose from.
3. Continue typing to narrow down the selection, and select **Asking Necromancer**.
4. The argument will be automatically filled in (in snake case): `asking_necromancer`.
## `visits` in branches
Context: Arcweave docs > Tutorials > Basic Arcweave > Basic Arcweave tutorial | Part 19: Function `visits` > `visits` in branches
We can also call `visits` from inside a branch.
### Demo study: branch
Context: Arcweave docs > Tutorials > Basic Arcweave > Basic Arcweave tutorial | Part 19: Function `visits` > `visits` in branches > Demo study: branch
From the same element as before (titled _Sigh),_ one of the output connections leads to a branch. Its `if` condition is:
```arcscript
visits(asking_necromancer) > 0
```
This branch diverts to a new element where the player can give the Druid a pat on the back.
In Play Mode, this extra line and the extra option will only appear if the player has already visited the _Asking Necromancer_ element.
### Add `visits` to branches
Context: Arcweave docs > Tutorials > Basic Arcweave > Basic Arcweave tutorial | Part 19: Function `visits` > `visits` in branches > Add `visits` to branches
To include a `visits` call in a branch:
1. Create a new branch.
2. Double-click its `if` condition and type an expression that uses `visits`, e.g. `visits()`... The branch already displays the `if` keyword, so don't type it.
3. Specify the argument of `visits`, i.e. what goes between the parentheses. This will be the title of the element you want to get the visits of. This is how you fill it in:
1. Place your cursor between the parentheses of `visits()`.
2. Type the `@` character (just as you would when mentioning a component or a board). This brings up a pop-up list of elements you can choose from.
3. Continue typing to narrow down the selection, and select **Asking Necromancer**.
4. The argument will be automatically filled in (in snake case): `asking_necromancer`.
## Element titles in `visits`
Context: Arcweave docs > Tutorials > Basic Arcweave > Basic Arcweave tutorial | Part 19: Function `visits` > Element titles in `visits`
When used as an argument of `visits`, an element's title is automatically converted to **snake_case** (i.e. all words are in lowercase, with underscores instead of spaces), while the `@` character disappears once the element is selected.
This happens under the hood: what you see isn't plain text code. In fact, the function's argument becomes a **link to the source element**. Clicking it will take you directly to the element it refers to, which is very convenient.
## Simplified syntax
Context: Arcweave docs > Tutorials > Basic Arcweave > Basic Arcweave tutorial | Part 19: Function `visits` > Simplified syntax
As mentioned, the `visits` function returns the number of visits, which is an integer.
Very often, though, we don't care about the exact count; we only care about whether an element has or hasn't been visited at all.
In these cases, we can simplify the syntax. Arcweave treats zero visits as `false` and any other number of visits as `true`, so this condition...
```arcscript
visits(asking_necromancer) > 0
```
... can be simplified to:
```arcscript
visits(asking_necromancer)
```
This is still valid, and functions the same way — it's a convenient shorthand for the very common case of only caring _whether_ something has happened, not _how many times_.
## `visits` without argument
Context: Arcweave docs > Tutorials > Basic Arcweave > Basic Arcweave tutorial | Part 19: Function `visits` > `visits` without argument
### First time descriptions
Context: Arcweave docs > Tutorials > Basic Arcweave > Basic Arcweave tutorial | Part 19: Function `visits` > `visits` without argument > First time descriptions
If you're calling `visits` from inside an element and want to reference that same element, you can call the function without any arguments.
This makes it easier to add first-time descriptions in an element, i.e. text that only appears the first time the element is visited:
```arcweave-html
You enter the tavern.
if visits() == 1
Whoa, you've never been in such a place before!
endif
You approach the bartender.
```
### Varying text per visit
Context: Arcweave docs > Tutorials > Basic Arcweave > Basic Arcweave tutorial | Part 19: Function `visits` > `visits` without argument > Varying text per visit
A variation of the above is creating text that differs with every visit.
Let's say we expect the player to visit an element several times. If we don't want the player to keep getting the same response every time they loop back, we can modify the content based on how many times they've visited the element, using `visits` without an argument.
This is done in the demo project's element titled _Ask about skeleton:_
```arcweave-html
if visits() == 1
"I see you remembered to bring your skeleton along, though. Carrying a pouch would have been too much?"
elseif visits() == 2
"Are you sure the skeleton has no money?" you ask.
Solon Blasphemius shrugs.
else
You don't bother asking him again.
endif
```
## What's next
Context: Arcweave docs > Tutorials > Basic Arcweave > Basic Arcweave tutorial | Part 19: Function `visits` > What's next
This was a more demanding chapter, but now you've learned one of the most powerful functions of Arcscript!
In the next part of the tutorial, you'll learn how to use Arcscript in labels, as well as an alternative way to create and connect items in a board.
# Basic Arcweave tutorial | Part 20: Advanced connections & labels
Source: https://docs.arcweave.com/tutorials/basic/pt-20
Section: Tutorials > Basic Arcweave
Description: Text & video tutorial on advanced functionalities of connections and labels
Arcscript examples: Arcscript has no delimiters, so never wrap code in `${ }`, `{{ }}`, `<< >>` or similar markers. An `arcscript` code block contains only code: each line is one segment, and a branch condition is a single expression without `if` or `endif`. An `arcweave-html` code block is element or connection label content as Arcweave stores it, the HTML that the REST API and MCP server accept: `` for text, `
` for an empty line, and each Arcscript segment in its own `` block, with `<` written as `<`. An element passed to `visits()` is written as element mention markup; replace `ELEMENT_ID` with the element ID.
This tutorial covers a few recent additions to Arcweave's **connections** and **labels**: a faster way to create new connections, and the ability to use Arcscript inside connection labels to change text dynamically or assign variables.
## Video tutorials
Context: Arcweave docs > Tutorials > Basic Arcweave > Basic Arcweave tutorial | Part 20: Advanced connections & labels > Video tutorials
Watch this tutorial as a video:
Video: https://www.youtube.com/watch?v=uMaqLWjoMvQ
> ⚠️ This video does not reflect the latest updates to Arcweave's UI.
> ✅ You can play the finished version of the Tutorial Project [here](https://arcweave.com/app/project/Qz0PXOZ0Ya/play) and explore its diagrams and structure [here](https://arcweave.com/app/project/Qz0PXOZ0Ya).
## Drop connections to create board items
Context: Arcweave docs > Tutorials > Basic Arcweave > Basic Arcweave tutorial | Part 20: Advanced connections & labels > Drop connections to create board items
So far you have seen how to connect two existing board items (elements, branches, or jumpers): first create the items and then draw a connection from one to the other.
You can also drag a new connection and **drop it directly onto an empty area of the board**. This opens a menu where you can choose to create a new element, jumper, or branch.
This removes the extra step of creating the item first and then connecting it, letting you build out your diagram with single actions.
> ✅ When an element is selected, you can use [keyboard shortcuts](https://docs.arcweave.com/project-tools/interface/keyboard-shortcuts#element-creation-connection) to instantly create a new connected element. Press **Ctrl + Alt/Option/Cmd + an arrow key** to create the new element in the direction of the arrow.
## Arcscript in labels
Context: Arcweave docs > Tutorials > Basic Arcweave > Basic Arcweave tutorial | Part 20: Advanced connections & labels > Arcscript in labels
You have already seen Arcscript living inside elements and branches. Time to learn that **connection labels can also take Arcscript**.
This lets you manipulate a label's text based on conditions or make variable assignments directly on a connection.
In Play Mode, the Arcscript in labels executes:
- **When the label text is rendered as an option button**
This execution _does not change the game state._ It solely allows the option text to get evaluated accordingly so its button can be rendered.
- **When the player chooses the respective option** (i.e. presses an option button)
This execution _changes the game state,_ as the story flow advances to the next element.
### Conditional text in labels
Context: Arcweave docs > Tutorials > Basic Arcweave > Basic Arcweave tutorial | Part 20: Advanced connections & labels > Arcscript in labels > Conditional text in labels
You can use Arcscript to change what a label says depending on how many times the player has passed through it. For example, in the demo project _In a tavern_ (see [Part 19](https://docs.arcweave.com/tutorials/basic/pt-19#demo-project)), take a label that reads:
> Are you sure the skeleton has no money?
To make the label change on repeat visits, split the sentence where you want the condition to apply, then insert a code segment. You can add a code segment the same way you would inside an element:
- Click the **Arcscript segment** icon, or
- Use the shortcut **Ctrl/Cmd+Shift+C**
Inside the segment, check how many times the element has been visited using the `visits()` function:
```arcweave-html
"Are you
if visits(ask_about_skeleton) > 1
absolutely
endif
sure the skeleton has no money?"
```
With this in place, the first time the player reaches the _Ask about skeleton_ element, the label reads:
> Are you sure the skeleton has no money?
Because the visit count is exactly `1` at that point, the condition isn't met. On every subsequent visit, the condition evaluates to true and the label becomes:
> Are you absolutely sure the skeleton has no money?
You can also apply formatting — such as italics — to the inserted text to give it extra emphasis.
To test this, run the project from that point using **Quickstart Play Mode from here**. On the first visit, the label shows the plain version of the question. Selecting the option and returning to it again shows the updated version with "absolutely" included, and it continues to appear on every visit after that.
### Variable assignments in labels
Context: Arcweave docs > Tutorials > Basic Arcweave > Basic Arcweave tutorial | Part 20: Advanced connections & labels > Arcscript in labels > Variable assignments in labels
You can also use a connection label to change a variable's value when the player picks a specific option.
For example, suppose two connections lead out of the same element with two different responses:
- **"Oh, well."** — a more accepting response
- **"You're all unbelievable."** — a more negative response
Since the second option is negative, you might want it to reduce the party's morale. To do this, add an Arcscript segment to that connection's label:
```arcweave-html
"You're all unbelievable."
morale -= 1
```
For the more accepting option, you could instead reward the player:
```arcweave-html
"Oh, well."
morale += 1
```
Both connections lead to the same destination element, but different variable assignments happen along the way depending on which one the player chooses.
To test this, run the project from that point using **Quickstart Play Mode from here** and open the **Debugger** to watch the `morale` variable change:
- `morale` starts at `10`.
- Choosing **"Oh, well."** increases it to `11`.
- Clicking **Undo last choice** in the Debugger and instead choosing **"You're all unbelievable."** decreases it to `9`.
## Demo: a quiz
Context: Arcweave docs > Tutorials > Basic Arcweave > Basic Arcweave tutorial | Part 20: Advanced connections & labels > Demo: a quiz
Variable assignments inside labels can be combined to build a multiple-choice quiz.
In the demo project _In a tavern,_ see the board titled _Quiz_. It has one element per question, and one connection per answer, each assigning a different score to a variable depending on the option chosen.
## What's next
Context: Arcweave docs > Tutorials > Basic Arcweave > Basic Arcweave tutorial | Part 20: Advanced connections & labels > What's next
You've now seen two ways to speed up and extend your use of connections: drag a connection onto empty space to quickly create new board items and use Arcscript inside labels to change text dynamically or assign variables. Try adding conditional text or a scoring system to one of your own connections to get a feel for how they work together.
The next part of the tutorial will familiarize you with audio assets.
# Basic Arcweave tutorial | Part 21: Audio assets
Source: https://docs.arcweave.com/tutorials/basic/pt-21
Section: Tutorials > Basic Arcweave
Description: Text & video tutorial on using audio assets in your Arcweave projects
In this tutorial, we'll show how to add and manage audio in your Arcweave projects. You can add music and sounds to your projects to create a much more immersive interactive experience.
Arcweave manages audio clips the same way it manages images. You can use the **Assets** tab in the sidebar to upload and access all your audio files.
## Video tutorial
Context: Arcweave docs > Tutorials > Basic Arcweave > Basic Arcweave tutorial | Part 21: Audio assets > Video tutorial
Watch this tutorial as a video:
Video: https://www.youtube.com/watch?v=Kk_2HRB7xd8
> ⚠️ This video does not reflect the latest updates to Arcweave's UI.
> ✅ You can play the finished version of the Tutorial Project [here](https://arcweave.com/app/project/Qz0PXOZ0Ya/play) and explore its diagrams and structure [here](https://arcweave.com/app/project/Qz0PXOZ0Ya).
## Upload audio assets
Context: Arcweave docs > Tutorials > Basic Arcweave > Basic Arcweave tutorial | Part 21: Audio assets > Upload audio assets
Just as with images, it's good practice to keep an organized folder structure for your audio files inside the **Assets section** of your left sidebar.

To upload a new audio file:
1. Click **Create asset** (the **+** icon) in the **Assets** section.
2. Select **Upload assets...** from the menu.
3. Select one or more audio files from your drive.
Arcweave supports `.mp3`, `.ogg`, `.wav`, and `.webm` files to be used as audio assets.
> ✅ You can also drag assets from your file manager straight into Arcweave's project window. See the [page on Assets](https://docs.arcweave.com/project-items/assets/overview#upload-assets) in this documentation.
For example, you could upload:
- A tavern ambience/atmosphere loop
- A zombie growl sound effect
- A short guitar music loop
## Preview audio assets
Context: Arcweave docs > Tutorials > Basic Arcweave > Basic Arcweave tutorial | Part 21: Audio assets > Preview audio assets
You can play, test, and adjust the volume of an audio asset directly from the left sidebar's **Assets section**:
1. In your **Assets section**, click on the audio asset you want to preview.
2. Click the **Play** button to listen to the clip.
3. Use the **volume slider** to adjust the volume.
4. Optionally, set **Fade in** and **Fade out** durations in milliseconds.
> ✅ The asset's volume and fades are defaults for **all instances** of that asset throughout the project. You can [override them for a single instance](https://docs.arcweave.com/tutorials/basic/pt-21#override-the-asset-defaults).
## Attach audio to elements
Context: Arcweave docs > Tutorials > Basic Arcweave > Basic Arcweave tutorial | Part 21: Audio assets > Attach audio to elements
To attach an audio asset to an element, simply drag and drop it from the Assets section into the element's body, the same way you would attach images or components.
Once attached, a new section appears at the bottom of the element listing its audio attachments. You can test how the audio plays by entering Play Mode.
### Attach multiple audio assets
Context: Arcweave docs > Tutorials > Basic Arcweave > Basic Arcweave tutorial | Part 21: Audio assets > Attach audio to elements > Attach multiple audio assets
You can attach multiple assets to the same element and you can even attach the **same** asset multiple times. Each attachment is its own independent instance of that audio clip.
### Set audio behavior
Context: Arcweave docs > Tutorials > Basic Arcweave > Basic Arcweave tutorial | Part 21: Audio assets > Attach audio to elements > Set audio behavior
Once you attach an audio asset to an element, you can set its playback behavior. See [Audio behavior](https://docs.arcweave.com/tutorials/basic/pt-21#audio-attachment-behavior) below.
### Remove audio attachment
Context: Arcweave docs > Tutorials > Basic Arcweave > Basic Arcweave tutorial | Part 21: Audio assets > Attach audio to elements > Remove audio attachment
To remove an audio instance from an element, drag it out of the element and drop it onto an empty area of the board. You can also drag a clip instance from one element directly onto another.
## Volume control in Play Mode
Context: Arcweave docs > Tutorials > Basic Arcweave > Basic Arcweave tutorial | Part 21: Audio assets > Volume control in Play Mode
While playing your project, you can adjust the volume from the Play Mode top menu:
1. Hover near the top of your browser window to reveal the Play Mode top menu.
2. On the right side of the menu, click the **Audio** icon (a speaker) to open the volume controls.
3. Drag the volume slider to turn the volume down, or click the mute icon next to the slider to silence the audio entirely during a playthrough.
> ✅ The debug icon is only accessible to the project's owners and editors, but the volume control is available to **anyone** playing the game.
## Audio attachment behavior
Context: Arcweave docs > Tutorials > Basic Arcweave > Basic Arcweave tutorial | Part 21: Audio assets > Audio attachment behavior
So far, the settings we've covered (the asset's volume and fades) apply at the **asset** level, as defaults for every instance of that clip across the project. However, you can also configure each attachment at the **instance** level, meaning the settings only affect that specific attachment.
To access these settings, click on an audio instance attached to an element. This opens the **Audio reference** dialog, with a volume slider and the following **Play mode settings**:
### Loops and one-shots
Context: Arcweave docs > Tutorials > Basic Arcweave > Basic Arcweave tutorial | Part 21: Audio assets > Audio attachment behavior > Loops and one-shots
1. By default, a newly attached instance is set to **Play clip once**, which is why clips stop after playing through a single time.
2. To make a clip loop, select **Loop clip**. If you run the project in Play Mode, the clip will now restart automatically every time it finishes playing.
3. The third option, **Stop playing all instances of this clip**, lets you stop a loop that was started on an earlier element. For example, if a guitar loop starts on one element, you can attach the same guitar asset to a later element and set that instance to stop all instances of the clip. This way, when the player reaches the new element, the loop ends.
> ✅ The stop option stops **all** instances of that clip, whether they're looping or not. If multiple instances of the same asset are attached to different elements, a single "stop" instance will stop every one of them.
### Add a delay
Context: Arcweave docs > Tutorials > Basic Arcweave > Basic Arcweave tutorial | Part 21: Audio assets > Audio attachment behavior > Add a delay
You can also delay when an instance starts playing. This is useful, for example, if you want to establish a scene with an ambience track first, then introduce music a few seconds later.
To add a delay:
1. Click on the audio instance.
2. Find the **Delay** field.
3. Enter a delay in milliseconds (e.g., `3000` for a 3-second delay).
### Fade in and out
Context: Arcweave docs > Tutorials > Basic Arcweave > Basic Arcweave tutorial | Part 21: Audio assets > Audio attachment behavior > Fade in and out
Use **Fade in** and **Fade out** to ease a clip in when it starts and out when it stops, instead of cutting it abruptly. Enter durations in milliseconds. A clip set to **Play clip once** also fades out at its end, and a stop instance fades out the clips it stops.
### Stop when leaving the element
Context: Arcweave docs > Tutorials > Basic Arcweave > Basic Arcweave tutorial | Part 21: Audio assets > Audio attachment behavior > Stop when leaving the element
Select **Auto-stop on element exit** to stop the clip as soon as the player moves to another element. This is handy for a line of narration or a sound that belongs to a single scene.
### Override the asset defaults
Context: Arcweave docs > Tutorials > Basic Arcweave > Basic Arcweave tutorial | Part 21: Audio assets > Audio attachment behavior > Override the asset defaults
The instance's volume, **Fade in**, and **Fade out** start with the asset's values. Changing them in the **Audio reference** dialog affects only this instance. To use the asset's value again, click **Reset to asset default** (the circular arrow icon) next to the setting.
See [Audio reference settings](https://docs.arcweave.com/project-items/assets/audio#audio-reference-settings) for details.
## Refresh Play Mode
Context: Arcweave docs > Tutorials > Basic Arcweave > Basic Arcweave tutorial | Part 21: Audio assets > Refresh Play Mode
Changes to an audio instance take effect the next time the clip starts playing. If a change doesn't seem to apply, refresh the Play Mode tab.
## What's next
Context: Arcweave docs > Tutorials > Basic Arcweave > Basic Arcweave tutorial | Part 21: Audio assets > What's next
You now know how to upload audio assets, attach them to elements, control volume both in the editor and in Play Mode, and configure instance-specific behavior like looping, stopping, delays, and fades.
Next, take a look at all the features of [assets](https://docs.arcweave.com/project-items/assets/overview) in this documentation, including **video**. Combining audiovisuals with your storytelling will help you create a richer, more immersive experience for your players.
From here, you can continue exploring the documentation pages for any specific features you'd like to learn more about.
If you have questions along the way, you can also find answers in [our Discord server](https://discord.gg/t6RqXYXRfJ).
# Style Editor tutorials
Source: https://docs.arcweave.com/tutorials/style-editor/overview
Section: Tutorials
Description: Tutorials on styling Play Mode with Arcweave's Style Editor and CSS, from basic selectors to a visual novel layout
This section includes the following tutorials:
- [Arcweave CSS basics](https://docs.arcweave.com/tutorials/style-editor/css-basics): Learn how to use Arcweave's [Style Editor](https://docs.arcweave.com/project-tools/play-mode/style-editor) to customize and style your story.
- [Visual novel CSS](https://docs.arcweave.com/tutorials/style-editor/css-visual-novel): Dive deeper into advanced CSS functionality and style your Arcweave story as a visual novel.
# Arcweave CSS basics tutorial
Source: https://docs.arcweave.com/tutorials/style-editor/css-basics
Section: Tutorials > Style Editor
Description: A tutorial teaching you Arcweave's main CSS selectors and how to target them
The [Style Editor](https://docs.arcweave.com/project-tools/play-mode/style-editor) of Arcweave's Play Mode uses CSS and gives you full control over how your prototype looks in regard to text styling, layout, and color palette.
This how-to guide teaches you how to customize your Arcweave game with the Style Editor. It iterates through the available CSS selectors, shows how they affect your Play Mode interface, and demonstrates simple, efficient examples of changes you can apply with ease.
For the complete DOM structure, defaults, and CSS precedence rules, use the [Play Mode styling reference](https://docs.arcweave.com/project-tools/play-mode/styling-reference). The same CSS works through the [REST API](https://docs.arcweave.com/rest-api/css) and [MCP tools](https://docs.arcweave.com/integrations/mcp#style-play-mode).
## Access the Style Editor
Context: Arcweave docs > Tutorials > Style Editor > Arcweave CSS basics tutorial > Access the Style Editor
To open the Style Editor:
1. Click the **Play Mode** button (▶) in the project's top menu bar. Play Mode opens in a new browser tab.
2. Select the **Style Editor** (🎨 palette icon) on Play Mode's top bar. If the bar has faded out, move the pointer to the top of the window.
3. Write your CSS directly in the panel; changes appear instantly.
4. Press **Save changes** to save the CSS in your project.
The Style Editor is available to project owners and editors.

> ⚠️ If the **Save changes** button is disabled, your CSS has errors. Click the error count at the bottom of the panel to see each error with its line number, then fix them.
The Style Editor previews your changes live. Keep a copy of existing CSS before replacing it so you can restore it later.
## Containers
Context: Arcweave docs > Tutorials > Style Editor > Arcweave CSS basics tutorial > Containers
### Prototype wrapper
Context: Arcweave docs > Tutorials > Style Editor > Arcweave CSS basics tutorial > Containers > Prototype wrapper
The **prototype wrapper** centers the story content and adds top spacing. It sits inside the scrollable `.prototype__root`; the outer page is `.prototype`.
You can target it with the `prototype__wrapper` class.
> ℹ️ Notice the **double underscore** `__` used in the class names.
For example, you can use it to perform the following changes:
- Change the background color
- Add some padding at the top
- Change font
- Set the font as bold
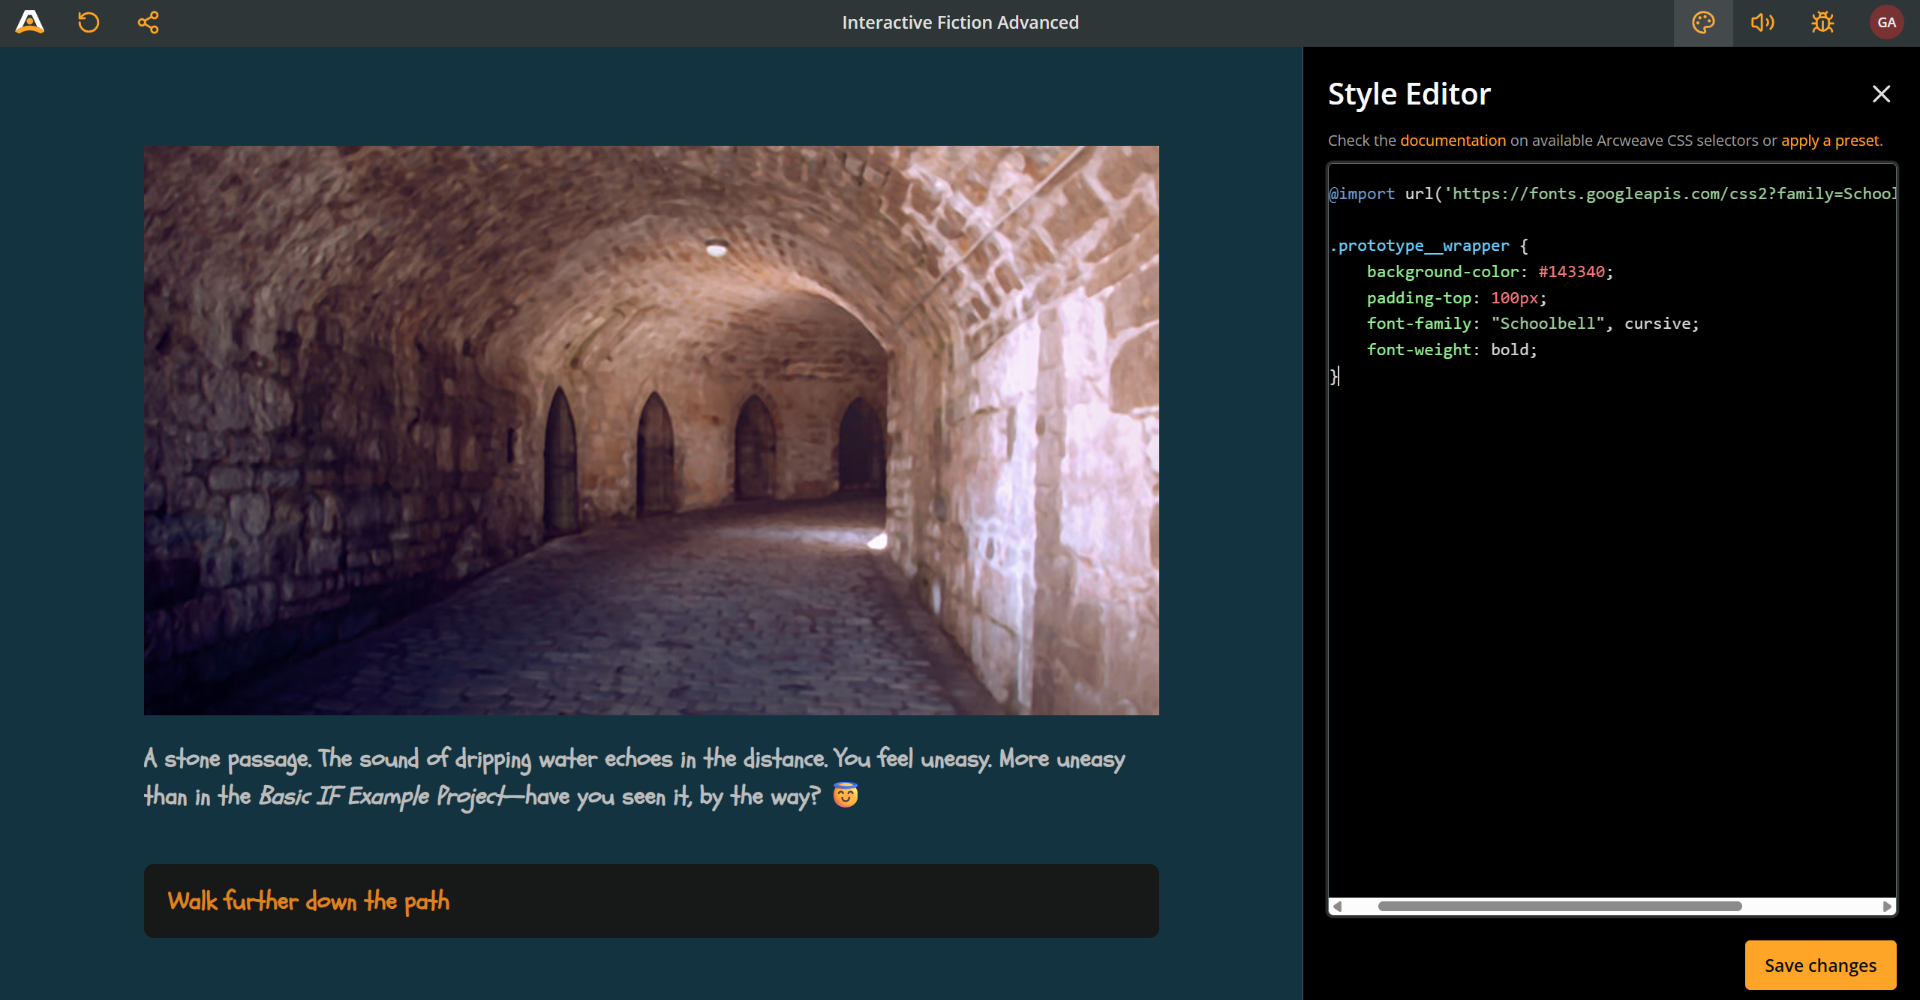
The code snippet for these changes is the following:
```css
@import url('https://fonts.googleapis.com/css2?family=Schoolbell&display=swap');
.prototype__wrapper {
background-color: #143340;
padding-top: 100px;
font-family: 'Schoolbell', cursive;
font-weight: 600;
}
```
> ✅ Remember to include an `@import` directive when importing fonts.
### Prototype content
Context: Arcweave docs > Tutorials > Style Editor > Arcweave CSS basics tutorial > Containers > Prototype content
Your story's elements don't just float freely inside the prototype wrapper; they're organized within their own container called **prototype content**.
You can target the `prototype__content` class to control the display of the following parts of the rendered element:
- Header (element cover and attached components)
- Text content
- Option buttons
Use this class to make layout and style adjustments like the following:
- Make the prototype content narrower
- Change the color of just the content area
- Change font
- Add some margin around the content
- Add border radius (soft corners) to the content area
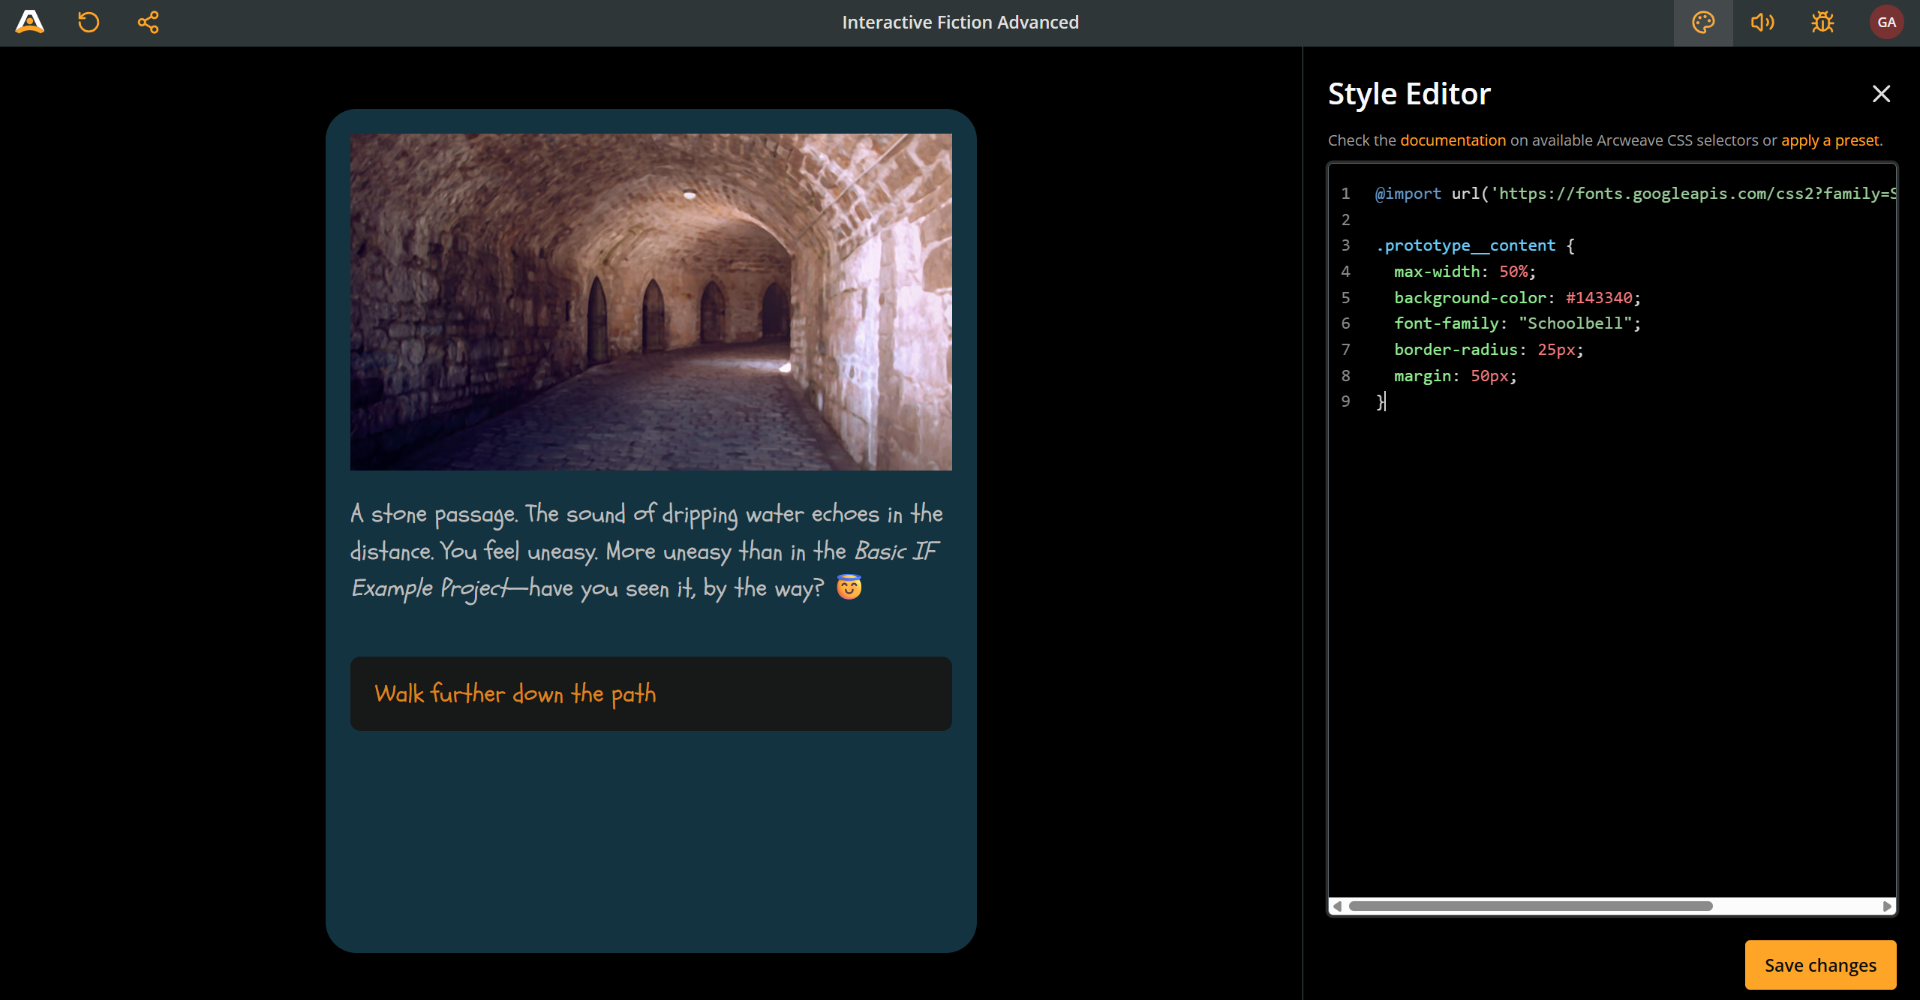
```css
@import url('https://fonts.googleapis.com/css2?family=Schoolbell&display=swap');
.prototype__content {
max-width: 50%;
background-color: #143340;
font-family: 'Schoolbell';
border-radius: 25px;
margin: 50px;
}
```
> ✅ As you've probably noticed, you can change the font using either class: `prototype__wrapper` or `prototype__content`. However, it's best practice to target the text content in the editor, as described in [Styling text](https://docs.arcweave.com/tutorials/style-editor/css-basics#styling-text) below.
### Prototype header
Context: Arcweave docs > Tutorials > Style Editor > Arcweave CSS basics tutorial > Containers > Prototype header
The **prototype header** is the area that holds the elements' following items:
- The element's **cover** (image, video, YouTube embed, or icon)
- Attached **components**
Target it by using the `prototype__header` class.
For example, to make the header area narrower than the text content, use the following snippet:
```css
.prototype__header {
max-width: 50%;
margin: auto;
}
```
> ℹ️ The `margin: auto;` line centers the image.

You can also color this area (and make corners rounded) with the following snippet:
```css
.prototype__header {
max-width: 60%;
margin: auto;
padding: 20px;
background-color: darkred;
border-radius: 25px;
}
```

If an element has attached components and no cover, the components will take the cover's place in the prototype header area.

### Prototype body
Context: Arcweave docs > Tutorials > Style Editor > Arcweave CSS basics tutorial > Containers > Prototype body
The **prototype body** contains the text content and the option buttons. Target it using the class `prototype__body`. See **prototype text**, below, for its usage.
### Prototype text
Context: Arcweave docs > Tutorials > Style Editor > Arcweave CSS basics tutorial > Containers > Prototype text
The **prototype text** is a sub-container and contains only the text content. Target it using the class `prototype__text`.
The following example uses a combination of prototype body and prototype text to:
- Narrow the text / buttons area setting the `max-width` of `prototype__body` to `95%`.
- Narrow the text content width setting the `max-width` of `prototype__text` to an extra `90%`.
- Center both `prototype__header` and `prototype__body` with `margin: auto`.
- Center the text block with `margin: auto` on `prototype__text`, and center-align its lines with `text-align: center`.
- Change all background colors.
- Give them some padding.
- Detach them from each other using `margin` and `margin-top`.
> ℹ️ Notice that centering the `prototype__body` is not the same as setting the text to be center-aligned. Feel free to experiment with the code snippets, to better understand exactly what each property does.
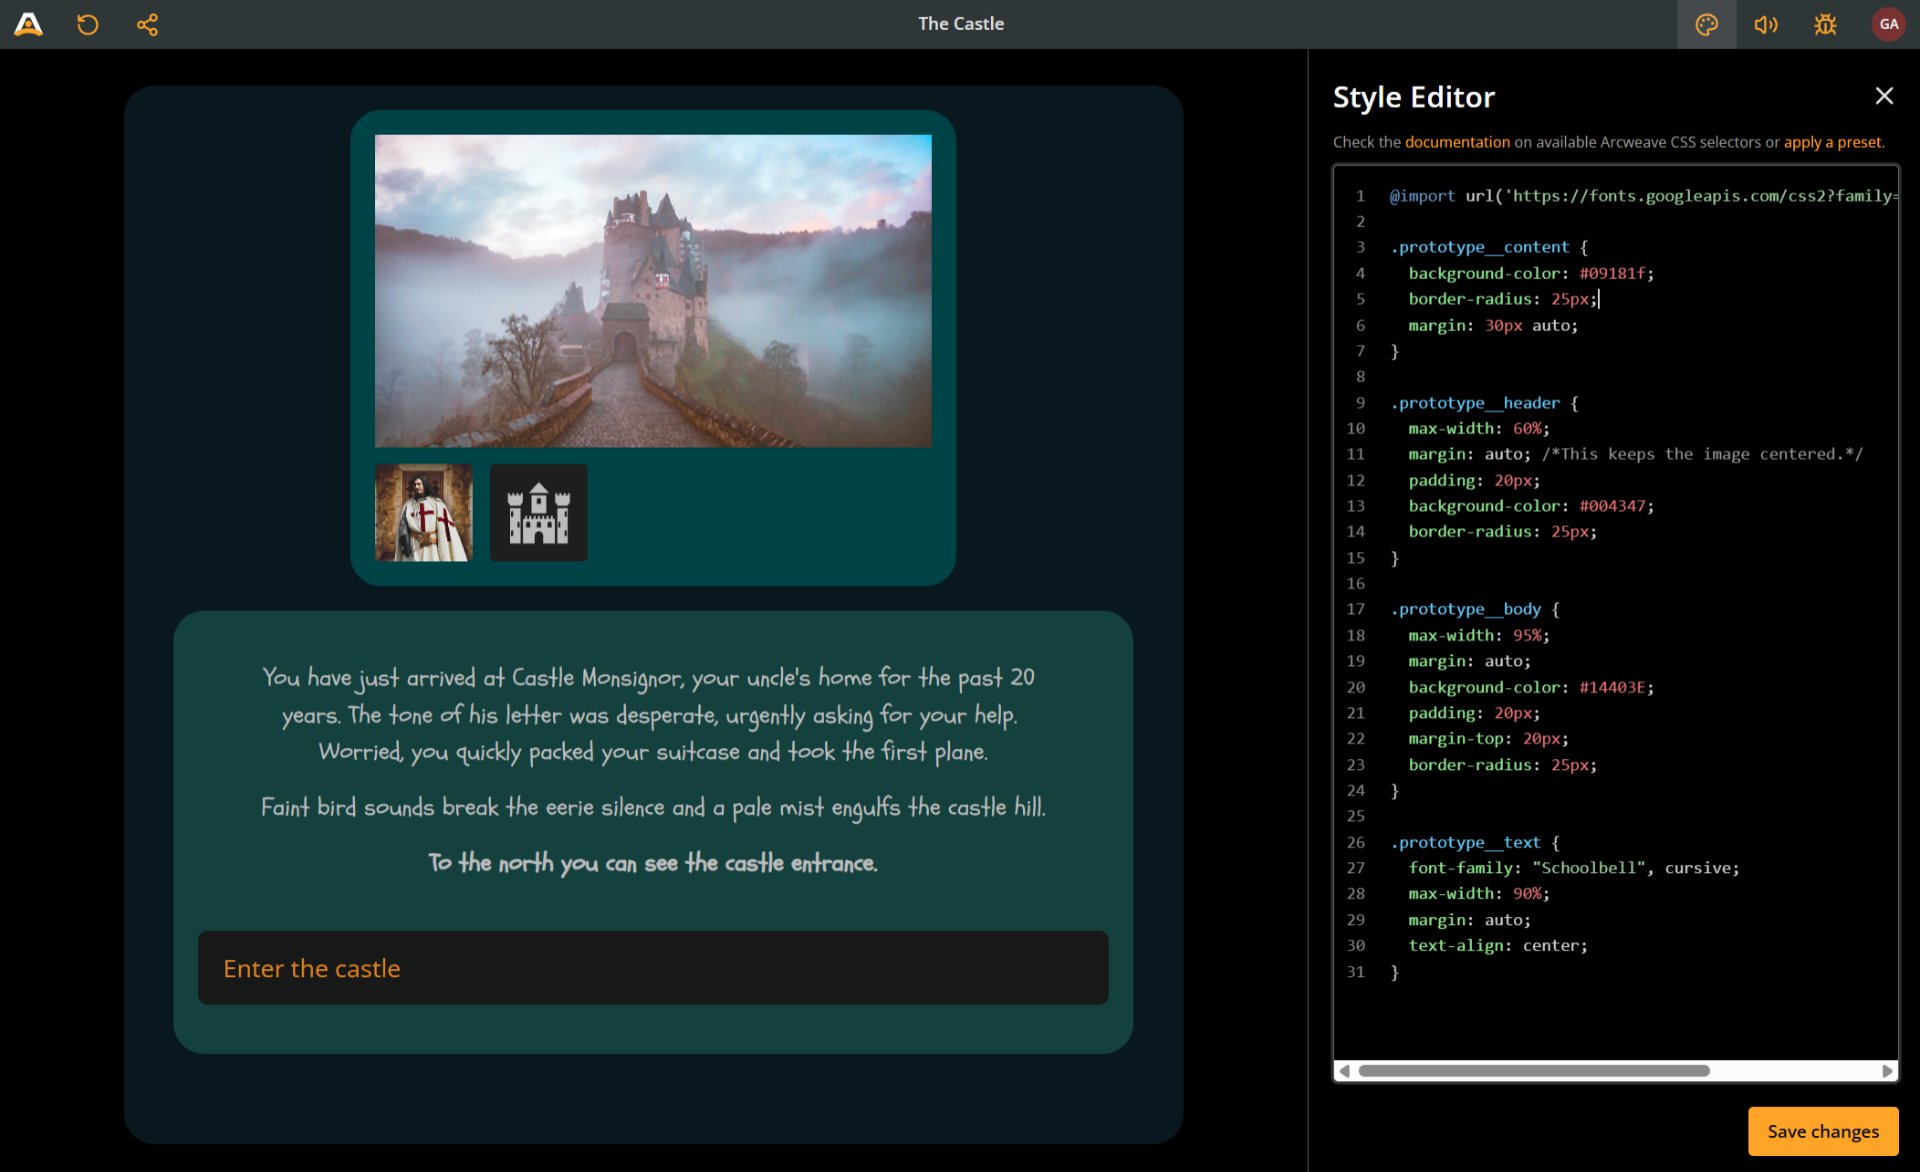
This is the code snippet that produces this result:
```css
@import url('https://fonts.googleapis.com/css2?family=Schoolbell&display=swap');
.prototype__content {
background-color: #09181f;
border-radius: 25px;
margin: 30px auto;
}
.prototype__header {
max-width: 60%;
margin: auto;
padding: 20px;
background-color: #004347;
border-radius: 25px;
}
.prototype__body {
max-width: 95%;
margin: auto;
background-color: #14403e;
padding: 20px;
margin-top: 20px;
border-radius: 25px;
}
.prototype__text {
font-family: 'Schoolbell', cursive;
max-width: 90%;
margin: auto;
text-align: center;
}
```
### Prototype options
Context: Arcweave docs > Tutorials > Style Editor > Arcweave CSS basics tutorial > Containers > Prototype options
**Prototype options** (notice the plural, _options_) is the container of the option buttons. Target it using the `prototype__options` class.
> ✅ One way to style specific option buttons is by targeting the respective children of the `.prototype__options` (see further below, under [Style specific options](https://docs.arcweave.com/tutorials/style-editor/css-basics#style-specific-options)).
## Styling text
Context: Arcweave docs > Tutorials > Style Editor > Arcweave CSS basics tutorial > Styling text
Although you can perform some text styling by targeting the containers described above, you need to target the text itself to go even deeper.
### Editor
Context: Arcweave docs > Tutorials > Style Editor > Arcweave CSS basics tutorial > Styling text > Editor
The **editor** is a sub-container of prototype text containing the rich text of your elements. It can be targeted using the `editor` class. This article contains a couple of cases where the editor comes in handy, the first one following right below.
### Editor content
Context: Arcweave docs > Tutorials > Style Editor > Arcweave CSS basics tutorial > Styling text > Editor content
To target the text content of your elements, use the full selector `.prototype__text .editor .editor-content`. Arcweave sets the default text color, font size, and padding on `.prototype__body .editor .editor-content`, so a shorter selector such as `.editor-content` alone does not override them. The following snippet increases the font size of the text content and changes its color:
```css
.prototype__text .editor .editor-content {
font-size: 28px;
color: darkseagreen;
}
```
## Prototype media
Context: Arcweave docs > Tutorials > Style Editor > Arcweave CSS basics tutorial > Prototype media
The element cover renders inside the `prototype__media` container. Target an image cover with `.prototype__media img.single` and a video cover with `.prototype__media video`:
```css
.prototype__media img.single {
border-radius: 25px;
}
.prototype__media video {
border-radius: 25px;
}
```
When an element has no cover, its attached components appear inside `prototype__media` instead. The `single` class keeps the image rule from also matching component images.
## Prototype components
Context: Arcweave docs > Tutorials > Style Editor > Arcweave CSS basics tutorial > Prototype components
Components are contained in the **prototype components** container, which you can target with the `prototype__components` class. To target the components themselves, use the selector `.prototype__components .comp`.
Here's an example of targeting components and their container to manipulate their size and remove their default border radius.

```css
.prototype__components {
height: 120px;
padding: 10px;
background: #123a54;
grid-gap: 5px;
}
.prototype__components .comp {
height: 100px;
background: darkred;
border-radius: 0px;
}
```
If you wish to completely omit components from the Play Mode experience, use `display: none`:
```css
.prototype__components {
display: none;
}
```
## Prototype option
Context: Arcweave docs > Tutorials > Style Editor > Arcweave CSS basics tutorial > Prototype option
Option buttons render as clickable `div` elements with the `prototype__option` class. (Don't confuse with the parent container `prototype__options`, in plural, mentioned [further above](https://docs.arcweave.com/tutorials/style-editor/css-basics#prototype-options).)
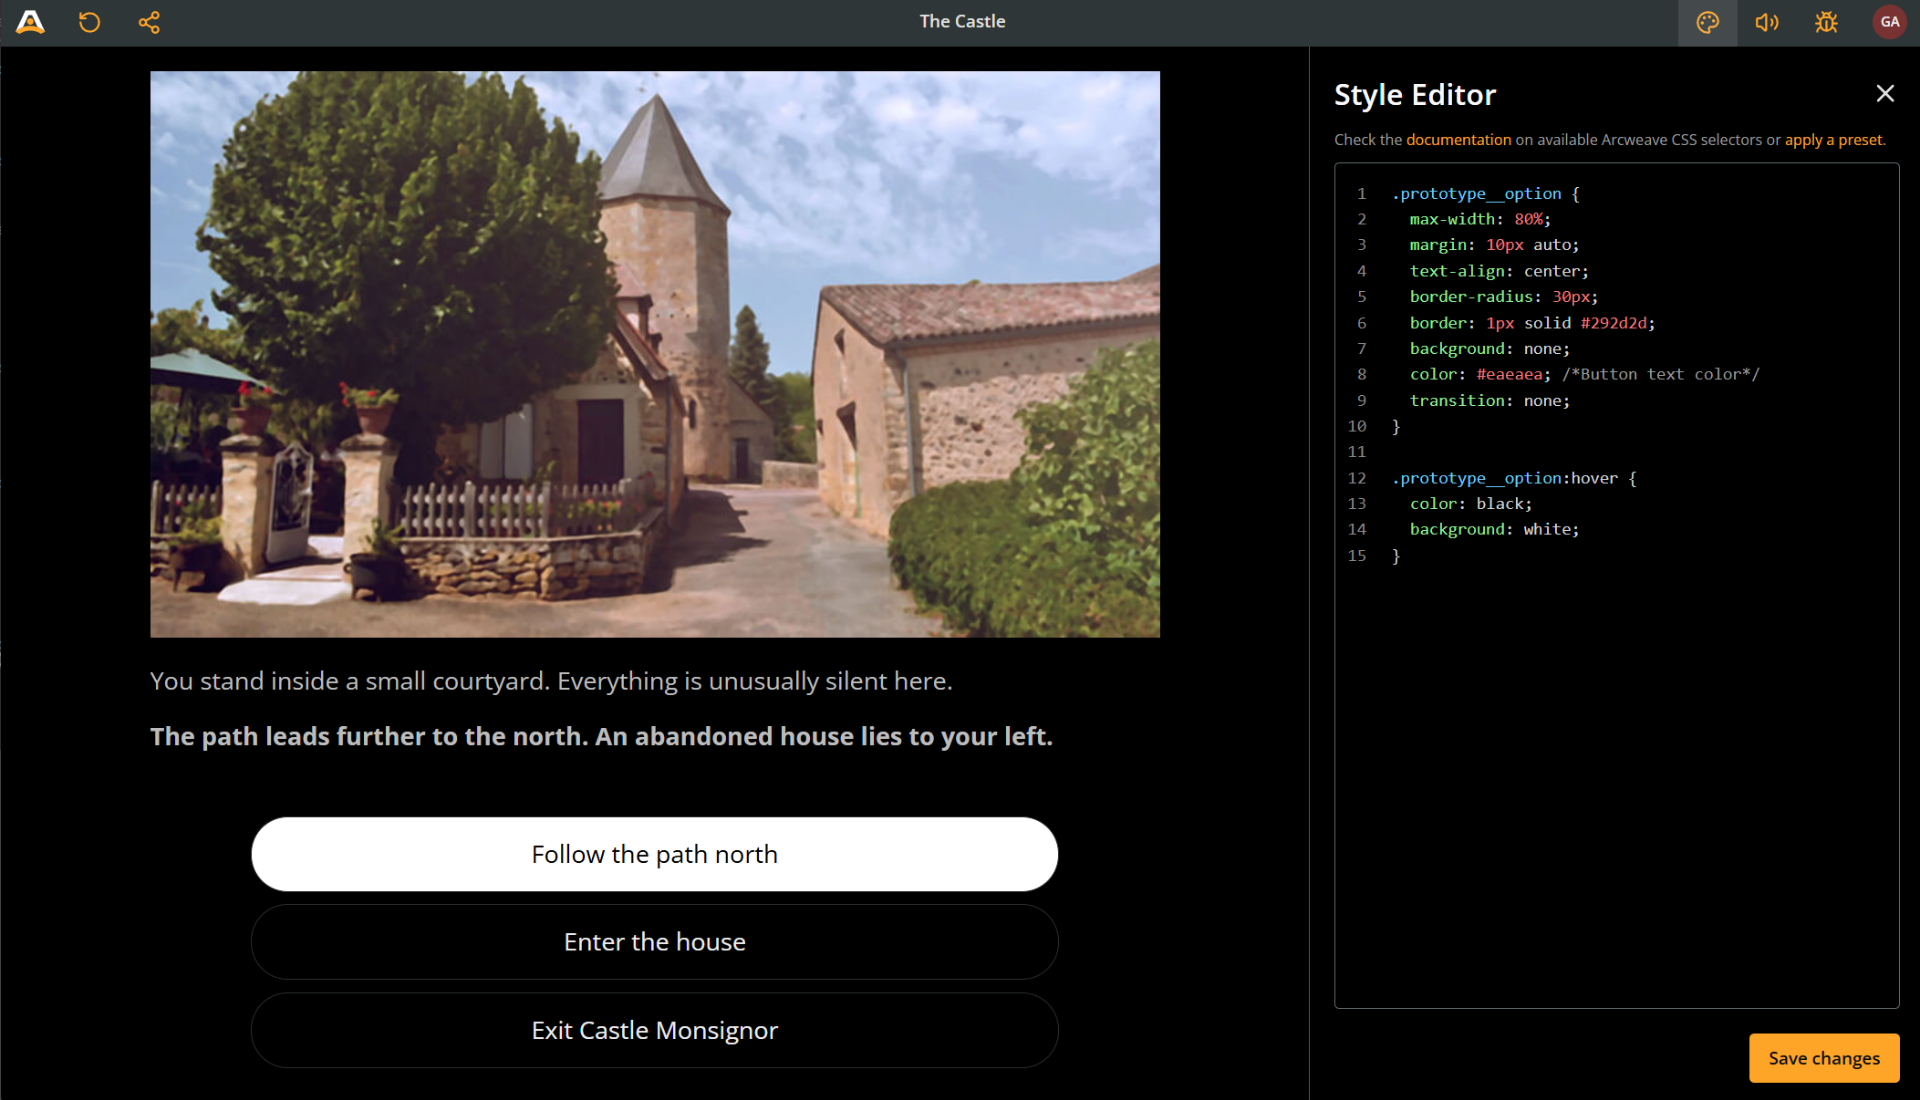
This example goes for a high-contrast, no-transition, rounded and centered buttons.
```css
.prototype__option {
max-width: 80%;
margin: 10px auto;
text-align: center;
border-radius: 30px;
border: 1px solid #292d2d;
background: none;
color: #eaeaea;
transition: none;
}
.prototype__option:hover {
color: black;
background: white;
}
```
### Style visited options
Context: Arcweave docs > Tutorials > Style Editor > Arcweave CSS basics tutorial > Prototype option > Style visited options
When an option leads to an element that has already been visited in the current playthrough, Arcweave adds the `visited` class to that option button. You can target those options with `.prototype__option.visited`.
For example, the following CSS dims choices that lead to previously visited elements:
```css
.prototype__option.visited {
opacity: 0.55;
}
```
## Advanced styling
Context: Arcweave docs > Tutorials > Style Editor > Arcweave CSS basics tutorial > Advanced styling
### Style specific elements
Context: Arcweave docs > Tutorials > Style Editor > Arcweave CSS basics tutorial > Advanced styling > Style specific elements
The Style Editor allows you not only to globally style _every_ element, but also style specific elements differently from the others.
Each element in your prototype has its own unique **element ID**. Including an element ID as a CSS selector allows you to target the specific element for CSS styling.
To do this, follow the next steps:
#### 1. Copy the element ID
Context: Arcweave docs > Tutorials > Style Editor > Arcweave CSS basics tutorial > Advanced styling > Style specific elements > 1. Copy the element ID
An element's ID looks like this: `81a30674-aa09-4eb8-8484-59298d37f984`. You can get that UUID from the API/MCP element record, or copy it in Arcweave:
**Debugger** (Play Mode environment):
1. Play the story until you reach the desired element.
2. Open the [Debugger](https://docs.arcweave.com/project-tools/play-mode/debugger).
3. Click the **ID** button in the **Element** row (not the **Board** row).
4. Next to **UUID**, press the copy button.
**Element Properties** (Project environment):
1. Locate and right-click the desired element in its board.
2. Select **Properties**.
3. Go to the **Details** tab.
4. Next to **Element ID**, press the clipboard button.
#### 2. Add the element ID to the CSS selectors
Context: Arcweave docs > Tutorials > Style Editor > Arcweave CSS basics tutorial > Advanced styling > Style specific elements > 2. Add the element ID to the CSS selectors
After copying the element's UUID, prefix it with `#el-` to form `#el-[element-id]`. A DOM ID copied from the browser already includes `el-`, so do not add it twice. This ensures that your styles apply only to that specific element when rendered in Play Mode.
Here's an example showing how to target both the editor content and the prototype content of a single element:
```css
@import url('https://fonts.googleapis.com/css2?family=Schoolbell&display=swap');
#el-81a30674-aa09-4eb8-8484-59298d37f984
.prototype__text
.editor
.editor-content {
color: darkseagreen;
}
#el-81a30674-aa09-4eb8-8484-59298d37f984 .prototype__content {
max-width: 50%;
background-color: #143340;
font-family: 'Schoolbell';
border-radius: 25px;
margin: 50px;
}
```
### Style specific options
Context: Arcweave docs > Tutorials > Style Editor > Arcweave CSS basics tutorial > Advanced styling > Style specific options
Style specific options in either of the following ways:
- Target a **specific option by its position** inside the [prototype options](https://docs.arcweave.com/tutorials/style-editor/css-basics#prototype-options) container (`prototype__options` class)
- Target **connections of specific color**.
#### Style nth child of prototype options
Context: Arcweave docs > Tutorials > Style Editor > Arcweave CSS basics tutorial > Advanced styling > Style specific options > Style nth child of prototype options
In normal playback, choices are direct children of `.prototype__options`. Edit content mode can wrap each choice in `.prototype-option-row`. Target the position at the container level in both forms:
```css
/* First visible choice, in playback and edit mode. */
.prototype__options > .prototype__option:first-child,
.prototype__options > .prototype-option-row:first-child > .prototype__option {
border: 2px solid #60a5fa;
}
```
To target the second choice of a specific element:
```css
#el-81a30674-aa09-4eb8-8484-59298d37f984
.prototype__options
> .prototype__option:nth-child(2),
#el-81a30674-aa09-4eb8-8484-59298d37f984
.prototype__options
> .prototype-option-row:nth-child(2)
> .prototype__option {
font-weight: bold;
}
```
These selectors mean the first or second **currently displayed choice**, not a particular connection. Branch conditions and reordering can change which choice occupies that position. A single unlabelled path shows an [advance arrow](https://docs.arcweave.com/project-tools/play-mode/styling-reference#conditional-content-and-the-advance-arrow) instead of a choice. Connection UUIDs are not exposed as DOM IDs; use a theme class when it better expresses the styling you want.
#### Style connections of specific color
Context: Arcweave docs > Tutorials > Style Editor > Arcweave CSS basics tutorial > Advanced styling > Style specific options > Style connections of specific color
In Arcweave, you can [change the color theme](https://docs.arcweave.com/project-items/connections#change-color-theme) of connections.
In the Style Editor, you can then target connections of specific colors, to style their respective option buttons. For example, to target the option corresponding to the pink connection of any element, add the following code:
```css
.prototype__option.pink {
...
}
```
The colors used as connection themes are:
Color Selector
██████████ .prototype__option.pink
██████████ .prototype__option.red
██████████ .prototype__option.purple
██████████ .prototype__option.lightBlue
██████████ .prototype__option.cyan
██████████ .prototype__option.moss
██████████ .prototype__option.green
██████████ .prototype__option.gold
██████████ .prototype__option.brown
██████████ .prototype__option.default
██████████ .prototype__option.orange
██████████ .prototype__option.blue
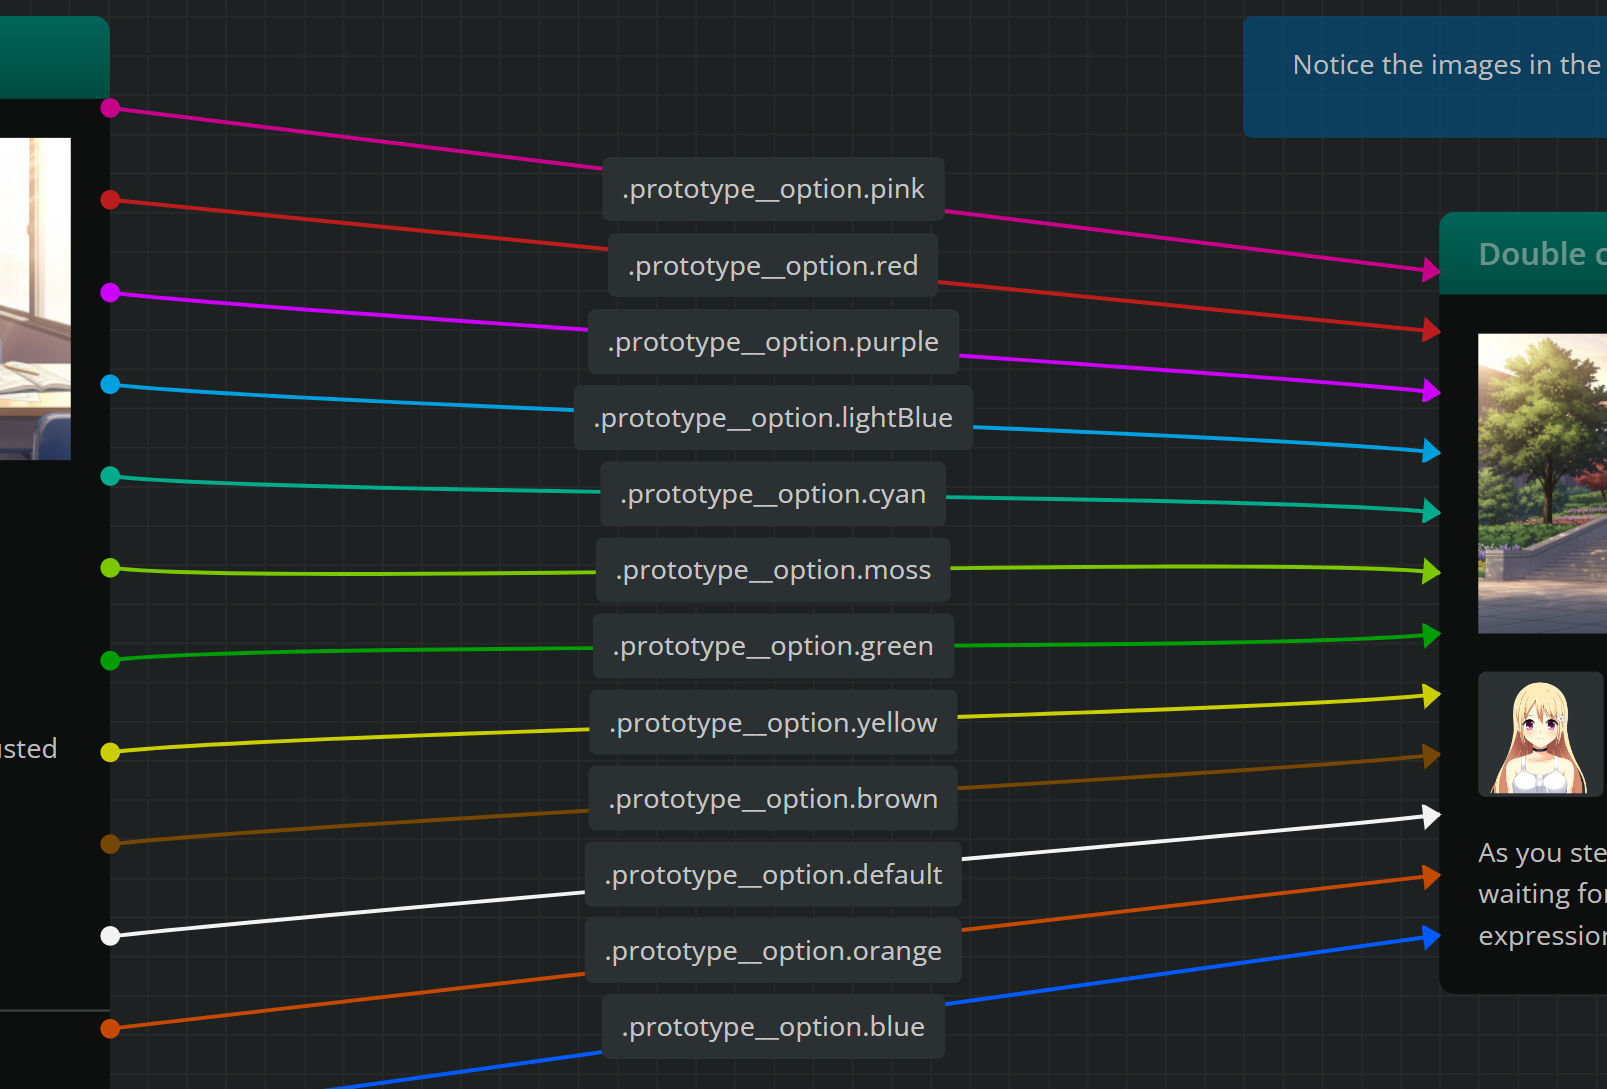
# Visual novel CSS tutorial
Source: https://docs.arcweave.com/tutorials/style-editor/css-visual-novel
Section: Tutorials > Style Editor
Description: A tutorial teaching you how to style your story as a visual novel using Arcweave's Style Editor and CSS
Visual novels are one of the most popular storytelling formats in interactive fiction. With their full-screen backgrounds, character sprites, and dialogue boxes, they create an immersive reading experience that draws players into your story.
This tutorial helps you achieve this polished look in Arcweave's Play Mode using the [Style Editor](https://docs.arcweave.com/project-tools/play-mode/style-editor) and some advanced CSS. It teaches you how to:
- [Set up your project with element covers and character components](https://docs.arcweave.com/tutorials/style-editor/css-visual-novel#set-up-your-project)
- [Access the Style Editor](https://docs.arcweave.com/tutorials/style-editor/css-visual-novel#access-the-style-editor)
- [Turn your element covers into full-screen background images for each scene](https://docs.arcweave.com/tutorials/style-editor/css-visual-novel#scene-backgrounds)
- [Create character components and position them as sprites at the bottom of the screen](https://docs.arcweave.com/tutorials/style-editor/css-visual-novel#character-sprites)
- [Create a stylish dialogue box with scrollable text](https://docs.arcweave.com/tutorials/style-editor/css-visual-novel#dialogue-box)
- [Style choice buttons and place them above your dialogue](https://docs.arcweave.com/tutorials/style-editor/css-visual-novel#option-buttons)
- [Make everything responsive for mobile devices](https://docs.arcweave.com/tutorials/style-editor/css-visual-novel#mobile-responsiveness)
- [Style specific words and paragraphs for emphasis](https://docs.arcweave.com/tutorials/style-editor/css-visual-novel#style-specific-text)
- [Style specific options](https://docs.arcweave.com/tutorials/style-editor/css-visual-novel#style-specific-options)
- [Experiment further with advanced tips](https://docs.arcweave.com/tutorials/style-editor/css-visual-novel#styling-tips)
- [Troubleshoot common problems](https://docs.arcweave.com/tutorials/style-editor/css-visual-novel#troubleshooting)
## Set up your project
Context: Arcweave docs > Tutorials > Style Editor > Visual novel CSS tutorial > Set up your project
The visual novel interface has specific visual parts. Before diving into CSS, you must first set your Arcweave project up in a way that these parts get represented as follows:
1. **Scene backgrounds**: The scenic backdrop for each scene, in full screen. In the Arcweave project, these will be represented by [element covers](https://docs.arcweave.com/project-items/elements#element-covers).
2. **Character sprites**: The characters that appear or speak in a dialogue scene. They are represented by [components](https://docs.arcweave.com/project-items/components) and their cover images.
3. **Dialogue box**: The text box where the game's dialogue appears in [rich text](https://docs.arcweave.com/project-tools/rich-text#formatting-menu). If the content is long, a scrollbar appears.
4. **Option buttons**: The player choices. In Arcweave, these are created with connections and [labels](https://docs.arcweave.com/project-items/labels).
## Access the Style Editor
Context: Arcweave docs > Tutorials > Style Editor > Visual novel CSS tutorial > Access the Style Editor
In order to type your CSS code, you first need to access Arcweave's [Style Editor](https://docs.arcweave.com/project-tools/play-mode/style-editor).
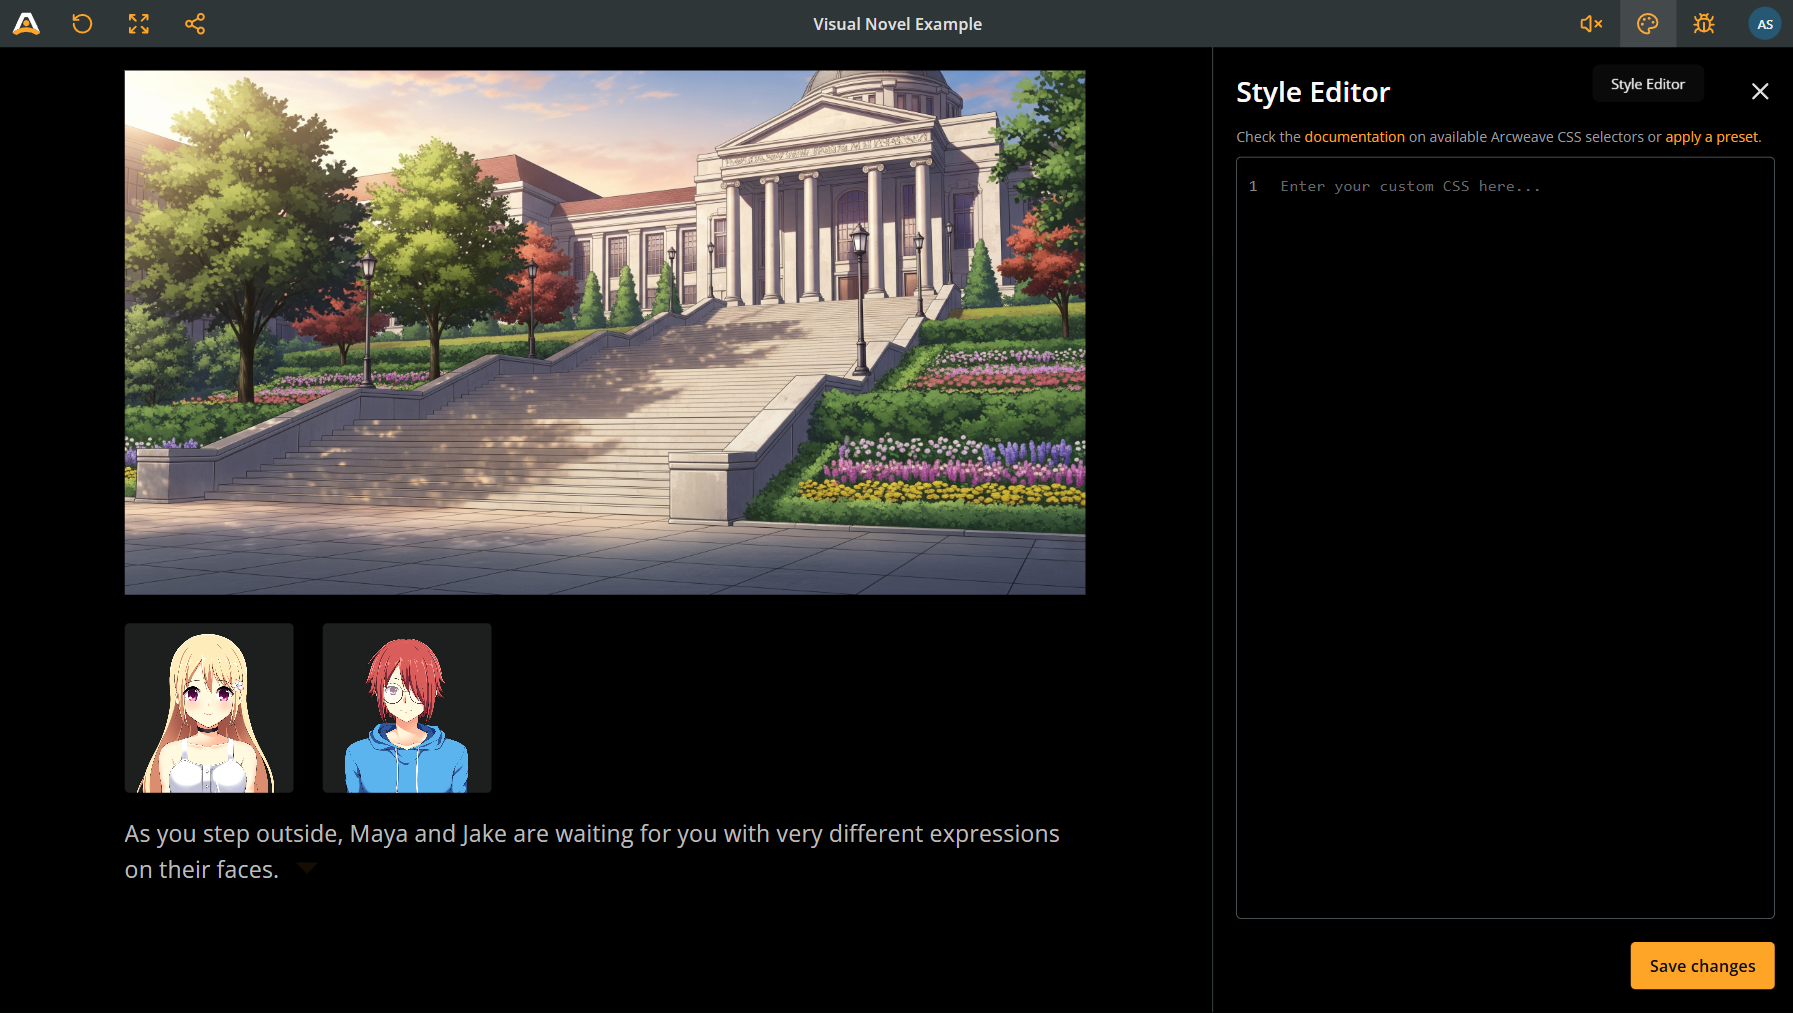
To open the Style Editor:
1. Open your project and click the **Play Mode** button (▶) in the top menu bar. Play Mode opens in a new browser tab.
2. In Play Mode, click the **Style Editor icon** (🎨 palette icon) in the top bar. If the bar has faded out, move the pointer to the top of the window.
The Style Editor is available to project owners and editors.
The Style Editor shows you the current CSS and previews your changes as you type. Save a copy of existing project CSS before replacing it.
The snippets below build one stylesheet in order; the [complete code template](https://docs.arcweave.com/tutorials/style-editor/css-visual-novel#complete-code-template) combines them. This recipe uses **image element covers and image component covers**. Its selectors stay inside the story root. See the [Play Mode styling reference](https://docs.arcweave.com/project-tools/play-mode/styling-reference) for the rendered structure, other cover types, edit mode differences, and API/MCP styling workflows.
## Scene backgrounds
Context: Arcweave docs > Tutorials > Style Editor > Visual novel CSS tutorial > Scene backgrounds
### Background assets
Context: Arcweave docs > Tutorials > Style Editor > Visual novel CSS tutorial > Scene backgrounds > Background assets
As these are the backdrops for your scenes, use high-resolution images that look good in full screen; a width of `1920` pixels is a good baseline.
Feel free to study and replicate the background assets used in the [Visual Novel Example](https://docs.arcweave.com/workspaces/projects#project-templates) project template (sized `2816` x `1536` pixels).
> ⚠️ **Responsiveness**: Keep in mind that players who access your game on mobile devices will see only a vertical section of your background. Make sure the essential details are near the center, since players may miss areas on the left and right.
### Element covers
Context: Arcweave docs > Tutorials > Style Editor > Visual novel CSS tutorial > Scene backgrounds > Element covers
In the Arcweave project, scene backgrounds will be represented by [element covers](https://docs.arcweave.com/project-items/elements#element-covers).
Attach the desired background to the elements of your scene as covers.
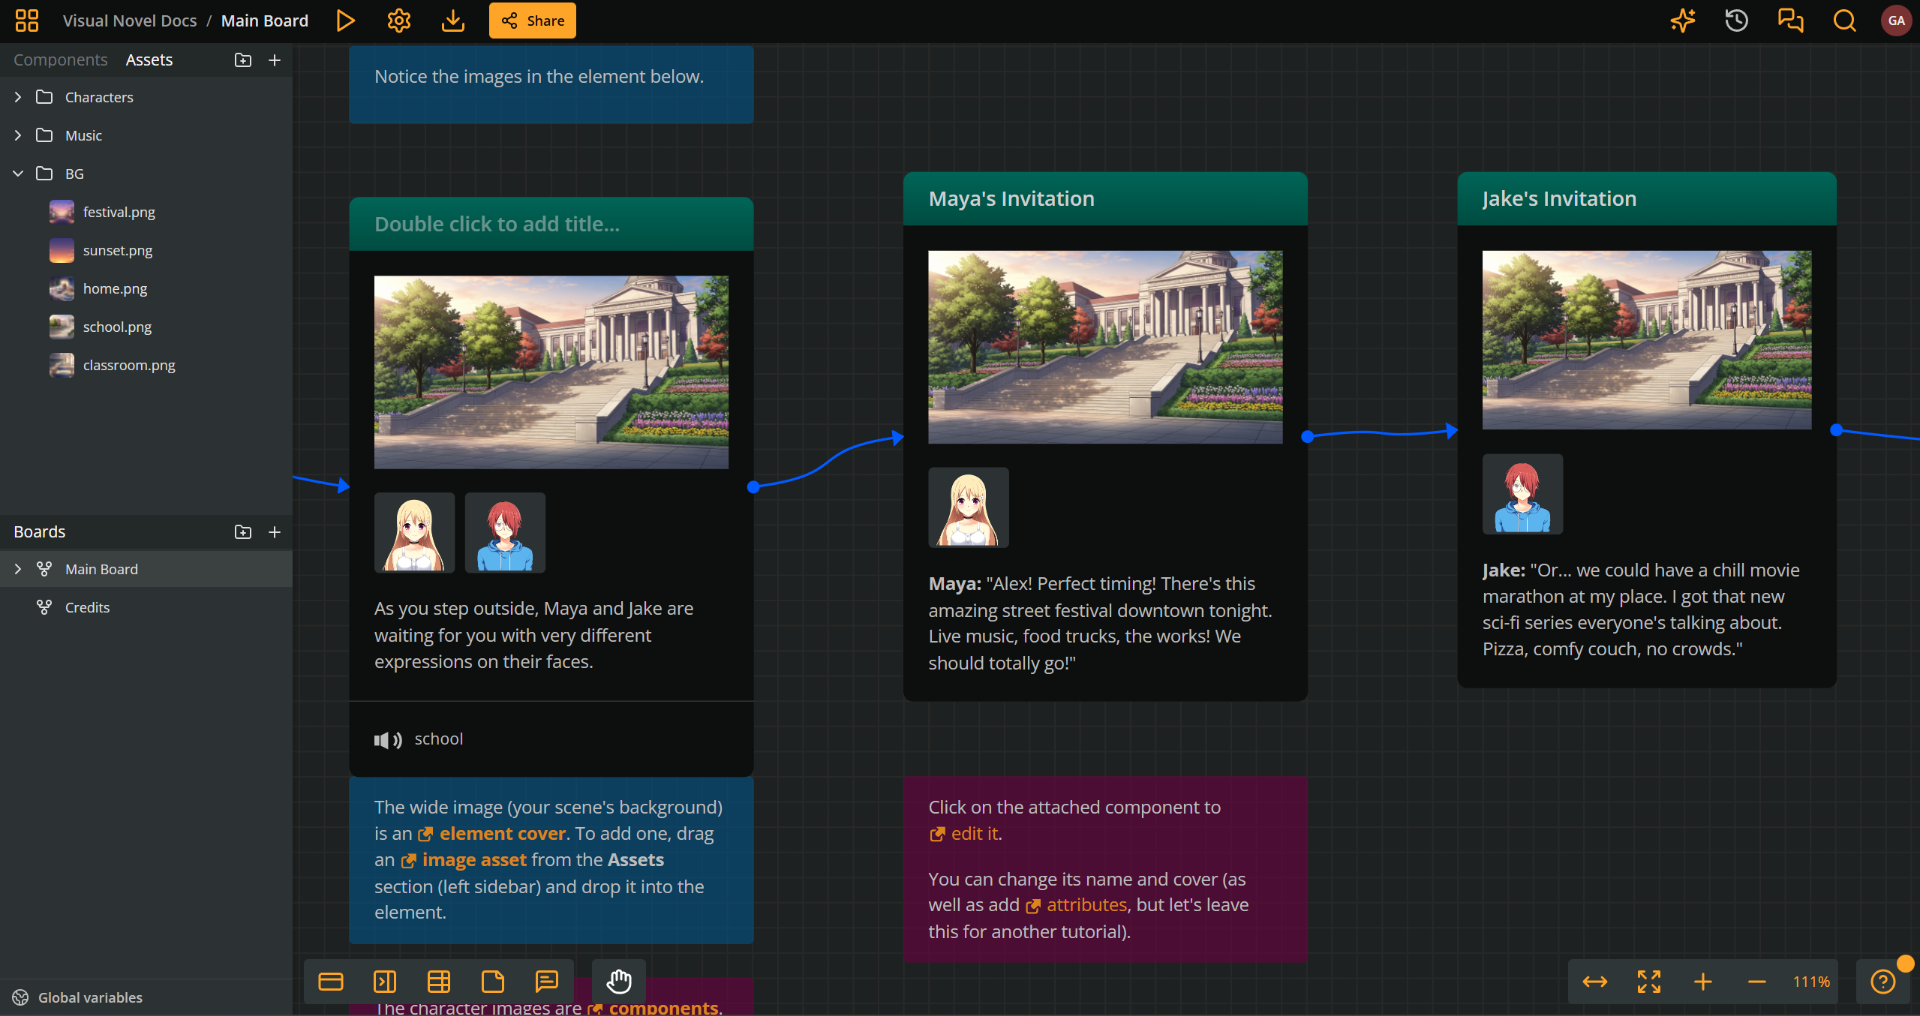
### Background CSS
Context: Arcweave docs > Tutorials > Style Editor > Visual novel CSS tutorial > Scene backgrounds > Background CSS
By default, element covers and attached components render as shown in the picture below.
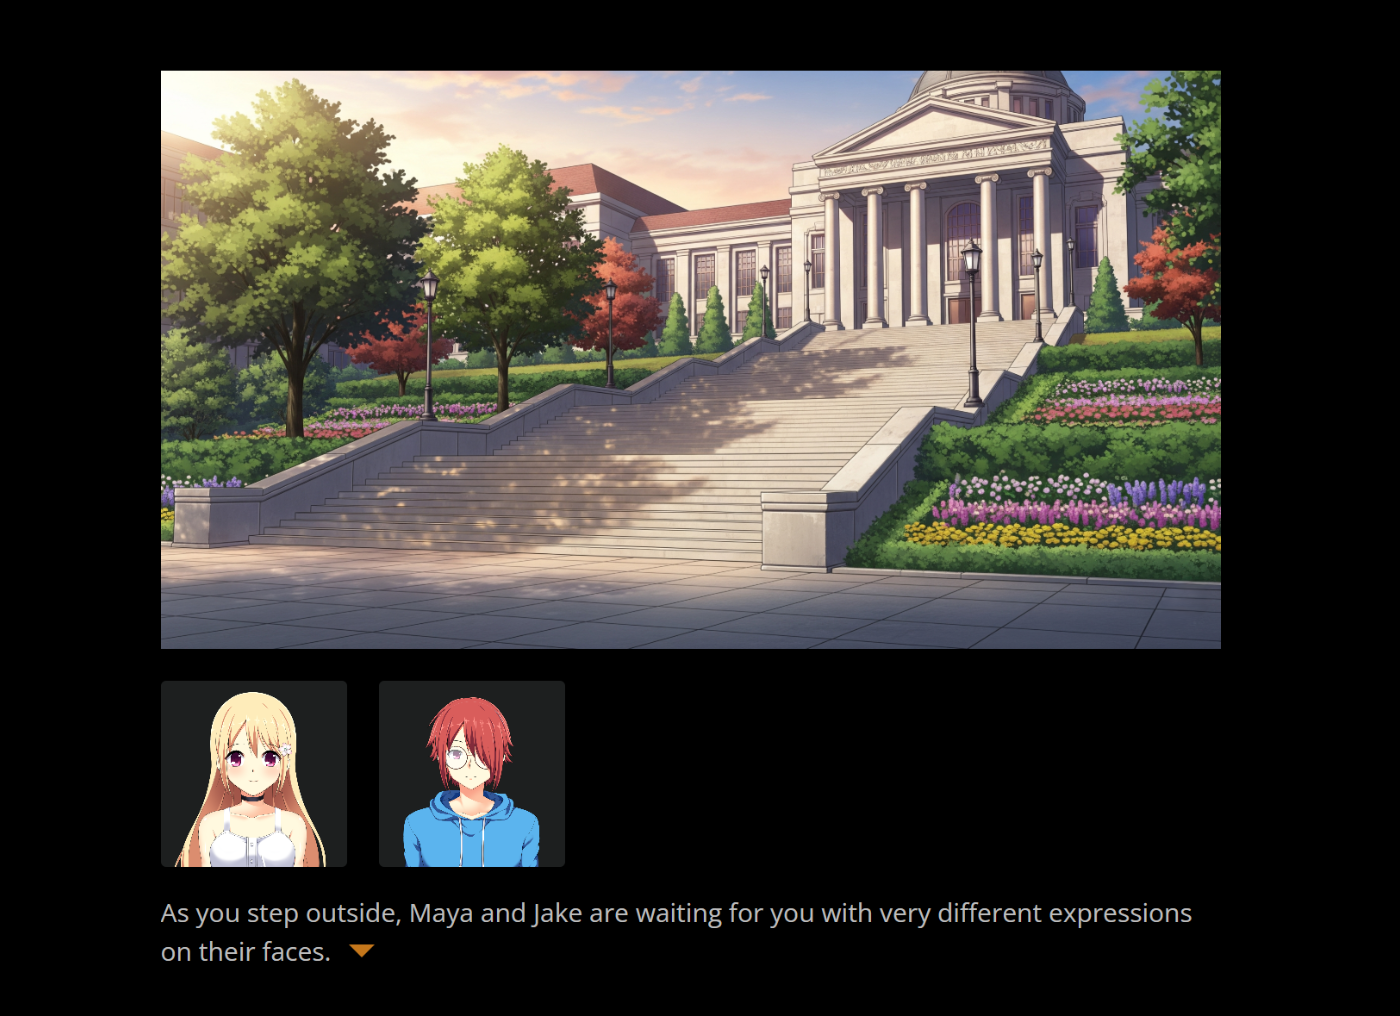
First, create a stage that fills the available Play Mode area. This positions the story inside the player and removes the default content width and padding. The `--vn-*` variables keep the dialogue, choices, and sprites aligned as the available height changes.
The `56px` top allowance keeps choices and sprites below the player toolbar. The background extends behind it. Then stretch image covers over the stage:
**CSS code extract**
```css
/* Define a stage inside the available Play Mode area. */
.prototype__root {
position: relative;
--vn-gap: clamp(12px, 2.5vw, 32px);
--vn-top-clearance: 56px;
--vn-dialogue-height: min(34%, 300px);
--vn-dialogue-text: #ffffff;
--vn-dialogue-shadow: 2px 2px 4px rgba(0, 0, 0, 0.6);
}
.prototype__root .prototype__wrapper {
padding: 0;
}
.prototype__root .prototype__content {
position: absolute;
inset: 0;
width: 100%;
max-width: none;
min-height: 0;
padding: 0;
overflow: hidden;
}
.prototype__root .prototype__header {
display: contents;
}
/* The image fills the stage, including the area behind the dialogue. */
.prototype__root .prototype__media {
position: absolute;
inset: 0;
z-index: 1;
}
.prototype__root .prototype__media img.single {
width: 100%;
height: 100%;
object-fit: cover;
}
```
Your background images now should fill the whole width and height of the Play Mode window.
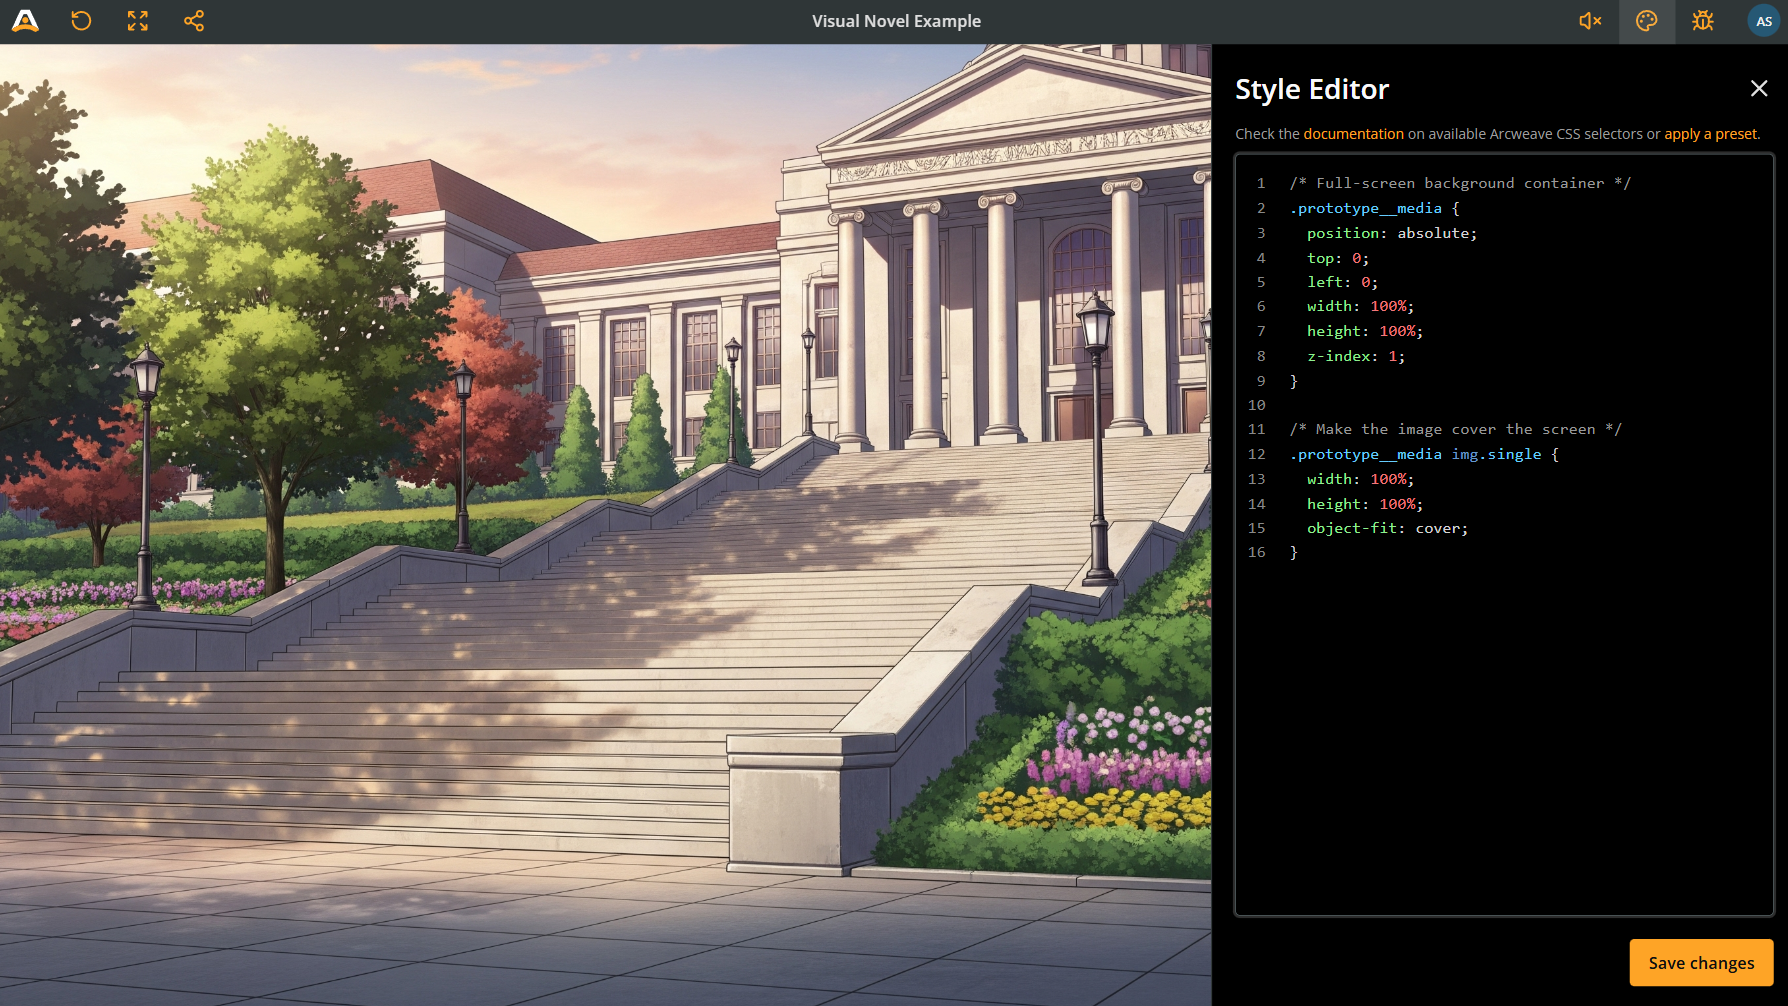
## Character sprites
Context: Arcweave docs > Tutorials > Style Editor > Visual novel CSS tutorial > Character sprites
### Character assets
Context: Arcweave docs > Tutorials > Style Editor > Visual novel CSS tutorial > Character sprites > Character assets
For the character sprites, use **PNG portraits with transparent backgrounds**. See the character assets of the Visual Novel Example, like the one below.
### Character components
Context: Arcweave docs > Tutorials > Style Editor > Visual novel CSS tutorial > Character sprites > Character components
Use [components](https://docs.arcweave.com/project-items/components) to signify dialogue speakers and characters present in a scene. Add covers to those components using the character images you uploaded as project assets.
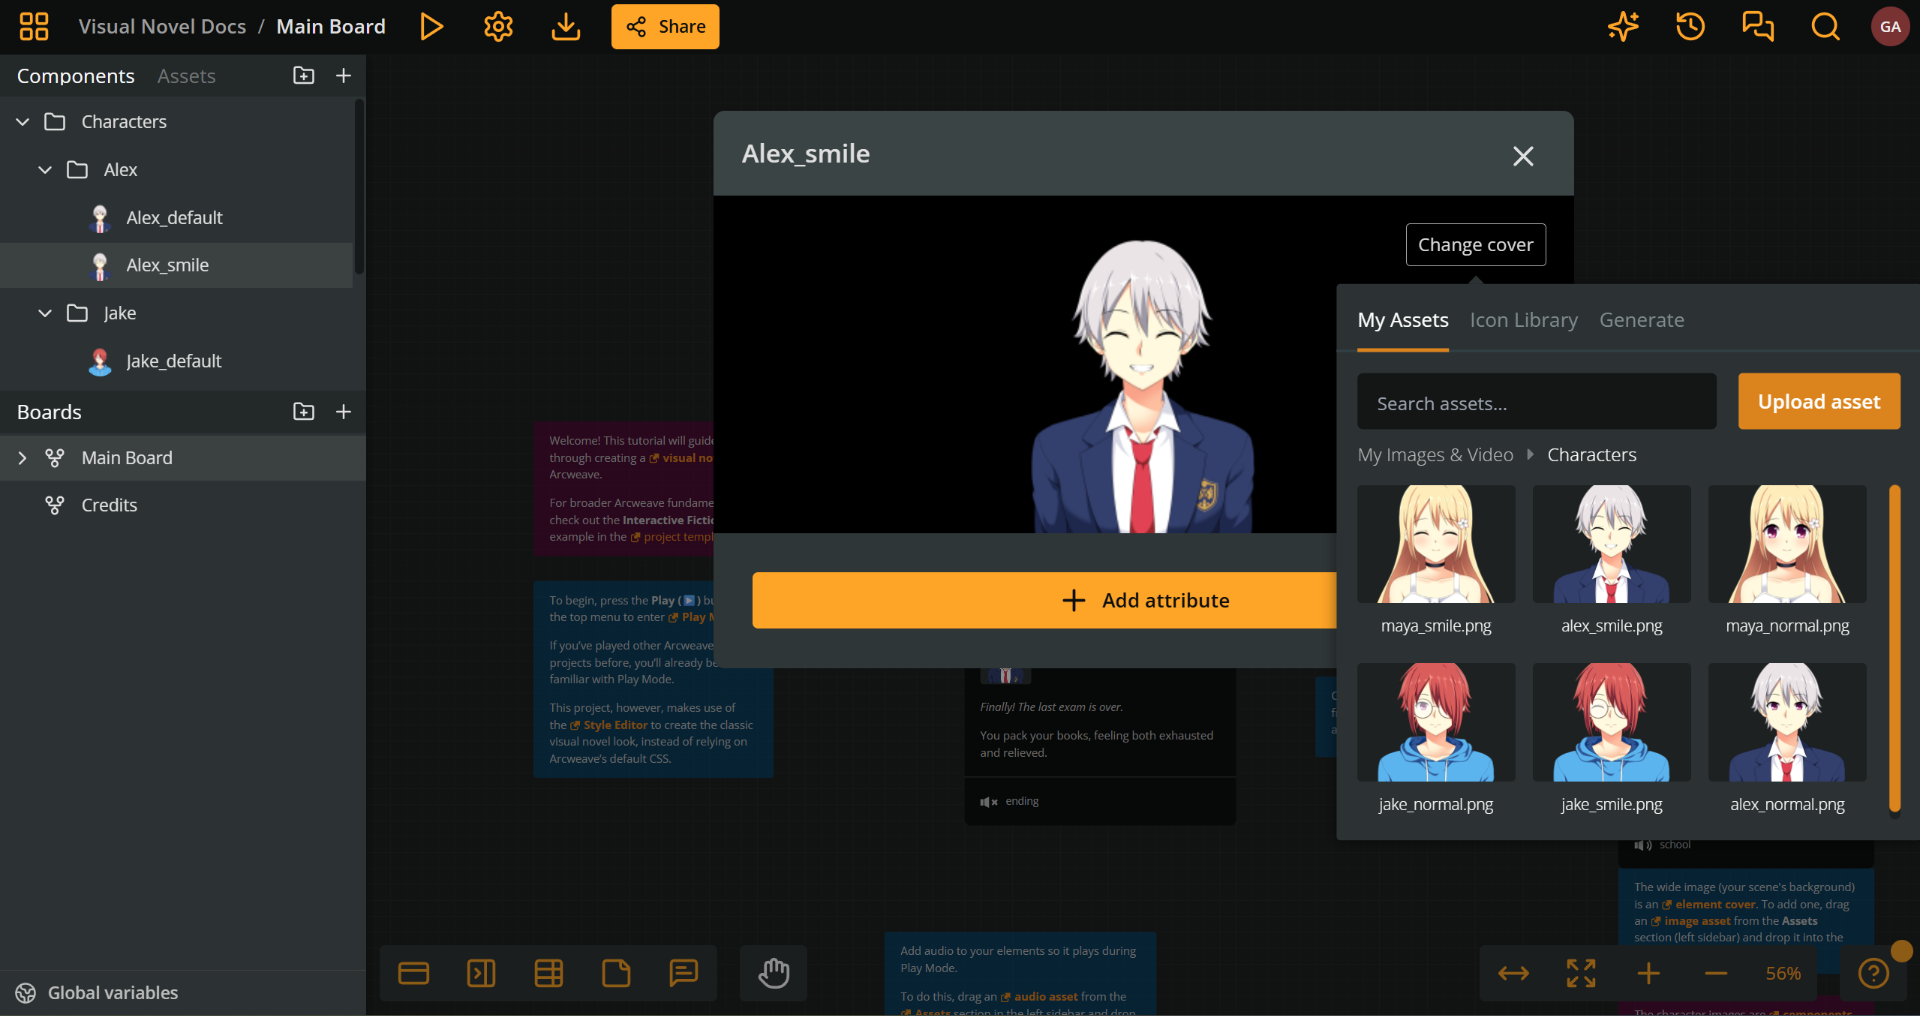
Then, attach the character components to the elements where they appear.
### Character emotions
Context: Arcweave docs > Tutorials > Style Editor > Visual novel CSS tutorial > Character sprites > Character emotions
To have a character appear with a variety of facial expressions, you need to do the following:
1. Upload a **different asset** (PNG image) for each facial expression.
2. Create a **different component** for each facial expression.
3. Attach the component with the desired expression to each element of the character's scene.
### Character CSS
Context: Arcweave docs > Tutorials > Style Editor > Visual novel CSS tutorial > Character sprites > Character CSS
Use the code snippet below to make character sprites appear at the bottom of the screen, standing above the dialogue box:
**CSS code extract**
```css
/* Bound sprites between the toolbar and the dialogue, so they fit. */
.prototype__root .prototype__components {
position: absolute;
top: var(--vn-top-clearance);
bottom: calc(var(--vn-dialogue-height) + var(--vn-gap));
left: 0;
right: 0;
height: auto;
margin: 0;
padding: 0 var(--vn-gap);
box-sizing: border-box;
display: flex;
align-items: flex-end;
justify-content: center;
gap: 3%;
z-index: 2;
}
.prototype__root .prototype__components > .comp {
flex: 1 1 0;
width: 0;
min-width: 0;
height: 100%;
max-height: 100%;
/* Component images have an inline aspect-ratio; remove that square box. */
aspect-ratio: auto !important;
background: none;
object-fit: contain;
object-position: center bottom;
filter: drop-shadow(0 0 20px rgba(0, 0, 0, 0.5));
}
.prototype__root .prototype__components > .flex-fix {
display: none;
}
```
> If you attach several image components, `display: flex` gives each a share of the available width. `object-fit: contain` keeps the full image visible in that space. Large transparent margins inside a PNG still reduce the visible character size; crop those margins in the asset itself.
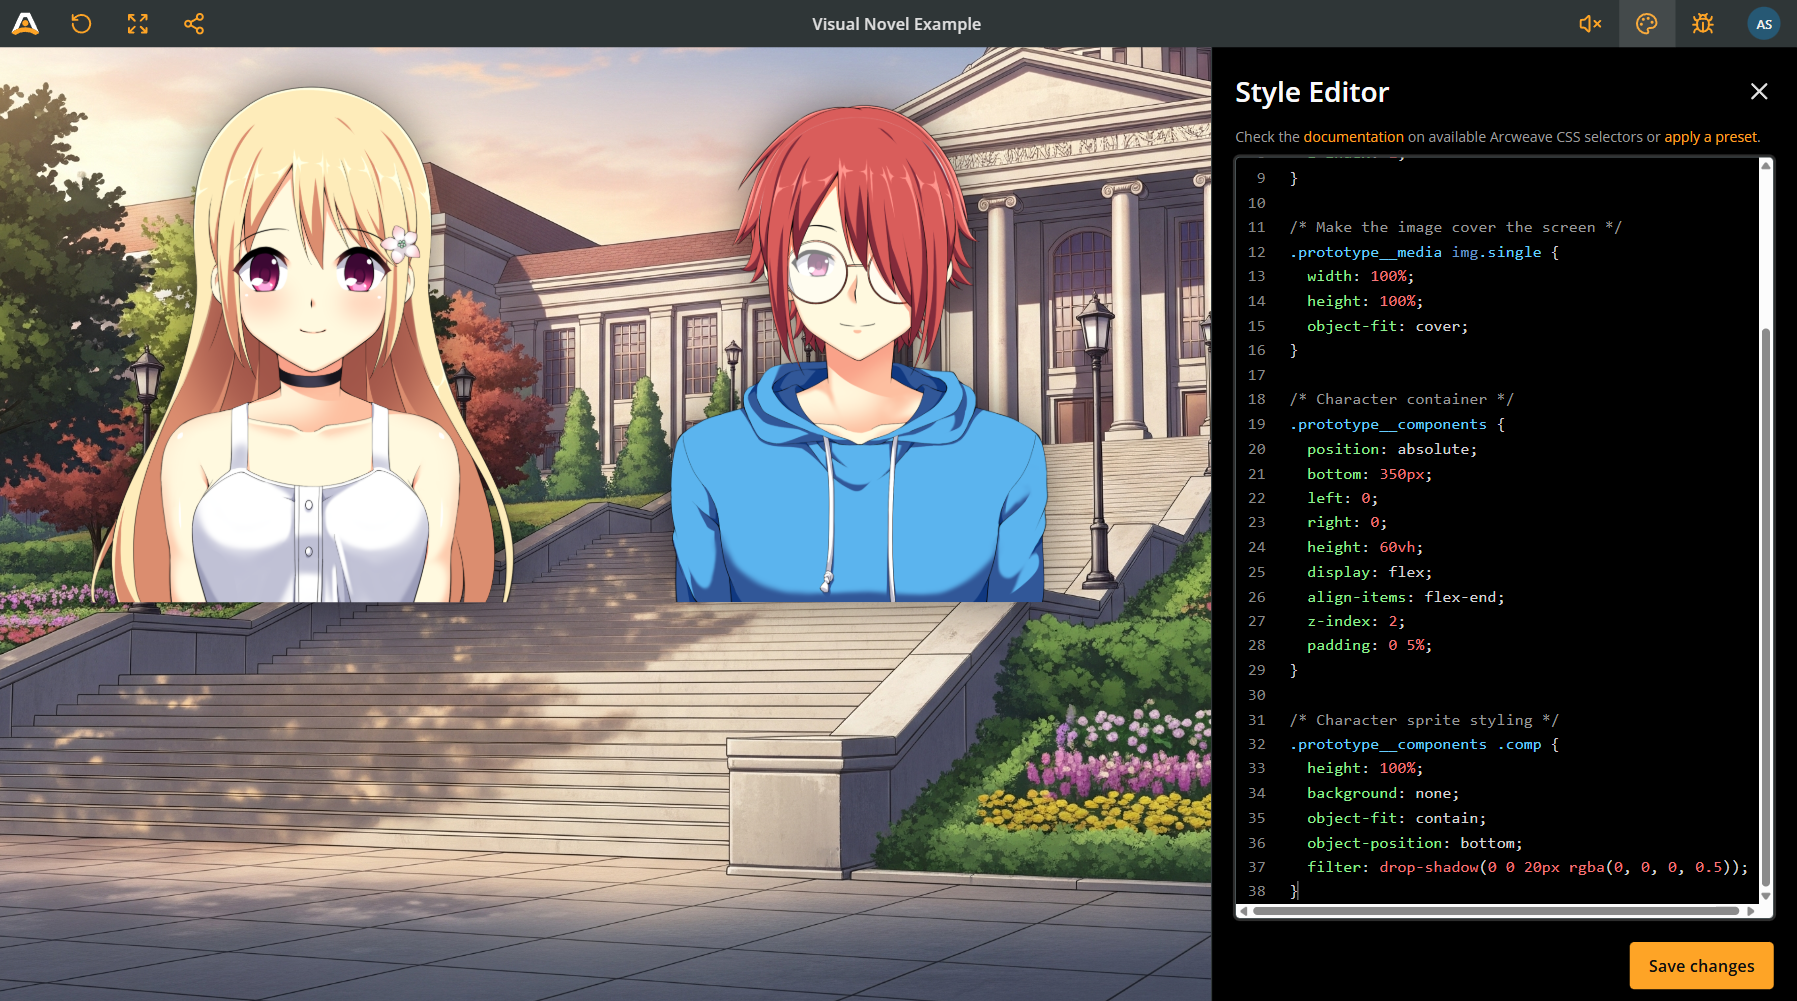
The sprite region has a top and bottom boundary instead of adding a fixed bottom offset to a viewport height. This prevents the sprites from extending above the screen on shorter displays. The targeted `!important` overrides the inline `aspect-ratio` on component images; the other declarations use normal specificity.
## Dialogue box
Context: Arcweave docs > Tutorials > Style Editor > Visual novel CSS tutorial > Dialogue box
The **dialogue box** scrolls independently when text is long. `.prototype__body` contains both the text and the choices, so keep it as a full-stage layer and draw the dialogue panel on `.prototype__text`. Its height resolves against that layer, and `box-sizing: border-box` includes the padding and border in that height.
The full-stage layer ignores pointer events in its empty areas. The text and options restore pointer events so reading, scrolling, and choosing still work.
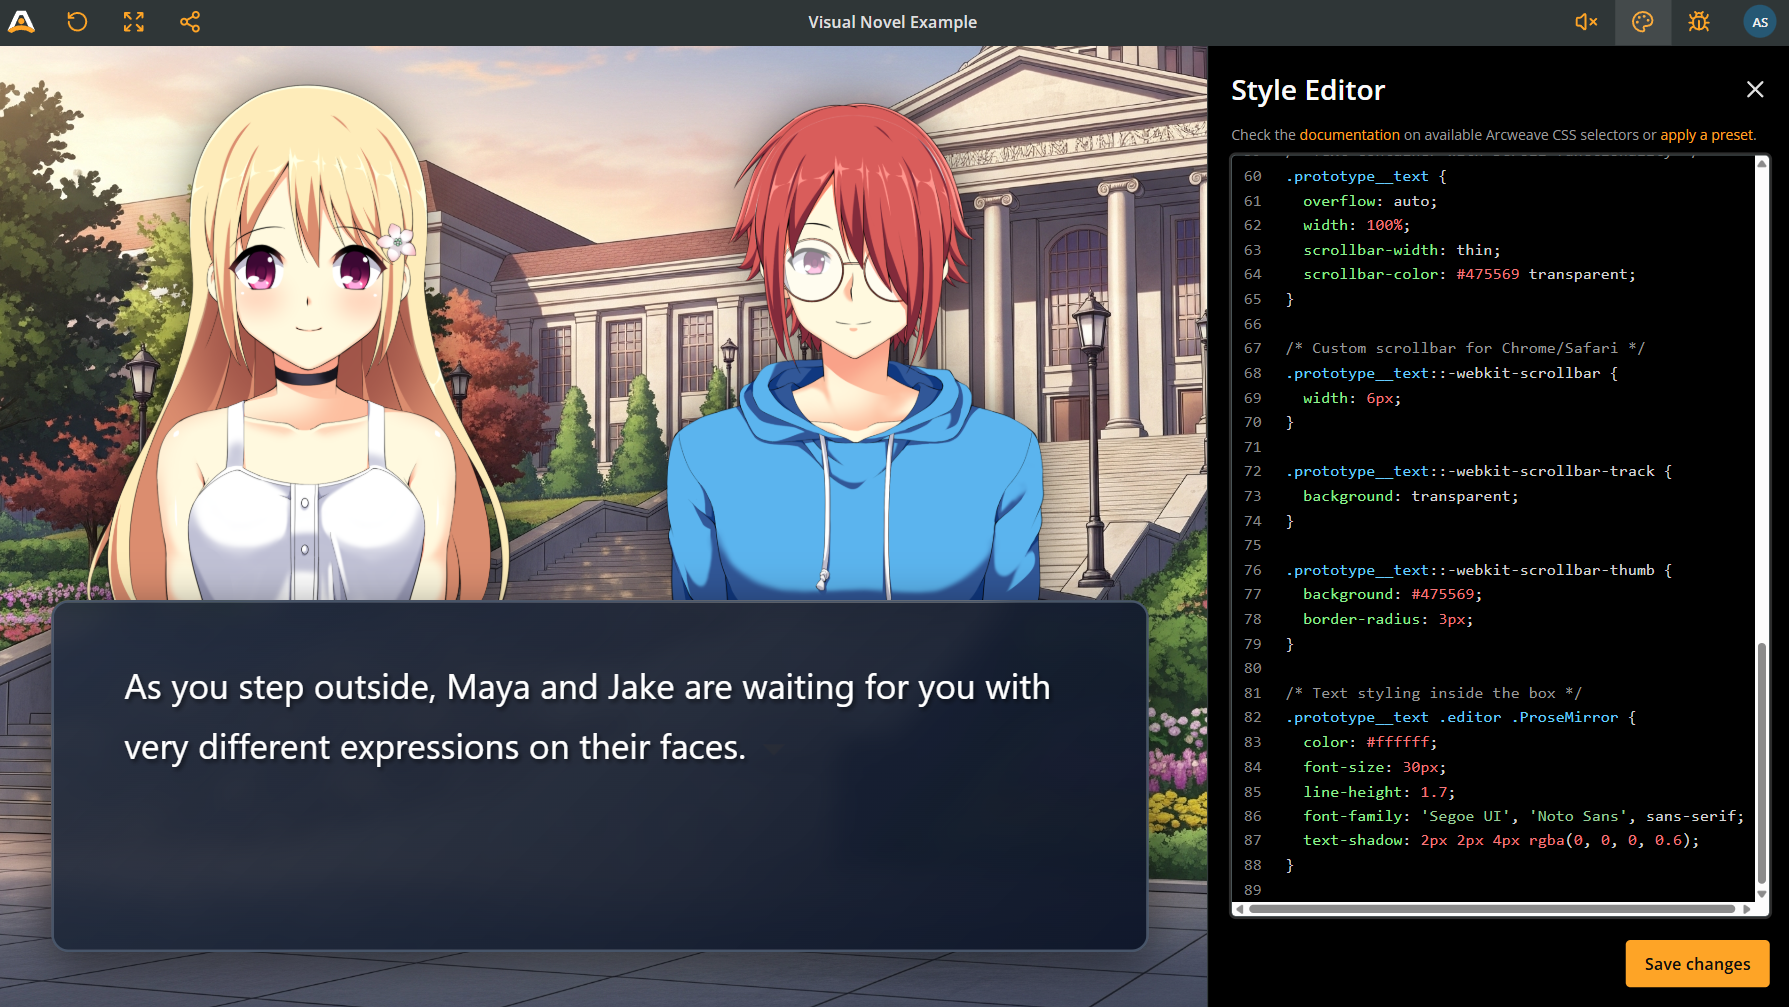
**CSS code extract**
```css
/* The body contains both dialogue and choices. Keep its full stage height. */
.prototype__root .prototype__body {
position: absolute;
inset: 0;
z-index: 3;
pointer-events: none;
}
/* Put the dialogue panel on the text container, not their shared parent. */
.prototype__root .prototype__text {
position: absolute;
bottom: var(--vn-gap);
left: var(--vn-gap);
right: var(--vn-gap);
height: var(--vn-dialogue-height);
min-height: 0;
box-sizing: border-box;
padding: 20px 32px;
overflow: auto;
overflow-wrap: anywhere;
overscroll-behavior: contain;
pointer-events: auto;
color: var(--vn-dialogue-text);
background: linear-gradient(
135deg,
rgba(30, 41, 59, 0.9) 0%,
rgba(15, 23, 42, 0.98) 100%
);
border: 2px solid #475569;
border-radius: 15px;
backdrop-filter: blur(10px);
box-shadow: 0 10px 40px rgba(0, 0, 0, 0.5);
scrollbar-width: thin;
scrollbar-color: #94a3b8 transparent;
}
.prototype__root .prototype__text .editor .editor-content {
color: var(--vn-dialogue-text);
font-size: 28px;
line-height: 1.6;
font-family: 'Segoe UI', 'Noto Sans', sans-serif;
text-shadow: var(--vn-dialogue-shadow);
padding: 0;
}
/* Match the edit outline to the text's zero padding. */
.prototype__root
.prototype-content-editor.is-content-editable
.editor.read-only::after,
.prototype__root
.prototype-content-editor.is-content-editable
.editor-input
.editor::after {
inset: 0;
}
```
`overflow: auto` needs a bounded height to create a useful scroll area. Keep the height and overflow rules together. The more specific `.prototype__text .editor .editor-content` selector also overrides Arcweave's default text padding and typography without changing choice labels. The final rule removes the default edit-outline inset so the blue outline fits this zero-padding text box, including short text.
## Option buttons
Context: Arcweave docs > Tutorials > Style Editor > Visual novel CSS tutorial > Option buttons
According to the classic visual novel style, player choices should appear above the dialogue box.
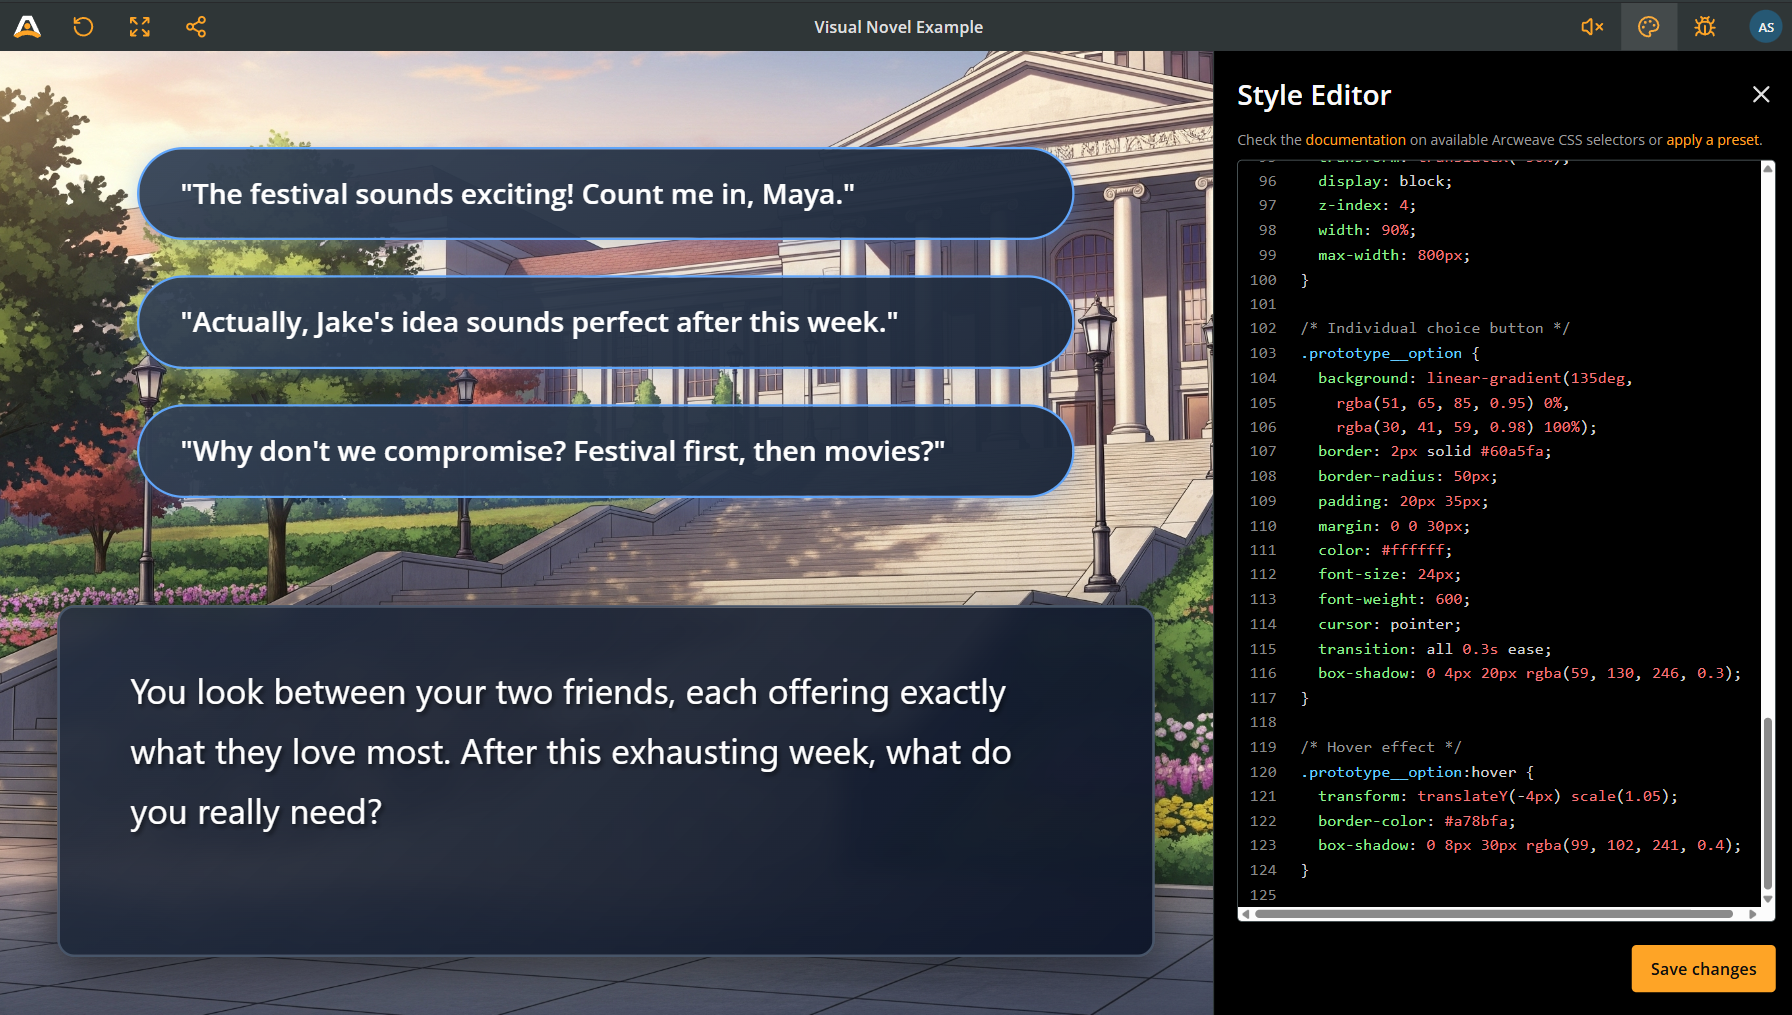
A fixed bottom offset alone is insufficient: five long choices can extend past the top of the screen. Limit the list to the space between the toolbar and dialogue, then let it scroll. The horizontal padding leaves room for edit mode's drag handles. This recipe changes colors on hover without scaling buttons outside the scroll area.
**CSS code extract**
```css
/* A long list scrolls in the space above the dialogue. */
.prototype__root .prototype__options {
position: absolute;
bottom: calc(var(--vn-dialogue-height) + 2 * var(--vn-gap));
left: var(--vn-gap);
right: var(--vn-gap);
width: auto;
max-width: 800px;
max-height: calc(
100% - var(--vn-dialogue-height) - 3 * var(--vn-gap) -
var(--vn-top-clearance)
);
margin: 0 auto;
padding: 8px 28px;
box-sizing: border-box;
overflow: auto;
overscroll-behavior: contain;
pointer-events: auto;
scrollbar-width: thin;
scrollbar-color: #94a3b8 transparent;
}
.prototype__root .prototype__option {
--prototype-option-background: linear-gradient(135deg, #334155, #1e293b);
--prototype-option-background-hover: linear-gradient(
135deg,
#475569,
#334155
);
background: var(--prototype-option-background);
border: 2px solid #60a5fa;
border-radius: 24px;
padding: 14px 24px;
margin: 0 0 12px;
color: #ffffff;
font-size: 22px;
line-height: 1.5;
font-weight: 600;
overflow-wrap: anywhere;
cursor: pointer;
transition:
background 0.2s,
border-color 0.2s;
}
.prototype__root .prototype__option:hover {
background: var(--prototype-option-background-hover);
border-color: #a78bfa;
}
```
## Mobile responsiveness
Context: Arcweave docs > Tutorials > Style Editor > Visual novel CSS tutorial > Mobile responsiveness
The stage-relative heights already adapt to the available player area. Add separate rules for narrow screens and short screens: a phone in landscape may be wider than the portrait breakpoint while having much less vertical space.
Keep these rules after the base styles. Media queries use the browser viewport (or the iframe viewport when embedded), so also test with the Style Editor and Debugger open.
**CSS code extract**
```css
/* Narrow screens, including phones in portrait. */
@media (max-width: 700px) {
.prototype__root {
--vn-gap: 12px;
--vn-dialogue-height: min(36%, 220px);
}
.prototype__root .prototype__text {
padding: 14px 18px;
}
.prototype__root .prototype__text .editor .editor-content {
font-size: 20px;
}
.prototype__root .prototype__option {
font-size: 18px;
padding: 10px 16px;
}
}
/* Short screens, including phones in landscape. */
@media (max-height: 500px) {
.prototype__root {
--vn-gap: 8px;
--vn-dialogue-height: 38%;
}
.prototype__root .prototype__text {
padding: 10px 16px;
}
.prototype__root .prototype__text .editor .editor-content {
font-size: 18px;
line-height: 1.5;
}
.prototype__root .prototype__option {
font-size: 16px;
padding: 8px 14px;
margin-bottom: 8px;
}
}
```
## Style specific text
Context: Arcweave docs > Tutorials > Style Editor > Visual novel CSS tutorial > Style specific text
You can emphasize a character's name with color, highlight clues, or give sound effects their own typography. Arcweave's rich-text formatting provides the HTML tags you can target without adding custom classes.
### How it works
Context: Arcweave docs > Tutorials > Style Editor > Visual novel CSS tutorial > Style specific text > How it works
When you format text in Arcweave's editor (italic, bold, underline), it generates standard HTML tags:
- **Italic** creates `` tags
- **Bold** creates `` tags
- **Underline** creates `` tags
We can target these tags with CSS and override their default appearance. The key is to use the **element ID** to make sure we only affect specific elements, not every italic word in your entire story.
### Find element IDs
Context: Arcweave docs > Tutorials > Style Editor > Visual novel CSS tutorial > Style specific text > Find element IDs
Use the element's **UUID**, not its title. In Play Mode, open the [Debugger](https://docs.arcweave.com/project-tools/play-mode/debugger), click the **ID** button in the **Element** row, and copy the **UUID**. You can also copy it from the element's **Properties → Details → Element ID**, and API/MCP project data provides the same element UUID.
For example, the UUID `cb35db92-3c07-41bf-9c45-580ad6b891b4` becomes the CSS selector `#el-cb35db92-3c07-41bf-9c45-580ad6b891b4`. The Debugger copies the raw UUID; add `#el-` once. In the examples below, replace `your-element-uuid` with that raw UUID.
### Step-by-step process
Context: Arcweave docs > Tutorials > Style Editor > Visual novel CSS tutorial > Style specific text > Step-by-step process
**1\. Format text in the editor**
Go to your element and edit it:
- Highlight the word or phrase you want to style
- Apply a format: **Italic**, **Bold**, or **Underline**
- This creates the HTML tag we'll target with CSS
**2\. Write the CSS**
Now in the Style Editor, target that specific formatted text:
**CSS code extract**
```css
/* Target italic text in a specific element and make it red */
#el-your-element-uuid .prototype__text .editor .editor-content em {
color: red;
font-style: normal; /* Remove the default italic effect */
}
```
### Practical examples
Context: Arcweave docs > Tutorials > Style Editor > Visual novel CSS tutorial > Style specific text > Practical examples
#### Example 1: Character names in color
Context: Arcweave docs > Tutorials > Style Editor > Visual novel CSS tutorial > Style specific text > Practical examples > Example 1: Character names in color
Make character names appear in their signature color:
**In Arcweave:** Format "Alice" with italic.
**CSS:**
**CSS code extract**
```css
#el-your-element-uuid .prototype__text .editor .editor-content em {
color: #60a5fa; /* Blue for Alice */
font-style: normal;
font-weight: bold;
}
```
#### Example 2: Important clues
Context: Arcweave docs > Tutorials > Style Editor > Visual novel CSS tutorial > Style specific text > Practical examples > Example 2: Important clues
Highlight clues that players should remember:
**In Arcweave:** Format clue words with bold.
**CSS:**
**CSS code extract**
```css
#el-your-element-uuid .prototype__text .editor .editor-content strong {
color: #fbbf24; /* Gold color */
font-weight: 900;
text-shadow: 0 0 10px rgba(251, 191, 36, 0.5); /* Glow effect */
}
```
#### Example 3: Sound effects
Context: Arcweave docs > Tutorials > Style Editor > Visual novel CSS tutorial > Style specific text > Practical examples > Example 3: Sound effects
Create stylized sound effects:
**In Arcweave:** Format "crash" with underline.
**CSS:**
**CSS code extract**
```css
#el-your-element-uuid .prototype__text .editor .editor-content u {
text-decoration: none; /* Remove underline */
color: #ef4444;
font-family: 'Impact', sans-serif;
font-size: 1.2em;
font-style: italic;
letter-spacing: 2px;
}
```
#### Example 4: Targeting specific paragraphs
Context: Arcweave docs > Tutorials > Style Editor > Visual novel CSS tutorial > Style specific text > Practical examples > Example 4: Targeting specific paragraphs
You can also style entire paragraphs using `nth-child`:
**CSS code extract**
```css
/* Style the first paragraph differently (maybe it's narration) */
#el-your-element-uuid .prototype__text .editor .editor-content p:first-child {
color: #a78bfa;
font-style: italic;
font-size: 0.9em;
}
/* Style the second paragraph (maybe it's a character speaking) */
#el-your-element-uuid .prototype__text .editor .editor-content p:nth-child(2) {
color: #60a5fa;
font-weight: bold;
}
```
### Creative uses
Context: Arcweave docs > Tutorials > Style Editor > Visual novel CSS tutorial > Style specific text > Creative uses
Here are some creative ways to use this technique:
**1\. Dialogue with different character voices:**
**CSS code extract**
```css
/* Character 1 - uses italic */
#el-your-element-uuid .prototype__text .editor .editor-content em {
color: #60a5fa;
font-style: normal;
font-weight: 600;
}
/* Character 2 - uses bold */
#el-your-element-uuid .prototype__text .editor .editor-content strong {
color: #f472b6;
font-weight: 700;
}
/* Narrator - uses underline */
#el-your-element-uuid .prototype__text .editor .editor-content u {
text-decoration: none;
color: #a78bfa;
font-style: italic;
}
```
**2\. Thoughts vs. spoken dialogue:**
**CSS code extract**
```css
/* Inner thoughts in italic */
#el-your-element-uuid .prototype__text .editor .editor-content em {
color: #94a3b8;
font-style: italic;
opacity: 0.8;
}
```
**3\. Highlighted decisions in the dialogue:**
**CSS code extract**
```css
/* Highlight bold text that introduces a decision */
#el-your-element-uuid .prototype__text .editor .editor-content strong {
color: #fbbf24;
font-weight: bold;
text-decoration: underline;
}
```
### Scope and formatting
Context: Arcweave docs > Tutorials > Style Editor > Visual novel CSS tutorial > Style specific text > Scope and formatting
Use the element selector when a rule belongs to one scene, and `.prototype__text .editor .editor-content` to limit it to dialogue. A global selector such as `em` can also affect the player UI. For intentional story-wide formatting, use `.prototype__root .prototype__text .editor .editor-content em`.
These examples reuse italic, bold, and underline formatting as three visual conventions. Reusing a format changes its appearance everywhere matched by that rule; keep ordinary emphasis readable and use paragraph selectors where that is more appropriate. Paragraph positions also change if you insert text or render different content with Arcscript.
## Style specific options
Context: Arcweave docs > Tutorials > Style Editor > Visual novel CSS tutorial > Style specific options
Use the instructions in the CSS basics guide to [style specific options](https://docs.arcweave.com/tutorials/style-editor/css-basics#style-specific-options) of either all elements or specific elements.
## Complete code template
Context: Arcweave docs > Tutorials > Style Editor > Visual novel CSS tutorial > Complete code template
This combines the five layout snippets above. Add scene-specific text rules after it if needed. It replaces the default reading layout with a visual novel stage; check long dialogue and choices before publishing.
**CSS code extract**
```css
/* Define a stage inside the available Play Mode area. */
.prototype__root {
position: relative;
--vn-gap: clamp(12px, 2.5vw, 32px);
--vn-top-clearance: 56px;
--vn-dialogue-height: min(34%, 300px);
--vn-dialogue-text: #ffffff;
--vn-dialogue-shadow: 2px 2px 4px rgba(0, 0, 0, 0.6);
}
.prototype__root .prototype__wrapper {
padding: 0;
}
.prototype__root .prototype__content {
position: absolute;
inset: 0;
width: 100%;
max-width: none;
min-height: 0;
padding: 0;
overflow: hidden;
}
.prototype__root .prototype__header {
display: contents;
}
/* The image fills the stage, including the area behind the dialogue. */
.prototype__root .prototype__media {
position: absolute;
inset: 0;
z-index: 1;
}
.prototype__root .prototype__media img.single {
width: 100%;
height: 100%;
object-fit: cover;
}
/* Bound sprites between the toolbar and the dialogue, so they fit. */
.prototype__root .prototype__components {
position: absolute;
top: var(--vn-top-clearance);
bottom: calc(var(--vn-dialogue-height) + var(--vn-gap));
left: 0;
right: 0;
height: auto;
margin: 0;
padding: 0 var(--vn-gap);
box-sizing: border-box;
display: flex;
align-items: flex-end;
justify-content: center;
gap: 3%;
z-index: 2;
}
.prototype__root .prototype__components > .comp {
flex: 1 1 0;
width: 0;
min-width: 0;
height: 100%;
max-height: 100%;
/* Component images have an inline aspect-ratio; remove that square box. */
aspect-ratio: auto !important;
background: none;
object-fit: contain;
object-position: center bottom;
filter: drop-shadow(0 0 20px rgba(0, 0, 0, 0.5));
}
.prototype__root .prototype__components > .flex-fix {
display: none;
}
/* The body contains both dialogue and choices. Keep its full stage height. */
.prototype__root .prototype__body {
position: absolute;
inset: 0;
z-index: 3;
pointer-events: none;
}
/* Put the dialogue panel on the text container, not their shared parent. */
.prototype__root .prototype__text {
position: absolute;
bottom: var(--vn-gap);
left: var(--vn-gap);
right: var(--vn-gap);
height: var(--vn-dialogue-height);
min-height: 0;
box-sizing: border-box;
padding: 20px 32px;
overflow: auto;
overflow-wrap: anywhere;
overscroll-behavior: contain;
pointer-events: auto;
color: var(--vn-dialogue-text);
background: linear-gradient(
135deg,
rgba(30, 41, 59, 0.9) 0%,
rgba(15, 23, 42, 0.98) 100%
);
border: 2px solid #475569;
border-radius: 15px;
backdrop-filter: blur(10px);
box-shadow: 0 10px 40px rgba(0, 0, 0, 0.5);
scrollbar-width: thin;
scrollbar-color: #94a3b8 transparent;
}
.prototype__root .prototype__text .editor .editor-content {
color: var(--vn-dialogue-text);
font-size: 28px;
line-height: 1.6;
font-family: 'Segoe UI', 'Noto Sans', sans-serif;
text-shadow: var(--vn-dialogue-shadow);
padding: 0;
}
/* Match the edit outline to the text's zero padding. */
.prototype__root
.prototype-content-editor.is-content-editable
.editor.read-only::after,
.prototype__root
.prototype-content-editor.is-content-editable
.editor-input
.editor::after {
inset: 0;
}
/* A long list scrolls in the space above the dialogue. */
.prototype__root .prototype__options {
position: absolute;
bottom: calc(var(--vn-dialogue-height) + 2 * var(--vn-gap));
left: var(--vn-gap);
right: var(--vn-gap);
width: auto;
max-width: 800px;
max-height: calc(
100% - var(--vn-dialogue-height) - 3 * var(--vn-gap) -
var(--vn-top-clearance)
);
margin: 0 auto;
padding: 8px 28px;
box-sizing: border-box;
overflow: auto;
overscroll-behavior: contain;
pointer-events: auto;
scrollbar-width: thin;
scrollbar-color: #94a3b8 transparent;
}
.prototype__root .prototype__option {
--prototype-option-background: linear-gradient(135deg, #334155, #1e293b);
--prototype-option-background-hover: linear-gradient(
135deg,
#475569,
#334155
);
background: var(--prototype-option-background);
border: 2px solid #60a5fa;
border-radius: 24px;
padding: 14px 24px;
margin: 0 0 12px;
color: #ffffff;
font-size: 22px;
line-height: 1.5;
font-weight: 600;
overflow-wrap: anywhere;
cursor: pointer;
transition:
background 0.2s,
border-color 0.2s;
}
.prototype__root .prototype__option:hover {
background: var(--prototype-option-background-hover);
border-color: #a78bfa;
}
/* Narrow screens, including phones in portrait. */
@media (max-width: 700px) {
.prototype__root {
--vn-gap: 12px;
--vn-dialogue-height: min(36%, 220px);
}
.prototype__root .prototype__text {
padding: 14px 18px;
}
.prototype__root .prototype__text .editor .editor-content {
font-size: 20px;
}
.prototype__root .prototype__option {
font-size: 18px;
padding: 10px 16px;
}
}
/* Short screens, including phones in landscape. */
@media (max-height: 500px) {
.prototype__root {
--vn-gap: 8px;
--vn-dialogue-height: 38%;
}
.prototype__root .prototype__text {
padding: 10px 16px;
}
.prototype__root .prototype__text .editor .editor-content {
font-size: 18px;
line-height: 1.5;
}
.prototype__root .prototype__option {
font-size: 16px;
padding: 8px 14px;
margin-bottom: 8px;
}
}
```
## Quick customization guide
Context: Arcweave docs > Tutorials > Style Editor > Visual novel CSS tutorial > Quick customization guide
| To change | Target | Property |
| ----------------------------------- | ------------------------------------------------------------------------------ | ------------------------------------------------------------------------------- |
| Dialogue height and sprite baseline | `.prototype__root` | `--vn-dialogue-height` |
| Space around and between panels | `.prototype__root` | `--vn-gap` |
| Space reserved below the toolbar | `.prototype__root` | `--vn-top-clearance` |
| Dialogue text size | `.prototype__root .prototype__text .editor .editor-content` | `font-size` |
| Dialogue text color | `.prototype__root` | `--vn-dialogue-text` |
| Dialogue panel background | `.prototype__root .prototype__text` | `background` |
| Scrollbar color | `.prototype__root .prototype__text` and `.prototype__root .prototype__options` | `scrollbar-color` |
| Choice colors | `.prototype__root .prototype__option` | `--prototype-option-background`, `--prototype-option-background-hover`, `color` |
| Choice shape | `.prototype__root .prototype__option` | `border-radius` |
Changing the shared layout variables moves the related parts together. Avoid replacing them with independent pixel offsets that can overlap on small screens.
## Styling tips
Context: Arcweave docs > Tutorials > Style Editor > Visual novel CSS tutorial > Styling tips
### Color themes
Context: Arcweave docs > Tutorials > Style Editor > Visual novel CSS tutorial > Styling tips > Color themes
Add these overrides after the template. Change the dialogue background on `.prototype__text`; `.prototype__body` spans the entire stage.
#### Dark & mysterious theme
Context: Arcweave docs > Tutorials > Style Editor > Visual novel CSS tutorial > Styling tips > Color themes > Dark & mysterious theme
```css
.prototype__root .prototype__text {
background: linear-gradient(
135deg,
rgba(15, 15, 25, 0.9) 0%,
rgba(5, 5, 15, 0.95) 100%
);
}
```
#### Light & airy theme
Context: Arcweave docs > Tutorials > Style Editor > Visual novel CSS tutorial > Styling tips > Color themes > Light & airy theme
Change the text and remove its dark shadow together with the background. If you added scene-specific emphasis colors, choose darker versions of those colors for this theme too.
```css
.prototype__root {
--vn-dialogue-text: #172033;
--vn-dialogue-shadow: none;
}
.prototype__root .prototype__text {
background: linear-gradient(
135deg,
rgba(240, 240, 250, 0.85) 0%,
rgba(220, 220, 240, 0.95) 100%
);
}
```
### Custom fonts
Context: Arcweave docs > Tutorials > Style Editor > Visual novel CSS tutorial > Styling tips > Custom fonts
Want a different font? Add a valid Google Fonts import at the top:
```css
@import url('https://fonts.googleapis.com/css2?family=Lora&display=swap');
.prototype__root .prototype__text .editor .editor-content {
font-family: 'Lora', serif;
}
```
### Scrollbar
Context: Arcweave docs > Tutorials > Style Editor > Visual novel CSS tutorial > Styling tips > Scrollbar
Use a contrasting thumb color for both scroll areas:
```css
.prototype__root .prototype__text,
.prototype__root .prototype__options {
scrollbar-color: #60a5fa transparent;
}
```
The operating system may hide scrollbars until scrolling starts. Check that wheel and touch scrolling reach the final paragraph and final option, even if a scrollbar is not always visible.
### Text overflow
Context: Arcweave docs > Tutorials > Style Editor > Visual novel CSS tutorial > Styling tips > Text overflow
Test a scene with long dialogue and at least five multi-line choices. Scroll each area to its end. Repeat on desktop, a portrait phone, and a short landscape screen; verify the last choice remains selectable and no panel covers the toolbar. Also check a scene with only an unlabeled outgoing connection: its advance arrow stays at the end of the dialogue rather than becoming a choice button.
### Further styling
Context: Arcweave docs > Tutorials > Style Editor > Visual novel CSS tutorial > Styling tips > Further styling
You now have a solid foundation and a beautiful visual novel interface. To take this even further, try the following ideas:
- **Add animations**: Try `transition` and `transform` properties for fade-ins.
- **Custom buttons for specific choices**: Combine element UUID selectors with the [option targeting rules](https://docs.arcweave.com/tutorials/style-editor/css-basics#style-specific-options). Choices do not expose connection UUIDs as HTML IDs.
- **Day/night themes**: Use element UUID selectors to apply different colors to specific scenes.
- **Sound effects**: Combine your CSS with Arcweave's audio features.
- **Character portraits**: Try different positioning for character components.
- **Text effects**: Experiment with glowing text, shadows, and animations.
- **Create a name tag system**: Use paragraph targeting to style character names.
> ✅ Remember: CSS is all about experimentation. Don't be afraid to adjust values, try different colors, or completely redesign elements. The Style Editor updates in real-time, so you can see your changes immediately.
## Troubleshooting
Context: Arcweave docs > Tutorials > Style Editor > Visual novel CSS tutorial > Troubleshooting
- **Characters are cut off:** Keep the top and bottom bounds on `.prototype__components`, and `object-fit: contain` on its images. Remove old `height: 60vh` or `bottom: 350px` rules. Increasing a fixed sprite height can make clipping worse.
- **Characters look small:** Check the transparent margins in the PNG and how many components share the row. The template fits the whole image into each character's available space.
- **Choices extend above the screen:** Keep the `max-height` and `overflow: auto` rules on `.prototype__options`. All geometry should use the same `--vn-dialogue-height` and `--vn-gap` values.
- **Dialogue does not scroll:** Check the bounded height and `overflow: auto` on `.prototype__text`. Its parent `.prototype__body` must still span the stage. Older tutorial rules that put the dialogue box on `.prototype__body` conflict with this template.
- **Text is hard to read:** Increase the dialogue background opacity and check text contrast. A light background also needs dark text and no dark text shadow, as shown in [Light & airy theme](https://docs.arcweave.com/tutorials/style-editor/css-visual-novel#light-airy-theme).
- **Landscape layout is cramped:** Keep the `max-height` media query as well as the `max-width` query. Test in the actual player or iframe size, with and without editing panels.
- **Scene-specific rules do not match:** Use `#el-` followed by the raw element UUID, exactly once. Copy the UUID from the Debugger's **Element** row, not the **Board** row; an element title is not an HTML ID.
- **API/MCP changes are missing in an open player:** Fully reload Play Mode after saving CSS through those interfaces. Read back the saved CSS and follow the [styling workflow](https://docs.arcweave.com/project-tools/play-mode/styling-reference#save-and-verify-styles).
# Unity integration tutorial
Source: https://docs.arcweave.com/tutorials/unity/overview
Section: Tutorials
Description: Overview of the tutorial on Arcweave's plugin for Unity
This series walks you through a step-by-step integration of Arcweave and Unity, in text and video.
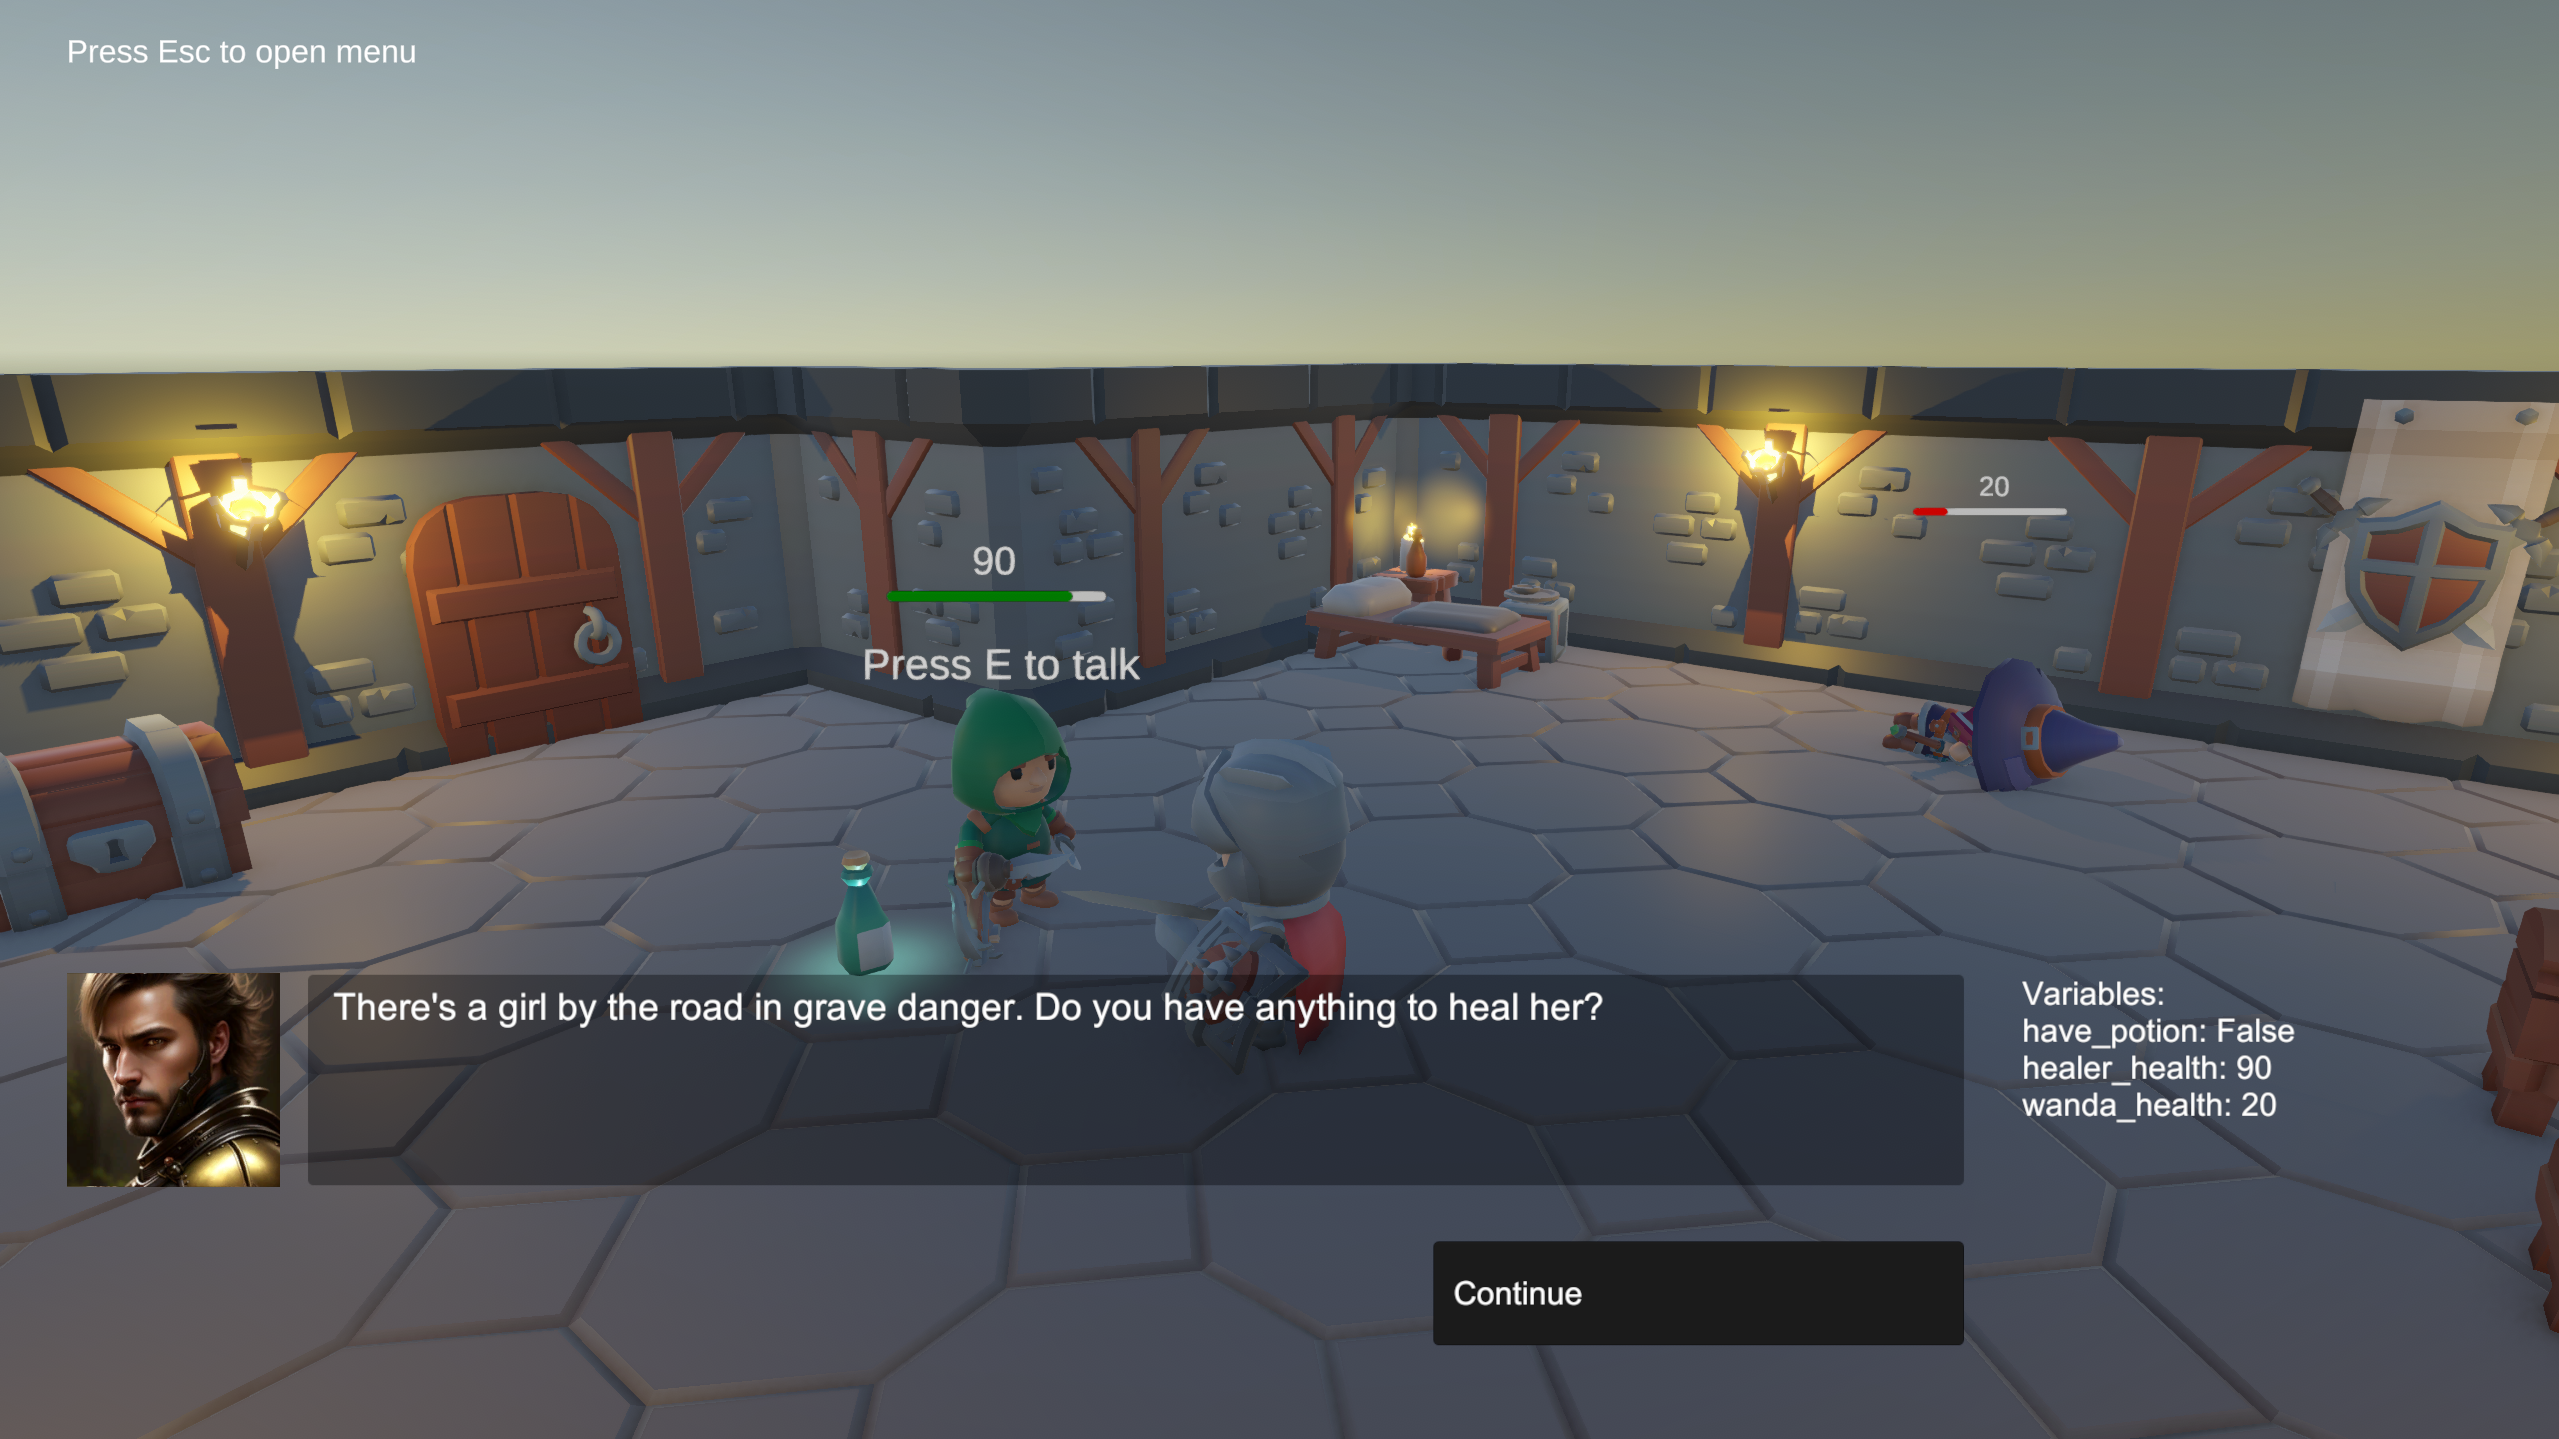
- [Part 1: Install & set up](https://docs.arcweave.com/tutorials/unity/pt-1): Set up your Unity project, install the Arcweave Unity plugin, import your first Arcweave project, and verify that your story runs in Unity.
- [Part 2: Demo scene architecture](https://docs.arcweave.com/tutorials/unity/pt-2): Dive into the demo scene to see how narrative data flows into the game. Learn about the event-driven architecture, how your Unity project controls story progression, and how the UI reacts dynamically to narrative events.
- [Part 3: Arcweave project structure](https://docs.arcweave.com/tutorials/unity/pt-3): Explore how Arcweave projects map to gameplay systems. You'll learn how to organize dialogue by NPC, manage global variables, define dialogue entry/exit points, and use Arcscript and components to shape narrative flow.
- [Part 4: The 3D demo project](https://docs.arcweave.com/tutorials/unity/pt-4): See how a full 3D RPG scene integrates with Arcweave. You'll wire up NPC interactions, control game state through a central manager, and use Arcweave variables and components to drive UI, environment, and gameplay behavior.
- [Part 5: Customize the template](https://docs.arcweave.com/tutorials/unity/pt-5): Customize your project by adding an NPC and setting up an alternative way to trigger dialogue that uses Arcweave components.
By the end of the series, you'll understand how Arcweave handles story logic and data, how Unity consumes that data, and how to connect the two in a clean, scalable way.
# Unity tutorial | Part 1: Install & set up
Source: https://docs.arcweave.com/tutorials/unity/pt-1
Section: Tutorials > Unity
Description: Unity tutorial part 1, installing the Arcweave plugin, exporting and importing project data, and connecting it to ArcweavePlayer
This tutorial walks you through installing the Arcweave Unity Plugin, exporting a narrative project from Arcweave, and importing it into Unity.
## Video tutorial
Context: Arcweave docs > Tutorials > Unity > Unity tutorial | Part 1: Install & set up > Video tutorial
You can watch the video version of this tutorial below.
Video: https://www.youtube.com/watch?v=E3E3h5ktnNI
## Create a Unity project
Context: Arcweave docs > Tutorials > Unity > Unity tutorial | Part 1: Install & set up > Create a Unity project
If you already have a Unity project, skip to [Download the plugin](https://docs.arcweave.com/tutorials/unity/pt-1#download-the-plugin).
Open Unity Hub and click **New project** in the top right.
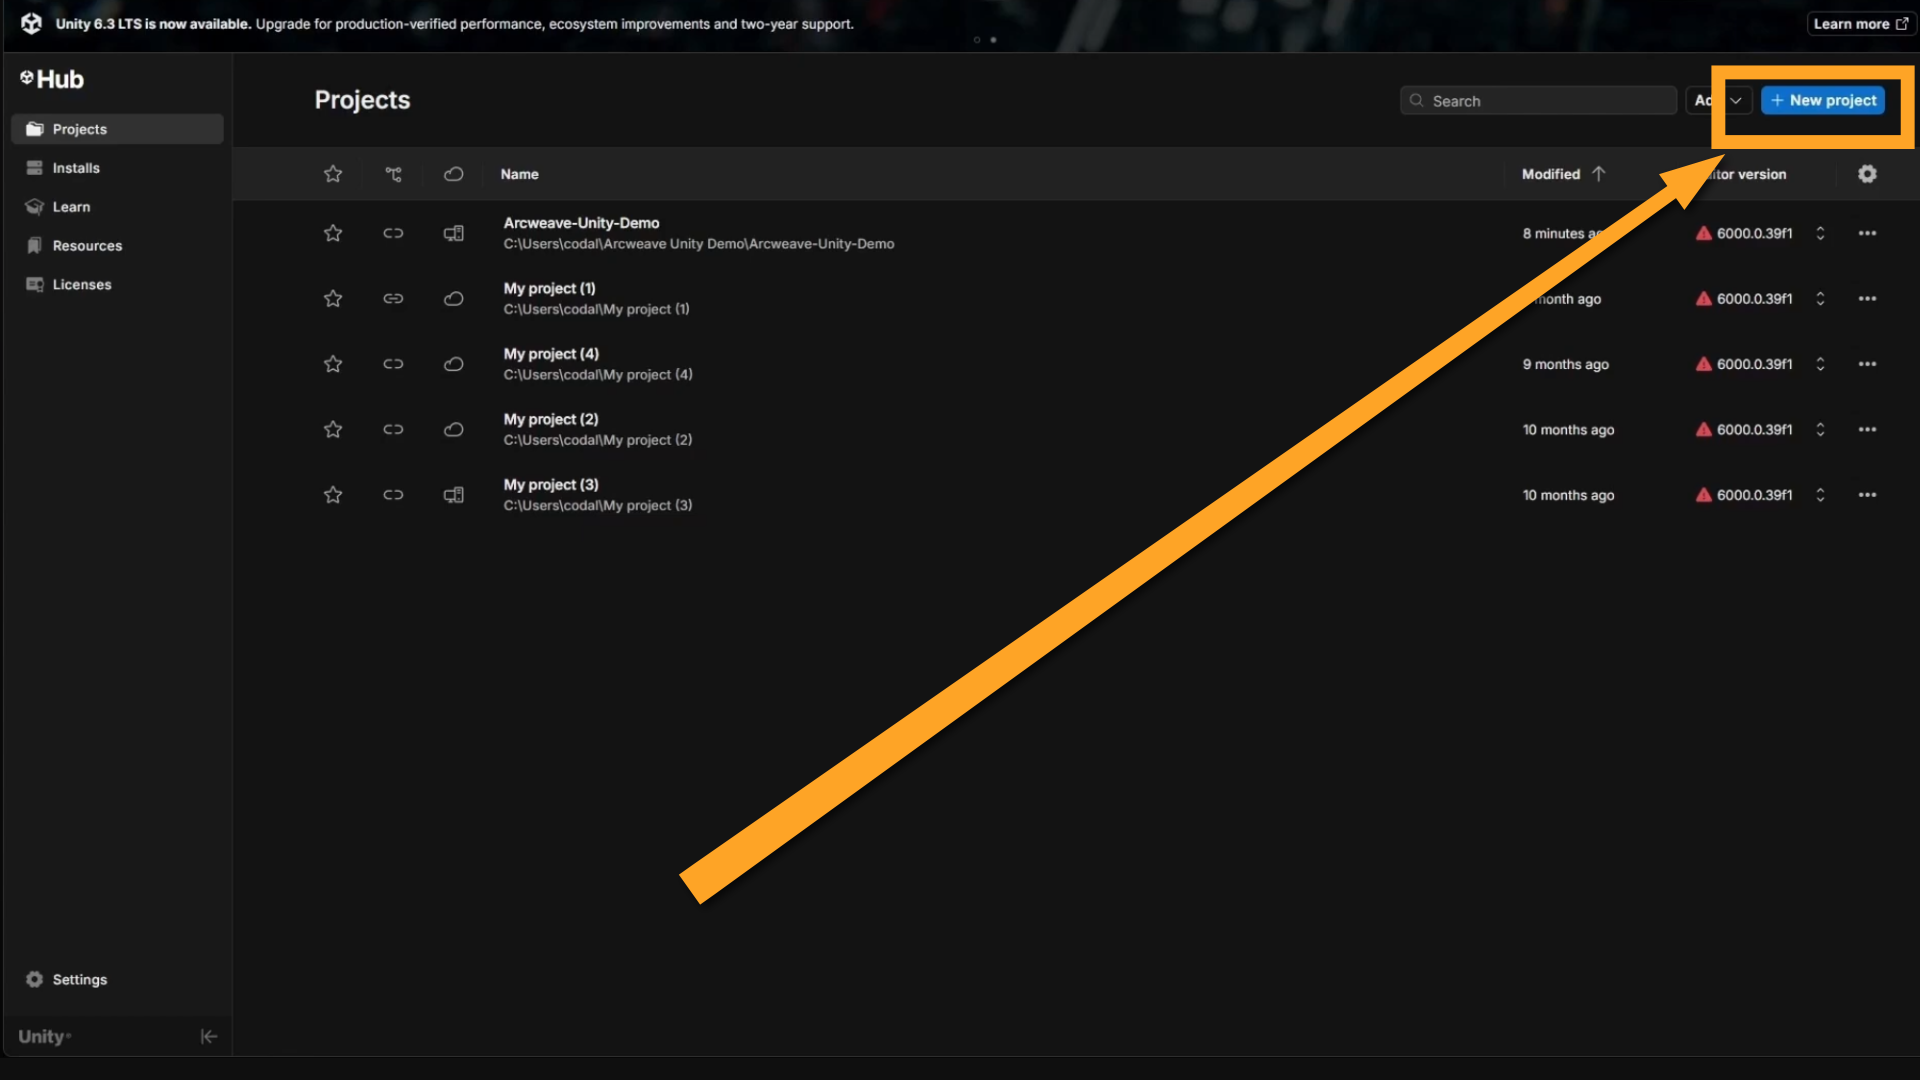
In the project creation window:
1. Select your Unity version from the dropdown at the top.
2. Choose either the **Universal 2D** or the **Universal 3D** template.
3. Give your project a name (e.g., `Unity Arcweave Plugin`).
4. Click **Create project**.
## Download the plugin
Context: Arcweave docs > Tutorials > Unity > Unity tutorial | Part 1: Install & set up > Download the plugin
The Arcweave Unity Plugin is available on both the Unity Asset Store and GitHub. The GitHub version is recommended as it is always up to date.
Navigate to the plugin repository:
**[github.com/arcweave/arcweave-unity-plugin](https://github.com/arcweave/arcweave-unity-plugin)**
Click the green **Code** button, then select **Download ZIP**.

Once the download is complete, extract the ZIP file. The extracted folder (`arcweave-unity-plugin-main`) contains:
- A readme file
- An Assets folder, containing:
- **`Assets/Arcweave/Plugin`**: The core plugin (scripts, editor tools, runtime components). Required.
- **`Assets/Arcweave/Demo`**: Demo scenes and sample implementations. Recommended for learning.
## Install the plugin
Context: Arcweave docs > Tutorials > Unity > Unity tutorial | Part 1: Install & set up > Install the plugin
The plugin's demo scripts require the **Unity UI** package (`com.unity.ugui`). If your project doesn't include it, install it from **Window > Package Manager** before you import the plugin; otherwise the demo scripts won't compile. New Unity 6000.5 projects don't include this package by default.
In Unity, make sure the **Project** window is visible and you are inside the **Assets** folder.
Arrange your windows so Unity and the file explorer are both visible side by side. Then drag the **Arcweave** folder from the extracted ZIP into Unity's **Assets** folder.
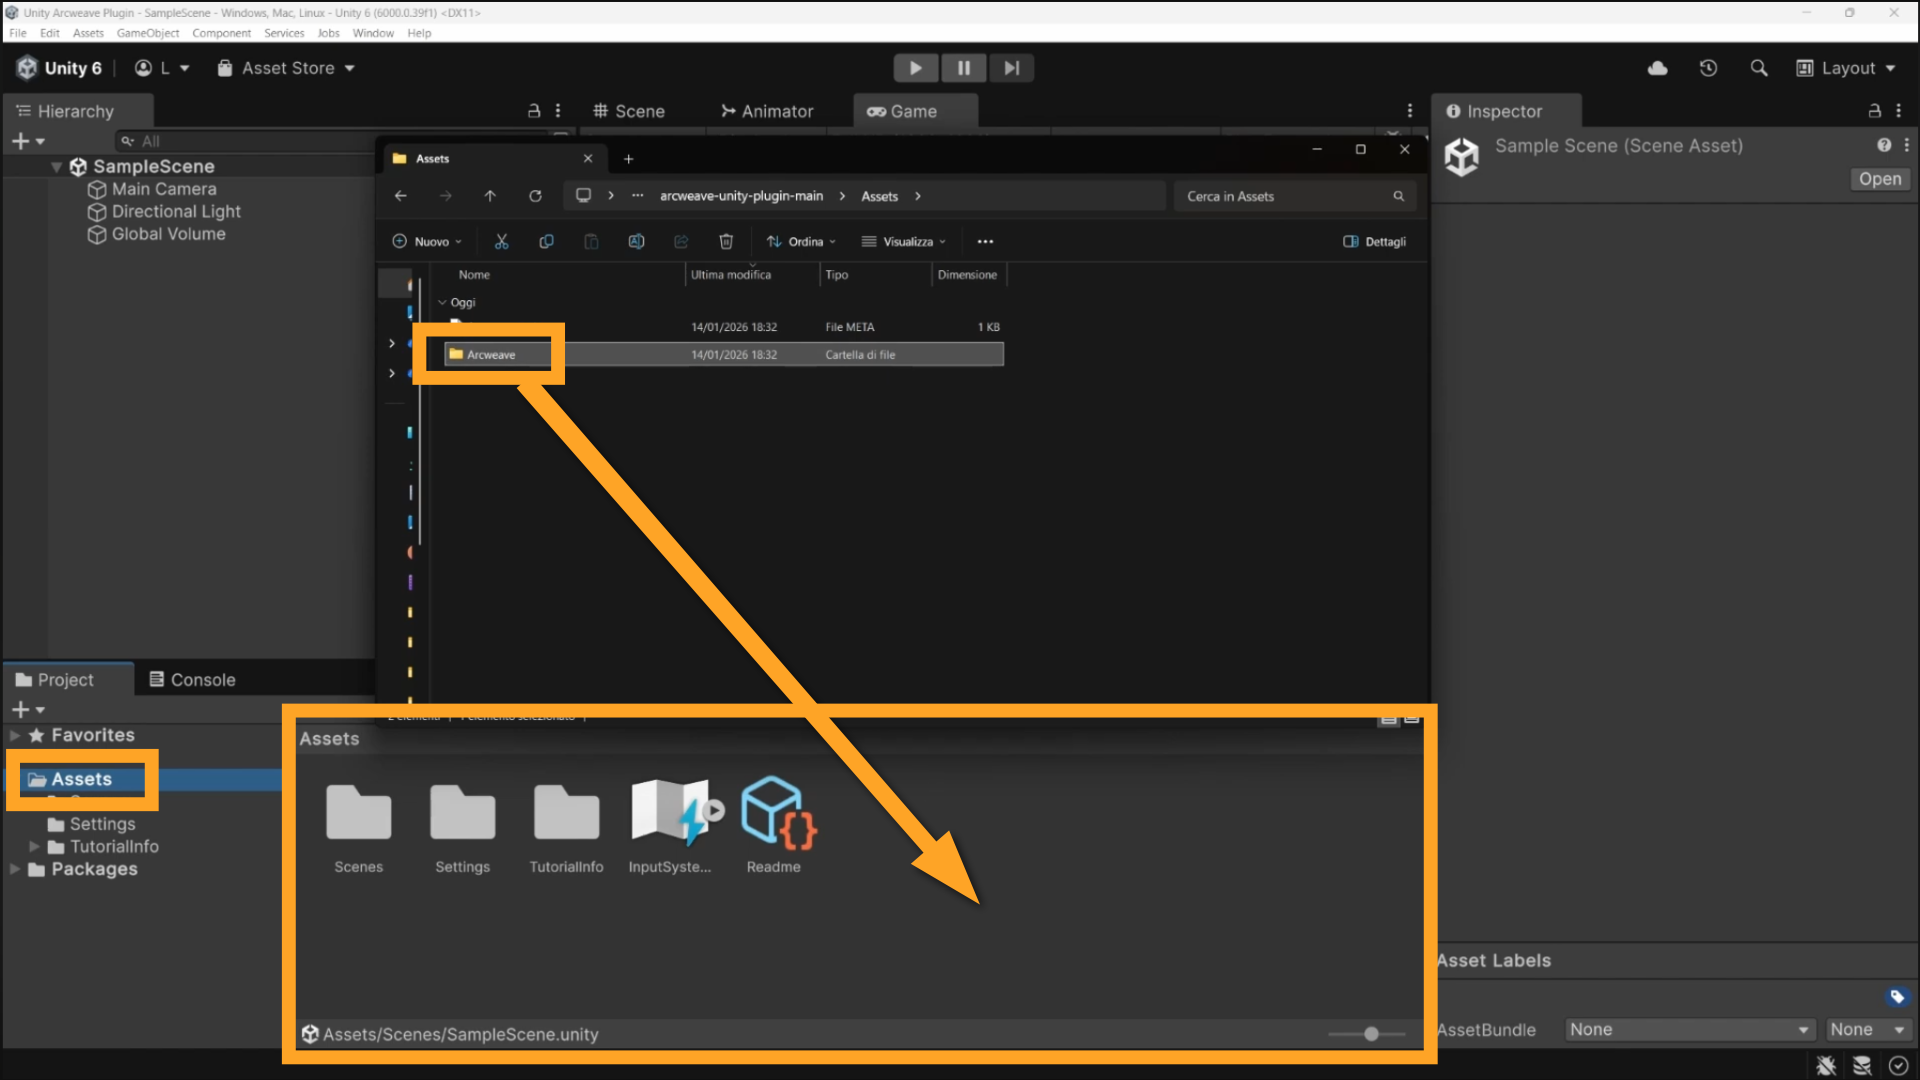
Unity will begin importing automatically. A progress bar appears in the bottom right while it compiles the scripts and sets up editor extensions. This takes about 30 seconds.
Once complete, verify the installation by expanding the **Arcweave** folder in the Project window — you should see **Demo** and **Plugin** subfolders.
To confirm everything is working, open the demo scene by navigating to the **Demo** folder and double-clicking the **ArcweaveDemoScene** scene file.
## Export for Unity
Context: Arcweave docs > Tutorials > Unity > Unity tutorial | Part 1: Install & set up > Export for Unity
The demo scene is empty until you provide narrative data from Arcweave. Log in to your Arcweave workspace at [arcweave.com](https://arcweave.com).
For this tutorial, open the **Game Engine Example** project. If it is not in your workspace, click **+ New project**.
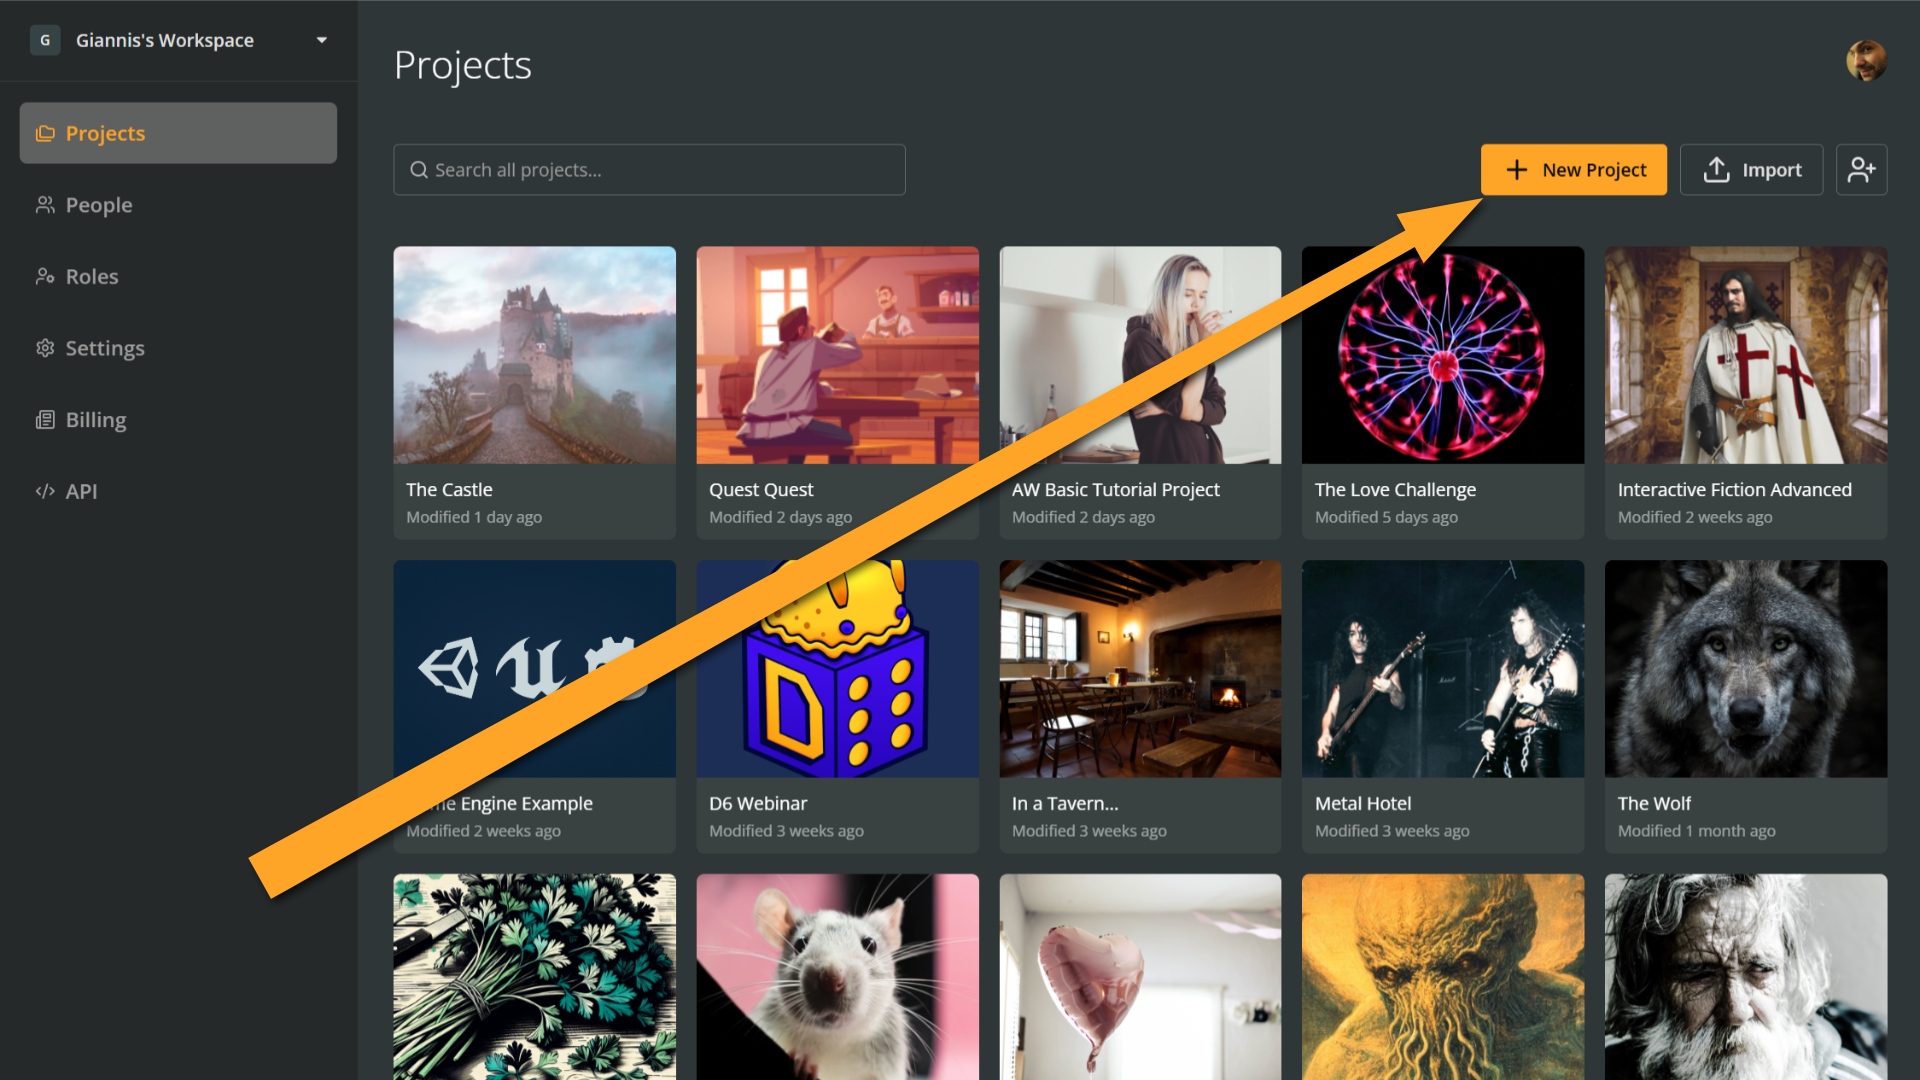
Then select the **Game Engine Example** template.
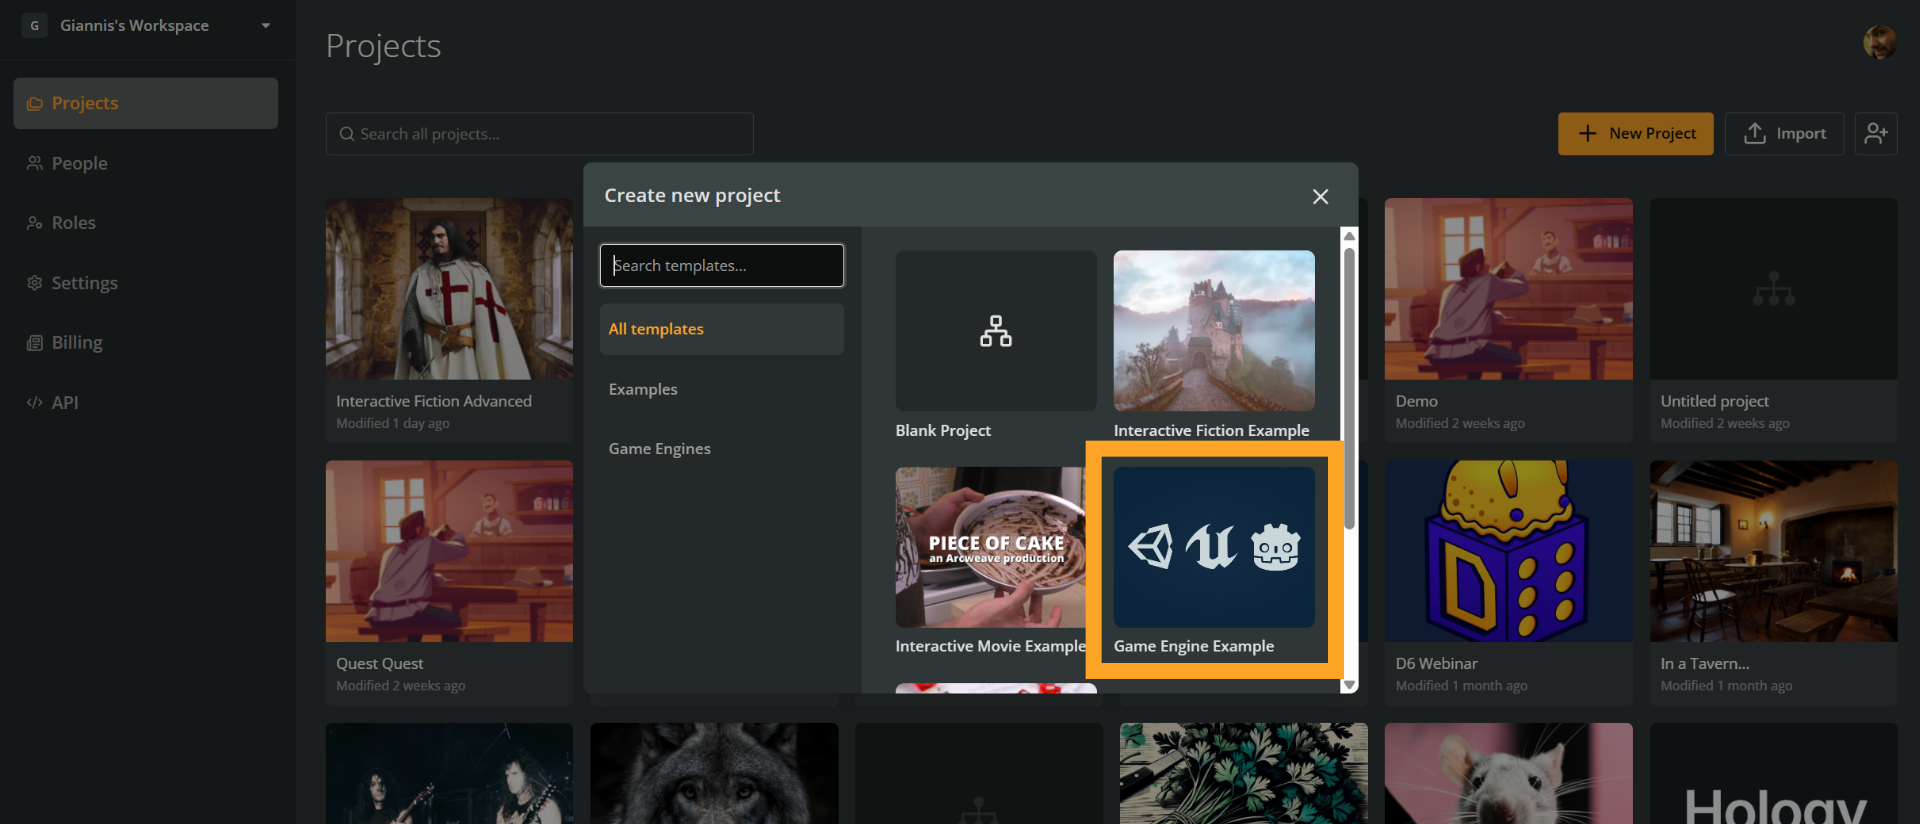
With the project open, click the **Export** icon (the download arrow) in the top menu bar.
In the **Export project** dialog, select the **Engine** tab, then choose **Export for Unity**.
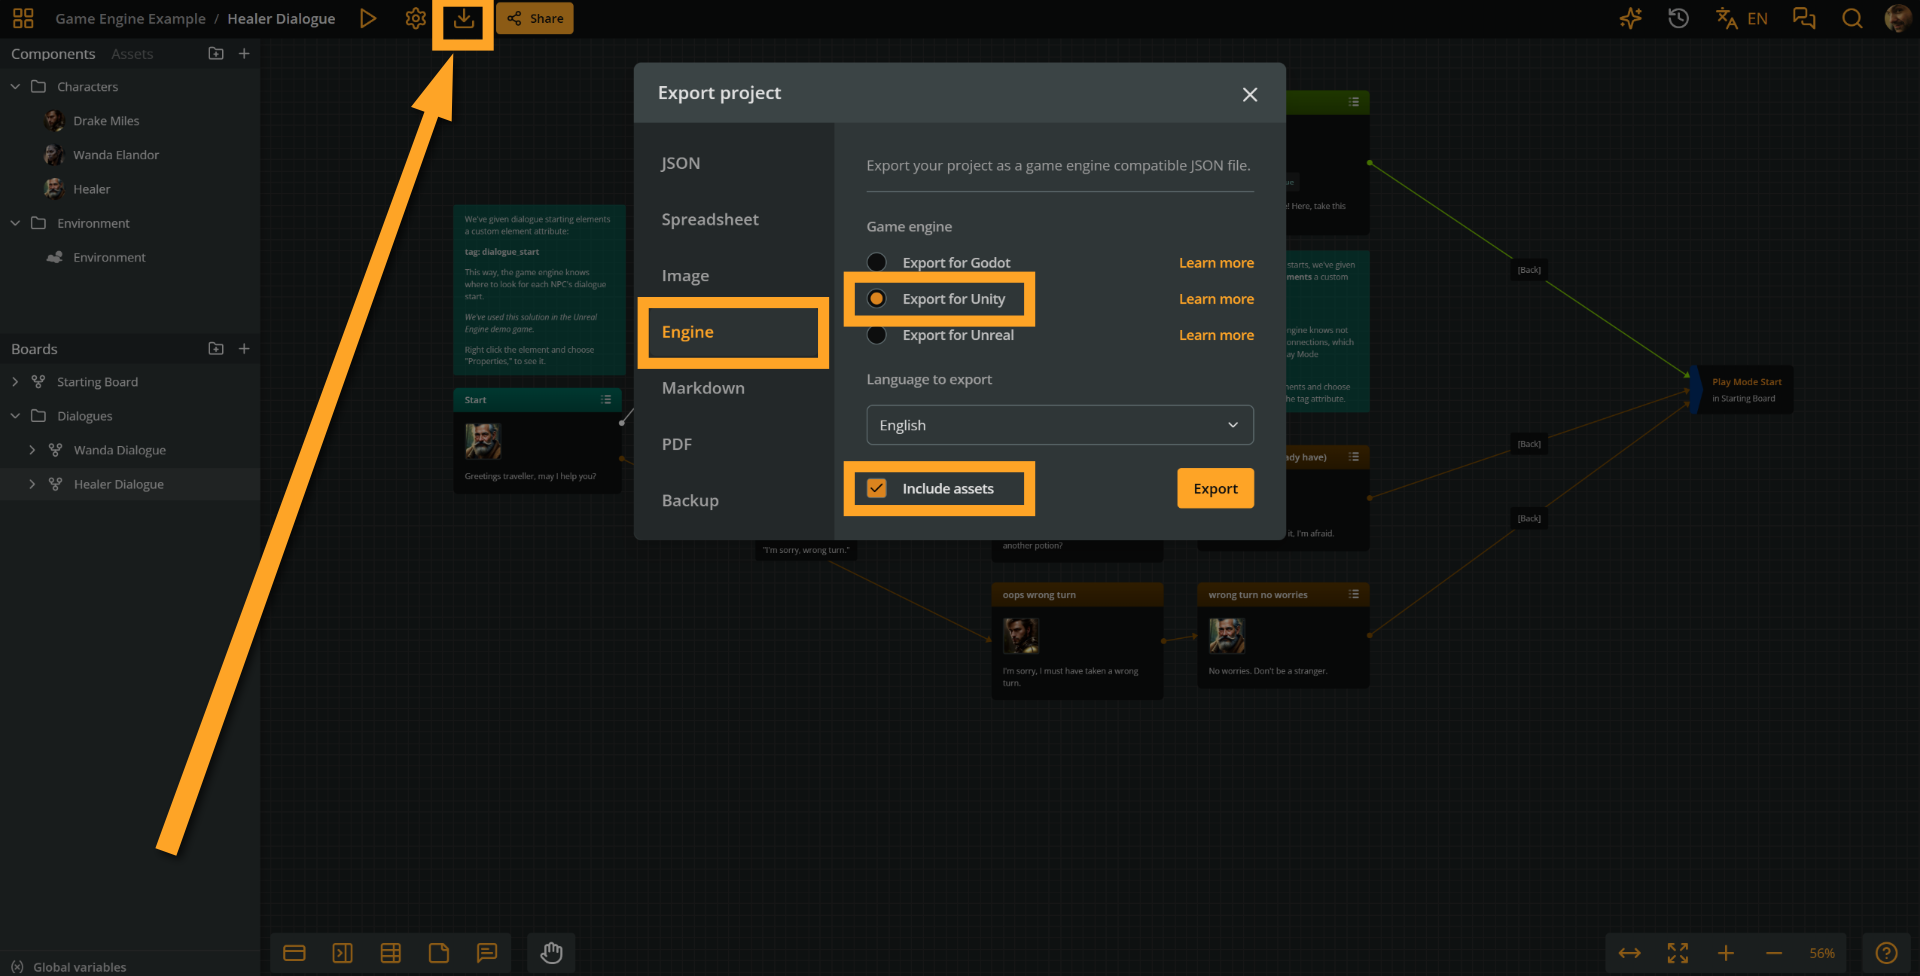
The **Include assets** checkbox is enabled by default. Leave it checked — this adds the project's asset files to the ZIP alongside the narrative data.
Click the orange **Export** button. A ZIP file named after the project and the export time (for example, `game-engine-example-2026-10-09-120000.unity.zip`) downloads to your machine.
## Examine the export
Context: Arcweave docs > Tutorials > Unity > Unity tutorial | Part 1: Install & set up > Examine the export
Extract the downloaded ZIP file. The folder contains:
- `project.json` (file): The core data file, which contains your entire narrative structure (elements, connections, variables, components, etc).
- `assets` (folder): Image, audio, and video files included in the project (if any), in the same folder structure as in the project's **Assets** tab.
- `cover` (folder): The project's cover image (if any). Not required for functionality.
## Import into Unity
Context: Arcweave docs > Tutorials > Unity > Unity tutorial | Part 1: Install & set up > Import into Unity
### Add the files to your Unity project
Context: Arcweave docs > Tutorials > Unity > Unity tutorial | Part 1: Install & set up > Import into Unity > Add the files to your Unity project
To add the story data and assets into Unity:
1. Drag the `project.json` file into Unity's `Assets/Arcweave` folder.
2. In the `Assets` folder, create a new folder named `Resources`:
1. Right-click `Assets`.
2. Select **Create → Folder**.
3. Name it `Resources`.
3. Drag the entire contents of the exported `assets` folder into Unity's `Assets/Resources` folder you just created.
Unity will automatically import all the files.
> ⚠️ The name must be exactly `Resources`. Unity uses this specific folder name to load assets dynamically at runtime. The plugin loads each file by its filename from the top level of a `Resources` folder, so if the exported `assets` folder contains subfolders, move their files directly into `Resources`.
### Create ArcweaveProjectAsset
Context: Arcweave docs > Tutorials > Unity > Unity tutorial | Part 1: Install & set up > Import into Unity > Create ArcweaveProjectAsset
To load your Arcweave data, you first need to create an **ArcweaveProjectAsset** in Unity:
1. In the Project window, right-click inside the `Assets/Arcweave/Demo` folder.
2. Select **Create → Arcweave → Project Asset**.
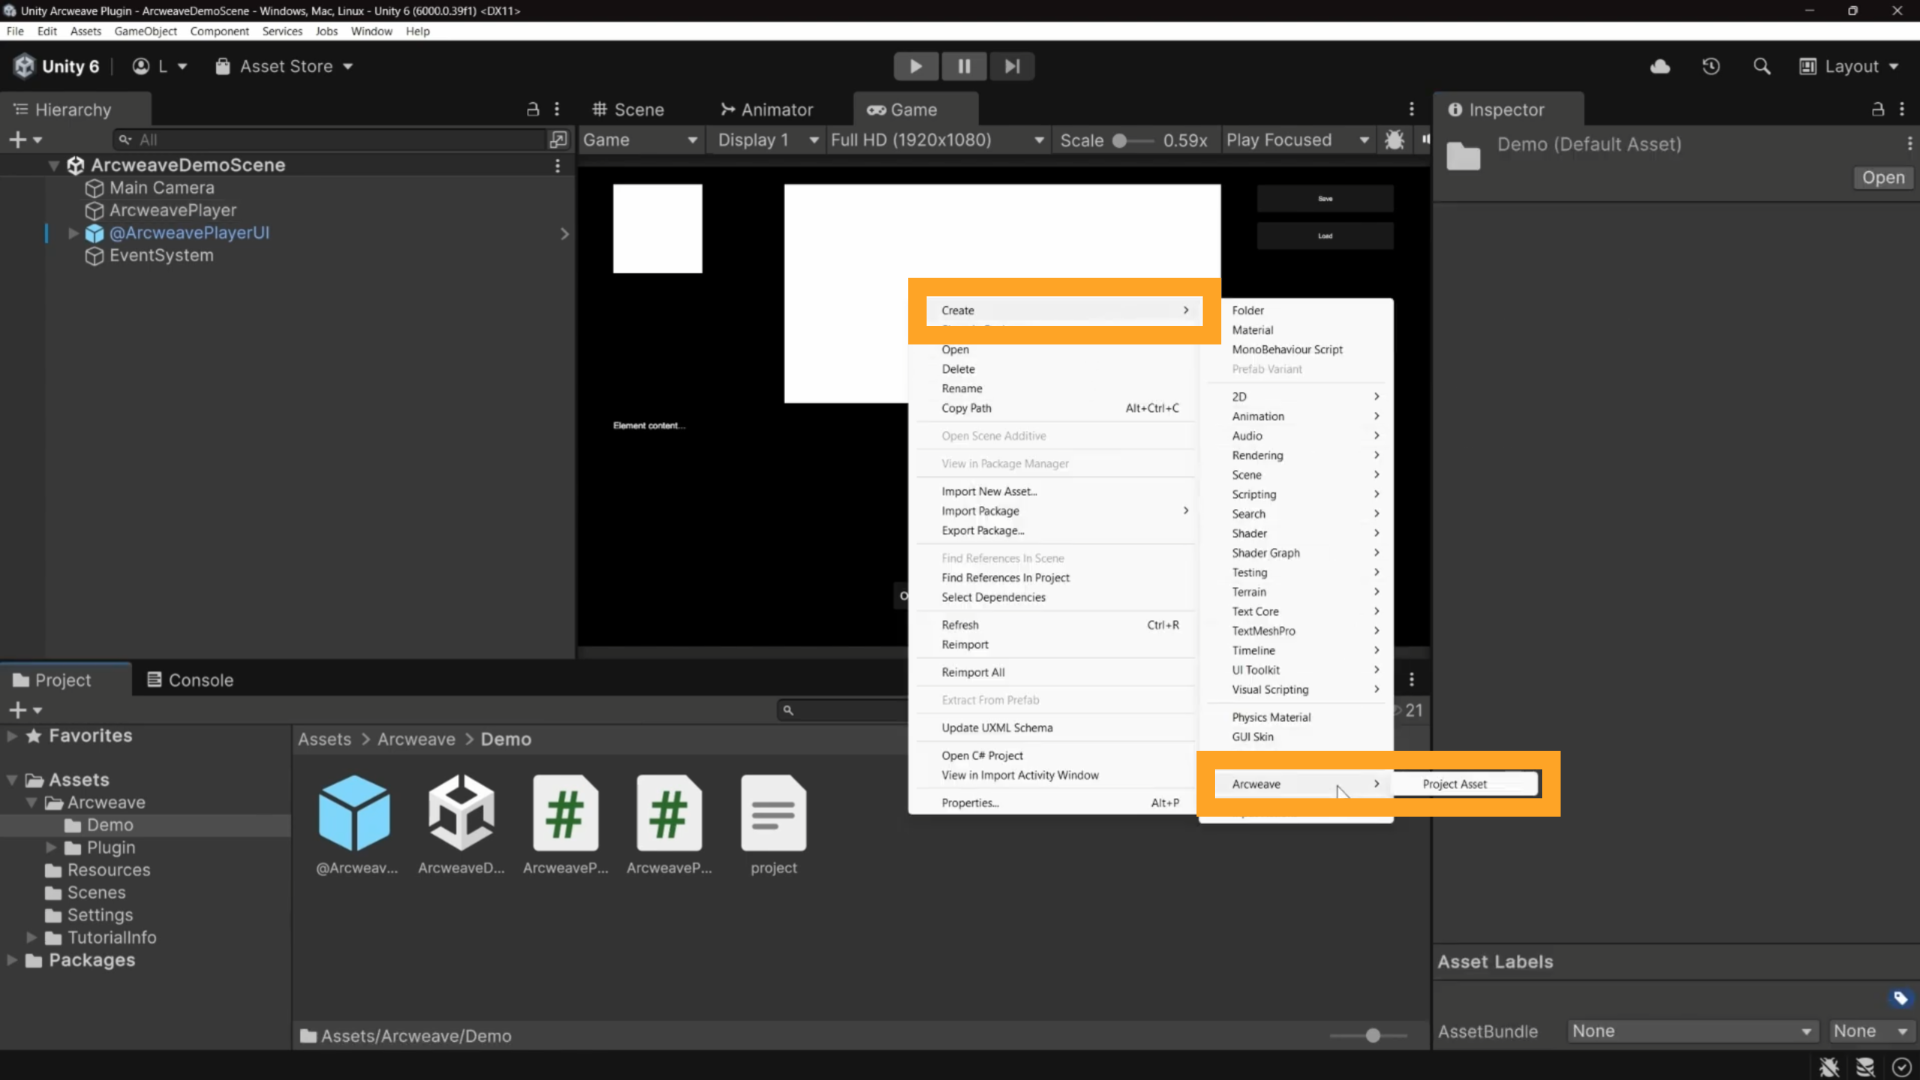
A new asset appears and you can rename it to something descriptive, such as `MyStory`.
Select the asset. In the **Inspector**:
1. Set **Import Source** to `From Json`.
2. Drag `project.json` from the Project window into the **Project JSON File** field.
3. Click **Import Project FromJson**.
Unity will parse the JSON and populate the asset with the project name, global variables, and scoped board and component variables. You can inspect this data and modify variable values at runtime through the plugin API.
### Explore with Project Viewer
Context: Arcweave docs > Tutorials > Unity > Unity tutorial | Part 1: Install & set up > Import into Unity > Explore with Project Viewer
In the Inspector of your ArcweaveProjectAsset, click **Open Project Viewer**.

A window opens directly inside Unity, showing the entire narrative structure of the Arcweave project that is loaded in the ArcweaveProjectAsset: its boards, elements, and their connections.
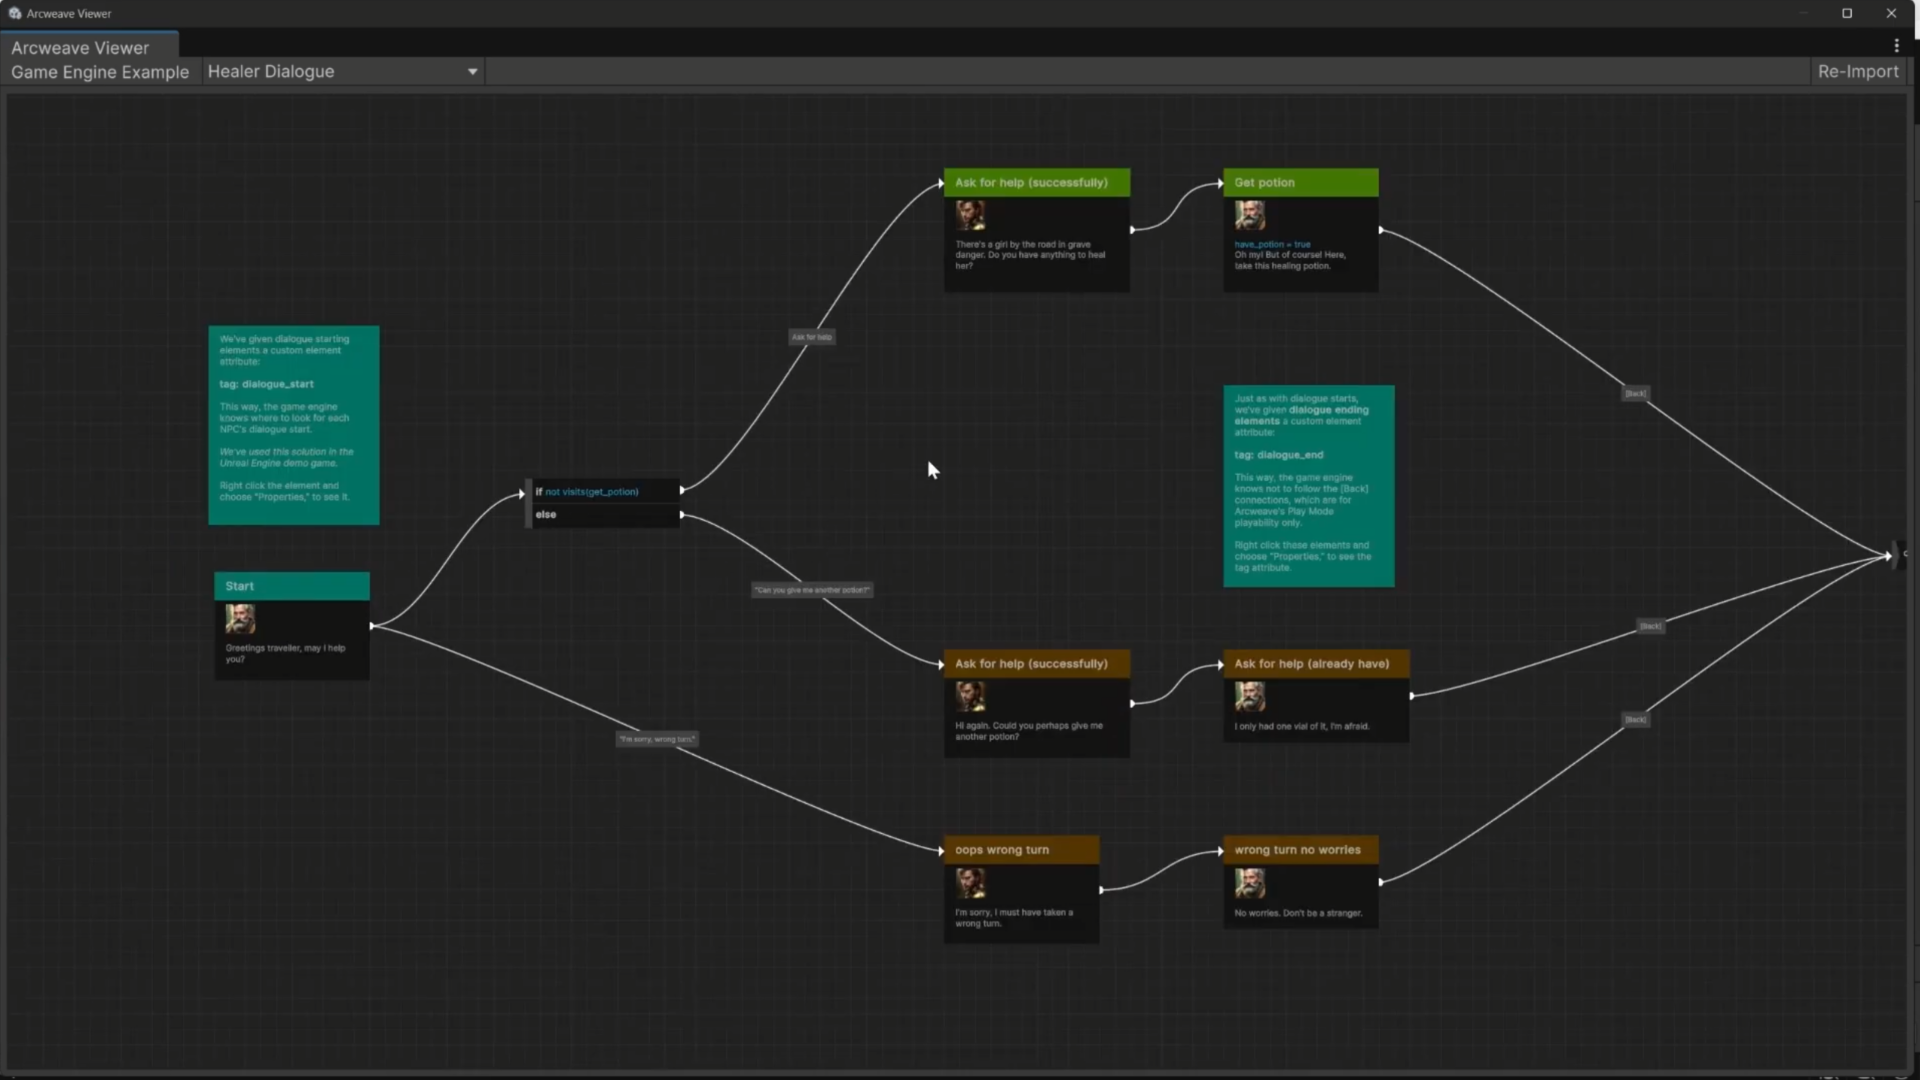
This lets you browse your narrative without leaving the editor.
### Connect the asset to the ArcweavePlayer
Context: Arcweave docs > Tutorials > Unity > Unity tutorial | Part 1: Install & set up > Import into Unity > Connect the asset to the ArcweavePlayer
The next step is to connect the ArcweaveProjectAsset with the ArcweavePlayer:
1. In the **Hierarchy**, select the **ArcweavePlayer** GameObject.
2. In its **Inspector**, locate the **Aw** field and drag your `MyStory` ArcweaveProjectAsset into it.

Press **Play**. The demo UI will display the Arcweave narrative project you imported.
### Troubleshooting: UI buttons not responding
Context: Arcweave docs > Tutorials > Unity > Unity tutorial | Part 1: Install & set up > Import into Unity > Troubleshooting: UI buttons not responding
If the demo scene buttons are unresponsive, check the project's **Active Input Handling** (**Edit > Project Settings > Player > Other Settings**). If it is set to **Input System Package (New)**, update the EventSystem's input module:
1. In the **Hierarchy**, select the **EventSystem** GameObject.
2. In the **Inspector**, find the **Standalone Input Module** component.
3. Click **Replace with InputSystemUIInputModule**.
The legacy **Standalone Input Module** can't read input when only the new Input System is active. Projects set to **Input Manager (Old)** or **Both** can keep it.
## Import via REST API
Context: Arcweave docs > Tutorials > Unity > Unity tutorial | Part 1: Install & set up > Import via REST API
Instead of a local JSON file, the plugin can fetch your project directly from Arcweave's servers. This is useful during production: when a narrative designer updates the project in Arcweave, you can pull the latest version into Unity without manually re-exporting.
The REST API is available to [Team workspaces](https://docs.arcweave.com/workspaces/billing-plans) only. To use this method, you need an **API Key** with **Read projects** enabled and a **Project Hash**.
**Get your API Key:**
1. In Arcweave, open your workspace's **API** section.
2. Choose a key with **Read projects** enabled and copy it. See [Workspace API](https://docs.arcweave.com/workspaces/api) to create or edit a key.
**Get your Project Hash:**
1. Open the project in Arcweave.
2. Click the **Settings** icon and go to **Properties**.
3. Copy the **Project hash**. See [Copy the project hash](https://docs.arcweave.com/project-tools/settings#copy-the-project-hash).
**Configure Unity:**
1. Select your ArcweaveProjectAsset and change **Import Source** to `From Web`.
2. Paste your API Key into the **User API Key** field.
3. Paste the Project Hash into the **Project Hash** field.
4. Click **Import Project FromWeb**.
The **Language ISO** and **Fallback Content** fields are optional. Leave **Language ISO** empty to import the project's default language, or enter a language code to import that language of a [localized](https://docs.arcweave.com/project-tools/localization) project.
Unity will connect to Arcweave's servers and import the latest version of the project automatically.
## Summary
Context: Arcweave docs > Tutorials > Unity > Unity tutorial | Part 1: Install & set up > Summary
You have now:
- Created a Unity project and installed the Arcweave Unity Plugin.
- Exported a narrative project from Arcweave.
- Imported it into Unity using the JSON method.
- Connected the project to the ArcweavePlayer and verified it in Play mode.
# Unity tutorial | Part 2: Demo scene architecture
Source: https://docs.arcweave.com/tutorials/unity/pt-2
Section: Tutorials > Unity
Description: Unity tutorial part 2, the demo scene hierarchy, the ArcweavePlayer and ArcweavePlayerUI scripts, and the event-driven loop
This tutorial walks you through the internal architecture of the Arcweave Unity Plugin's Demo Scene. By the end, you'll understand exactly how data flows from Arcweave through the plugin into your UI, and how user interactions drive the story forward.
## Video tutorial
Context: Arcweave docs > Tutorials > Unity > Unity tutorial | Part 2: Demo scene architecture > Video tutorial
You can watch the video version of this tutorial below.
Video: https://www.youtube.com/watch?v=kZhOHi5GmSk
## Scene hierarchy overview
Context: Arcweave docs > Tutorials > Unity > Unity tutorial | Part 2: Demo scene architecture > Scene hierarchy overview
In Unity, open the Demo Scene:
1. Navigate to the Unity folder **Assets > Arcweave > Demo**.
2. Double-click **ArcweaveDemoScene**.
Once the scene opens, look at the **Hierarchy** panel. At the root level there are three main GameObjects:
- [ArcweavePlayer](https://docs.arcweave.com/tutorials/unity/pt-2#arcweaveplayer): Manages the project's narrative.
- [@ArcweavePlayerUI](https://docs.arcweave.com/tutorials/unity/pt-2#arcweaveplayerui): Manages the UI related to the project's narrative.
- [EventSystem](https://docs.arcweave.com/tutorials/unity/pt-2#eventsystem): Unity's event system, which handles UI input such as button clicks.
> ℹ️ Both **ArcweavePlayer** and **@ArcweavePlayerUI** use the Arcweave plugin for Unity. To learn more about how the plugin works, visit its [GitHub repository](https://github.com/arcweave/arcweave-unity-plugin#plugin-documentation).
We'll start with **ArcweavePlayer**, the narrative brain that drives story flow, then move to **@ArcweavePlayerUI**, which listens to its events and updates the visuals.
## ArcweavePlayer
Context: Arcweave docs > Tutorials > Unity > Unity tutorial | Part 2: Demo scene architecture > ArcweavePlayer
### Overview
Context: Arcweave docs > Tutorials > Unity > Unity tutorial | Part 2: Demo scene architecture > ArcweavePlayer > Overview
#### Hierarchy
Context: Arcweave docs > Tutorials > Unity > Unity tutorial | Part 2: Demo scene architecture > ArcweavePlayer > Overview > Hierarchy
The **ArcweavePlayer** GameObject is the system's narrative manager. It has no child objects and no visual representation; it is purely logic.
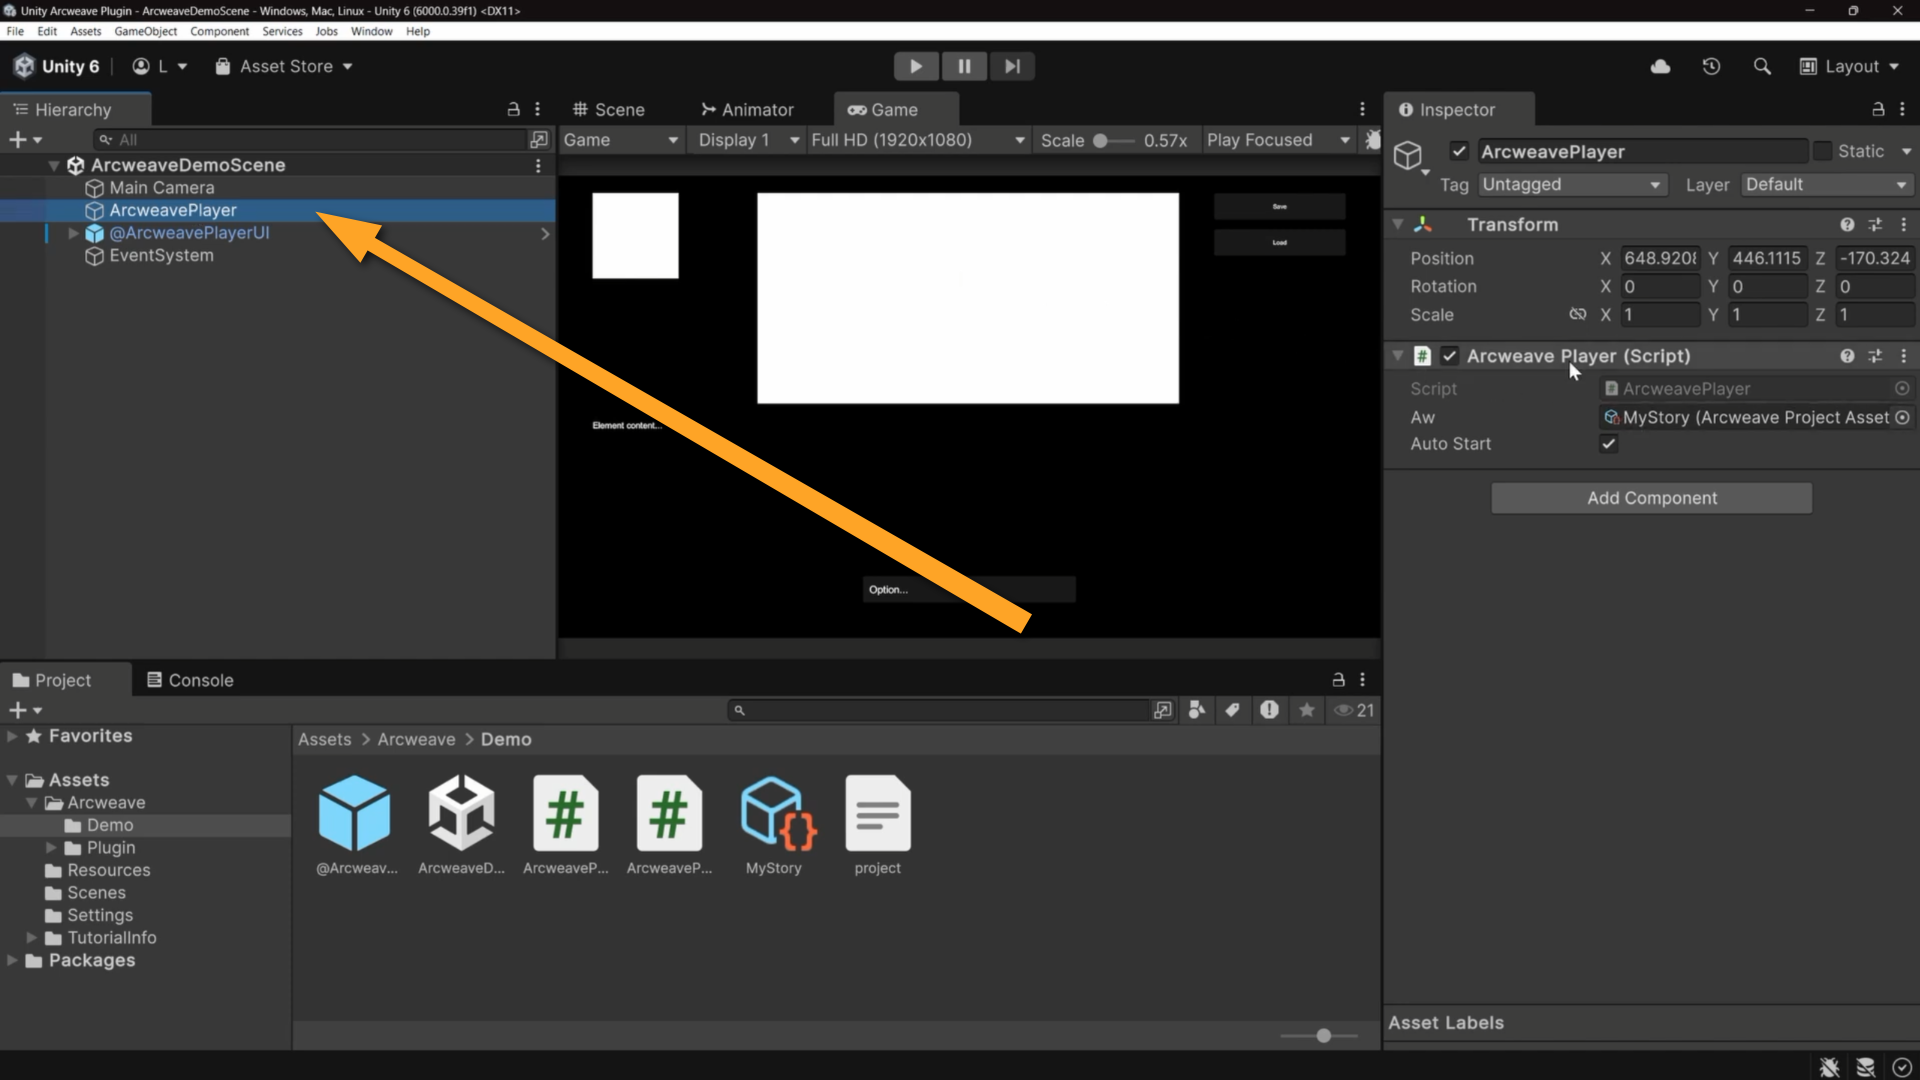
#### Inspector
Context: Arcweave docs > Tutorials > Unity > Unity tutorial | Part 2: Demo scene architecture > ArcweavePlayer > Overview > Inspector
Selecting the **ArcweavePlayer** in the Hierarchy reveals a single component in the Inspector with three public fields:
- **ArcweavePlayer script**: The object's script; see right below.
- **Aw**: The `ArcweaveProjectAsset` reference. This is the imported Arcweave project, i.e. the story data the player will run.
- **Auto Start**: When checked, the narrative begins automatically when the scene loads. When unchecked, you call `PlayProject()` manually, which is useful if you want to show a title screen first.
### Script
Context: Arcweave docs > Tutorials > Unity > Unity tutorial | Part 2: Demo scene architecture > ArcweavePlayer > Script
The real power of the ArcweavePlayer component lies in its script. Open `ArcweavePlayer.cs` in your code editor to follow along.
#### Events
Context: Arcweave docs > Tutorials > Unity > Unity tutorial | Part 2: Demo scene architecture > ArcweavePlayer > Script > Events
`ArcweavePlayer` exposes five events that form the communication bridge between narrative logic and visual presentation. The player handles only story flow; when the narrative state changes, it fires an event. `ArcweavePlayerUI` listens and reacts. This is a classic **observer pattern**.
| Event | When it fires | What it passes |
| ------------------ | ------------------------------------ | ---------------------------------------------- |
| `onProjectStart` | Once, when the narrative begins | The `Project` object |
| `onElementEnter` | Every time a new element is entered | The `Element` object |
| `onElementOptions` | When the player has multiple choices | An `Options` object + a callback `Action` |
| `onWaitInputNext` | When there is only one path forward | A callback `Action` |
| `onProjectFinish` | When the story reaches an endpoint | The `Project` object |
`onElementOptions` passes a callback that accepts an integer — the index of the chosen path. `onWaitInputNext` passes a callback without parameters, since there is no choice to make. Without these events, the UI would have no way to know when to refresh content, create buttons, or show a restart screen.
#### Methods
Context: Arcweave docs > Tutorials > Unity > Unity tutorial | Part 2: Demo scene architecture > ArcweavePlayer > Script > Methods
`Start()`:
Unity's built-in method. If `autoStart` is true, it calls `PlayProject()`.
---
`PlayProject()`:
Initializes and starts the narrative.
1. Verifies the `Aw` field is assigned.
2. Calls `aw.Project.Initialize()`, resetting all variables to defaults and all visit counts to zero.
3. Fires `onProjectStart` if any listeners are subscribed.
4. Calls `Next(aw.Project.StartingElement)` to jump to the first element.
---
`Next(Path path)`:
Called when the player selects an option or clicks **Continue**:
1. Calls `path.ExecuteAppendedConnectionLabels()` to run any Arcscript on the connection (e.g. `has_key = true`, `player_health -= 10`).
2. Calls `Next(path.TargetElement)` to advance to the target element.
---
`Next(Element element)`:
The heart of the system:
1. Stores the element as `currentElement`.
2. Increments `currentElement.Visits`.
3. Fires `onElementEnter`.
4. Calls `currentElement.GetOptions()` to evaluate all branch conditions and determine available paths.
5. Branches on the result:
- **No paths** → the story is over; fire `onProjectFinish`.
- **Paths + options** → fire `onElementOptions` with the choices and a callback; return and wait for user input. `hasOptions` is true when there are multiple paths, or a single path with a label.
- **Paths, no options** → a single unlabeled path (a "Continue" moment); fire `onWaitInputNext` with a callback; return and wait.
---
`Save()` and `Load()`:
The save system stores the current element's ID and all variable states as JSON in Unity's `PlayerPrefs`. Loading retrieves them, restores variable states via `LoadVariables()`, and calls `Next(element)` to jump back to the saved story point.
## @ArcweavePlayerUI
Context: Arcweave docs > Tutorials > Unity > Unity tutorial | Part 2: Demo scene architecture > @ArcweavePlayerUI
### Overview
Context: Arcweave docs > Tutorials > Unity > Unity tutorial | Part 2: Demo scene architecture > @ArcweavePlayerUI > Overview
#### Hierarchy
Context: Arcweave docs > Tutorials > Unity > Unity tutorial | Part 2: Demo scene architecture > @ArcweavePlayerUI > Overview > Hierarchy
This GameObject holds the **ArcweavePlayerUI** component and all the visual UI structure underneath it.
The `@` prefix is a naming convention to keep it visually distinct in the Hierarchy.
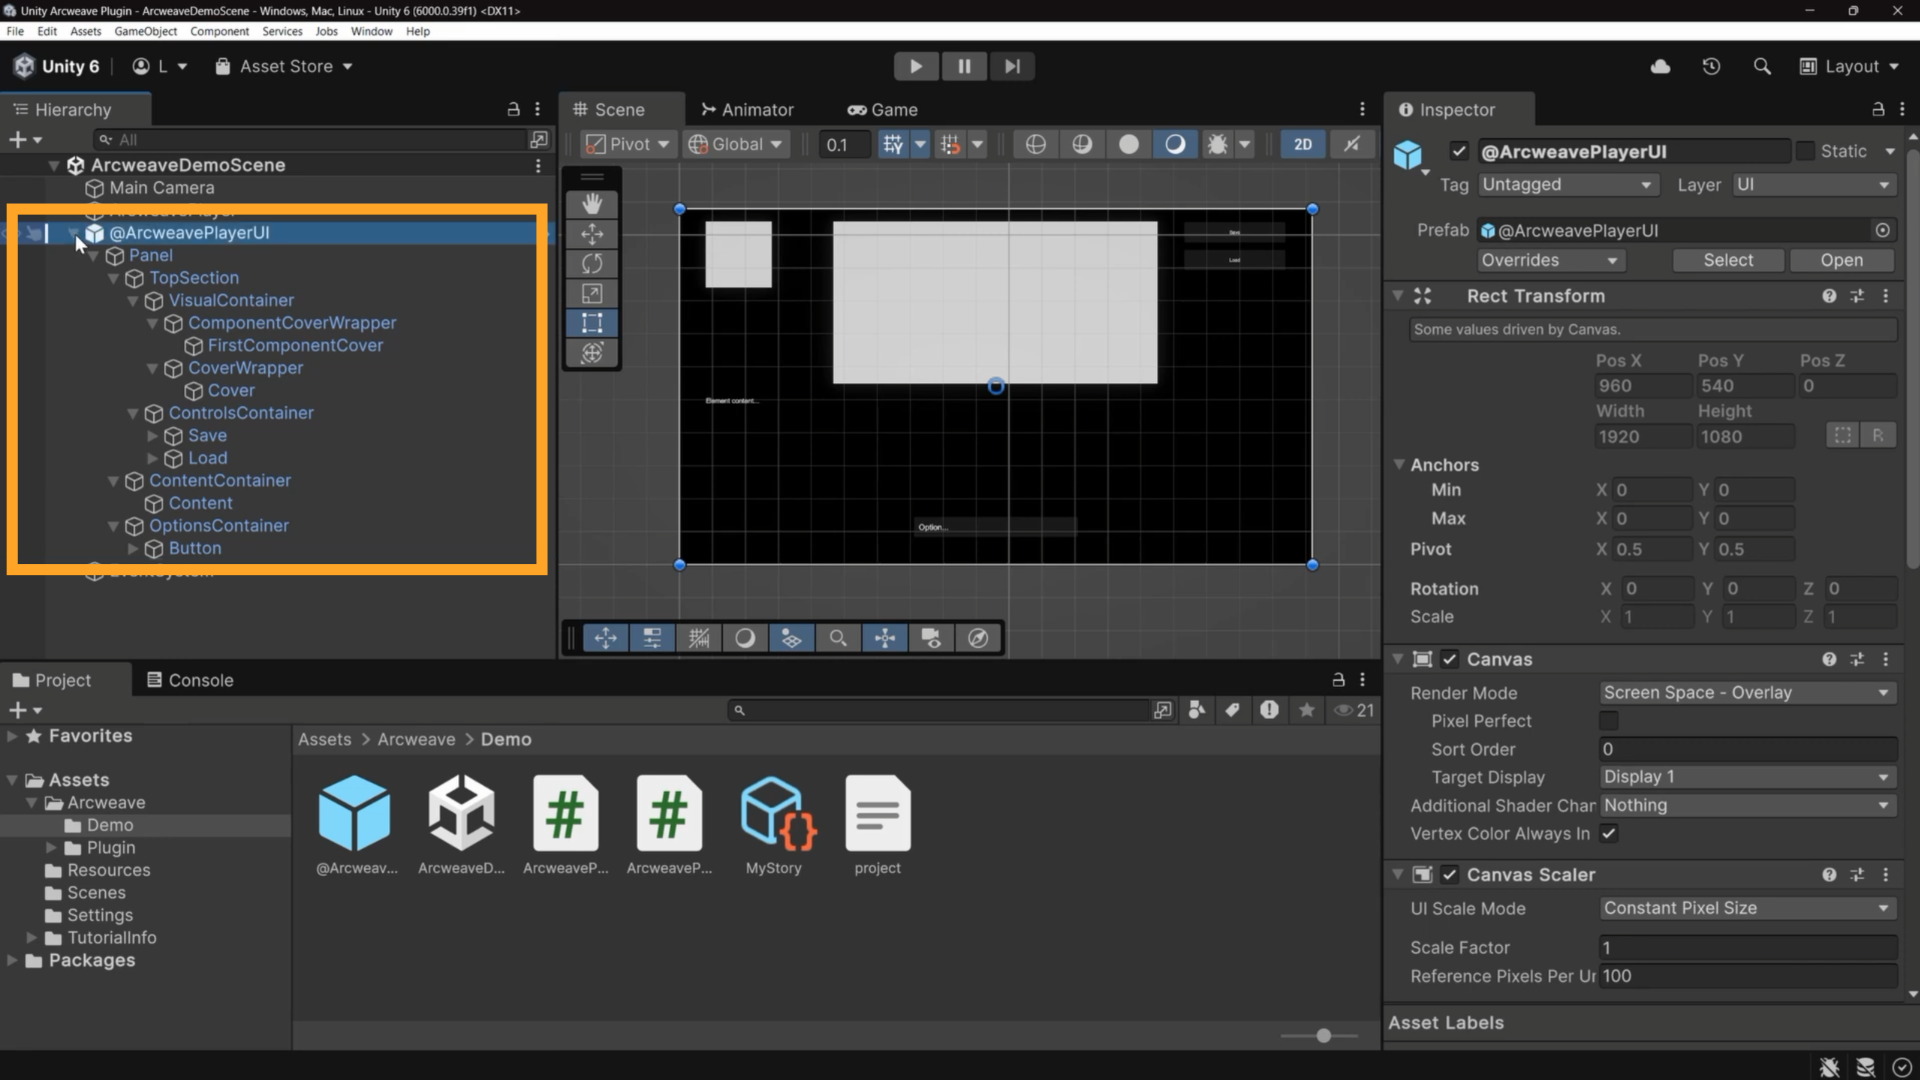
To see the UI layout clearly, switch to the **Scene** tab and enable **2D view** from the Scene view toolbar. Zoom out with the scroll wheel if needed.
Expanding `@ArcweavePlayerUI` in the Hierarchy reveals the following structure under a root **Panel**:
- **TopSection**: Visual imagery and the save/load controls at the top of the screen
- **VisualContainer**
- **ComponentCoverWrapper > FirstComponentCover**: A `RawImage` that displays character portraits or entity images
- **CoverWrapper > Cover**: A `RawImage` that displays the element's main cover image
- **ControlsContainer**: Save/load buttons
- **Save** (with a Text child)
- **Load** (with a Text child)
- **ContentContainer**
- **Content**: The `Text` component that displays dialogue or story content
- **OptionsContainer**: The interactive choice buttons area
- **Button**: A template button that gets cloned dynamically for each player option, with a **Text** child for the button label
#### Inspector
Context: Arcweave docs > Tutorials > Unity > Unity tutorial | Part 2: Demo scene architecture > @ArcweavePlayerUI > Overview > Inspector
Select `@ArcweavePlayerUI` and look at the **ArcweavePlayerUI** component in the Inspector. Its fields are organized into sections:
- **Core**: The **Player** field references the `ArcweavePlayer` GameObject. This is the critical link: it tells the UI which narrative player to listen to.
- **Text Display**: References to the `Content` text component, plus fallback strings for empty content, empty option labels, the continue button, and the restart button.
- **Images**: The **Cover** and **Component Cover** fields reference the `Cover` and `FirstComponentCover` `RawImage` components.
- **Buttons**: References to the `Button` template, the `Save` button, and the `Load` button.
- **Animation**:
- **Enable Fade** (checked by default)
- **Crossfade Time** (0.5 seconds by default) for smooth transitions
These references tell `ArcweavePlayerUI` exactly which UI elements to update when narrative events fire.
### Script
Context: Arcweave docs > Tutorials > Unity > Unity tutorial | Part 2: Demo scene architecture > @ArcweavePlayerUI > Script
Now that the Inspector references are wired up, select `@ArcweavePlayerUI` and open the script `ArcweavePlayerUI.cs`, to see how the component uses them at runtime. The sections below follow the script from top to bottom:
#### Initialization & cleanup
Context: Arcweave docs > Tutorials > Unity > Unity tutorial | Part 2: Demo scene architecture > @ArcweavePlayerUI > Script > Initialization & cleanup
`OnEnable()`: Runs when the GameObject becomes active:
1. Deactivates the button template (`buttonTemplate.gameObject.SetActive(false)`).
2. Initializes both images to invisible (alpha 0).
3. Connects the Save and Load buttons with their methods.
4. Hides the Load button if no save file exists.
5. Subscribes to four of the player's five events (all except `onProjectStart`):
- `onElementEnter`
- `onElementOptions`
- `onWaitInputNext`
- `onProjectFinish`
`OnDisable()`: Unsubscribes from all events to prevent memory leaks, when the GameObject is disabled or destroyed.
#### Save & load
Context: Arcweave docs > Tutorials > Unity > Unity tutorial | Part 2: Demo scene architecture > @ArcweavePlayerUI > Script > Save & load
`Save()` and `Load()` are simple wrapper methods for the UI buttons.
`Save()`:
Calls the ArcweavePlayer's `Save()` method (see ArcweavePlayer > [Script](https://docs.arcweave.com/tutorials/unity/pt-2#script)). It also enables the **Load button**, so the player knows a saved file exists.
`Load()`:
Clears any existing player option buttons and then calls ArcweavePlayer's `Load()` method which jumps to the saved element. This fires the event `onElementEnter` (see below), which rebuilds the UI.
#### Event handler methods
Context: Arcweave docs > Tutorials > Unity > Unity tutorial | Part 2: Demo scene architecture > @ArcweavePlayerUI > Script > Event handler methods
`OnElementEnter`:
Fires every time a new element is entered:
1. Calls `DisplayContent(e)` to update the dialogue text.
2. Calls `DisplayImage(cover, e.GetCoverOrFirstComponentImage())` to update the main cover. If the element has no cover, the first component's cover is used as a fallback.
3. If the element has its own cover, also shows the component cover in the `componentCover` slot; otherwise hides it.
`OnElementOptions`:
Fires when there are multiple choices. Loops through `options.Paths` and calls `MakeButton()` for each, passing a lambda that invokes `callback(index)` when clicked.
`OnWaitInputNext`:
Fires for single-path moments. Calls `MakeButton()` once with the "Continue" label.
`OnProjectFinish`:
Fires when the story ends. Calls `MakeButton()` with the "Restart" label, passing `player.PlayProject` as the callback.
#### Display & image methods
Context: Arcweave docs > Tutorials > Unity > Unity tutorial | Part 2: Demo scene architecture > @ArcweavePlayerUI > Script > Display & image methods
`DisplayContent`:
Handles the story content and how it appears on the screen:
1. If the element has content, calls `e.RunContentScript()` to evaluate all Arcscript and populate `RuntimeContent`. Skipping this would leave raw Arcscript markup visible.
2. Sets `content.text` to `RuntimeContent` or the "No Content" fallback if empty.
3. Fades the text in over `crossfadeTime` seconds if `enableFade` is true, or sets alpha to 1 instantly otherwise.
`FadeImage`:
A coroutine that handles smooth image transitions:
1. If fade is enabled, the current image is visible, and the texture is changing: fade out the old image first.
2. Assign the new texture, call `UpdateAspectRatio()` to maintain correct proportions, then fade in.
3. If the texture is null, hide and clear the image.
`UpdateAspectRatio`:
Calculates the texture's width-to-height ratio and updates the `AspectRatioFitter` component so images are never stretched or squashed.
#### Button management
Context: Arcweave docs > Tutorials > Unity > Unity tutorial | Part 2: Demo scene architecture > @ArcweavePlayerUI > Script > Button management
`MakeButton`:
Creates and displays an option button:
1. Instantiates a clone of the button template, parented to the same container.
2. Sets the button visible and adds it to `tempButtons` for later cleanup.
3. Sets the label text.
4. Fades in the button (or sets alpha to 1 instantly).
5. Adds a click listener that first calls `ClearTempButtons()` to destroy all existing buttons, then invokes the `onClick` callback to trigger `Next()` in the player.
`ClearTempButtons()`:
Destroys all GameObjects in `tempButtons` and clears the list, preventing old choices from accumulating on screen.
## EventSystem
Context: Arcweave docs > Tutorials > Unity > Unity tutorial | Part 2: Demo scene architecture > EventSystem
Unity's standard event system, required for handling UI clicks and interactions. Its input module must match the project's **Active Input Handling** setting; see [Troubleshooting: UI buttons not responding](https://docs.arcweave.com/tutorials/unity/pt-1#troubleshooting-ui-buttons-not-responding).
## Play and inspect
Context: Arcweave docs > Tutorials > Unity > Unity tutorial | Part 2: Demo scene architecture > Play and inspect
To observe the full flow, set up a split view in the Unity Editor with the Hierarchy, Game view, and Inspector visible simultaneously. In the Project window, select your ArcweaveProjectAsset (for example, `MyStory`) so you can watch the project's variables in the Inspector. The **ArcweavePlayer** Inspector only shows its **Aw** and **Auto Start** fields.
Click **Play**.
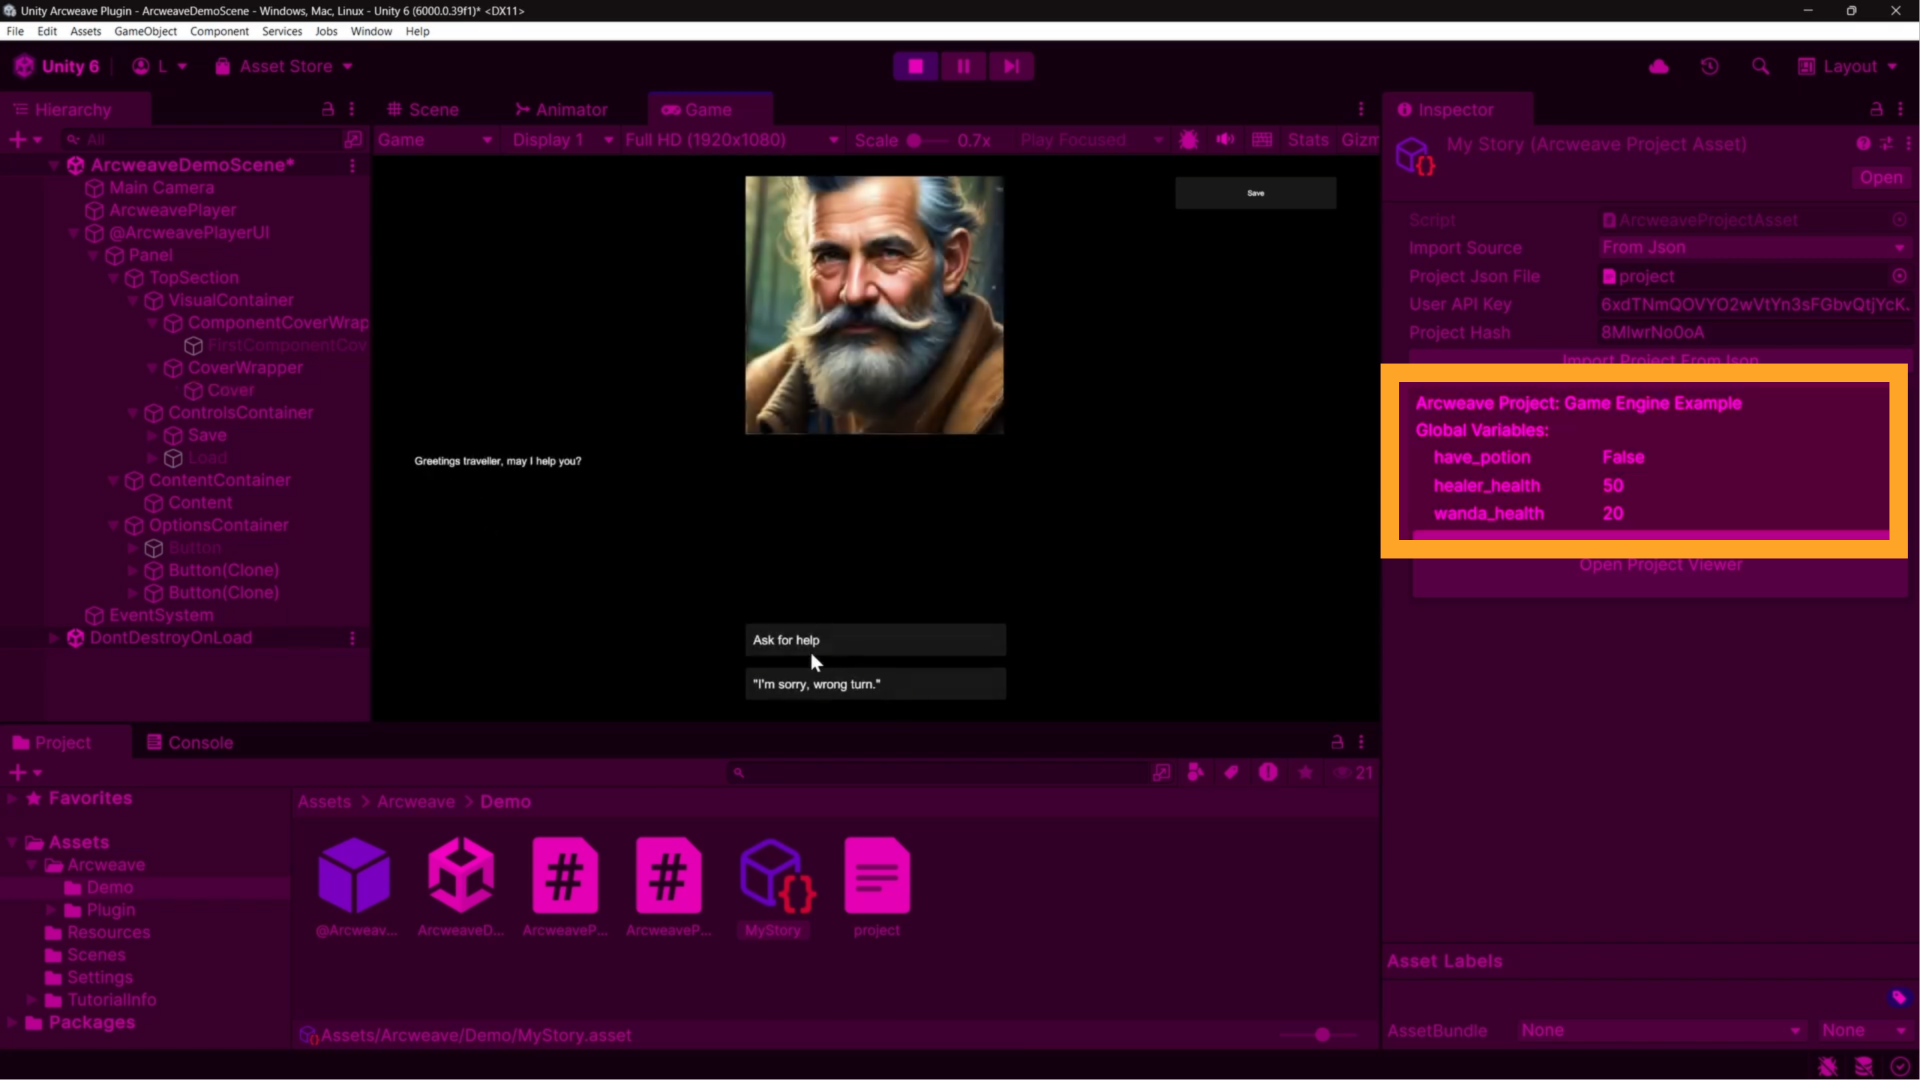
Here is what happened the moment Play was pressed:
1. `Start()` ran → `autoStart` is true → `PlayProject()` fired.
2. `aw.Project.Initialize()` reset all variables (`have_potion = false`, `healer_health = 50`, `wanda_health = 20`).
3. `Next(StartingElement)` was called → `currentElement.Visits` incremented → `onElementEnter` fired.
4. `GetOptions()` found two paths → `onElementOptions` fired → `MakeButton()` created two `Button(Clone)` GameObjects under `OptionsContainer`.
Click **Go to Healer**. The old buttons are destroyed, the callback invokes `Next(path)`, `ExecuteAppendedConnectionLabels()` runs any Arcscript on that connection, and `Next(targetElement)` advances the story. `onElementEnter` fires again, the UI updates with the Healer's dialogue and a new cover image.
Continue through the story to the point where you receive a potion. Watch the Inspector: when `DisplayContent()` calls `e.RunContentScript()`, the Arcscript embedded in the element's content executes and `have_potion` changes from `false` to `true`.
Navigate to Wanda and examine her. Because `have_potion` is `true`, the branch condition allows the "Give her the potion" option to appear. Choosing it leads to an element whose content Arcscript (`wanda_health += 50`) runs when `DisplayContent()` calls `RunContentScript()`, so `wanda_health` updates accordingly.
## Event-driven loop
Context: Arcweave docs > Tutorials > Unity > Unity tutorial | Part 2: Demo scene architecture > Event-driven loop
Here is a summary of the game loop:
1. **Button clicked** → `ClearTempButtons()` destroys old buttons → callback invokes `Next(path)`.
2. `ExecuteAppendedConnectionLabels()` runs connection label Arcscript → variables update.
3. `Next(targetElement)` advances the story → `Visits` increments → `onElementEnter` fires.
4. **UI updates** → `DisplayContent()` and `DisplayImage()` refresh text and images → new buttons are created via `MakeButton()`.
The architecture is deliberately decoupled:
- `ArcweavePlayer` manages story flow, evaluates conditions, and broadcasts events. It knows nothing about the UI.
- `ArcweavePlayerUI` listens to those events and updates visuals. It makes no narrative decisions.
- **Variables** track state across the entire playthrough.
- **Arcscript** drives logic through content and connection labels.
Because everything communicates through events, you can extend the system freely — add sound effects, trigger animations, or integrate with any game system — simply by subscribing to the same five events.
# Unity tutorial | Part 3: Arcweave project structure
Source: https://docs.arcweave.com/tutorials/unity/pt-3
Section: Tutorials > Unity
Description: Unity tutorial part 3, how the demo's Arcweave project uses boards, variables, branches, Arcscript, and components
This tutorial covers the Arcweave project that drives the **Arcweave Unity Example**, a 3D RPG demonstrating Arcweave's integration with Unity. You can find the example on [its GitHub repo](https://github.com/arcweave/arcweave-unity-example).
Before opening Unity and playing the demo, it's worth understanding how the data is structured on the Arcweave side, because that is where the project's narrative logic lives. Once you understand how the project is organized, wiring it up in Unity becomes straightforward.
> **Prerequisites:** This tutorial is part of a series on Arcweave's Unity integration. It assumes you have completed [Part 1](https://docs.arcweave.com/tutorials/unity/pt-1) and [Part 2](https://docs.arcweave.com/tutorials/unity/pt-2), where you installed the plugin and explored a simple 2D scene.
## Video tutorial
Context: Arcweave docs > Tutorials > Unity > Unity tutorial | Part 3: Arcweave project structure > Video tutorial
You can watch the video version of this tutorial below.
Video: https://www.youtube.com/watch?v=33DtZciyCx0
## Project overview
Context: Arcweave docs > Tutorials > Unity > Unity tutorial | Part 3: Arcweave project structure > Project overview
### Boards
Context: Arcweave docs > Tutorials > Unity > Unity tutorial | Part 3: Arcweave project structure > Project overview > Boards
Open the Arcweave project used for the Unity demo. The first thing to examine is the board list on the left side of the editor.
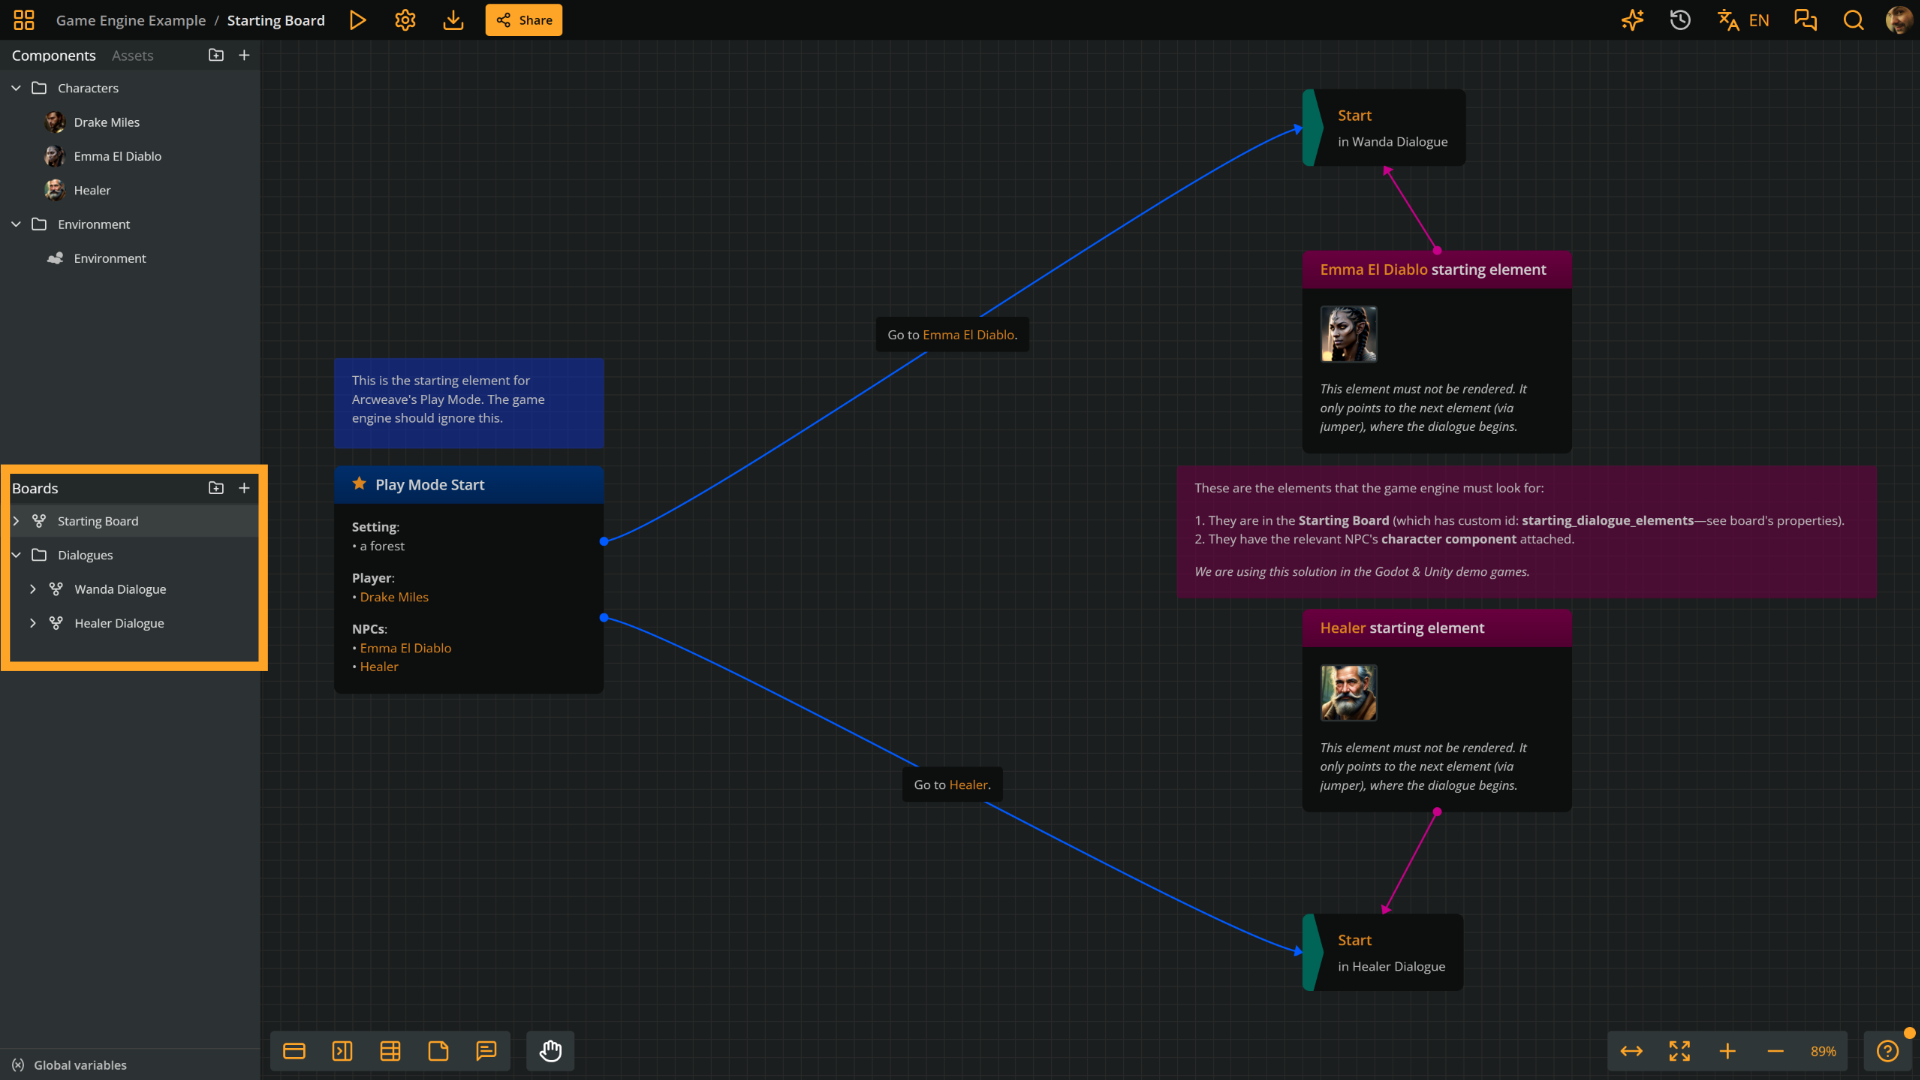
The project has three boards:
- **Starting Board**: Contains the starting element for testing the project in Arcweave's Play Mode. We won't be using this board in the Unity 3D project, although the [2D demo scene](https://docs.arcweave.com/tutorials/unity/pt-2) uses it, as we saw in Part 2.
- **Dialogues** (folder):
- **Healer Dialogue**: The dialogue tree between the player and the healer NPC.
- **Wanda Dialogue**: The dialogue tree between the player and Wanda, the injured NPC.
In the 3D demo we'll explore next, the relevant boards are **Healer Dialogue** and **Wanda Dialogue**, and _their names are not decorative._ As we'll see [in the next part of this tutorial](https://docs.arcweave.com/tutorials/unity/pt-4#dialoguetrigger), these names are the only connection between an NPC and their dialogue, in Unity.
## Global variables
Context: Arcweave docs > Tutorials > Unity > Unity tutorial | Part 3: Arcweave project structure > Global variables
Before going into the boards, open the **Global variable dialog** from the project sidebar.
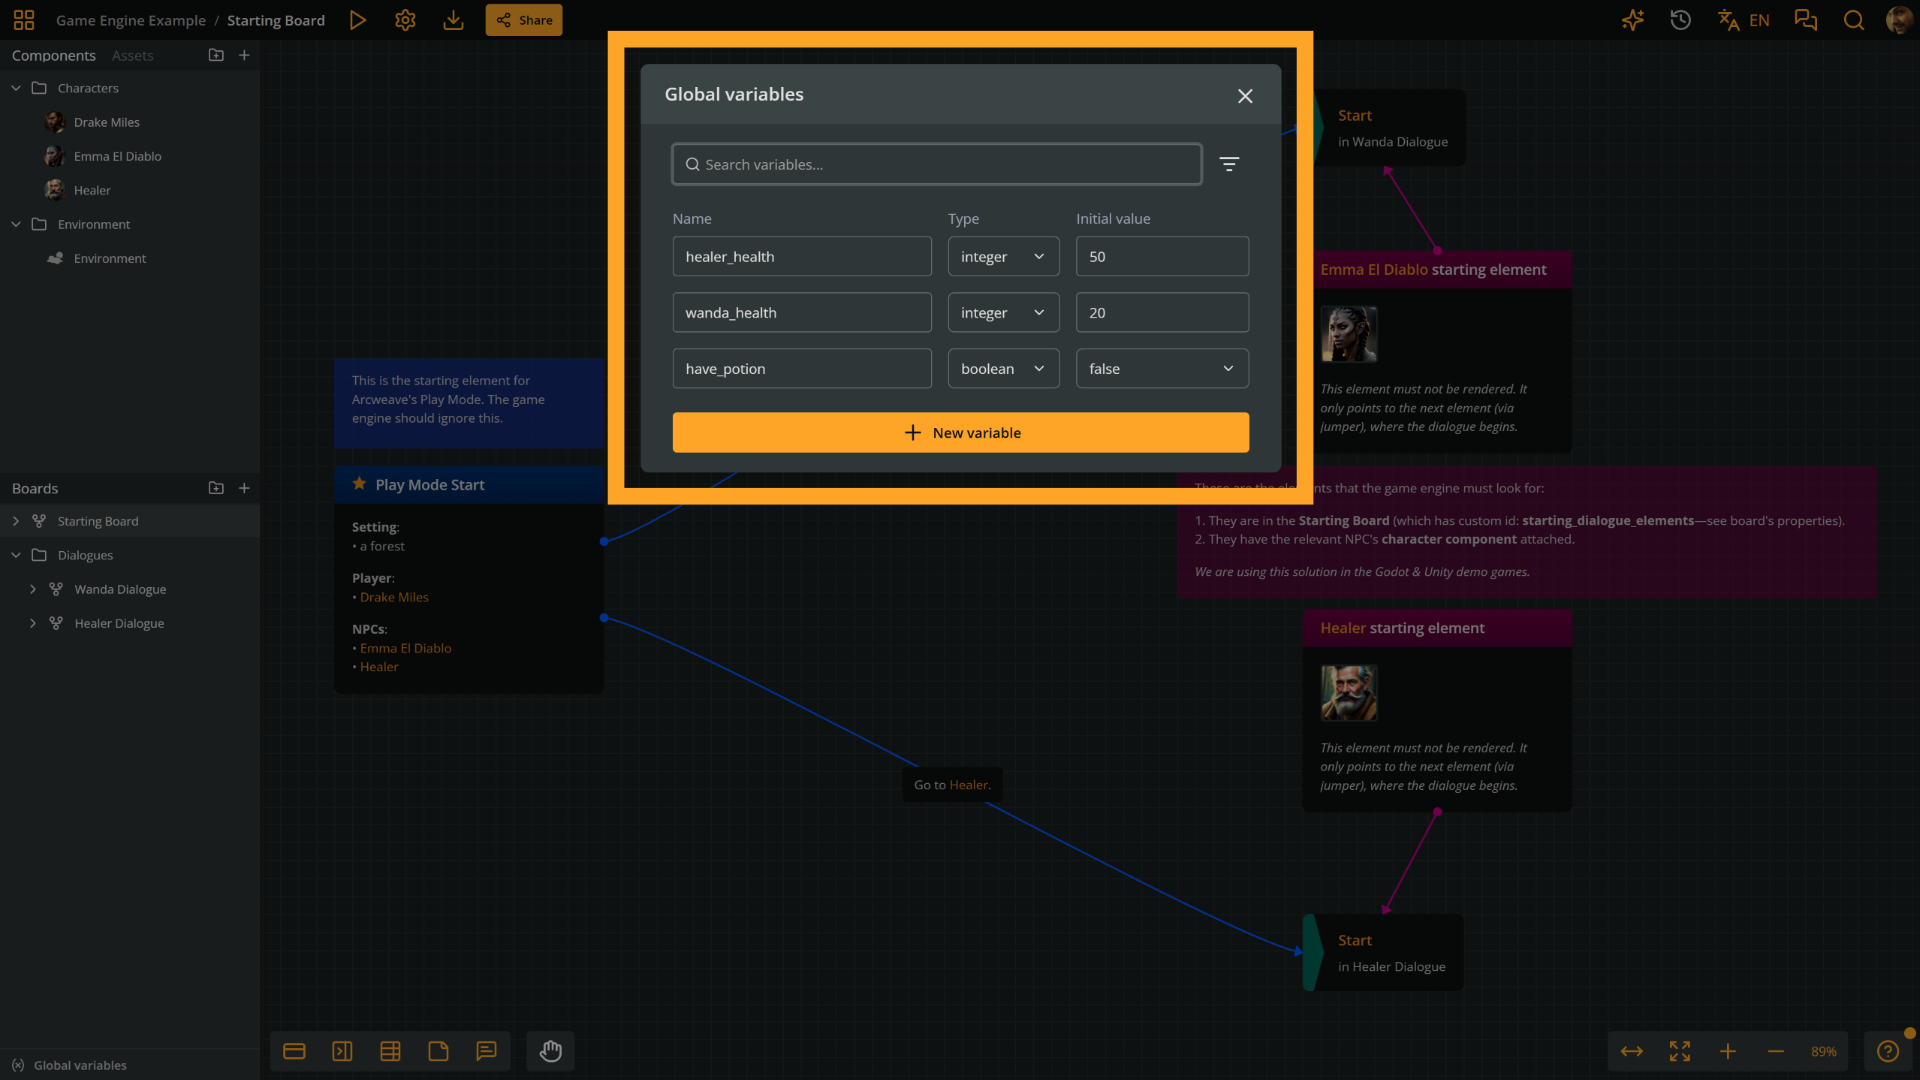
The project defines three variables:
- `have_potion` — boolean, default `false`
- `healer_health` — integer, default `50`
- `wanda_health` — integer, default `20`
In Unity, the `ArcweaveHealthUI` component on each NPC reads from this list, using the variable name as a string key to get the current value. Arcweave owns the values; Unity reads them. If you add a new variable here, it becomes accessible in Unity after you re-import the project — no code changes required.
## Boards and dialogue flow
Context: Arcweave docs > Tutorials > Unity > Unity tutorial | Part 3: Arcweave project structure > Boards and dialogue flow
### Entry and exit points
Context: Arcweave docs > Tutorials > Unity > Unity tutorial | Part 3: Arcweave project structure > Boards and dialogue flow > Entry and exit points
Open the **Healer Dialogue** board. This is a graph where each box is an element, a moment in the dialogue, and the arrows are connections representing the paths a player can follow.
The first thing to identify is the entry point. Unity needs to know when a conversation starts so it can lock player movement, and when it ends so it can return control.
Locate the first element of the dialogue. The icon at its top right corner shows that the element has attributes: hover over it to preview them, or double-click it (or right-click the element and select **Properties**) to open the **Element Properties** dialog on its **Attributes** tab.
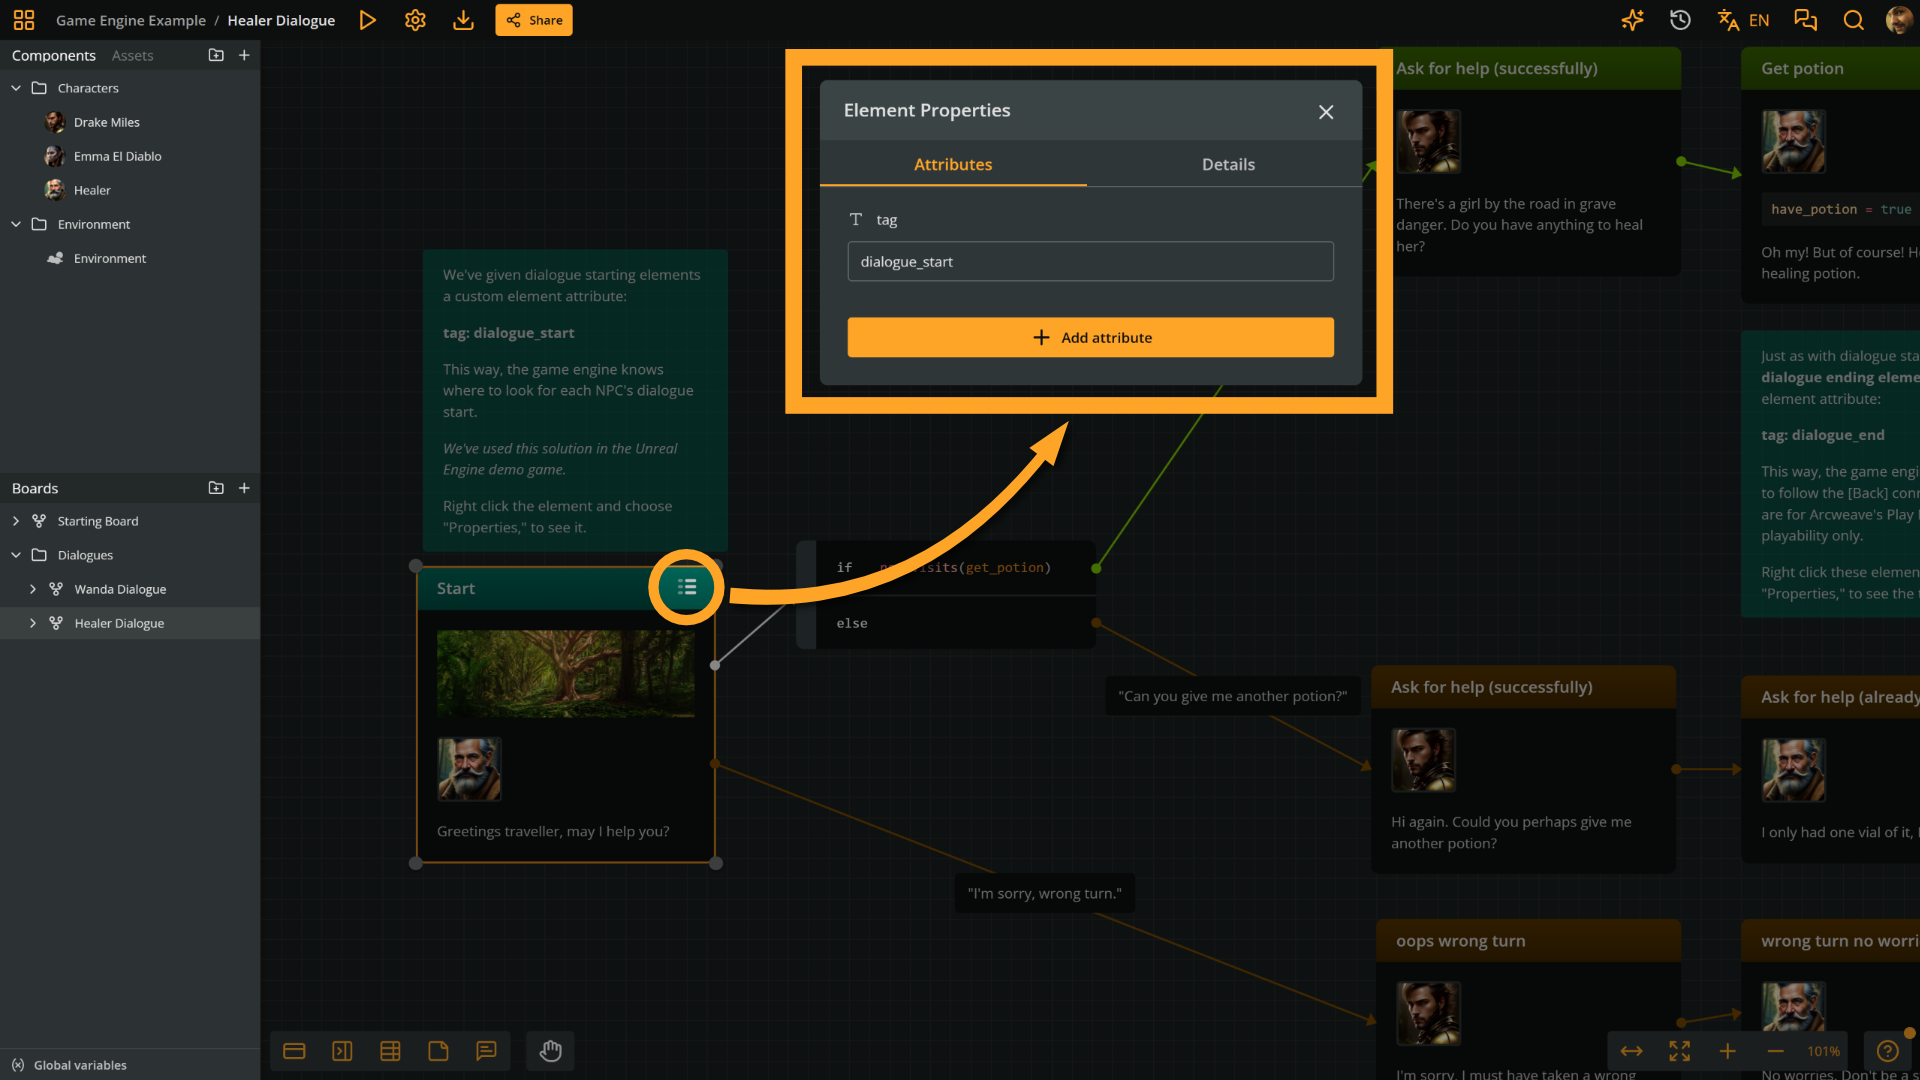
This element has an attribute named `tag` with the value `dialogue_start`. When Unity opens a board for an NPC, it searches for this tag to know where to begin. Without it, the entry point is unpredictable. **Always tag the first element explicitly.**
The element's content holds the Healer's opening line — the text Unity displays in the dialogue box when this element is reached.
At the other end of the graph, there is a final element tagged `dialogue_end`. When Unity detects this tag, it closes the dialogue and returns control to the player.
This is your explicit exit point. The tag string must match what Unity expects — the default is `dialogue_end`.
### Player choices
Context: Arcweave docs > Tutorials > Unity > Unity tutorial | Part 3: Arcweave project structure > Boards and dialogue flow > Player choices
The outgoing connections from an element represent the player's choices. Each connection label becomes a button in the UI — for example, _Ask for help_ or _"I'm sorry, wrong turn."_
### Arcscript in elements
Context: Arcweave docs > Tutorials > Unity > Unity tutorial | Part 3: Arcweave project structure > Boards and dialogue flow > Arcscript in elements
Some elements contain Arcscript. Look for elements whose content includes an expression such as `have_potion = true`.
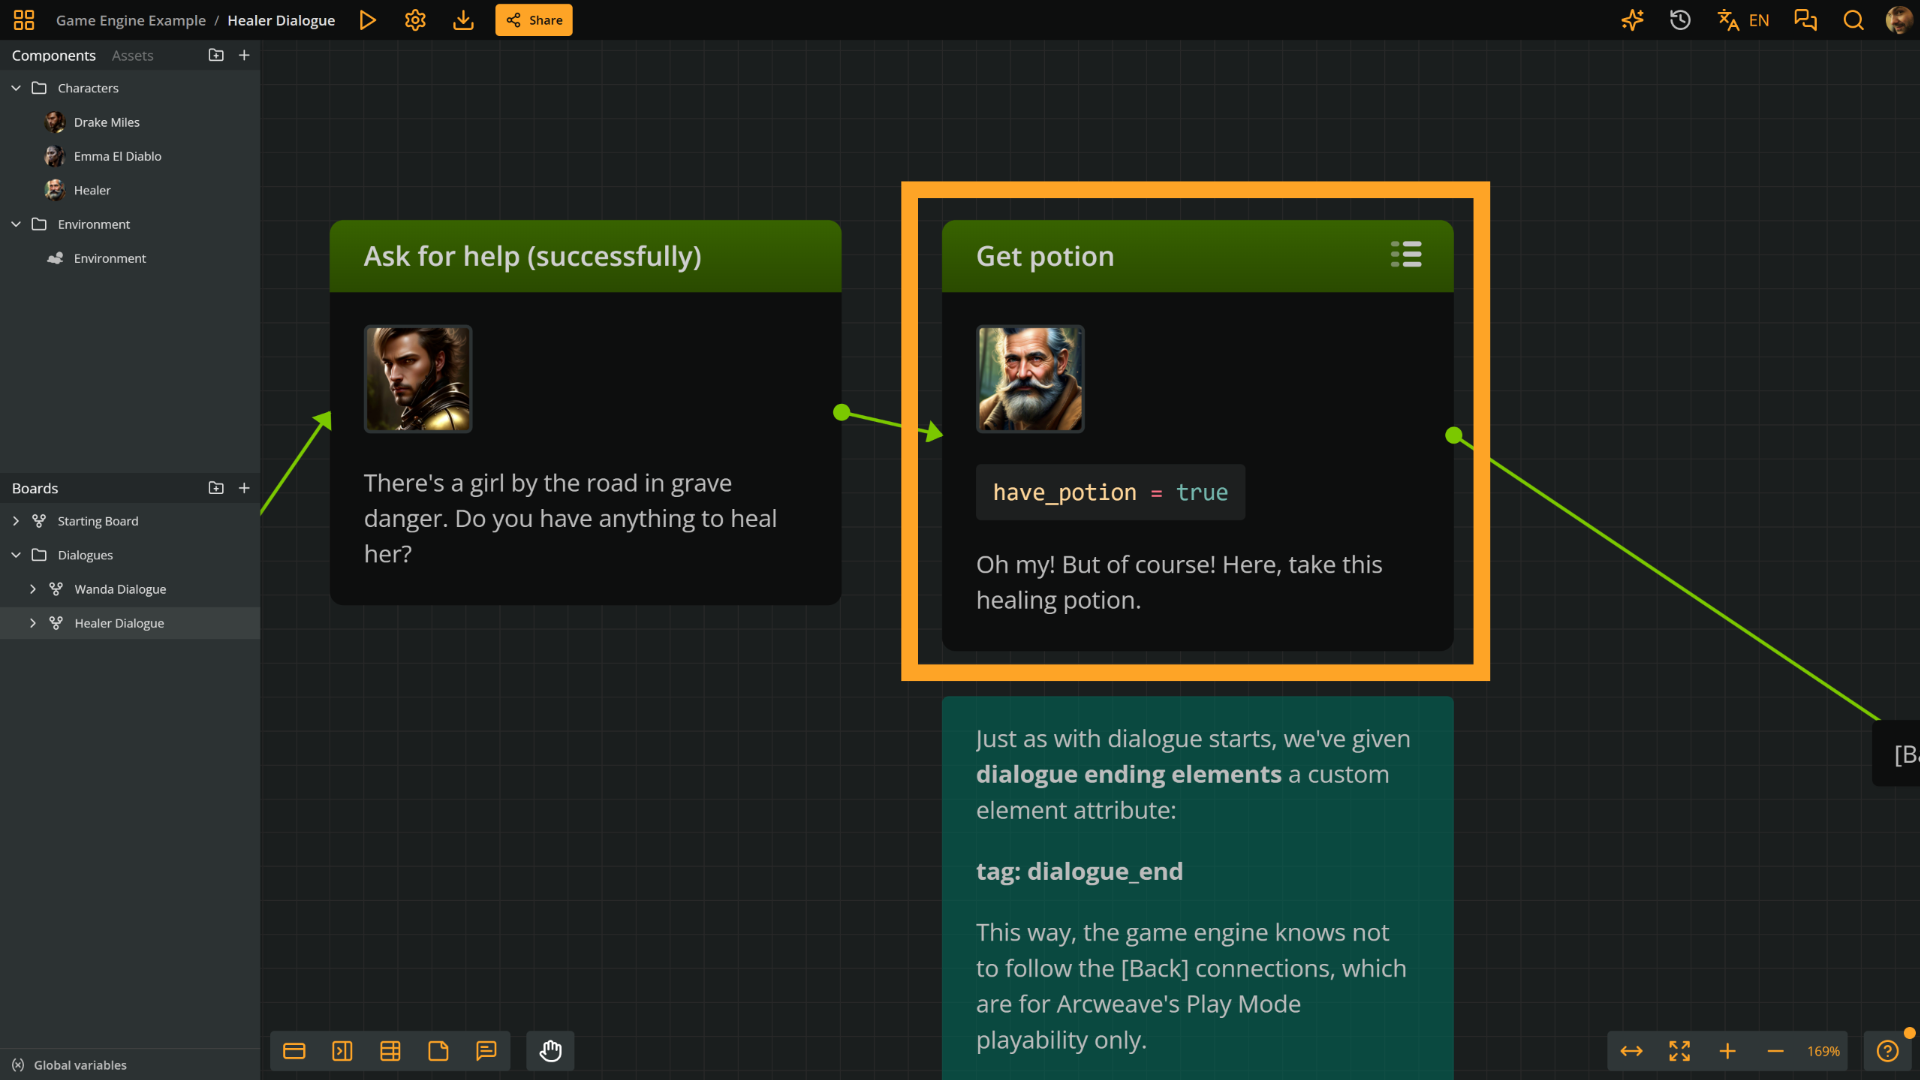
This script runs when the player arrives at that element — before the element content is rendered. That is the moment `have_potion` flips from `false` to `true`.
### Branches
Context: Arcweave docs > Tutorials > Unity > Unity tutorial | Part 3: Arcweave project structure > Boards and dialogue flow > Branches
The project also includes [branches](https://docs.arcweave.com/project-items/branches), project items that evaluate conditions and direct the flow accordingly.
Open the **Wanda Dialogue** board and notice the branch with the condition `if have_potion`. Arcweave evaluates the expression `have_potion` to decide whether the player option to _Give her the potion_ should be available.
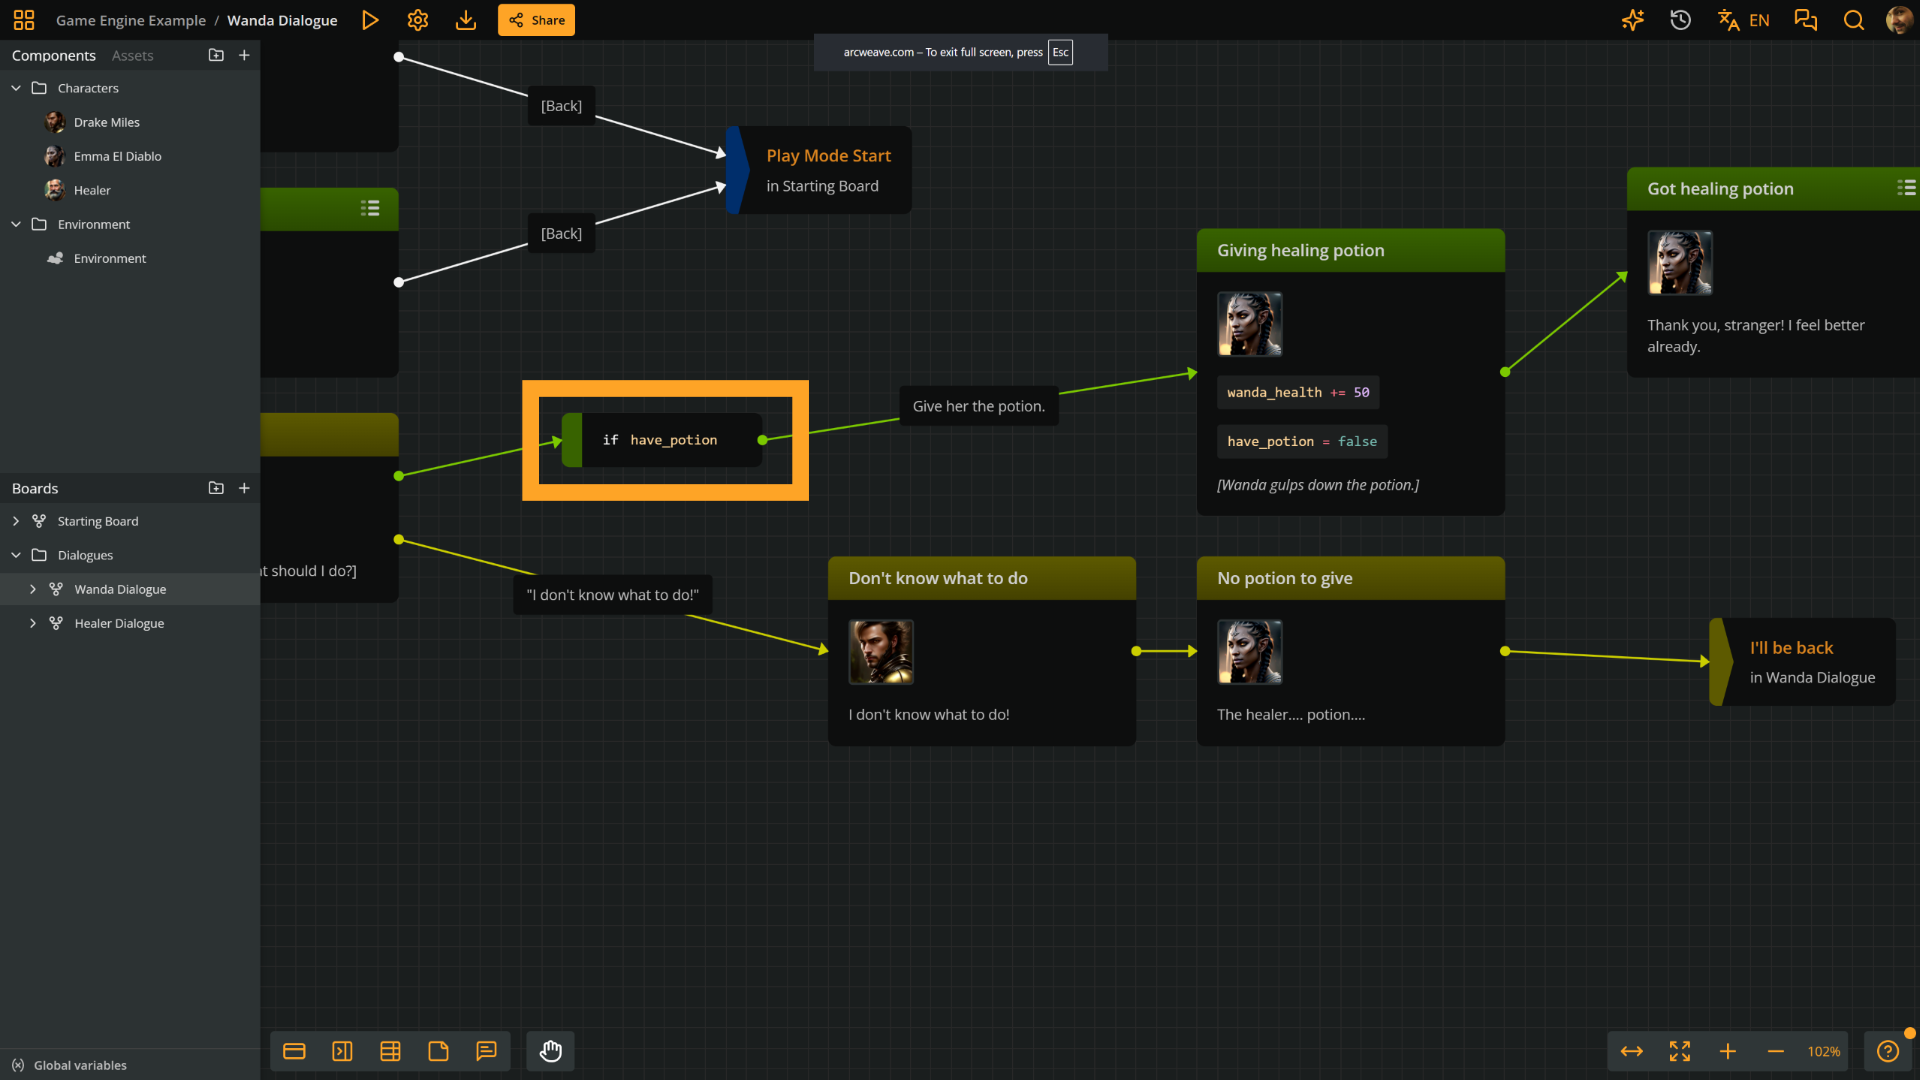
## Components and attributes
Context: Arcweave docs > Tutorials > Unity > Unity tutorial | Part 3: Arcweave project structure > Components and attributes
Navigate to the **Components** section in the project sidebar. Components in Arcweave are reusable data containers, named objects that hold attributes. They don't drive narrative flow; they hold configuration that scripts in Unity read.
### The Environment component
Context: Arcweave docs > Tutorials > Unity > Unity tutorial | Part 3: Arcweave project structure > Components and attributes > The Environment component
Open the component named **Environment**.
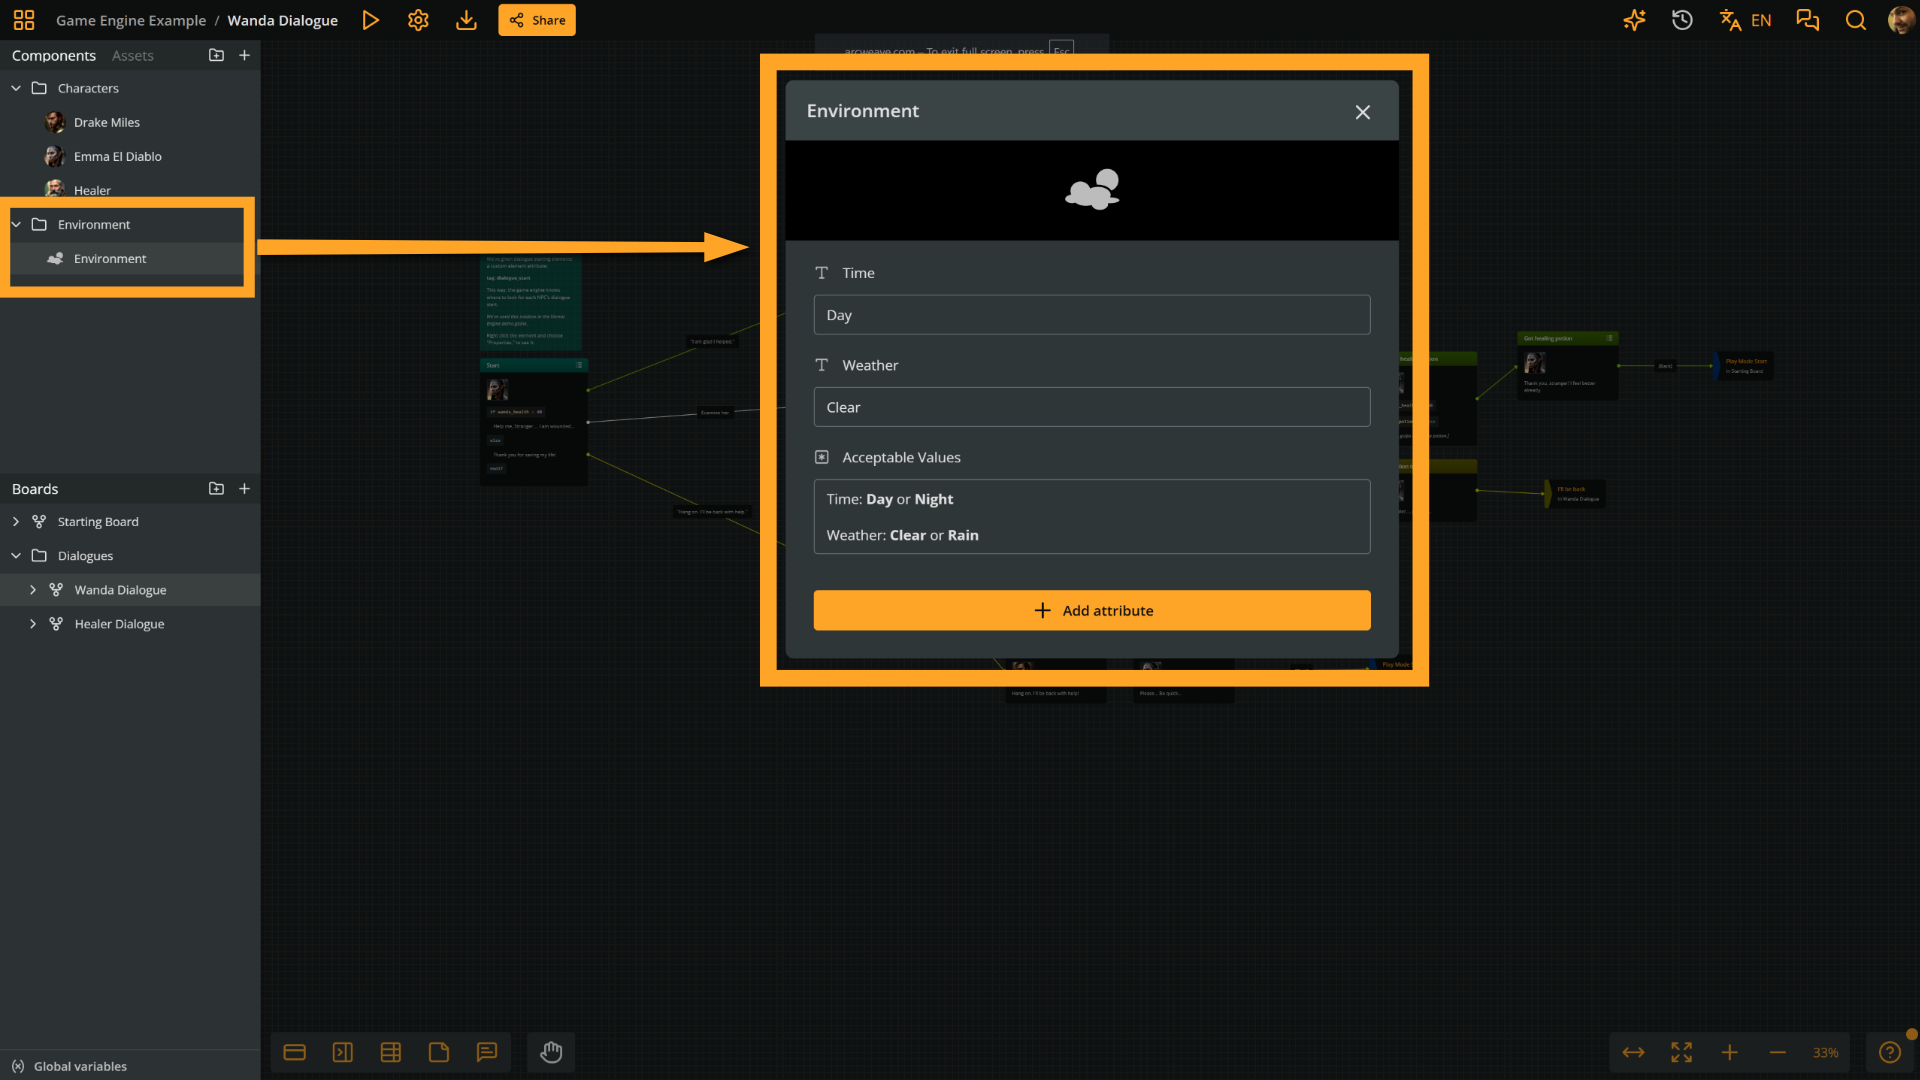
It has two attributes:
- `Time`: A string, either `Day` or `Night`
- `Weather`: A string, either `Clear` or `Rain`
In Unity, a script reads these values when the project loads and updates the scene accordingly — showing the skybox by day or a solid night color by night, and starting or stopping the rain particle system. To change the weather or time of day in the game, update the attribute value here and re-import in Unity. No code changes needed.
### Character components
Context: Arcweave docs > Tutorials > Unity > Unity tutorial | Part 3: Arcweave project structure > Components and attributes > Character components
Each NPC has its own component named after them: **Healer** and **Wanda Elandor**.
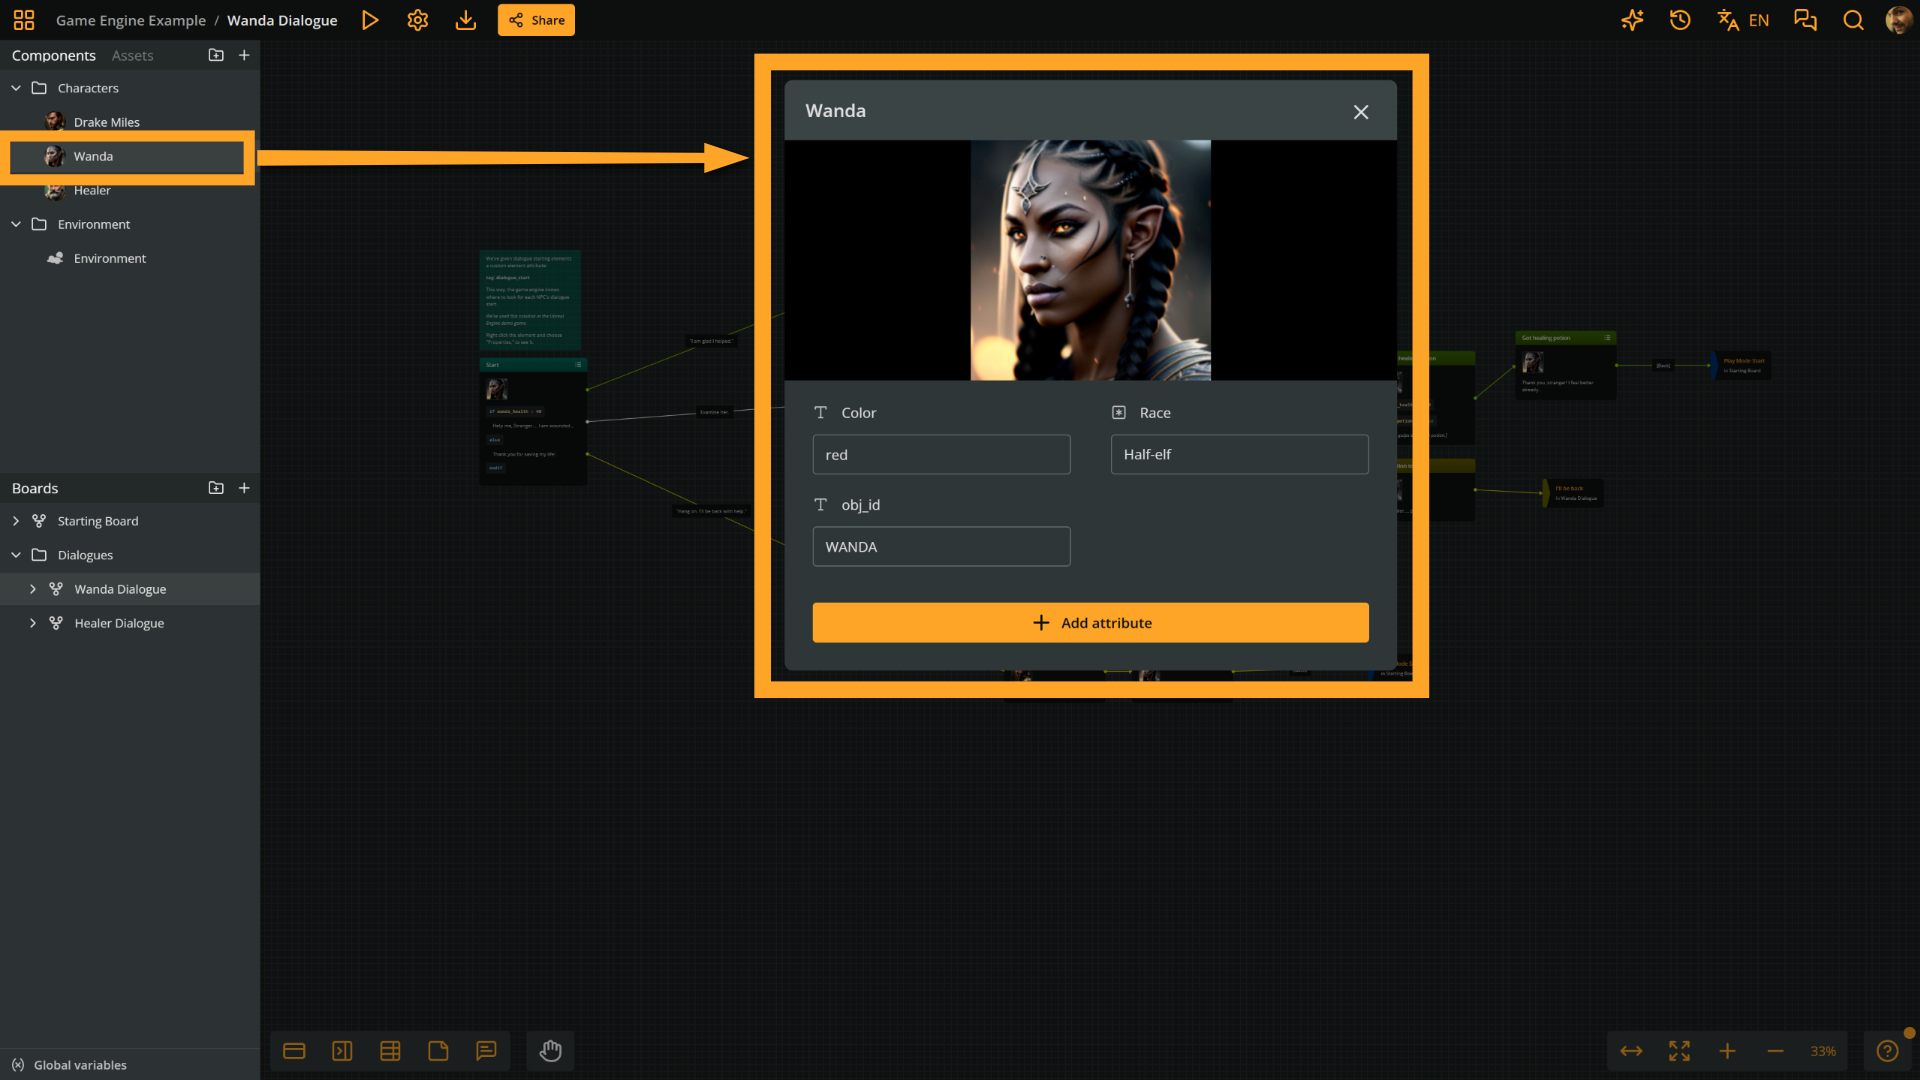
Open Wanda's component to see its attributes:
- `Color`: A color string, for example `Blue`
- `Race`: A text description of the character
- `obj_id`: A custom string that can be used to reference this component from Unity
In Unity, the `Color` attribute controls the fill color of the character's health bar slider. The `obj_id` can be used to match components from Unity code when a name-based lookup isn't sufficient.
String Field component attributes also import as scoped variables when both the attribute and its component have custom IDs. Their Arcscript and Unity scope uses the component custom ID, so Wanda's `Color` attribute (custom ID `color`) on the component with custom ID `wanda_elandor` is available as `wanda_elandor.color`. The demo handlers still look these attributes up by component and attribute name; `ArcweaveSceneController` uses the scoped variable's current value when one exists.
### Components attached to elements
Context: Arcweave docs > Tutorials > Unity > Unity tutorial | Part 3: Arcweave project structure > Components and attributes > Components attached to elements
Components can also be attached to individual elements.
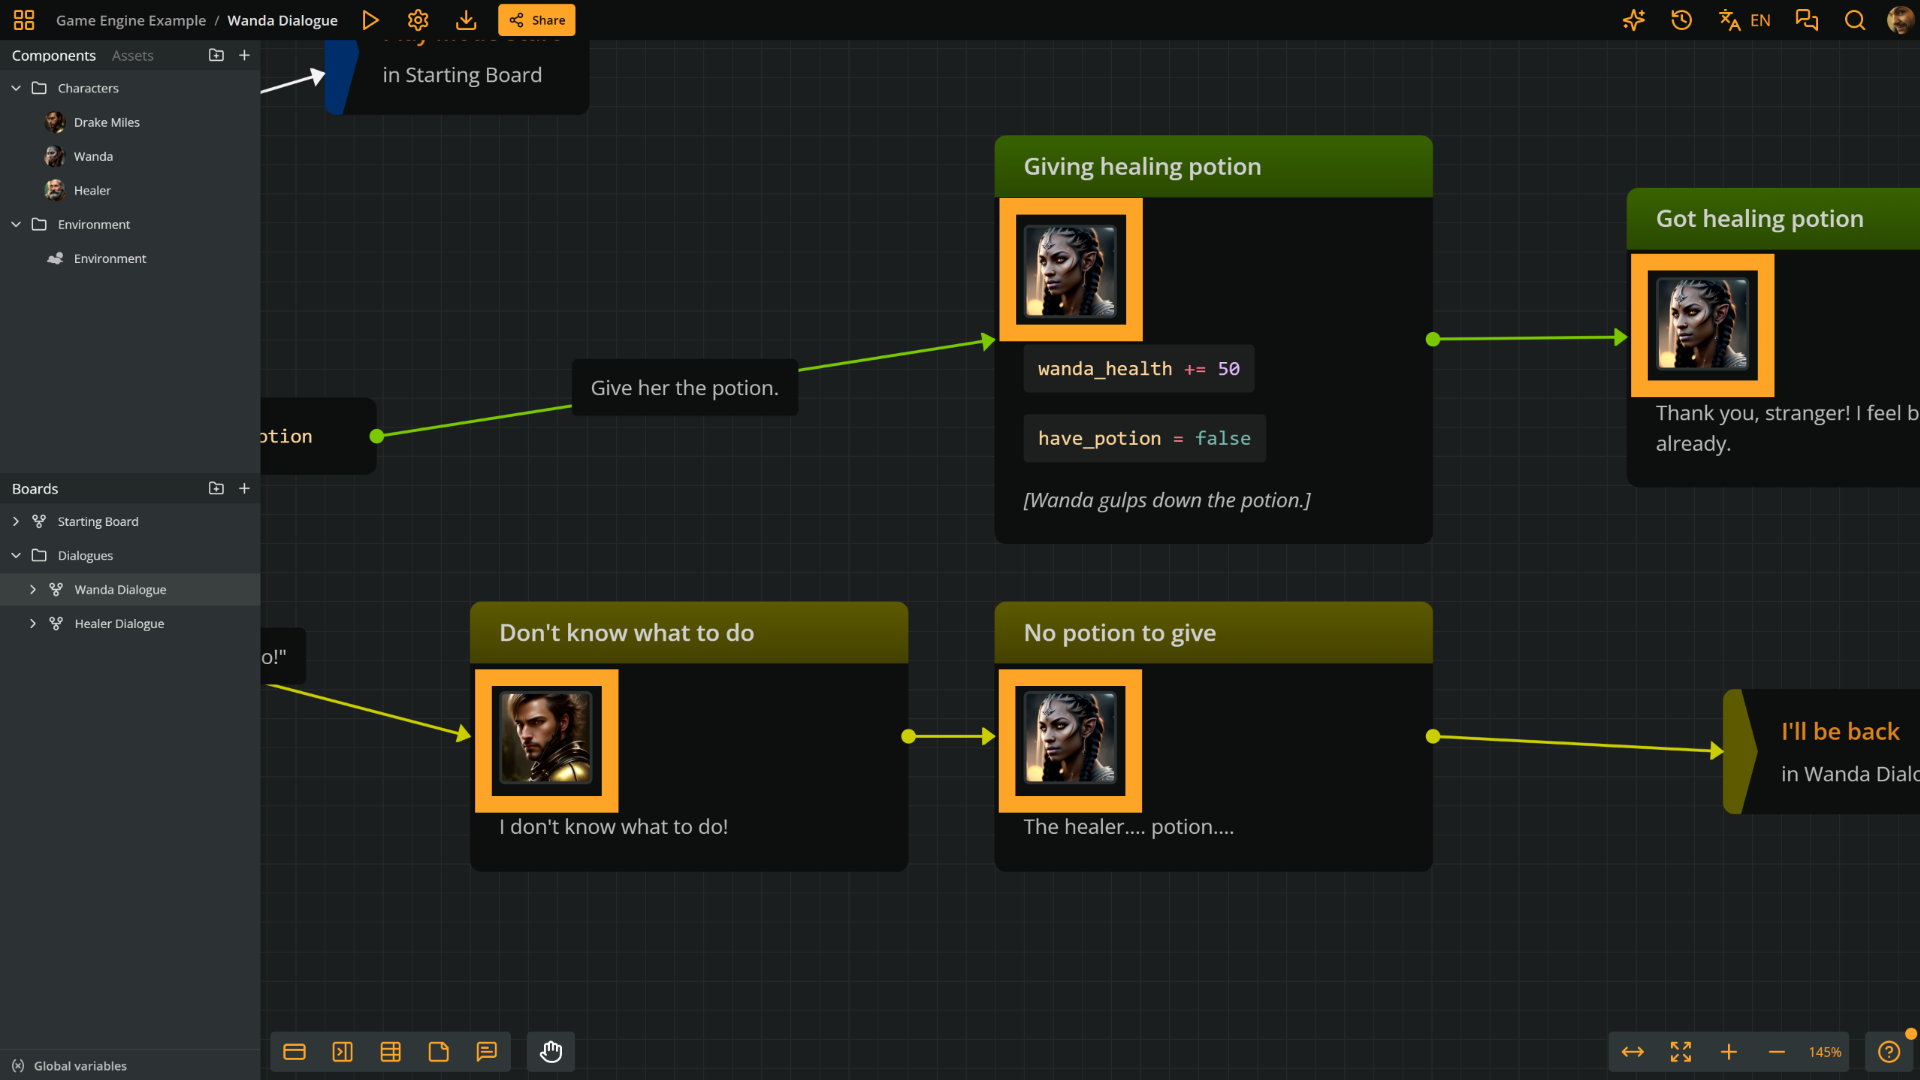
When an element's first attached component has a cover image, Unity displays that image as the character portrait during dialogue.
To show a character portrait during a specific line of dialogue: attach a component with a cover image to the relevant element, as its first component.
## Summary
Context: Arcweave docs > Tutorials > Unity > Unity tutorial | Part 3: Arcweave project structure > Summary
The Arcweave project follows a few consistent rules that everything else builds on:
**Boards are named after NPCs.** Each NPC in Unity references their board by name. The string must match exactly.
**Variables are typed and can be global or scoped.** This template keeps its main story-state variables global. String Field, Boolean, Integer, and Float board and component attributes are also available through their owner scope when both the attribute and its owner have custom IDs.
**Tags control flow entry and exit.** `dialogue_start` tells Unity where to begin a conversation; `dialogue_end` tells it when to return to gameplay. Both must match the strings Unity expects.
**Components hold configuration.** The `Environment` component drives scene visuals. Character components drive properties like the health bar slider color.
This project is intentionally small — two NPCs, three variables, a handful of components — but the pattern scales. More NPCs means more boards. More gameplay effects means more variables and components. The architecture stays the same.
# Unity tutorial | Part 4: The 3D demo project
Source: https://docs.arcweave.com/tutorials/unity/pt-4
Section: Tutorials > Unity
Description: Unity tutorial part 4, the 3D demo project with its GameManager, NPC dialogue triggers, and extension patterns
This tutorial walks through a full 3D RPG demo that shows how each piece of an Arcweave project connects to a Unity scene. You will see characters you can walk up to, conversations that change health bars and environmental effects, and a world that reacts to story choices.
## Video tutorial
Context: Arcweave docs > Tutorials > Unity > Unity tutorial | Part 4: The 3D demo project > Video tutorial
You can watch the video version of this tutorial below.
Video: https://www.youtube.com/watch?v=qPq1QCNuYnQ
## Download project
Context: Arcweave docs > Tutorials > Unity > Unity tutorial | Part 4: The 3D demo project > Download project
Download the 3D demo project [from GitHub](https://github.com/arcweave/arcweave-unity-example). Click the green **Code** button, then **Download ZIP**. Extract it and open Unity Hub.
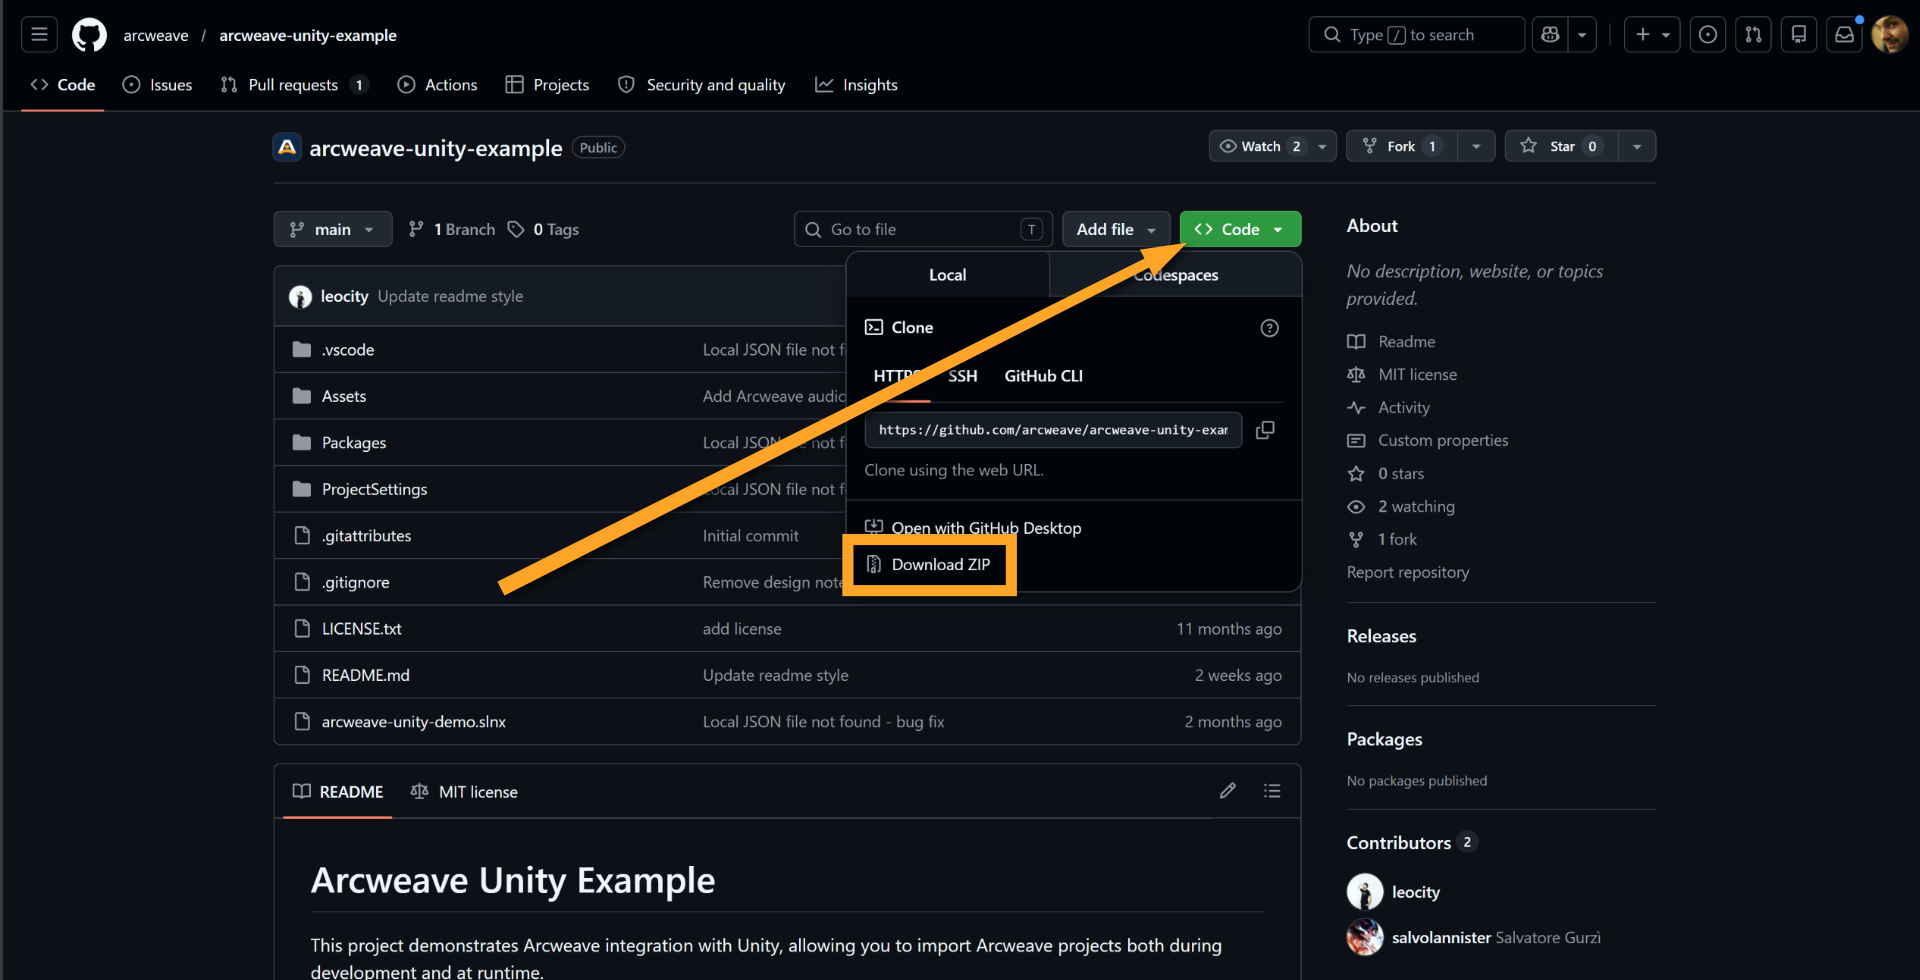
In Unity Hub, click **Open → Add project from disk**, select the `arcweave-unity-example` root folder, and open it. Unity will import assets on first load; this may take a minute.
Once loaded, navigate to **Assets > Scenes** and double-click **Demo Scene** to open the scene.
## What the demo does
Context: Arcweave docs > Tutorials > Unity > Unity tutorial | Part 4: The 3D demo project > What the demo does
Before diving into the wiring, it helps to see the demo running.
Hit **Play** in the Editor.
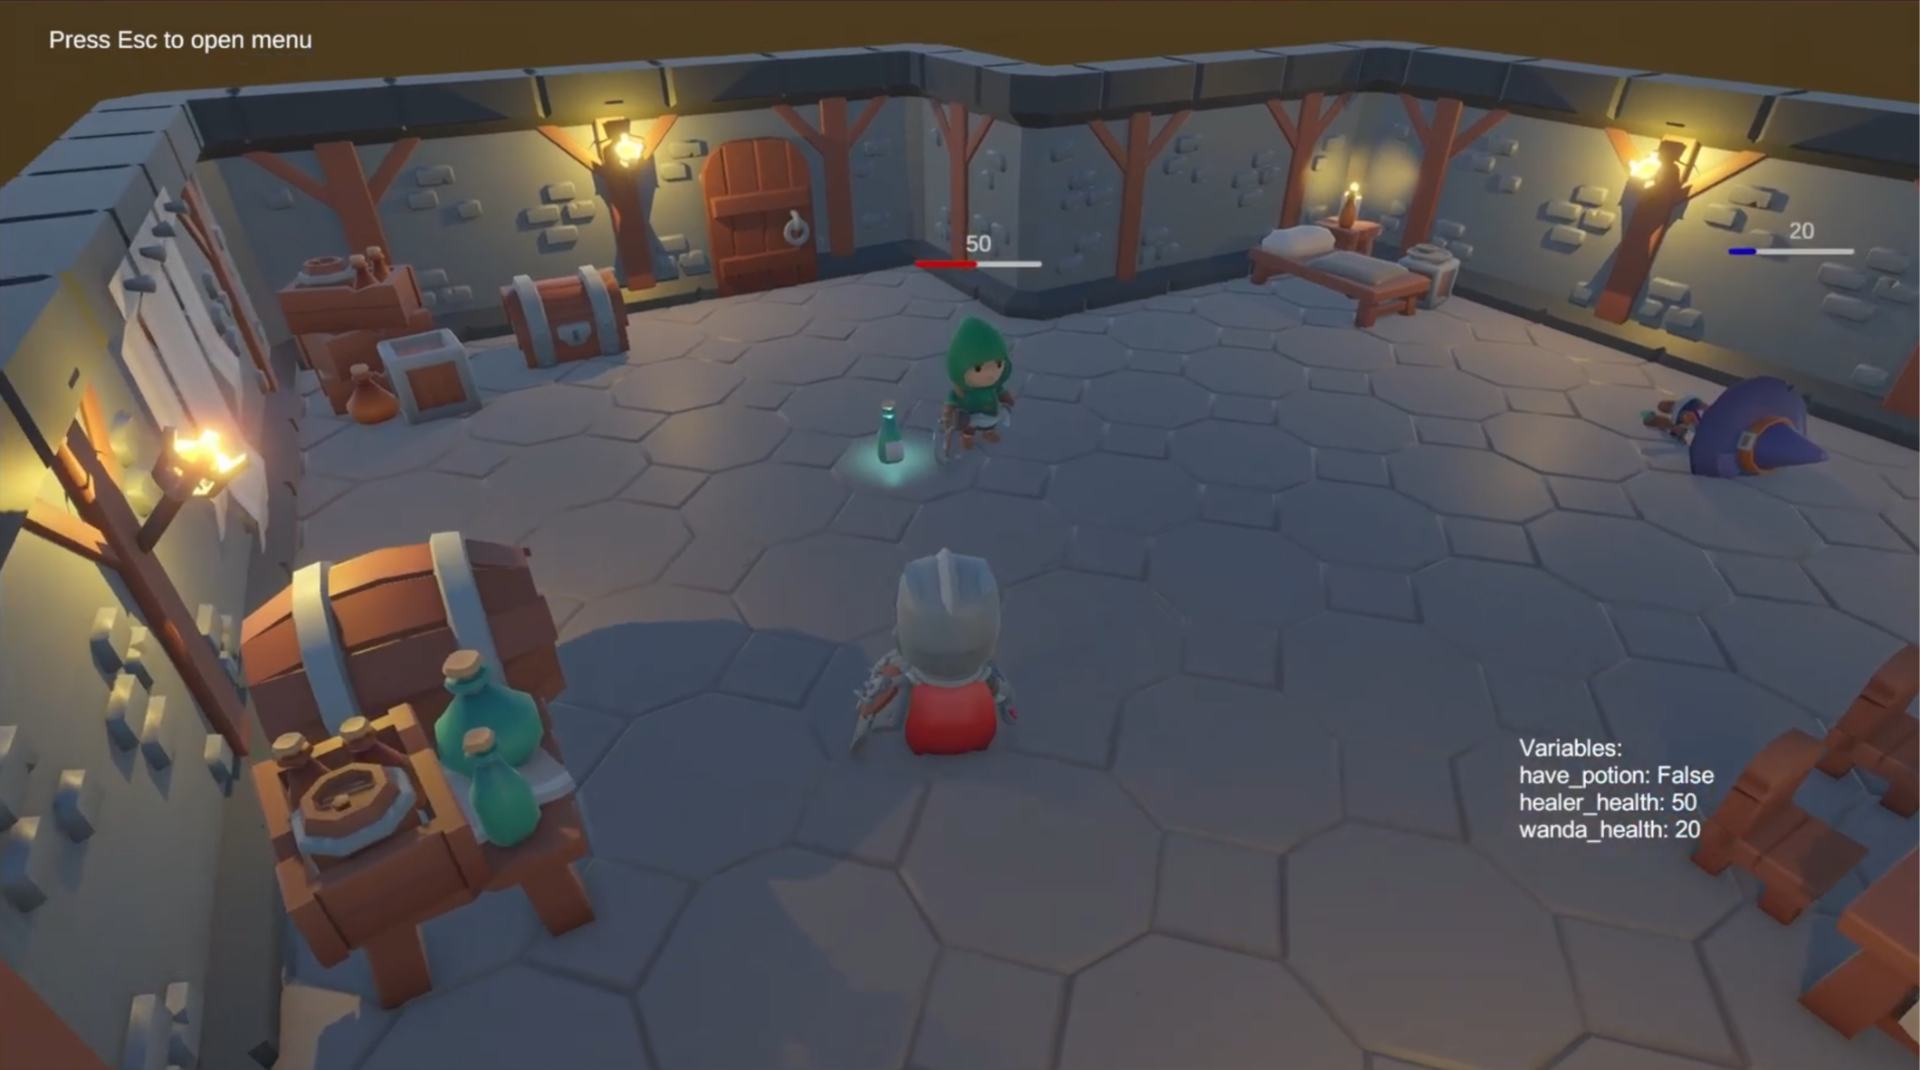
You are in a small village with two NPCs. Notice the health bar above them. That value is driven by an Arcweave variable, not set manually in Unity.
Walk toward the Healer until a prompt appears, then press **E**. The player freezes, the camera locks, and the dialogue UI slides in: the same **ArcweavePlayerUI** covered in the earlier tutorials.
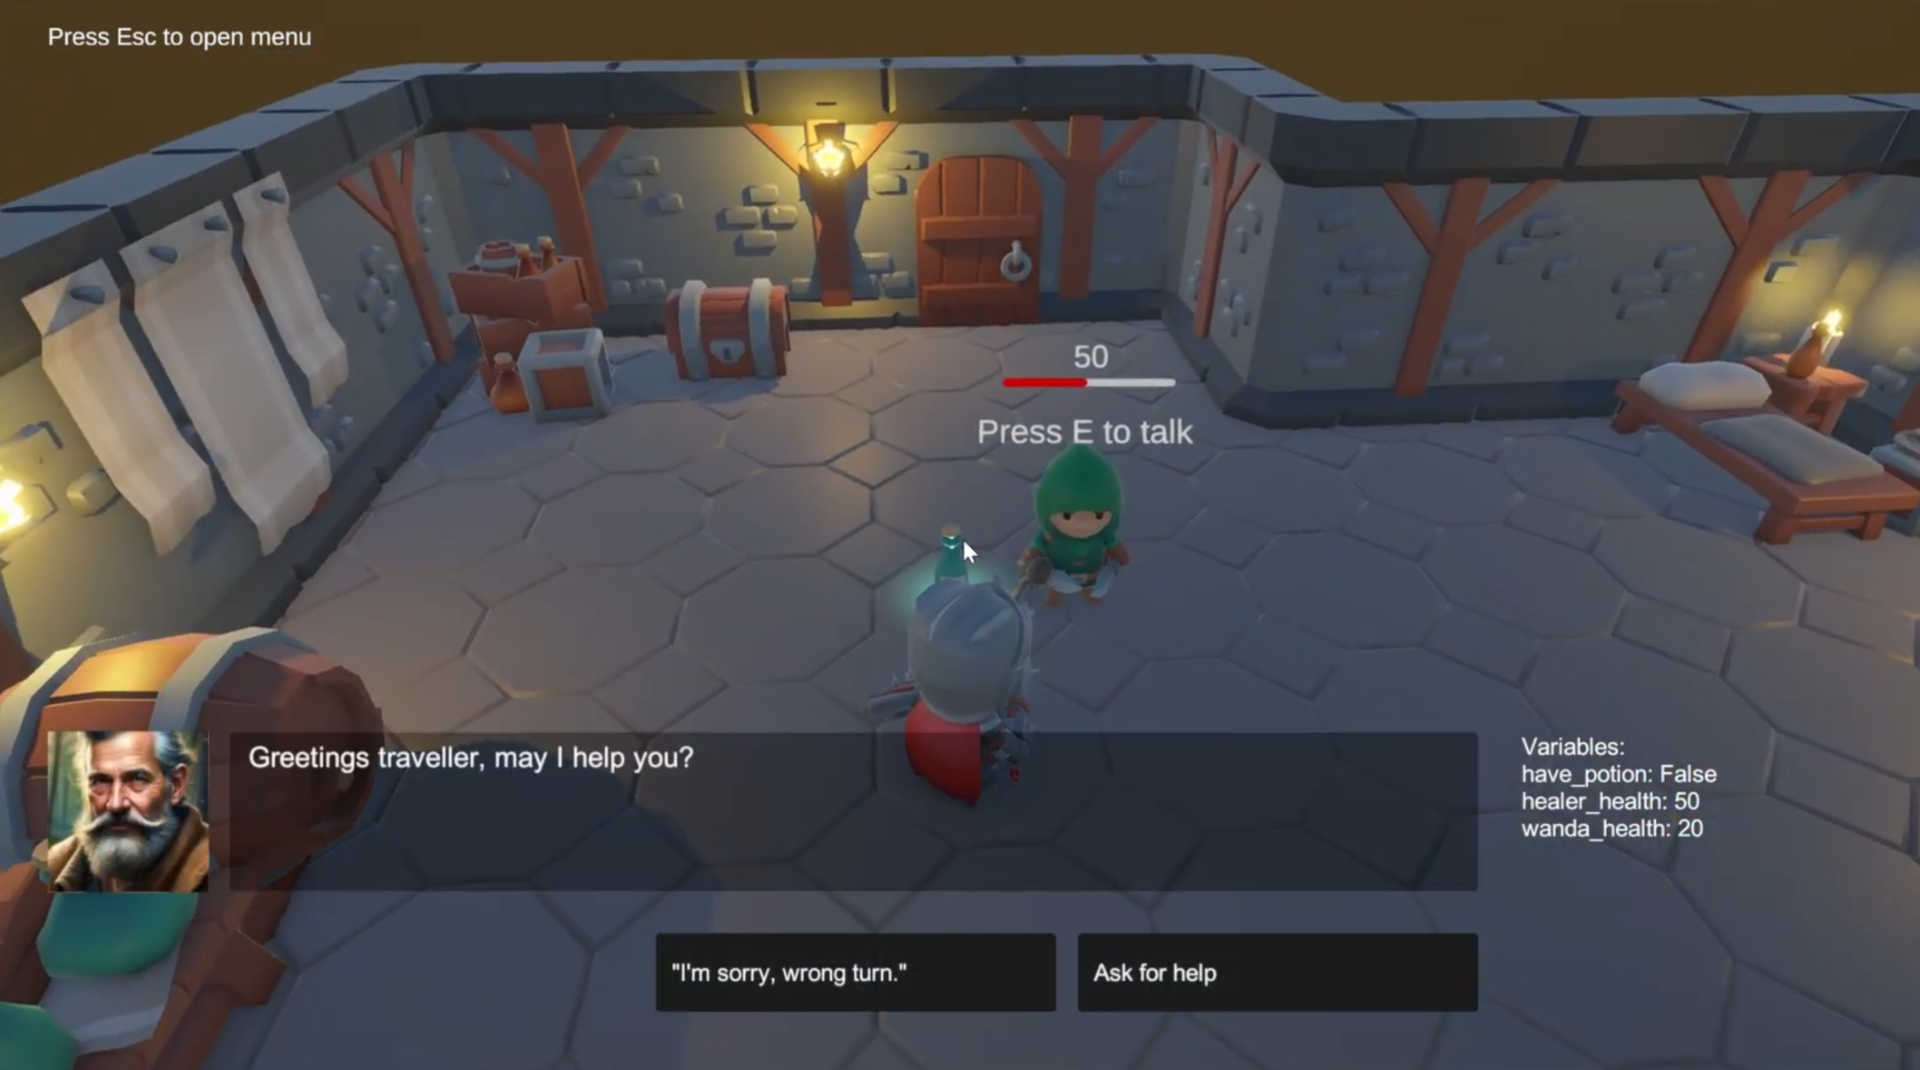
Make a choice and work through the conversation. When it ends, movement is restored and you return to the world.
Now walk to Wanda. She has low health. If you got a potion during the Healer conversation, you will see the option to give it here. Watch the bar above her head update immediately when you do.
Finally, press **Escape** during gameplay. The game pauses and an import menu appears. This is how you re-import the Arcweave project at any time, from the web or a local JSON file, without rebuilding or redeploying.
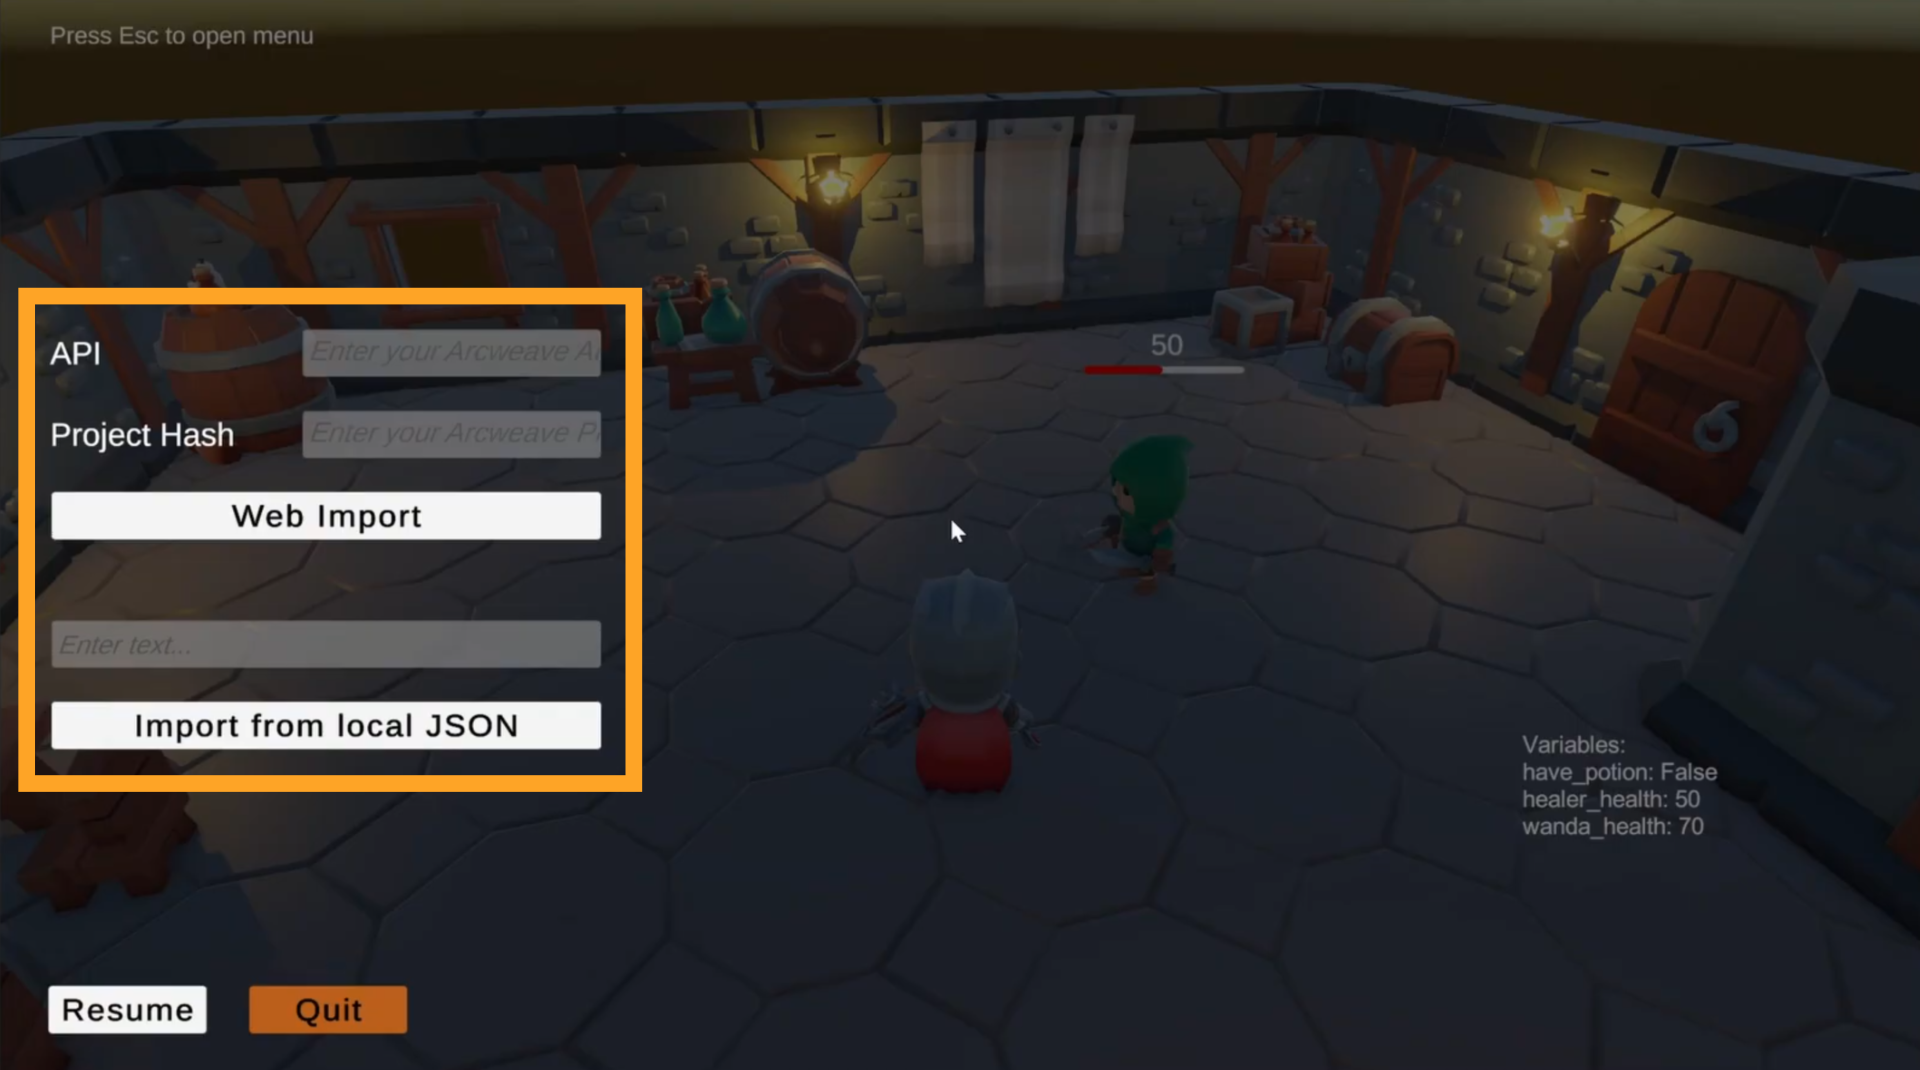
Press **Escape** again to close it, then stop Play mode.
## Scene hierarchy overview
Context: Arcweave docs > Tutorials > Unity > Unity tutorial | Part 4: The 3D demo project > Scene hierarchy overview
Open the Hierarchy panel and expand all top-level objects. **ArcweavePlayer** and **ArcweavePlayerUI** work as described in [Part 2](https://docs.arcweave.com/tutorials/unity/pt-2), with a few demo-specific additions: **Auto Start** is off, because each NPC's dialogue trigger starts its own conversation, and **ArcweavePlayerUI** ends the conversation when it reaches an element marked as a dialogue end. Five additional systems build on top of them.
## GameManager GameObject
Context: Arcweave docs > Tutorials > Unity > Unity tutorial | Part 4: The 3D demo project > GameManager GameObject
Select the **GameManager** object and look at its Inspector.
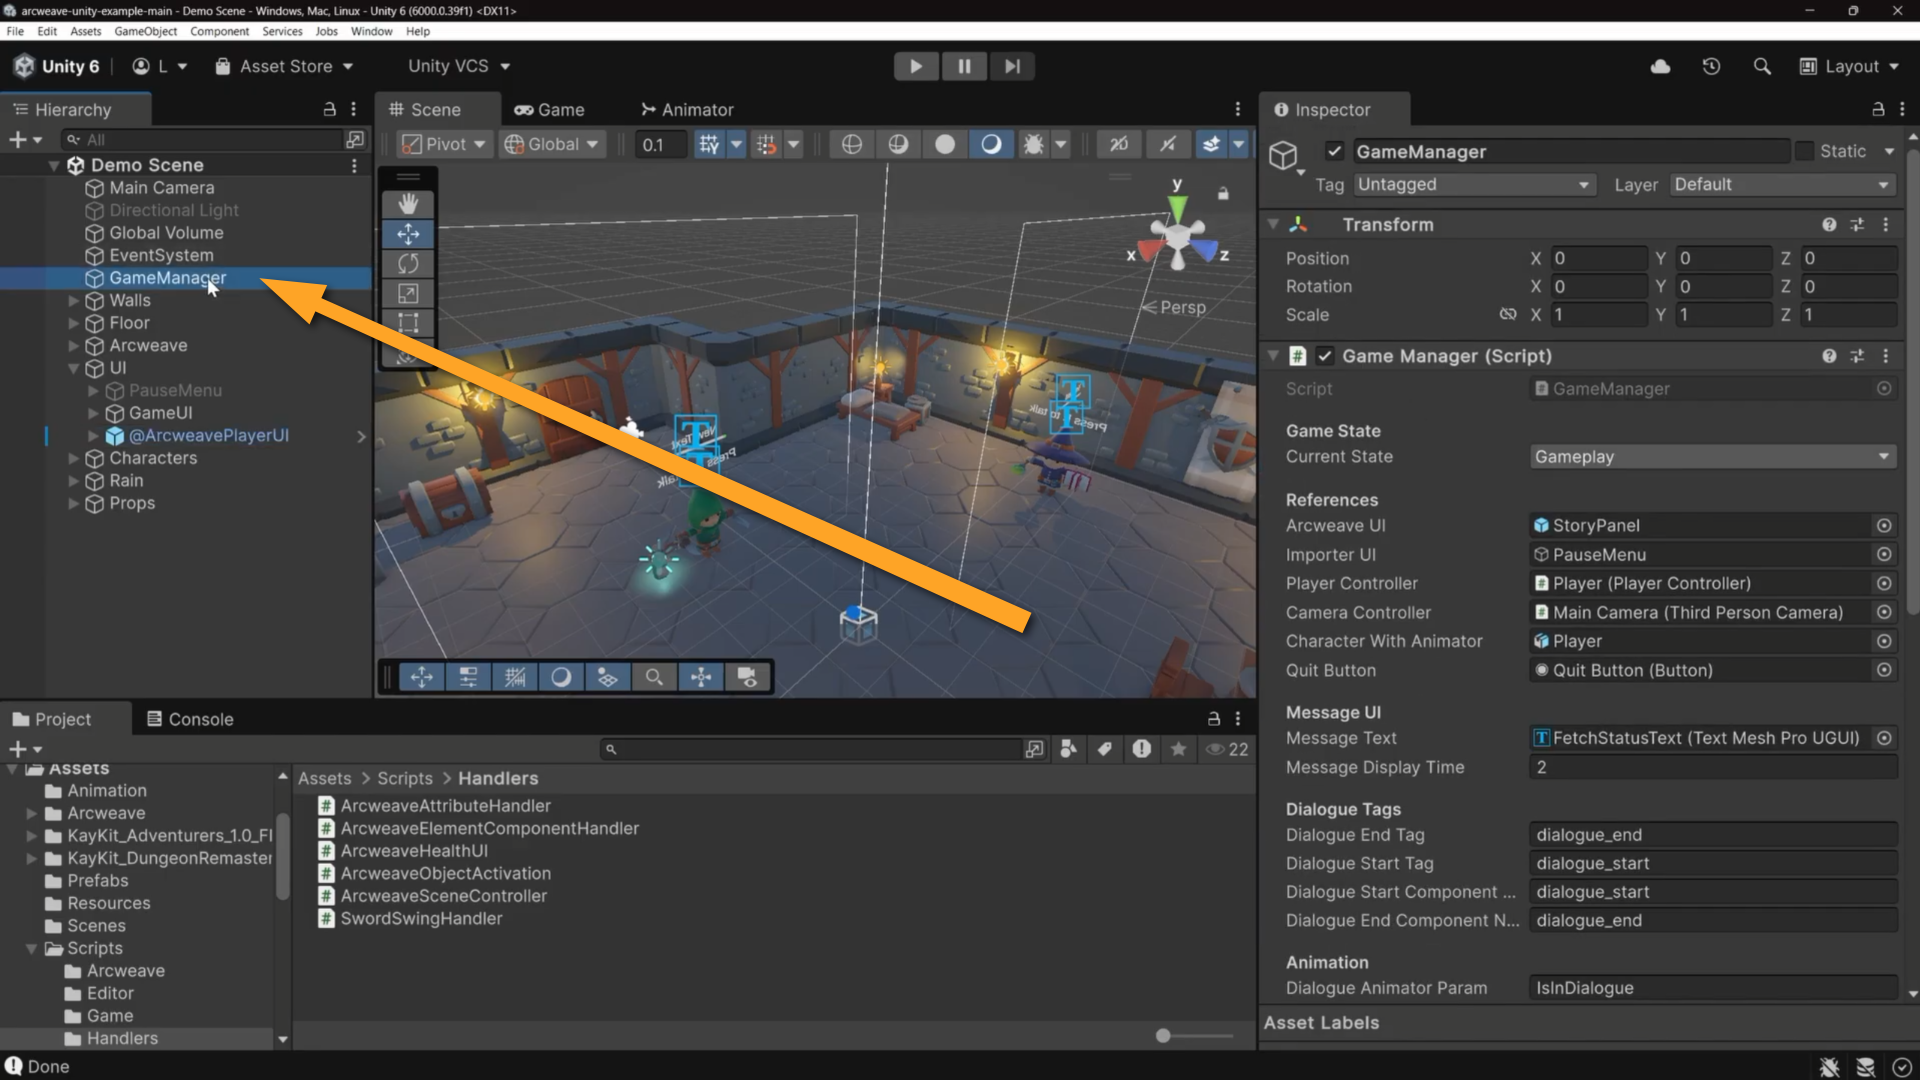
### GameManager component
Context: Arcweave docs > Tutorials > Unity > Unity tutorial | Part 4: The 3D demo project > GameManager GameObject > GameManager component
The first component of the GameManager GameObject is **GameManager**. It is a singleton with three states: `Gameplay`, `Dialogue`, and `Paused`. It holds references to all major scene objects (**ArcweaveUI**, **ImporterUI**, **PlayerController**, **ThirdPersonCamera**) and enables or disables them as the state changes.
Two string fields control how dialogue boundaries are identified:
- **dialogueStartTag**: defaults to `dialogue_start`
- **dialogueEndTag**: defaults to `dialogue_end`
These strings must match exactly the tags placed on elements in the Arcweave boards. There are also two optional fields:
- **dialogueStartComponentName**
- **dialogueEndComponentName**
When filled in, the demo first looks for an element carrying an Arcweave **component** with that name, and falls back to matching the tag value if no element has it. Use this when you prefer to mark entry and exit points with a dedicated component rather than a tag string.
When the state becomes `Paused`, triggered by pressing Escape, **GameManager** shows the **ImporterUI**.
### ArcweaveSceneController component
Context: Arcweave docs > Tutorials > Unity > Unity tutorial | Part 4: The 3D demo project > GameManager GameObject > ArcweaveSceneController component
The GameManager GameObject also has the component **ArcweaveSceneController**.
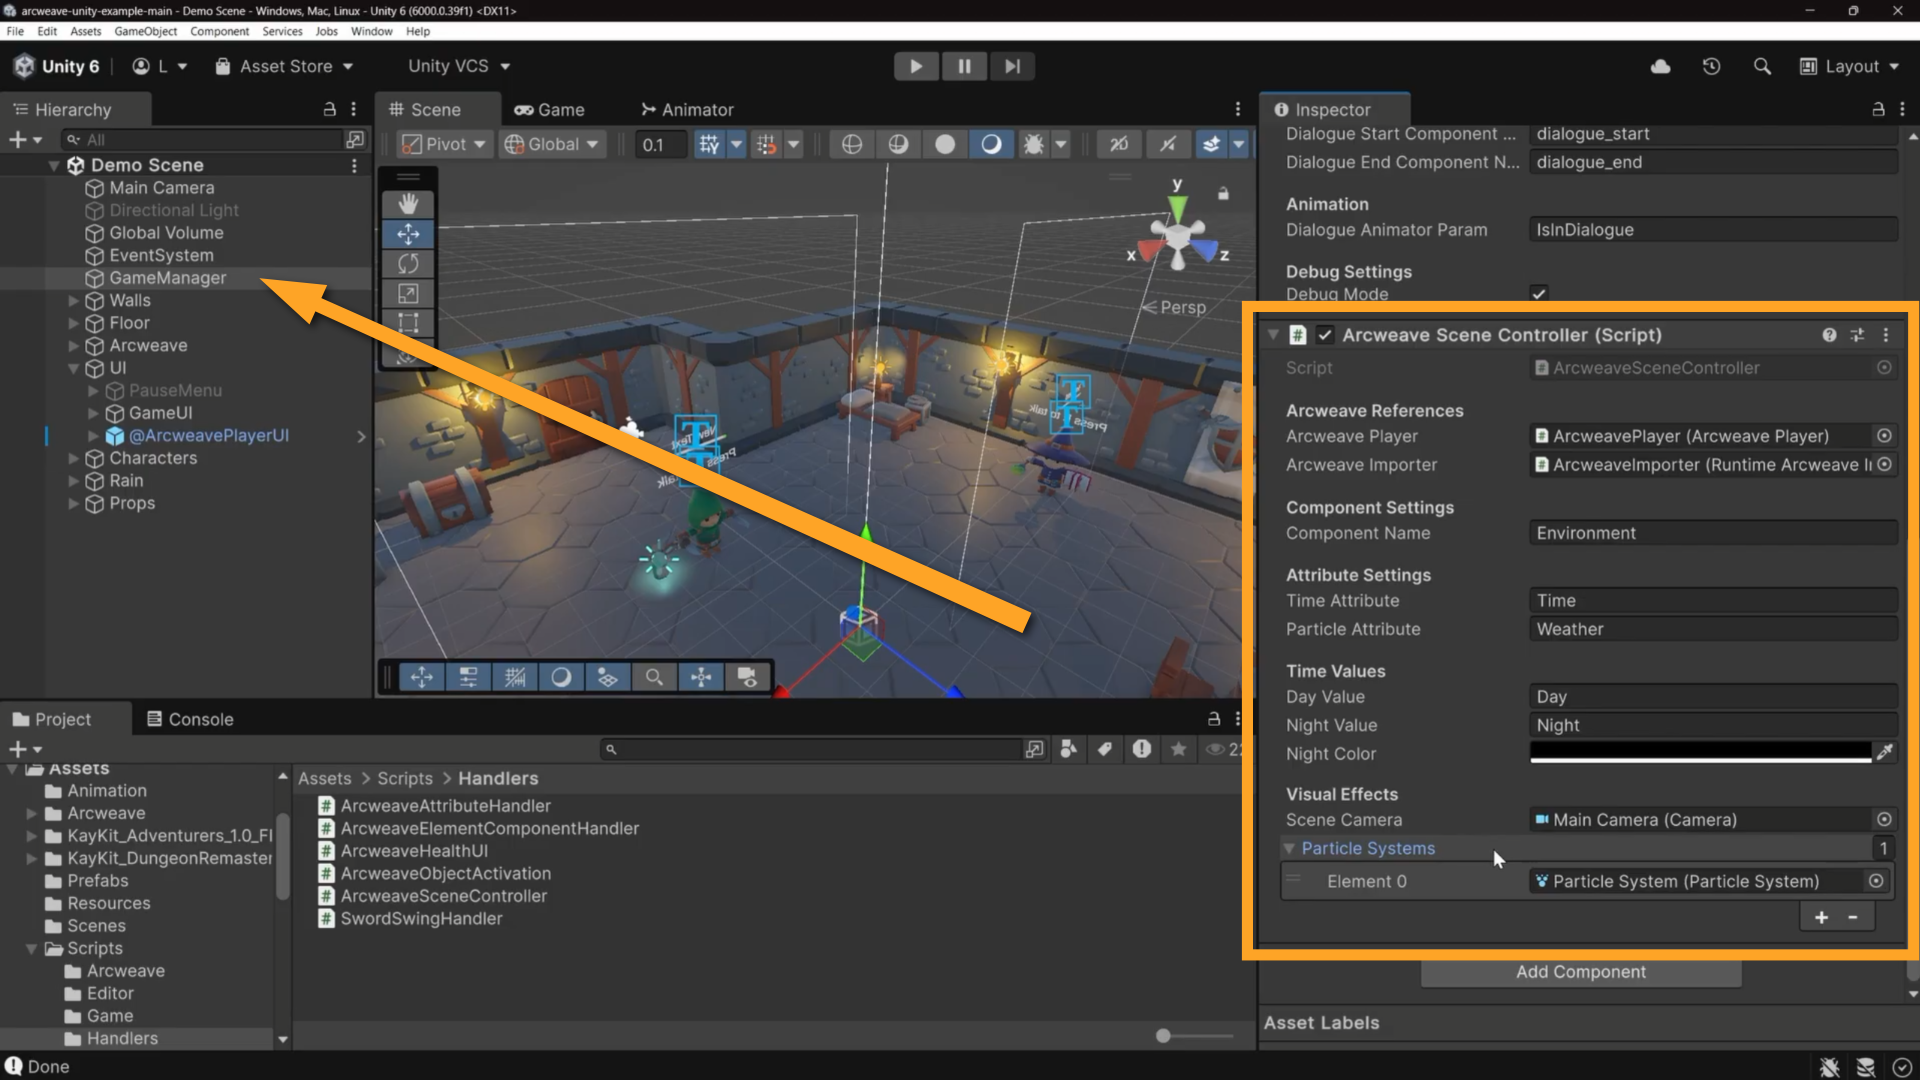
**ArcweaveSceneController** reads scene configuration from the Arcweave project on three occasions:
- When the scene starts
- When the narrative reaches an element with no outgoing paths (`onProjectFinish`)
- When a new project is imported (`onImportSuccess`)
It draws its **Time** (`Day`/`Night`) and **Weather** (`Clear`/`Rain`) values from the Arcweave project's **Environment** component. The component and these two Arcweave attributes link with the following fields in **ArcweaveSceneController**'s Inspector:
- **Component Name**: Set to `Environment`; the Arcweave component to read.
- **Time Attribute**: Set to `Time`; it controls the camera's clear flags; Skybox for day, solid black for night.
- **Particle Attribute**: Set to `Weather`; it controls whether particle systems in the scene are playing.
Change the attribute values in Arcweave's **Environment** component, reimport, and the environment updates automatically.
## NPC GameObjects
Context: Arcweave docs > Tutorials > Unity > Unity tutorial | Part 4: The 3D demo project > NPC GameObjects
Let's now have a look at the components of our NPC GameObjects.
### DialogueTrigger
Context: Arcweave docs > Tutorials > Unity > Unity tutorial | Part 4: The 3D demo project > NPC GameObjects > DialogueTrigger
Select any NPC in the Hierarchy and find the **DialogueTrigger** component in its Inspector.
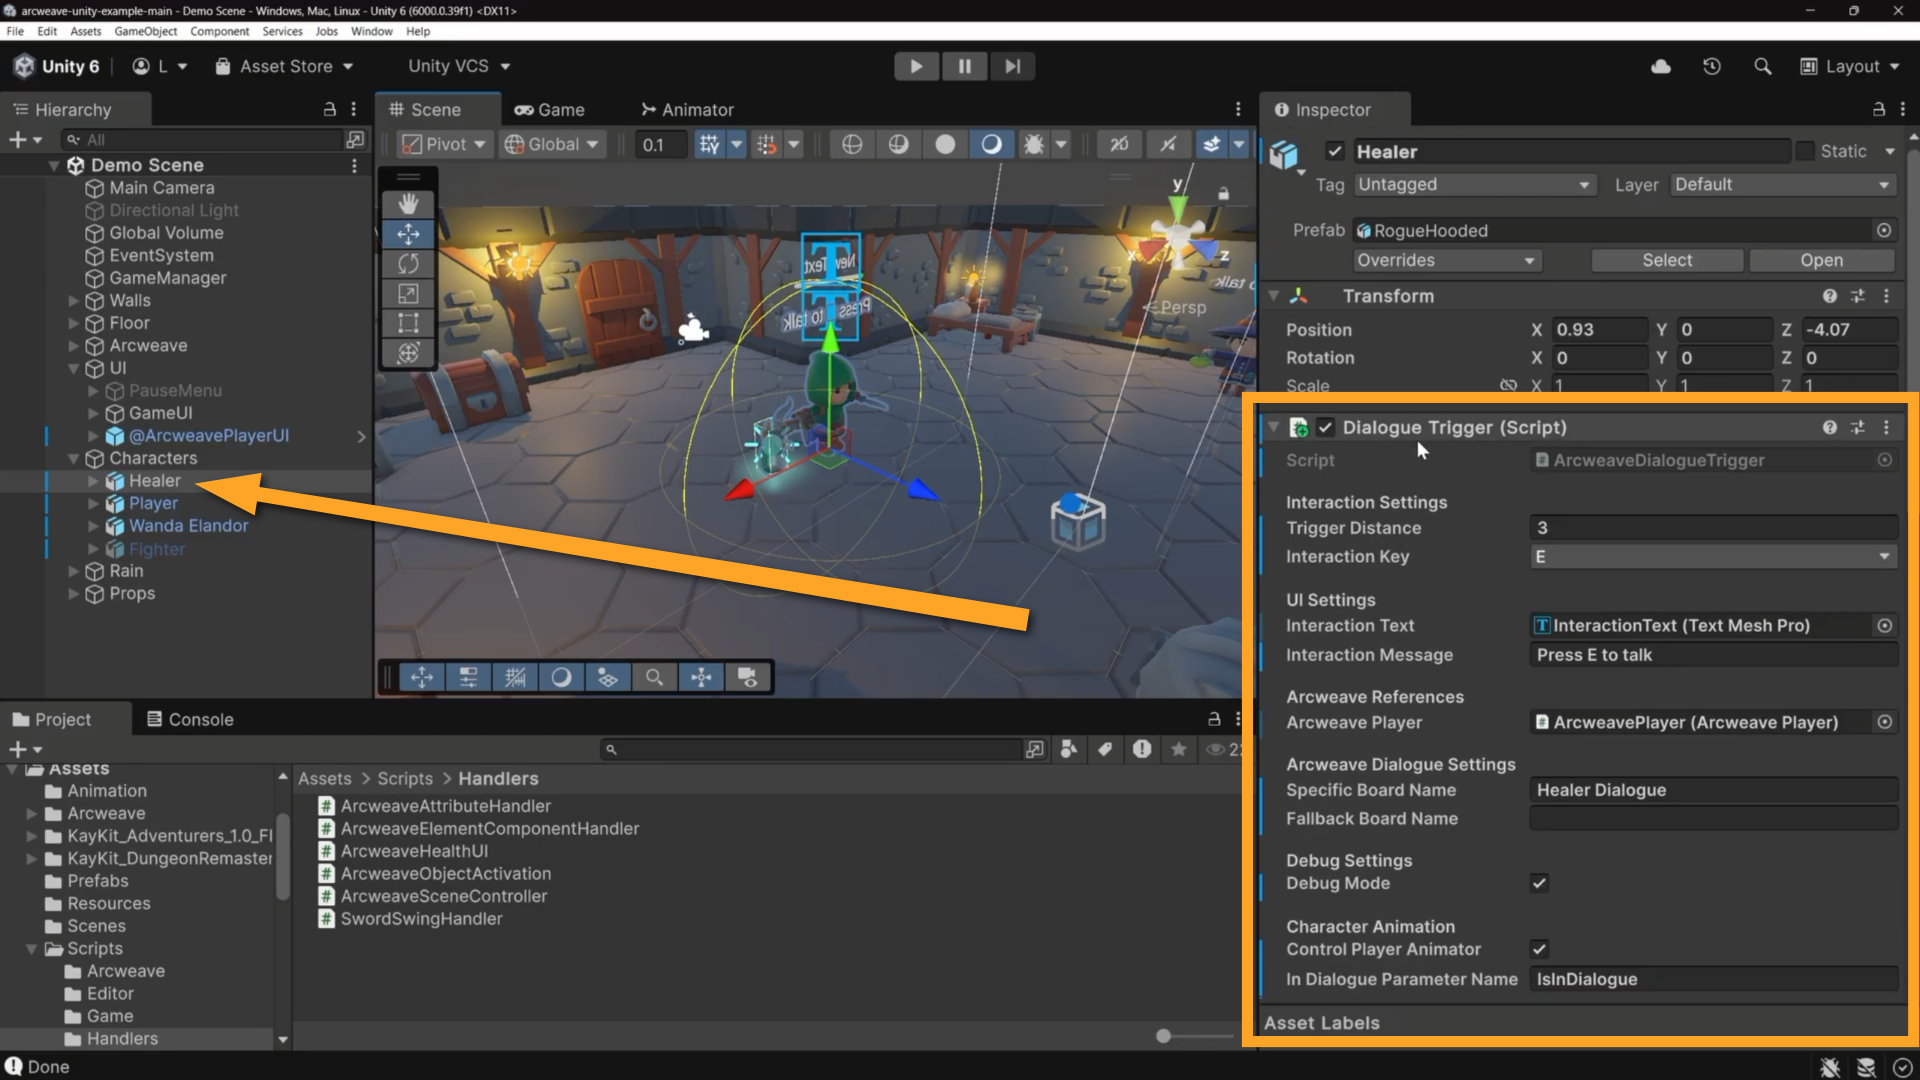
**DialogueTrigger** runs every frame, measuring the distance between the NPC and the player. When the player is close enough and presses the interaction key, this component starts the dialogue flow.
The key field is **Specific Board Name**. This string must match exactly the name of a board in the Arcweave project (`Healer Dialogue`, `Wanda Dialogue`, and so on). That single string is the only link between an NPC and their dialogue. If you rename a board in Arcweave without updating the Unity Inspector, the connection will break and the NPC will have nothing to say.
Other configurable fields:
- **Trigger Distance**: How close the player must be before the prompt appears
- **Interaction Key**: Key to press (default: E)
- **Interaction Text**: Reference to the 3D TextMeshPro label above the NPC's head
> ✅ With **Gizmos** enabled in the Scene view, select an NPC to see its trigger radius as a yellow wire sphere.
### ArcweaveHealthUI
Context: Arcweave docs > Tutorials > Unity > Unity tutorial | Part 4: The 3D demo project > NPC GameObjects > ArcweaveHealthUI
Select an NPC that has a health bar. Find **ArcweaveHealthUI** in its Inspector.
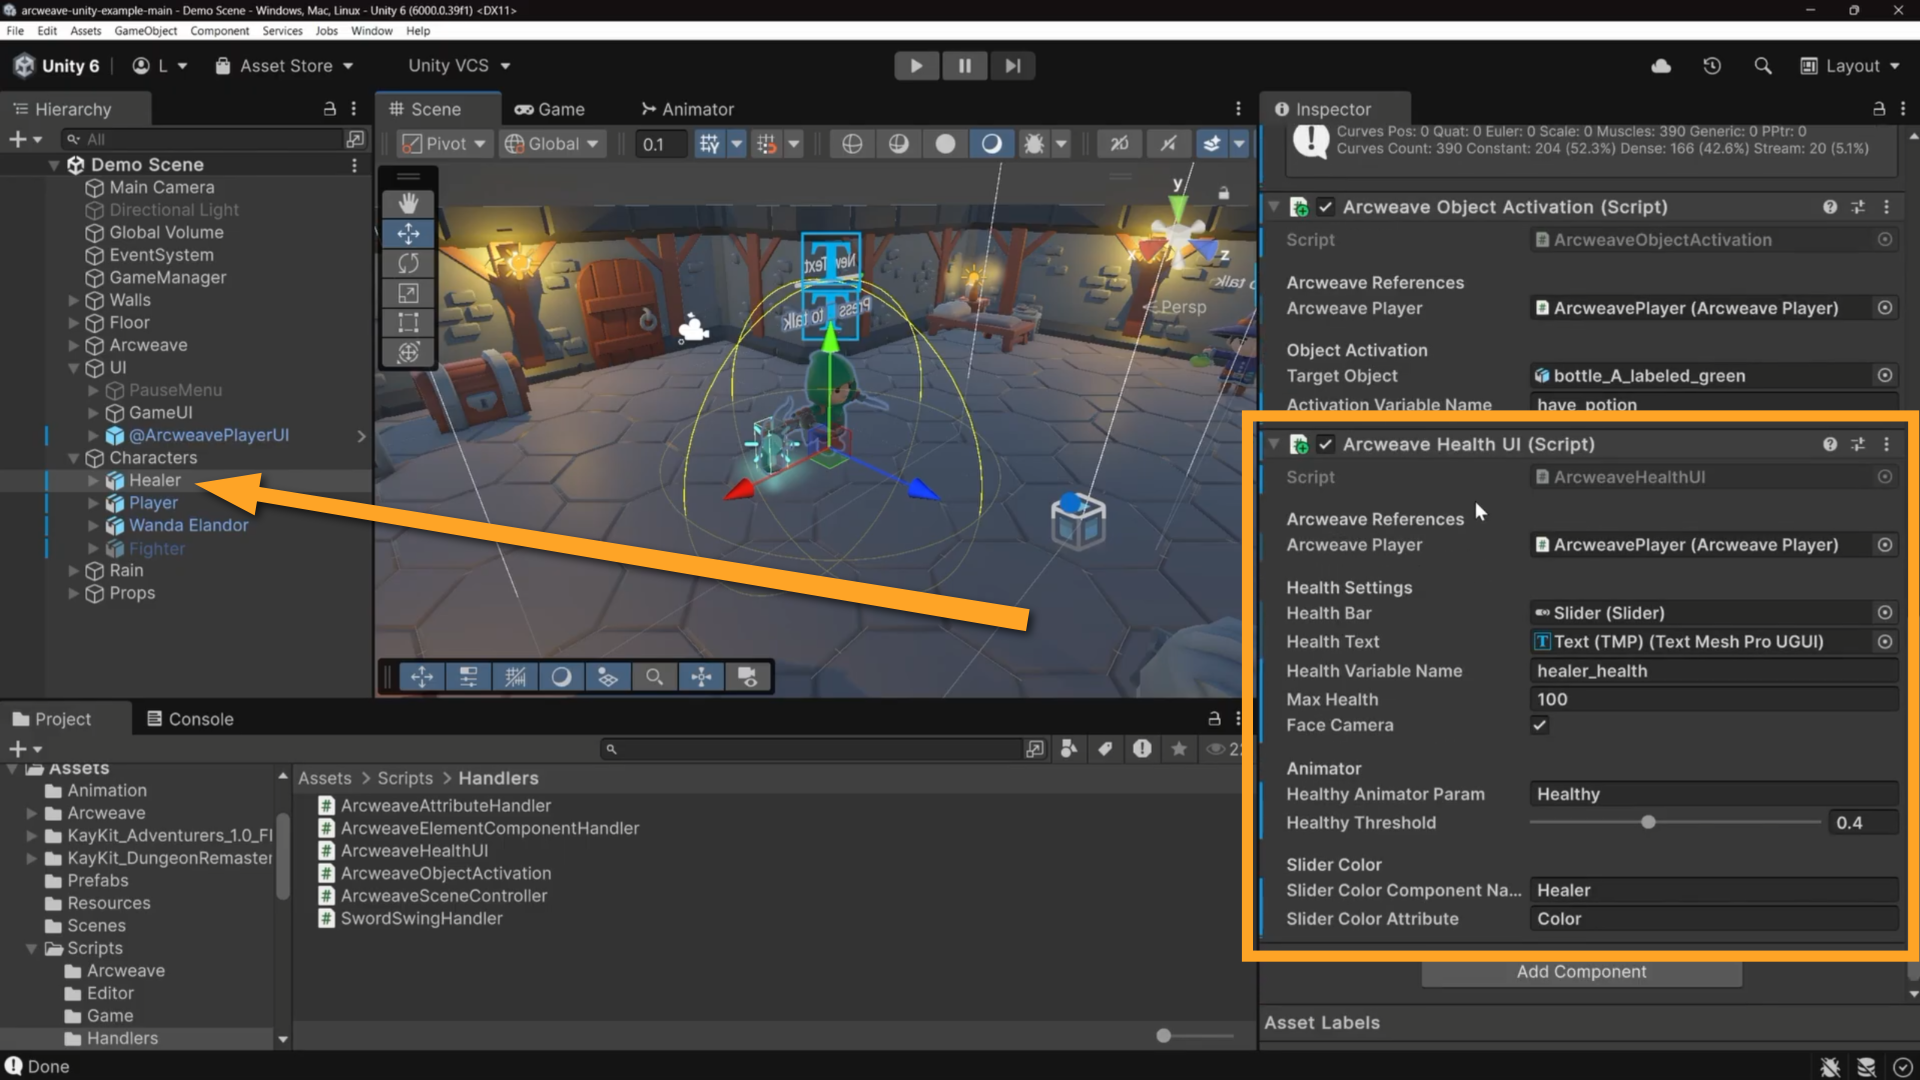
**ArcweaveHealthUI** reads a health variable from the Arcweave project every frame and pushes its value to a UI Slider.
The relevant fields are:
- **Health Variable Name**: the name of the Arcweave variable (e.g. `wanda_health`)
- **Health Bar**: the UI Slider above the NPC's head
- **Max Health**: sets the slider's full scale
The component also updates on `onProjectFinish` and `onImportSuccess` to stay in sync after imports.
A separate **Slider Color** section lets you point to an Arcweave component attribute containing an HTML color string: a hex value such as `#FF0000` or a color name such as `Red`. When the project loads, that color is applied to the slider fill. Change the color in Arcweave, reimport, and the bar updates; no code required.
### ArcweaveObjectActivation
Context: Arcweave docs > Tutorials > Unity > Unity tutorial | Part 4: The 3D demo project > NPC GameObjects > ArcweaveObjectActivation
Select an NPC that has **ArcweaveObjectActivation** in its Inspector.
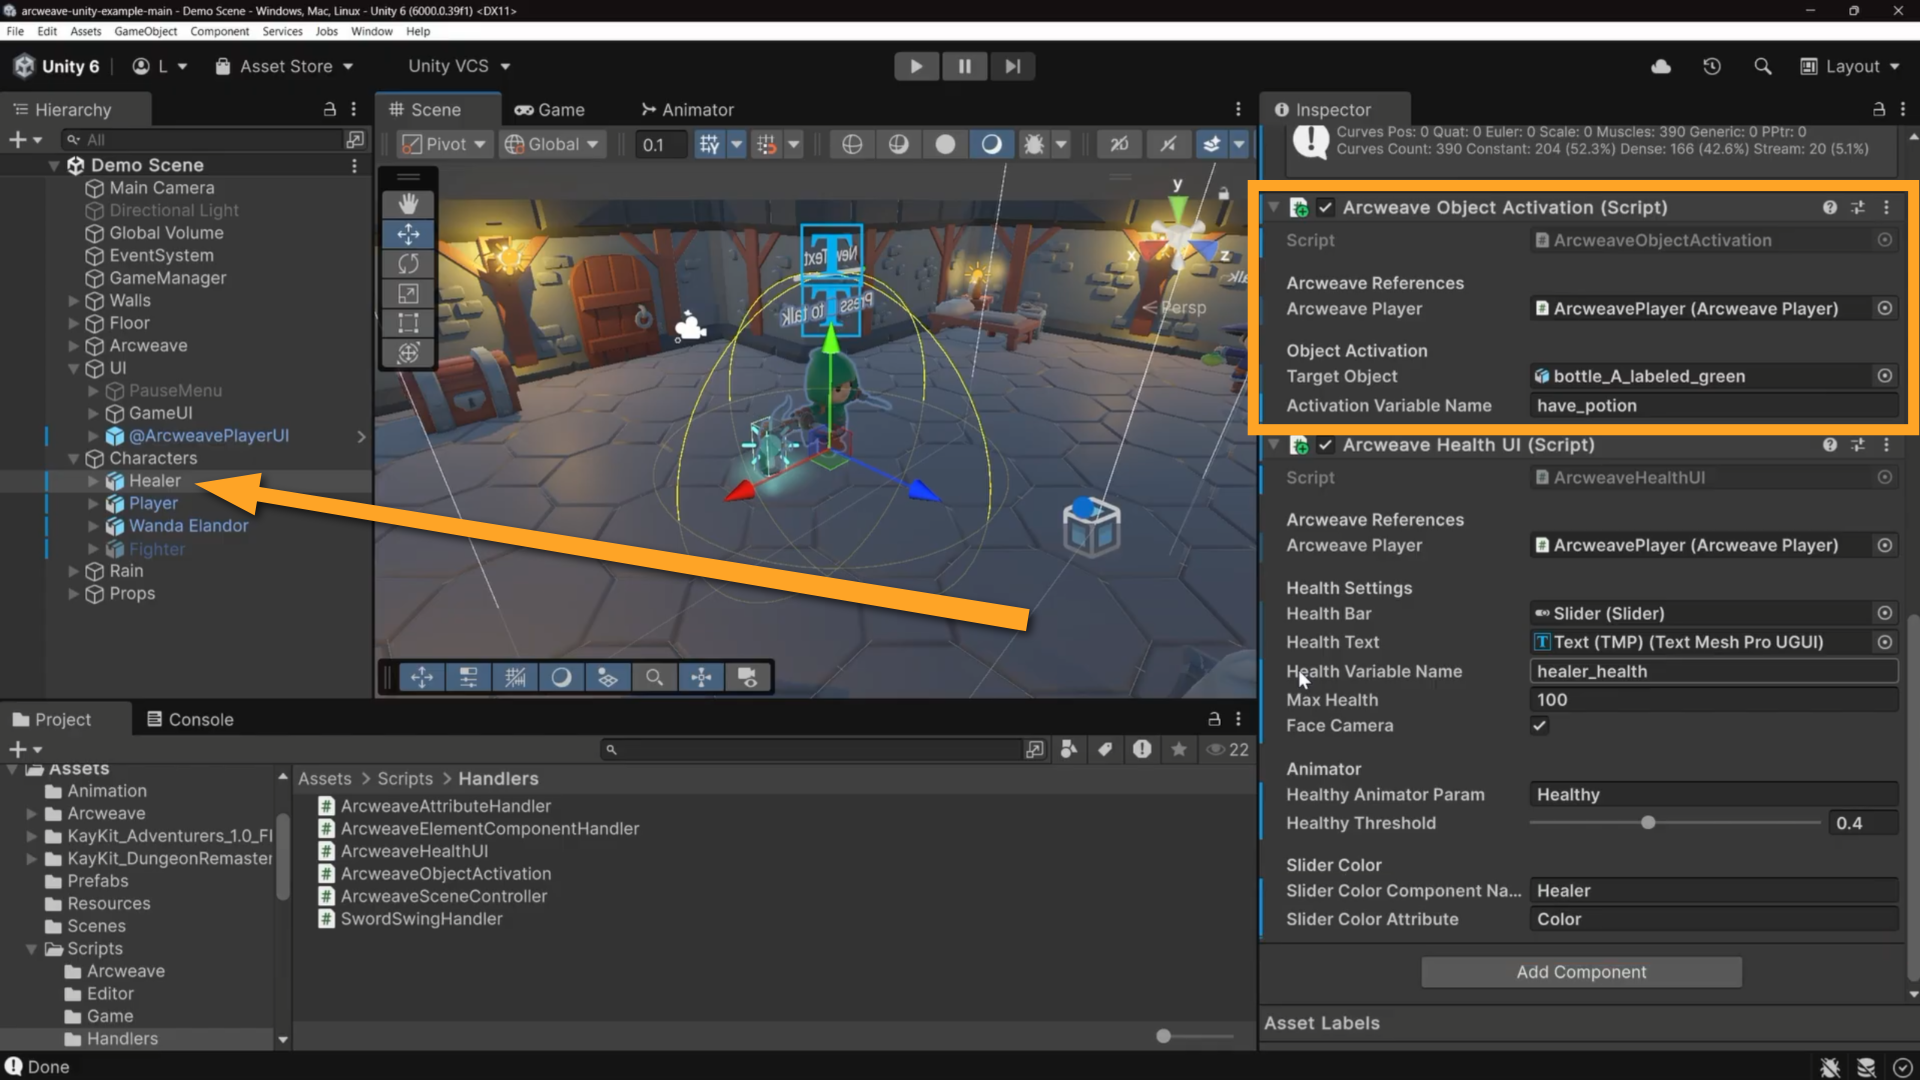
This component shows or hides a GameObject based on a boolean Arcweave variable. Two fields:
- **Target Object**: the GameObject to activate or deactivate
- **Activation Variable Name**: the boolean variable to watch
The logic is inverted: while the variable is `false`, the object is active. When the variable becomes `true`, the object is deactivated and stays inactive for the rest of the session, even if the variable later returns to `false`. A reimport (`onImportSuccess`) or `onProjectFinish` resets this.
## Extension patterns
Context: Arcweave docs > Tutorials > Unity > Unity tutorial | Part 4: The 3D demo project > Extension patterns
Beyond the five systems above, the demo includes two reusable patterns for connecting Arcweave data to custom Unity behavior.
> ℹ️ For specific details on how these scripts work, take a look at the README file in the [GitHub repository](https://github.com/arcweave/arcweave-unity-example) of the Unity example.
### ArcweaveAttributeHandler
Context: Arcweave docs > Tutorials > Unity > Unity tutorial | Part 4: The 3D demo project > Extension patterns > ArcweaveAttributeHandler
Go to the **Assets > Scripts > Handlers** folder and open **ArcweaveAttributeHandler**.
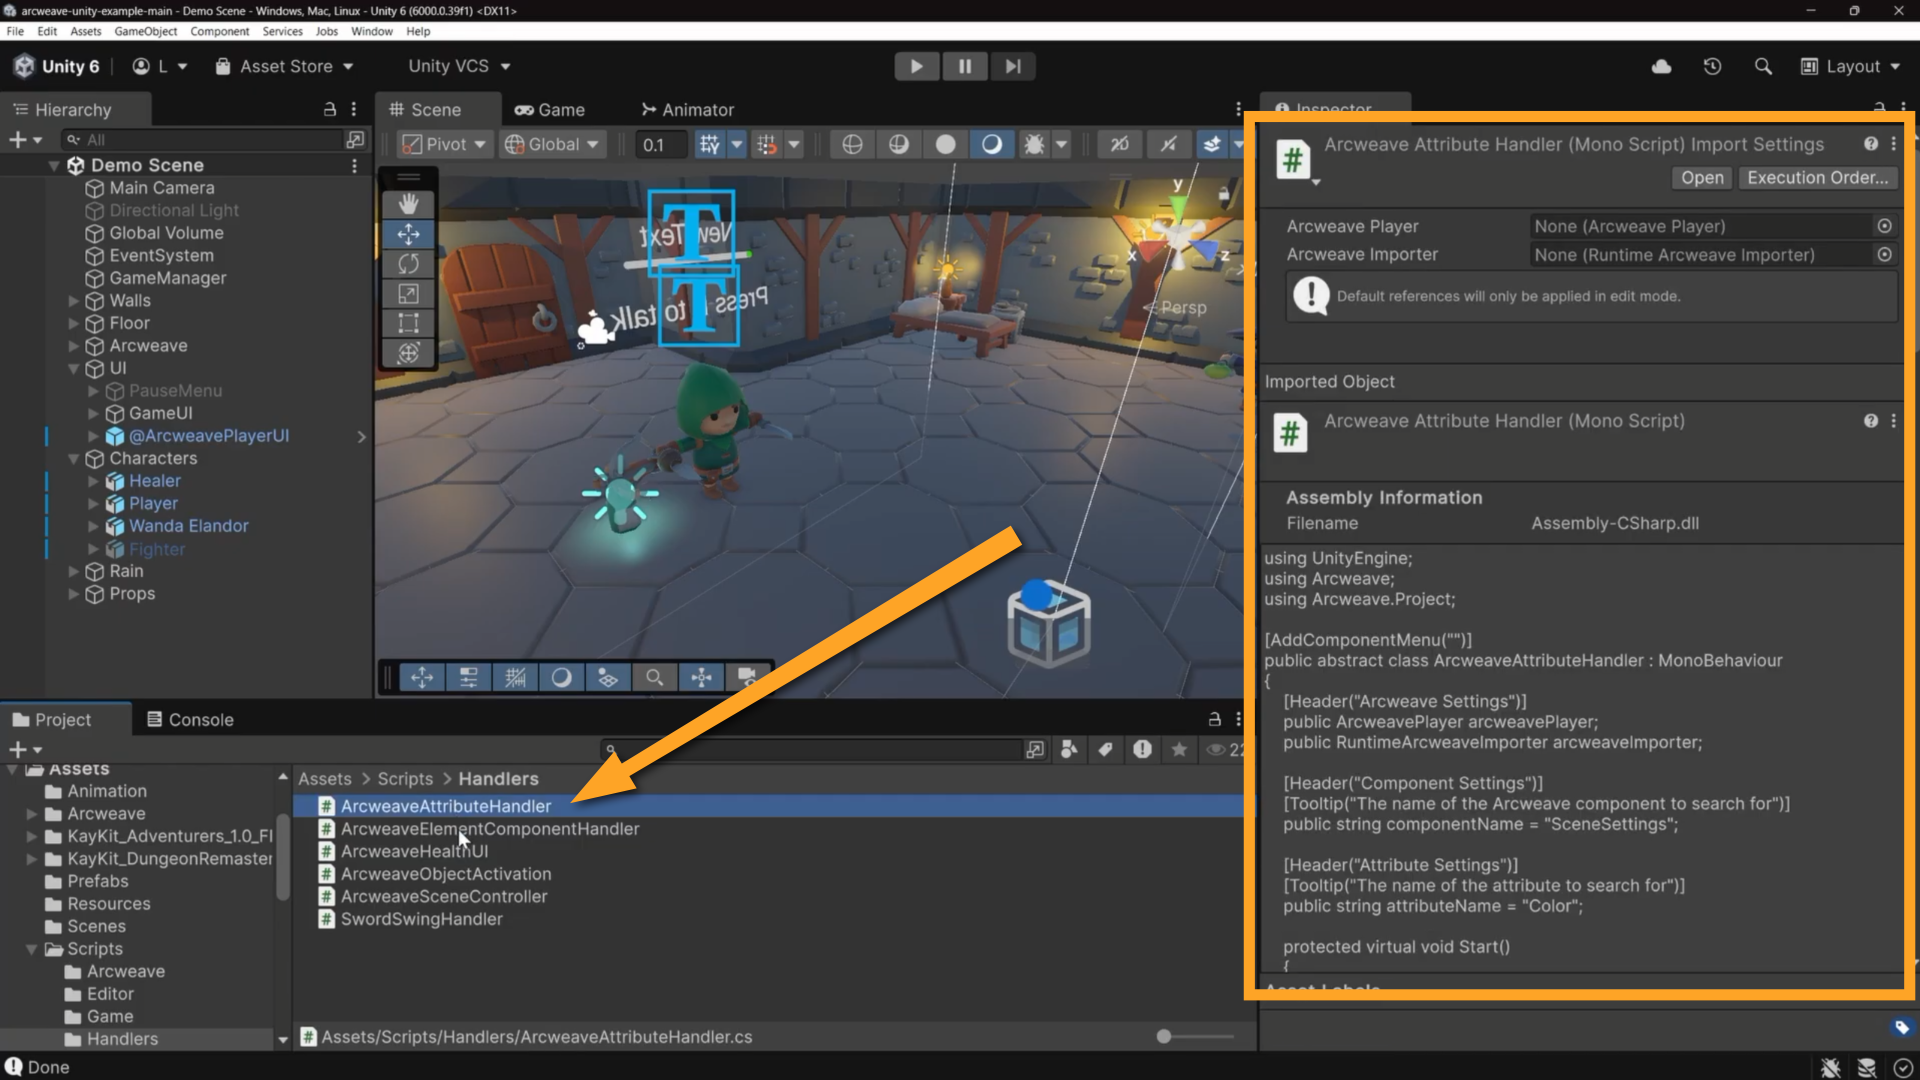
**ArcweaveAttributeHandler** is an abstract base class that handles the boilerplate of finding a component by name, finding an attribute by name, and subscribing to the right events. You subclass it, override one method, and implement your behavior.
ArcweaveHealthUI uses the same lookup pattern in its own code, without subclassing **ArcweaveAttributeHandler**: it reads a color string from an Arcweave attribute and applies it to the health bar slider fill. Any Arcweave attribute can drive any Unity object through a subclass of **ArcweaveAttributeHandler**. Full documentation is available in the GitHub repository.
### ArcweaveElementComponentHandler
Context: Arcweave docs > Tutorials > Unity > Unity tutorial | Part 4: The 3D demo project > Extension patterns > ArcweaveElementComponentHandler
Go to the **Assets > Scripts > Handlers** folder and open **ArcweaveElementComponentHandler**.
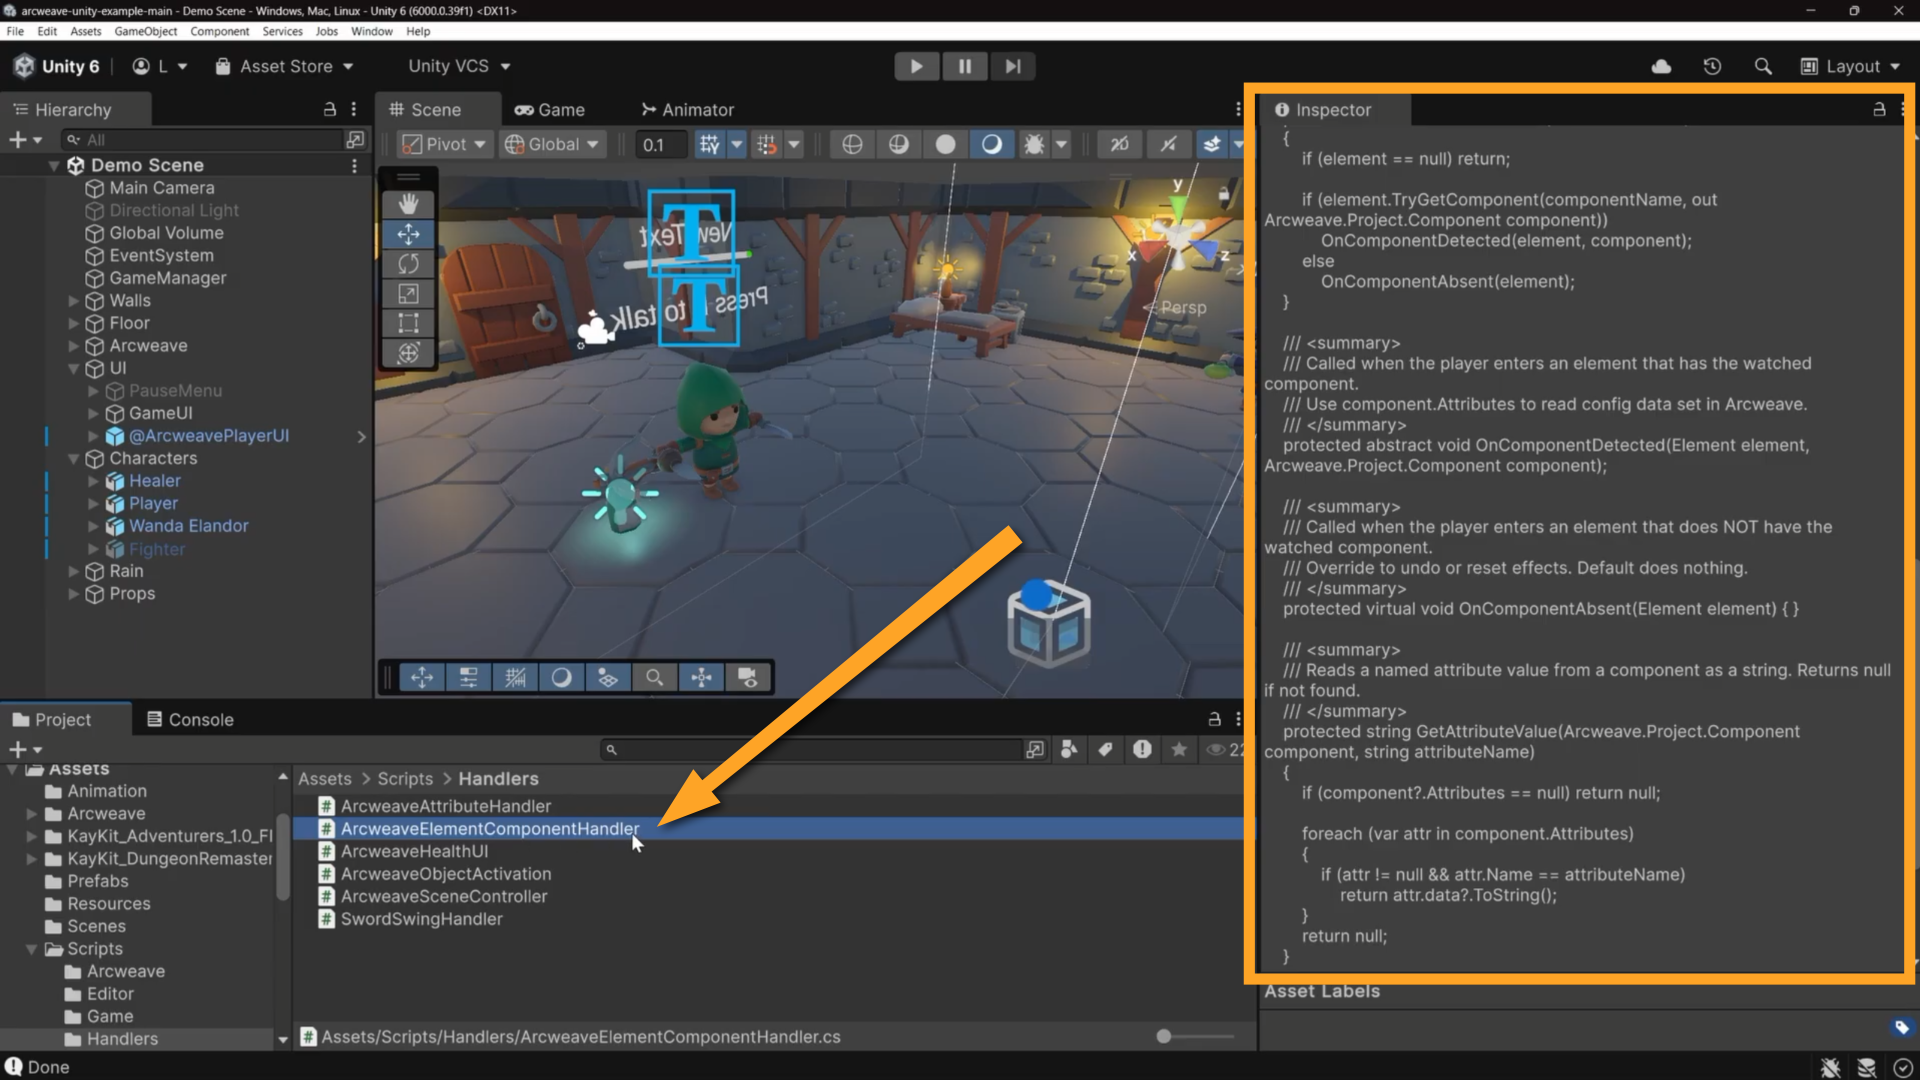
Where **ArcweaveAttributeHandler** reads data at project load time, **ArcweaveElementComponentHandler** reacts to components attached to specific dialogue **elements**, firing every time the player enters a new element during a conversation.
The concrete example in the scene is **SwordSwingHandler**. Its **Component Name** field is set to `attack`.
When the dialogue reaches an element that has the `attack` component attached, this handler fires and permanently enables the player's sword swing ability; left-click now triggers the attack animation.
The component's presence on the element is the trigger itself. This pattern is covered in more detail in the next tutorial.
> ℹ️ For specific details on how these scripts work, take a look at the README file in the [GitHub repository](https://github.com/arcweave/arcweave-unity-example) of the Unity example.
## How it all connects
Context: Arcweave docs > Tutorials > Unity > Unity tutorial | Part 4: The 3D demo project > How it all connects
The clearest way to understand these systems working together is to watch variables change during Unity's Play mode.

In the Project window, select the ArcweaveProjectAsset assigned to **ArcweavePlayer**'s **Aw** field (`ArcweaveProjectAssetV2` in **Assets > Arcweave**) so the Inspector shows the project's variables, then enter Play mode.
**Approaching the Healer.** **DialogueTrigger** measures distance every frame. While outside the trigger radius, no prompt appears.
**Stepping inside the radius.** The prompt appears. Press **E**.
Under the hood: **DialogueTrigger** called `GameManager.Instance.StartDialogue()`. **GameManager** switched to `GameState.Dialogue`, disabling **PlayerController** and **ThirdPersonCamera**, showing **ArcweaveUI**, and unlocking the cursor. Then **DialogueTrigger** ran `FindAndStartNPCDialogue()`, which searched the Arcweave project for a board named `Healer Dialogue`, found the element tagged `dialogue_start` inside it, and called `arcweavePlayer.Next()` on it. From there, `onElementEnter` fires and **ArcweavePlayerUI** updates, exactly as described in the earlier tutorials.
**Making a choice.** Watch `have_potion` in the Inspector. Click **"Ask for help"**, then **Continue**.
`have_potion` now becomes `true`. Each button click invokes the player's callback, which runs any Arcscript in the connection labels and enters the next element. When **ArcweavePlayerUI** displays the Healer's reply, it calls `RunContentScript()`, which executes the Arcscript `have_potion = true` embedded in that element's content.
**Ending the Healer dialogue.** The Healer's reply is tagged `dialogue_end`. When you click its button, **ArcweavePlayerUI** calls the active **DialogueTrigger**'s `EndDialogue()`, which calls `GameManager.Instance.EndDialogue()`. State returns to `Gameplay` and controls are restored. If the narrative reaches an element with no outgoing paths instead, `onProjectFinish` ends the dialogue the same way.
**Walking to Wanda.** Because `have_potion` is `true`, `GetOptions()` evaluated the condition on the "Give her the potion" path as true, and the button is visible after you examine her. If you had visited Wanda first, without the potion, this option would not have appeared.
**Giving the potion.** Watch `wanda_health` in the Inspector jump to 70. The health bar responds at the same frame; **ArcweaveHealthUI** polled the variable in `Update` and pushed the new value to the Slider.
# Unity tutorial | Part 5: Customize the template
Source: https://docs.arcweave.com/tutorials/unity/pt-5
Section: Tutorials > Unity
Description: Unity tutorial part 5, extending the template with new variables, components, and a dialogue board, then re-importing into Unity
Arcscript examples: Arcscript has no delimiters, so never wrap code in `${ }`, `{{ }}`, `<< >>` or similar markers. An `arcscript` code block contains only code: each line is one segment, and a branch condition is a single expression without `if` or `endif`. An `arcweave-html` code block is element or connection label content as Arcweave stores it, the HTML that the REST API and MCP server accept: `` for text, `
` for an empty line, and each Arcscript segment in its own `` block, with `<` written as `<`. An element passed to `visits()` is written as element mention markup; replace `ELEMENT_ID` with the element ID.
In this tutorial, you'll add a Fighter NPC who teaches the player combat, for a price. The result depends on whether the player can afford the training.
You'll use Arcweave components to mark where each dialogue starts and ends, and to signal Unity when to enable the attack animation.
## Expanded project
Context: Arcweave docs > Tutorials > Unity > Unity tutorial | Part 5: Customize the template > Expanded project
This tutorial focuses on expanding Arcweave's original Game Engine Example template. You can play the expanded version in the embedded window below and see its boards [here](https://arcweave.com/app/project/4OlzN3zlqP):
Embedded content: https://arcweave.com/embed/4OlzN3zlqP/play
## Video tutorial
Context: Arcweave docs > Tutorials > Unity > Unity tutorial | Part 5: Customize the template > Video tutorial
You can watch the video version of this tutorial below.
Video: https://www.youtube.com/watch?v=cuisZChIn5k
## Set up variables
Context: Arcweave docs > Tutorials > Unity > Unity tutorial | Part 5: Customize the template > Set up variables
Open your Arcweave project and navigate to the **Global variable dialog**. Add two new variables:
- `gold`: integer, default `50`. The player starts with exactly enough to pay for training.
- `sword_locked`: boolean, default `true`. The player starts without combat training.
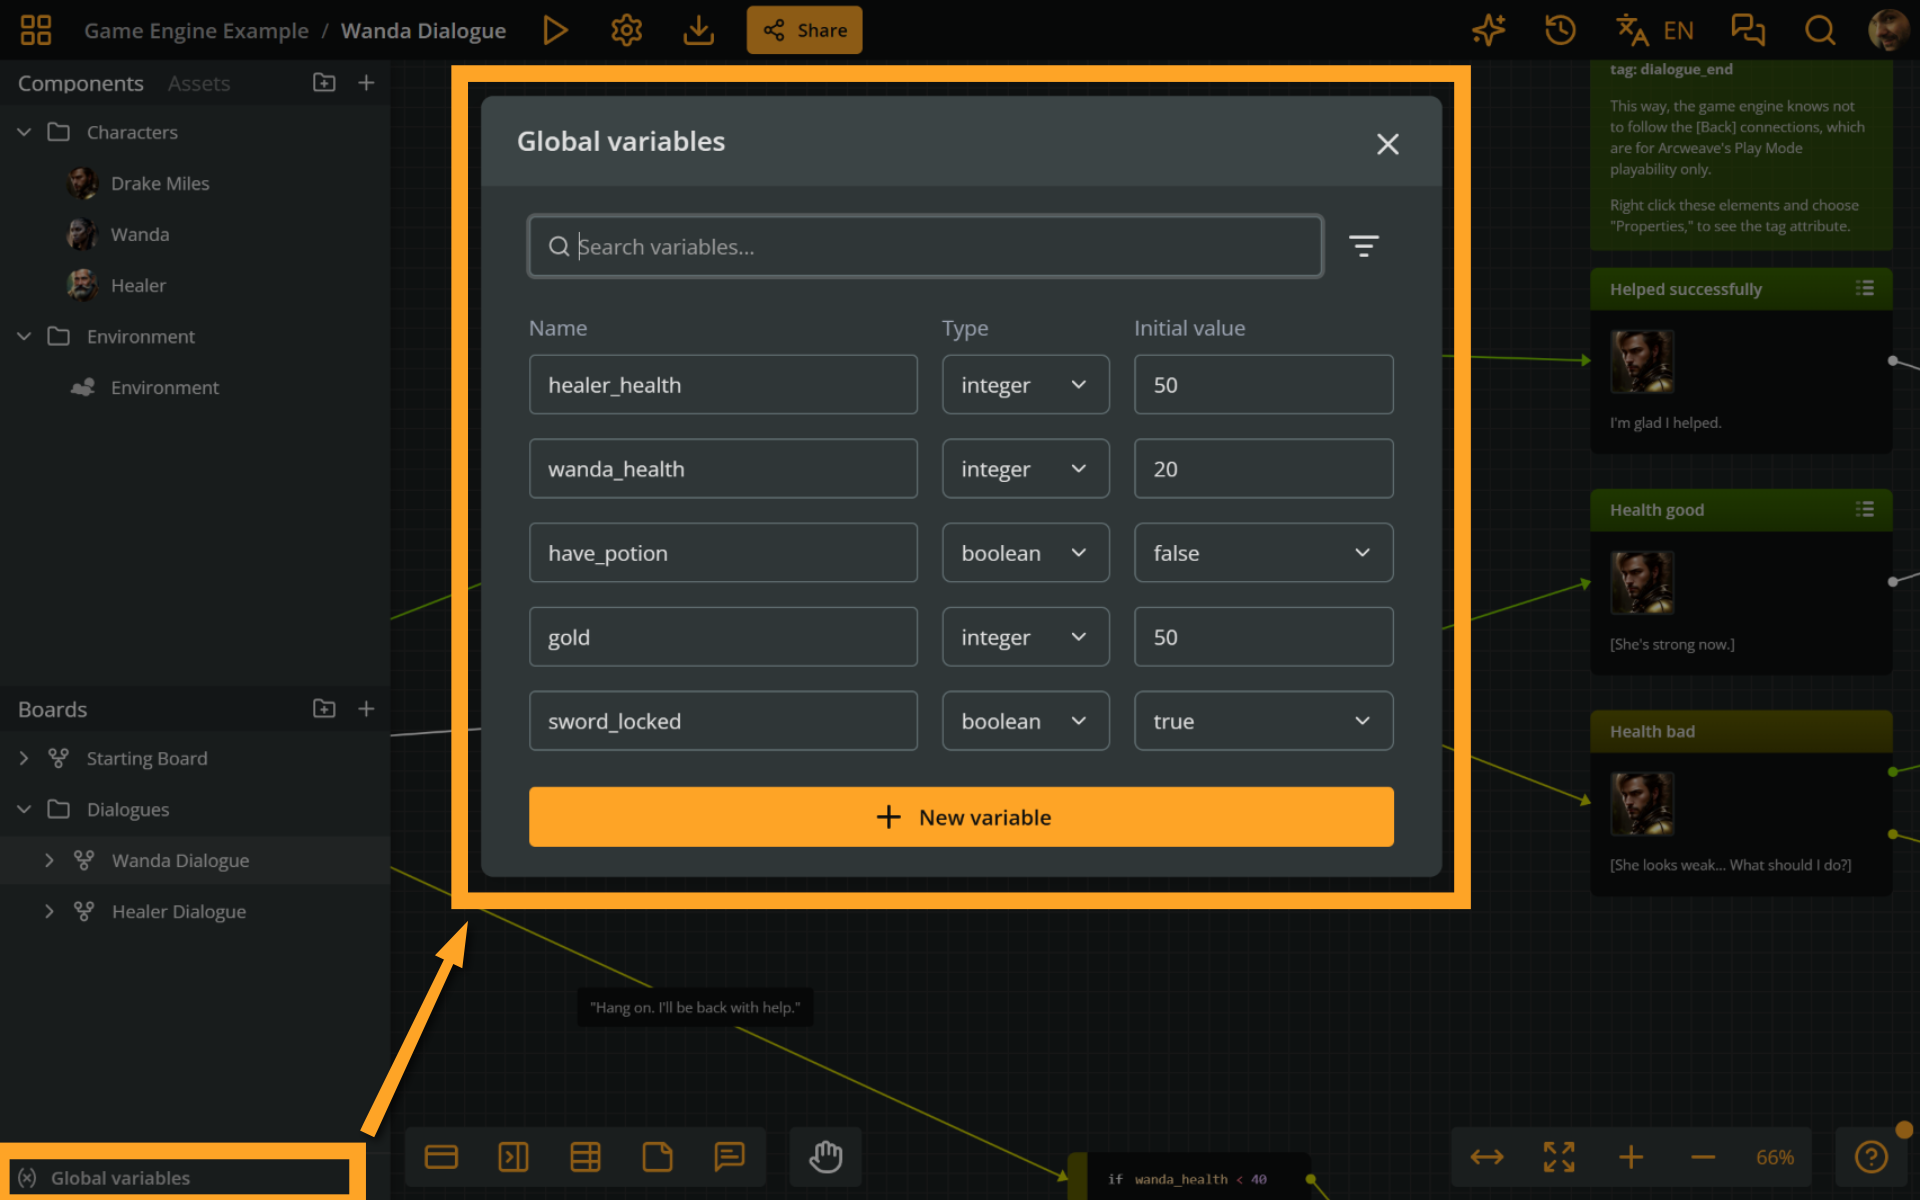
`sword_locked` is the narrative flag that tracks the player's state. It starts as `true` (not yet trained), drives the conditional text in the dialogue, and controls which branch the player can take.
## Create components
Context: Arcweave docs > Tutorials > Unity > Unity tutorial | Part 5: Customize the template > Create components
In the Components panel, create four components:
- `dialogue_start`: marks the element where a conversation begins. Unity looks for this component name, as configured on the `GameManager`, to find the entry point. No attributes needed.
- `dialogue_end`: marks the exit element. When Unity detects it, the dialogue closes and gameplay resumes.
- `Fighter`: the character component. Attach a portrait image here; the filename (e.g. `fighter.png`) must match the file you'll place in Unity's `Resources/` folder.
- `attack`: the gameplay signal. When the dialogue reaches an element with this component attached, a Unity script detects it and enables the attack ability on the player. No attributes needed, just the name matters.
> ⚠️ The component names' capitalization does not need to follow a specific protocol, but make sure you are consistent between your Arcweave and Unity projects. Here, we're using snake case, except for the `Fighter` component, in order for it to match the other character components.
Two components handle dialogue flow, one handles the portrait, and one triggers gameplay.
## Build the Fighter Dialogue board
Context: Arcweave docs > Tutorials > Unity > Unity tutorial | Part 5: Customize the template > Build the Fighter Dialogue board
In your **Dialogues** board folder, create a new board named **Fighter Dialogue**. This name must match the name Unity will use to locate the fighter dialogue tree.
### Dialogue starting element
Context: Arcweave docs > Tutorials > Unity > Unity tutorial | Part 5: Customize the template > Build the Fighter Dialogue board > Dialogue starting element
Let's now create the starting element of the fighter dialogue.
Create a new element inside the **Fighter Dialogue** board and attach the `Fighter` and `dialogue_start` components to it, in that order.
> ⚠️ Attach the `Fighter` component first. The dialogue UI shows the cover image of the element's first attached component as the portrait, so a marker component such as `dialogue_start` must come after the character component.
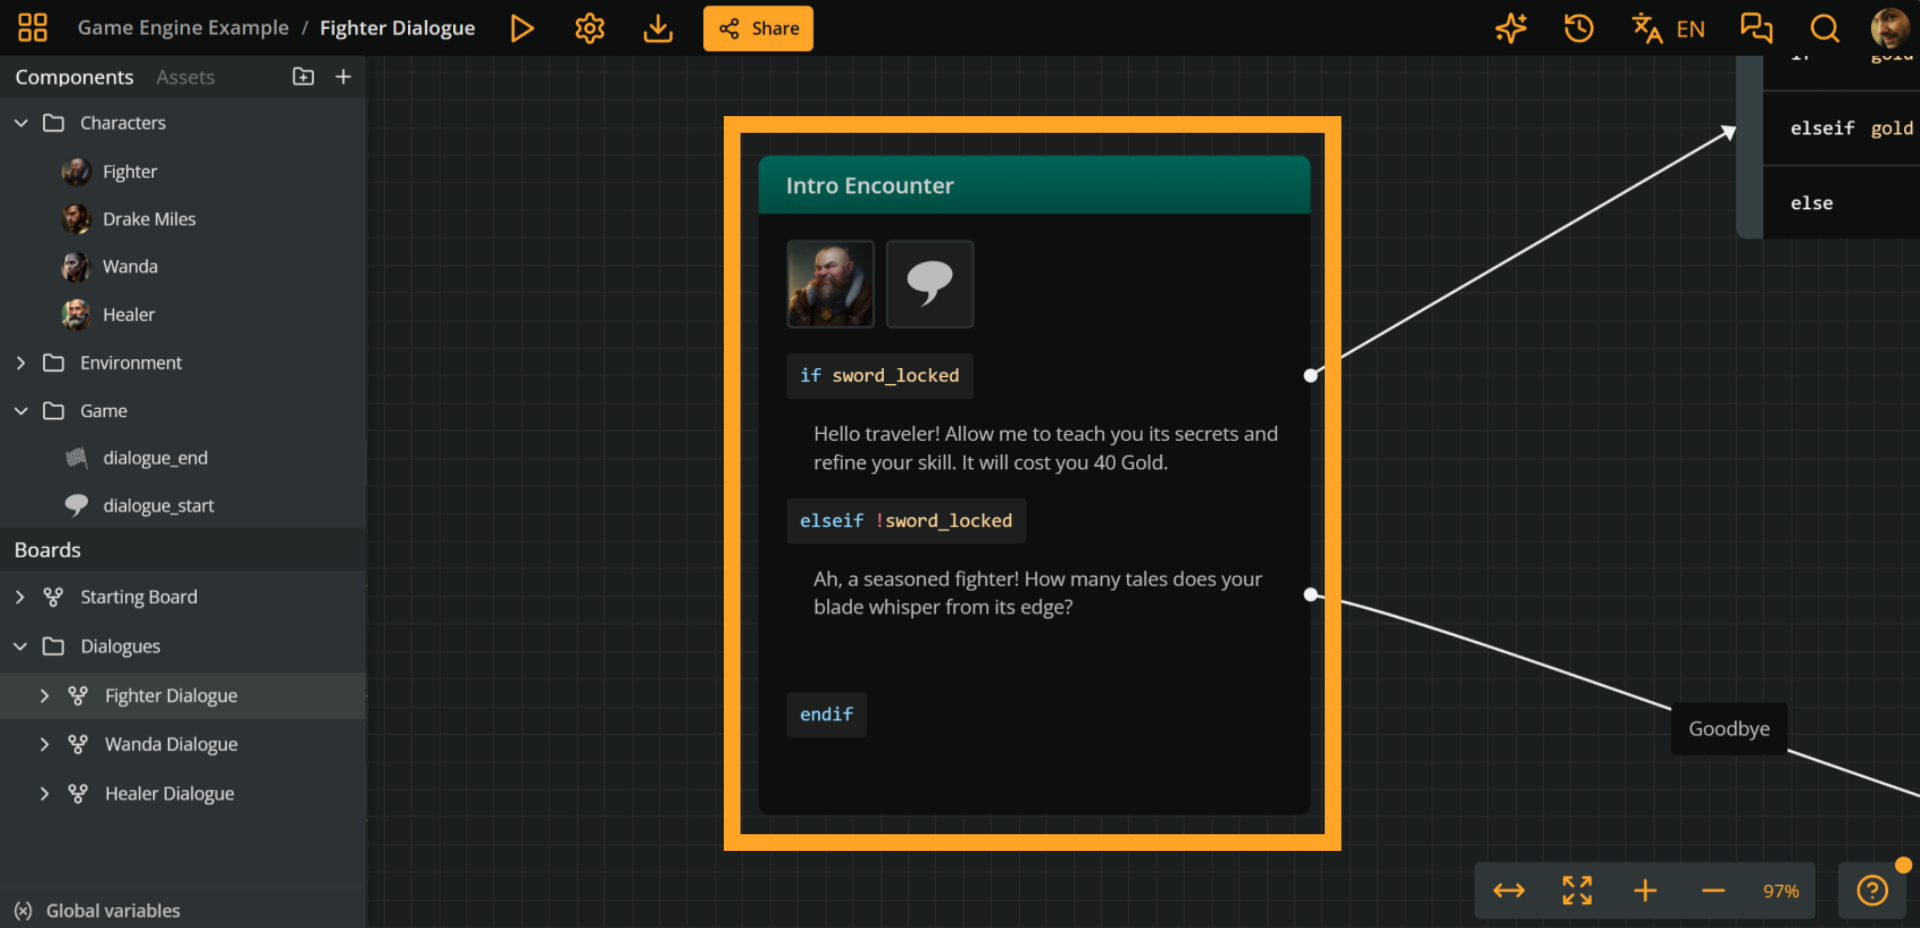
This element's content will use conditional text to show different dialogue depending on the player's state. Type in the following content and [Arcscript](https://docs.arcweave.com/project-items/arcscript#add-arcscript):
```arcweave-html
if sword_locked
I see your blade is untested. Allow me to teach you its secrets and refine your skill. It will cost you 50 Gold.
else
Ah, a seasoned fighter! How many tales does your blade whisper from its edge?
endif
```
Arcweave evaluates `sword_locked` and displays only the matching text.
### Player options
Context: Arcweave docs > Tutorials > Unity > Unity tutorial | Part 5: Customize the template > Build the Fighter Dialogue board > Player options
The dialogue's starting element has the following two output [connections](https://docs.arcweave.com/project-items/connections):
#### 1. Evaluating gold
Context: Arcweave docs > Tutorials > Unity > Unity tutorial | Part 5: Customize the template > Build the Fighter Dialogue board > Player options > 1. Evaluating gold
The first connection leads to a [branch](https://docs.arcweave.com/project-items/branches) that evaluates the player's gold and fighting skills:
- **If** the player has not been trained yet and also has the gold to pay for their training (i.e. `if gold >= 50 and sword_locked`), they then can choose to pay and unlock their fighting skills. This path leads to the training element (see further below).
- **Else if** the player has not been trained yet, but cannot afford it (i.e. `elseif gold < 50 and sword_locked`), the Fighter tells them to come back with more gold.
- **Else** (if the player has been already trained), they can boast about their fighting achievements.
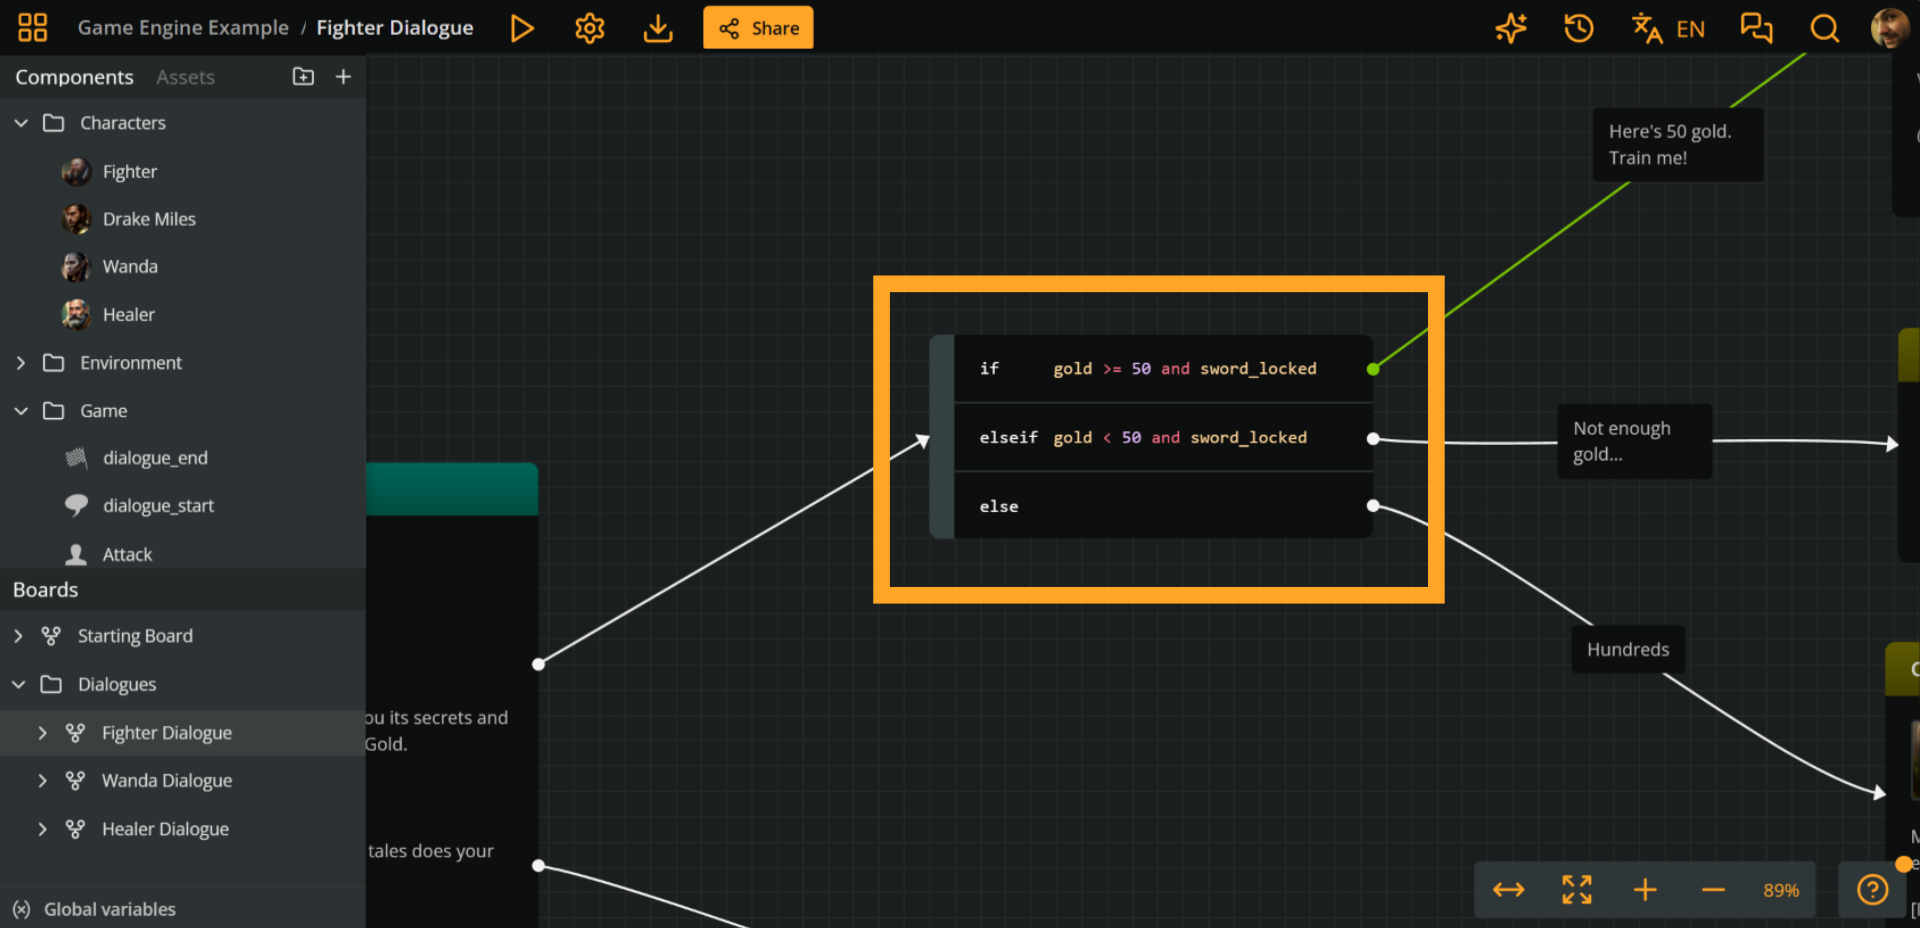
#### 2. Escape clause
Context: Arcweave docs > Tutorials > Unity > Unity tutorial | Part 5: Customize the template > Build the Fighter Dialogue board > Player options > 2. Escape clause
The second player option is an unconditional "goodbye" route, which leads to an element with the `dialogue_end` component attached.
> ✅ Including unconditional output connections safeguards your dialogue from running out of player options in cases where required conditions are not met.
### Training element
Context: Arcweave docs > Tutorials > Unity > Unity tutorial | Part 5: Customize the template > Build the Fighter Dialogue board > Training element
The first output of our [evaluating branch](https://docs.arcweave.com/tutorials/unity/pt-5#_1-evaluating-gold) leads to this element, where training takes place.
#### Variables
Context: Arcweave docs > Tutorials > Unity > Unity tutorial | Part 5: Customize the template > Build the Fighter Dialogue board > Training element > Variables
Type the following Arcscript in the element's content:
```arcscript
gold -= 50
sword_locked = false
```
50 gold coins are deducted and `sword_locked` flips to `false`. From this point on, the [dialogue's starting element](https://docs.arcweave.com/tutorials/unity/pt-5#dialogue-starting-element) shows the "seasoned fighter" text instead of the training offer.
`sword_locked` is the narrative variable: it shapes the dialogue text and determines which branch path the player can take.
To notify Unity to unlock the attack animation, attach the `attack` component to the training element. See right below.
#### Components
Context: Arcweave docs > Tutorials > Unity > Unity tutorial | Part 5: Customize the template > Build the Fighter Dialogue board > Training element > Components
Attach the following components to the training element: `Drake Miles`, `attack`, and `dialogue_end`.
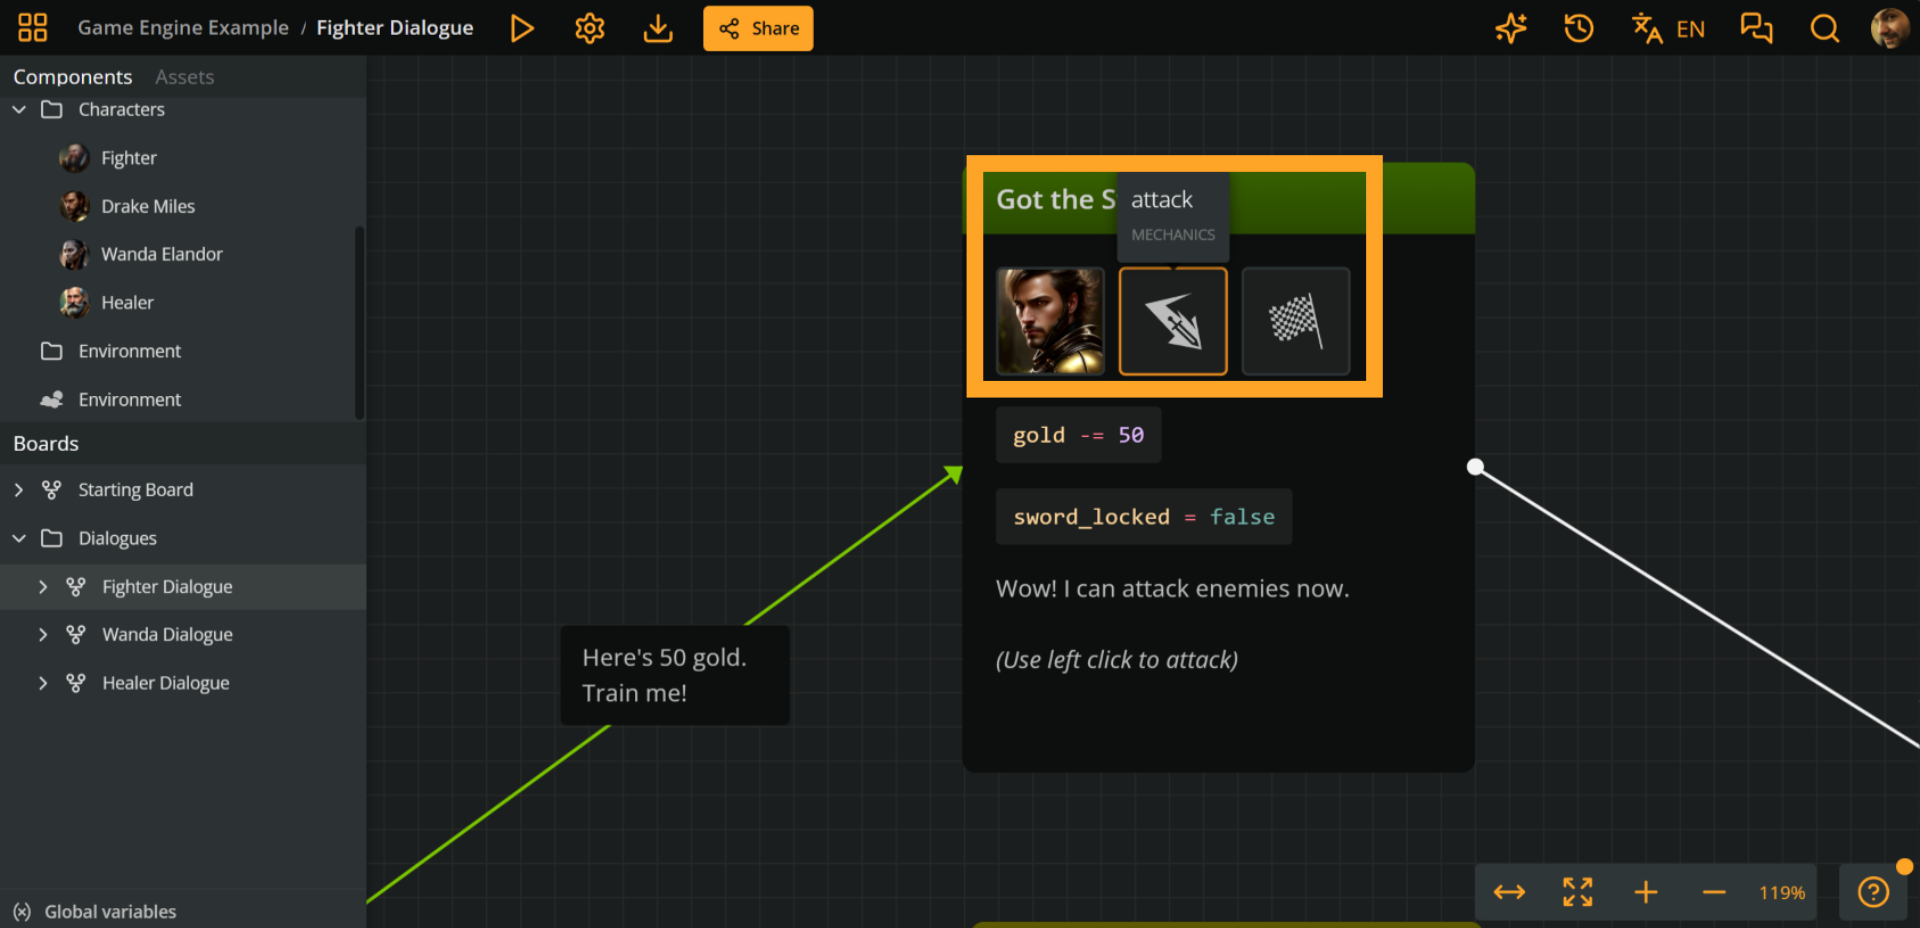
This is why:
- `Drake Miles`: Since the player is the speaker, we attach the `Drake Miles` component.
- `attack`: To trigger Unity to unlock the fighting player skill (and its animation), attach the `attack` component to the training element; this is the event Unity will listen for.
- `dialogue_end`: Although the flow continues in the Arcweave project (the training element has an output connection leading to a jumper), we want the dialogue to end here in our Unity game.
## Export from Arcweave
Context: Arcweave docs > Tutorials > Unity > Unity tutorial | Part 5: Customize the template > Export from Arcweave
1. Go to **Export**.
2. Select the **Engine** tab.
3. Select **Export for Unity**.
4. Check **Include assets**.
5. Press **Export** and save the compressed `.zip` file to your drive.
6. Extract the `.zip` file and notice the `project.json` file it includes. You'll use it in the next step, below.

## Import into Unity
Context: Arcweave docs > Tutorials > Unity > Unity tutorial | Part 5: Customize the template > Import into Unity
### Import new JSON
Context: Arcweave docs > Tutorials > Unity > Unity tutorial | Part 5: Customize the template > Import into Unity > Import new JSON
1. In the Unity editor, import the new `.json` file by dragging it from the file explorer into the project folder **Assets > Arcweave**.
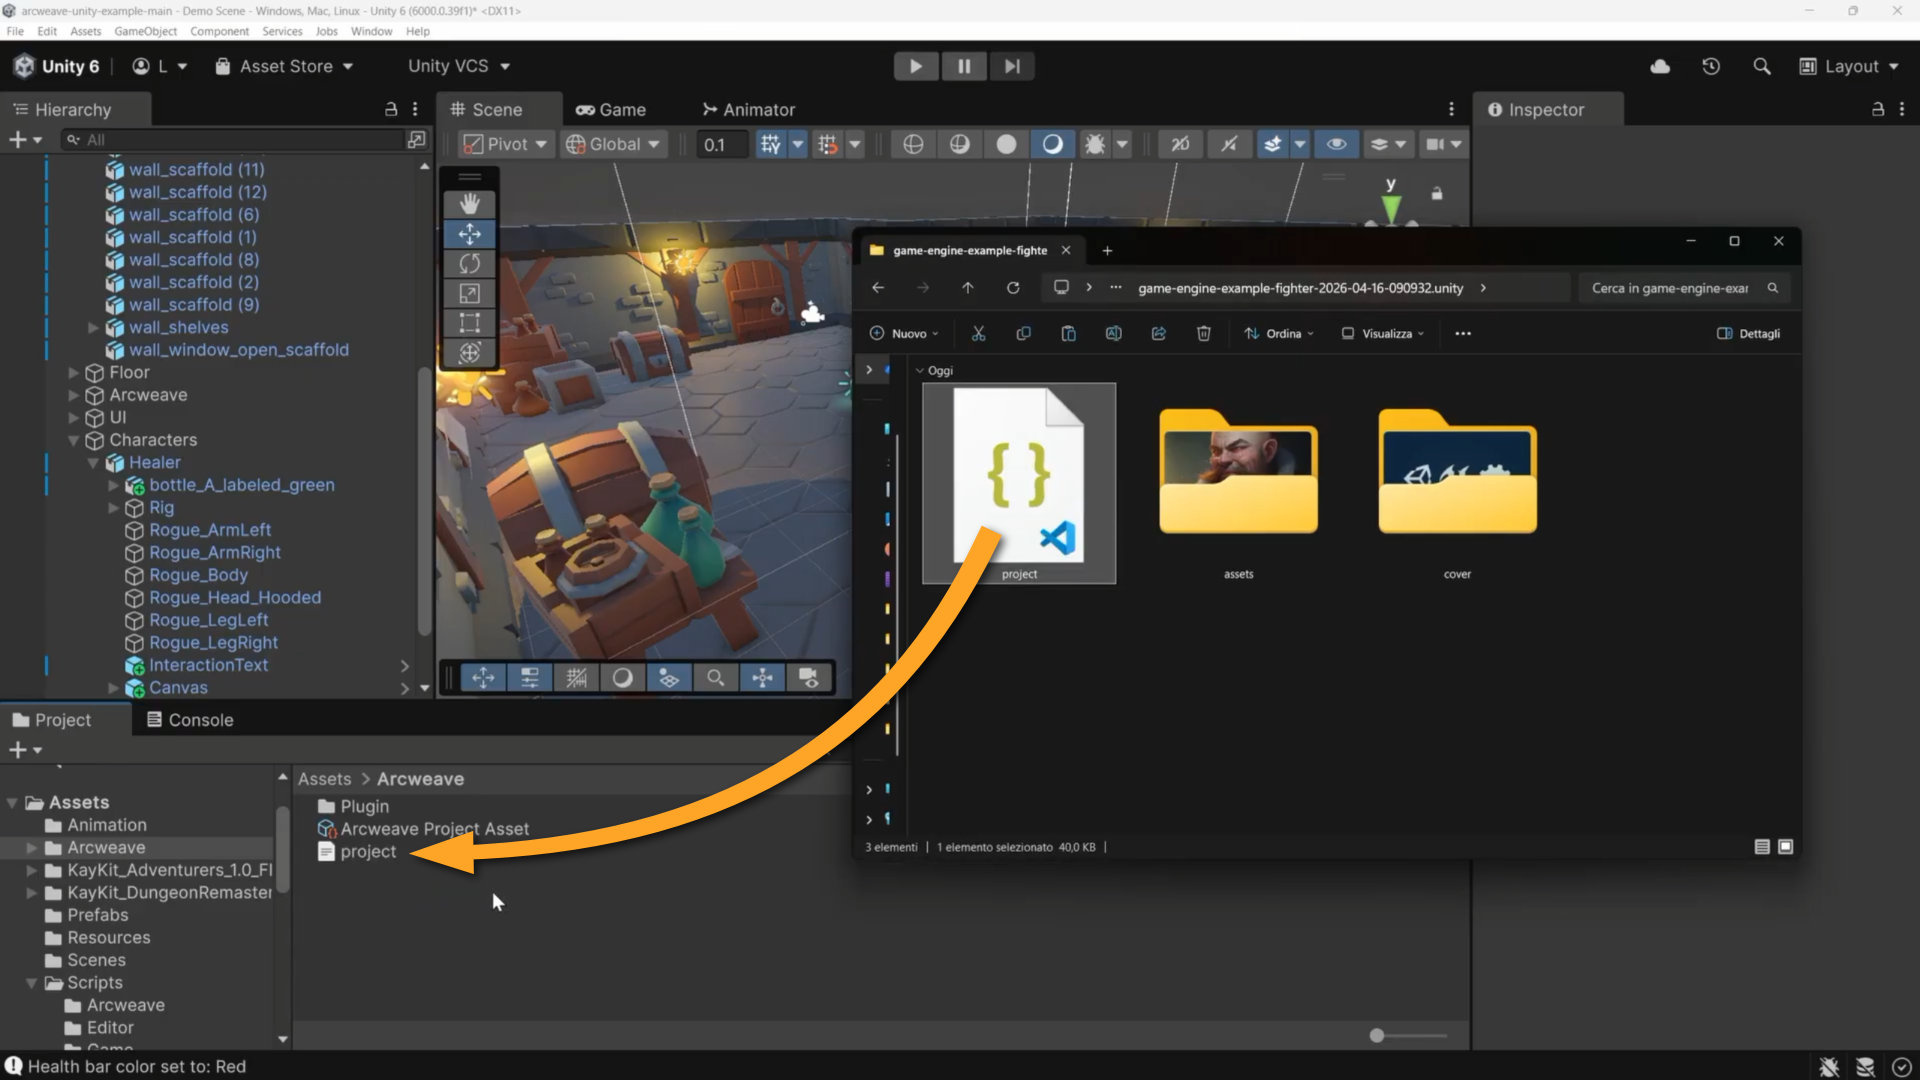
2. Select the `ArcweaveProjectAsset` and notice its field **Project JSON File** in the Inspector. Drag the new `.json` file from **Assets > Arcweave** into that field.
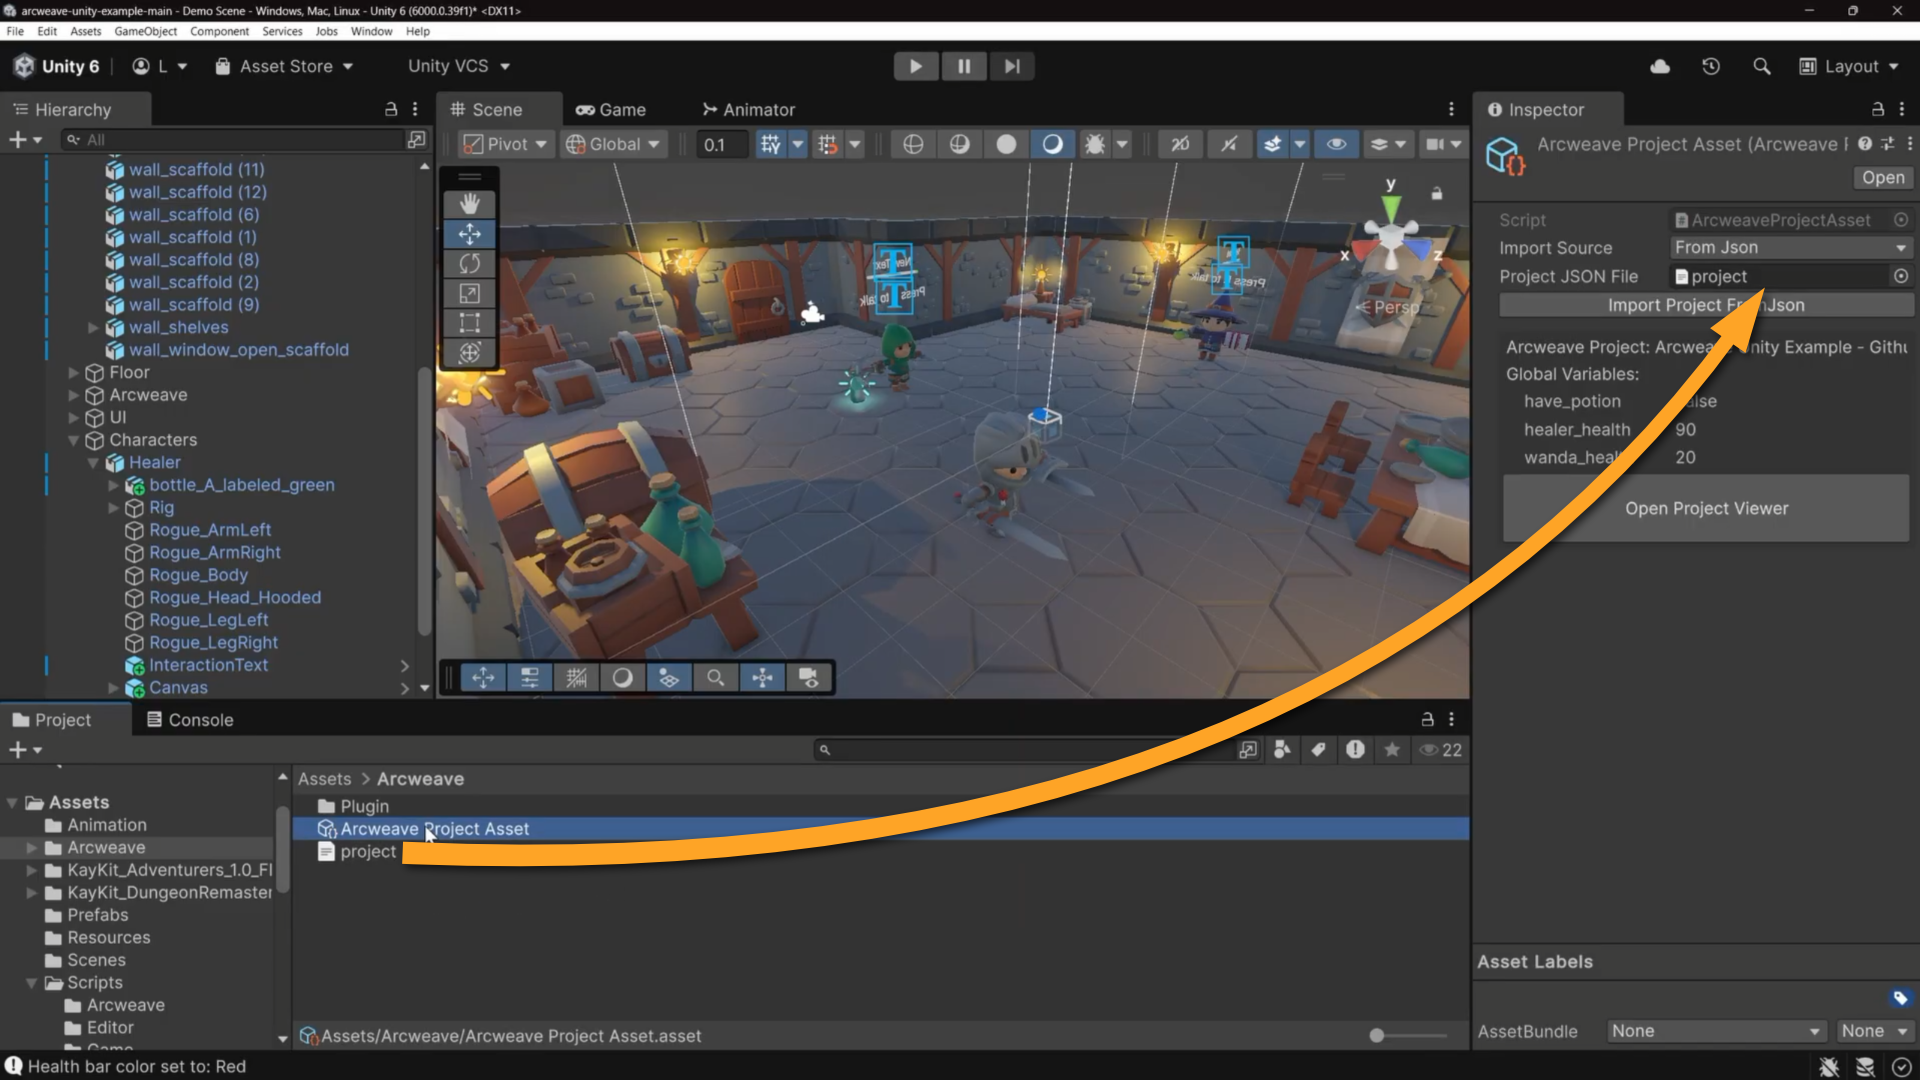
3. Click **Import Project FromJson**.
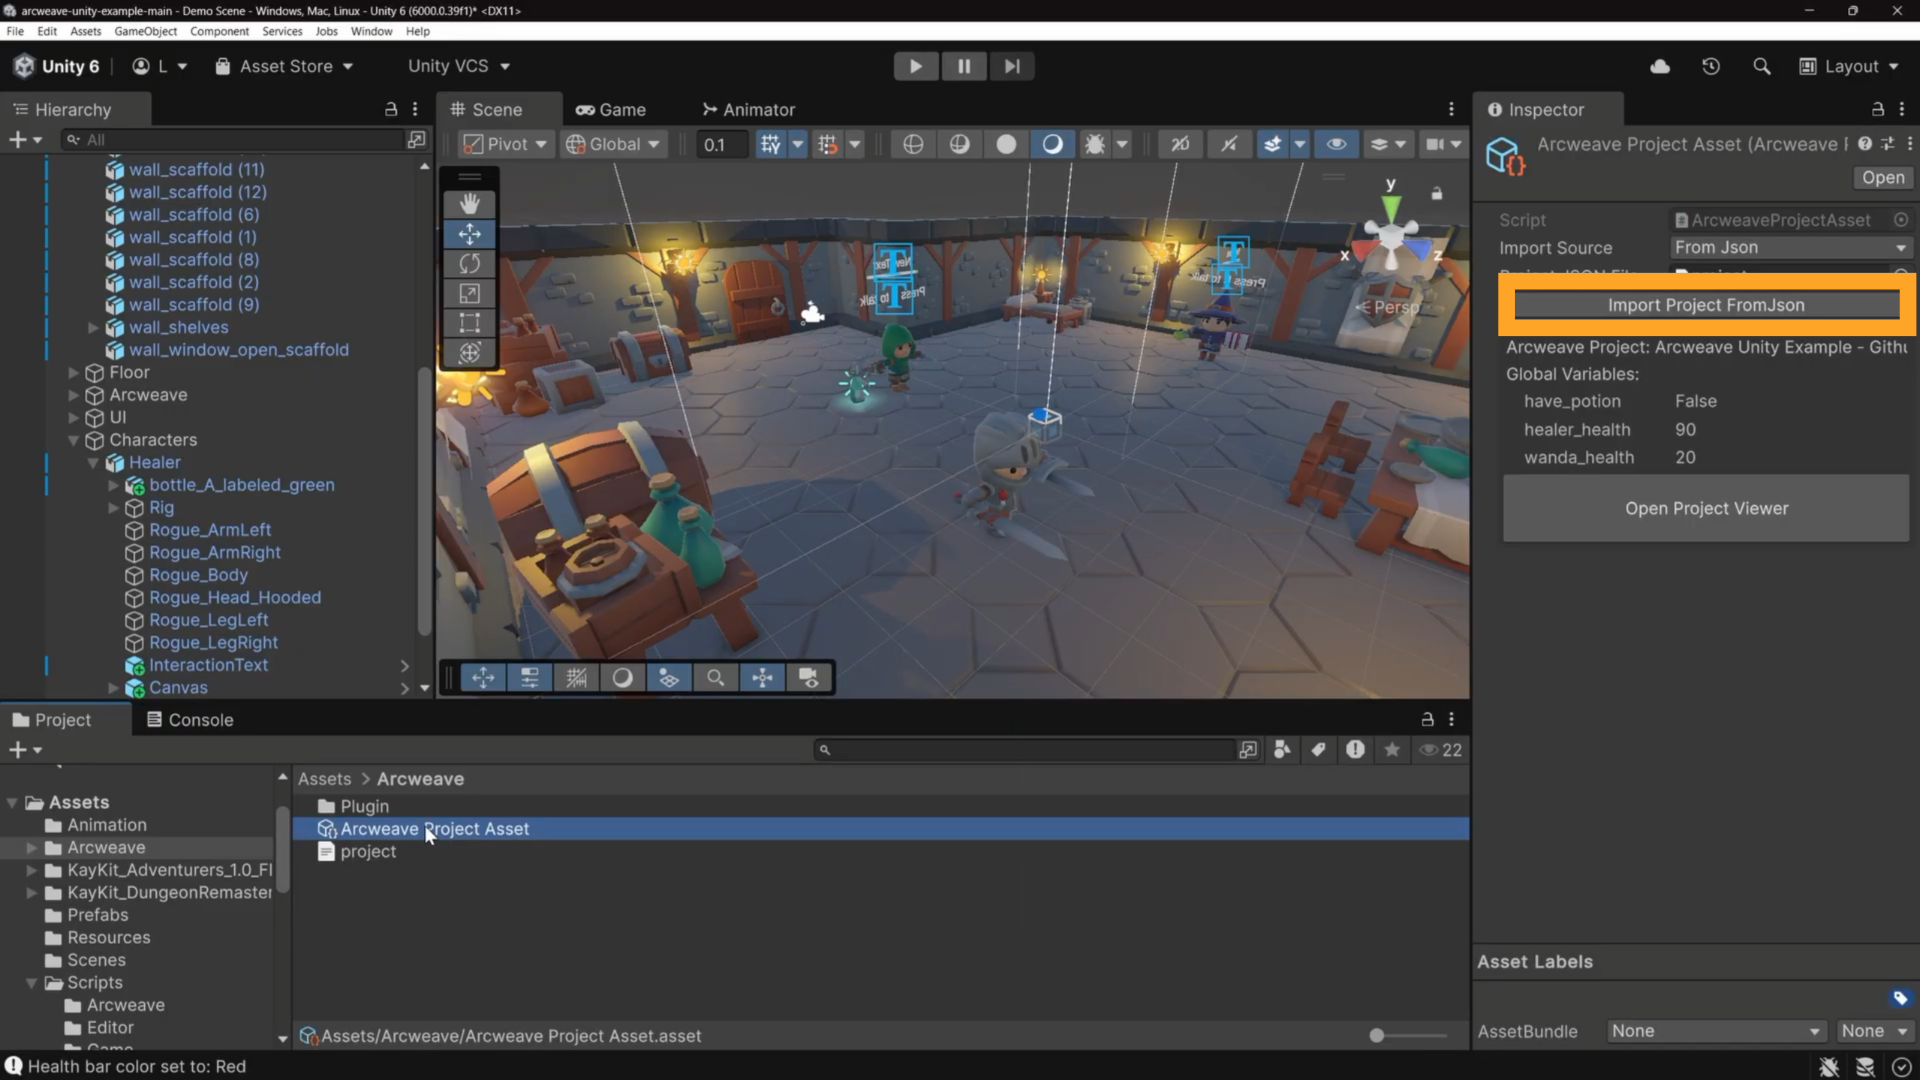
4. Once you've imported the project from the `.json` file, you will notice the new variables appearing in the Inspector. Confirm that both `gold: 50` and `sword_locked: true` are present.
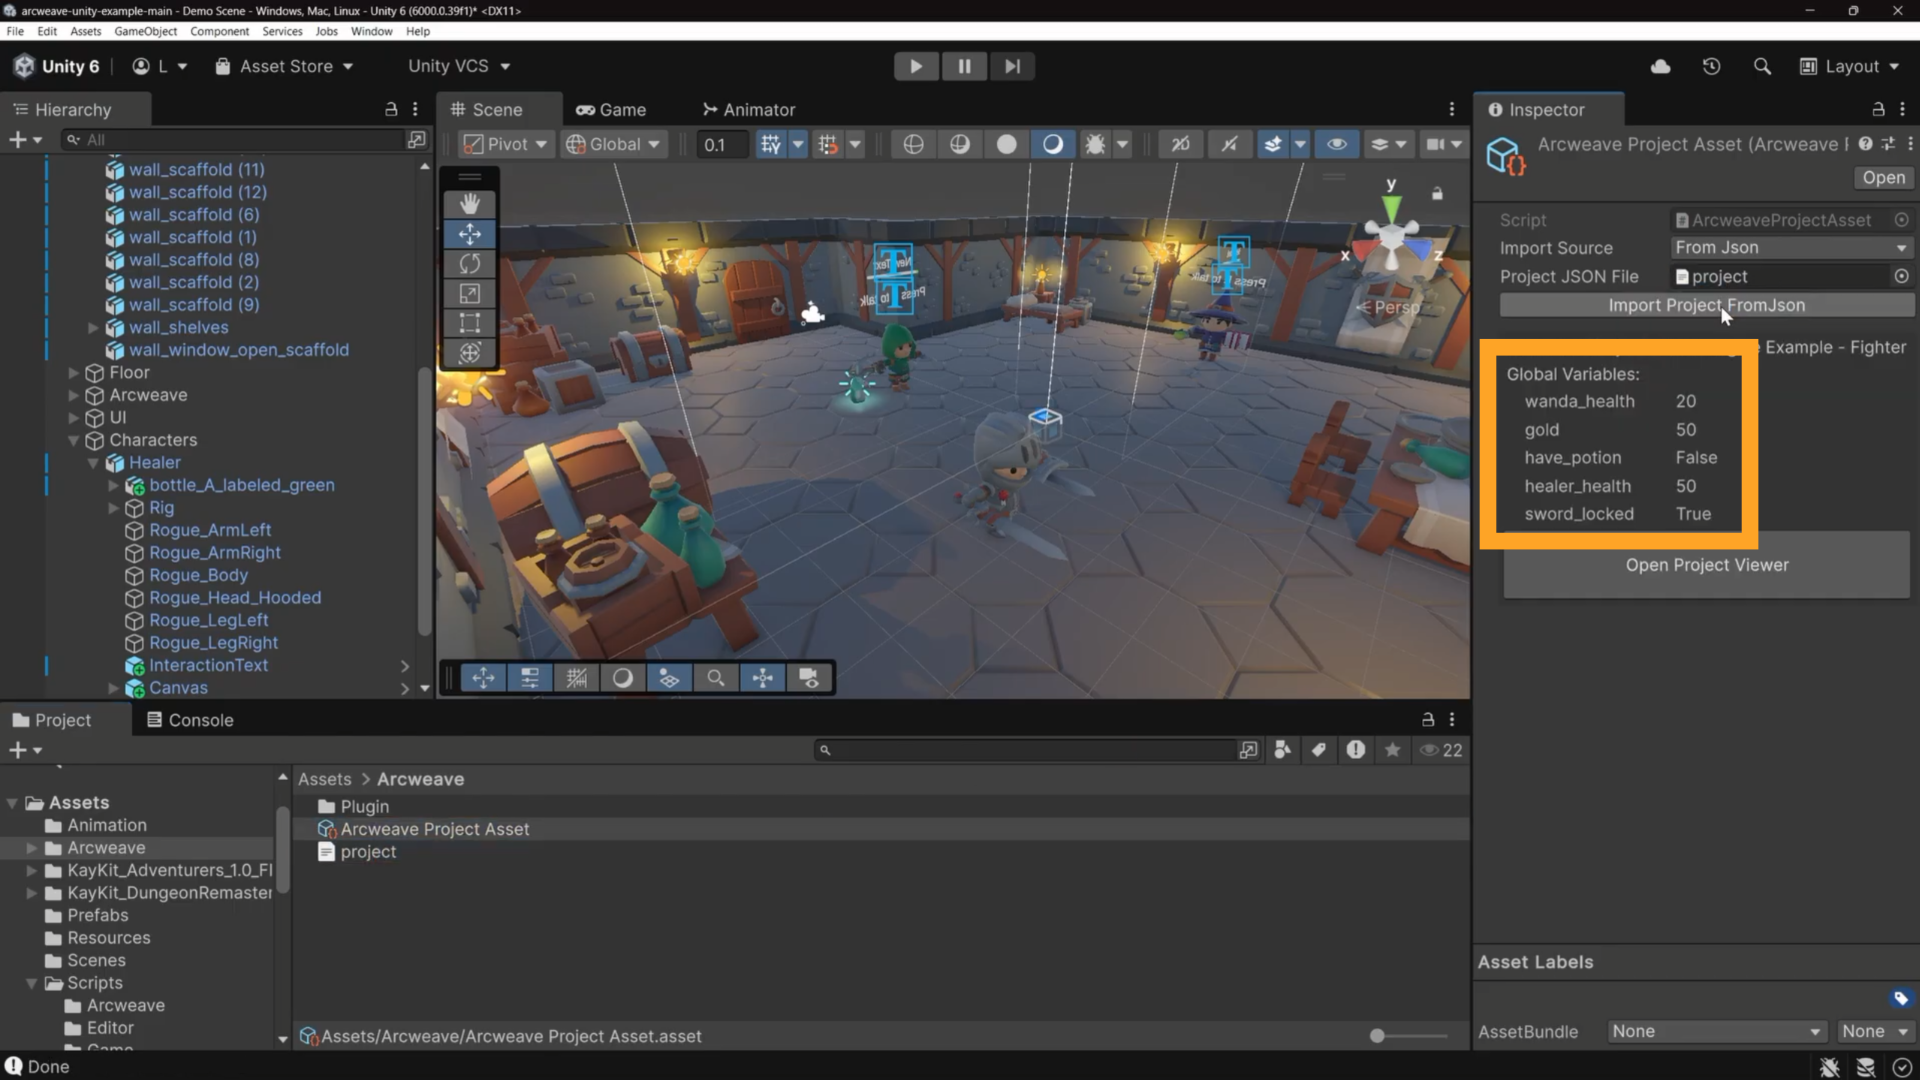
### Import fighter asset
Context: Arcweave docs > Tutorials > Unity > Unity tutorial | Part 5: Customize the template > Import into Unity > Import fighter asset
For the fighter portrait to appear during dialogue, we need to import the new fighter image asset: in Unity's **Project** panel, open **Assets > Resources** and drag `fighter.png` into it.
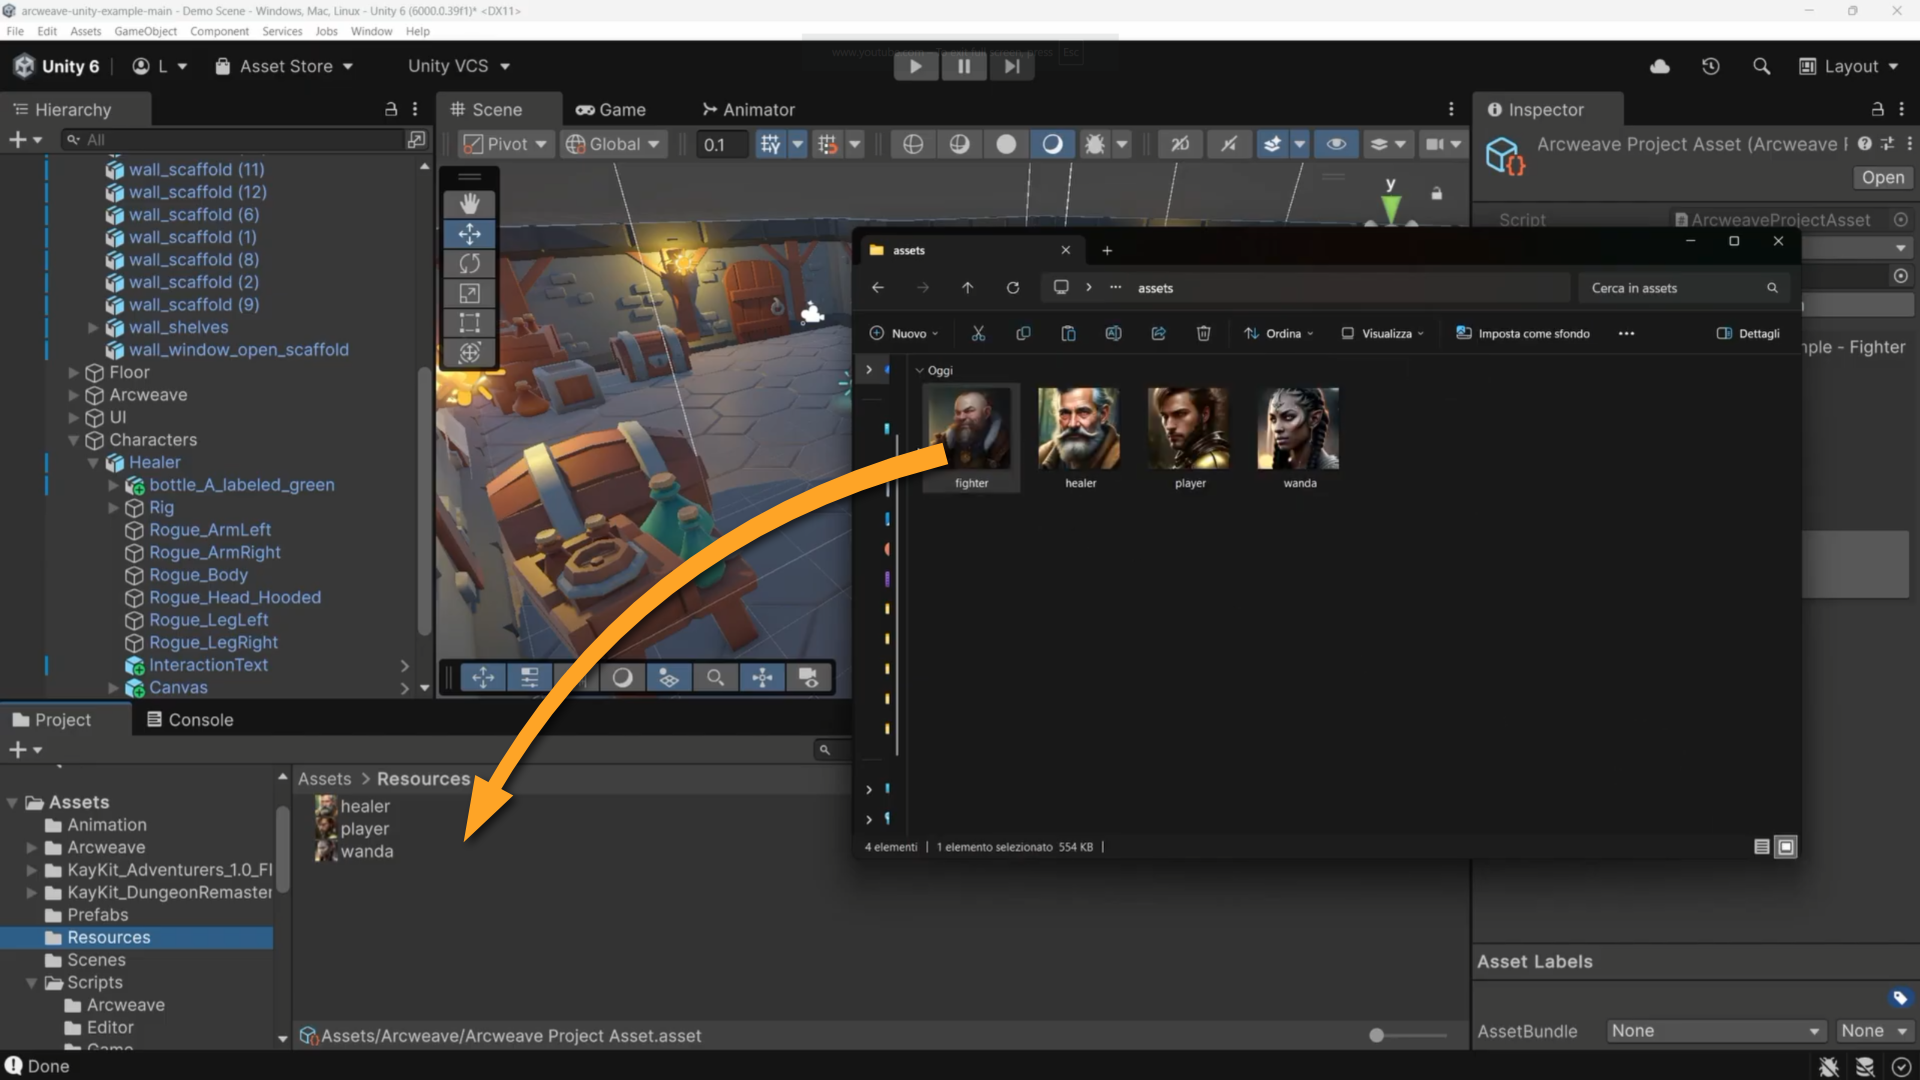
When the dialogue reaches an element whose first attached component is `Fighter`, **@ArcweavePlayerUI** loads that component's cover image from a `Resources` folder by filename (without the extension). The only rule: the filename in **Assets > Resources** must match the asset name in the Arcweave project.
## Configure dialogue components
Context: Arcweave docs > Tutorials > Unity > Unity tutorial | Part 5: Customize the template > Configure dialogue components
Select `GameManager` in the Hierarchy and open the Inspector. Find the **Dialogue Tags** section.
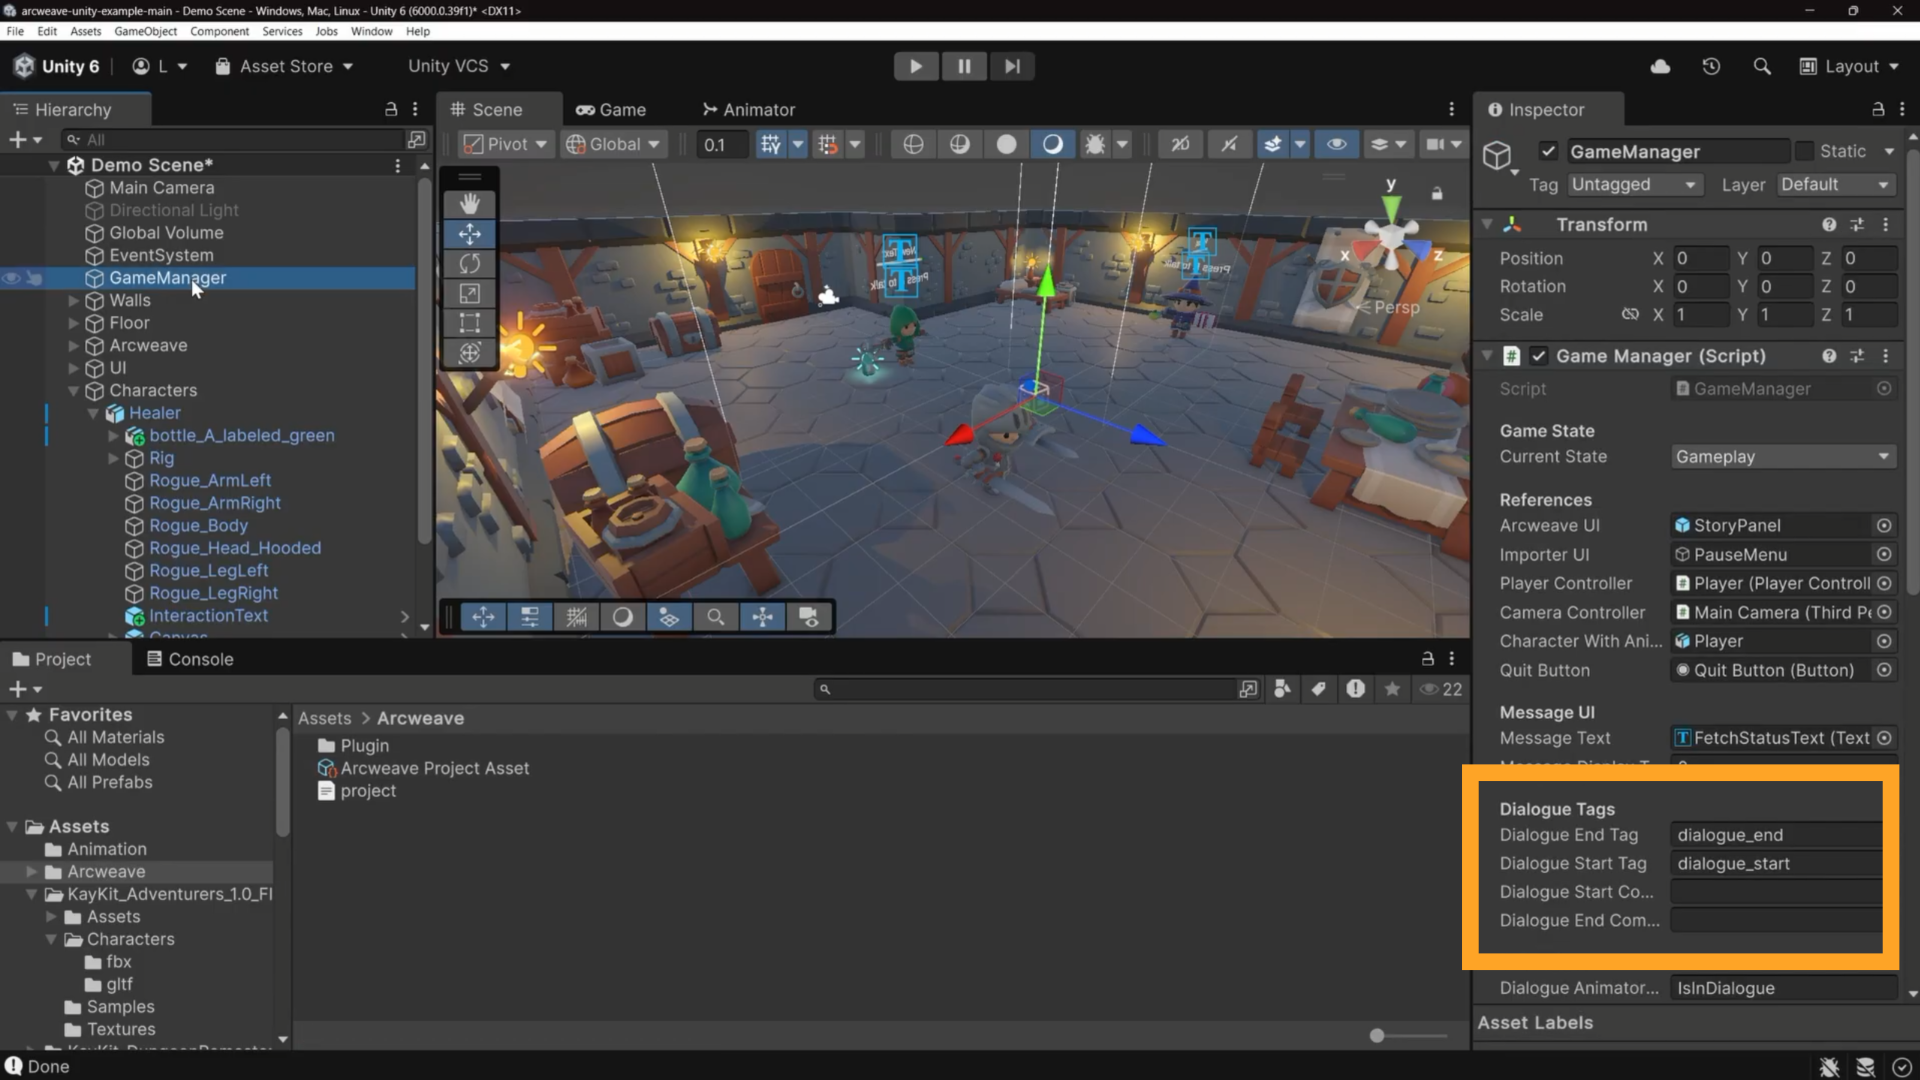
The first two fields (`dialogue_end` and `dialogue_start`) are text-based defaults used by the existing **Healer Dialogue** and **Wanda Dialogue** boards.
Fill in the last two empty fields:
- **Dialogue Start Component Name**: `dialogue_start`
- **Dialogue End Component Name**: `dialogue_end`
When the game evaluates an element, it checks for a component named `dialogue_start` first. If it doesn't find one, it falls back to the text attribute check, so existing boards keep working without any changes.
## Fighter GameObject
Context: Arcweave docs > Tutorials > Unity > Unity tutorial | Part 5: Customize the template > Fighter GameObject
### Add fighter 3D model
Context: Arcweave docs > Tutorials > Unity > Unity tutorial | Part 5: Customize the template > Fighter GameObject > Add fighter 3D model
1. In the Project panel, navigate to the folder **Assets > KayKit_Adventurers_1.0_FREE > Characters > fbx**.
2. Drag the **Barbarian** 3D model into the scene and position it as needed.
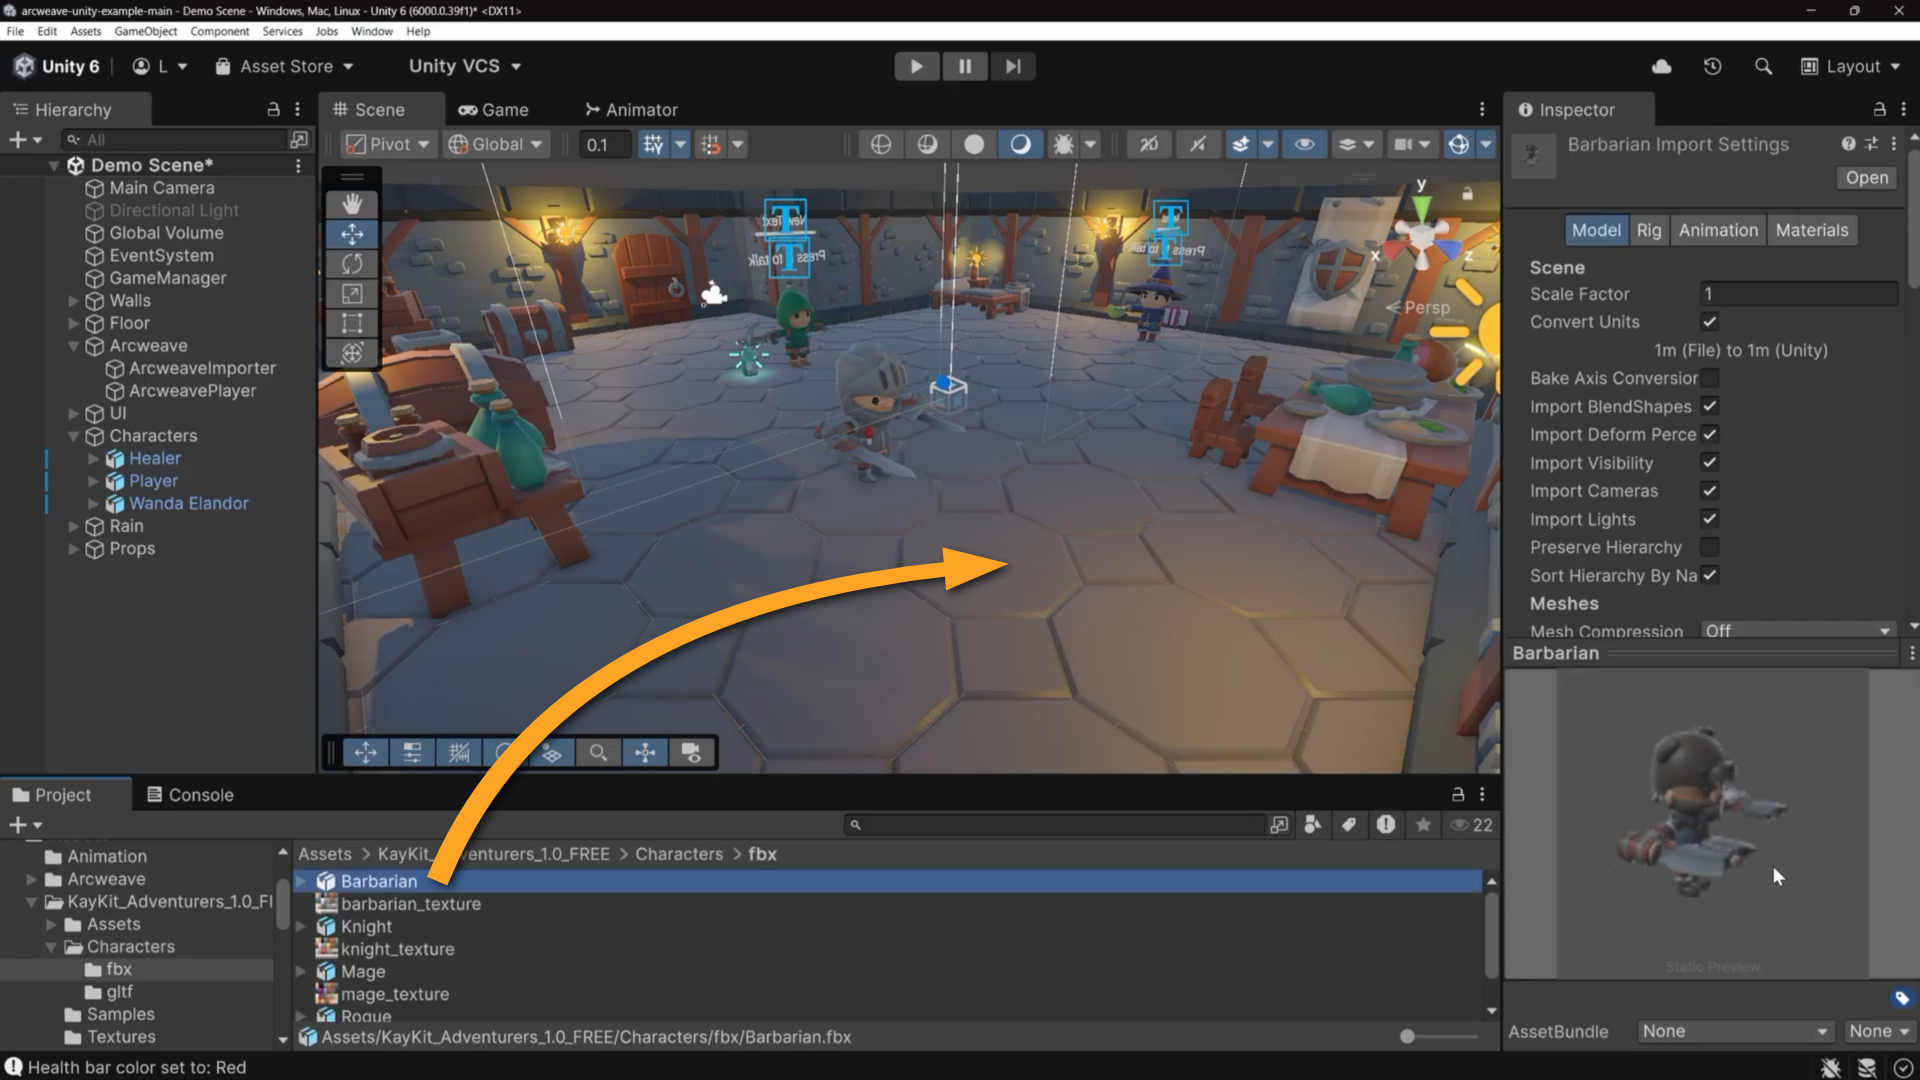
3. In the scene Hierarchy, rename the GameObject from "Barbarian" to "**Fighter**."
### Add Dialogue Trigger component
Context: Arcweave docs > Tutorials > Unity > Unity tutorial | Part 5: Customize the template > Fighter GameObject > Add Dialogue Trigger component
We must now add the **Dialogue Trigger** component to the Fighter GameObject. This way, the player can trigger the dialogue when approaching the fighter.
1. In the Project panel, navigate to **Assets > Scripts > Game** and locate the **ArcweaveDialogueTrigger** script.
2. Drag the **ArcweaveDialogueTrigger** script into the Inspector of the **Fighter** GameObject. The [Dialogue Trigger](https://docs.arcweave.com/tutorials/unity/pt-4#dialoguetrigger) component will be added.
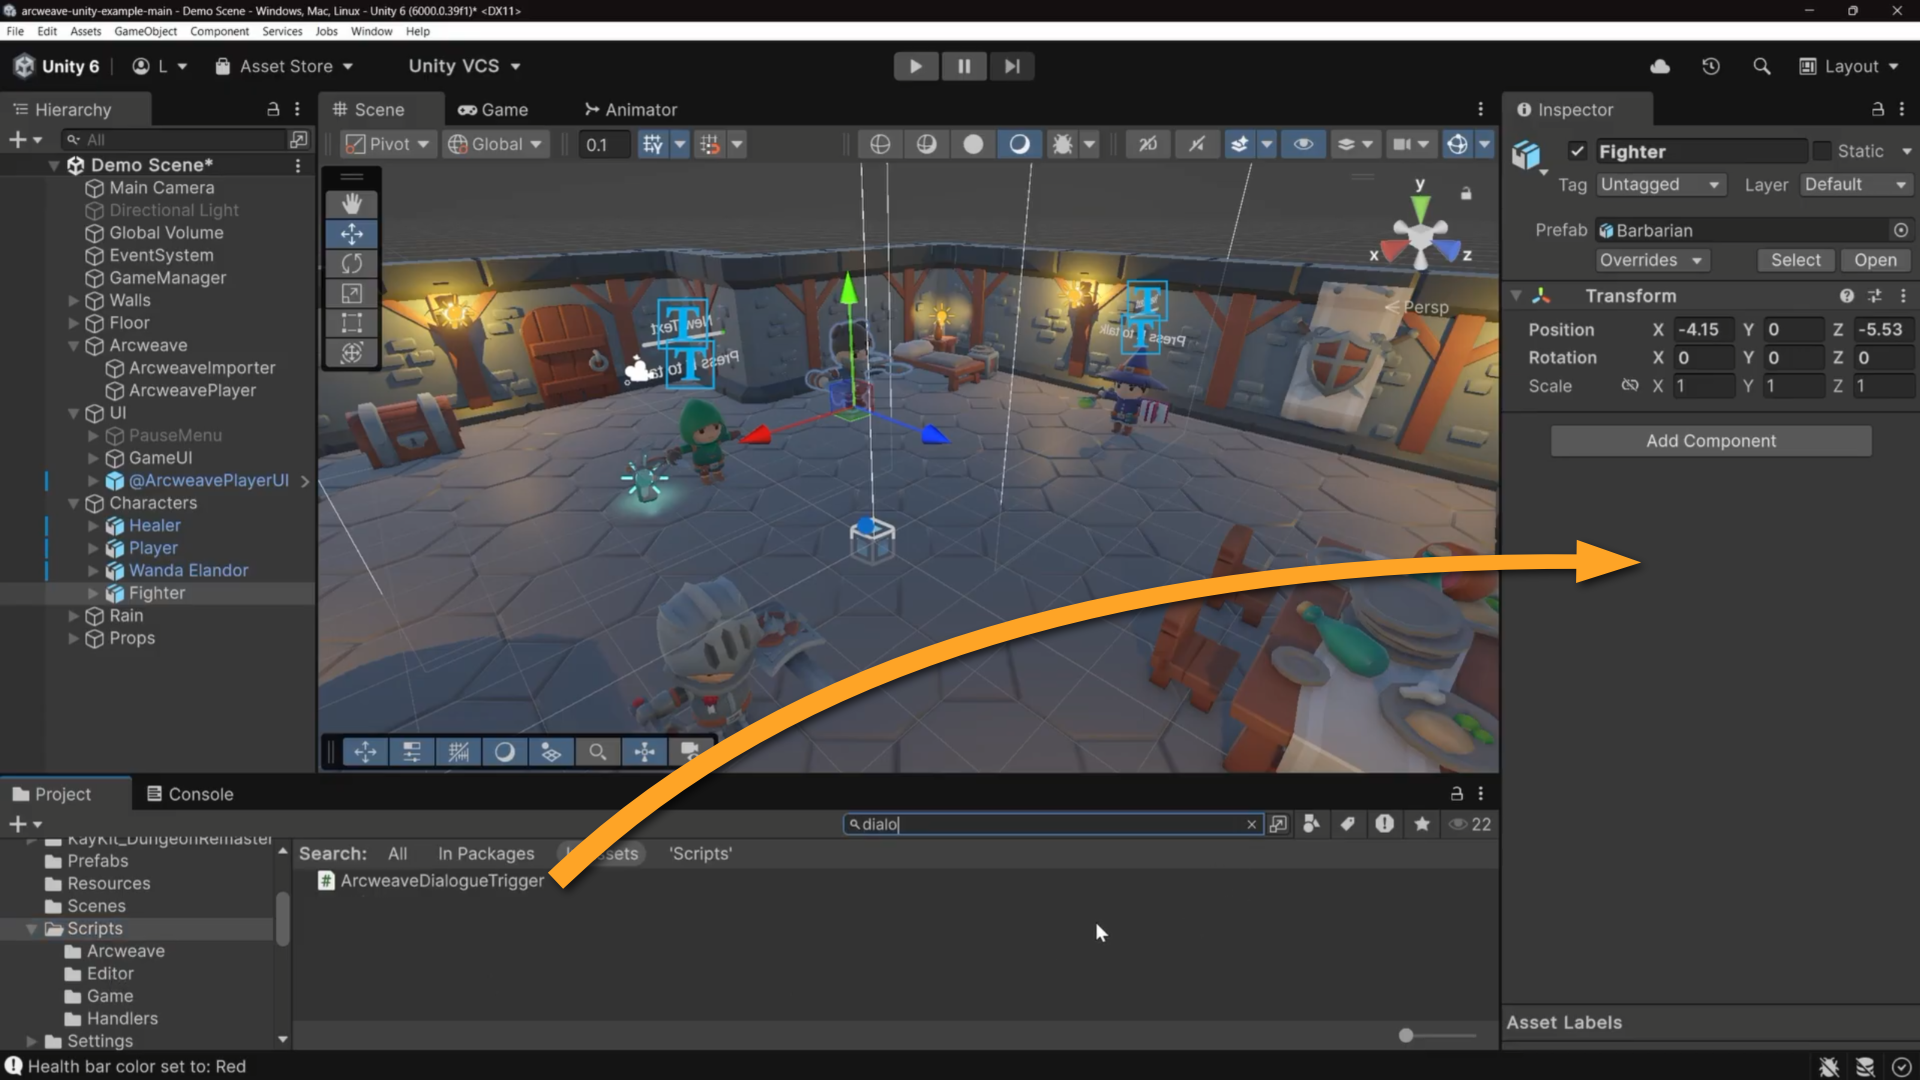
3. Configure the following fields of the **Dialogue Trigger** component:
**Specific Board Name**: Type `Fighter Dialogue`. This must match the board name in the Arcweave project exactly.
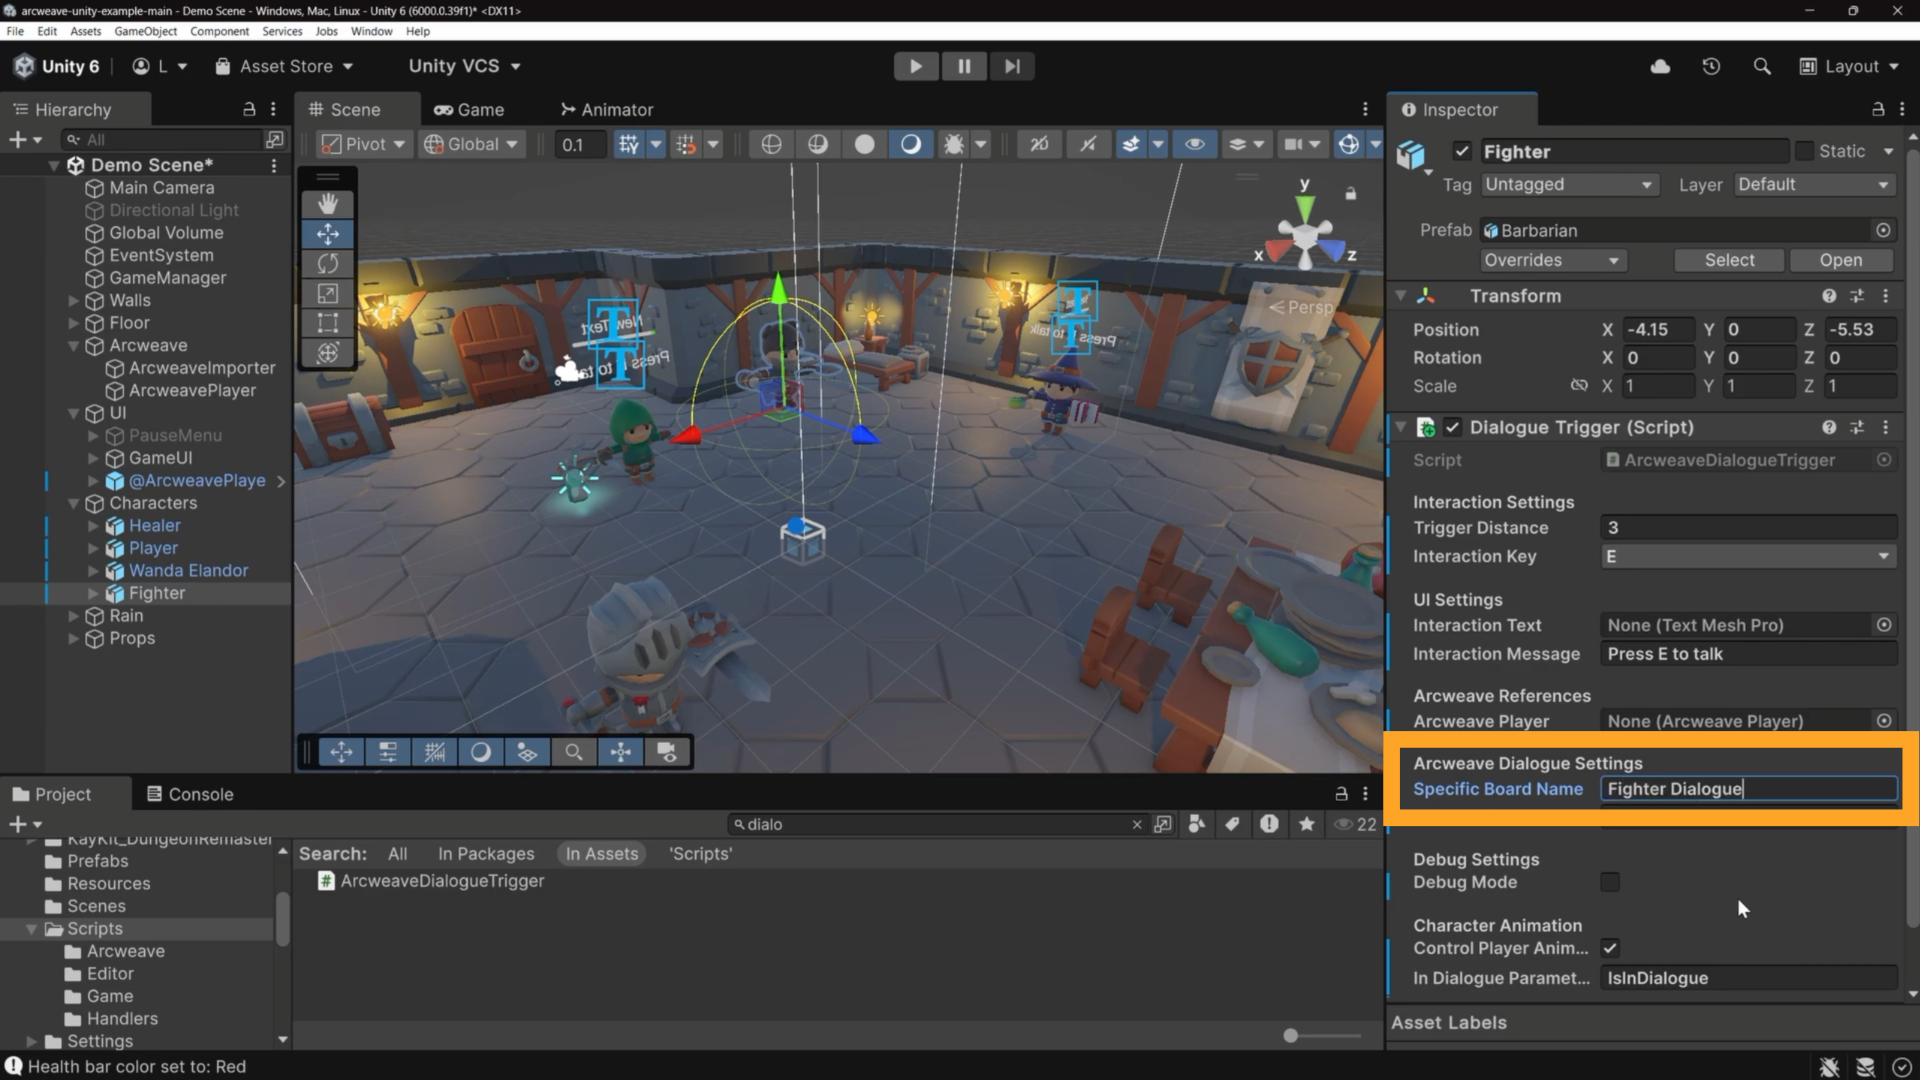
**Arcweave Player**: Drag the **ArcweavePlayer** GameObject from the Hierarchy and drop it into this field.
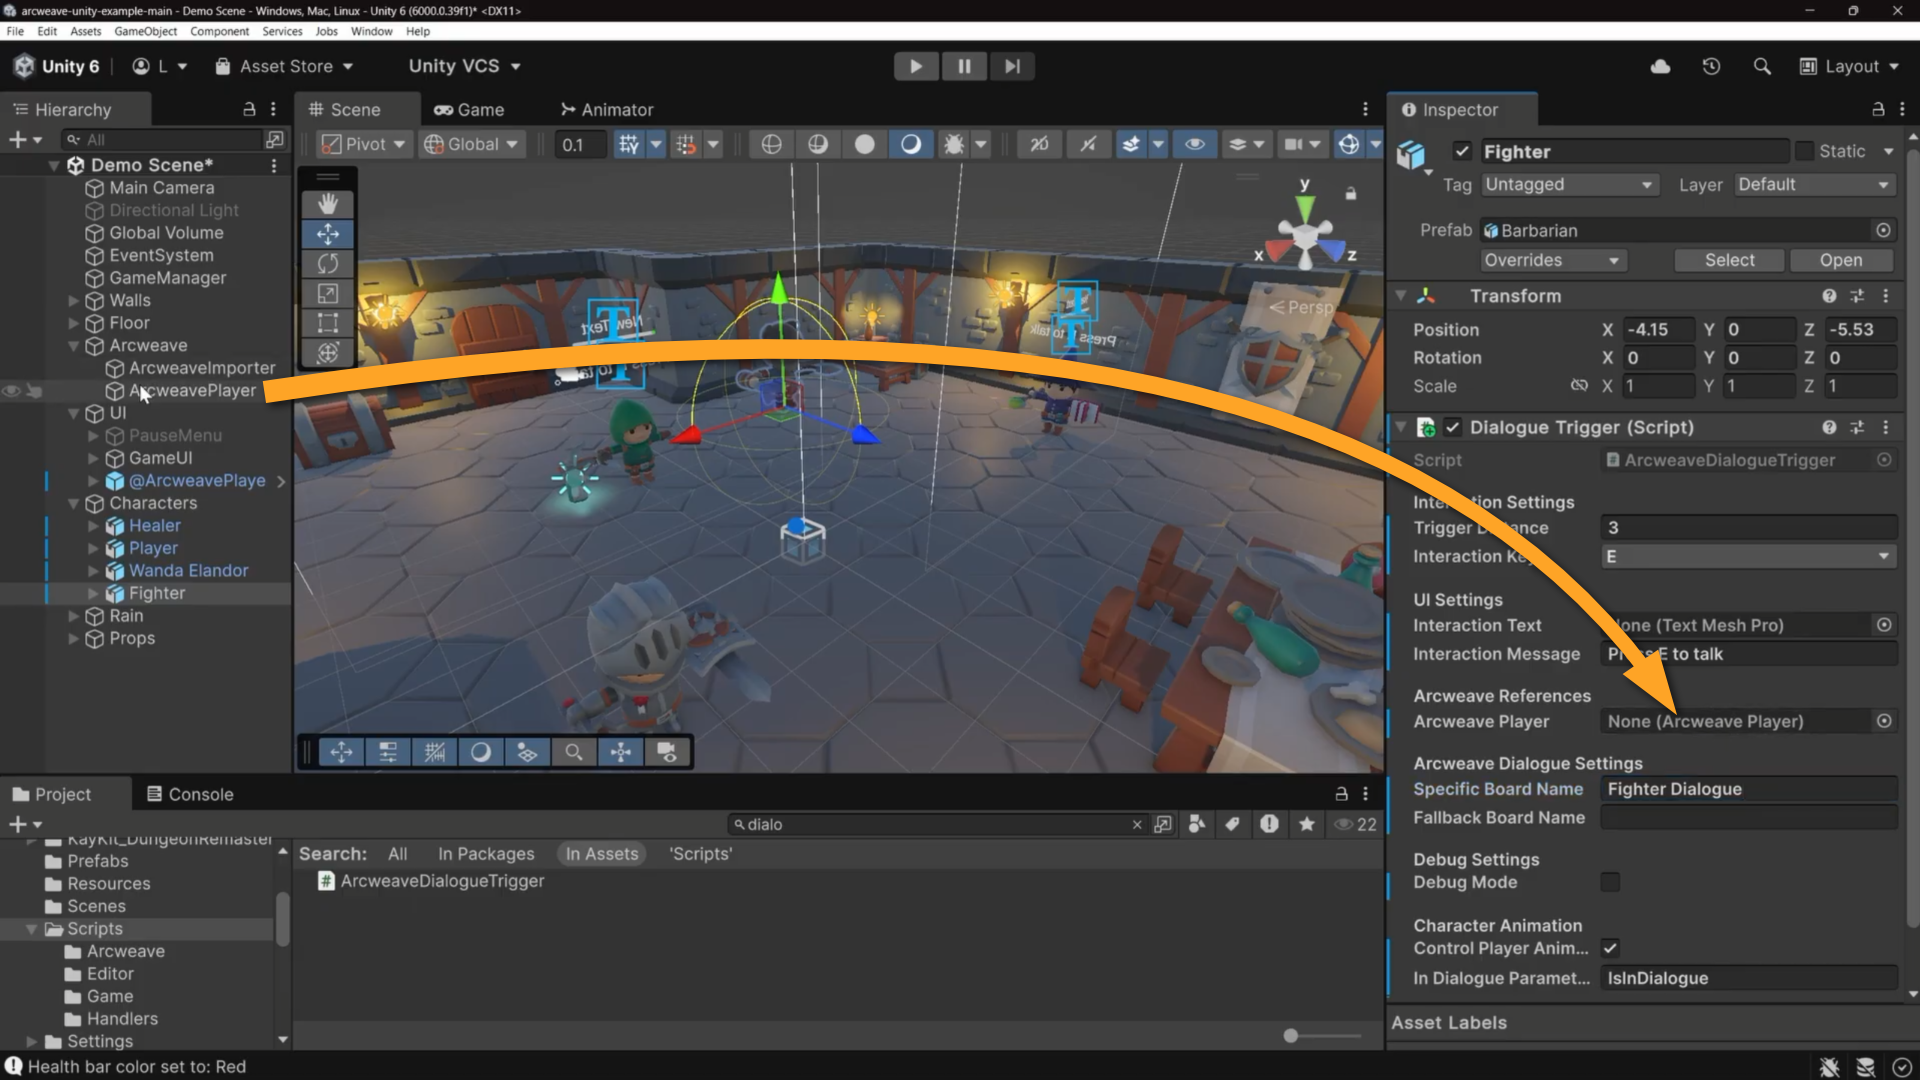
**Interaction Text**:
1. Open the **Assets > Prefabs** folder in the **Project** panel.
2. Drag the **InteractionText** prefab from the **Prefabs** folder and drop it onto the **Fighter** GameObject in the Hierarchy.
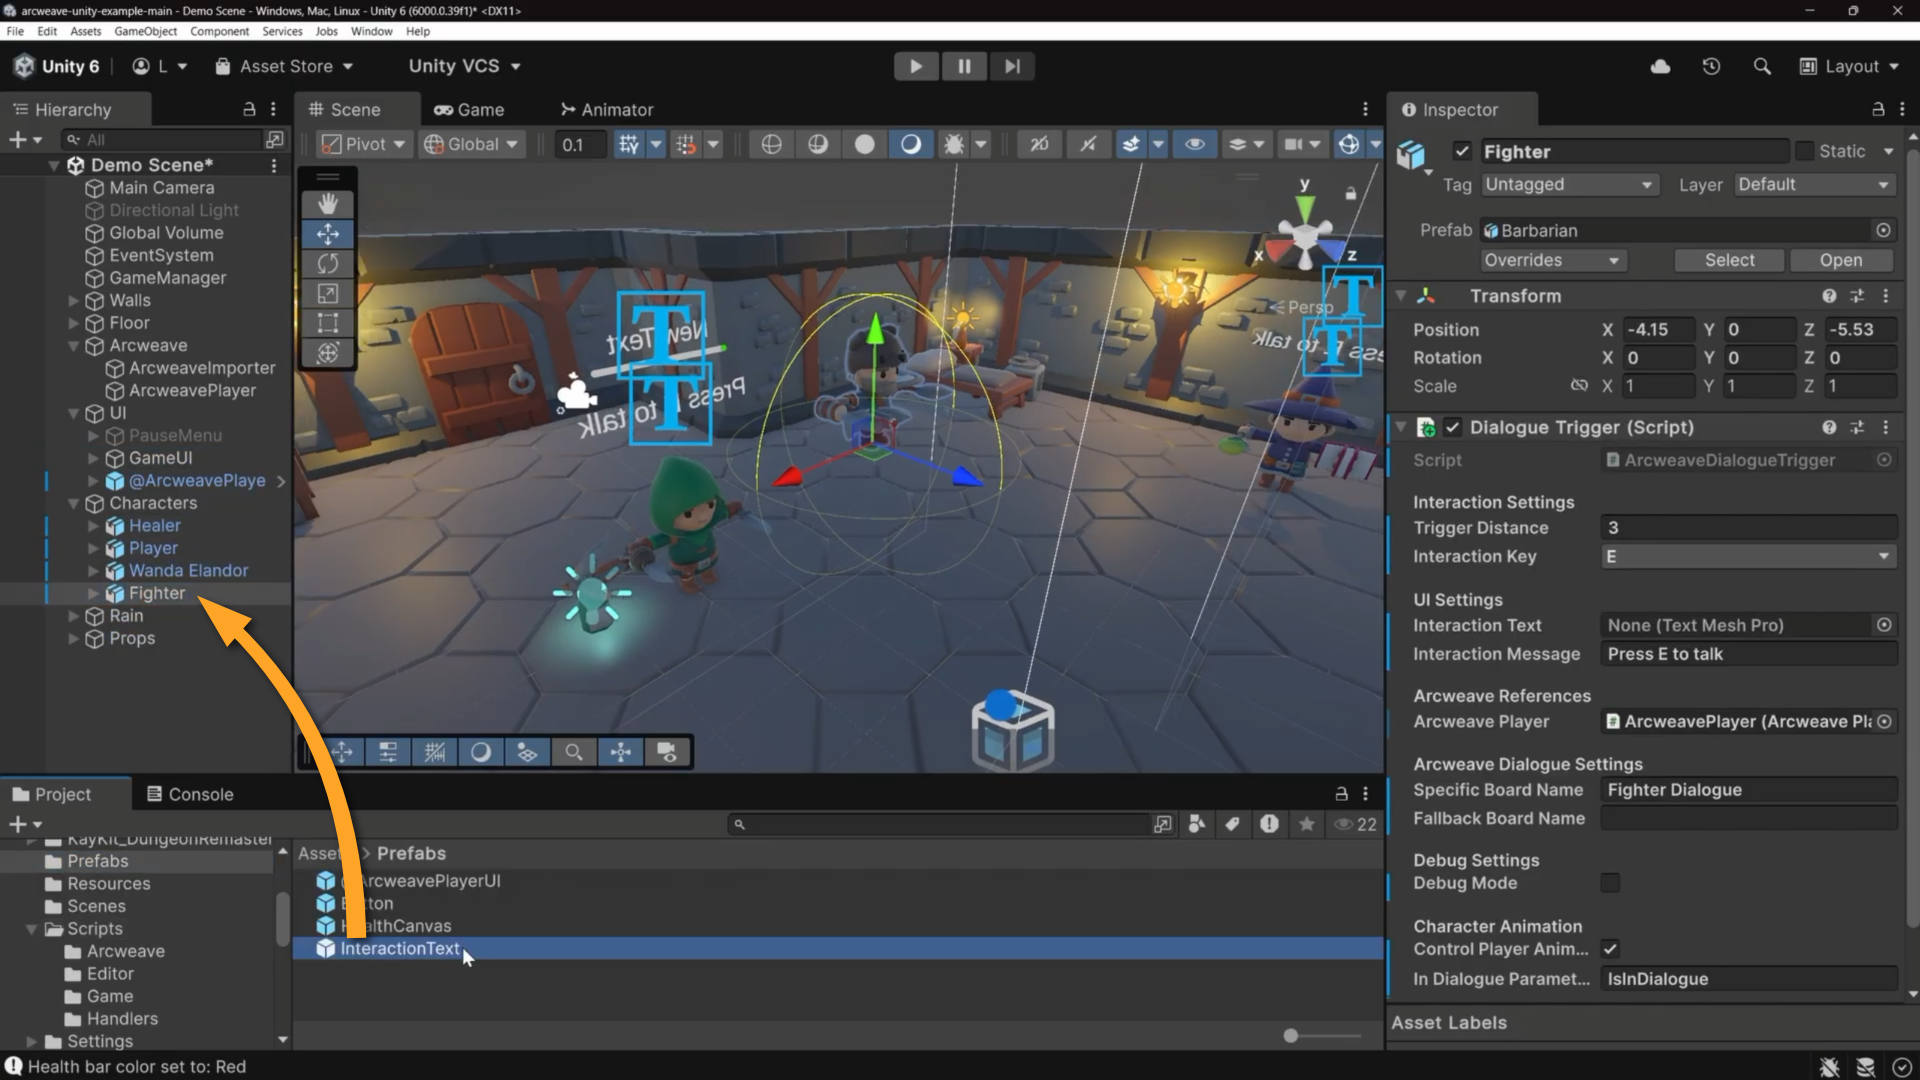
3. Then, drag the **InteractionText** child from the Hierarchy into the **Interaction Text** field, under **UI Settings** of the Fighter Inspector to assign it.
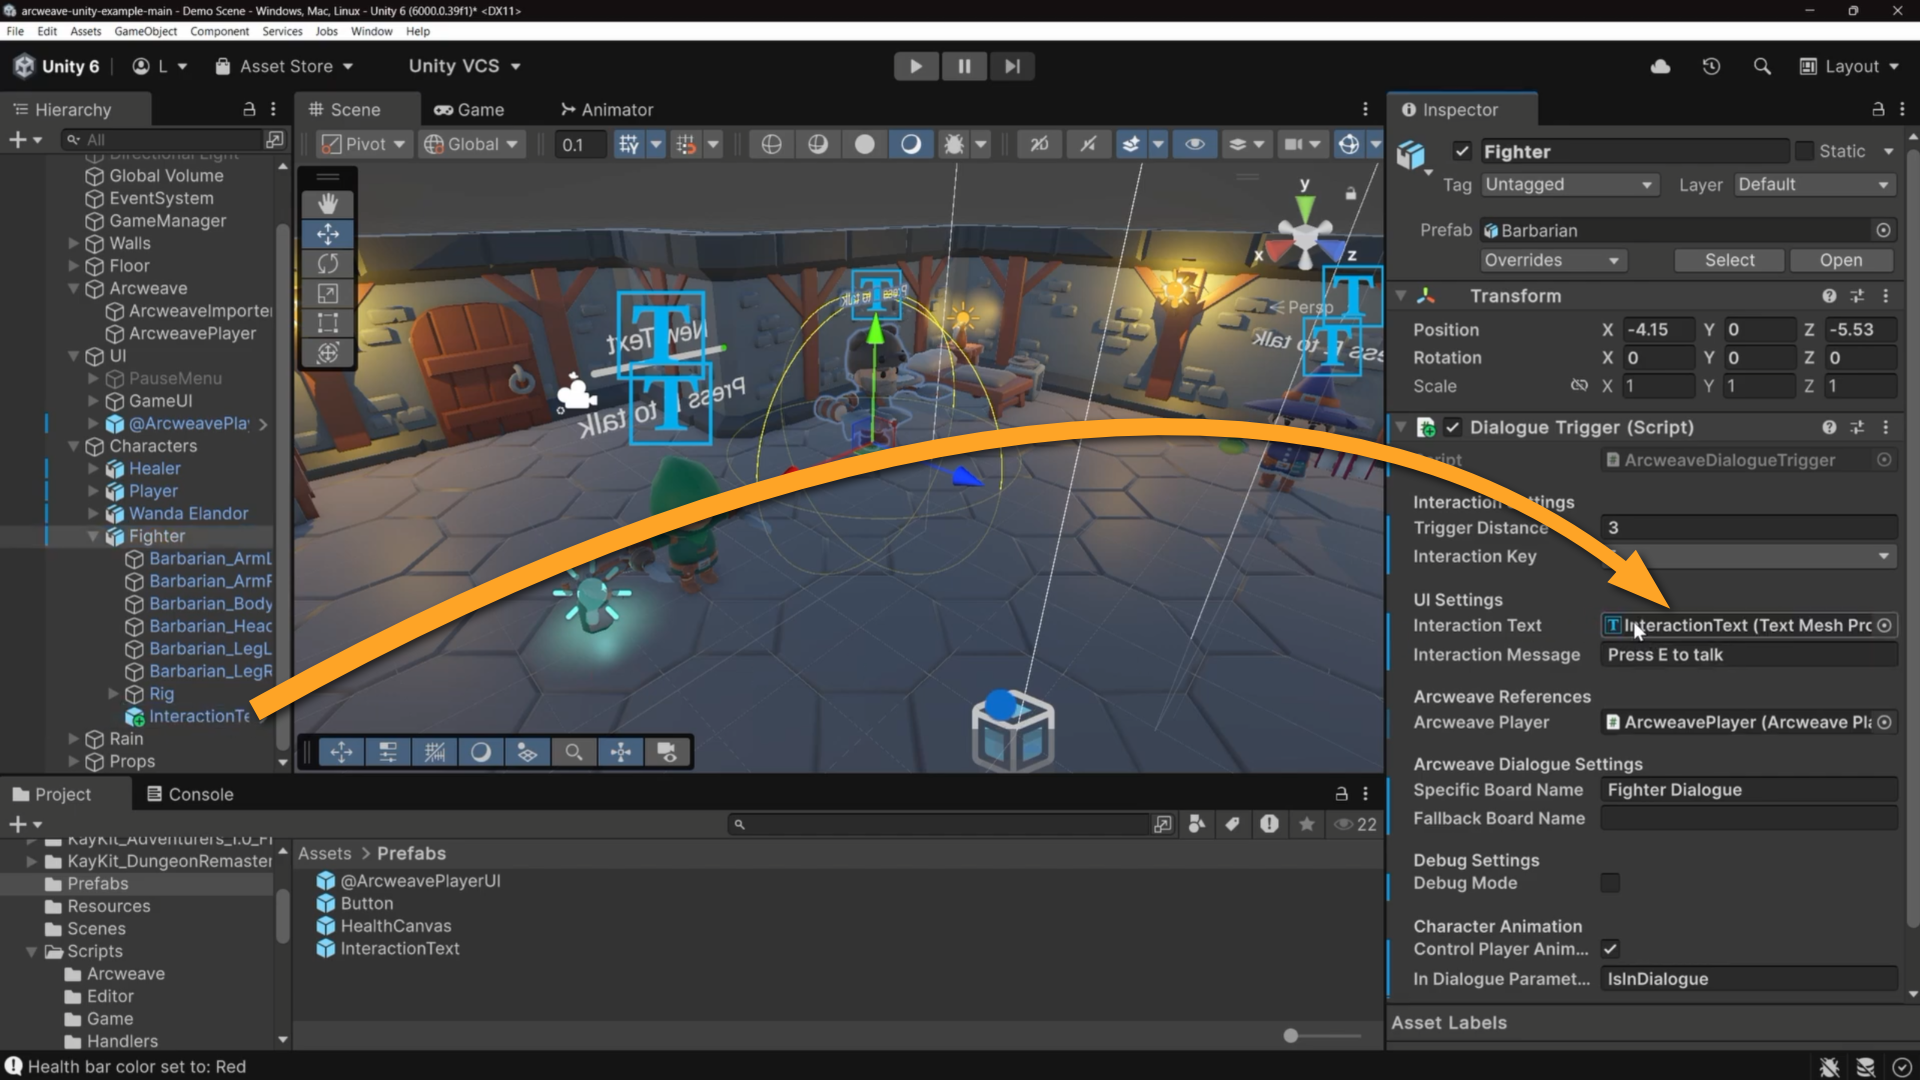
When the player walks into range and presses E, Unity looks for the board named `Fighter Dialogue`, finds the element with the `dialogue_start` component, and begins the conversation.
## Enable the attack animation
Context: Arcweave docs > Tutorials > Unity > Unity tutorial | Part 5: Customize the template > Enable the attack animation
### Add SwordSwingHandler
Context: Arcweave docs > Tutorials > Unity > Unity tutorial | Part 5: Customize the template > Enable the attack animation > Add SwordSwingHandler
1. Go to Unity's Project panel and open the **Assets > Scripts > Handlers** folder.
2. Select the **Player** GameObject in the Hierarchy.
3. Drag the **SwordSwingHandler** script from the Handlers folder into the Player Inspector.
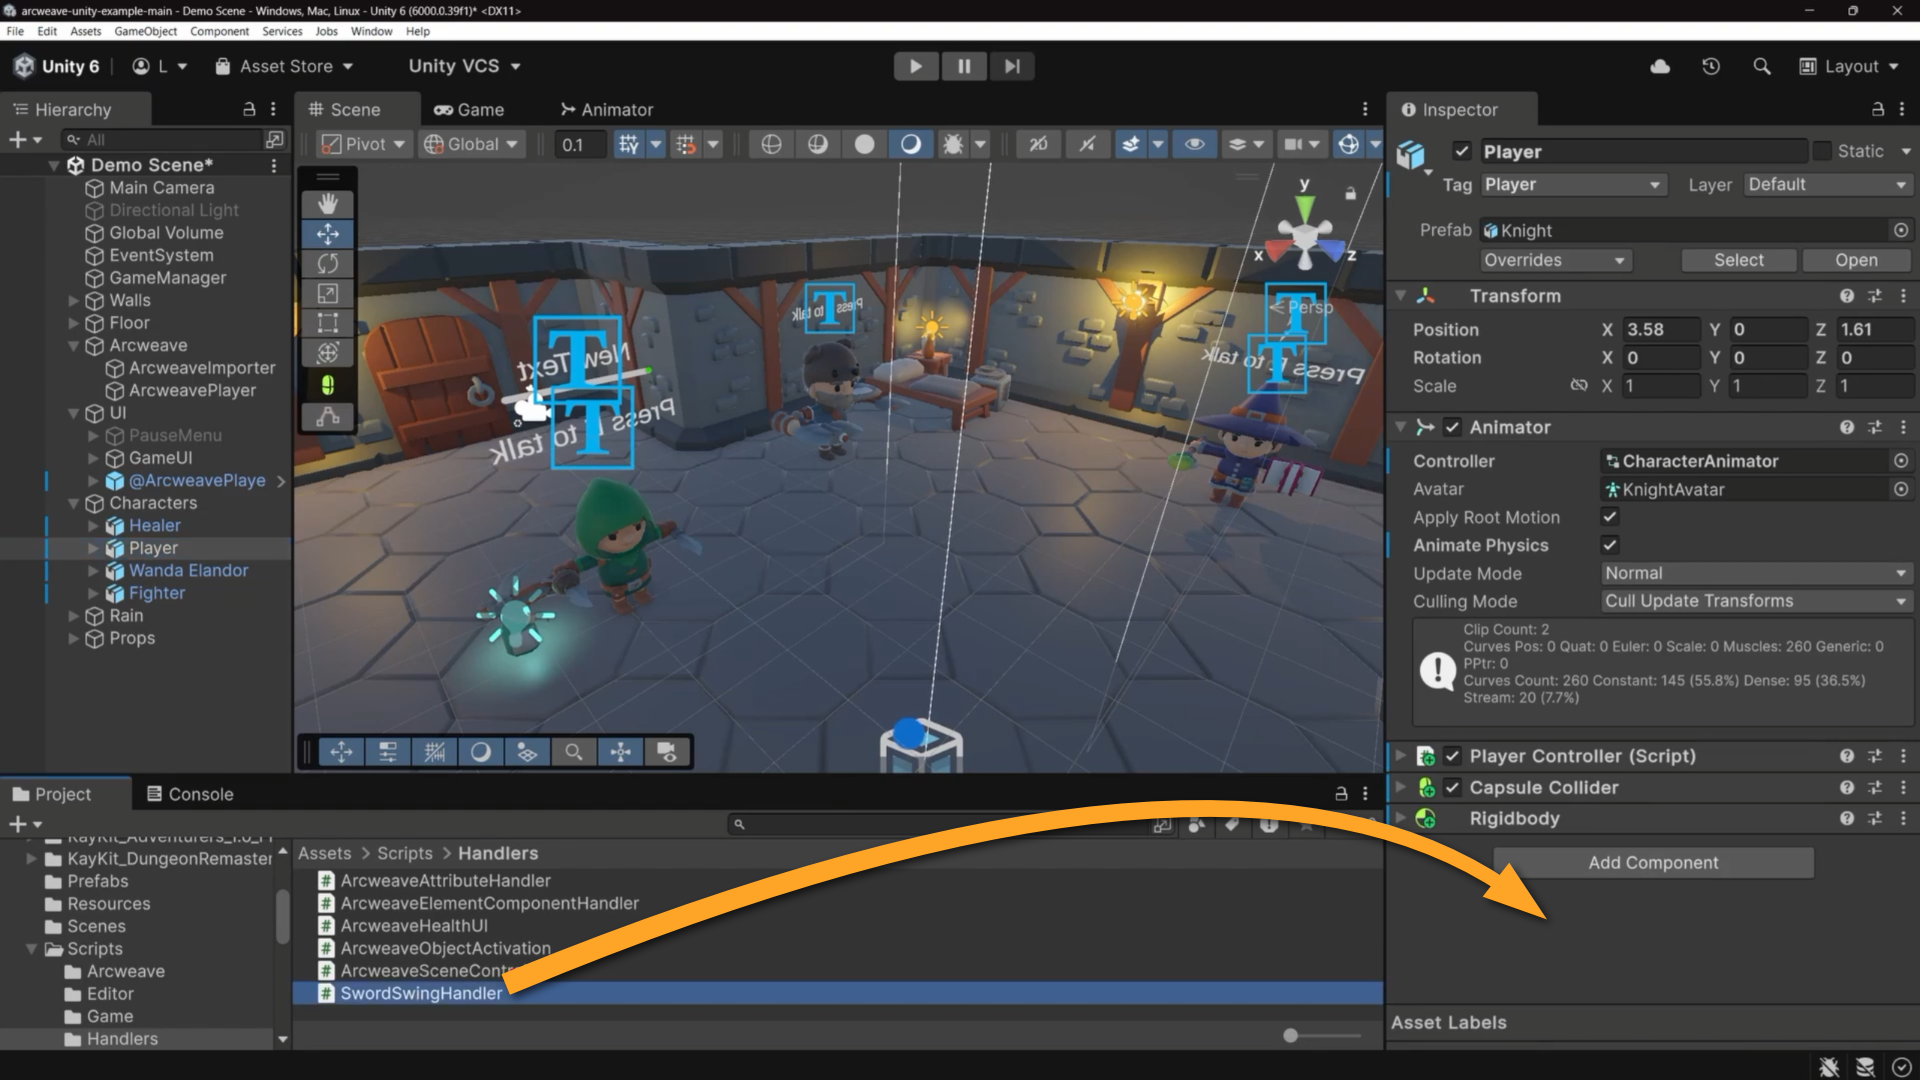
This adds the Sword Swing Handler component to the Player.
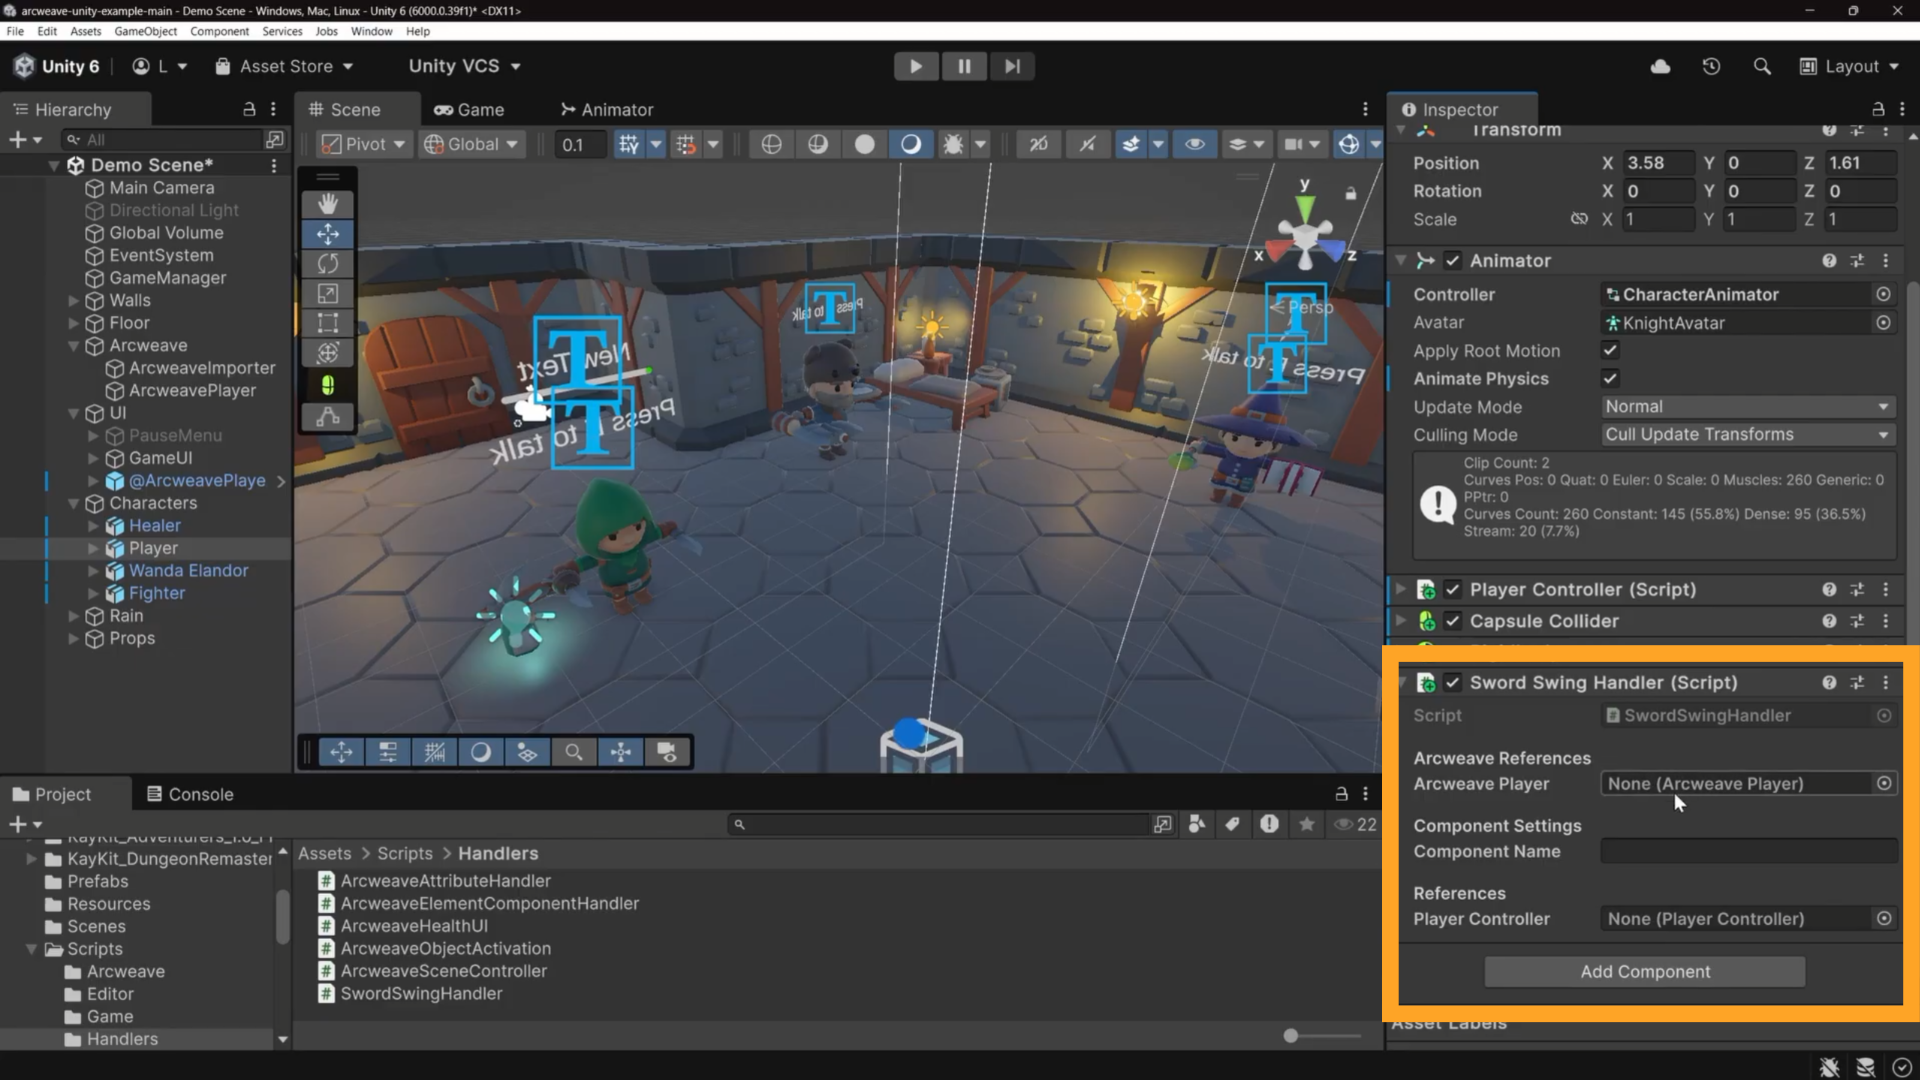
This script extends `ArcweaveElementComponentHandler`. It listens to every element the dialogue passes through, and when it finds one with the `attack` component attached, it calls `EnableSwordSwing()` on the player.
Configure its three fields:
- **Arcweave Player**: Drag the ArcweavePlayer GameObject from the Hierarchy and drop it into this field.
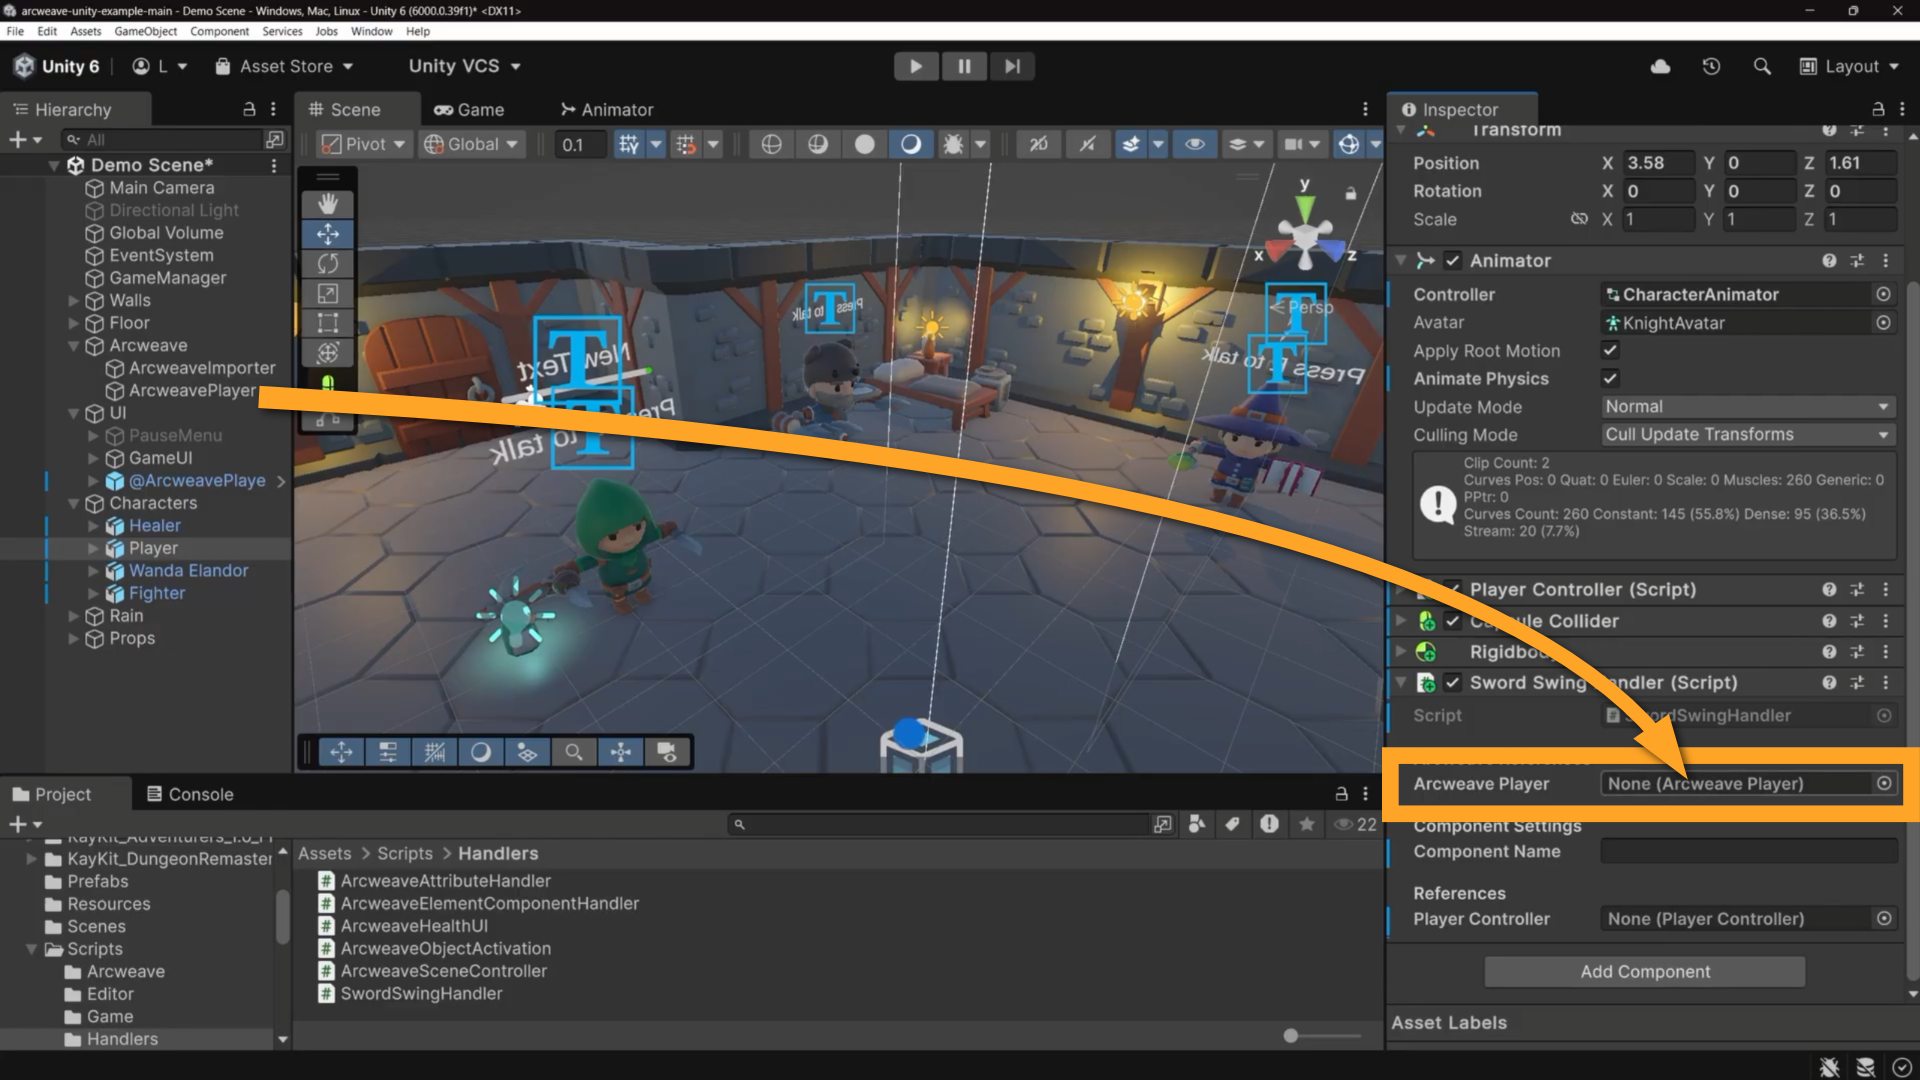
- **Component Name**: Type `attack`. This must match the Arcweave component name exactly (case-sensitive).
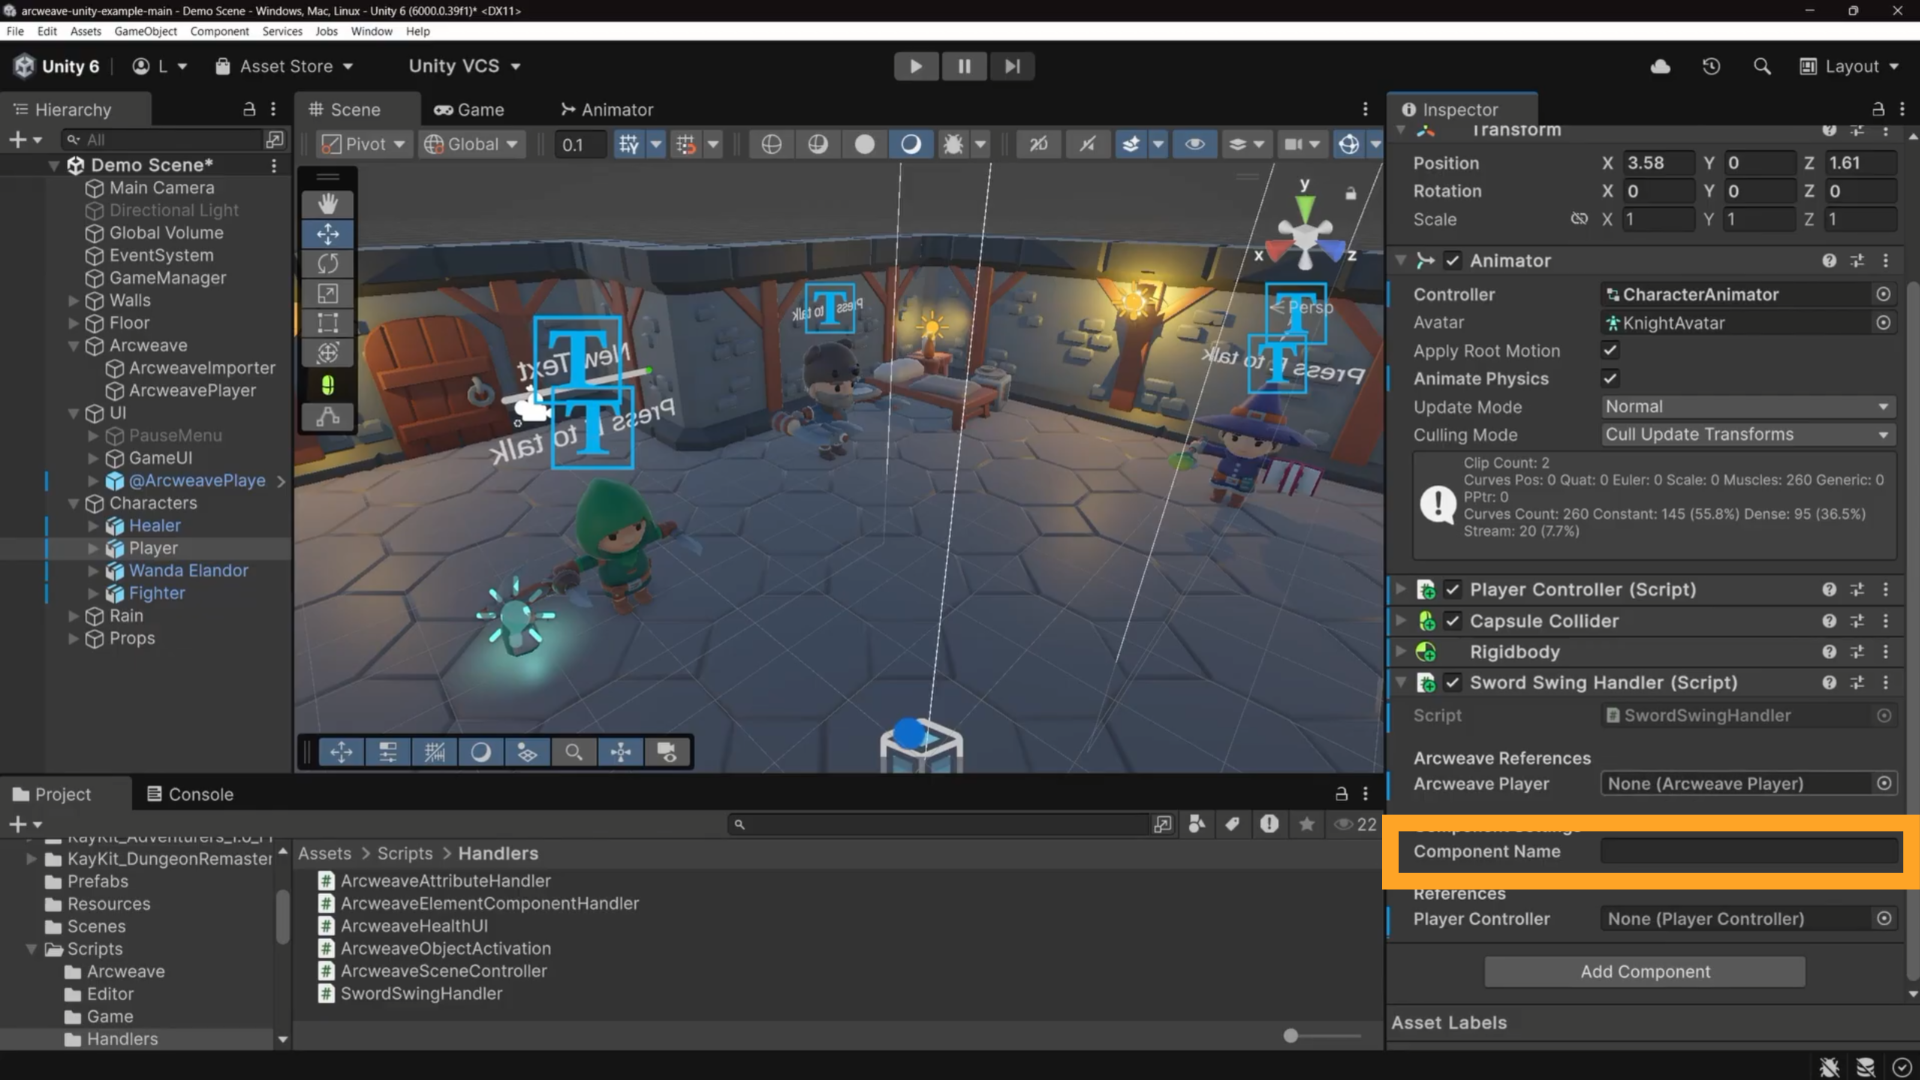
- **Player Controller**: Drag the `Player` GameObject from the Hierarchy and drop it into this field.
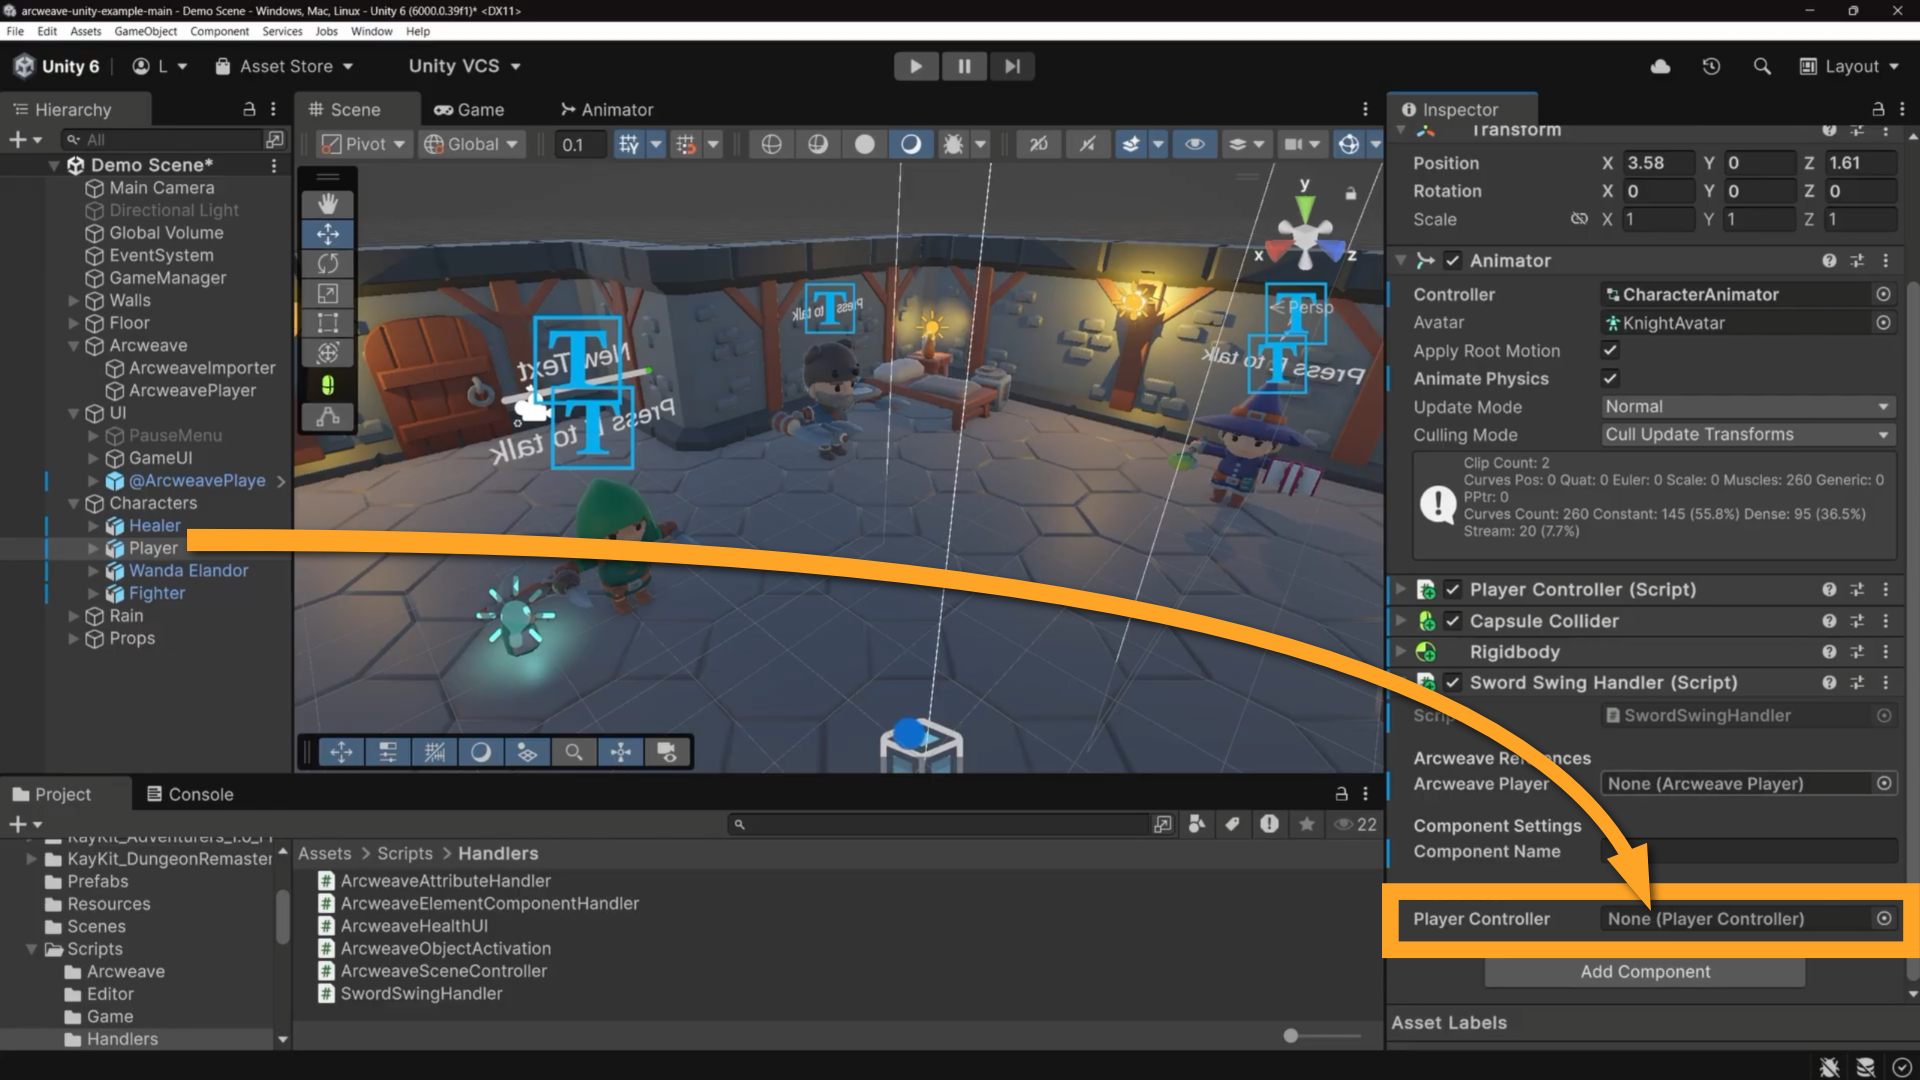
### Set up the Animator
Context: Arcweave docs > Tutorials > Unity > Unity tutorial | Part 5: Customize the template > Enable the attack animation > Set up the Animator
1. Select the **Player** GameObject in the Hierarchy
2. Locate the **Animator** component in the Inspector
3. Double-click the **Controller** asset to open the animator graph in the Animator window.
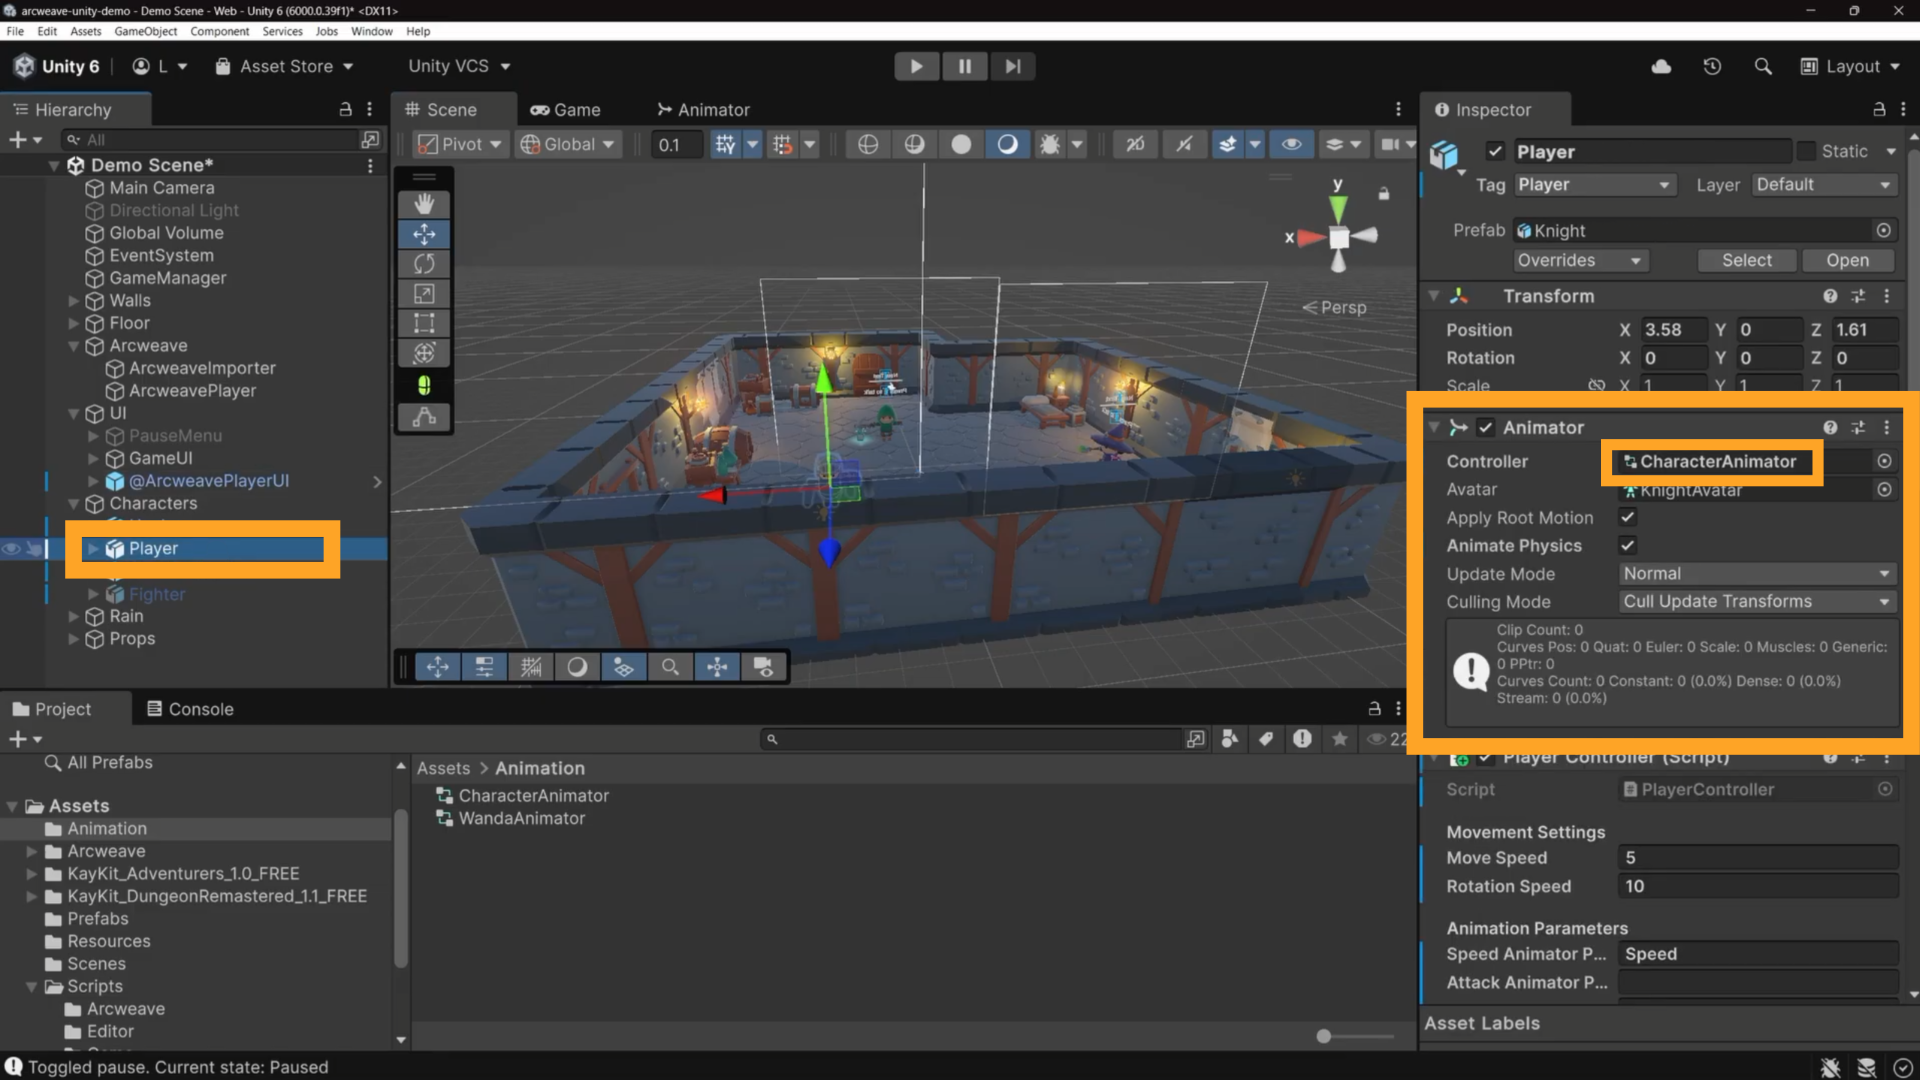
Right-click on an empty area of the graph and select **Create State > Empty**.
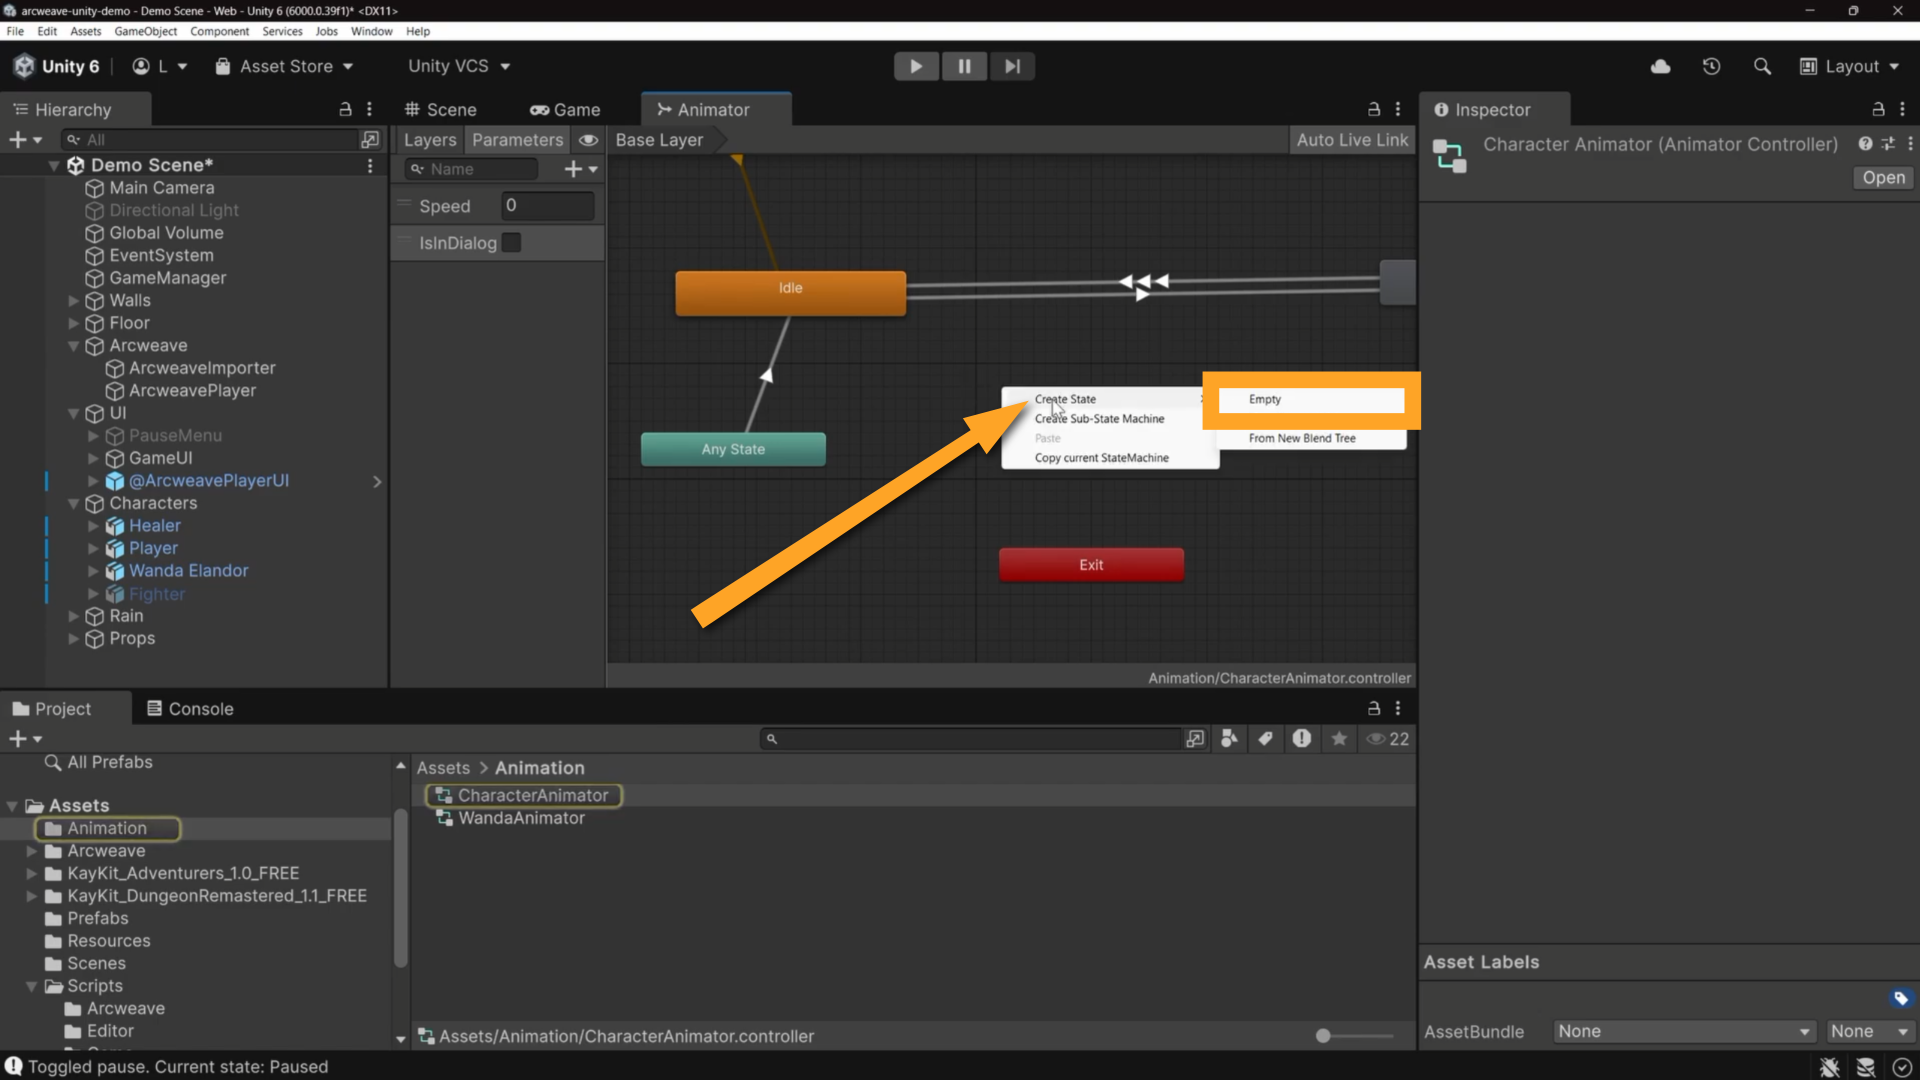
Rename the state `Attack`.
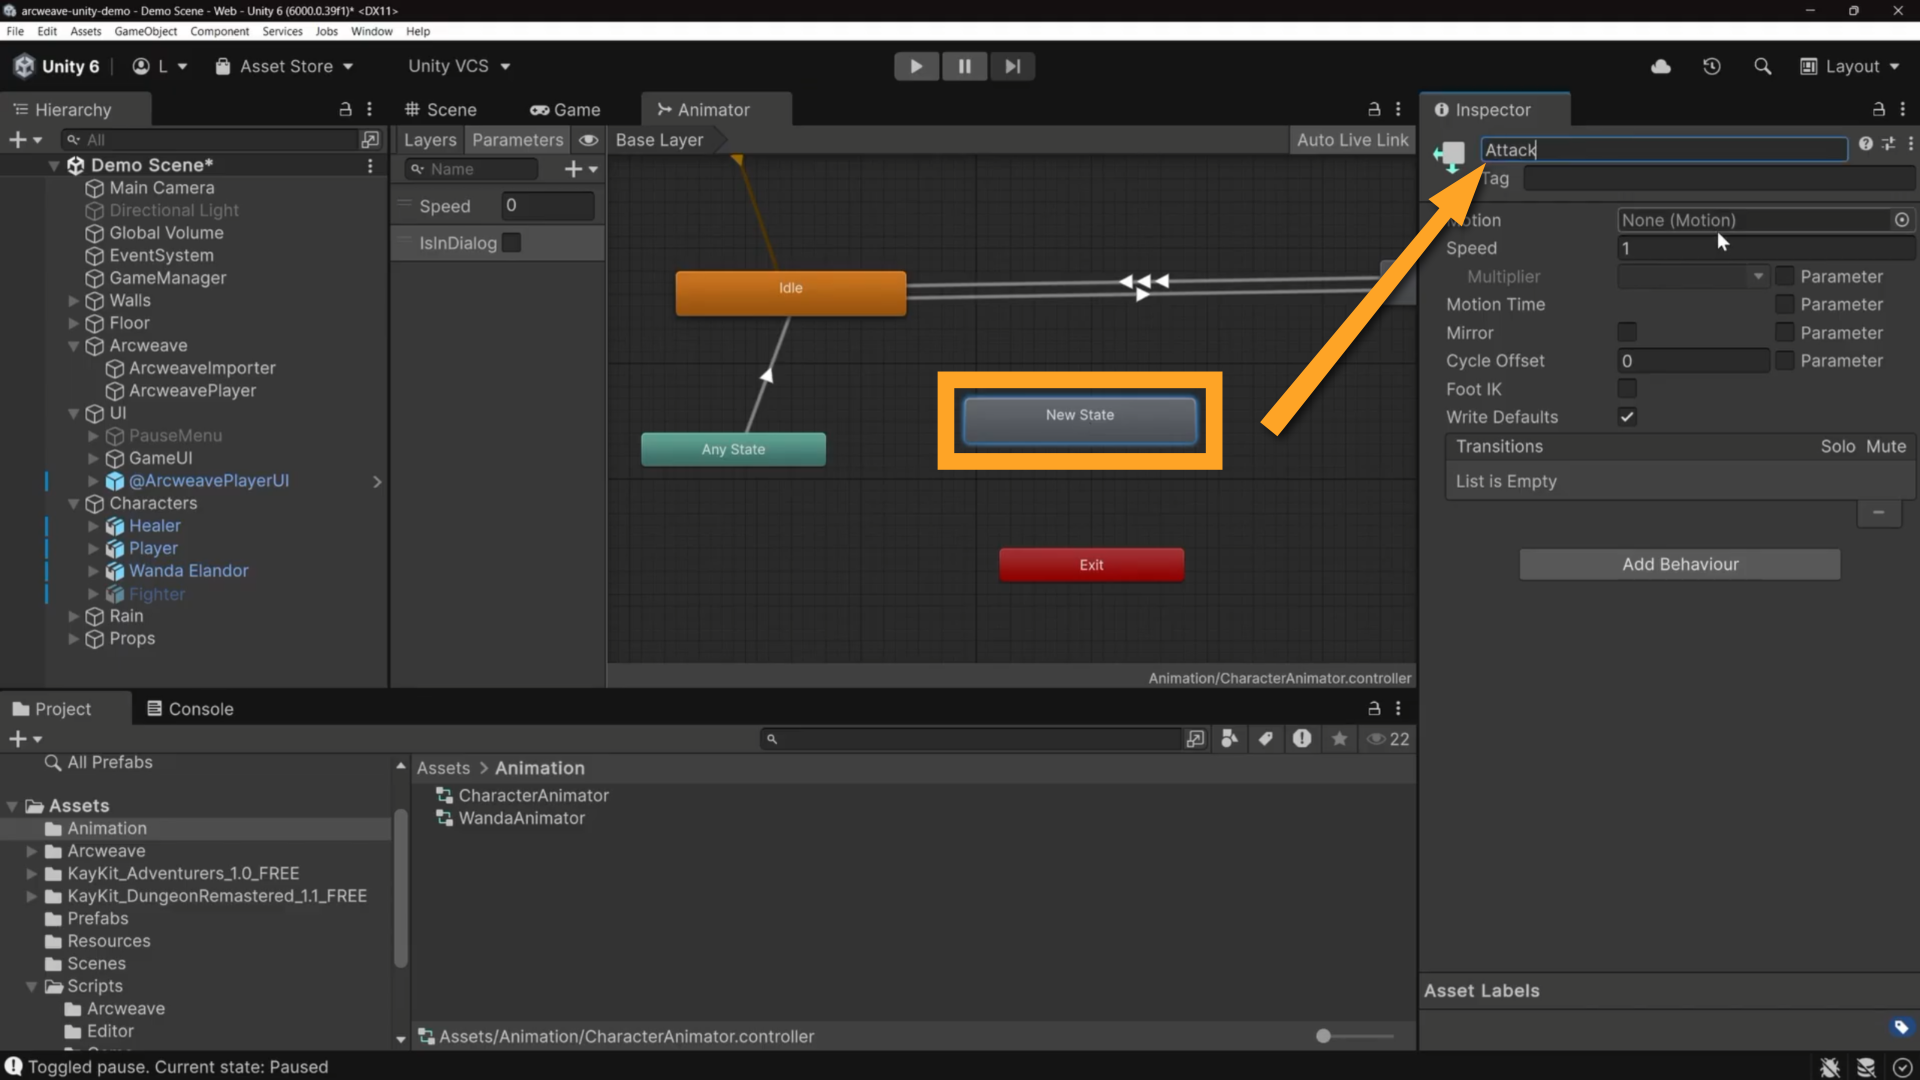
With the state selected, click the object picker button (on the right side of the **Motion** field), to browse the available animation clips.
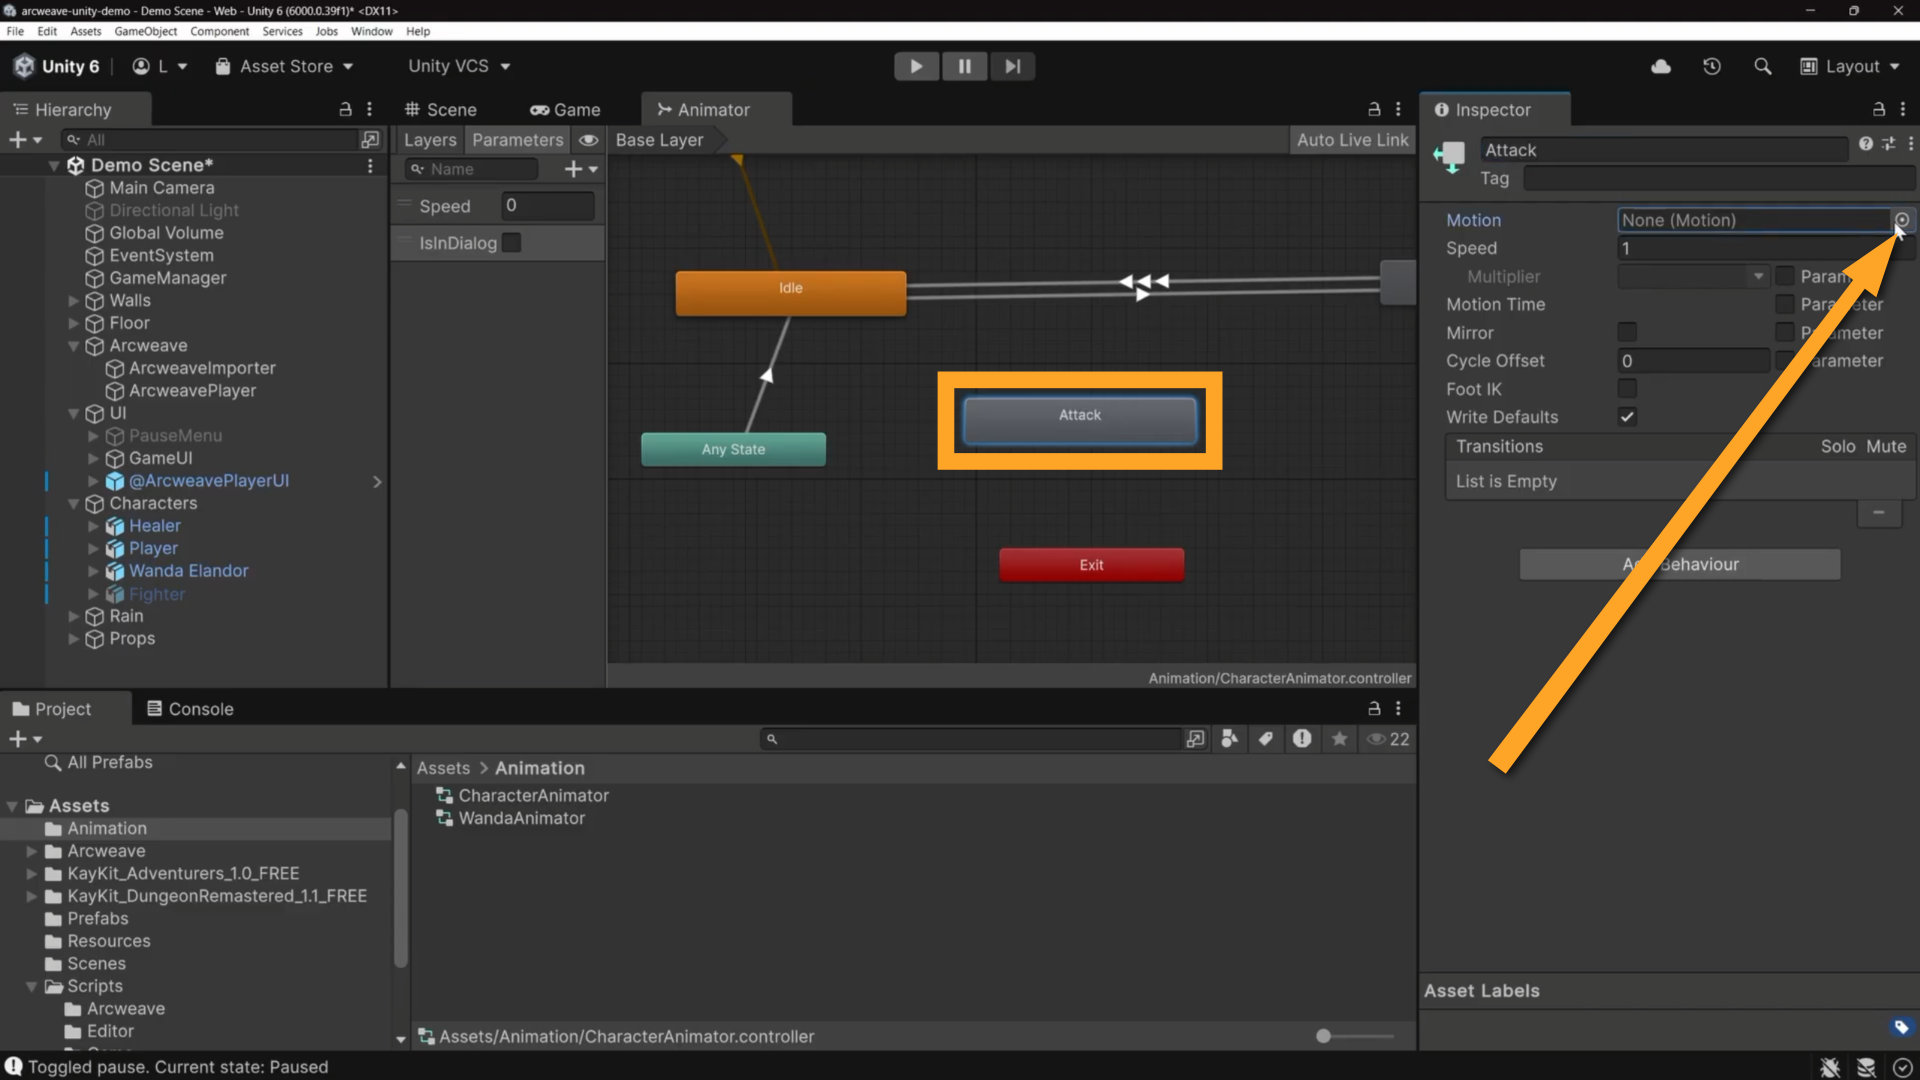
Select the attack animation clip named **1H_Melee_Attack_Slice_Diagonal** and assign it to the **Motion** field in the Inspector.
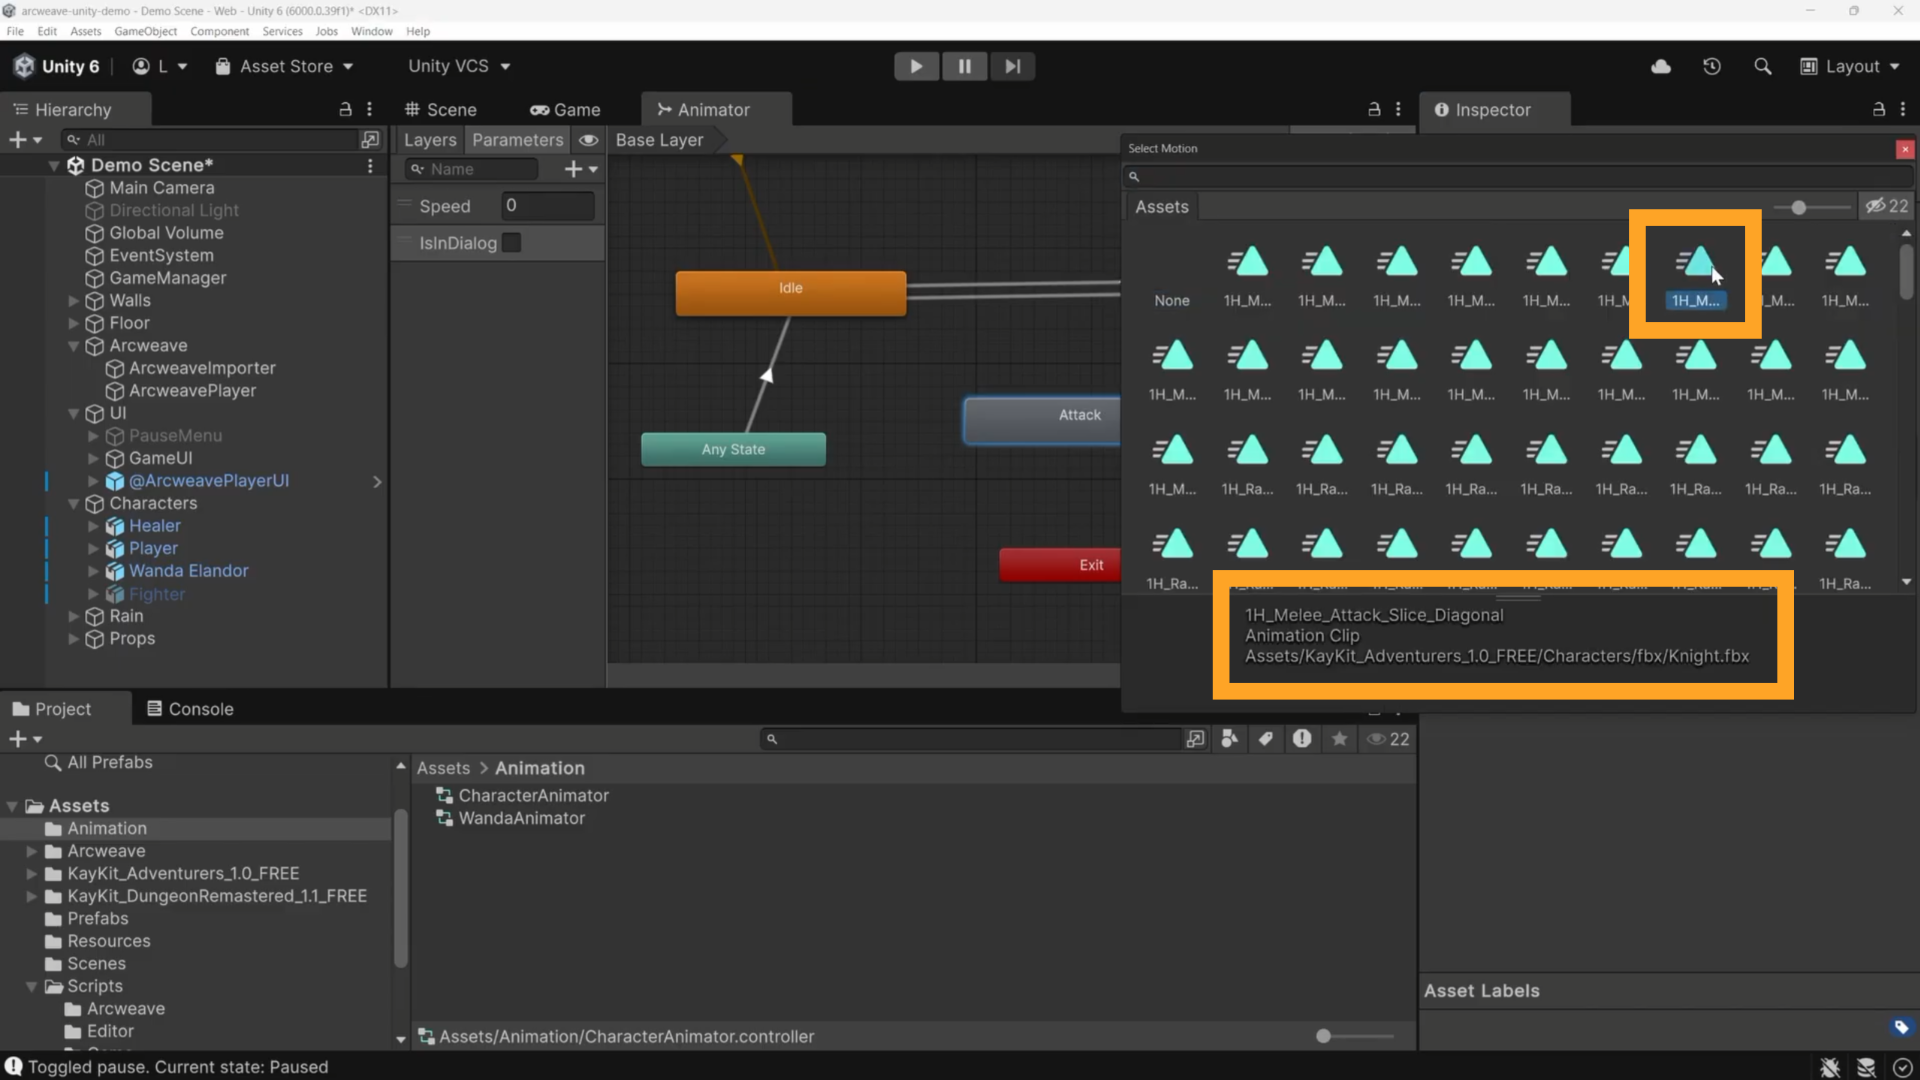
Now add the transitions:
1. Right-click **Any State** and drag a transition to the **Attack** state.
2. Right-click the **Attack** state and drag a transition to **Exit**.
The final animation graph should look like the one in the image below:
In the Parameters panel, click **+**, add a **Trigger**, and name it `Attack`.
Select the **Any State → Attack** transition. In the Inspector, uncheck **Has Exit Time** so the animation fires immediately on input rather than waiting for the current clip to finish.
To the same transition, add a condition: `Attack`.
> ✅ The **Attack → Exit** transition can keep **Has Exit Time** checked; this lets the animation finish naturally before returning to idle.
> ✅ If you're using the template Player from this project, the Animator is already configured.
Finally, set the animation parameters in Player:
1. Select the **Player** GameObject in the Hierarchy.
2. In the **Player Controller** component, locate the **Animation Parameters**.
3. Type `Attack` in both fields of **Attack Animator Param** and **Attack State Name**.
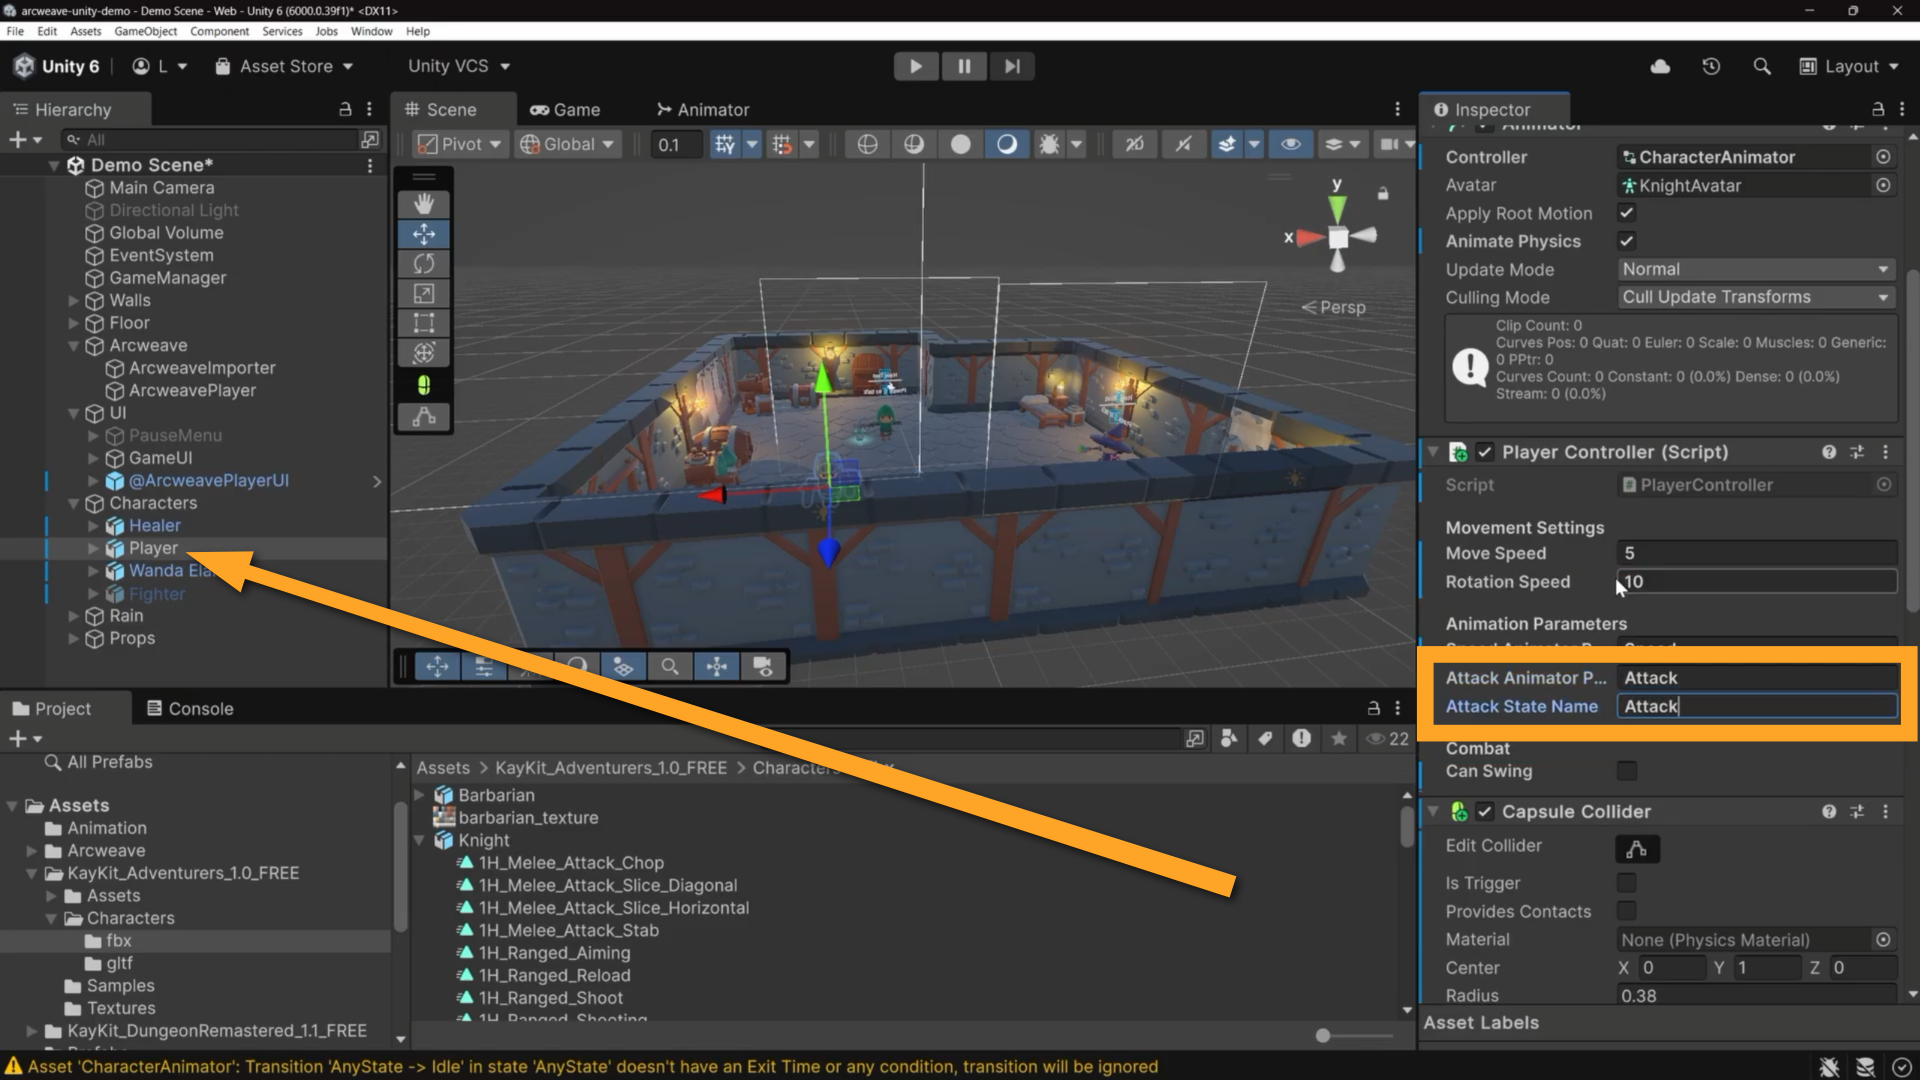
These tell the script the name of the trigger that activates the attack and the name of the attack animation.
### The full chain
Context: Arcweave docs > Tutorials > Unity > Unity tutorial | Part 5: Customize the template > Enable the attack animation > The full chain
When the player chooses to train:
1. The Arcweave project's Arcscript runs in the training element (`gold -= 50`, `sword_locked = false`).
2. `ArcweavePlayer` fires `onElementEnter` for the training element, which has the `attack` component attached.
3. `SwordSwingHandler` detects the `attack` component and calls `EnableSwordSwing()` on the `PlayerController`.
4. From that point on, left-clicking triggers the attack animation.
## Test in Play mode
Context: Arcweave docs > Tutorials > Unity > Unity tutorial | Part 5: Customize the template > Test in Play mode
Enter Play mode. Walk to the Fighter and press E.
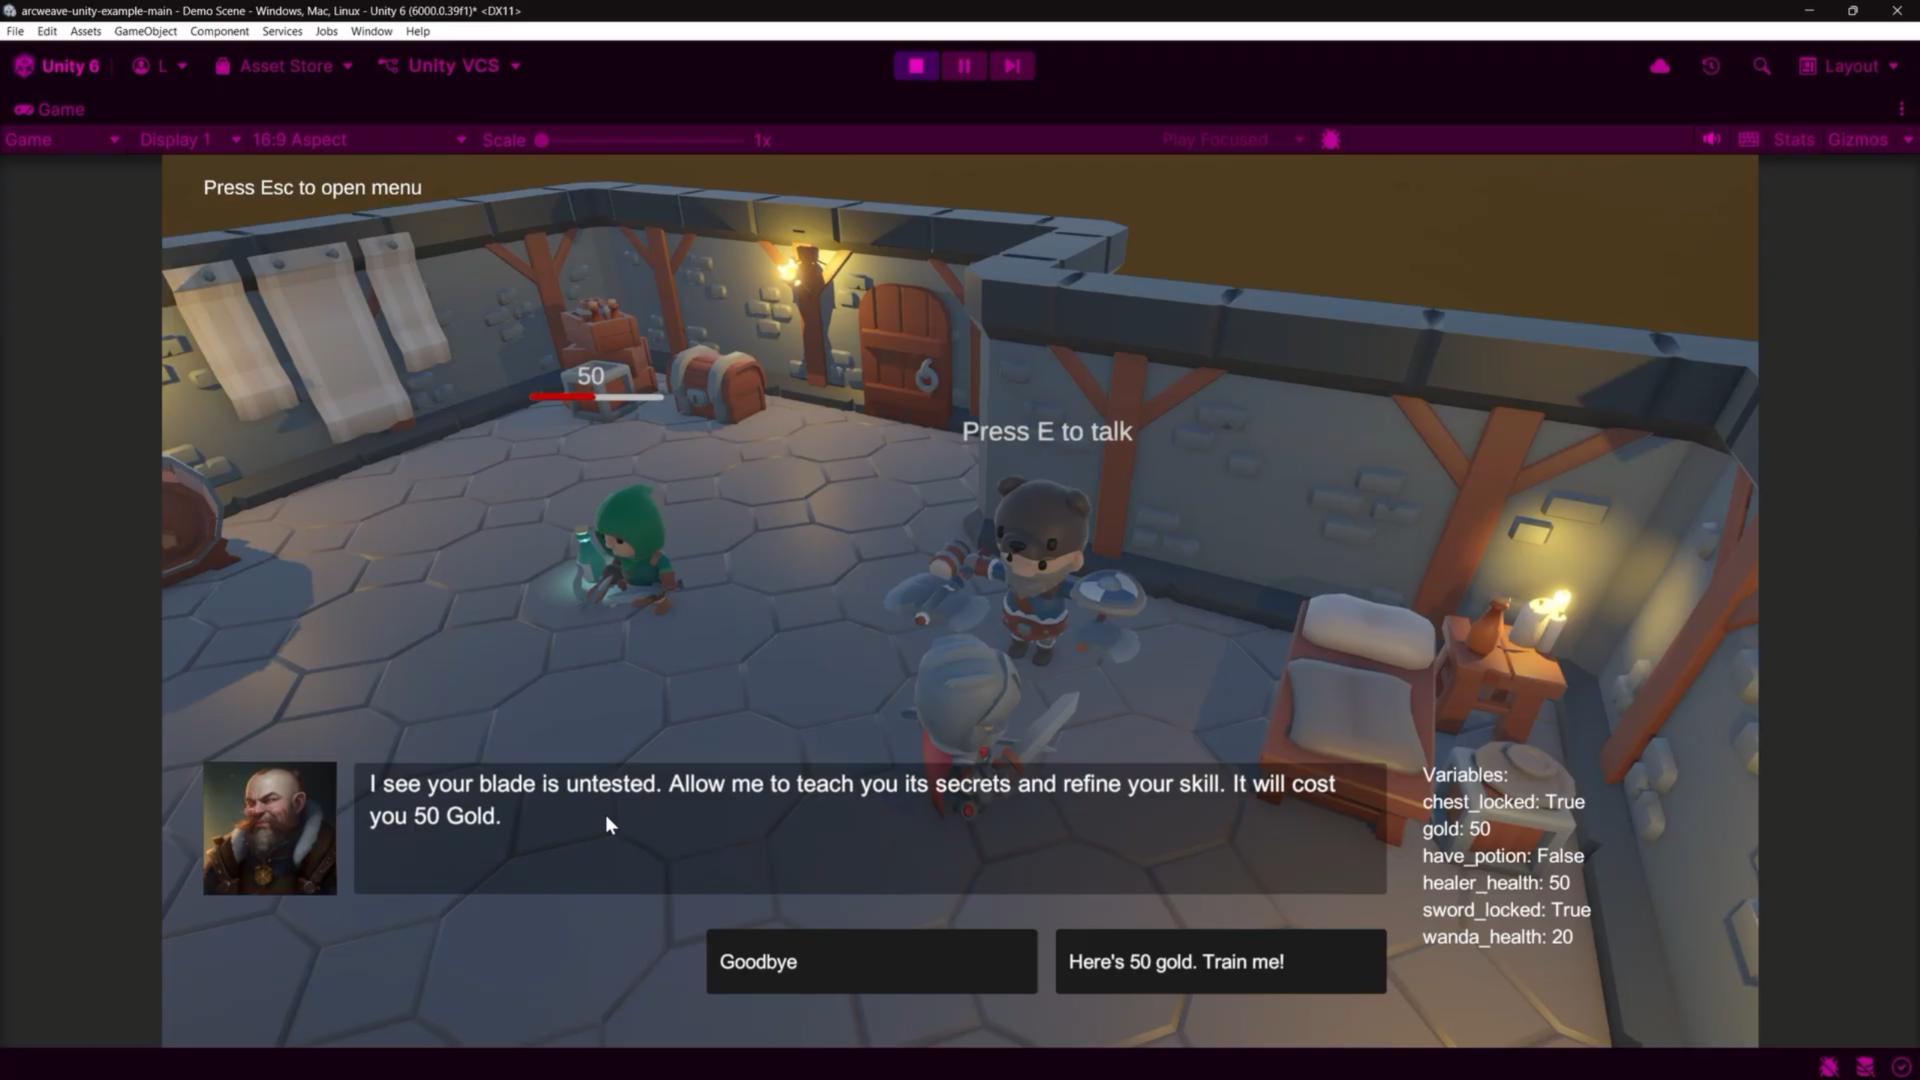
- The starting element shows the training offer because `sword_locked` is `true`.
- The branch evaluates `gold >= 50 and sword_locked` as true, so the training path is available.
- After choosing it, `SwordSwingHandler` detects the `attack` component and calls `EnableSwordSwing()`. You can see `canSwing` flip to `true` on the PlayerController in the Inspector.
- Close the dialogue and left-click: the attack animation plays.
- Return to the Fighter: `sword_locked` is now `false`, so the starting element shows the "seasoned fighter" line and the training path is no longer available.
## Build the project
Context: Arcweave docs > Tutorials > Unity > Unity tutorial | Part 5: Customize the template > Build the project
Go to **File → Build Profiles** (**File → Build Settings** in Unity versions before Unity 6), confirm the scene is in the scene list and the platform is selected, then click **Build**.
After the build completes, open the output folder. Alongside the executable and data folder, you'll find an `arcweave/` folder with an `arcweave/resources/` subfolder inside. This is created automatically by `ArcweaveBuildProcessor.cs` after every build. It also copies `project.json` from `Assets/Arcweave/` if one is present.
That `arcweave/` folder is what makes it possible to update narrative without rebuilding.
## Update dialogue after shipping
Context: Arcweave docs > Tutorials > Unity > Unity tutorial | Part 5: Customize the template > Update dialogue after shipping
### From a local JSON file
Context: Arcweave docs > Tutorials > Unity > Unity tutorial | Part 5: Customize the template > Update dialogue after shipping > From a local JSON file
Edit the Fighter dialogue in Arcweave, export it for Unity again, and copy the new `project.json` into the `arcweave/` folder next to the executable. The next time the game launches, `RuntimeArcweaveImporter` loads it automatically, with no Unity rebuild required.
If the game is already running, press Escape to open the import panel and click **Import from local JSON** to reload immediately.
### From the REST API
Context: Arcweave docs > Tutorials > Unity > Unity tutorial | Part 5: Customize the template > Update dialogue after shipping > From the REST API
In the import panel, fill in:
- **API**: an API key with **Read projects** enabled from your workspace's [API section](https://docs.arcweave.com/workspaces/api). The REST API is available to Team workspaces only.
- **Project Hash**: from [Project settings](https://docs.arcweave.com/project-tools/settings#project-hash).
Click **Web Import**. The game pulls the latest version directly from Arcweave. The designer saves in Arcweave; you test in the running build.
## Summary
Context: Arcweave docs > Tutorials > Unity > Unity tutorial | Part 5: Customize the template > Summary
For any new NPC and mechanic in this template, the workflow is:
1. **In Arcweave**: add variables; create components (`dialogue_start`, `dialogue_end`, character portrait, gameplay components like `attack`); build the board with conditional text and branches; attach components to elements to signal Unity at the right narrative moment; export.
2. **In Unity, import**: update the `ArcweaveProjectAsset`.
3. **In Unity, GameManager**: fill in `Dialogue Start Component Name` and `Dialogue End Component Name`.
4. **In Unity, NPC**: add the character, rename it, add `ArcweaveDialogueTrigger` with the correct board name.
5. **In Unity, portrait**: place the image in `Assets/Resources/` with the same filename as in Arcweave.
6. **In Unity, gameplay**: add the appropriate handler script (an `ArcweaveElementComponentHandler` subclass) to the relevant GameObject, set the component name to watch, and wire up the target.
7. **Build**: the `arcweave/` folder is created automatically. Drop in a new `project.json` or use the import panel to update without rebuilding.
The Arcweave project is where the narrative lives; Unity is where it runs. Variables shape the story, components trigger the gameplay, and the two sides stay connected even after shipping.
# Unreal Engine integration tutorial
Source: https://docs.arcweave.com/tutorials/unreal/overview
Section: Tutorials
Description: A tutorial introducing you to Arcweave's plugin for Unreal Engine
This tutorial introduces the Arcweave [plugin for Unreal Engine](https://docs.arcweave.com/integrations/unreal). By the end of this short collection of videos, you'll know how to:
1. [Install the plugin](https://docs.arcweave.com/tutorials/unreal/overview#_1-install)
2. [Understand the plugin's core classes and functions](https://docs.arcweave.com/tutorials/unreal/overview#_2-classes-functions)
3. [Connect your Arcweave project](https://docs.arcweave.com/tutorials/unreal/overview#_3-connect-your-project)
4. [Fetch your story data into the Unreal Editor and the game build](https://docs.arcweave.com/tutorials/unreal/overview#_4-fetch-your-story-data)
5. [Put everything together in an example game](https://docs.arcweave.com/tutorials/unreal/overview#_5-example-game)
> ✅ The example game described in this tutorial uses Arcweave's [Game Engine Example](https://docs.arcweave.com/workspaces/projects#project-templates) project template.
> ℹ️ For written installation steps and the plugin's classes and functions, see [Unreal Engine integration](https://docs.arcweave.com/integrations/unreal#plugin-installation).
## 1. Install
Context: Arcweave docs > Tutorials > Unreal Engine integration tutorial > 1. Install
Video: https://www.youtube.com/watch?v=Ws_Cz-IQQYg
## 2. Classes & functions
Context: Arcweave docs > Tutorials > Unreal Engine integration tutorial > 2. Classes & functions
Video: https://www.youtube.com/watch?v=6Q7aEAFtAVU
## 3. Connect your project
Context: Arcweave docs > Tutorials > Unreal Engine integration tutorial > 3. Connect your project
Video: https://www.youtube.com/watch?v=HmBD-aIcW6E
## 4. Fetch your story data
Context: Arcweave docs > Tutorials > Unreal Engine integration tutorial > 4. Fetch your story data
Video: https://www.youtube.com/watch?v=IsLsv1q88Bw
## 5. Example game
Context: Arcweave docs > Tutorials > Unreal Engine integration tutorial > 5. Example game
Video: https://www.youtube.com/watch?v=RdaCcYEMG58
# Godot Engine integration tutorial
Source: https://docs.arcweave.com/tutorials/godot/overview
Section: Tutorials
Description: A tutorial introducing you to Arcweave's plugin for Godot Engine
This tutorial introduces the Arcweave [plugin for Godot Engine](https://docs.arcweave.com/integrations/godot). By the end of this short video series, you'll know how to:
1. [Install and activate the plugin](https://docs.arcweave.com/tutorials/godot/overview#_1-install-activate)
2. [Use it in a simple Play Mode Godot game](https://docs.arcweave.com/tutorials/godot/overview#_2-play-mode-in-godot)
3. [Connect and navigate the example game](https://docs.arcweave.com/tutorials/godot/overview#_3-example-game-playthrough)
4. [Navigate the project's scenes and scripts](https://docs.arcweave.com/tutorials/godot/overview#_4-scenes-scripts)
5. [Fetch your story data into Godot, both in the editor and in a game build](https://docs.arcweave.com/tutorials/godot/overview#_5-test-in-runtime)
> ✅ The example game described in this tutorial uses Arcweave's [Game Engine Example](https://docs.arcweave.com/workspaces/projects#project-templates) project template.
> ℹ️ The plugin requires the **.NET** version of Godot Engine. For written installation steps and the plugin's API, see [Godot Engine integration](https://docs.arcweave.com/integrations/godot#requirements).
## 1. Install & activate
Context: Arcweave docs > Tutorials > Godot Engine integration tutorial > 1. Install & activate
Video: https://www.youtube.com/watch?v=SGrg3DAHiRA
## 2. Play Mode in Godot
Context: Arcweave docs > Tutorials > Godot Engine integration tutorial > 2. Play Mode in Godot
Video: https://www.youtube.com/watch?v=6WDjRaOtdd0
## 3. Example game playthrough
Context: Arcweave docs > Tutorials > Godot Engine integration tutorial > 3. Example game playthrough
Video: https://www.youtube.com/watch?v=RASdYz7qyVo
## 4. Scenes & scripts
Context: Arcweave docs > Tutorials > Godot Engine integration tutorial > 4. Scenes & scripts
Video: https://www.youtube.com/watch?v=ZWhQz-SVncQ
## 5. Test in runtime
Context: Arcweave docs > Tutorials > Godot Engine integration tutorial > 5. Test in runtime
Video: https://www.youtube.com/watch?v=ZeBuHkxrNYU
# AI tools tutorial
Source: https://docs.arcweave.com/tutorials/ai-tools/overview
Section: Tutorials
Description: Video tutorial on Arcweave's Element Generator, Element Enhancer, Image Generator, and Design Assistant
This short video tutorial series introduces Arcweave's AI tools:
- [Element Generator & Element Enhancer](https://docs.arcweave.com/tutorials/ai-tools/element-generator-enhancer)
- [Image Generator](https://docs.arcweave.com/tutorials/ai-tools/image-generator)
- [Design Assistant](https://docs.arcweave.com/tutorials/ai-tools/design-assistant)
For written instructions on each tool, see the [AI tools](https://docs.arcweave.com/project-tools/ai-features/overview) section.
# Element Generator / Enhancer
Source: https://docs.arcweave.com/tutorials/ai-tools/element-generator-enhancer
Section: Tutorials > AI tools
Description: Video tutorial on Arcweave's Element Generator, which creates new elements, and Element Enhancer, which refines existing ones
This video tutorial shows Arcweave's [Element Generator](https://docs.arcweave.com/project-tools/ai-features/element-generator), which creates new elements from a prompt, and [Element Enhancer](https://docs.arcweave.com/project-tools/ai-features/element-enhancer), which refines existing elements. For the written reference, see those pages.
Video: https://www.youtube.com/watch?v=x86KqQZuKJI
# Image Generator
Source: https://docs.arcweave.com/tutorials/ai-tools/image-generator
Section: Tutorials > AI tools
Description: Video tutorial on Arcweave's Image Generator, which creates image assets for your project with generative AI
This video tutorial shows Arcweave's [Image Generator](https://docs.arcweave.com/project-tools/ai-features/image-generator), which creates image assets for your project with generative AI. For written instructions, see that page.
Video: https://www.youtube.com/watch?v=mBlagOinKCU
# Design Assistant
Source: https://docs.arcweave.com/tutorials/ai-tools/design-assistant
Section: Tutorials > AI tools
Description: Video tutorial on Arcweave's Design Assistant, the AI assistant that explores, brainstorms, and edits your project
This video tutorial shows Arcweave's [Design Assistant](https://docs.arcweave.com/project-tools/ai-features/design-assistant), the AI assistant that helps you explore, brainstorm, and edit your project. For written instructions, including how to access it, make edits, and track AI credits, see that page.
Video: https://www.youtube.com/watch?v=N9CS0Ihs1F8
# Project items
Source: https://docs.arcweave.com/project-items/overview
Section: Project Items
Description: Guide to all items used in your Arcweave project and how they relate to each other
In Arcweave, a [project](https://docs.arcweave.com/workspaces/projects) holds the structure and content of your interactive story, allowing you to design, test, share, and export it.
> ℹ️ New to Arcweave? [Core concepts](https://docs.arcweave.com/introduction/core-concepts) introduces these items in plain terms before you dive into the reference pages.
This section covers all the Arcweave items you can use to build your story. You will learn everything there is to know about the following:
- [Boards](https://docs.arcweave.com/project-items/boards) are the canvases where you design your story flowcharts.
- Use [elements](https://docs.arcweave.com/project-items/elements) and [connections](https://docs.arcweave.com/project-items/connections) to map out story events and write scenes or dialogue trees. To connect distant elements, create [jumpers](https://docs.arcweave.com/project-items/jumpers)—shortcuts that continue the story at an element elsewhere, on the same board or another one. These items define how your story flows.
- Represent story objects with [components](https://docs.arcweave.com/project-items/components), storing data in the form of [attributes](https://docs.arcweave.com/project-items/attributes).
- Add logic using [variables](https://docs.arcweave.com/project-items/variables/overview), [Arcscript](https://docs.arcweave.com/project-items/arcscript), and [branches](https://docs.arcweave.com/project-items/branches).
- Add image and sound [assets](https://docs.arcweave.com/project-items/assets/overview) to enrich your story with visuals and audio.
- Use [notes](https://docs.arcweave.com/project-items/notes) and [comments](https://docs.arcweave.com/project-items/comments) to communicate with collaborators—or your future self.
To send someone directly to a board, element, jumper, note, branch, connection, or component, use its **Copy link** action. See [Share an item or board position](https://docs.arcweave.com/project-tools/share#share-an-item-or-board-position).
## How project items relate
Context: Arcweave docs > Project Items > How project items relate
A project's story flow lives on its boards. Components, assets, and global variables belong to the whole project and can be used from any board.
| Item | Where it lives | What it holds | How it relates to other items |
| --------------------------------------------- | -------------------------------------------------------------- | -------------------------------------------------------------------------------------------------------------------- | ----------------------------------------------------------------------------------------------------------------------------------------------------------------------------- |
| [Board](https://docs.arcweave.com/project-items/boards) | The project's **Boards** section, optionally in board folders. | Elements, connections, branches, jumpers, notes, and comments; board attributes. | Its variable-type attributes are [board variables](https://docs.arcweave.com/project-items/variables/board); boards can be [mentioned](https://docs.arcweave.com/project-tools/mentions) in text. |
| [Element](https://docs.arcweave.com/project-items/elements) | A board. | A title and rich text content with optional Arcscript segments; a cover, audio, attached components, and attributes. | Sends and receives connections; can be the target of jumpers. |
| [Connection](https://docs.arcweave.com/project-items/connections) | A board. | An optional [label](https://docs.arcweave.com/project-items/labels) with text and Arcscript, shown as option text in Play Mode. | Goes from an element or branch to an element, branch, or jumper on the same board. |
| [Branch](https://docs.arcweave.com/project-items/branches) | A board. | `if` and `elseif` conditions written in Arcscript, and an optional `else`. | Receives connections; has at most one output connection per condition. |
| [Jumper](https://docs.arcweave.com/project-items/jumpers) | A board. | A link to a target element. | Receives connections and continues the flow at its target element, which can be on another board; has no output connections. |
| [Note](https://docs.arcweave.com/project-items/notes) | A board. | Rich text annotations. | Not part of the flow; has no connections, components, or Arcscript. |
| [Component](https://docs.arcweave.com/project-items/components) | The project's **Components** section. | A name, custom ID, cover, and attributes. | Attached to elements, mentioned in text, and listed in Component List attributes; its variable-type attributes are [component variables](https://docs.arcweave.com/project-items/variables/component). |
| [Attribute](https://docs.arcweave.com/project-items/attributes) | A board, component, or element. | A label and a value of a given type. | Component List and Asset List attributes reference components and assets; Boolean, Integer, Float, and String Field attributes of boards and components act as variables. |
| [Variable](https://docs.arcweave.com/project-items/variables/overview) | Global (project), board, or component scope. | A value that can change during play. | Read and changed by Arcscript in element content and labels; read by branch conditions. |
| [Asset](https://docs.arcweave.com/project-items/assets/overview) | The project's **Assets** section. | Image, audio, and video files. | Used as element and component covers, element audio and video, and in Asset List attributes. |
In [Play Mode](https://docs.arcweave.com/project-tools/play-mode/overview), the story starts at the starting element and follows connections from element to element. Connection labels become the options the player chooses, branches send the flow down the connection of the first condition that is true, and jumpers continue the flow at their target element. Along the way, [Arcscript](https://docs.arcweave.com/project-items/arcscript) in element content and labels reads and changes variables, and branch conditions read them to choose a path.
# Boards
Source: https://docs.arcweave.com/project-items/boards
Section: Project Items
Description: Create, organize, and manage boards and board folders, the canvases that hold your story flowcharts, plus performance and usage tips
In Arcweave, your story's flow takes place on one or more **boards**—the canvases where you build your story flowcharts. A board is where you visually map out scenes, dialogue, choices, and logic.

## Usage examples
Context: Arcweave docs > Project Items > Boards > Usage examples
There are no restrictions on how you use a board. It can visually represent a story chapter, a dialogue scene, a game level, or even an algorithm.
Some examples include:
- **Story parts**: Chapters, scenes, or levels—you decide what they are. Keep each one on its own board.
- **Synopses**: Outline your entire narrative in a single board before zooming into individual scenes on separate boards.
- **Subplots**: Keep main and secondary plots distinct by mapping each one on a different board.
- **Dialogue**: Create a separate board for each NPC dialogue tree, and group them in a folder named "Dialogue Trees."
- **Locations**: Build geography-based diagrams to give an overview of your game's terrain or specific areas.
- **Puzzle dependencies**: Design puzzle logic and dependencies to avoid issues—like locking a drawer while the key's still inside!
- **Storyboards**: Use [assets](https://docs.arcweave.com/project-items/assets/overview) as [element covers](https://docs.arcweave.com/project-items/elements#element-covers) to visually narrate your story.
## Usage tips
Context: Arcweave docs > Project Items > Boards > Usage tips
When working on your flowcharts, keep the following in mind:
- Use multiple boards to keep your project modular, clear, and easy to navigate.
- Use [jumpers](https://docs.arcweave.com/project-items/jumpers) to connect flowcharts across boards.
- Group related boards into board folders for better organization.
## Board folders
Context: Arcweave docs > Project Items > Boards > Board folders
To organize your boards efficiently, Arcweave lets you create your own structure of board folders within your project.
## Boards section
Context: Arcweave docs > Project Items > Boards > Boards section
Once inside a project, you can view and manage your boards and folders in the **Boards** section, located in the lower half of Arcweave's left sidebar.

Expand a board in this section to see an outline of its elements, connections, branches, jumpers, and notes. Click an item to zoom to it on the board. See [Board contents](https://docs.arcweave.com/project-tools/interface/left-sidebar#board-contents).
## Create boards or folders
Context: Arcweave docs > Project Items > Boards > Create boards or folders
### At section top
Context: Arcweave docs > Project Items > Boards > Create boards or folders > At section top
To create a new board or folder at the top of the **Boards** section:
- Go to the header of the **Boards** section.
- Click **Create board** (**+** icon) or **Create folder** (**folder** icon).
### At section bottom
Context: Arcweave docs > Project Items > Boards > Create boards or folders > At section bottom
To create a new board or folder at the bottom of the **Boards** section:
- Right-click on an empty area of the **Boards** section.
- Select **Create board** or **Create folder** from the menu.
### Above existing board
Context: Arcweave docs > Project Items > Boards > Create boards or folders > Above existing board
To create a new board or folder above an existing board in the **Boards** section:
- Right-click on the existing board's name.
- Select **Create board** or **Create folder** from the menu.
Or:
- Hover the mouse cursor over the existing board's name.
- Click on the **(+)** icon that appears.
- Select **Create board** or **Create folder** from the menu.
### Inside existing folder
Context: Arcweave docs > Project Items > Boards > Create boards or folders > Inside existing folder
To create a new board or folder inside an existing folder:
- Right-click on the existing folder's name.
- Select **Create board** or **Create folder** from the menu.
Or:
- Hover the mouse cursor over the folder's name.
- Click on the **(+) icon** that appears.
- Select **Create board** or **Create folder** from the menu.
## Delete boards / folders
Context: Arcweave docs > Project Items > Boards > Delete boards / folders
To delete a board or folder:
- Right-click on its name, on the **Boards** section.
- Select **Delete**.
> ⚠️ Deleting a board folder will also delete all its contents. You can undo the action.
> ℹ️ A project must keep at least one board. **Delete** is unavailable for the project's last remaining board, or for a folder that contains it.
> ℹ️ When deleting a board, all [mentions](https://docs.arcweave.com/project-tools/mentions) of this board will be removed as well.
## Rename boards / folders
Context: Arcweave docs > Project Items > Boards > Rename boards / folders
To rename a board or folder:
- Right-click on its name, on the **Boards** section.
- Select **Rename** from the menu.
You can also rename the currently open board from the [top menu](https://docs.arcweave.com/project-tools/interface/top-menu). You will find the current board's name next to the project name, on the left of the menu. Click it once to rename it.
## Duplicate boards
Context: Arcweave docs > Project Items > Boards > Duplicate boards
To duplicate a board:
- Right-click on its name, on the **Boards** section.
- Select **Duplicate**.
> ℹ️ Duplicating board folders is not allowed.
## Open boards
Context: Arcweave docs > Project Items > Boards > Open boards
To open a board, go to your **Boards** section on the sidebar and click on its name. Your current board area will switch to display its contents.
## Copy a board link
Context: Arcweave docs > Project Items > Boards > Copy a board link
Right-click the board's name in the sidebar's **Boards** section and select **Copy link**. Opening the link switches to that board and restores its saved position and zoom. Board folders do not have this action.
The link includes the current project language. See [Share an item or board position](https://docs.arcweave.com/project-tools/share#share-an-item-or-board-position) for access requirements and how to share a particular board view.
## Board performance
Context: Arcweave docs > Project Items > Boards > Board performance
If board navigation, selection, or connection editing feels slower than expected, see [Troubleshooting](https://docs.arcweave.com/project-tools/troubleshooting#board-performance).
Board performance can also vary depending on the selected board renderer in [Project Settings](https://docs.arcweave.com/project-tools/settings#board-renderer).
## Mention boards
Context: Arcweave docs > Project Items > Boards > Mention boards
You can create links to your boards while editing rich text in elements, notes, attributes, and labels. This kind of link is called a **mention** and you initiate it by typing the character `@` followed by a board name.
Read more on [mentions](https://docs.arcweave.com/project-tools/mentions) under the section of **Project tools**.
> ℹ️ You can also mention [components](https://docs.arcweave.com/project-items/components#mention-components).
## Board properties
Context: Arcweave docs > Project Items > Boards > Board properties
To access the properties of any board:
1. Locate the board in the **Boards** section of the left sidebar
2. Right-click the board's name and select **Properties** from the menu.
To access the properties of the current board:
1. Right-click in an empty board area.
2. Select **Board Properties**.
The properties that you can access are the following:
### Board ID
Context: Arcweave docs > Project Items > Boards > Board properties > Board ID
Each board has a **unique identifier** in the form of:
`81a30674-aa09-4eb8-8484-59298d37f984` (version 4 UUID)
> ℹ️ Uses of this board ID include accessing the board in the project's [JSON](https://docs.arcweave.com/integrations/json).
### Custom ID
Context: Arcweave docs > Project Items > Boards > Board properties > Custom ID
Besides its UUID, every regular board has an editable custom ID. Arcweave generates it when the board is created and uses it to scope the board's [attribute variables](https://docs.arcweave.com/project-items/variables/board).
To edit a board custom ID:
1. Right-click the board in the **Boards** section and select **Attributes**.
2. Select the custom ID beneath the panel title and enter a new value.
The custom ID cannot be removed, must be unique across all boards and components, and must follow the [variable naming rules](https://docs.arcweave.com/project-items/variables/overview#variable-names-and-custom-ids). Renaming it updates existing Arcscript references automatically.
### Attributes
Context: Arcweave docs > Project Items > Boards > Board properties > Attributes
Regular boards can store [attributes](https://docs.arcweave.com/project-items/attributes), including String Field, Boolean, Integer, and Float attributes that act as [board variables](https://docs.arcweave.com/project-items/variables/board).
To open a board's attributes, right-click it in the **Boards** section and select **Attributes**. Boards with attributes also display an attributes button next to their name. Board folders cannot contain attributes.
To [add](https://docs.arcweave.com/project-items/attributes#create-attributes), [edit](https://docs.arcweave.com/project-items/attributes#edit-attributes), or [remove](https://docs.arcweave.com/project-items/attributes#delete-attributes) a board's attributes, see the **Attributes** page.
### Content
Context: Arcweave docs > Project Items > Boards > Board properties > Content
This section displays the board's item count by type:
- [Elements](https://docs.arcweave.com/project-items/elements)
- [Connections](https://docs.arcweave.com/project-items/connections)
- [Notes](https://docs.arcweave.com/project-items/notes)
- [Jumpers](https://docs.arcweave.com/project-items/jumpers)
- [Branches](https://docs.arcweave.com/project-items/branches)
- [Comments](https://docs.arcweave.com/project-items/comments)
### Total words
Context: Arcweave docs > Project Items > Boards > Board properties > Total words
This section displays the **board's word count**, adding together words in element titles, element content, and connection labels in the currently selected language.
Arcscript blocks and notes are not counted. For the title and content breakdown of an individual element, see [element word count](https://docs.arcweave.com/project-items/elements#word-count).
### Total characters
Context: Arcweave docs > Project Items > Boards > Board properties > Total characters
This section displays the **board's character count** for the same text: element titles, element content, and connection labels in the currently selected language. Arcscript blocks and notes are not counted.
# Elements
Source: https://docs.arcweave.com/project-items/elements
Section: Project Items
Description: Elements are the board items that hold your story text and build your flowcharts
**Elements** are the main board items in Arcweave and the building blocks of your flowcharts. Each element holds a small fragment of your story in a **title** and a rich text **content** area. It can also carry a cover image or video, attached components and audio, [Arcscript](https://docs.arcweave.com/project-items/arcscript) (Arcweave's scripting language), and [attributes](https://docs.arcweave.com/project-items/attributes) (labeled pieces of data).

By connecting elements together with [connections](https://docs.arcweave.com/project-items/connections), you create your story flow, allowing the player to make choices and progress through your game.
> ✅ Play-test the flow of your elements and connections in [Play Mode](https://docs.arcweave.com/project-tools/play-mode/overview).
## Create elements
Context: Arcweave docs > Project Items > Elements > Create elements
### Create independent elements
Context: Arcweave docs > Project Items > Elements > Create elements > Create independent elements
To create an element, do any of the following:
- Double-click on an empty area of the current board.
- Drag and drop the **New element icon** (at the left of the [bottom menu](https://docs.arcweave.com/project-tools/interface/bottom-menu)) on an empty area of the current board.
- Right-click on an empty area of the current board and select **Create > Element** from the menu.

### Create connected elements
Context: Arcweave docs > Project Items > Elements > Create elements > Create connected elements
To create a new element that is already connected, drag a connection from an element's edge or a branch's output and drop it on an empty area of the board. In the menu that opens, select **Create element here**. See [Create connections](https://docs.arcweave.com/project-items/connections#with-drag-and-drop).
When an element is selected, you can use [keyboard shortcuts](https://docs.arcweave.com/project-tools/interface/keyboard-shortcuts#element-creation-connection) to instantly create and connect a new element in one action.
Press **Ctrl + Alt/Option/Cmd + an arrow key**. A new element is created and automatically connected to the first one.
> ✅ The new element is automatically selected. To edit it, press **Enter** and start typing.
## Select elements
Context: Arcweave docs > Project Items > Elements > Select elements
Click an element to select it. To select multiple items, see [Select board items](https://docs.arcweave.com/project-tools/interface/mouse-actions#select-board-items).
## Copy an element link
Context: Arcweave docs > Project Items > Elements > Copy an element link
Right-click an element on the board or in the sidebar's **Boards** section and select **Copy link**. On the board, select only that element to make the action available.
Opening the link centers the element on its board in the language active when you copied it. See [Share an item or board position](https://docs.arcweave.com/project-tools/share#share-an-item-or-board-position) for access requirements.
## Delete elements
Context: Arcweave docs > Project Items > Elements > Delete elements
To delete an element, you can do either of the following:
- Select the element and press **Delete** or **Backspace**.
- Right-click on it and select **Delete selection** from the menu.
## Edit elements
Context: Arcweave docs > Project Items > Elements > Edit elements
Each element has a **title** (the top, coloured part) and a **content** area (the main black part). To edit either, simply double-click on it.
To cycle editing between title and content, press the **tab key**.
Format the element's title and content using [rich text](https://docs.arcweave.com/project-tools/rich-text).
To exit editing mode press **Esc** or click on an empty area of the board.
> ✅ Project owners and editors can also edit element content in [Play Mode](https://docs.arcweave.com/project-tools/play-mode/using-play-mode#edit-content-in-play-mode) while playtesting, without returning to the board.
## Resize elements
Context: Arcweave docs > Project Items > Elements > Resize elements
To resize an element manually, select it and drag any of its corners or edges.
To set it to **auto-resize**, so it continuously adjusts to fit its content, double-click any edge or corner handle.

## Change element theme
Context: Arcweave docs > Project Items > Elements > Change element theme
To change the color theme of an element, right-click on it and select one of the available colors from the menu's color picker.

## Element covers
Context: Arcweave docs > Project Items > Elements > Element covers
Elements can have a **cover**: an image, icon, or video that renders in [Play Mode](https://docs.arcweave.com/project-tools/play-mode/overview), above the element's text content.
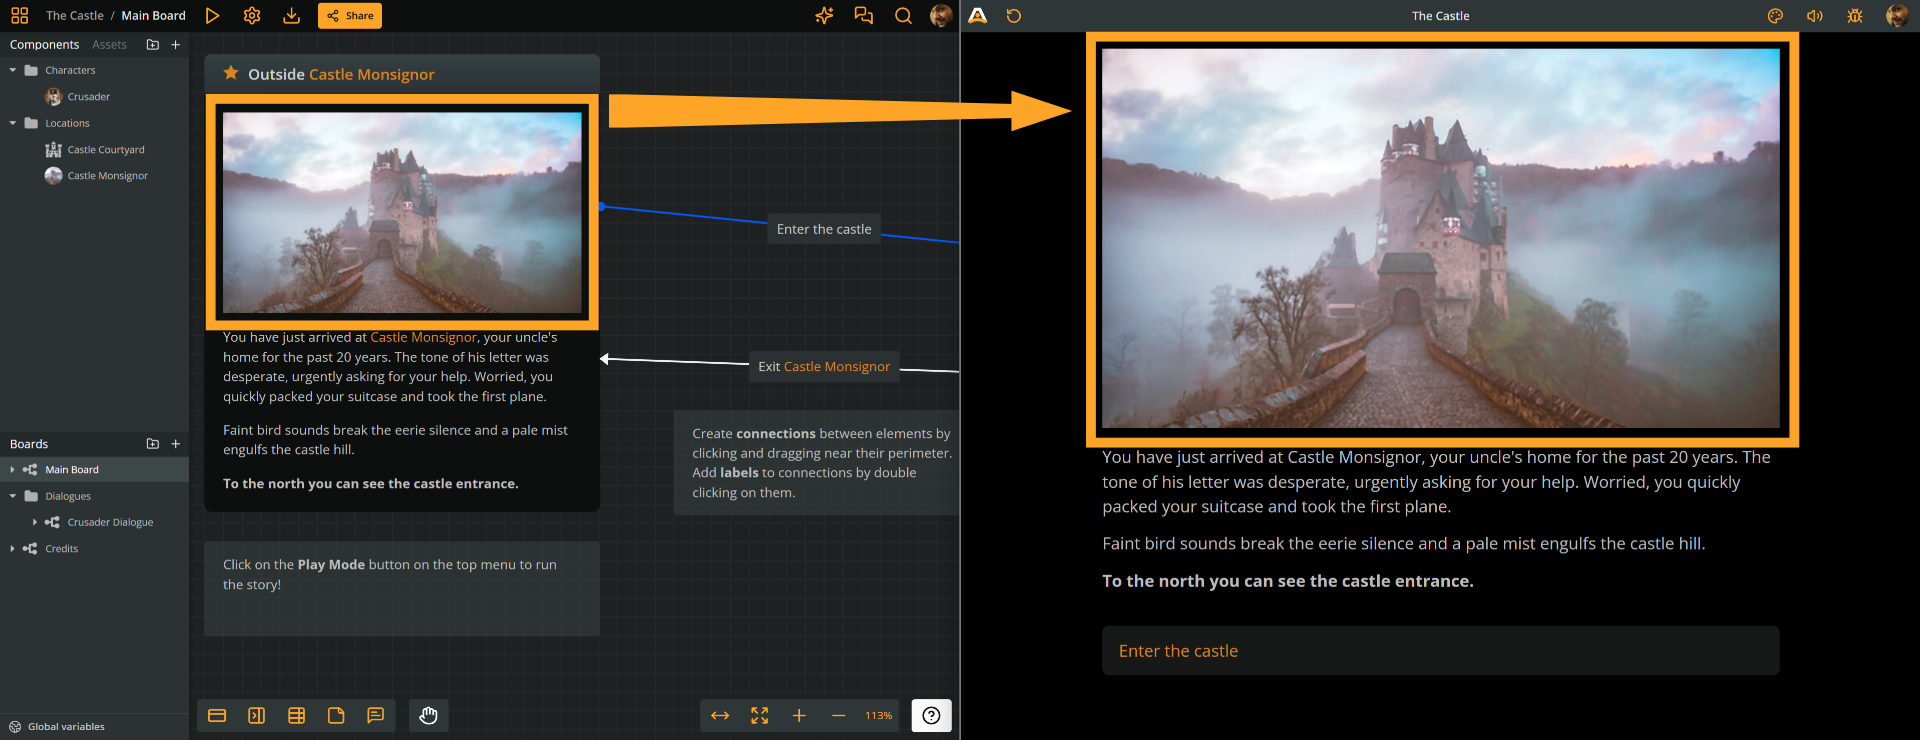
As covers, you can use one of the following:
- [Image assets](https://docs.arcweave.com/project-items/assets/images)
- [Video assets](https://docs.arcweave.com/project-items/assets/video)
- Icons from Arcweave's [built-in icon library](https://docs.arcweave.com/project-tools/icon-library)
- [YouTube video embeds](https://docs.arcweave.com/project-items/elements#youtube-embeds-as-element-covers)
### Assets as element covers
Context: Arcweave docs > Project Items > Elements > Element covers > Assets as element covers
[Images](https://docs.arcweave.com/project-items/assets/images) and [video assets](https://docs.arcweave.com/project-items/assets/video) can be assigned as element covers. In Play Mode, both images and videos are rendered above the element's text content.
> ℹ️ For configuring video asset playback behavior, see the page on [Video assets](https://docs.arcweave.com/project-items/assets/video#playback-behavior).
#### Drag and drop assets to set as element covers
Context: Arcweave docs > Project Items > Elements > Element covers > Assets as element covers > Drag and drop assets to set as element covers
To easily assign an image or video asset, drag it from the [Assets section](https://docs.arcweave.com/project-items/assets/overview#assets-section) of your project and drop it into the element.

#### Use context menu to set element covers
Context: Arcweave docs > Project Items > Elements > Element covers > Assets as element covers > Use context menu to set element covers
You can also assign a cover to an element using the element's context menu. This opens your options to icons, YouTube embed, and image generation.
To set a cover using the context menu:
1. Right-click on the element.
2. Select **Cover > Set cover** in the context menu.

3. Select a tab:
- **My Assets**: Select an [image](https://docs.arcweave.com/project-items/assets/images) or [video asset](https://docs.arcweave.com/project-items/assets/video).
- **Icon Library**: Select an icon from Arcweave's built-in [icon library](https://docs.arcweave.com/project-tools/icon-library).
- **Embed**: Embed a YouTube video. (See [below](https://docs.arcweave.com/project-items/elements#youtube-embeds-as-element-covers))
- **Generate**: Use Arcweave's [Image generator](https://docs.arcweave.com/project-tools/ai-features/image-generator) to generate a cover.
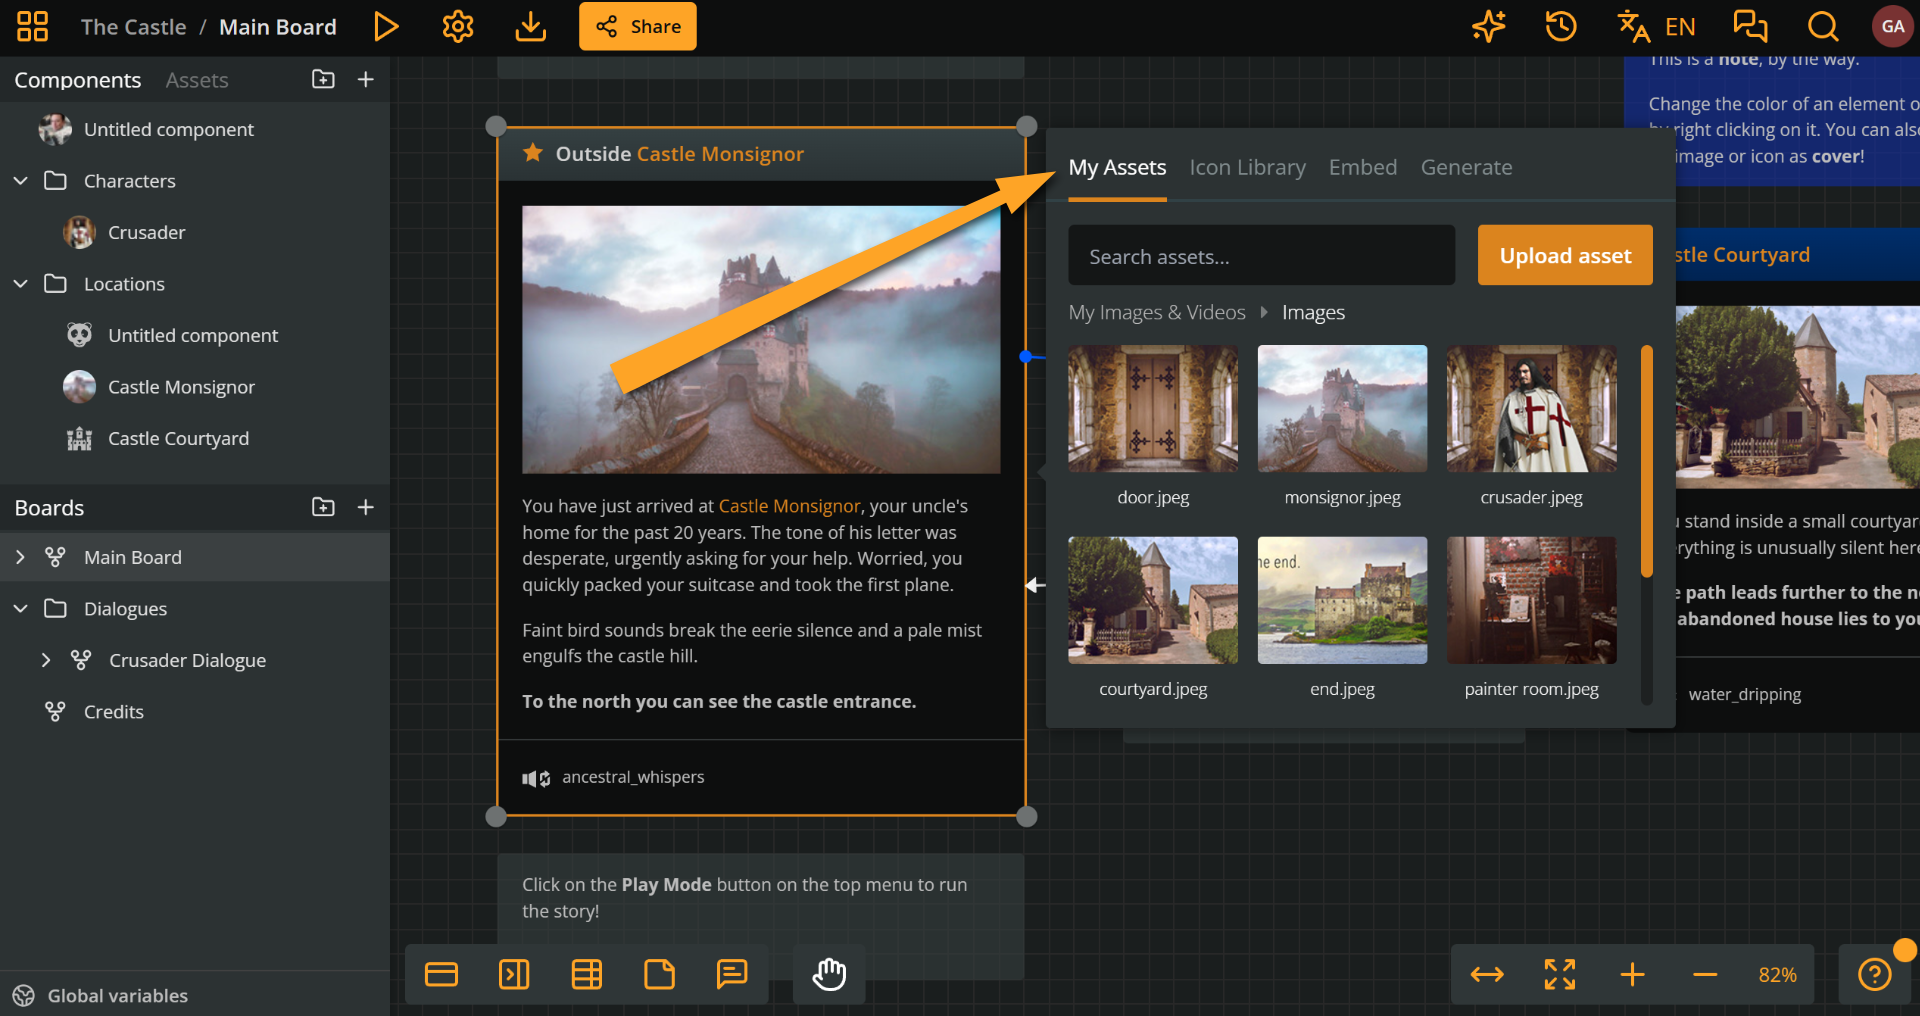
4. Choose an image or video asset, an icon, or paste a YouTube video URL, accordingly.
> ℹ️ To use your own images in a project, you must upload them as [assets](https://docs.arcweave.com/project-items/assets/overview).
### YouTube embeds as element covers
Context: Arcweave docs > Project Items > Elements > Element covers > YouTube embeds as element covers
You can embed a YouTube video as an element cover. In Play Mode, embedded YouTube videos are rendered above the element's text content.
To embed a YouTube video as an element cover, perform the following steps:
1. Right-click the element and select **Cover > Set cover** in the context menu.
2. Select the **Embed** tab.
3. Paste a YouTube video URL in the relevant field.
4. Configure video's playback behavior:
- **Autoplay**: Video plays automatically when element loads.
- **Show controls**: Player has access to video controls (play, pause, seek bar).
5. Click **Embed Video**.

### Generate covers
Context: Arcweave docs > Project Items > Elements > Element covers > Generate covers
You can also use Arcweave's Image Generator to do either of the following:
- [Generate element covers](https://docs.arcweave.com/project-tools/ai-features/image-generator#set-covers): Submit a prompt and image orientation preferences; Arcweave generates a relevant image and assigns it as the element cover.

- [Auto-generate element covers](https://docs.arcweave.com/project-tools/ai-features/image-generator#auto-generate-covers): Let Arcweave generate an element cover using the element title and content as context, without requiring a prompt. Right-click the element and select **AI > Auto-generate cover**.
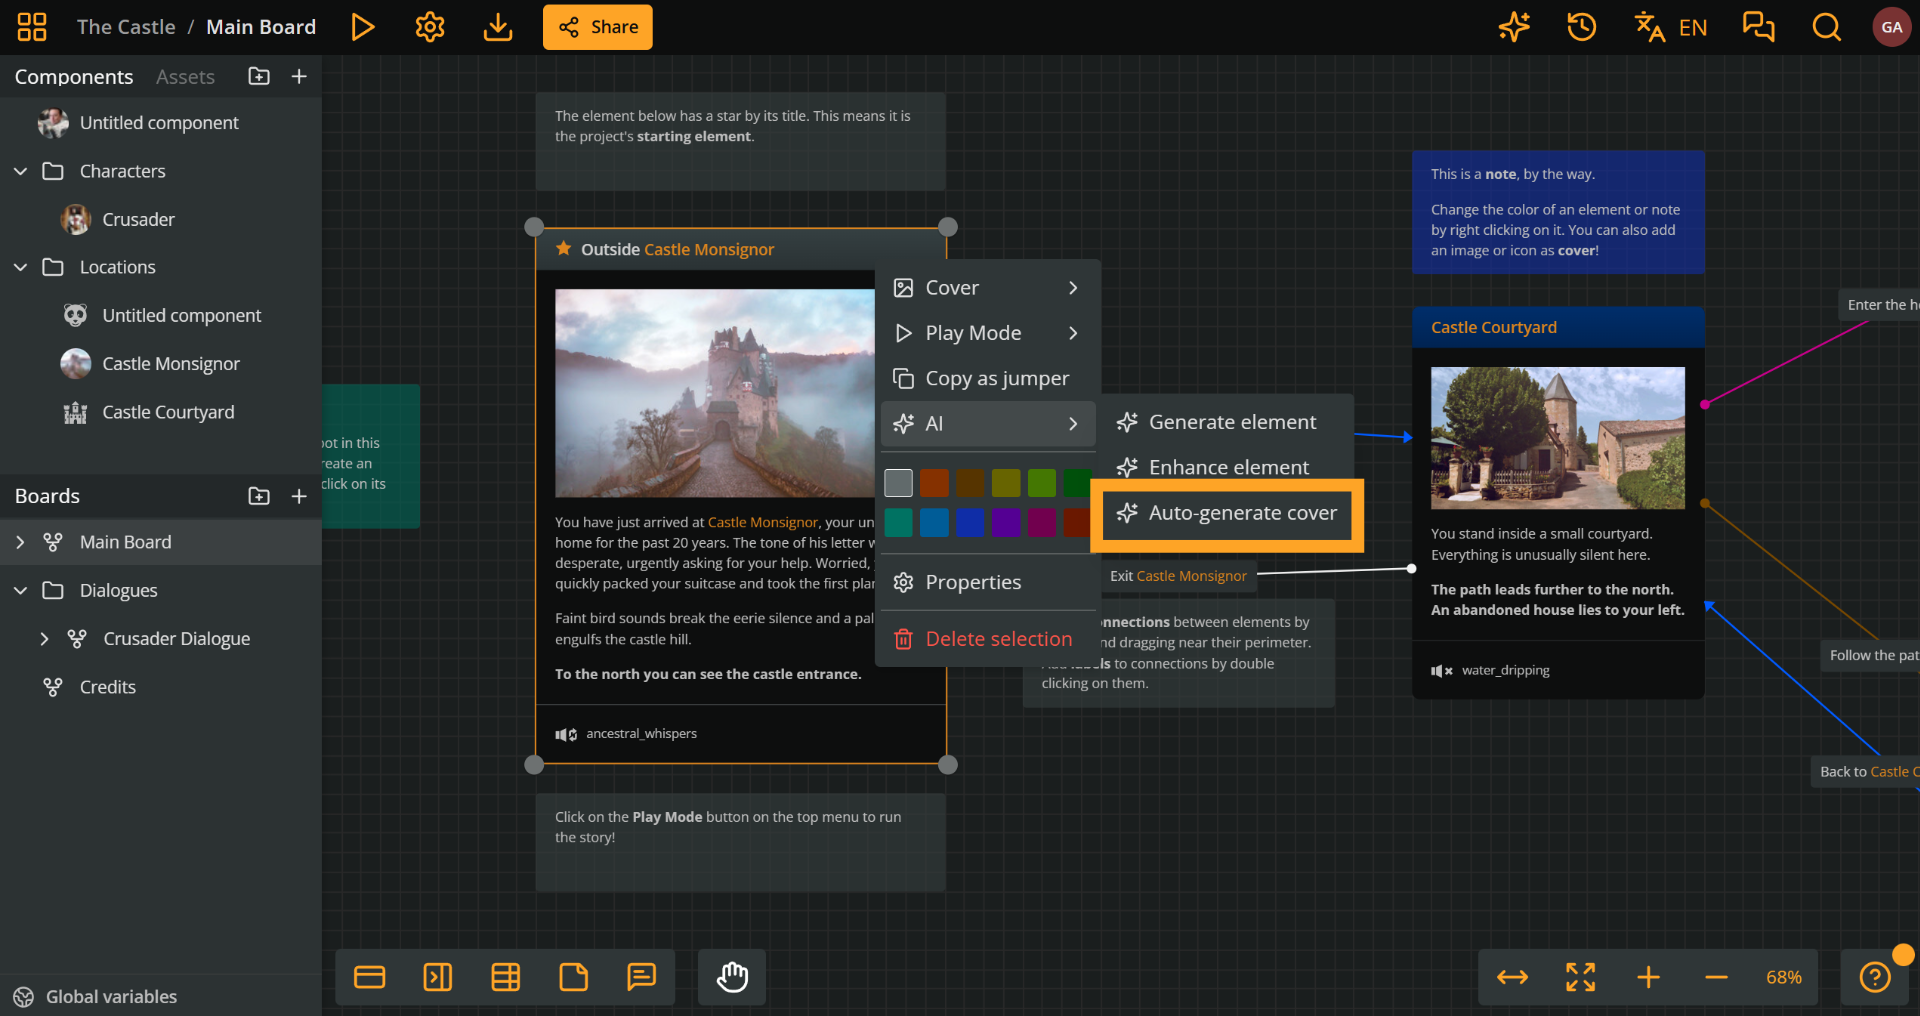
> ✅ For detailed instructions, see [Image Generator](https://docs.arcweave.com/project-tools/ai-features/image-generator).
### Change element covers
Context: Arcweave docs > Project Items > Elements > Element covers > Change element covers
To change an element's cover, simply set a new cover to the element in any of the ways described above.
### Remove element covers
Context: Arcweave docs > Project Items > Elements > Element covers > Remove element covers
To remove an element's cover, right-click on the element and select **Cover > Remove cover**.
## Audio attachments
Context: Arcweave docs > Project Items > Elements > Audio attachments
Elements can optionally have one or more attached audio assets. The audio assets play during [Play Mode](https://docs.arcweave.com/project-tools/play-mode/overview), upon the element's rendering, as loops or one-shots.
### Attach audio assets
Context: Arcweave docs > Project Items > Elements > Audio attachments > Attach audio assets
To attach an audio file to an element, take the following steps:
1. Upload the audio file to your project (see [Assets](https://docs.arcweave.com/project-items/assets/overview#upload-assets)).
2. Locate the asset in your project's **Assets** section.
3. Drag and drop the asset from your **Assets** section into the element.
Once attached, click the asset on the element to open its **Audio reference** dialog, where you can set its behavior, delay, fades, volume, and auto-stop. See [Audio reference settings](https://docs.arcweave.com/project-items/assets/audio#audio-reference-settings).
### Move audio assets
Context: Arcweave docs > Project Items > Elements > Audio attachments > Move audio assets
To **move** audio assets between elements, drag them from one element and drop them into another.
### Remove audio assets
Context: Arcweave docs > Project Items > Elements > Audio attachments > Remove audio assets
To **remove** an attached audio asset, drag and drop it from the element to an empty area of the board.
> ℹ️ Removing an audio asset from an element simply removes the reference and does not delete the asset.
## Attach components
Context: Arcweave docs > Project Items > Elements > Attach components
You can attach components to an element to visually reference them in the story flow, both in the boards and in Play Mode. See [components](https://docs.arcweave.com/project-items/components) for all information.
To share an attached component, right-click its reference on the board and select **Copy link**. The link opens the component's dialog. See [Copy a component link](https://docs.arcweave.com/project-items/components#copy-a-component-link).
## Add Arcscript
Context: Arcweave docs > Project Items > Elements > Add Arcscript
You can add [Arcscript segments](https://docs.arcweave.com/project-items/arcscript#arcscript-segments)—single lines of code that run when the story reaches the element—to your element content, assigning values to variables or manipulating the text output.

To insert an Arcscript segment into an element's content, see [Add Arcscript](https://docs.arcweave.com/project-items/arcscript#add-arcscript) on the Arcscript page.
## Element properties
Context: Arcweave docs > Project Items > Elements > Element properties
To access an element's properties, right-click the element and select **Properties**.
This opens the element's Properties panel, which has the following tabs:
- **Attributes**: The element's [attributes](https://docs.arcweave.com/project-items/attributes), if any.
- **Details**: Element ID, word count, and character count.
### Attributes
Context: Arcweave docs > Project Items > Elements > Element properties > Attributes
An element's **Attributes** tab contains the element's attributes, if any. An element can hold the following four types of attributes:
- Rich Text Field
- String Field
- Component List
- Asset List
> ℹ️ These four types are also available to [boards](https://docs.arcweave.com/project-items/boards) and [components](https://docs.arcweave.com/project-items/components). Boards and components additionally support Boolean, Integer, and Float attributes; together with String Field, they act as [scoped variables](https://docs.arcweave.com/project-items/variables/overview#variable-scope).
To [add](https://docs.arcweave.com/project-items/attributes#create-attributes), [edit](https://docs.arcweave.com/project-items/attributes#edit-attributes), or [remove](https://docs.arcweave.com/project-items/attributes#delete-attributes) an element's attributes, see the **Attributes** page.
### Details
Context: Arcweave docs > Project Items > Elements > Element properties > Details
An element's **Details** tab contains the following information:
#### Element ID
Context: Arcweave docs > Project Items > Elements > Element properties > Details > Element ID
Each element has a **unique identifier** in the form of:
`81a30674-aa09-4eb8-8484-59298d37f984` (version 4 UUID)
Uses of this element ID include:
- Accessing the element in the project's [JSON](https://docs.arcweave.com/integrations/json).
- Targeting the element for CSS styling in the [Style Editor](https://docs.arcweave.com/project-tools/play-mode/style-editor); see the [CSS basics guide](https://docs.arcweave.com/tutorials/style-editor/css-basics#style-specific-elements).
#### Word count
Context: Arcweave docs > Project Items > Elements > Element properties > Details > Word count
The element Details tab includes a word count breakdown:
- Words in title
- Words in content
- Total words
It shows the same breakdown for characters: **Characters in title**, **Characters in content**, and **Total characters**.
> ℹ️ Word and character counts do not include Arcscript segments in the element's content (see [Add Arcscript](https://docs.arcweave.com/project-items/elements#add-arcscript) above).
## Element references
Context: Arcweave docs > Project Items > Elements > Element references
Arcweave provides easy access to an element's **references**. These can be:
- The **jumpers** targeting the element
- The **Arcscript expressions** that mention the element (e.g. a `visits()` expression—see syntax of [`visits` function in Arcscript page](https://docs.arcweave.com/project-items/arcscript#visits).)
To access an element's references:
1. Right-click the element, in either of the two locations:
- In the board where it lies

- In the **Boards** section of the left sidebar

2. Select **References**.
In the modal that opens, you will see all references of the element in elements, jumpers, connection labels, and branches.
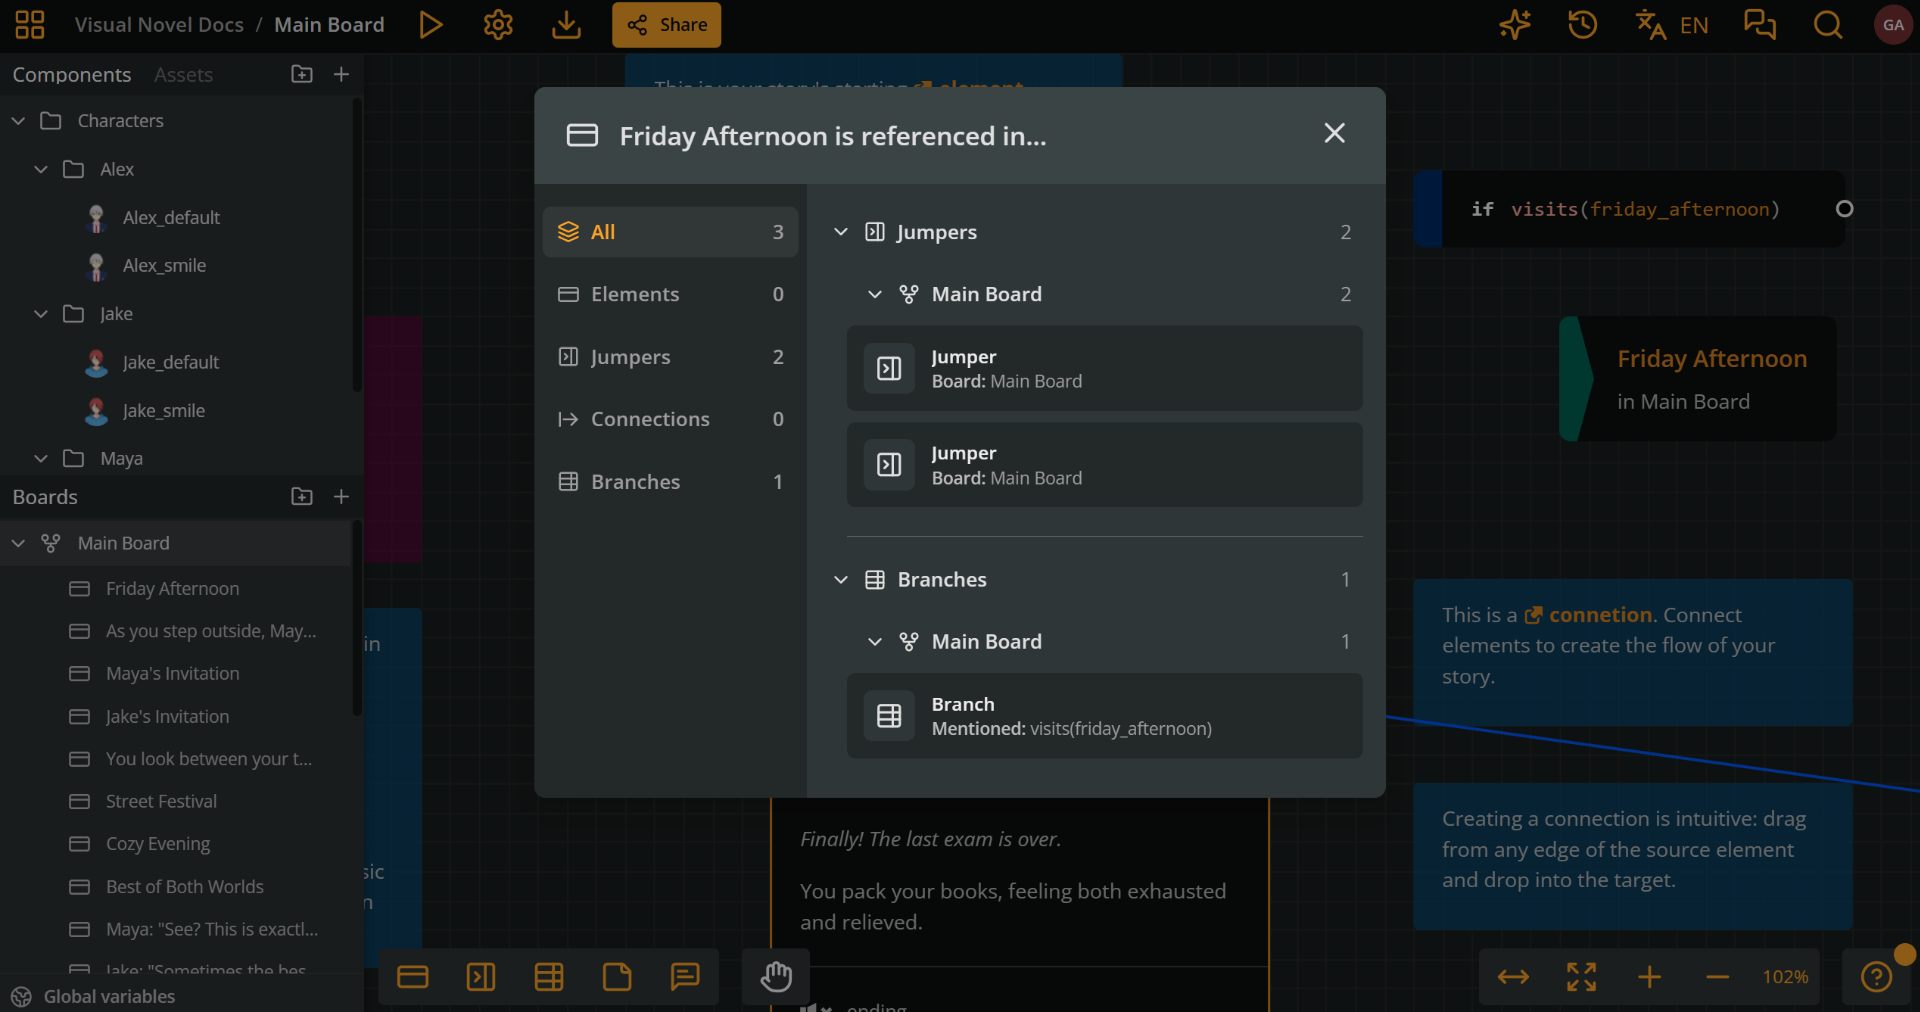
To visit any of the referencing items, **click on the reference**.
> ✅ Use the modal's left sidebar to view all references or to filter the ones in elements, jumpers, connection labels, or branches.
# Connections
Source: https://docs.arcweave.com/project-items/connections
Section: Project Items
Description: Connections link elements, branches, and jumpers into your story flow; create, move, reorder, customize, and reroute them
**Connections** are arrows that connect board items together ([elements](https://docs.arcweave.com/project-items/elements), [branches](https://docs.arcweave.com/project-items/branches), and [jumpers](https://docs.arcweave.com/project-items/jumpers)), creating your project's flow.
> ℹ️ [Notes](https://docs.arcweave.com/project-items/notes) and [comments](https://docs.arcweave.com/project-items/comments) are not part of the project's flow and cannot be connected.
In [Play Mode](https://docs.arcweave.com/project-tools/play-mode/overview), connections render as **option buttons**, allowing the player to progress the story by making choices. Connections can also carry [labels](https://docs.arcweave.com/project-items/labels), which render as the option buttons' text.
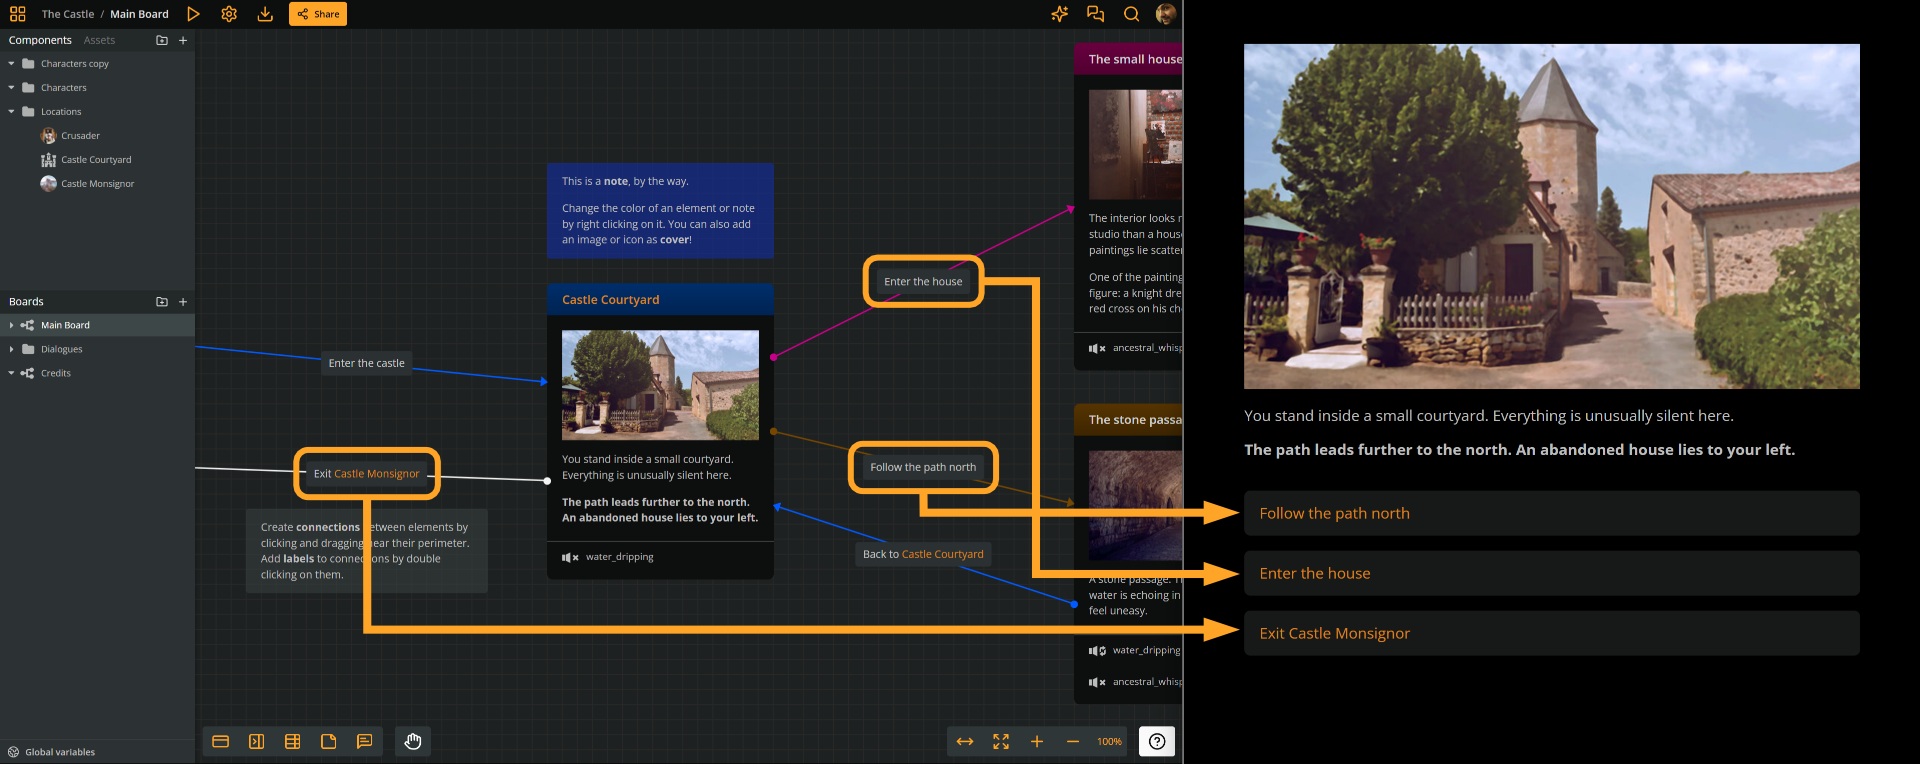
## Sources & targets
Context: Arcweave docs > Project Items > Connections > Sources & targets
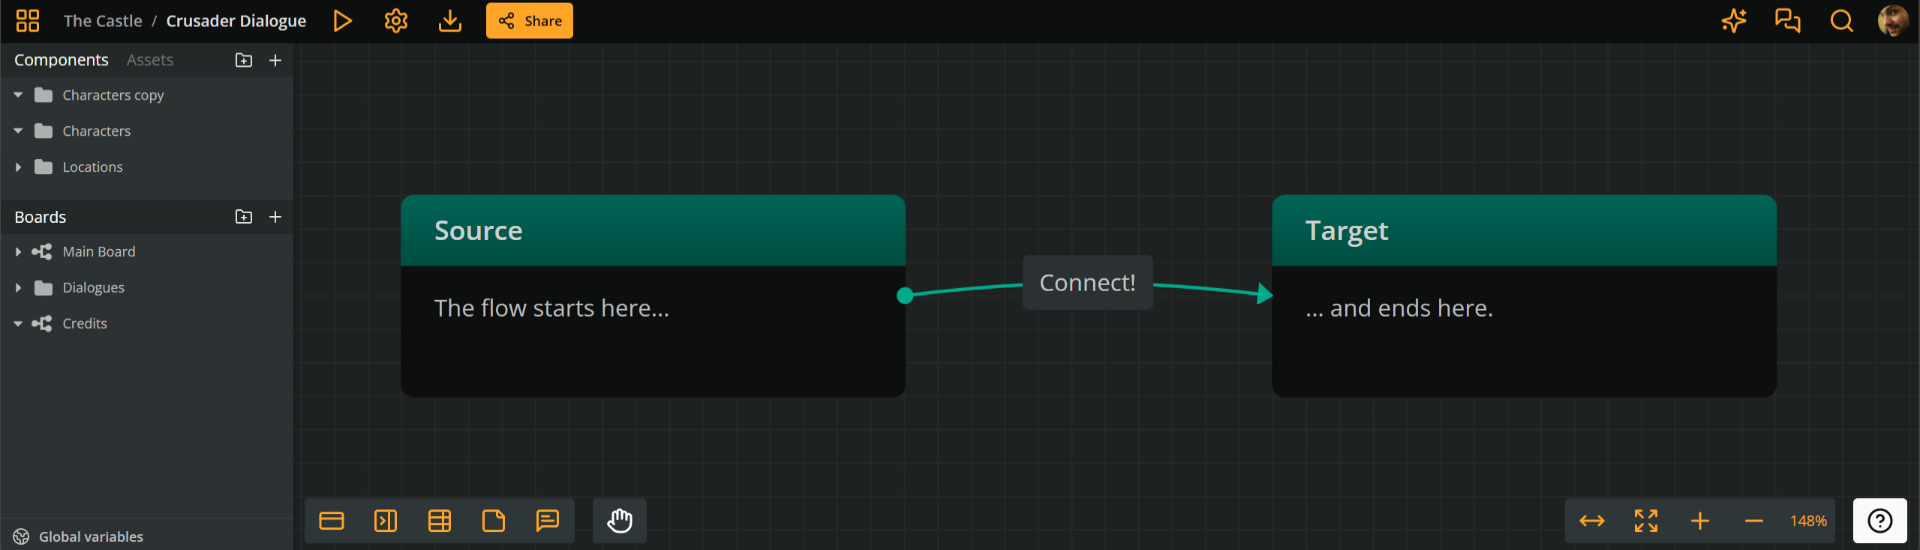
Connections progress the story flow from a **source** item (arrow-tail end) to a **target** item (arrow-head end).
### Output connections
Context: Arcweave docs > Project Items > Connections > Sources & targets > Output connections
From the perspective of the source item, a connection is an **output**.
Only elements and branches can have output connections. [Jumpers](https://docs.arcweave.com/project-items/jumpers) cannot act as connection sources.
### Input connections
Context: Arcweave docs > Project Items > Connections > Sources & targets > Input connections
Conversely, from the perspective of the target item, a connection is an **input**.
All elements, branches, and jumpers can receive input connections.
### Number of connections
Context: Arcweave docs > Project Items > Connections > Sources & targets > Number of connections
The following rules apply to the number of connections an item can have:
- Elements, branches, and jumpers can have unlimited input connections.
- Elements can have unlimited output connections.
- Branches can have one output connection per condition.
- Jumpers cannot have output connections.
The screenshot below demonstrates these rules.
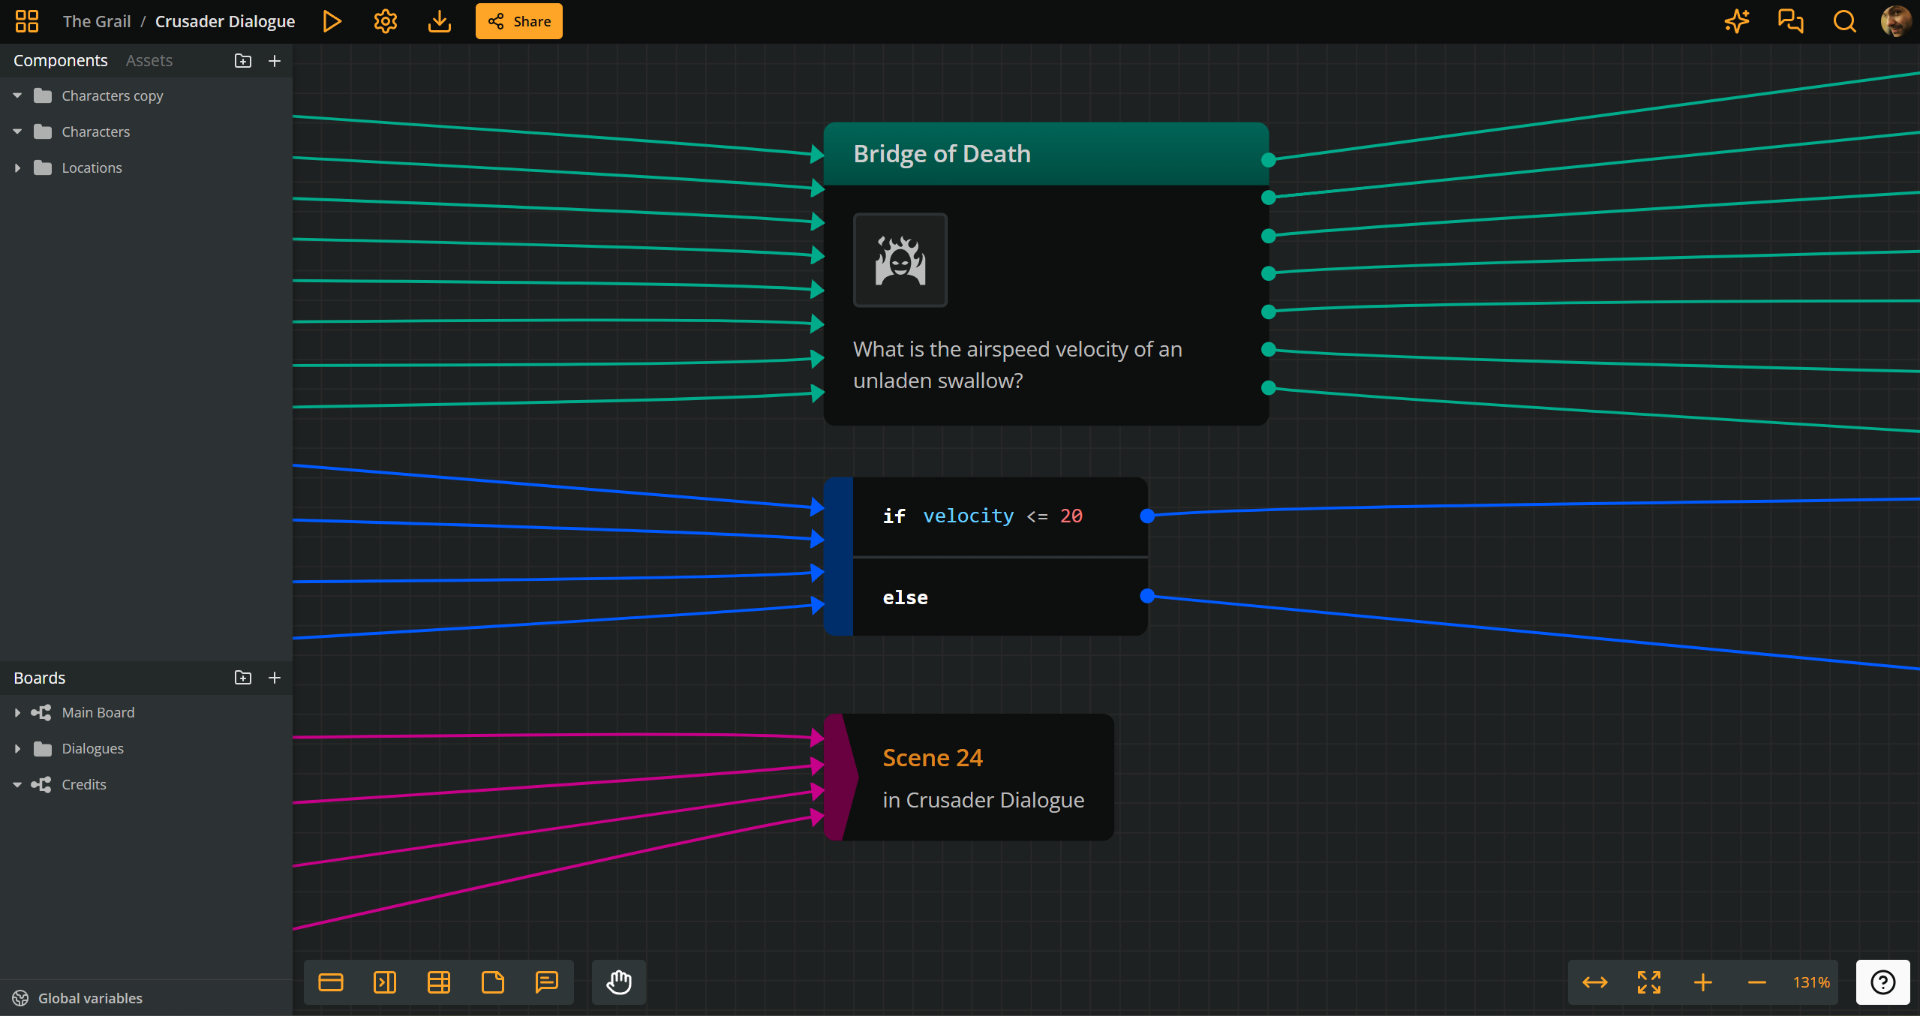
## Create connections
Context: Arcweave docs > Project Items > Connections > Create connections
Creating a connection is an intuitive process: you drag from the source ([element](https://docs.arcweave.com/project-items/elements) or [branch](https://docs.arcweave.com/project-items/branches)) and drop onto a target (element, branch, or [jumper](https://docs.arcweave.com/project-items/jumpers)) with your mouse.
An alternative is to use [keyboard shortcuts](https://docs.arcweave.com/project-items/connections#with-keyboard-shortcuts). This reduces context switching between mouse and keyboard, helping you focus on typing.
### With drag and drop
Context: Arcweave docs > Project Items > Connections > Create connections > With drag and drop
The simplest way to create a connection is by dragging and dropping:
1. **Drag from the source**: Depending on the connection's intended source, do the following:
- **Element**: Drag from any edge.
- **Branch**: Drag from one of its outputs.
2. **Drop onto the target**: Drop the connection's endpoint on either of the following:
- **Empty board space**: A menu opens. Choose **Create element here**, **Create jumper here**, or **Create branch here** to create a new item, connected as the target.
- **An existing item**: The item becomes the connection's target. Where you drop determines whether the connection is [automatic or fixed](https://docs.arcweave.com/project-items/connections#automatic-and-fixed-connections).
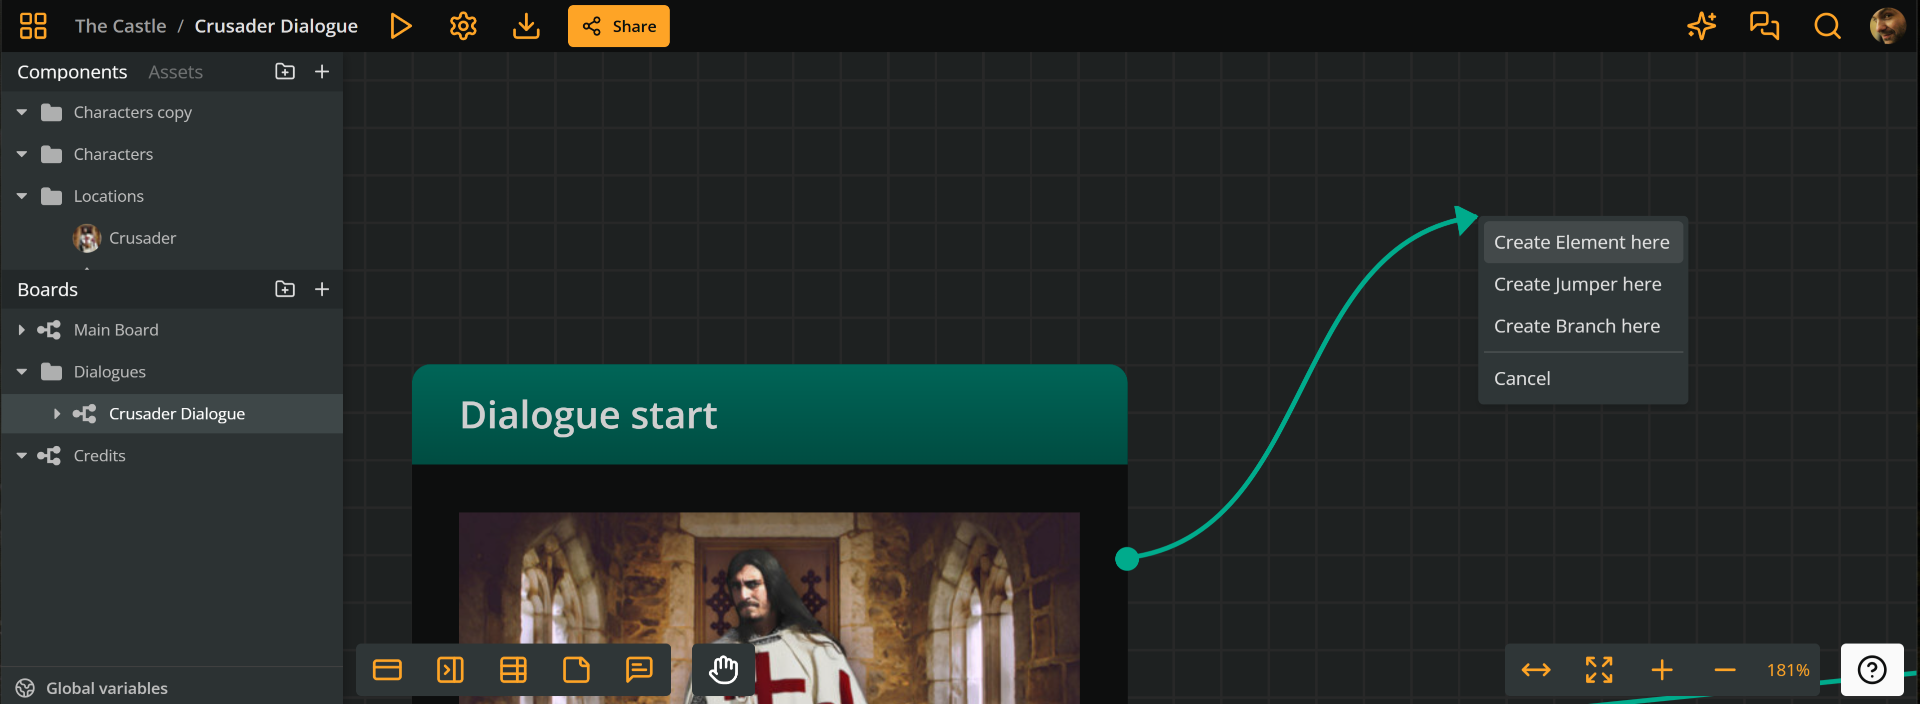
### With keyboard shortcuts
Context: Arcweave docs > Project Items > Connections > Create connections > With keyboard shortcuts
#### Create a connected element
Context: Arcweave docs > Project Items > Connections > Create connections > With keyboard shortcuts > Create a connected element
You can also create a **connection leading to a new element** using [keyboard shortcuts](https://docs.arcweave.com/project-tools/interface/keyboard-shortcuts#element-creation-connection):
1. Select an element.
2. Press **Ctrl + Alt/Option/Cmd + an arrow key**. A new element is created in the direction of the arrow and connected to the first element.
> ✅ The new element is selected automatically. To edit it, press **Enter** and start typing.
#### Edit the label of the new connection
Context: Arcweave docs > Project Items > Connections > Create connections > With keyboard shortcuts > Edit the label of the new connection
To add or edit the label of the connection you just created (and assuming your new element is currently selected) you need to first select the connection:
1. Press **Ctrl/Cmd + the opposite arrow key**, meaning the arrow that points back toward the first element. For example, if you pressed **Right arrow** to create the new element, press **Left arrow** to select the connection.
2. Press **Enter** to edit the connection's label.
## Automatic and fixed connections
Context: Arcweave docs > Project Items > Connections > Automatic and fixed connections
Each end of a connection attaches to its item through a **handle**, which can be **automatic** or **fixed**:
- **Automatic handle**:
- Attaches to the **nearest edge** of the item.
- **Switches edges automatically** as the source and target items move.
- **Fixed handle**:
- Stays **locked to a specific side** of the item.
- **Does not change sides**, even if the items move.
> ℹ️ By default, a connection's source handle is in automatic mode.
### Set the handle mode
Context: Arcweave docs > Project Items > Connections > Automatic and fixed connections > Set the handle mode
The same gesture sets the mode whether you are creating a connection or moving an existing handle. Drag the handle and drop it:
- **On the item's body**: The handle becomes **automatic**. Before you release, the item's entire perimeter is highlighted in orange.
- **On a specific edge**: The handle becomes **fixed**. Before you release, that edge is highlighted in orange.
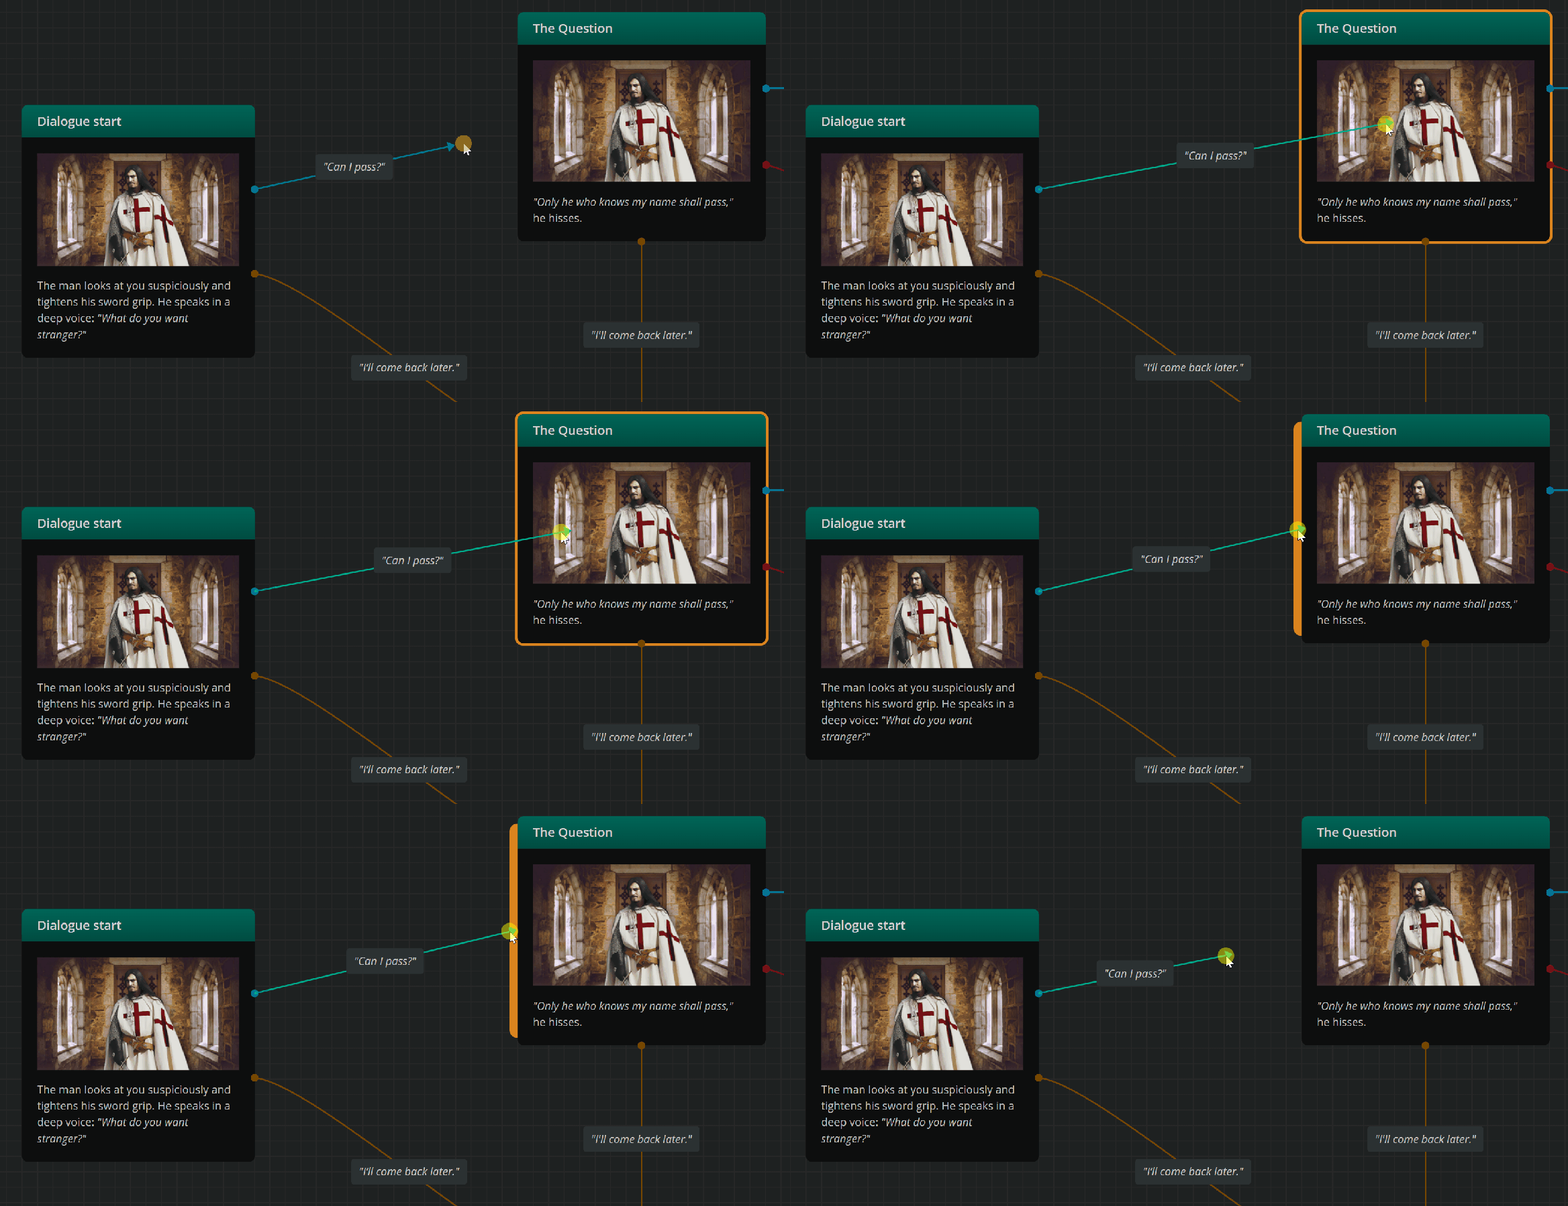
To switch an existing handle between modes, drag it away from its current position and drop it using the rules above.
## Delete connections
Context: Arcweave docs > Project Items > Connections > Delete connections
You can delete a connection in any of the following three ways:
- Select it and press **Delete** or **Backspace**.
- Right-click and choose **Delete selection**.
- Drag either of its handles to empty board space.
## Select connections
Context: Arcweave docs > Project Items > Connections > Select connections
Click a connection to select it. To select multiple items, see [Select board items](https://docs.arcweave.com/project-tools/interface/mouse-actions#select-board-items).
## Copy a connection link
Context: Arcweave docs > Project Items > Connections > Copy a connection link
With only the connection selected, right-click the connection or its label on the board and select **Copy link**. Opening the link takes you to the connection's area on its board in the language active when you copied it.
See [Share an item or board position](https://docs.arcweave.com/project-tools/share#share-an-item-or-board-position) for access requirements.
## Move connections
Context: Arcweave docs > Project Items > Connections > Move connections
Each endpoint of a connection has a **handle** that you use to drag and drop with your mouse or trackpad.
### Change source
Context: Arcweave docs > Project Items > Connections > Move connections > Change source
To change a connection's source, drag the connection's source handle and drop it on a new board item.
### Change target
Context: Arcweave docs > Project Items > Connections > Move connections > Change target
To change a connection's target, drag its target handle and drop it on a new board item.
### Change handle mode
Context: Arcweave docs > Project Items > Connections > Move connections > Change handle mode
To switch a handle between automatic and fixed, see [Automatic and fixed connections](https://docs.arcweave.com/project-items/connections#automatic-and-fixed-connections).
## Reorder connections
Context: Arcweave docs > Project Items > Connections > Reorder connections
Connections render as **player options** in Arcweave's [Play Mode](https://docs.arcweave.com/project-tools/play-mode/overview). They also render in the order in which they were added to the flowchart.
To reorder an element's output connections:
1. Right-click the element on the board.
2. Select **Play Mode > Quickstart Play Mode from here**.
3. Once in Play Mode, press **Edit content** (the **pencil** icon in the top menu).
4. Drag an option by the grip handle on its left, or by its border, to reorder it. Changes are saved automatically.
See [Reorder options](https://docs.arcweave.com/project-tools/play-mode/using-play-mode#reorder-options) for details.
## Customize connections
Context: Arcweave docs > Project Items > Connections > Customize connections
### Change color theme
Context: Arcweave docs > Project Items > Connections > Customize connections > Change color theme
To change a connection's color theme, right-click the connection and select one of the available colors from the menu.
### Change type
Context: Arcweave docs > Project Items > Connections > Customize connections > Change type
Arcweave supports three connection types:
- **Bezier** (default): Smooth curve
- **Straight**: Straight line
- **Flowchart**: Right-angled line with rounded corners
To change the type, right-click the connection and choose from the available icons.
> ✅ Your last selected type becomes the default for new connections.
## Edit connection paths
Context: Arcweave docs > Project Items > Connections > Edit connection paths
By default, Arcweave routes **Bezier** and **Flowchart** connections automatically. You can reshape their paths to avoid overlapping items or to make your board easier to read. **Straight** connections can't be reshaped.
To reshape a connection:
1. Click the connection to select it. Path handles appear on it:
- **Bezier**: two handles on the curve.
- **Flowchart**: a handle on each straight segment you can move.
2. Drag a handle. The connection's endpoints stay attached to their items.
- **Bezier**: the curve bends through the dragged handle while the other handle stays in place.
- **Flowchart**: the segment moves, and the adjacent segments adjust to keep the right angles. Guides show when the segment aligns with nearby geometry; hold **Alt** while dragging to bypass snapping.
3. Release to save the new path. Press **Escape** before releasing to cancel the drag.
Each drag is a single change that you can undo. Handles hide when the connection is too short for them, and they don't appear in image or PDF exports.
To restore the automatic path, **double-click** (or double-tap) one of the connection's path handles. Changing the connection's [type](https://docs.arcweave.com/project-items/connections#change-type) also restores automatic routing.
When you move an element, customized **Flowchart** segments stay attached to it, and moving both connected items together moves the whole path. Pasting, duplicating, and exporting keep customized paths.
> ℹ️ Right-click a path handle to open the connection's context menu.
# Labels
Source: https://docs.arcweave.com/project-items/labels
Section: Project Items
Description: Connection labels become option text in Play Mode; create, edit, and position labels and use Arcscript in them
Arcscript examples: Arcscript has no delimiters, so never wrap code in `${ }`, `{{ }}`, `<< >>` or similar markers. An `arcscript` code block contains only code: each line is one segment, and a branch condition is a single expression without `if` or `endif`. An `arcweave-html` code block is element or connection label content as Arcweave stores it, the HTML that the REST API and MCP server accept: `` for text, `
` for an empty line, and each Arcscript segment in its own `` block, with `<` written as `<`. An element passed to `visits()` is written as element mention markup; replace `ELEMENT_ID` with the element ID.
[Connections](https://docs.arcweave.com/project-items/connections) can include **labels**: text fields that render as **option text** in [Play Mode](https://docs.arcweave.com/project-tools/play-mode/overview).

Labels support the following powerful features:
- Rich text formatting: Create option text that includes bold, italics, underline, strikethrough, and links.
- [Mentions](https://docs.arcweave.com/project-tools/mentions) of [components](https://docs.arcweave.com/project-items/components) and [boards](https://docs.arcweave.com/project-items/boards).
- [Arcscript](https://docs.arcweave.com/project-items/arcscript):
- Write dynamic option text that changes based on the story state.
- Apply variable changes when the option is selected.
## Create labels
Context: Arcweave docs > Project Items > Labels > Create labels
You can add a label to a [connection](https://docs.arcweave.com/project-items/connections) in either of the following ways:
- Double-click the connection.
- Right-click the connection and choose **Add label**.
Type your text directly using [rich text](https://docs.arcweave.com/project-tools/rich-text).
Press **Esc** or **Tab** to exit.
## Edit labels
Context: Arcweave docs > Project Items > Labels > Edit labels
To edit a label, do either of the following:
- Double-click the label or its connection.
- Right-click the label or its connection and choose **Edit label**.
Format the label's content using [rich text](https://docs.arcweave.com/project-tools/rich-text).
> ✅ Project owners and editors can also edit labels in [Play Mode](https://docs.arcweave.com/project-tools/play-mode/using-play-mode#edit-content-in-play-mode) while playtesting the story. Enable **Edit content**, then edit the option buttons for the current element.
## Copy a link to a label's connection
Context: Arcweave docs > Project Items > Labels > Copy a link to a label's connection
With only the connection selected, right-click its label and select **Copy link**. The link opens the connection's area on its board. See [Copy a connection link](https://docs.arcweave.com/project-items/connections#copy-a-connection-link).
## Resize labels
Context: Arcweave docs > Project Items > Labels > Resize labels
To manually resize a label's width:
1. Click the label to select it.
2. Drag the label's left or right border and release at the desired width.
## Reposition labels
Context: Arcweave docs > Project Items > Labels > Reposition labels
To change the position of a label on the same connection, **click and drag the label** along the connection and release it at the desirable point.
## Delete labels
Context: Arcweave docs > Project Items > Labels > Delete labels
To delete a label, do any of the following:
- Click the label to select it and press Backspace or Delete.
- Right-click the label and choose **Remove label**.
- Clear the text and press **Esc** or **Tab**.
## No labels?
Context: Arcweave docs > Project Items > Labels > No labels?
Labels are not required for your story to run in [Play Mode](https://docs.arcweave.com/project-tools/play-mode/overview), but they give you greater control and flexibility in shaping the player's experience.
If an available option has no label text after Arcscript is evaluated, Arcweave uses the [target element's](https://docs.arcweave.com/project-items/connections#sources-targets) [title](https://docs.arcweave.com/project-items/elements#edit-elements) for its button text. If the target has no title, it uses the beginning of its content instead.
When **only one option is available** and its labels produce **no text**, Play Mode shows a blinking arrow instead of an option button. Click the element's content area to continue. Arcweave checks this after evaluating branches and label Arcscript, so multiple outgoing connections can still lead to a single available option.
A label containing only variable assignments, or conditional text that produces nothing in the current playthrough, can still result in the arrow. To show a button for a single option, give its path a label that produces text, such as **Continue**. See [labels across branches](https://docs.arcweave.com/project-items/labels#labels-across-branches) for paths with several labels.
## Arcscript in labels
Context: Arcweave docs > Project Items > Labels > Arcscript in labels
Connection labels support [Arcscript segments](https://docs.arcweave.com/project-items/arcscript), which allow the following features:
- **Dynamic option text**: The option text changes based on conditions and variable values.
- **Variable changes**: When the player selects an option, the variable changes calculated from its label Arcscript are applied to the playthrough.
### Add Arcscript
Context: Arcweave docs > Project Items > Labels > Arcscript in labels > Add Arcscript
To add an Arcscript segment while editing a label:
1. Press **Enter** to start a new line.
2. Convert the new line into an Arcscript segment: click the **Arcscript** icon (`<>`) in the toolbar or press **Ctrl/Cmd + Shift + C**.
3. Type your [Arcscript expression](https://docs.arcweave.com/project-items/arcscript#expressions).
4. Press **Enter** to exit the Arcscript segment and start a new rich text line.
5. Repeat step **2** if you need to convert the new line into a consecutive Arcscript segment.
### Evaluation & execution
Context: Arcweave docs > Project Items > Labels > Arcscript in labels > Evaluation & execution
Play Mode evaluates label Arcscript while preparing the available options:
- The result determines the option text. Any variable changes calculated along the path are also available to later labels and branch conditions on that path.
- Those variable changes are applied to the playthrough **only when the player selects the option**, before the target element's content is evaluated. Changes from options the player does not select are not applied.
This allows for dynamic option text, as in the following example:
```arcweave-html
Talk to
if name_known
Jefferson.
else
the moustached man.
endif
```
### Labels across branches
Context: Arcweave docs > Project Items > Labels > Arcscript in labels > Labels across branches
An option can follow several connections through [branches](https://docs.arcweave.com/project-items/branches) before reaching its target element, so one option can carry several labels. The board shows all of them, but Play Mode displays **only one** as the option text. The rest still run their Arcscript.
Play Mode applies the following rules to every label on an option's path:
- **Option text:** The option displays the text of the **last label on the path that produces text**. The text of earlier labels is not displayed.
- **Arcscript:** Every label on the path is evaluated, in path order, including labels whose text is not displayed. Their variable changes are calculated and carried along the path.
- **Branch conditions:** Each branch checks its conditions using the values calculated by the labels before it.
- **Applying changes:** The variable changes calculated by **all** labels on the path are applied to the playthrough only when the player selects the option, before the target element's content is evaluated.
A label produces no text when it is empty after evaluation: for example, when it contains only variable assignments, or conditional text whose condition is not met in the current playthrough. Such a label does not replace the earlier text. Because labels are evaluated every time options are prepared, the same path can display a different label's text in different playthroughs.
If no label on the path produces text, the option uses the target element's title. See [No labels?](https://docs.arcweave.com/project-items/labels#no-labels).
### How Play Mode prepares an option across branches
Context: Arcweave docs > Project Items > Labels > Arcscript in labels > How Play Mode prepares an option across branches
For each path leaving the current element, Play Mode does the following:
1. Starts from the playthrough's current variable values.
2. Evaluates the label of the first connection, calculating its variable changes and its text.
3. At a branch, checks the conditions from top to bottom, using the values calculated so far, and follows the connection of the first condition that is met. If no condition is met, or the first met condition has no outgoing connection, the path ends at the branch and produces no option.
4. Evaluates the label of the next connection, continuing from the values calculated so far. If the label produces text, that text replaces the option's text.
5. Repeats steps 3 and 4 until the path reaches its target element.
When the player selects the option, Play Mode applies the calculated variable changes to the playthrough and then loads the target element. If the player selects a different option, these changes are discarded.
> ℹ️ Option text that uses `show()` or conditional text reflects the values calculated along the path, even though they have not yet been applied to the playthrough. See the [chain of branches example](https://docs.arcweave.com/project-items/labels#example-a-chain-of-branches).
### Example: labels before and after a branch
Context: Arcweave docs > Project Items > Labels > Arcscript in labels > Example: labels before and after a branch
Create a [global variable](https://docs.arcweave.com/project-items/variables/global) named `score`, with type **Integer** and initial value `0`. Connect an element named **Gate** to a branch, and connect the branch's `if` output to an element named **Garden**. Set the `if` condition to `score >= 1`, and [start Play Mode from Gate](https://docs.arcweave.com/project-tools/play-mode/using-play-mode#quickstart-play-mode-from-here).
On the connection from **Gate** to the branch, add this label:
```arcweave-html
Try the gate
score = score + 1
```
On the connection from the branch to **Garden**, add:
```arcweave-html
Enter the garden
score = score + 2
```
While preparing the option, Arcweave calculates `score = 1` from the first label. The branch uses that value, so its condition is met. The second label then calculates `score = 3` and replaces **Try the gate** with **Enter the garden** as the option text.
The playthrough's `score` remains `0` until the player selects **Enter the garden**. It then becomes `3` before **Garden** loads. If you remove **Enter the garden** from the second label but keep its Arcscript, the option displays **Try the gate** and still changes `score` to `3` when selected.
### Example: a chain of branches
Context: Arcweave docs > Project Items > Labels > Arcscript in labels > Example: a chain of branches
This example follows the same rules through three branches. Create a global `score` variable of type **Integer**, with initial value `0`. Connect an element named **Start** to a chain of three branches, each with the condition `if true`, and connect the last branch to an element named **Target**.
The finished path consists of the following items, in order. Each connection's label holds text, an Arcscript segment, or both:
1. Element: **Start**
2. Connection
- Text: `Count to two`
3. Branch: `if true`
4. Connection
- Arcscript: `score += 1`
5. Branch: `if true`
6. Connection
- Arcscript: `score += 1`
7. Branch: `if true`
8. Connection
- Text: `Your score:`
- Arcscript: `show(score)`
9. Element: **Target**
In Play Mode, **Start** shows a single option: **Your score: 2**.
- **Count to two** is not displayed, because a later label on the path produces text.
- The two middle labels produce no text, but their assignments are evaluated. The last label shows the calculated value, `2`.
- The playthrough's `score` remains `0` while the option is displayed, and becomes `2` when the player selects it, before **Target** loads.
# Jumpers
Source: https://docs.arcweave.com/project-items/jumpers
Section: Project Items
Description: Jumpers link to a target element on any board; use cases and how to create, select, and retarget jumpers
A jumper is a shortcut on a board: when the story flow reaches it, the story continues at the [element](https://docs.arcweave.com/project-items/elements) it points to, anywhere in the same project. Jumpers allow the connection of elements or [branches](https://docs.arcweave.com/project-items/branches) with other elements that are either far away or in different [boards](https://docs.arcweave.com/project-items/boards). Jumpers offer flexibility to your writing process and improve the readability of your project, allowing you to organize your story in small sections across multiple boards.
The element a jumper links to is called **target element**.
## Use cases
Context: Arcweave docs > Project Items > Jumpers > Use cases
Consider the following use cases:
### Use multiple boards
Context: Arcweave docs > Project Items > Jumpers > Use cases > Use multiple boards
Structure your narrative by organizing it into sequences, scenes, and dialogue trees.
Use [board folders](https://docs.arcweave.com/project-items/boards#board-folders) to group related sequences or acts, and create separate [boards](https://docs.arcweave.com/project-items/boards) for each scene or dialogue tree. This modular setup keeps your project organized and scalable—especially in complex or branching narratives.
Once your boards are set up, use jumpers to connect story elements between them.
### Restart the story
Context: Arcweave docs > Project Items > Jumpers > Use cases > Restart the story
Let players restart the story by linking your ending elements back to the beginning. Use a jumper to connect the final node to the starting one—and don't forget to reset any relevant [variables](https://docs.arcweave.com/project-items/variables/overview)!
> ℹ️ Reset variables using the Arcscript functions `reset` and `resetAll`. See [Built-in functions](https://docs.arcweave.com/project-items/arcscript#built-in-functions).
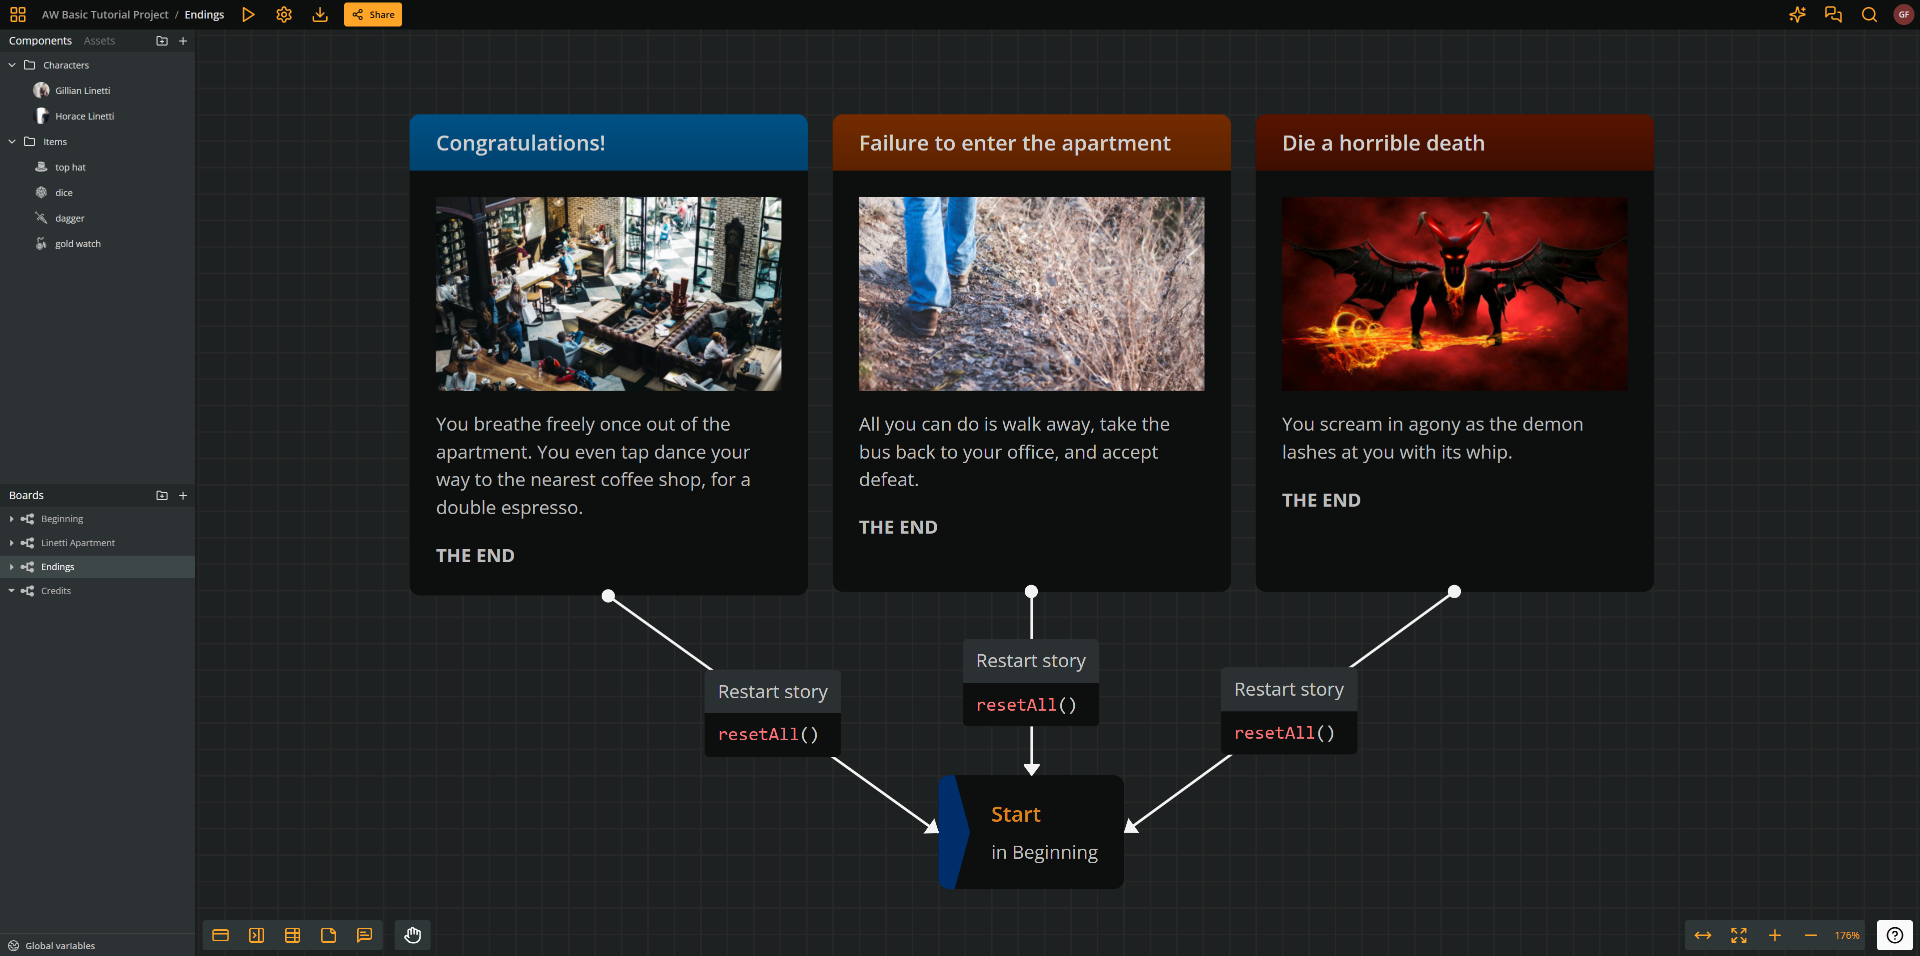
### Create loops
Context: Arcweave docs > Project Items > Jumpers > Use cases > Create loops
You can also use jumpers to create loops within a single board. For example, an element might connect to itself to increment a variable each time it's visited:
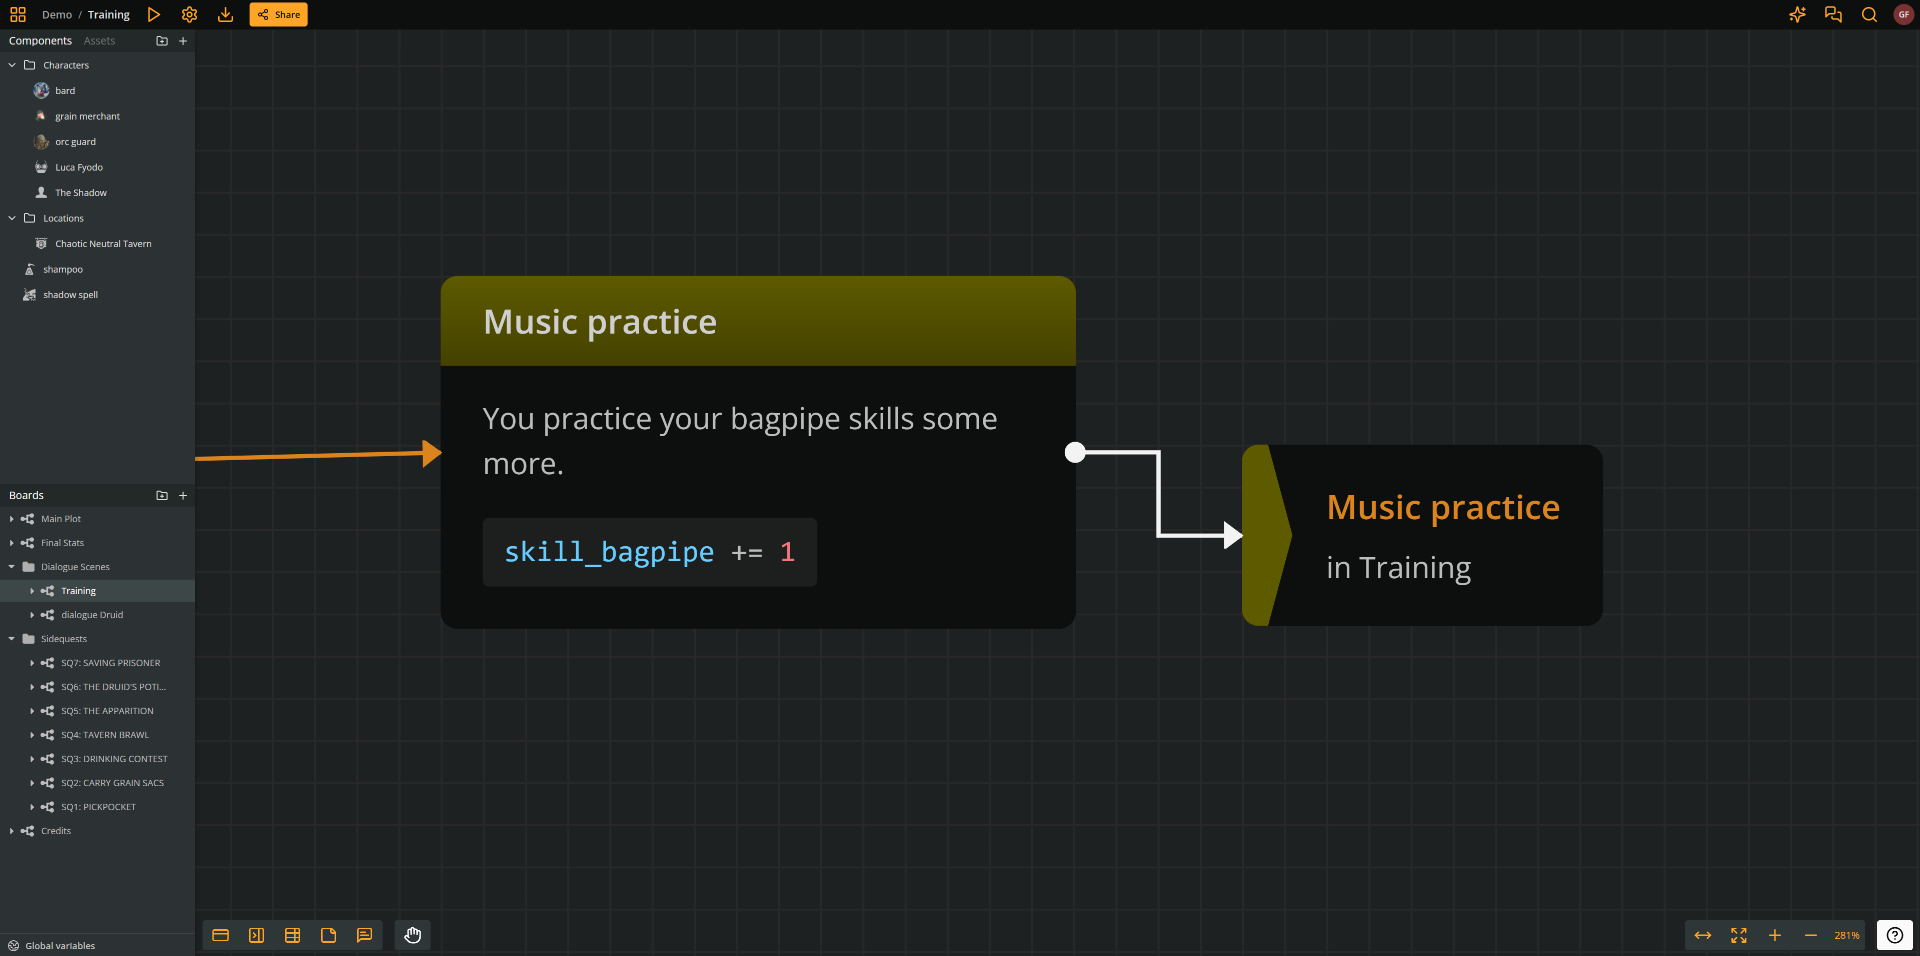
## Create jumpers
Context: Arcweave docs > Project Items > Jumpers > Create jumpers
To create a jumper, take any of the three following actions:
- **Right-click** on an empty area of the current board and select **Create > Jumper**.
- Drag and drop the **New jumper** icon from the bottom menu's left corner to an empty area of the board.
- Drop a connection end to an empty board area and select **Create jumper here**. (See [connections](https://docs.arcweave.com/project-items/connections).)
These methods create an **empty jumper**. For a jumper to work, you must [assign it a target element](https://docs.arcweave.com/project-items/jumpers#assign-jumper-targets).
## Select jumpers
Context: Arcweave docs > Project Items > Jumpers > Select jumpers
Click a jumper to select it. To select multiple items, see [Select board items](https://docs.arcweave.com/project-tools/interface/mouse-actions#select-board-items).
## Copy a jumper link
Context: Arcweave docs > Project Items > Jumpers > Copy a jumper link
With only the jumper selected, right-click it on the board and select **Copy link**. Opening the link centers the jumper itself on its board, rather than following its target element.
The link includes the current project language. See [Share an item or board position](https://docs.arcweave.com/project-tools/share#share-an-item-or-board-position) for access requirements.
## Delete jumpers
Context: Arcweave docs > Project Items > Jumpers > Delete jumpers
To delete a jumper, do either of the following two:
- Select it and press the **Delete** or **Backspace** key.
- Right-click on it and select **Delete selection** from the menu.
## Assign jumper targets
Context: Arcweave docs > Project Items > Jumpers > Assign jumper targets
To assign a target element to a jumper, do any of the following:
- Via **Copy/Paste**: this method is handy when you can easily access the target element in a board.
- In the board, click on the element to **select** it.
- Copy the element (either with **Ctrl/Cmd + C** or **right-click** and **Copy**).
- Right-click your empty jumper (or an empty area of the board) and select **Paste as jumper** (or use the **Ctrl/Cmd + Shift + V** shortcut).
- From the **Boards** section: use this method when you have located the target element in the left sidebar.
- Go to the **Boards** section of the left sidebar.
- Find the board where the target element is.
- Expand the board by clicking on the drop-down arrow next to its icon.
- Find the target element by its name.
- Drag and drop the element into the empty jumper (or an empty area of the board).
- From the **Search** field: use this method if you have the target element in your search results.
- Search and find the desired element.
- From the search results, drag the element into an empty jumper (or an empty area of the board).
> ✅ Dragging an element from the **Boards** section or **Search** field, or pasting an element using **Paste as jumper** to an empty area of the board creates a jumper and assigns its target at the same time.
## Change jumper targets
Context: Arcweave docs > Project Items > Jumpers > Change jumper targets
To change a jumper's target, drag and drop the new target element into the jumper, using any of above methods.
# Notes
Source: https://docs.arcweave.com/project-items/notes
Section: Project Items
Description: Notes are rich text sticky notes on boards for ideas and reminders; create, edit, resize, and color them
Arcweave's **notes** are simple, flexible sticky textboxes you can place on your boards to jot down ideas, instructions, or reminders.

They're great for organizing your thoughts, leaving comments for teammates, or planning what comes next, without affecting your story's flow.
Notes share some features with [elements](https://docs.arcweave.com/project-items/elements):
- ✅ [Rich text formatting](https://docs.arcweave.com/project-tools/rich-text#formatting-menu)
- ✅ [Customizable color themes](https://docs.arcweave.com/project-items/notes#change-color-theme)
- ✅ [Auto-resizing](https://docs.arcweave.com/project-items/notes#resize-notes)
Notes differ from elements in the following aspects:
- ❌ They do not have a title field.
- ❌ They are not part of the flowchart and cannot have [connections](https://docs.arcweave.com/project-items/connections).
- ❌ They cannot take [components](https://docs.arcweave.com/project-items/components) as attachments.
- ❌ They cannot contain blockquotes or [Arcscript](https://docs.arcweave.com/project-items/arcscript).
## Create notes
Context: Arcweave docs > Project Items > Notes > Create notes
To create a note:
- Right-click on an empty area of the current board and select **Create > Note**.
Or:
- Drag the **new note icon** from the bottom menu onto an empty area of the board.

## Select notes
Context: Arcweave docs > Project Items > Notes > Select notes
Click a note to select it. To select multiple items, see [Select board items](https://docs.arcweave.com/project-tools/interface/mouse-actions#select-board-items).
## Copy a note link
Context: Arcweave docs > Project Items > Notes > Copy a note link
With only the note selected, right-click it on the board and select **Copy link**. Opening the link centers the note on its board in the language active when you copied it.
See [Share an item or board position](https://docs.arcweave.com/project-tools/share#share-an-item-or-board-position) for access requirements.
## Delete notes
Context: Arcweave docs > Project Items > Notes > Delete notes
To delete a note, do either of the following actions:
- Select it and press **Delete** or **Backspace**.
- Right-click on the note and select **Delete selection**.
## Edit notes
Context: Arcweave docs > Project Items > Notes > Edit notes
To edit a note, double-click its content.
Format the note's content using [rich text](https://docs.arcweave.com/project-tools/rich-text).
To exit editing mode, press **Esc** or click anywhere outside the note.
## Resize notes
Context: Arcweave docs > Project Items > Notes > Resize notes
To resize a note manually, select it and drag any of its corners or edges.
To set it to **auto-resize**, so it continuously adjusts to fit its content, double-click any edge or corner handle.
## Change color theme
Context: Arcweave docs > Project Items > Notes > Change color theme
You can change the color of your notes, to color-code them by topic or purpose.
To change a note's color theme, right-click on it and choose one of the available colors from the menu.

# Assets
Source: https://docs.arcweave.com/project-items/assets/overview
Section: Project Items
Description: How to upload and use assets in Arcweave projects
**Assets** are media files you can upload to your Arcweave project to enrich the interactive experience with audiovisual elements. Arcweave supports the following asset types:
- [**Image assets**](https://docs.arcweave.com/project-items/assets/images): Used as covers for [elements](https://docs.arcweave.com/project-items/elements) and [components](https://docs.arcweave.com/project-items/components).
- [**Audio assets**](https://docs.arcweave.com/project-items/assets/audio): Attached to elements to play automatically in [Play Mode](https://docs.arcweave.com/project-tools/play-mode/overview), adding sound effects, background music, or narration.
- [**Video assets**](https://docs.arcweave.com/project-items/assets/video): Attached to elements to play automatically in Play Mode, enabling video sequences, visual storytelling, or interactive movies.
Assets help clarify your story, enhance immersion, and strengthen emotional impact.
## Assets section
Context: Arcweave docs > Project Items > Assets > Assets section
Inside any project, you can view and manage all uploaded assets and folders in the **Assets** section. This is located in the upper half of Arcweave's left sidebar, under the **Assets** tab.

## Asset folders
Context: Arcweave docs > Project Items > Assets > Asset folders
Arcweave allows you to create folders to organize your assets efficiently. You can build a custom folder structure to keep your project files clear and manageable.
## Upload assets
Context: Arcweave docs > Project Items > Assets > Upload assets
### From file manager
Context: Arcweave docs > Project Items > Assets > Upload assets > From file manager
The simplest way to upload assets is by dragging media files from your operating system's file manager into Arcweave's window. You can:
- **Drop anywhere**: Adds the files to the root of the [Assets section](https://docs.arcweave.com/project-items/assets/overview#assets-section).
- **Drop into a specific position**: Adds the files to a specific folder or position within the Assets list.
### From Assets section
Context: Arcweave docs > Project Items > Assets > Upload assets > From Assets section
You can also upload files directly within the **Assets** section using the **Upload assets...** options.
#### Upload assets to the top of the Assets section
Context: Arcweave docs > Project Items > Assets > Upload assets > From Assets section > Upload assets to the top of the Assets section
To upload a new asset at the top of your **Assets** list:
1. In the **Assets** section header, click **Create asset** (image icon with a plus).
2. Select **Upload assets...**.
3. Select one or more files from your device.
#### Upload assets to the bottom of the Assets section
Context: Arcweave docs > Project Items > Assets > Upload assets > From Assets section > Upload assets to the bottom of the Assets section
To upload a new asset at the bottom of your **Assets** list:
1. Right-click an empty area in the **Assets** section.
2. Select **Upload assets...**.
3. Select one or more files from your device.
#### Upload assets above existing assets
Context: Arcweave docs > Project Items > Assets > Upload assets > From Assets section > Upload assets above existing assets
To upload a new asset above an existing one:
- Right-click the existing asset's name.
- Select **Upload assets...** from the menu.
Or:
- Hover the mouse cursor over the existing asset's name.
- Click the **(+) icon** that appears.
- Select **Upload assets...** from the menu.
#### Upload assets into existing folders
Context: Arcweave docs > Project Items > Assets > Upload assets > From Assets section > Upload assets into existing folders
To upload a new asset inside a folder:
- Right-click the folder's name.
- Select **Upload assets...** from the menu.
Or:
- Hover the mouse cursor over the folder's name.
- Click the **(+) icon** that appears.
- Select **Upload assets...**.
### Asset upload limits
Context: Arcweave docs > Project Items > Assets > Upload assets > Asset upload limits
Each workspace plan includes specific file sizes and storage limits:
| Plan | Max file size | Total storage per project |
| --------- | ------------: | ------------------------: |
| **Basic** | 5 MB | 50 MB |
| **Pro** | 100 MB | 1 GB |
| **Team** | 400 MB | 10 GB |
> ⚠️ **If I downgrade my plan, what happens to my assets?** Existing assets remain in your project. New uploads must fit the new plan's limits: each file must be within the maximum file size, and the project's total asset storage, including existing assets, must stay within the plan's limit. See [Downgrade to Basic](https://docs.arcweave.com/workspaces/billing-plans#downgrade-to-basic) in the Workspace plans page.
## Replace assets
Context: Arcweave docs > Project Items > Assets > Replace assets
You can replace an existing asset with a new file. Arcweave automatically updates all instances of that asset throughout the project, saving you from manually reassigning it.
To replace an asset:
1. In the **Assets** section, right-click the asset you want to replace.
2. Select **Replace asset...**.
3. Select a new file from your device.
## Generate image asset
Context: Arcweave docs > Project Items > Assets > Generate image asset

You can use Arcweave's [Image Generator](https://docs.arcweave.com/project-tools/ai-features/image-generator) to generate image assets. See [Image Generator: Use from the Assets section](https://docs.arcweave.com/project-tools/ai-features/image-generator#use-from-the-assets-section) for instructions.
## Create folders
Context: Arcweave docs > Project Items > Assets > Create folders
### From Assets section
Context: Arcweave docs > Project Items > Assets > Create folders > From Assets section
You can create asset folders directly from your project's **Assets** section.
#### Create a folder at the top of the Assets section
Context: Arcweave docs > Project Items > Assets > Create folders > From Assets section > Create a folder at the top of the Assets section
In the **Assets** section header, click **Create folder** (**folder** icon).
#### Create a folder at the bottom of the Assets section
Context: Arcweave docs > Project Items > Assets > Create folders > From Assets section > Create a folder at the bottom of the Assets section
1. Right-click an empty area in the **Assets** section.
2. Select **Create folder**.
#### Create a folder above an existing asset
Context: Arcweave docs > Project Items > Assets > Create folders > From Assets section > Create a folder above an existing asset
- Right-click the asset's name.
- Select **Create folder** from the menu.
Or:
- Hover the mouse cursor over the asset's name.
- Click the **(+) icon** that appears.
- Select **Create folder**.
#### Create a subfolder inside an existing folder
Context: Arcweave docs > Project Items > Assets > Create folders > From Assets section > Create a subfolder inside an existing folder
- Right-click the folder's name.
- Select **Create folder** from the menu.
Or:
- Hover the mouse cursor over the folder's name.
- Click the **(+) icon** that appears.
- Select **Create folder**.
## Rename assets or folders
Context: Arcweave docs > Project Items > Assets > Rename assets or folders
To rename an asset or folder:
1. Open the **Assets** section.
2. Right-click the asset or folder.
3. Select **Rename**.
## Asset references
Context: Arcweave docs > Project Items > Assets > Asset references
Arcweave provides easy access to an asset's **references**: the instances of the asset that are attached to elements or components.
To access an asset's references:
1. Right-click the asset in the **Assets** section.
2. Select **References...**.

In the modal that opens, you will see all references of the asset in elements (as a cover, audio attachment, or Asset List item) and components (as a cover or Asset List item). To visit any of the referenced elements or components, **click on the reference**.

> ✅ Use the modal's left sidebar to view all references or to filter the ones in elements or components.
## Delete assets or folders
Context: Arcweave docs > Project Items > Assets > Delete assets or folders
To delete an asset or folder:
1. Open the **Assets** section.
2. Right-click the asset or folder.
3. Select **Delete**.
> ℹ️ Deleting an asset removes all its instances from elements and components.
> ⚠️ Deleting a folder also deletes all assets and subfolders contained within it.
## Preview assets
Context: Arcweave docs > Project Items > Assets > Preview assets
To preview an asset, click it in the **Assets** section.
Each asset type has its own preview interface: see [image](https://docs.arcweave.com/project-items/assets/images#preview-image-assets), [audio](https://docs.arcweave.com/project-items/assets/audio#preview-audio-assets), and [video](https://docs.arcweave.com/project-items/assets/video#preview-video-assets) documentation for details.
## Use assets
Context: Arcweave docs > Project Items > Assets > Use assets
After uploading, you can use assets in the following ways:
- **Image assets**: Set as covers for [elements](https://docs.arcweave.com/project-items/elements#element-covers) or [components](https://docs.arcweave.com/project-items/components#cover).
- **Audio assets**: Attach to [elements](https://docs.arcweave.com/project-items/elements#audio-attachments) to play automatically in Play Mode.
- **Video assets**: Set as covers for [elements](https://docs.arcweave.com/project-items/elements#element-covers) to play in Play Mode.
# Image assets
Source: https://docs.arcweave.com/project-items/assets/images
Section: Project Items > Assets
Description: How to add and use images in Arcweave projects
Use image assets in Arcweave to add visual depth to your story, its objects, and scenes. Setting images as covers for [elements](https://docs.arcweave.com/project-items/elements#element-covers) or [components](https://docs.arcweave.com/project-items/components#cover) enhances immersion and gives players a stronger sense of the world they're navigating.
## Supported file types
Context: Arcweave docs > Project Items > Assets > Image assets > Supported file types
Arcweave supports the following image file types, which you can use as assets:
- `.jpg` / `.jpeg`
- `.png`
- `.gif`
- `.webp`
> ℹ️ `.gif` files animate in Play Mode only. In the board view, they appear as static images.
Uploaded images can be up to **8192 x 8192 pixels**.
## Preview image assets
Context: Arcweave docs > Project Items > Assets > Image assets > Preview image assets
You can preview images directly from the **Assets** section. This allows you to view the image in full size and also download it to your device.
To preview an image asset:
1. Locate it in the **Assets** section.
2. Click the asset to open its full-size preview.
3. Click **Download** under the image preview, to save the image to your device.
## Element covers
Context: Arcweave docs > Project Items > Assets > Image assets > Element covers
You can add an image asset as element cover. See [elements](https://docs.arcweave.com/project-items/elements#element-covers) for instructions.
## Component covers
Context: Arcweave docs > Project Items > Assets > Image assets > Component covers
You can add an image asset as component cover. See [components](https://docs.arcweave.com/project-items/components#cover) for instructions.
# Audio assets
Source: https://docs.arcweave.com/project-items/assets/audio
Section: Project Items > Assets
Description: How to add and use audio in Arcweave projects
Use audio assets in Arcweave to add music, sound effects, or narration to your interactive project. When you [attach an audio asset](https://docs.arcweave.com/project-items/elements#audio-attachments) to an element, it will automatically play when that element is rendered in [Play Mode](https://docs.arcweave.com/project-tools/play-mode/using-play-mode).
## Supported file types
Context: Arcweave docs > Project Items > Assets > Audio assets > Supported file types
Arcweave supports the following audio formats:
- `.mp3`
- `.ogg`
- `.wav`
- `.webm`
You can upload these file types as assets and attach them to elements in your project.
## Preview audio assets
Context: Arcweave docs > Project Items > Assets > Audio assets > Preview audio assets
You can preview audio directly from the **Assets** section and set the asset's default playback settings.
To preview an audio asset:
1. Locate it in the **Assets** section.
2. Click the asset to open its preview.
3. Play the asset, seek through it, and adjust its **volume slider**. Use the speaker icon to mute or unmute it.
4. Optionally, set the asset's **Fade in** and **Fade out** durations in milliseconds.
The volume and fade durations are the asset's defaults. Every [audio reference](https://docs.arcweave.com/project-items/assets/audio#audio-reference-settings) to the asset uses them unless it overrides them, helping you balance audio across your project.
> ℹ️ Note: [Play Mode](https://docs.arcweave.com/project-tools/play-mode/using-play-mode#control-audio-volume) has a volume slider to control the overall playback volume.
## Attach audio assets
Context: Arcweave docs > Project Items > Assets > Audio assets > Attach audio assets
To get the audio assets to play in your story, you need to attach them to elements. See [elements](https://docs.arcweave.com/project-items/elements#audio-attachments) for instructions.
## Audio reference settings
Context: Arcweave docs > Project Items > Assets > Audio assets > Audio reference settings
Each audio asset attached to an element is an **audio reference**. Click an attached audio asset on the element to open its **Audio reference** dialog, which has its own preview and volume slider, followed by its **Play mode settings**.
Changes to a reference affect only that element's attachment, not the asset or its other references.
### Audio behavior
Context: Arcweave docs > Project Items > Assets > Audio assets > Audio reference settings > Audio behavior
Set the reference's playback behavior to one of the following:
- **Play clip once**: Plays the audio a single time when the element is reached in the flow and rendered.
- **Loop clip**: Continuously loops the audio until it is stopped.
- **Stop playing all instances of this clip**: Stops playback of the specified audio asset wherever it is currently playing.
### Delay
Context: Arcweave docs > Project Items > Assets > Audio assets > Audio reference settings > Delay
To fine-tune playback timing, add a **Delay** in milliseconds before the audio starts. This allows you to synchronize sound with other actions or create dramatic timing effects. Each reference has its own delay, which defaults to `0`.
### Fades
Context: Arcweave docs > Project Items > Assets > Audio assets > Audio reference settings > Fades
- **Fade in**: Milliseconds for the audio to fade in from silence when it starts playing.
- **Fade out**: Milliseconds for the audio to fade out when it stops. A **Play clip once** reference also fades out at the end of the clip.
With **Stop playing all instances of this clip**, the reference's **Fade out** sets how the stopped clips fade out; **Delay**, **Fade in**, and **Auto-stop on element exit** don't apply.
### Auto-stop on element exit
Context: Arcweave docs > Project Items > Assets > Audio assets > Audio reference settings > Auto-stop on element exit
Select **Auto-stop on element exit** to stop the audio, using its fade out, when Play Mode moves to another element. Otherwise, the audio keeps playing until it ends or is stopped by another reference.
### Override asset defaults
Context: Arcweave docs > Project Items > Assets > Audio assets > Audio reference settings > Override asset defaults
A reference uses the asset's volume, **Fade in**, and **Fade out** unless you change them in the **Audio reference** dialog. A changed fade field is highlighted. To use the asset's value again, click **Reset to asset default** (the circular arrow icon) next to the volume slider or fade field.
# Video assets
Source: https://docs.arcweave.com/project-items/assets/video
Section: Project Items > Assets
Description: How to add and use video files in Arcweave projects
Use video assets in Arcweave to add advanced visual storytelling, video sequences, or even create complete interactive movies. You can attach videos as [element](https://docs.arcweave.com/project-items/elements) covers and control their [Play Mode](https://docs.arcweave.com/project-tools/play-mode/overview) behavior.
## Supported file types
Context: Arcweave docs > Project Items > Assets > Video assets > Supported file types
Arcweave supports the following video file types, which you can use as assets:
- `.mp4`
- `.ogg`
- `.webm`
## Preview video assets
Context: Arcweave docs > Project Items > Assets > Video assets > Preview video assets
You can preview videos directly from the **Assets** section. This allows you to view the videos in full size and also download them to your device.
To preview a video asset:
1. Locate it in the **Assets** section.
2. Click the asset to open its preview.
3. Click **Download** under the video preview, to save the video file to your device.
## Element covers
Context: Arcweave docs > Project Items > Assets > Video assets > Element covers
You can add a video asset as element cover. See [elements](https://docs.arcweave.com/project-items/elements#element-covers) for instructions.
> ℹ️ Video assets cannot be set as [component covers](https://docs.arcweave.com/project-items/components#cover).
## Playback behavior
Context: Arcweave docs > Project Items > Assets > Video assets > Playback behavior
When you set a video asset as an element cover, double-click its thumbnail within the element to open its **settings panel**.

In the settings panel, you can configure the video's playback behavior as follows:
1. **Play behavior** (checkboxes):
- **Autoplay**: Automatically starts video playback when the element loads in Play Mode. _(Required if **Show controls** is disabled.)_
- **Show controls**: Displays standard video playback controls. _(Required if **Autoplay** is disabled.)_
- **Show options on video end**: Hides the element's option buttons until the video finishes playing. _(Available only when **Stop at end** is selected.)_
2. **Stop behavior** (radio buttons):
- **Stop at end**: Plays the video once and then stops.
- **Loop**: Repeats the video indefinitely.
# Components
Source: https://docs.arcweave.com/project-items/components
Section: Project Items
Description: Components are reusable story objects, such as characters, locations, and items, that store information in attributes
**Components** are Arcweave's reusable story objects, such as characters, locations, and items. They don't sit on boards or take part in the story flow; instead, each component stores information about one story object in its name, cover, and [attributes](https://docs.arcweave.com/project-items/attributes): labeled values, such as a character's age or backstory. You can attach components to [elements](https://docs.arcweave.com/project-items/elements), [mention](https://docs.arcweave.com/project-tools/mentions) them in text, and use their attributes as [component variables](https://docs.arcweave.com/project-items/variables/component) in Arcscript.
Depending on its genre and theme, your story may include some of the following objects:
- Characters
- Locations
- Items
- Clues
- Weapons
- Magical spells
- Emotions
- Weather conditions
- Memories
- Time periods
- All sorts of stats
Components are very flexible: you can use them to represent any of the above, according to your project's needs.
For example, the component below stores a magical spell, with its stats (level, range, description, and so on) stored as attributes.

You can find and manage your project's components and their folders on the upper part of Arcweave's sidebar, under the **Components** tab.
## Component folders
Context: Arcweave docs > Project Items > Components > Component folders
To organize your components efficiently, Arcweave lets you create your own structure of component folders within your project.
## Components section
Context: Arcweave docs > Project Items > Components > Components section
Once inside a project, you can view and manage your components and folders in the **Components** section, located in the upper half of Arcweave's left sidebar, under the **Components** tab.

## Create components or folders
Context: Arcweave docs > Project Items > Components > Create components or folders
### At section top
Context: Arcweave docs > Project Items > Components > Create components or folders > At section top
To create a new component or folder at the top of the **Components** section:
- Go to the header of the **Components** section.
- Click **Create component** (**+** icon) or **Create folder** (**folder** icon).
### At section bottom
Context: Arcweave docs > Project Items > Components > Create components or folders > At section bottom
To create a new component or folder at the bottom of the **Components** section:
- Right-click on an empty area of the **Components** section.
- Select **Create component** or **Create folder** from the menu.
### Above existing component
Context: Arcweave docs > Project Items > Components > Create components or folders > Above existing component
To create a new component or folder above an existing component in the **Components** section:
- Right-click on the existing component's name.
- Select **Create component** or **Create folder** from the menu.
Or:
- Hover the mouse cursor over the existing component's name.
- Click on the **(+) icon** that appears.
- Select **Create component** or **Create folder** from the menu.
### Inside existing folder
Context: Arcweave docs > Project Items > Components > Create components or folders > Inside existing folder
To create a new component or folder inside an existing folder:
- Right-click on the existing folder's name.
- Select **Create component** or **Create folder** from the menu.
Or:
- Hover the mouse cursor over the existing folder's name.
- Click on the **(+) icon** that appears.
- Select **Create component** or **Create folder** from the menu.
## Delete components or folders
Context: Arcweave docs > Project Items > Components > Delete components or folders
To delete a component or folder:
- Right-click on its name, on the **Components** section.
- Select **Delete**.
> ⚠️ Deleting a component folder will also delete all its contents. You can undo the action.
> ℹ️ When deleting a component, all [mentions](https://docs.arcweave.com/project-tools/mentions) and references of this component will be removed as well.
## Rename components or folders
Context: Arcweave docs > Project Items > Components > Rename components or folders
To rename a component or folder:
- Right-click on its name on the **Components** section.
- Select **Rename** from the menu.
You can also rename a component while [editing](https://docs.arcweave.com/project-items/components#edit-components) it.
## Duplicate components or folders
Context: Arcweave docs > Project Items > Components > Duplicate components or folders
To duplicate a component or folder:
- Right-click on its name on the **Components** section.
- Select **Duplicate**.
Duplicating a folder also duplicates all the components and folders it contains.
## Copy a component link
Context: Arcweave docs > Project Items > Components > Copy a component link
Select **Copy link** from any of these menus:
- Right-click the component in the sidebar's **Components** section.
- Open the component and click the **three-dot (•••)** menu in its header.
- Right-click a component reference attached to an element or included in a **Component List** attribute.
Opening the link opens the component's dialog in the language active when you copied it. A reference's link opens the referenced component. Component folders and unsaved components do not have this action.
See [Share an item or board position](https://docs.arcweave.com/project-tools/share#share-an-item-or-board-position) for access requirements. People with read-only board access can also copy component links.
## Mention components
Context: Arcweave docs > Project Items > Components > Mention components
You can create links to your components while editing rich text in elements, notes, attributes, and labels. This kind of link is called a [mention](https://docs.arcweave.com/project-tools/mentions) and you initiate it by typing the character `@` followed by a component name.
> ℹ️ You can also mention [boards](https://docs.arcweave.com/project-items/boards#mention-boards).
## Edit components
Context: Arcweave docs > Project Items > Components > Edit components
To open a component for editing, find it in the list of your components and click on its name or thumbnail.
Each component consists of a **name**, a **custom ID**, a **cover image**, and a set of **attributes**.
### Name
Context: Arcweave docs > Project Items > Components > Edit components > Name
To rename a component, click on its name field, or choose **Rename** from the **three-dot (•••)** header menu to select the field for editing.
You can also [rename a component](https://docs.arcweave.com/project-items/components#rename-components-or-folders) from the **Components** section.
### Custom ID
Context: Arcweave docs > Project Items > Components > Edit components > Custom ID
Every component has a custom ID, generated from its name. This ID scopes the component's [variables](https://docs.arcweave.com/project-items/variables/component). For example, an attribute with custom ID `health` on a component with custom ID `hero` is available in Arcscript as `hero.health`.
Select the custom ID beneath the component name to edit it, or choose **Edit Custom ID** from the **three-dot (•••)** header menu to select the field. It cannot be removed, must be unique across all components and boards, and must follow the [variable naming rules](https://docs.arcweave.com/project-items/variables/overview#variable-names-and-custom-ids). Renaming it updates existing Arcscript references automatically.
### Cover
Context: Arcweave docs > Project Items > Components > Edit components > Cover
To change a component's cover image:
1. Hover the mouse cursor over the image.
2. Click on **Change cover**.
3. Select an image from the **My Assets** tab, or an icon from the **Icon Library** tab. You can also generate a cover in the **Generate** tab; see [Image Generator](https://docs.arcweave.com/project-tools/ai-features/image-generator#use-from-components).
Alternatively, you can drag and drop an image asset from the sidebar into the component cover area.
> ✅ An asset will also be created and attached to a component as cover when dropping an image file from your drive or browser at the top area of the component (while in component edit mode).
> ⚠️ [Video assets](https://docs.arcweave.com/project-items/assets/video) cannot be used as component covers.
### Component attributes
Context: Arcweave docs > Project Items > Components > Edit components > Component attributes
Like [boards](https://docs.arcweave.com/project-items/boards), components can hold the following attribute types:
- String Field
- Boolean
- Integer
- Float
- Rich Text Field
- Component List
- Asset List
Component folders cannot contain attributes.
String Field, Boolean, Integer, and Float attributes are [component variables](https://docs.arcweave.com/project-items/variables/component). See [Attributes](https://docs.arcweave.com/project-items/attributes) for more details about attributes that do not act as variables.
To [add](https://docs.arcweave.com/project-items/attributes#create-attributes), [edit](https://docs.arcweave.com/project-items/attributes#edit-attributes), or [remove](https://docs.arcweave.com/project-items/attributes#delete-attributes) a component's attributes, see the **Attributes** page.
## Component properties
Context: Arcweave docs > Project Items > Components > Component properties
To access a component's properties:
1. Right-click the component in the **Components** section.
2. Select **Properties**.
The component Properties panel displays the following information:
### Component ID
Context: Arcweave docs > Project Items > Components > Component properties > Component ID
Each component has a **unique identifier** in the form of:
`81a30674-aa09-4eb8-8484-59298d37f984` (version 4 UUID)
Click the **clipboard icon** to copy the component ID.
Component IDs are useful when working with the project's [JSON](https://docs.arcweave.com/integrations/json) or integrating Arcweave with external tools and game engines.
The UUID is different from the component's editable [custom ID](https://docs.arcweave.com/project-items/components#custom-id), which is used as an Arcscript variable scope.
### Words and characters
Context: Arcweave docs > Project Items > Components > Component properties > Words and characters
The component properties panel displays the component's word and character counts.
These counts include the component name and the values of its String Field and Rich Text Field attributes.
## Component references
Context: Arcweave docs > Project Items > Components > Component references
Arcweave provides easy access to a component's **references**: the elements it is attached to, the Component List attributes that include it, and the element content, labels, notes, and attributes that mention it.
To access a component's references:
1. Right-click the component in the **Components** section.
2. Select **References**.

In the modal that opens, you will see all references of the component in elements, components, connection labels, and notes.

To visit any of the referenced elements or components, **click on the reference**.
> ✅ Use the modal's left sidebar to view all references or to filter the ones in elements, components, labels, or notes.
## Attach to elements
Context: Arcweave docs > Project Items > Components > Attach to elements
You can also attach components to elements. To do this:
1. Go to your **Components** section on the sidebar.
2. Drag the component of your choice and drop it inside the element of your choice.

Use this feature to **create a visual reference** to the component during a plot point or dialogue beat and to **easily access** the component—just click on the attachment and the component will open.
To share the attached component, right-click its reference on the board and select **Copy link**. See [Copy a component link](https://docs.arcweave.com/project-items/components#copy-a-component-link).
> ℹ️ The attached components of an element also render on Play Mode.
Drag and drop attached components to **reorder** them inside an element or to **move them** from one element to another.
To **remove** an attached component, drag and drop it from the element to an empty area of the board.
> ℹ️ Removing a component from an element simply removes the reference and does not delete the component.
# Branches
Source: https://docs.arcweave.com/project-items/branches
Section: Project Items
Description: Branches add conditional logic to flowcharts with if, elseif, and else conditions in Arcscript; create, edit, and connect them
Branches are board items that carry **conditional logic**. By evaluating one or more conditions written in [Arcscript](https://docs.arcweave.com/project-items/arcscript), a branch determines which outgoing connection the game flow follows at runtime.

> ℹ️ The above example uses [board variables](https://docs.arcweave.com/project-items/variables/board): variable attributes on a board with the custom ID `items`, such as `bronze_key` and `potion_strength`.
In [Play Mode](https://docs.arcweave.com/project-tools/play-mode/overview), a branch evaluates its conditions in order and sends the game flow down the connection that corresponds to the first condition satisfied. You can use this behavior to control precisely which options are presented to the player.
## Conditions and connections
Context: Arcweave docs > Project Items > Branches > Conditions and connections
### Number of connections
Context: Arcweave docs > Project Items > Branches > Conditions and connections > Number of connections
A branch can have any number of incoming connections. Its outgoing connections correspond one-to-one with its conditions, structured as:
- `if condition 1` → Connection 1
- `elseif condition 2` → Connection 2
- ...
- `elseif condition n` → Connection n
- `else` → Connection n+1
### Number of conditions
Context: Arcweave docs > Project Items > Branches > Conditions and connections > Number of conditions
Logic dictates that a branch must have exactly one `if` condition, may have any number of `elseif` conditions, and may have at most one `else` condition.
### Condition expressions
Context: Arcweave docs > Project Items > Branches > Conditions and connections > Condition expressions
Each `if` and `elseif` condition holds a single Arcscript expression, such as `score > 3` or `has_key`. The branch supplies the `if` or `elseif` keyword, so you write only the expression, without `if`, `endif`, or other statements.
### Condition evaluation
Context: Arcweave docs > Project Items > Branches > Conditions and connections > Condition evaluation
Conditions are evaluated in order from top to bottom. In the example below, the `elseif` expression is redundant and will always be skipped:
- `if score < 1000`...
- `elseif score < 10`...
- `else`
The `else` condition applies to all cases not covered by the previous `if`/`elseif` conditions, therefore it does not take custom expressions.
> ✅ Play-test your branch logic in [Play Mode](https://docs.arcweave.com/project-tools/play-mode/overview).
## Branch usage
Context: Arcweave docs > Project Items > Branches > Branch usage
Branches connect with [elements](https://docs.arcweave.com/project-items/elements), [jumpers](https://docs.arcweave.com/project-items/jumpers), and other branches, permitting or blocking the narrative flow depending on their conditions and the current game state.
### Labels along a branch path
Context: Arcweave docs > Project Items > Branches > Branch usage > Labels along a branch path
Connections entering and leaving a branch can both have labels. When a path passes through one or more branches, the option displays the **last label that produces text** after Arcscript is evaluated.
> ✅ A later label that produces no text keeps the earlier label's text.
Every label on a branch path has **its Arcscript evaluated**, including labels whose text is replaced by a later label. Variable changes from all labels accumulate along the path, and a branch checks its conditions using the values calculated by the labels before it.
These variable changes are applied to the playthrough **only when the player selects that option**, before its target element loads.
See [Labels across branches](https://docs.arcweave.com/project-items/labels#labels-across-branches) for the rules, [How Play Mode prepares an option across branches](https://docs.arcweave.com/project-items/labels#how-play-mode-prepares-an-option-across-branches) for the evaluation order, and the [chain of branches example](https://docs.arcweave.com/project-items/labels#example-a-chain-of-branches).
### `if` branches
Context: Arcweave docs > Project Items > Branches > Branch usage > `if` branches
An `if`-only branch renders its connected option only when its condition is met. Otherwise, it blocks the story flow, providing no output.
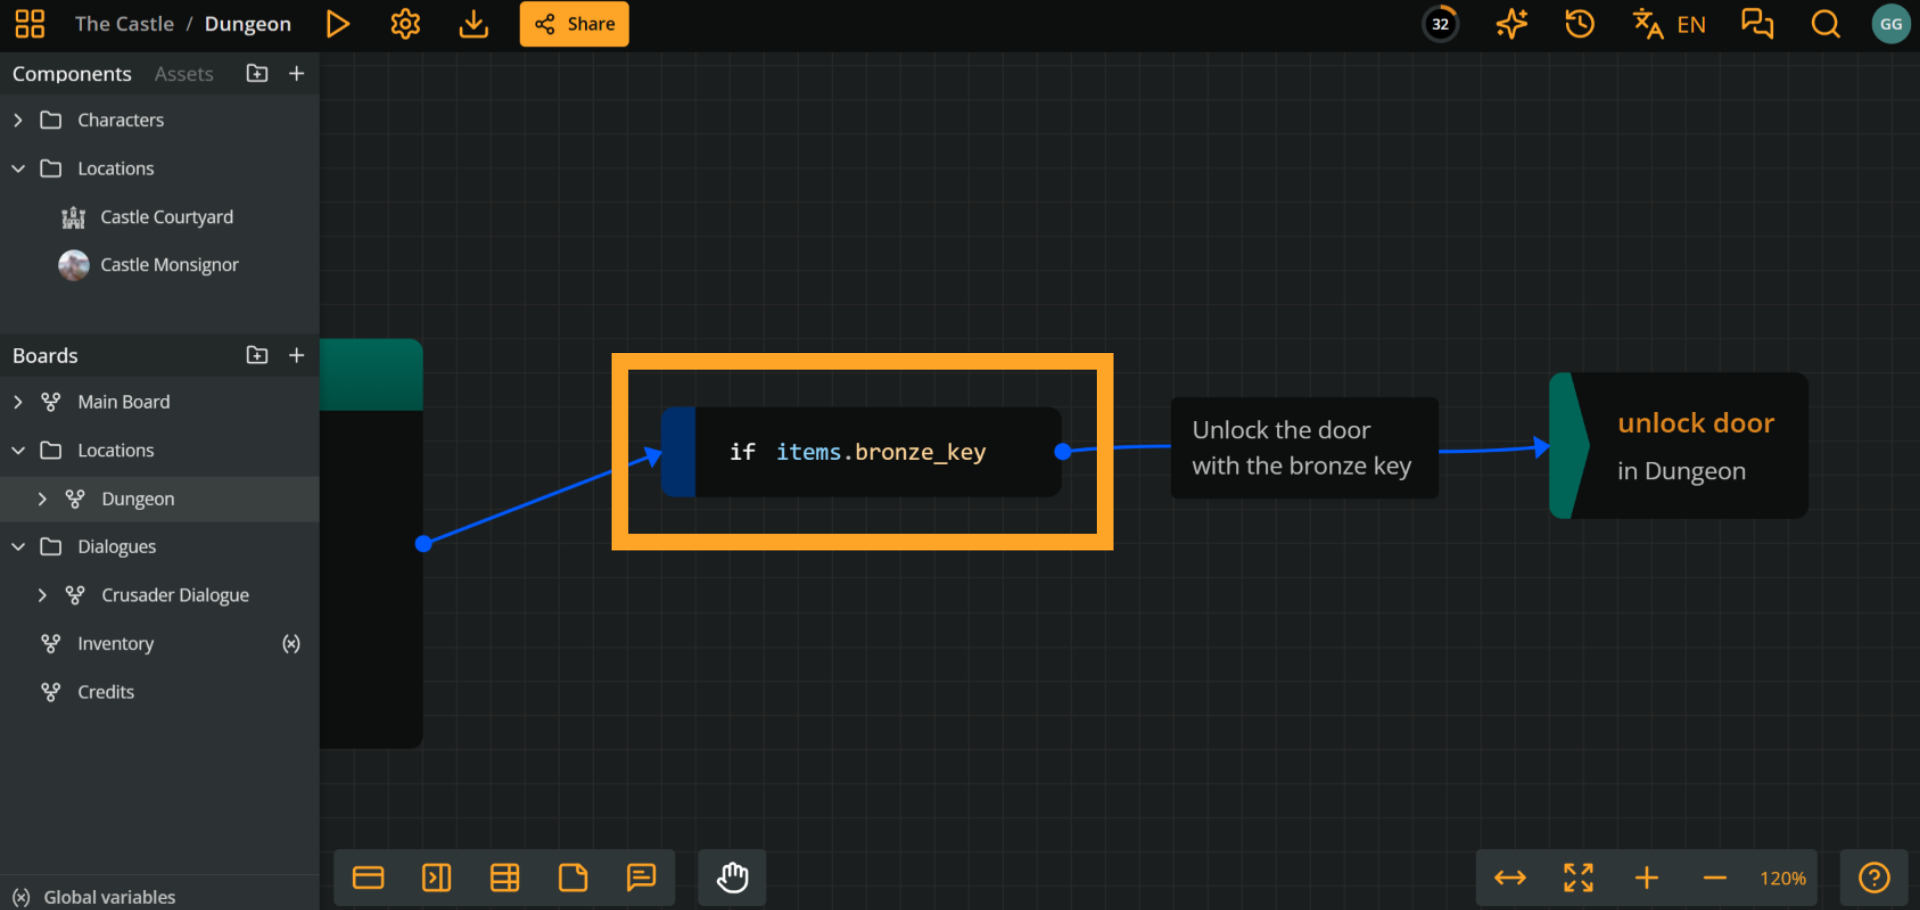
In the above example, the branch evaluates the board variable `items.bronze_key`. If `true`, the option to unlock the door is presented. If `false`, no option appears instead.
You can add multiple `if`-only branches to offer several independent conditional options. If the player satisfies more than one condition, they receive all corresponding options.

Below, you can see how the example above renders in Play Mode, if the player has all three items:

### elseif conditions
Context: Arcweave docs > Project Items > Branches > Branch usage > elseif conditions
To ensure the player receives **at most one** option from a set of possibilities, use a single branch with `elseif` conditions rather than multiple separate branches. In the following example, the options of using the key or the potion are bundled in the same branch, so only one option can be provided, even if the player has both items:

Even if the player has the potion of strength, only using the bronze key will be available as an option. The bronze key takes priority, due to its higher position in the branch.

The battle axe appears independently, since it is evaluated by its own branch.
### Fallback options
Context: Arcweave docs > Project Items > Branches > Branch usage > Fallback options
When using conditional options, get in the good habit of including at least one unconditional option (that is one without a branch). This can work as a fallback option, making sure the flow can continue regardless of the game state.
In this example, the flow continues even if the player has none of the three items:
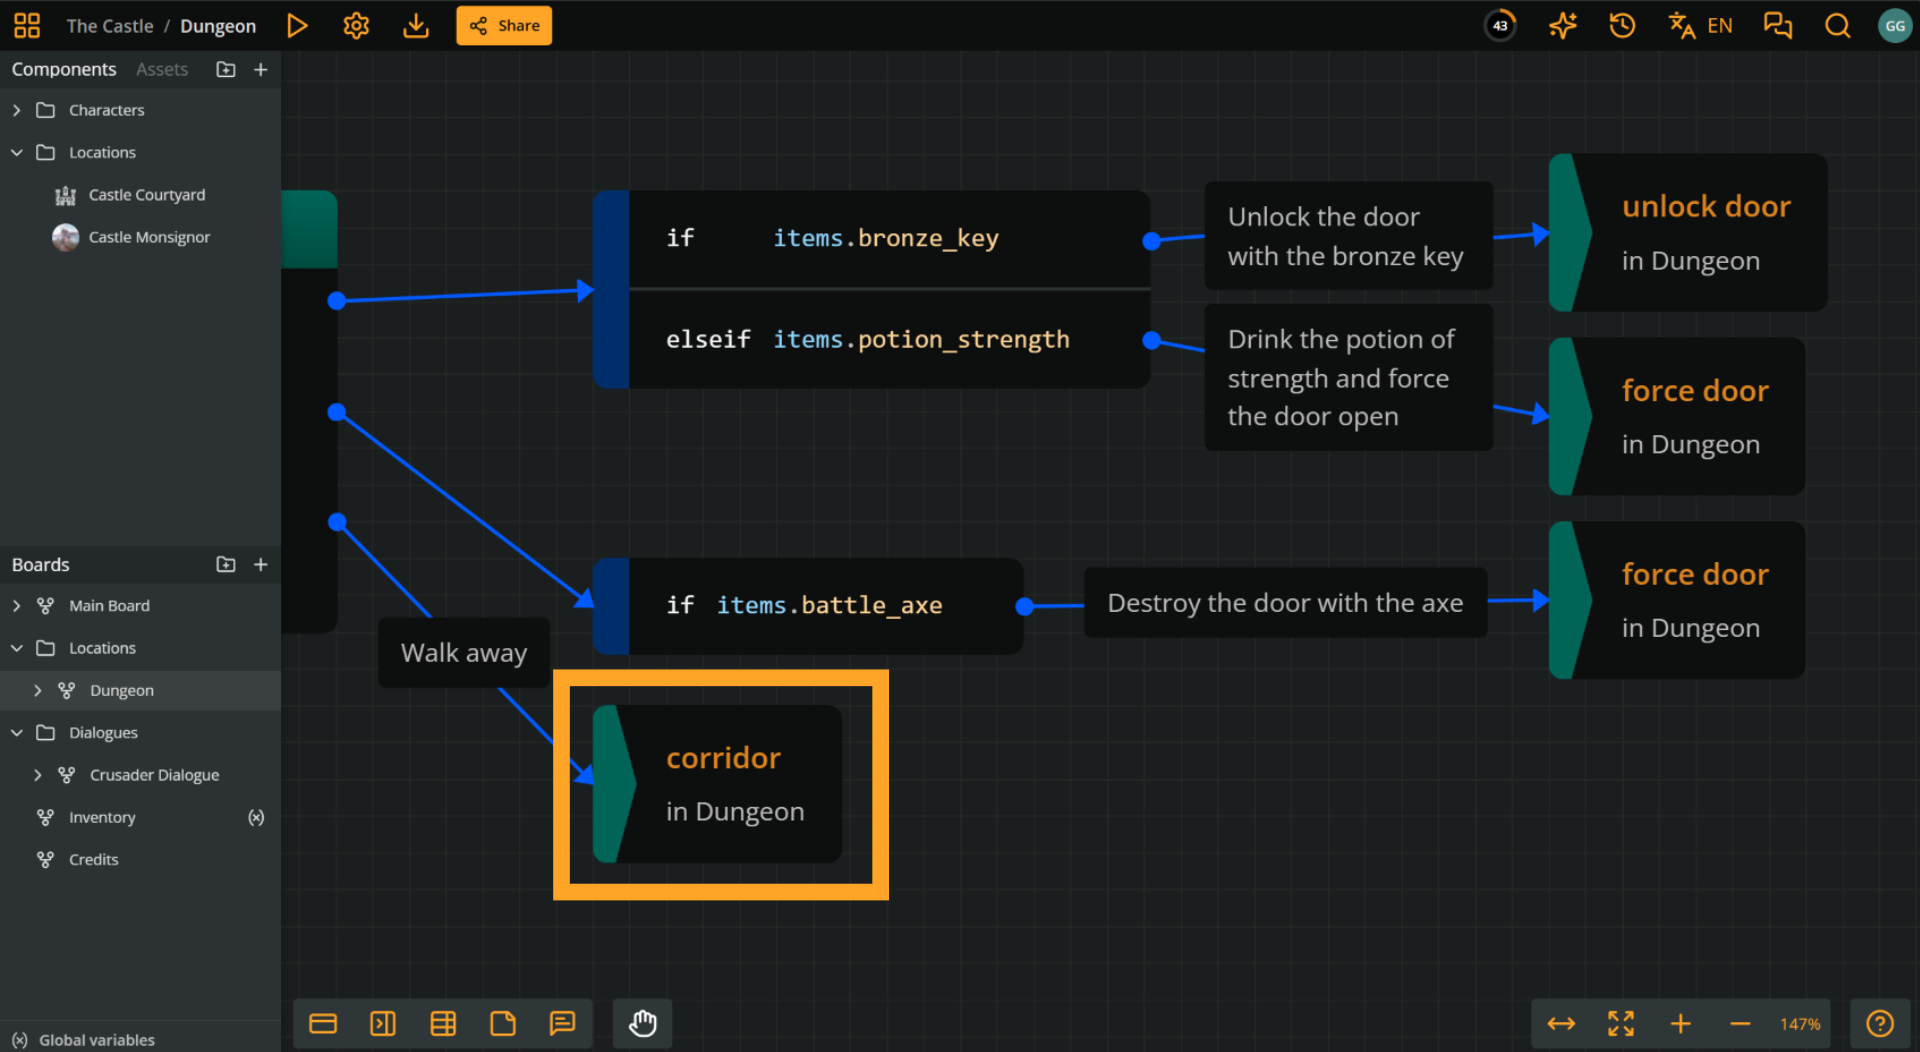
In Play Mode, only the fallback option is visible:

### else conditions
Context: Arcweave docs > Project Items > Branches > Branch usage > else conditions
Adding an `else` condition guarantees the branch always provides exactly one option, regardless of which conditions are met.

In this example, the branch provides the option to use only one object, even if the player has all three of them.
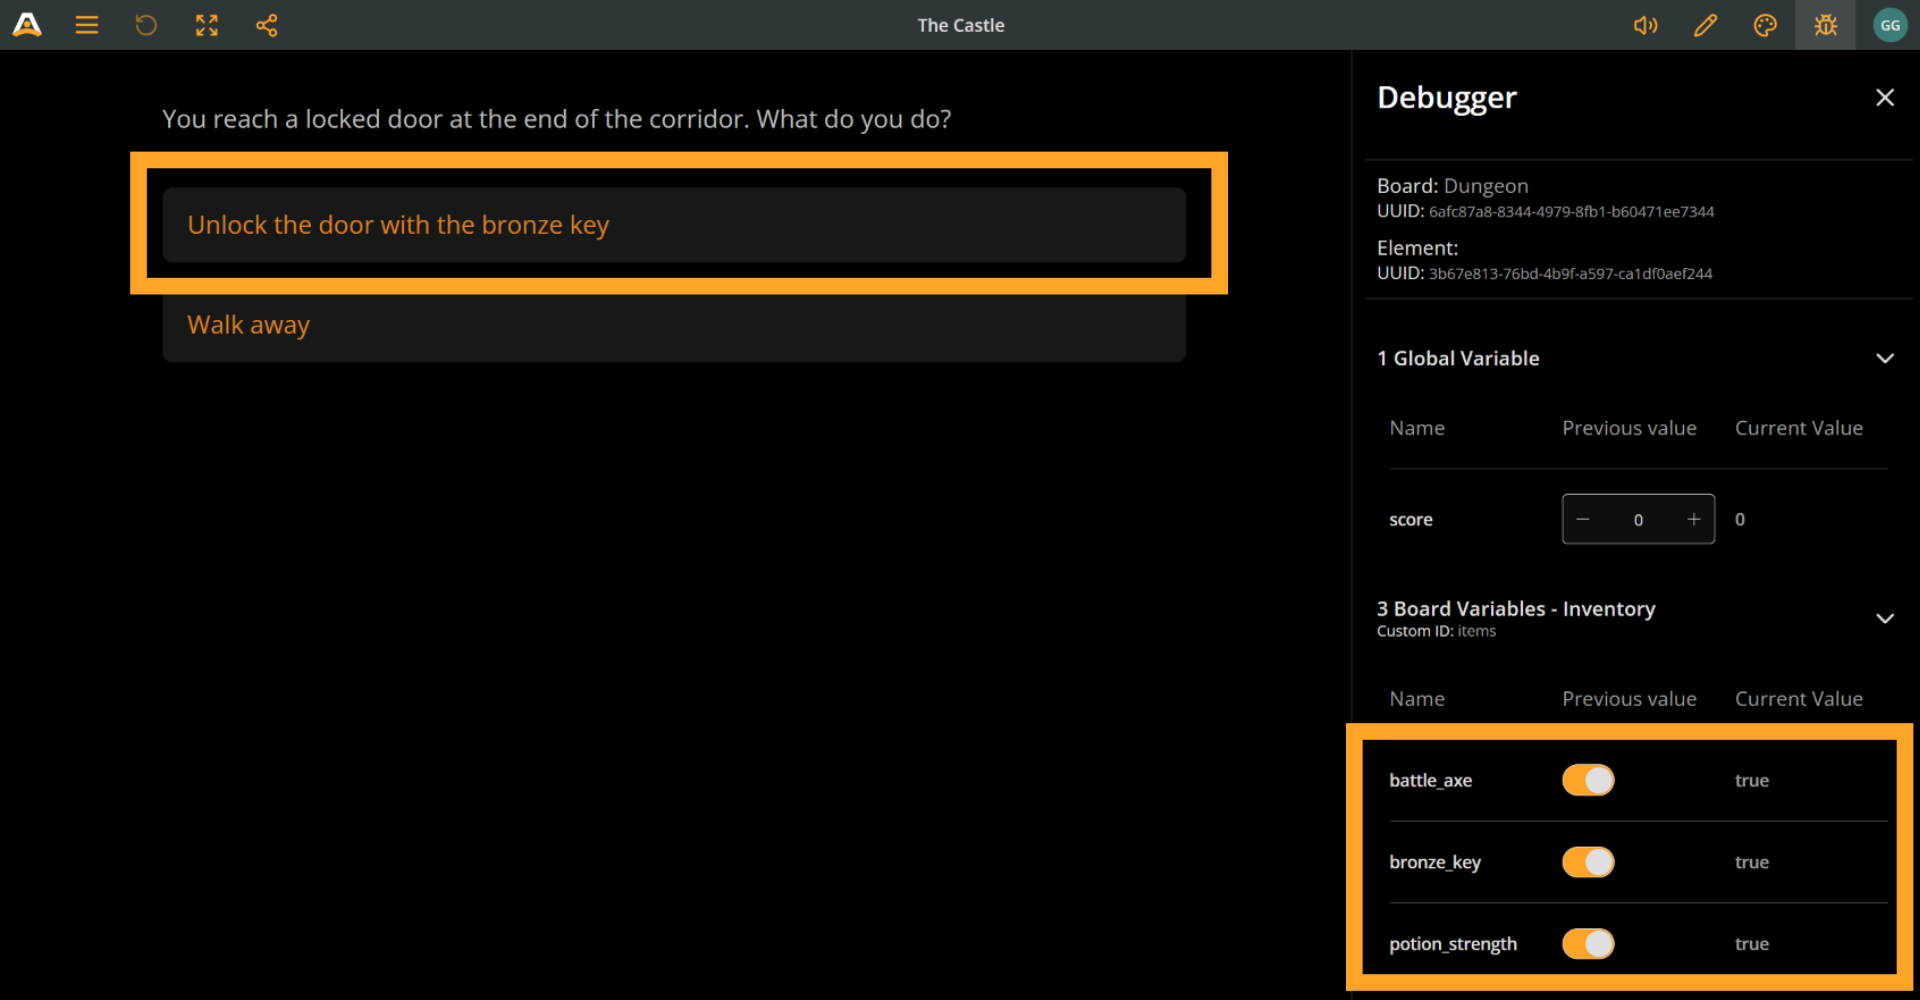
> ✅ Read more about [variables](https://docs.arcweave.com/project-items/variables/overview) and [Arcscript](https://docs.arcweave.com/project-items/arcscript) on their respective pages.
## Create branches
Context: Arcweave docs > Project Items > Branches > Create branches
To create a branch, do any of the following:
- Right-click on an empty board area and select **Create > Branch** from the menu.
- Drag and drop the **New branch icon** (at the left of the [bottom menu](https://docs.arcweave.com/project-tools/interface/bottom-menu)) onto an empty board area.
- Drag a connection from an element or another branch and drop it on an empty board area, then select **Create branch here**. The new branch is created as the connection's target. See [Create connections](https://docs.arcweave.com/project-items/connections#with-drag-and-drop).
When you create a new branch, it contains only its required `if` condition.
## Select branches
Context: Arcweave docs > Project Items > Branches > Select branches
Click a branch to select it. To select multiple items, see [Select board items](https://docs.arcweave.com/project-tools/interface/mouse-actions#select-board-items).
## Copy a branch link
Context: Arcweave docs > Project Items > Branches > Copy a branch link
With only the branch selected, right-click it on the board and select **Copy link**. Opening the link centers the branch on its board in the language active when you copied it.
See [Share an item or board position](https://docs.arcweave.com/project-tools/share#share-an-item-or-board-position) for access requirements.
## Delete branches
Context: Arcweave docs > Project Items > Branches > Delete branches
To delete a branch, do either of the following:
- Select it and press **Delete** or **Backspace**.
- Right-click on it and select **Delete selection** from the menu.
## Edit branches
Context: Arcweave docs > Project Items > Branches > Edit branches
### `if` conditions
Context: Arcweave docs > Project Items > Branches > Edit branches > `if` conditions
#### Edit `if` conditions
Context: Arcweave docs > Project Items > Branches > Edit branches > `if` conditions > Edit `if` conditions
To edit the `if` condition, double-click it. Press **Esc** to exit editing.
> ⚠️ The `if` condition is required and cannot be added or removed.
### `elseif` conditions
Context: Arcweave docs > Project Items > Branches > Edit branches > `elseif` conditions
#### Add `elseif` conditions
Context: Arcweave docs > Project Items > Branches > Edit branches > `elseif` conditions > Add `elseif` conditions
To add an `elseif` condition, do either of the following:
- Right-click the branch and choose **Add elseif**.
- Press **Ctrl+Enter** or **Cmd+Enter** while editing another condition. The new `elseif` condition appears below the one you are editing.
#### Remove `elseif` conditions
Context: Arcweave docs > Project Items > Branches > Edit branches > `elseif` conditions > Remove `elseif` conditions
To remove an `elseif` condition:
1. Double-click the `elseif` condition to enter editing mode.
2. Click the **(x) icon** that appears on the right side of the condition.
#### Edit `elseif` conditions
Context: Arcweave docs > Project Items > Branches > Edit branches > `elseif` conditions > Edit `elseif` conditions
To edit an `elseif` condition, double-click it. Press **Esc** to exit editing.
### `else` conditions
Context: Arcweave docs > Project Items > Branches > Edit branches > `else` conditions
#### Add `else` conditions
Context: Arcweave docs > Project Items > Branches > Edit branches > `else` conditions > Add `else` conditions
To add an `else` condition, do either of the following:
- Right-click the branch and choose **Add else**.
- Press **Enter** while editing another condition, if the branch has no `else` condition yet.
#### Remove `else` conditions
Context: Arcweave docs > Project Items > Branches > Edit branches > `else` conditions > Remove `else` conditions
To remove the `else` condition, right-click the branch and select **Remove else**.
> ℹ️ A branch can have only one `else` condition.
> ℹ️ The `else` condition matches all cases not covered by the preceding `if`/`elseif` conditions, therefore it takes no custom expression and cannot be edited.
## Change color theme
Context: Arcweave docs > Project Items > Branches > Change color theme
To change the color theme of a branch, right-click on it and select one of the available colors from the menu.
# Attributes
Source: https://docs.arcweave.com/project-items/attributes
Section: Project Items
Description: Storing information in boards, components, and elements using attributes
Arcscript examples: Arcscript has no delimiters, so never wrap code in `${ }`, `{{ }}`, `<< >>` or similar markers. An `arcscript` code block contains only code: each line is one segment, and a branch condition is a single expression without `if` or `endif`. An `arcweave-html` code block is element or connection label content as Arcweave stores it, the HTML that the REST API and MCP server accept: `` for text, `
` for an empty line, and each Arcscript segment in its own `` block, with `<` written as `<`. An element passed to `visits()` is written as element mention markup; replace `ELEMENT_ID` with the element ID.
In Arcweave, **attributes** let you store information inside [boards](https://docs.arcweave.com/project-items/boards), [components](https://docs.arcweave.com/project-items/components), and [elements](https://docs.arcweave.com/project-items/elements). Board and component attributes can also provide scoped variables for your story logic.
The following attribute types are available on boards, components, and elements:
- Rich Text Field
- String Field
- Component List
- Asset List
Boards and components additionally support these variable-compatible attribute types:
- Boolean
- Integer
- Float
Attributes are particularly useful when you [integrate](https://docs.arcweave.com/integrations/overview) your story with other platforms or game engines. Attribute content does not render automatically in Play Mode. However, String Field, Boolean, Integer, and Float board and component attributes can be read and changed through Arcscript, and their values appear in the [Debugger](https://docs.arcweave.com/project-tools/play-mode/debugger).
## General structure
Context: Arcweave docs > Project Items > Attributes > General structure
All types of attributes follow the same basic structure: a _Label-Content_ pair.
The label is the human-readable name of the attribute. The content is its value, whose data type depends on the attribute type.
## String field
Context: Arcweave docs > Project Items > Attributes > String field
Use string fields to store single-line, plain text values, like words, numbers, or short phrases. Example cases of the string field include the following:
**Component attributes**:
- A character's aliases, e.g. `Nickname`: `Yardbird`
- A character's ability scores, e.g. `Charisma`: `12`
- A weapon's damage die, e.g. `Damage`: `1d4`
- A spell's specifications, e.g. `Duration`: `3 rounds`
**Element attributes**:
- Setting an element as starting (or ending) dialogue, e.g. `dialogue`: `start`
- Tagging an element with properties required for a storylet or an event to trigger, e.g. `storylet`: `foo`
Boards and components treat String Field attributes as scoped variables. Use the dedicated **Integer** or **Float** type when you need a numeric value. Elements do not support numeric attribute types; use a string field for numeric element metadata.
These fields are particularly useful when [integrating](https://docs.arcweave.com/integrations/overview) with other platforms, as they don't contain any HTML tags.
## Rich text field
Context: Arcweave docs > Project Items > Attributes > Rich text field
Use rich text attributes when you want to store long, detailed, or formatted content in a board, component, or element attribute. Example cases of the rich text field include the following:
- **Descriptions**: Write a short description for your character or location.
- **Backstory**: Keep characters' backstories in their components for easy access.
Rich Text attributes support basic formatting options such as **bold**, _italic_, underline, and ~~strikethrough~~. You can also include [mentions](https://docs.arcweave.com/project-tools/mentions) to reference components and boards in your project.
> ⚠️ Do not confuse a rich text attribute of an element with the element's main content. Attributes are for internal use only and do _not_ appear in [Play Mode](https://docs.arcweave.com/project-tools/play-mode/overview).
## Component lists
Context: Arcweave docs > Project Items > Attributes > Component lists
Use component lists when you need to attach an array of components to a board, component, or element.
> ✅ Elements include a primary component list, visible in Play Mode, which is created by dragging a component directly into the element. Additional component lists can be added as element attributes; however, these are metadata only and do _not_ render in Play Mode.
You can use this to list items and relations, as in the following examples:
- **Character inventory**: add the items carried (as components) into a character's component.
- **Spellbook**: list the spells they know.
- **Character relations**: list other characters that have important relations to the component character.
- **Contents**: in a location's component, list the items or characters found there.
Component lists also have a **label field**, so name each of them according to your needs.
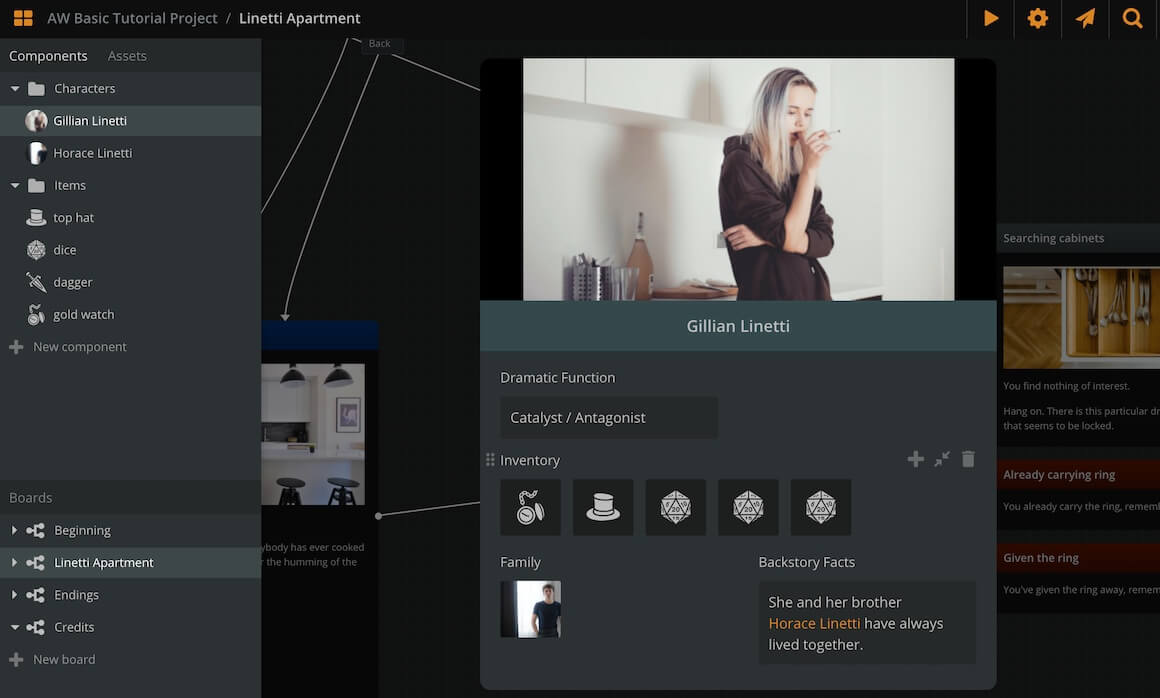
The attached components appear with their thumbnail. Click on the thumbnail to open the attached component.
## Asset lists
Context: Arcweave docs > Project Items > Attributes > Asset lists
Use asset lists when you need to attach an array of image, audio, or video assets to a board, component, or element.
> ✅ Elements already have their unique cover (image or video asset) and their attached audio clips (audio assets), which appear in Play Mode. Still, asset list attributes allow you to add additional image, audio, and video references as metadata, although they are not visible in Play Mode.
The image below shows an element with all 4 types of attributes.
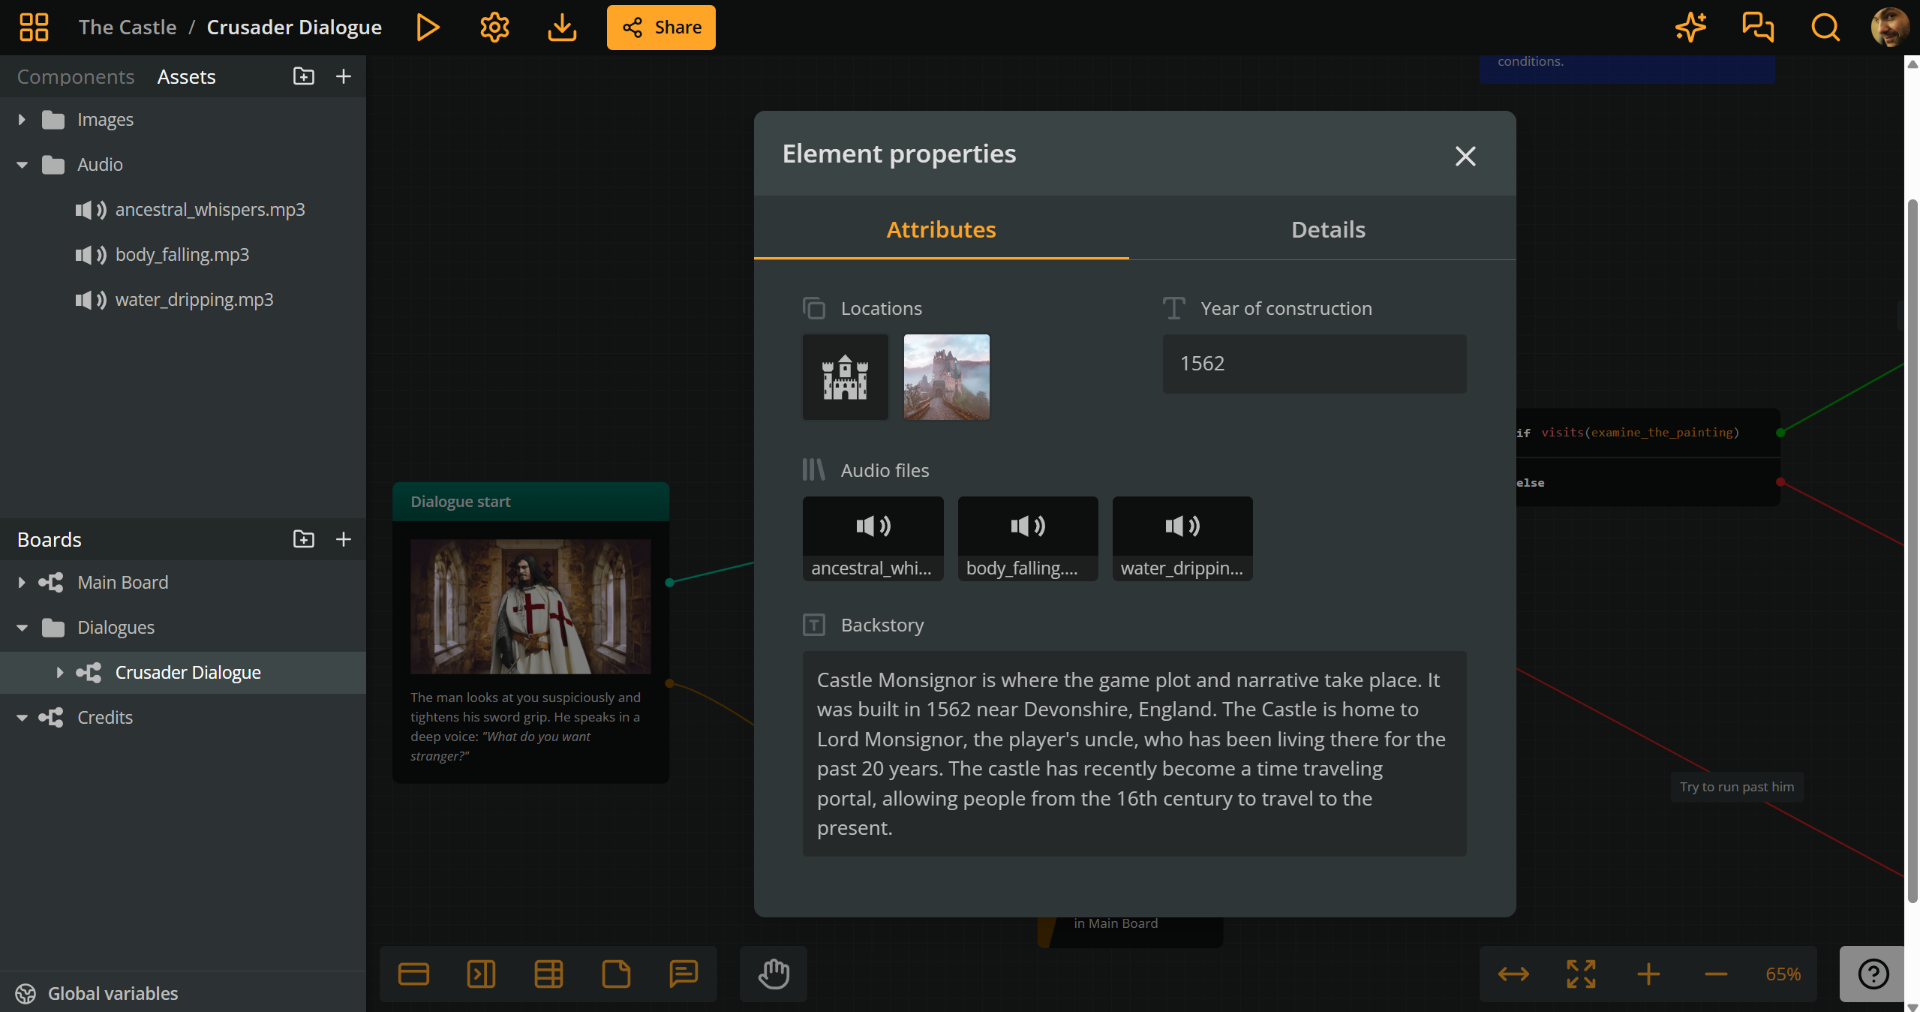
## Access attributes
Context: Arcweave docs > Project Items > Attributes > Access attributes
To create, edit, or delete an attribute, first open the item's attributes interface.
### Board attributes dialog
Context: Arcweave docs > Project Items > Attributes > Access attributes > Board attributes dialog
To access a board's attributes, right-click a regular board in the **Boards** section and select **Attributes**. Boards that already have attributes also display an attributes button next to their name.
### Component attributes panel
Context: Arcweave docs > Project Items > Attributes > Access attributes > Component attributes panel
To access a component's attributes, do the following:
1. Locate the component:
- **Sidebar**: In the **Components** section
- **Current board**: In an element where it is attached
2. Click the component to open its attributes panel.
### Element attributes panel
Context: Arcweave docs > Project Items > Attributes > Access attributes > Element attributes panel
To access an element's attributes, do the following:
1. Locate the element on your board.
2. Right-click the element and choose **Properties**.
3. In the Properties modal, switch to the **Attributes** tab, to reveal its attributes panel.
## Scoped variable attributes
Context: Arcweave docs > Project Items > Attributes > Scoped variable attributes
A String Field, Boolean, Integer, or Float attribute on a board or component becomes an Arcscript variable when the attribute and its owner have custom IDs. These are called [board variables](https://docs.arcweave.com/project-items/variables/board) and [component variables](https://docs.arcweave.com/project-items/variables/component).
The Arcscript reference combines two IDs:
- The owning board or component's **custom ID** is the scope.
- The attribute's **custom ID** is the variable name.
For example, an integer attribute with custom ID `health` on the component `hero` is referenced as `hero.health`:
```arcscript
hero.health -= 10
show(hero.health)
```
The attribute label can be more descriptive and does not affect the Arcscript reference. Rich Text Field, Component List, and Asset List attributes remain metadata even if their exported data contains a `customId`.
Arcweave generates a custom ID when you create a regular board or component. When you name a variable attribute, Arcweave generates its custom ID from its label. To edit an attribute custom ID, open its three-dot menu and select **Edit Custom ID**. To edit the scope, select the custom ID beneath a board title or component name. Renaming an ID updates existing Arcscript references automatically.
### Custom ID rules
Context: Arcweave docs > Project Items > Attributes > Scoped variable attributes > Custom ID rules
See [Variable names and custom IDs](https://docs.arcweave.com/project-items/variables/overview#variable-names-and-custom-ids) for the syntax, uniqueness, and reserved-name rules shared by global, board, and component variables.
## Create attributes
Context: Arcweave docs > Project Items > Attributes > Create attributes
After opening the relevant attributes interface, do either of the following:
- To add an attribute at the end of the list, click **Add attribute** below the attributes and select the type you want to create.
- To add an attribute after an existing one:
1. Hover the mouse cursor over the existing attribute.
2. Open its **three-dot menu** and select **Add Attribute**.
3. Select the type of attribute you want to create from the menu. The newly created attribute will appear below the clicked one.
On boards and components, variable-compatible types appear in the **Variables** group of the type menu. **Integer** and **Float** are under **Number** in that group.
## Edit attributes
Context: Arcweave docs > Project Items > Attributes > Edit attributes
To edit an attribute, open the relevant attributes interface, then do either of the following:
- **Label**: Click the attribute's label, type the new label, and press **Enter** or click outside the attribute.
- **Content**: Click the attribute's content and edit its value. For component and asset lists, see [Add to list attributes](https://docs.arcweave.com/project-items/attributes#add-to-list-attributes).
On board and component variable attributes, the label is only a human-readable description. Changing it does not change the attribute's custom ID, so existing Arcscript references keep working. To change how Arcscript references the attribute, [edit its custom ID](https://docs.arcweave.com/project-items/attributes#scoped-variable-attributes) instead.
## Add to list attributes
Context: Arcweave docs > Project Items > Attributes > Add to list attributes
### Component lists
Context: Arcweave docs > Project Items > Attributes > Add to list attributes > Component lists
To add a component to a component list, do the following:
1. Open the relevant attributes interface.
2. Locate the component list attribute you want to use.
3. In the **Components** section of the sidebar, find the component you want to attach.
4. Drag and drop it into the component list.
To share a listed component, right-click its reference and select **Copy link**. The link opens the referenced component's dialog. See [Copy a component link](https://docs.arcweave.com/project-items/components#copy-a-component-link).
You can also **reorder components** within a list or **move them between lists** by dragging and dropping.
### Asset lists
Context: Arcweave docs > Project Items > Attributes > Add to list attributes > Asset lists
To add an asset to an asset list, do the following:
1. Open the relevant attributes interface.
2. Locate the asset list attribute you want to use.
3. In the **Assets** section of the sidebar, find the asset you want to attach.
4. Drag and drop it into the asset list.
You can also **reorder assets** within a list or **move them between lists** by dragging and dropping.
## Resize attributes
Context: Arcweave docs > Project Items > Attributes > Resize attributes
By default, attributes span the **full width** of their interface, but you can resize an attribute to span only **half-width** and vice-versa.
To resize an attribute, do the following:
1. Hover the mouse cursor over it.
2. Open the **three-dot menu** at the top right.
3. Select **Resize**.
## Reorder attributes
Context: Arcweave docs > Project Items > Attributes > Reorder attributes
To reorder an attribute, do the following:
1. Click and hold it from the **dots icon** that appears at its top left corner when you hover over it.
2. Drag and release it above or below another attribute.
## Delete attributes
Context: Arcweave docs > Project Items > Attributes > Delete attributes
To delete an attribute, do the following:
1. Hover the mouse cursor over it.
2. Open the **three-dot menu** at the top right.
3. Select **Delete**.
# Arcscript
Source: https://docs.arcweave.com/project-items/arcscript
Section: Project Items
Description: Arcweave's scripting language, use, syntax, and functions
Arcscript examples: Arcscript has no delimiters, so never wrap code in `${ }`, `{{ }}`, `<< >>` or similar markers. An `arcscript` code block contains only code: each line is one segment, and a branch condition is a single expression without `if` or `endif`. An `arcweave-html` code block is element or connection label content as Arcweave stores it, the HTML that the REST API and MCP server accept: `` for text, `
` for an empty line, and each Arcscript segment in its own `` block, with `<` written as `<`. An element passed to `visits()` is written as element mention markup; replace `ELEMENT_ID` with the element ID.
Arcweave has its own scripting language, **Arcscript**, with basic scripting capabilities. You can use Arcscript in the following two ways:
- As **conditions**, in [branches](https://docs.arcweave.com/project-items/branches).
- As **segments**, in [element content](https://docs.arcweave.com/project-items/elements#add-arcscript) and [connection labels](https://docs.arcweave.com/project-items/labels#arcscript-in-labels).
## Arcscript in branches
Context: Arcweave docs > Project Items > Arcscript > Arcscript in branches
Arcscript is used in **branches** to control flow with `if`, `elseif`, and `else` conditions.

Branch conditions use the [expressions](https://docs.arcweave.com/project-items/arcscript#expressions) and [condition operators](https://docs.arcweave.com/project-items/arcscript#conditions) described on this page. For how a branch evaluates its conditions, see [branches](https://docs.arcweave.com/project-items/branches).
## Arcscript segments
Context: Arcweave docs > Project Items > Arcscript > Arcscript segments
Arcscript segments are single lines of code that you can add into the content of [elements](https://docs.arcweave.com/project-items/elements) and [labels](https://docs.arcweave.com/project-items/labels).

They support [assignment statements](https://docs.arcweave.com/project-items/arcscript#assignment-statements), [conditional statements](https://docs.arcweave.com/project-items/arcscript#conditional-statements), and calls to [built-in functions](https://docs.arcweave.com/project-items/arcscript#built-in-functions) such as `show()` or `reset()`.
> ℹ️ In Play Mode, an Arcscript segment does not start a new paragraph. Text before and after a segment, including text produced by a conditional statement or `show()`, joins the same paragraph, separated by a space. To keep the text after a segment in a separate paragraph, leave an empty line after the segment.
## Add Arcscript
Context: Arcweave docs > Project Items > Arcscript > Add Arcscript
To insert an Arcscript segment into the content of an [element](https://docs.arcweave.com/project-items/elements) or connection [label](https://docs.arcweave.com/project-items/labels), you use the **Arcscript** icon of the [formatting menu](https://docs.arcweave.com/project-tools/rich-text), the one with the symbol `<>`.
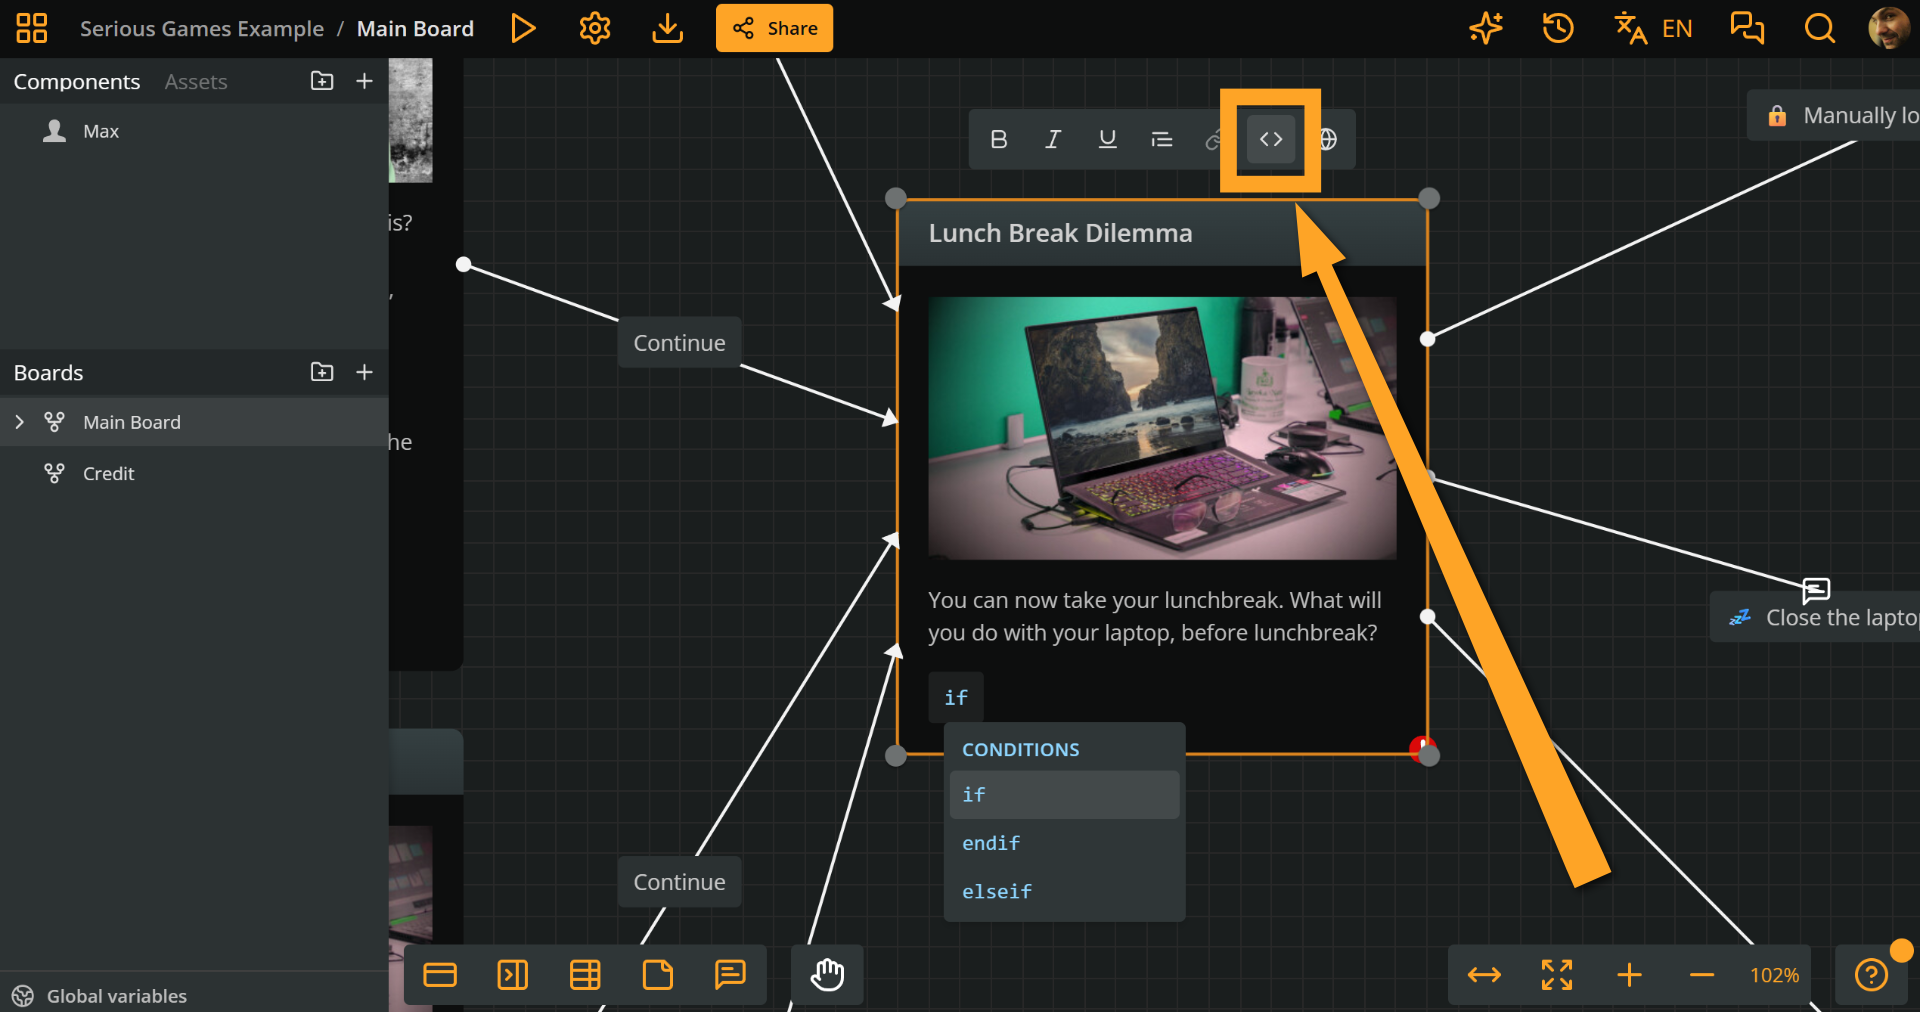
1. Double-click the element or label to enter content editing mode.
2. Place the cursor on the line where you want to insert the Arcscript segment.
3. Click the **Arcscript** icon (`<>`) in the formatting menu.
4. Press **Enter** to exit the Arcscript segment and continue writing in the next line.
> ✅ You can also toggle an Arcscript segment using the shortcut **Ctrl/Cmd + Shift + C**.
## Auto-complete
Context: Arcweave docs > Project Items > Arcscript > Auto-complete
While you type in an Arcscript segment or branch condition, Arcweave provides auto-complete suggestions.
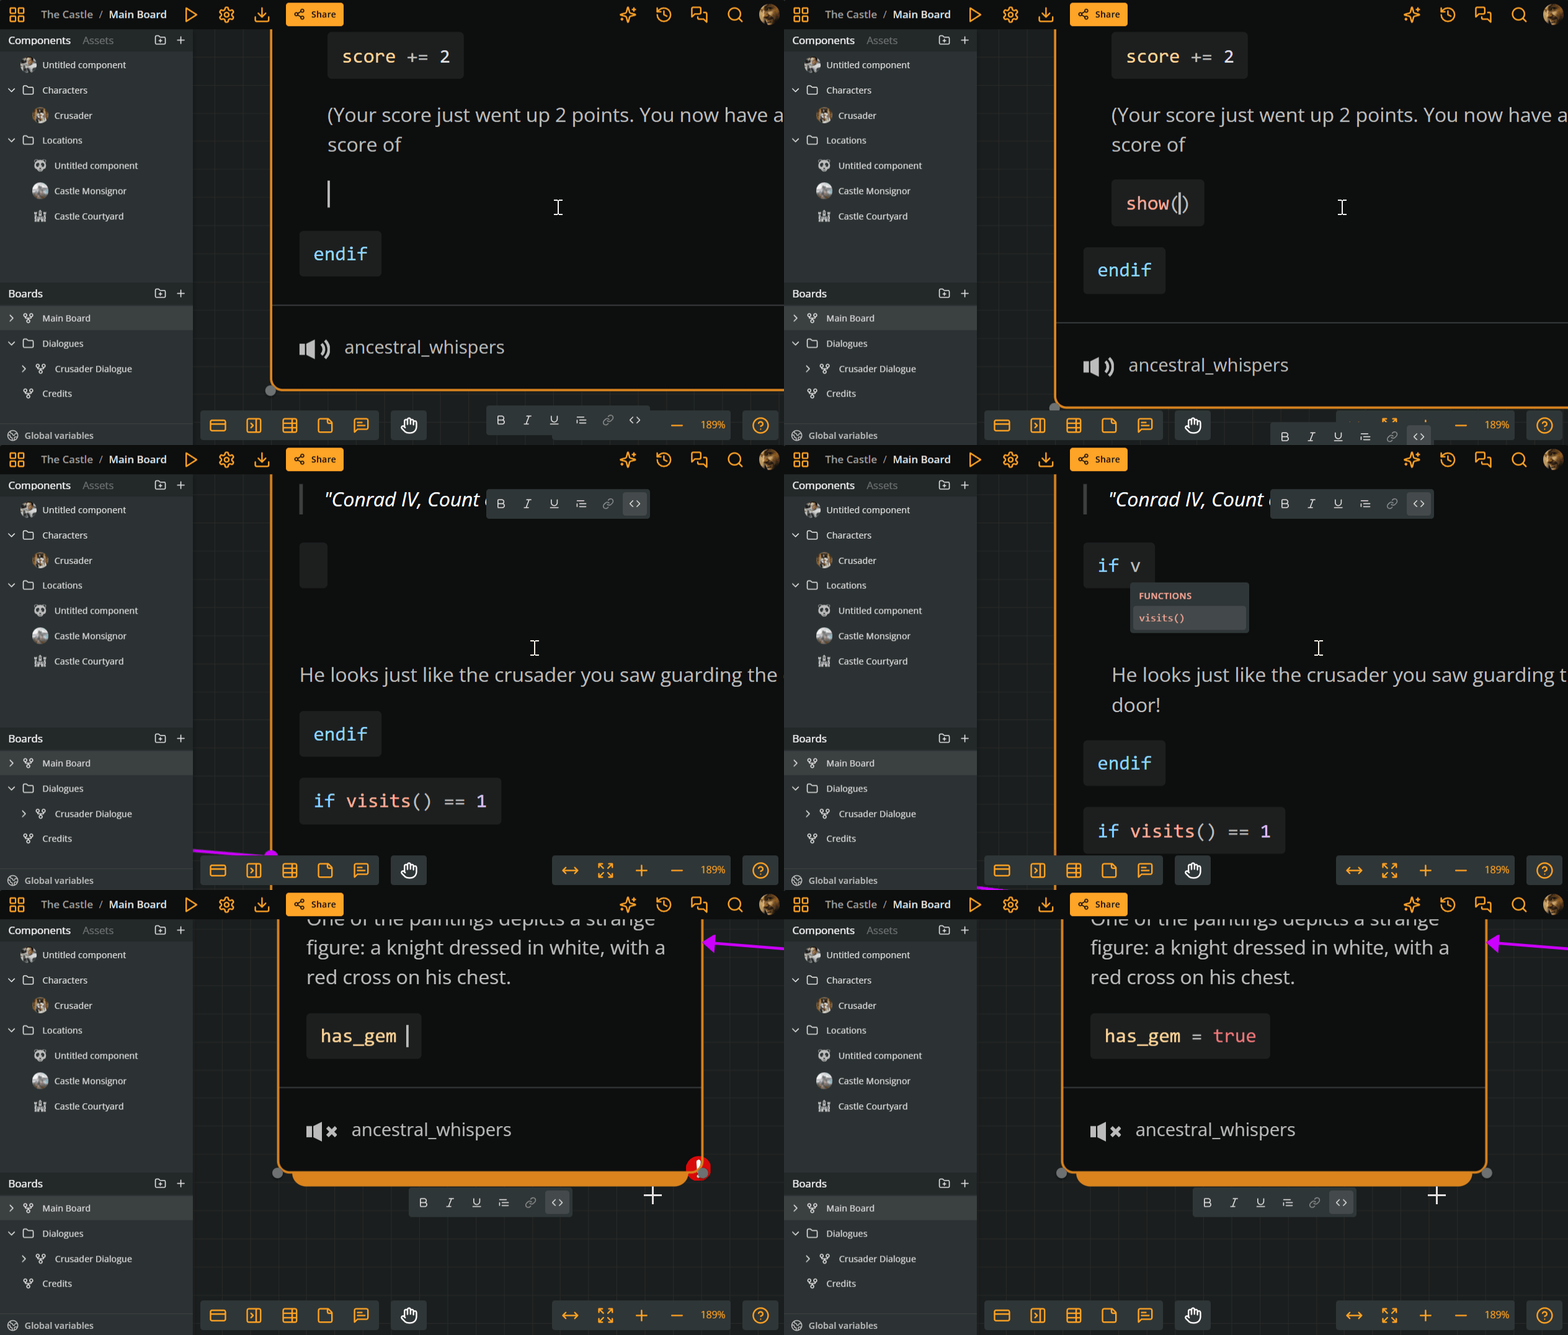
Suggestions include:
- Global variables, and board and component variables with their scope, such as `hero.health`
- [Built-in functions](https://docs.arcweave.com/project-items/arcscript#built-in-functions)
- The keywords `if`, `elseif`, `else`, and `endif`
- The word operators `and`, `or`, `not`, and `is`
- The literals `true` and `false`
Use the arrow keys to select the relevant suggestion and press **Enter** or **Tab** to insert it in your code. Press **Esc** to close the suggestions.
## Variables and scope
Context: Arcweave docs > Project Items > Arcscript > Variables and scope
Global variables use their name directly. Board and component variables are String Field, Boolean, Integer, or Float attributes and use the owning board or component's custom ID as a scope:
```arcscript
health = 100
castle.health = 10
hero.health = 20
```
In this example, `health`, `castle.health`, and `hero.health` are three distinct variables. Unqualified names such as `health` resolve global variables only.
Scoped variables support string, boolean, integer, and float values. See [Variable scope](https://docs.arcweave.com/project-items/variables/overview#variable-scope), [Board variables](https://docs.arcweave.com/project-items/variables/board), and [Component variables](https://docs.arcweave.com/project-items/variables/component) for setup instructions.
## Assignment statements
Context: Arcweave docs > Project Items > Arcscript > Assignment statements
Assignment statements are of the form of `variable = expression`. For example:
```arcscript
x = 5
x = y + 5
name = "Tim"
has_key = true
```
> ℹ️ Before using a variable, create it in **Global variables** or add a **String Field**, **Boolean**, **Integer**, or **Float** attribute to a board or component. Arcweave's auto-complete uses the variable's current name and scope.
Arcscript also supports the following operations, with their respective operators:
| Operation | Operator | Description |
| :------------- | :------: | :-------------------------------------------------------------------------------- |
| Addition | `+=` | Adds the right-hand value to the variable and assigns the result. |
| Subtraction | `-=` | Subtracts the right-hand value from the variable and assigns the result. |
| Multiplication | `*=` | Multiplies the variable by the right-hand value and assigns the result. |
| Division | `/=` | Divides the variable by the right-hand value and assigns the result. |
| Modulo | `%=` | Applies modulo to the variable using the right-hand value and assigns the result. |
For example:
```arcscript
x = 5
x += 10
x -= 2
```
With string values, `+=` appends the right-hand text, for example `name += " Smith"`. The other compound operators cause an error when used with strings.
## Conditional statements
Context: Arcweave docs > Project Items > Arcscript > Conditional statements
Conditional statements are of the form: `if...`/`elseif...`/`else`/`endif`.
> ℹ️ This section applies to conditional statements found in [elements](https://docs.arcweave.com/project-items/elements) and [labels](https://docs.arcweave.com/project-items/labels). Conditional statements in branches follow the same logic, but do not close with `endif` expressions. See [Condition evaluation](https://docs.arcweave.com/project-items/branches#condition-evaluation).
Inside conditional statements you may have:
- other statements (assignments, function calls, or conditionals).
- text content.
> ⚠️ The `if`, `elseif`, `else`, and `endif` segments of a conditional statement cannot be inside a blockquote, although the text between them can. Inside a blockquote, you can use assignments and function calls.
Example of a conditional statement containing an assignment:
```arcscript
if x == 5
y = 4
endif
```
Example of a conditional statement containing some text content:
```arcweave-html
if wielding_shield
The knight is wielding a large shield.
endif
```
Example of a conditional statement containing some text content and a variable assignment:
```arcweave-html
if hasKey
You unlock the door!
doorUnlocked = true
else
You cannot open the door
endif
```
Example of using `elseif` for multiple outcomes:
```arcweave-html
if age >= 18
Look at you! All grown up!
type = "adult"
elseif age > 0
You are not an adult yet.
type = "child"
else
Are you sure you have been born?
type = "unborn"
endif
```
## Expressions
Context: Arcweave docs > Project Items > Arcscript > Expressions
Arcscript supports expressions that use the following arithmetic operators:
| Operator | Name | Description |
| :------: | :------------- | :-------------------------------------------------------------- |
| `+` | Addition | Adds two numbers, or joins them as text if either is a string. |
| `-` | Subtraction | Subtracts the right-hand value from the left-hand value. |
| `*` | Multiplication | Multiplies two numeric values. |
| `/` | Division | Divides the left-hand value by the right-hand value. |
| `%` | Modulo | Returns the remainder of a division between two numeric values. |
| `(` `)` | Parentheses | Groups parts of an expression to control evaluation order. |
Expressions may combine literals, function calls, and variables. Write string literals in double or single quotes, such as `"Tim"` or `'Tim'`. A minus sign before a value negates it, such as `-x`.
## Conditions
Context: Arcweave docs > Project Items > Arcscript > Conditions
### Conditional operators
Context: Arcweave docs > Project Items > Arcscript > Conditions > Conditional operators
| Operator | Name | Description |
| :------------: | :-------------------- | :----------------------------------------------------------------------------------- |
| `==`, `is` | Equality | Checks whether two values are equal. `5` and `"5"` are not equal. |
| `!=`, `is not` | Inequality | Checks whether two values are not equal. |
| `>` | Greater than | Checks whether the left-hand value is greater than the right-hand value. |
| `>=` | Greater than or equal | Checks whether the left-hand value is greater than or equal to the right-hand value. |
| `<` | Less than | Checks whether the left-hand value is less than the right-hand value. |
| `<=` | Less than or equal | Checks whether the left-hand value is less than or equal to the right-hand value. |
### Logical operators
Context: Arcweave docs > Project Items > Arcscript > Conditions > Logical operators
| Operator | Name | Description |
| :----------: | :---------- | :--------------------------------------------------------------- |
| `&&`, `and` | Logical AND | Evaluates to `true` if both conditions are true. |
| `\|\|`, `or` | Logical OR | Evaluates to `true` if at least one condition is true. |
| `!`, `not` | Logical NOT | Negates a condition, turning `true` into `false` and vice versa. |
## Built-in functions
Context: Arcweave docs > Project Items > Arcscript > Built-in functions
The functions that are currently supported in Arcscript:
| Function | Returns |
| ----------------------- | ---------------------------------------------------------------------------------------- |
| `abs(n)` | The absolute value of a number |
| `sqr(n)` | The square of a number |
| `sqrt(n)` | The square root of a number |
| `min(n1, n2, ...)` | The minimum of two or more numbers |
| `max(n1, n2, ...)` | The maximum of two or more numbers |
| `random()` | A random decimal between (and including) 0 and (excluding) 1, i.e. in `[0, 1)` |
| `reset(v1, v2, ...)` | Has no return value; resets one or more given variables to their initial value |
| `resetAll(v1, v2, ...)` | Has no return value; resets all variables, except the given ones, to their initial value |
| `resetVisits()` | Has no return value; resets all elements' visits to 0 |
| `roll(m, n)` | The sum of `n` rolls of an `m`-sided die (`n` defaults to 1) |
| `round(n)` | The number rounded to the nearest integer |
| `show(e1, e2, ...)` | Has no return value; renders the concatenation of its evaluated arguments as text |
| `visits(el)` | The number of visits to an element; without an argument, to the current element |
`reset()` and `resetAll()` apply to global, board, and component variables. Call `resetAll()` without arguments to reset every variable.
### `roll`
Context: Arcweave docs > Project Items > Arcscript > Built-in functions > `roll`
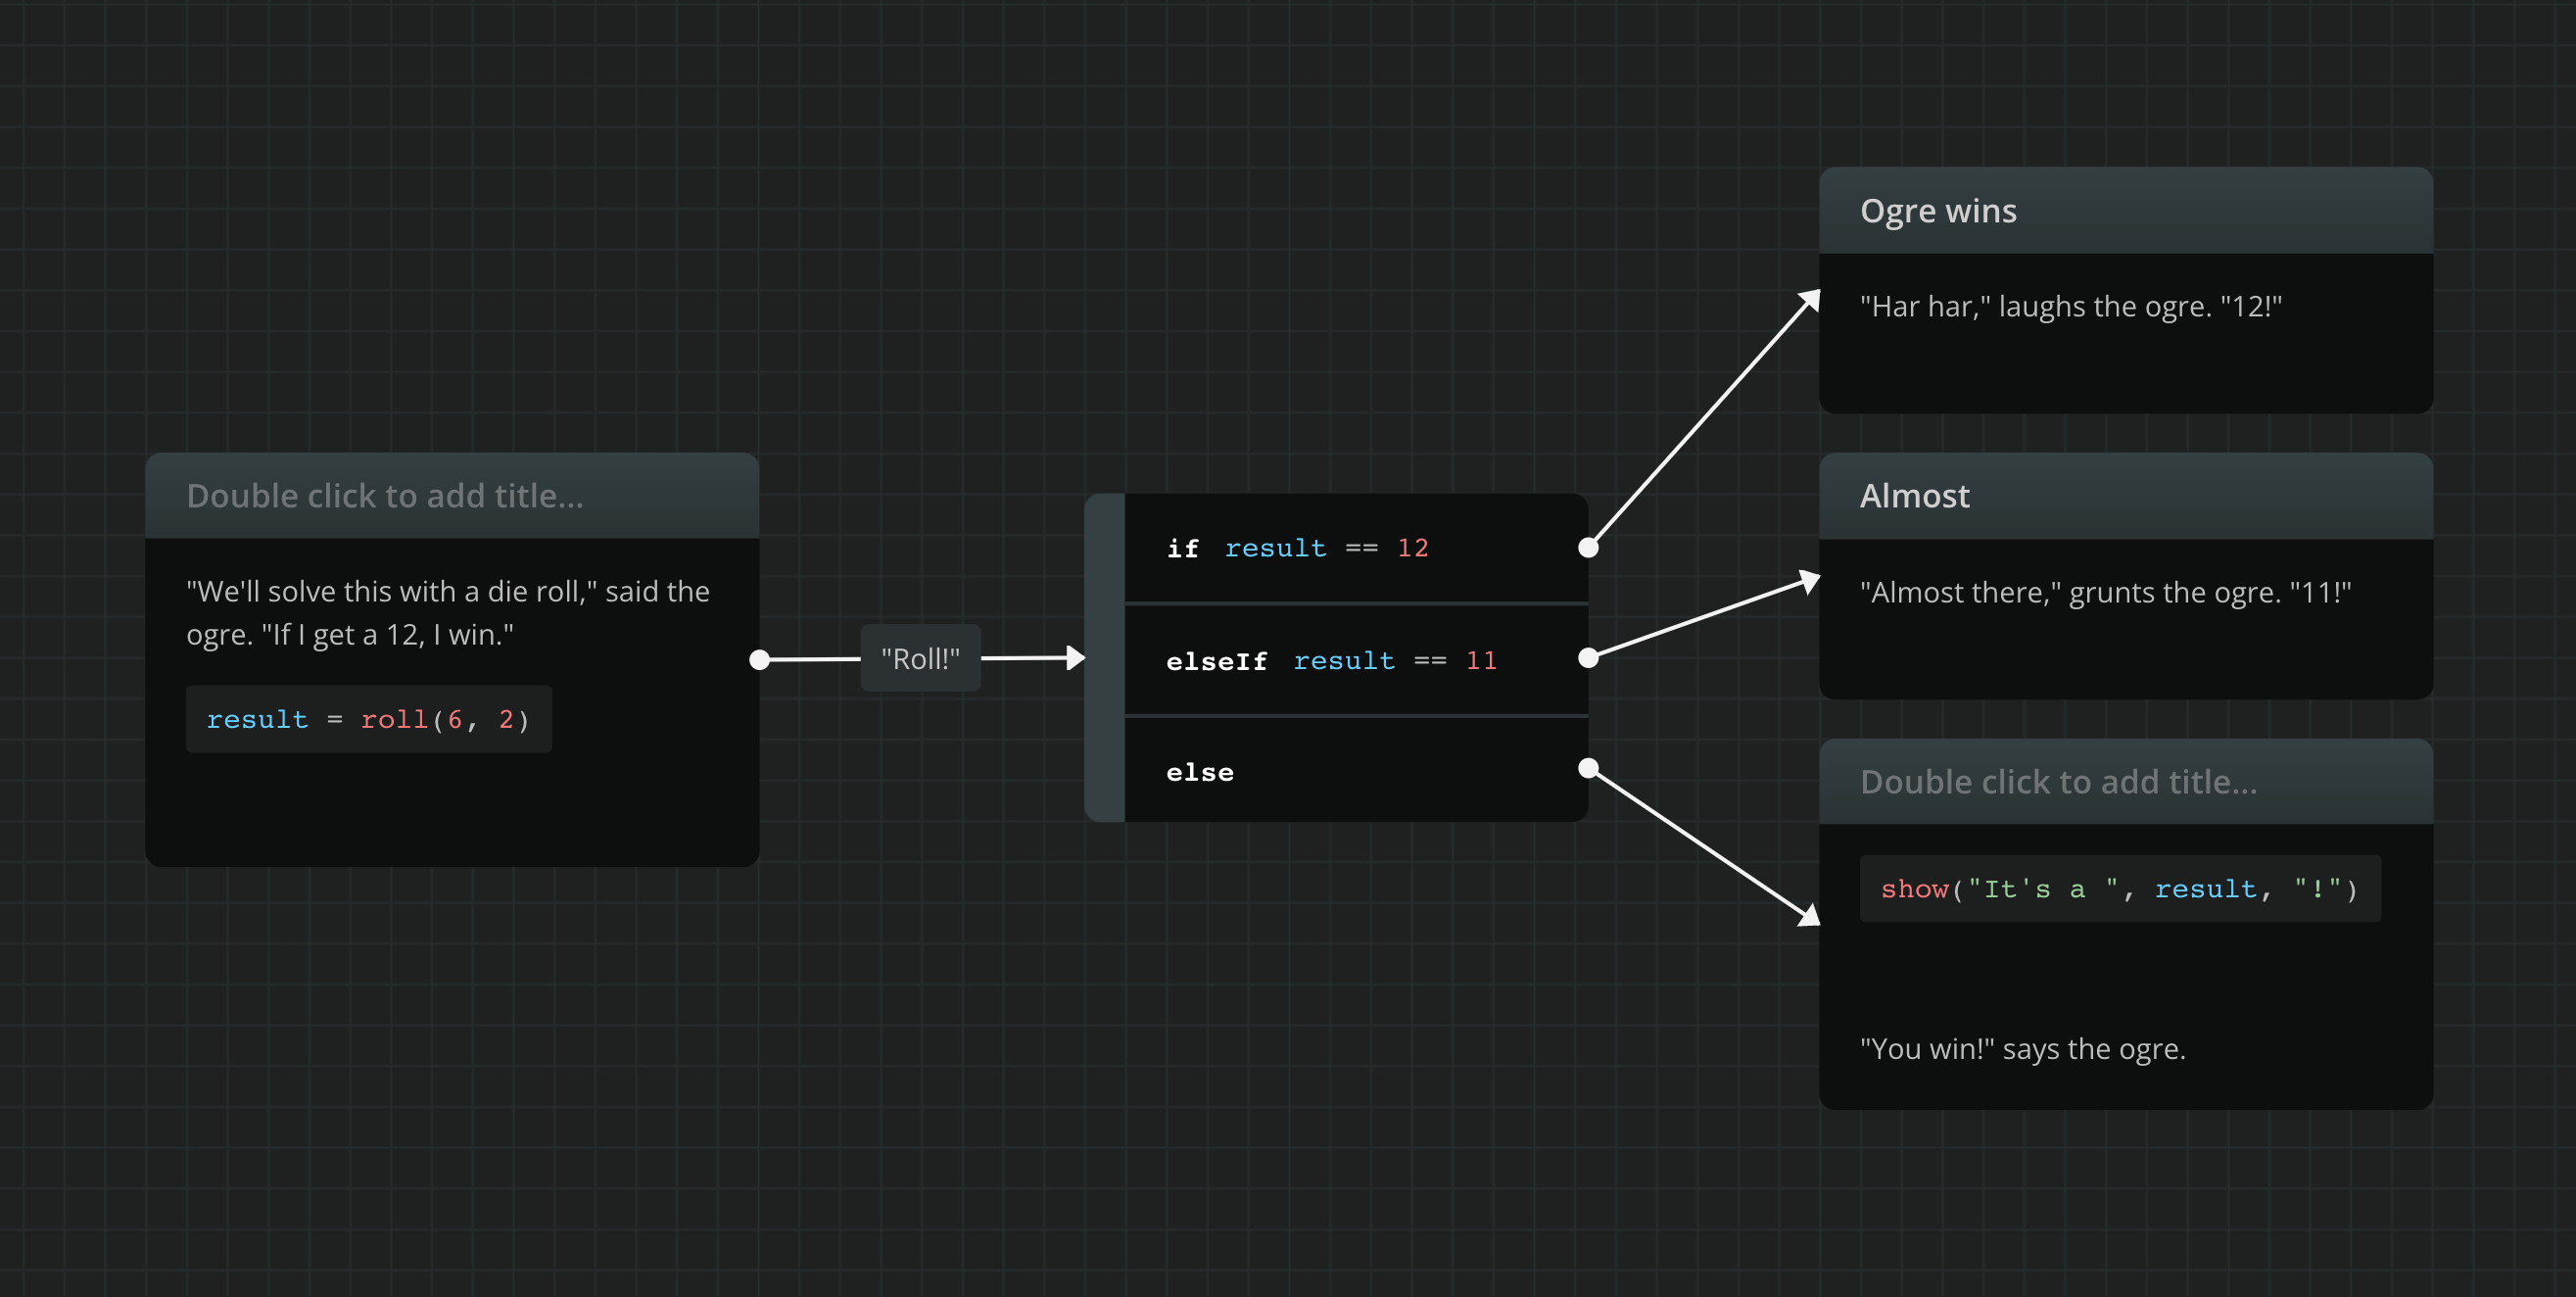
The `roll(m, n)` function simulates polyhedral die rolls from the classic tabletop RPGs.
Roll takes up to 2 positive integers as its arguments:
- `m`: the number of sides of the rolled die.
- `n`: the number of dice rolled.
The function returns a random integer between (and including both) `n` and `n*m`, i.e. `[n, n*m]`.
> ✅ If `n = 1`, you can omit the second argument and simply type `roll(m)`.
For example, rolling for a number from 1 to 12:
```arcscript
damage = roll(12)
```
Example of rolling 3d6 (3 six-sided dice) for a character's ability scores in _Dungeons & Dragons:_
```arcscript
dexterity = roll(6, 3)
```
Example of a dynamic use, where the player suffers damage from `1` to `max_damage`:
```arcscript
player_hp = player_hp - roll(max_damage)
```
But the `roll(m, n)` function can also be used in a conditional statement:
```arcweave-html
if roll(max_damage) > player_hp
Oops... This isn't good...
endif
```
### `show`
Context: Arcweave docs > Project Items > Arcscript > Built-in functions > `show`
The `show(e1, e2, ...)` function renders its arguments and concatenates them as one string.
For example, the following:
```arcscript
show("Your score is ", score, "/", max_score, ".")
```
... for `score == 3` and `max_score == 256` renders:
> Your score is 3/256.
You can use the `show(e1, e2, ...)` function in combination with text content, in elements. For example:
```arcweave-html
if roll(max_damage) > player_hp
Oops... This isn't good...
You have died. In this game you scored
show(score, " out of ", max_score, ".")
endif
```
### `visits`
Context: Arcweave docs > Project Items > Arcscript > Built-in functions > `visits`
#### Call `visits()` with an `element` argument
Context: Arcweave docs > Project Items > Arcscript > Built-in functions > `visits` > Call `visits()` with an `element` argument
The `visits(element)` function returns the number of times a specific element has been visited during the current playthrough. The count includes the current visit: while the player is on an element for the first time, its count is `1`.
The `element` argument must be a **mention** to an element. To mention an element inside `visits()`:
1. Place your cursor within the parentheses of `visits()`.
2. Type `@` and begin entering the element's title. You can mention elements from any board.
3. Select the correct element from the autocomplete list.
> ✅ Mentioning an element in Arcscript works similarly to [mentioning a component or board](https://docs.arcweave.com/project-tools/mentions) in rich text fields.
#### Call `visits()` without an argument
Context: Arcweave docs > Project Items > Arcscript > Built-in functions > `visits` > Call `visits()` without an argument
If `visits()` is called without an argument, it refers to the element the player is currently on:
- When used inside an **element's content**, it refers to that element itself.
- When used inside a **connection label** or **branch condition**, it refers to the element whose options are being prepared: the element where the option's path starts.
> ✅ To reset the visits of all elements of your project, use the `resetVisits()` function. It is always called without arguments.
#### Examples
Context: Arcweave docs > Project Items > Arcscript > Built-in functions > `visits` > Examples
In the following example, `examine_the_painting` is a mention of the **Examine the painting** element:
```arcweave-html
The knight is guarding a mysterious gate. You see a name written above his head:
"Conrad IV, Count of Exeter"
if visits(examine_the_painting) > 1
You make a mental note of the knight's name.
endif
```
And if we are already in the **Examine the painting** element, we can write:
```arcweave-html
The knight is guarding a mysterious gate. You see a name written above his head:
"Conrad IV, Count of Exeter"
if visits() > 1
You make a mental note of the knight's name.
endif
```
## Errors
Context: Arcweave docs > Project Items > Arcscript > Errors
Arcweave checks your Arcscript as you write it. When a script has a syntax error, uses a variable that does not exist, calls a function with the wrong number of arguments, or mentions an element that does not exist, an **exclamation mark symbol** appears at the corner of the element, label, or branch condition that contains it.
> ✅ Hover your mouse cursor over the symbol to see the error message and the line and column where the error occurs.
Other errors occur only when Play Mode runs the script, such as dividing by zero or passing text to a function that expects a number. Play Mode shows these errors below the element's content or below its options. An option whose label causes an error is not shown, and a branch condition that causes an error counts as not met.
# Variables
Source: https://docs.arcweave.com/project-items/variables/overview
Section: Project Items
Description: How to create and use story variables in your Arcweave project
Arcscript examples: Arcscript has no delimiters, so never wrap code in `${ }`, `{{ }}`, `<< >>` or similar markers. An `arcscript` code block contains only code: each line is one segment, and a branch condition is a single expression without `if` or `endif`. An `arcweave-html` code block is element or connection label content as Arcweave stores it, the HTML that the REST API and MCP server accept: `` for text, `
` for an empty line, and each Arcscript segment in its own `` block, with `<` written as `<`. An element passed to `visits()` is written as element mention markup; replace `ELEMENT_ID` with the element ID.
Arcweave uses **variables** to store data during play. These are the mechanism through which the game can "remember" what happens and progress accordingly.
Variables are used in [branches](https://docs.arcweave.com/project-items/branches), as well as in [Arcscript segments](https://docs.arcweave.com/project-items/arcscript#arcscript-segments) within [elements](https://docs.arcweave.com/project-items/elements) and [labels](https://docs.arcweave.com/project-items/labels).
## Common use cases
Context: Arcweave docs > Project Items > Variables > Common use cases
You can use variables in the following ways.
### Assign values
Context: Arcweave docs > Project Items > Variables > Common use cases > Assign values
Assigning a value to a variable stores that value for later use in the game. You can assign values using any of [Arcscript's assignment statements](https://docs.arcweave.com/project-items/arcscript#assignment-statements).
For example, if the player finds a key, you can store this information in a boolean variable named `has_key` (see [variable types](https://docs.arcweave.com/project-items/variables/overview#variable-types), below), assigning it the value `true` in an [Arcscript segment](https://docs.arcweave.com/project-items/arcscript#arcscript-segments).
Then, the game will remember that the player has found the key.
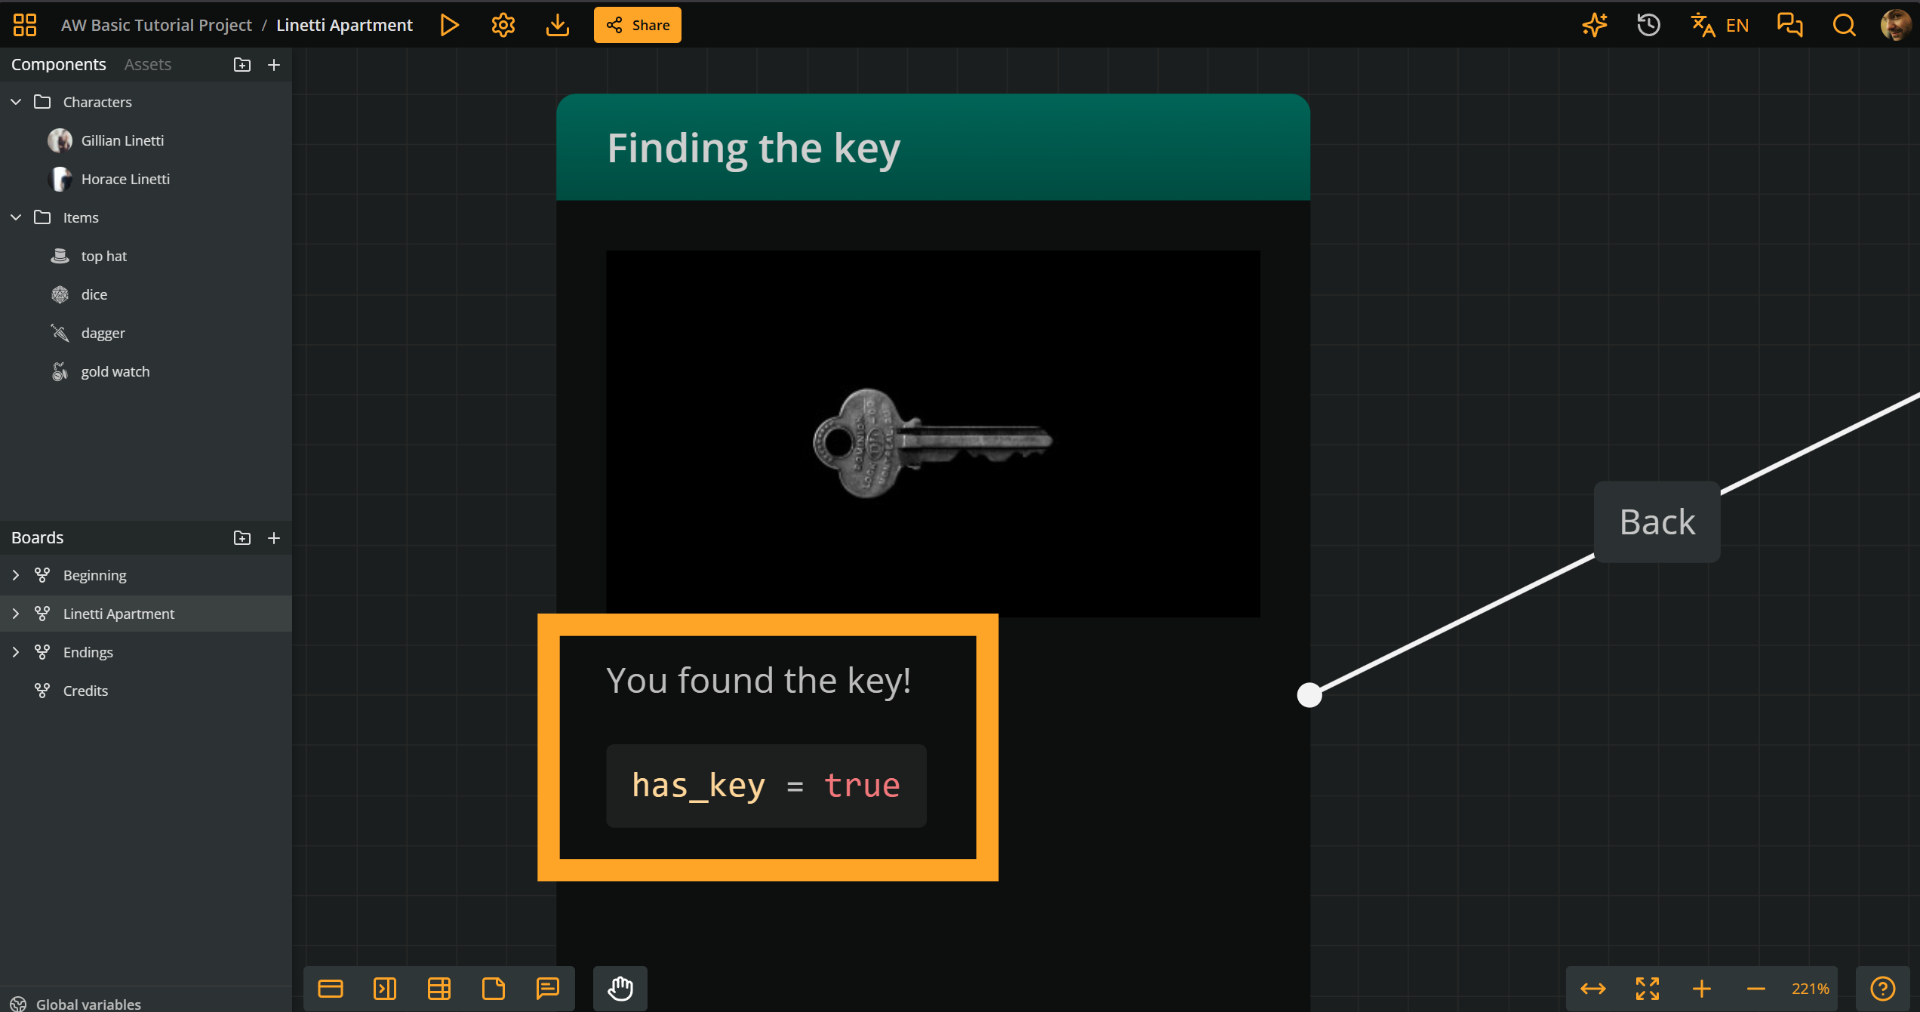
### Evaluate in branches
Context: Arcweave docs > Project Items > Variables > Common use cases > Evaluate in branches
Evaluating a variable allows the game to read and use its value. [Branches](https://docs.arcweave.com/project-items/branches) can evaluate variables using `if`/`elseif`/`else` [conditions](https://docs.arcweave.com/project-items/branches#condition-evaluation) and direct the story flow accordingly.
> ℹ️ For a full guide on Arcscript conditions and their syntax, see [Arcscript](https://docs.arcweave.com/project-items/arcscript) > [Conditional statements](https://docs.arcweave.com/project-items/arcscript#conditional-statements).
In the same example as above, when the player finds the locked drawer, a [branch](https://docs.arcweave.com/project-items/branches) can decide whether they can open it, by evaluating the variable `has_key` in an `if` statement.
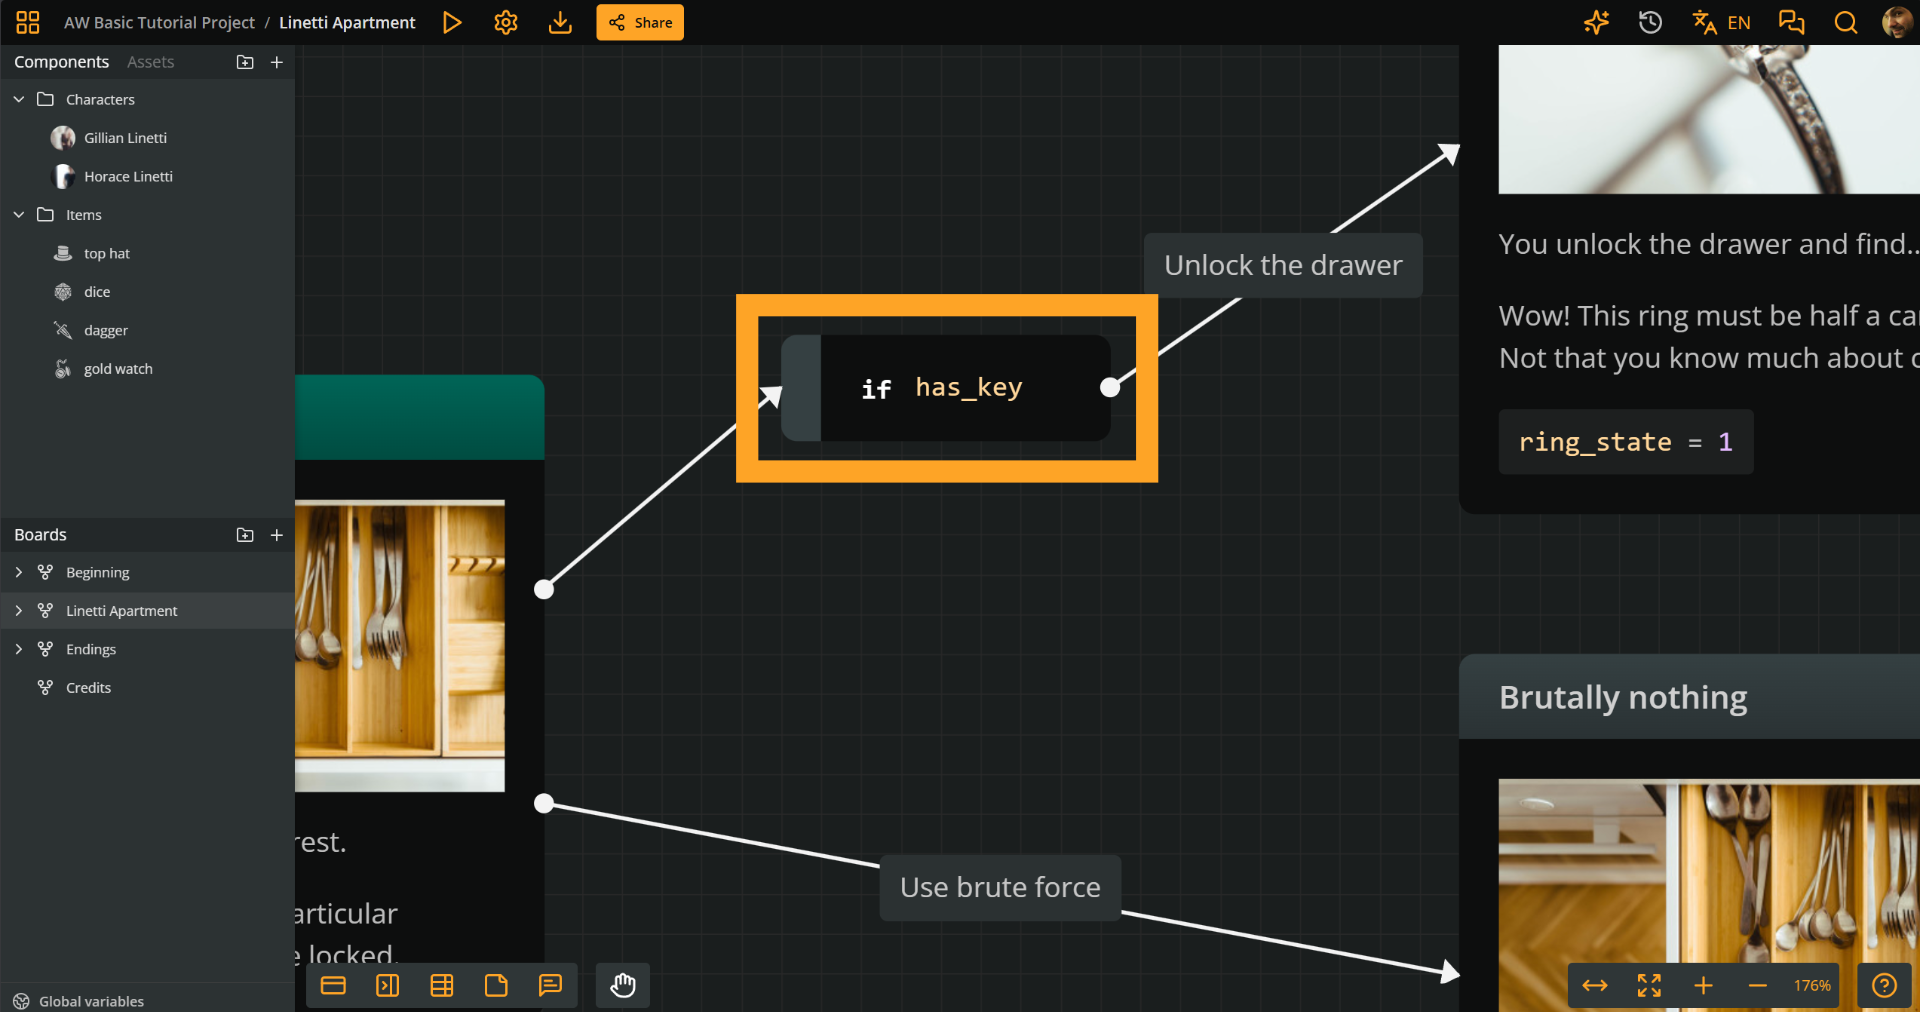
### Display dynamic text
Context: Arcweave docs > Project Items > Variables > Common use cases > Display dynamic text
Another common use of variables is to **display dynamic text content** in [elements](https://docs.arcweave.com/project-items/elements) and [labels](https://docs.arcweave.com/project-items/labels). In other words, the player gets to see different text output depending on the variables' values.
#### Dynamic text using conditional statements
Context: Arcweave docs > Project Items > Variables > Common use cases > Display dynamic text > Dynamic text using conditional statements
One way of creating dynamic text output is by using conditional statements that output different text.
For example, by using the integer `day` (see [Variable types](https://docs.arcweave.com/project-items/variables/overview#variable-types)), we can display a different message to the player as the weekend approaches. (Week starts from `1` = Monday.)
```arcweave-html
if day >= 6
It's weekend! You stretch out in bed. No alarm, no rush. Bliss.
elseif day >= 5
Weekend is almost here. You hum your favourite song all the way to work.
else
The week is still young. Lots of things to do.
endif
```
> ℹ️ For a full guide on Arcscript conditions and their syntax, see [Arcscript](https://docs.arcweave.com/project-items/arcscript) > [Conditional statements](https://docs.arcweave.com/project-items/arcscript#conditional-statements).
#### Dynamic text using the `show` function
Context: Arcweave docs > Project Items > Variables > Common use cases > Display dynamic text > Dynamic text using the `show` function
Another way to display dynamic text in elements and labels is by using the `show` function, which renders its arguments as text content.
The following example uses the `coins` integer (see [Variable types](https://docs.arcweave.com/project-items/variables/overview#variable-types)) to store the player's riches:
```arcscript
show("You have ", coins, " gold coins.")
```
> ℹ️ See [Arcscript](https://docs.arcweave.com/project-items/arcscript) > [`show`](https://docs.arcweave.com/project-items/arcscript#show) for more on the function's syntax and uses.
## Variable types
Context: Arcweave docs > Project Items > Variables > Variable types
The supported variable types are:
- **Boolean**:
A `true`/`false` value, useful for tracking flags, e.g. `has_key` or `met_daisy`.
- **String**:
A sequence of characters, used for names or any other text value, e.g. `happy` or `John Smith`.
- **Integer**:
A whole number, ideal for stats or counters, e.g. `dexterity` or `score`.
- **Float**:
A number with a decimal point, suited for precise measurements, e.g. `speed` or `temperature`.
> ⚠️ Arcscript does not enforce strict type checking. When type conversion occurs, it follows JavaScript's type coercion rules.
For board and component variables, the **String** type appears as **String Field** in the attributes menu.
Every variable has an initial value. Play Mode starts with these values, and restarting Play Mode restores them for global, board, and component variables.
## Variable scope
Context: Arcweave docs > Project Items > Variables > Variable scope
Arcweave supports one global variable category and two scoped variable categories:
| Category | Stored and managed in | Arcscript reference |
| -------------------------------------------------------- | ------------------------------- | ------------------------ |
| [Global variable](https://docs.arcweave.com/project-items/variables/global) | The **Global variable dialog** | `score` |
| [Board variable](https://docs.arcweave.com/project-items/variables/board) | The **Board attributes dialog** | `castle.drawbridge_open` |
| [Component variable](https://docs.arcweave.com/project-items/variables/component) | The component editor | `hero.health` |
All three categories can be read and changed from anywhere in the project. For board and component variables, the scope qualifies the variable's name; it does not restrict where the variable is available. A component variable belongs to the component itself, so attaching that component to multiple elements does not create separate copies of its value.
Board and component variables use the same underlying mechanism. A **String Field**, **Boolean**, **Integer**, or **Float** attribute becomes a scoped variable when both the attribute and its owning board or component have custom IDs. Rich Text, Component List, and Asset List attributes remain metadata and cannot be used as Arcscript variables.
The owner's custom ID is the scope and the attribute's custom ID is the variable name. The attribute label is only a human-readable description and does not affect the Arcscript reference. Unqualified names such as `health` resolve global variables only, so `health`, `castle.health`, and `hero.health` can coexist as three distinct variables.
### Variable names and custom IDs
Context: Arcweave docs > Project Items > Variables > Variable scope > Variable names and custom IDs
Variable names and custom IDs must be valid Arcscript identifiers and cannot be Arcscript keywords or built-in function names.
- A global variable name must start with a letter, `_`, or `$` and must be unique among global variables.
- A board or component custom ID must start with a letter or `$` and must be unique across all regular boards and components.
- A variable attribute custom ID must start with a letter, `_`, or `$` and must be unique among the attributes of its owner.
- After the first character, these identifiers can contain letters, numbers, and underscores.
A global variable name may match a board or component custom ID because unqualified and scoped references are distinct. For example, the global variable `hero` and the component variable `hero.health` can coexist.
Arcweave generates a custom ID when you create a regular board or component. When you name a variable attribute, Arcweave generates its custom ID from its label. Renaming an owner or attribute custom ID updates existing Arcscript references automatically.
## Variables in Debugger
Context: Arcweave docs > Project Items > Variables > Variables in Debugger
When in Play Mode, you can monitor the variables and their values in the Debugger.
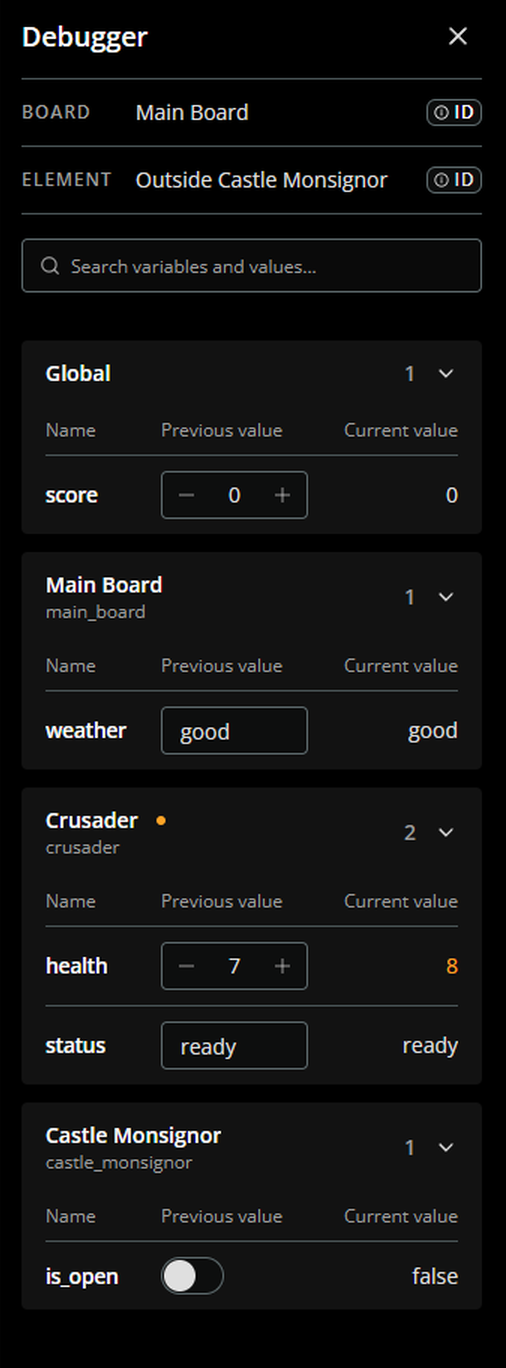 See [Play Mode](https://docs.arcweave.com/project-tools/play-mode/overview) > [Debugger](https://docs.arcweave.com/project-tools/play-mode/debugger) for full instructions.
# Global variables
Source: https://docs.arcweave.com/project-items/variables/global
Section: Project Items > Variables
Description: How to create, manage, and use project-level variables in Arcweave
**Global variables** are project-level variables that are not owned by a board or component. They are accessed without a scope.
## Global variables list
Context: Arcweave docs > Project Items > Variables > Global variables > Global variables list
To view and manage your project's global variables, click **Global variables** at the bottom of the [left sidebar](https://docs.arcweave.com/project-tools/interface/left-sidebar).
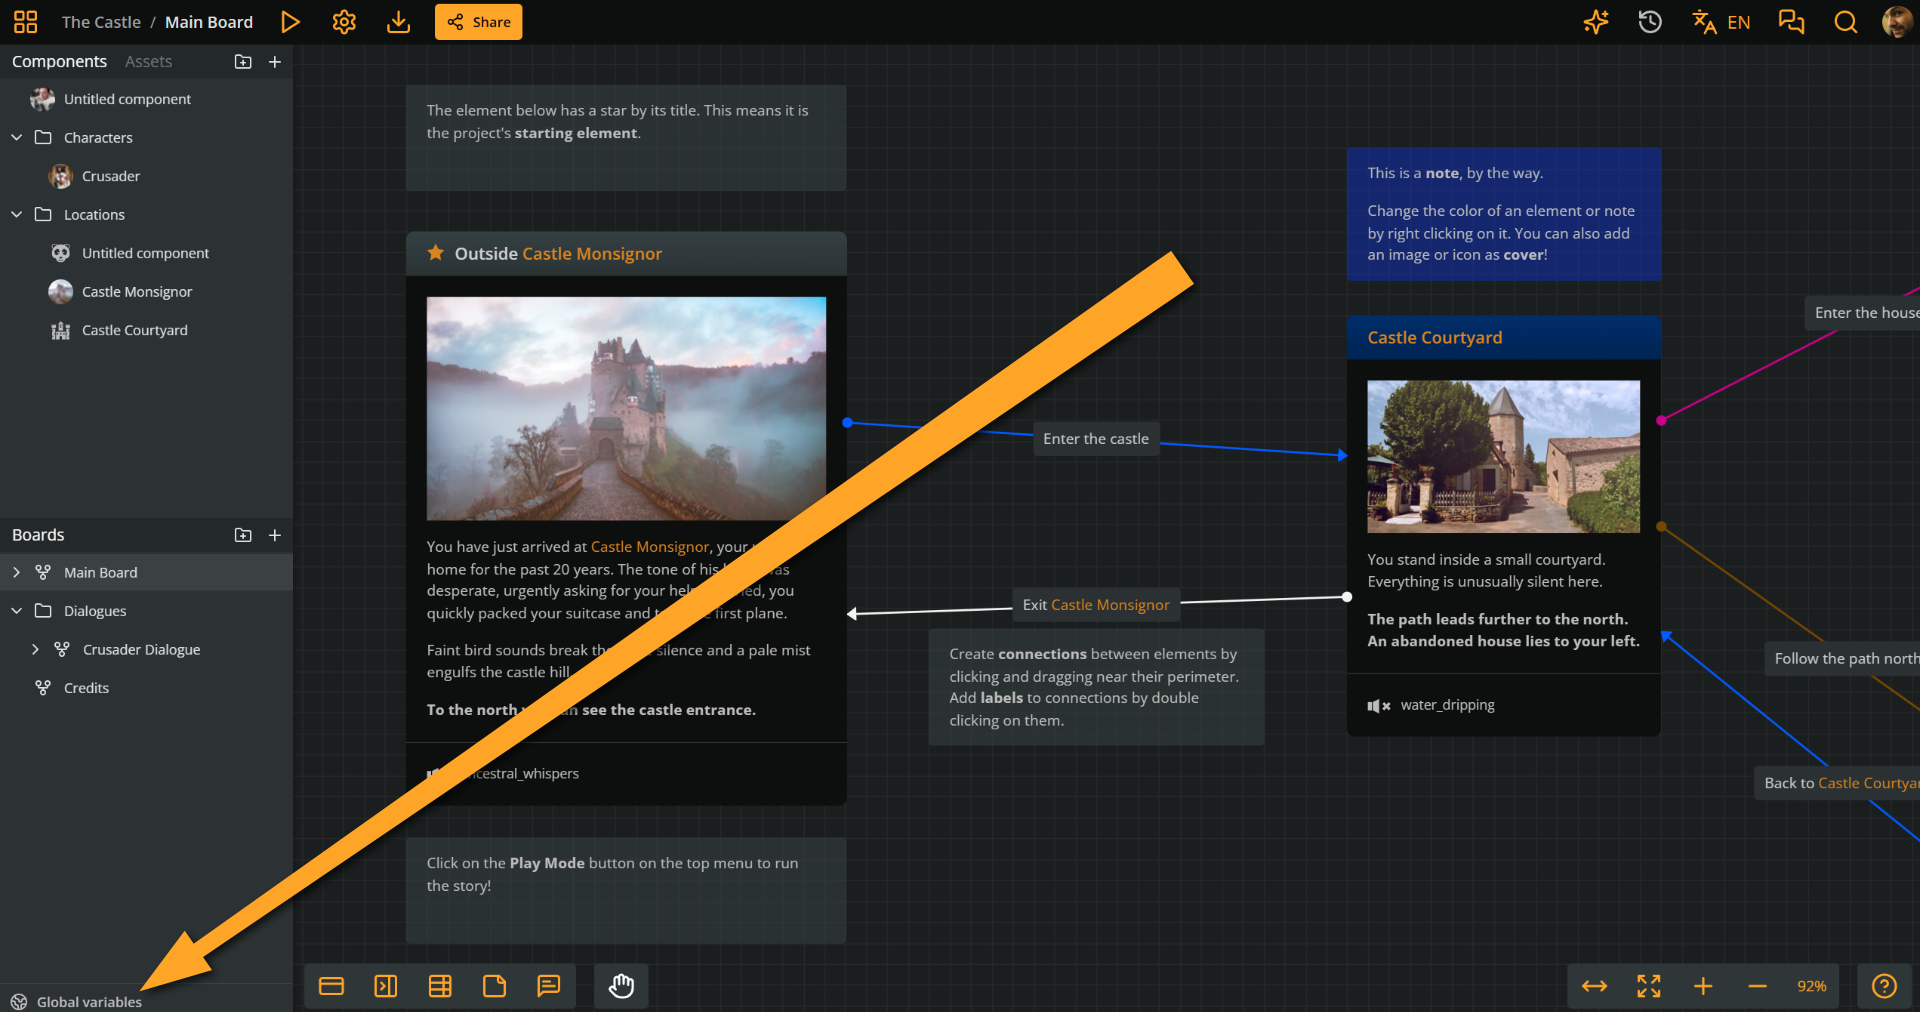
This opens the **global variables list**, which includes the project's global variables along with their **name**, **type**, and **initial value**.
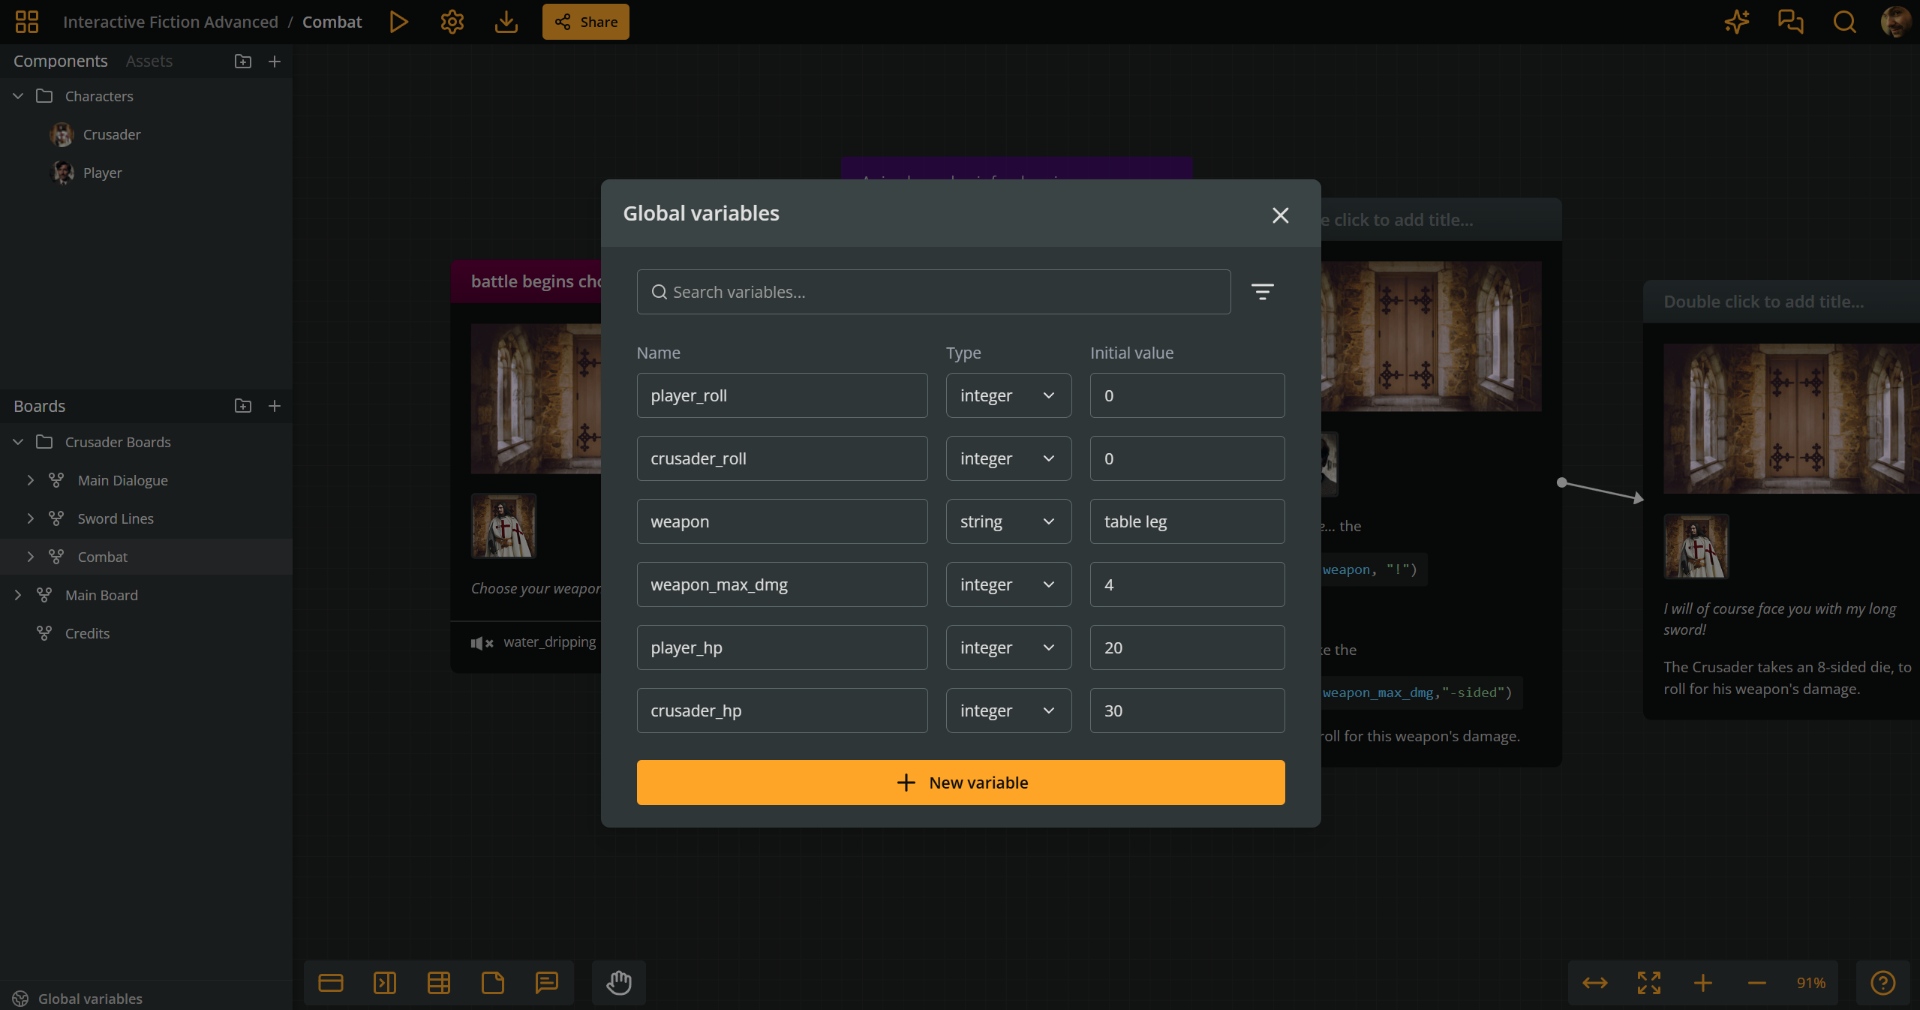
> ℹ️ A variable's **initial value** is the value it holds at the start of [Play Mode](https://docs.arcweave.com/project-tools/play-mode/overview).
## Create global variables
Context: Arcweave docs > Project Items > Variables > Global variables > Create global variables
To create a new variable follow the next steps:
1. Click **Global variables** at the bottom of the sidebar to open the **Global variable dialog**.
2. Click **+ New variable**.
3. Enter a unique variable name.
4. Select the variable's **type** from the dropdown menu.
5. Enter its **initial value**.
> ℹ️ Arcweave will prevent you from entering an invalid initial value for a variable's type (e.g. a string like `"John Smith"` for an integer).
See [Variable names and custom IDs](https://docs.arcweave.com/project-items/variables/overview#variable-names-and-custom-ids) for the naming rules.
## Use global variables
Context: Arcweave docs > Project Items > Variables > Global variables > Use global variables
Global variables are accessible from anywhere in the project using **just their name**, e.g. `score += 2`. An unqualified name always resolves a global variable, never a board or component variable.
See [Common use cases](https://docs.arcweave.com/project-items/variables/overview#common-use-cases) in the Variables overview page for instructions and examples.
## Search global variables
Context: Arcweave docs > Project Items > Variables > Global variables > Search global variables
To locate a variable in the global variables list, start typing its name in the search field at the top of the **Global variable dialog**.
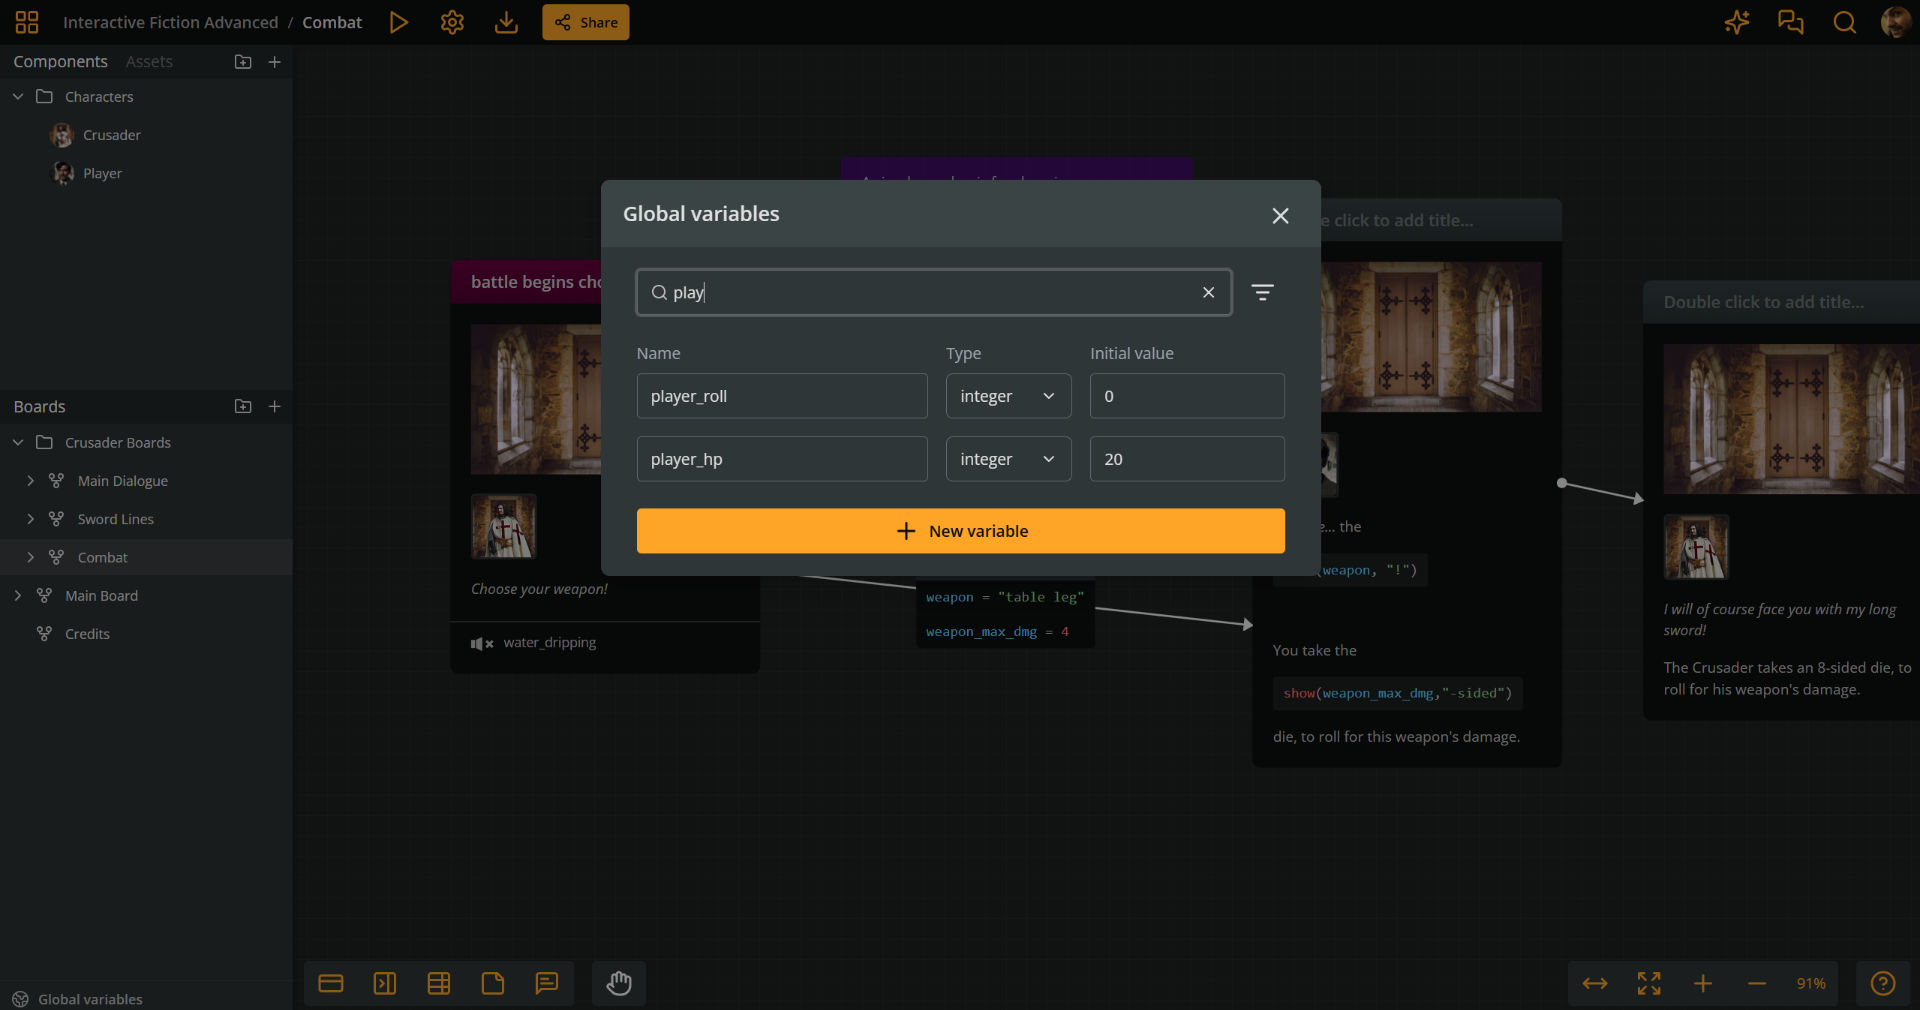
## Filter global variables
Context: Arcweave docs > Project Items > Variables > Global variables > Filter global variables
For type-specific searches, you can filter your variables list by type:
1. Click the **Filter** icon at the right of the search field, at the top of the **Global variable dialog**.
2. Select the variable types you want to add to the search.
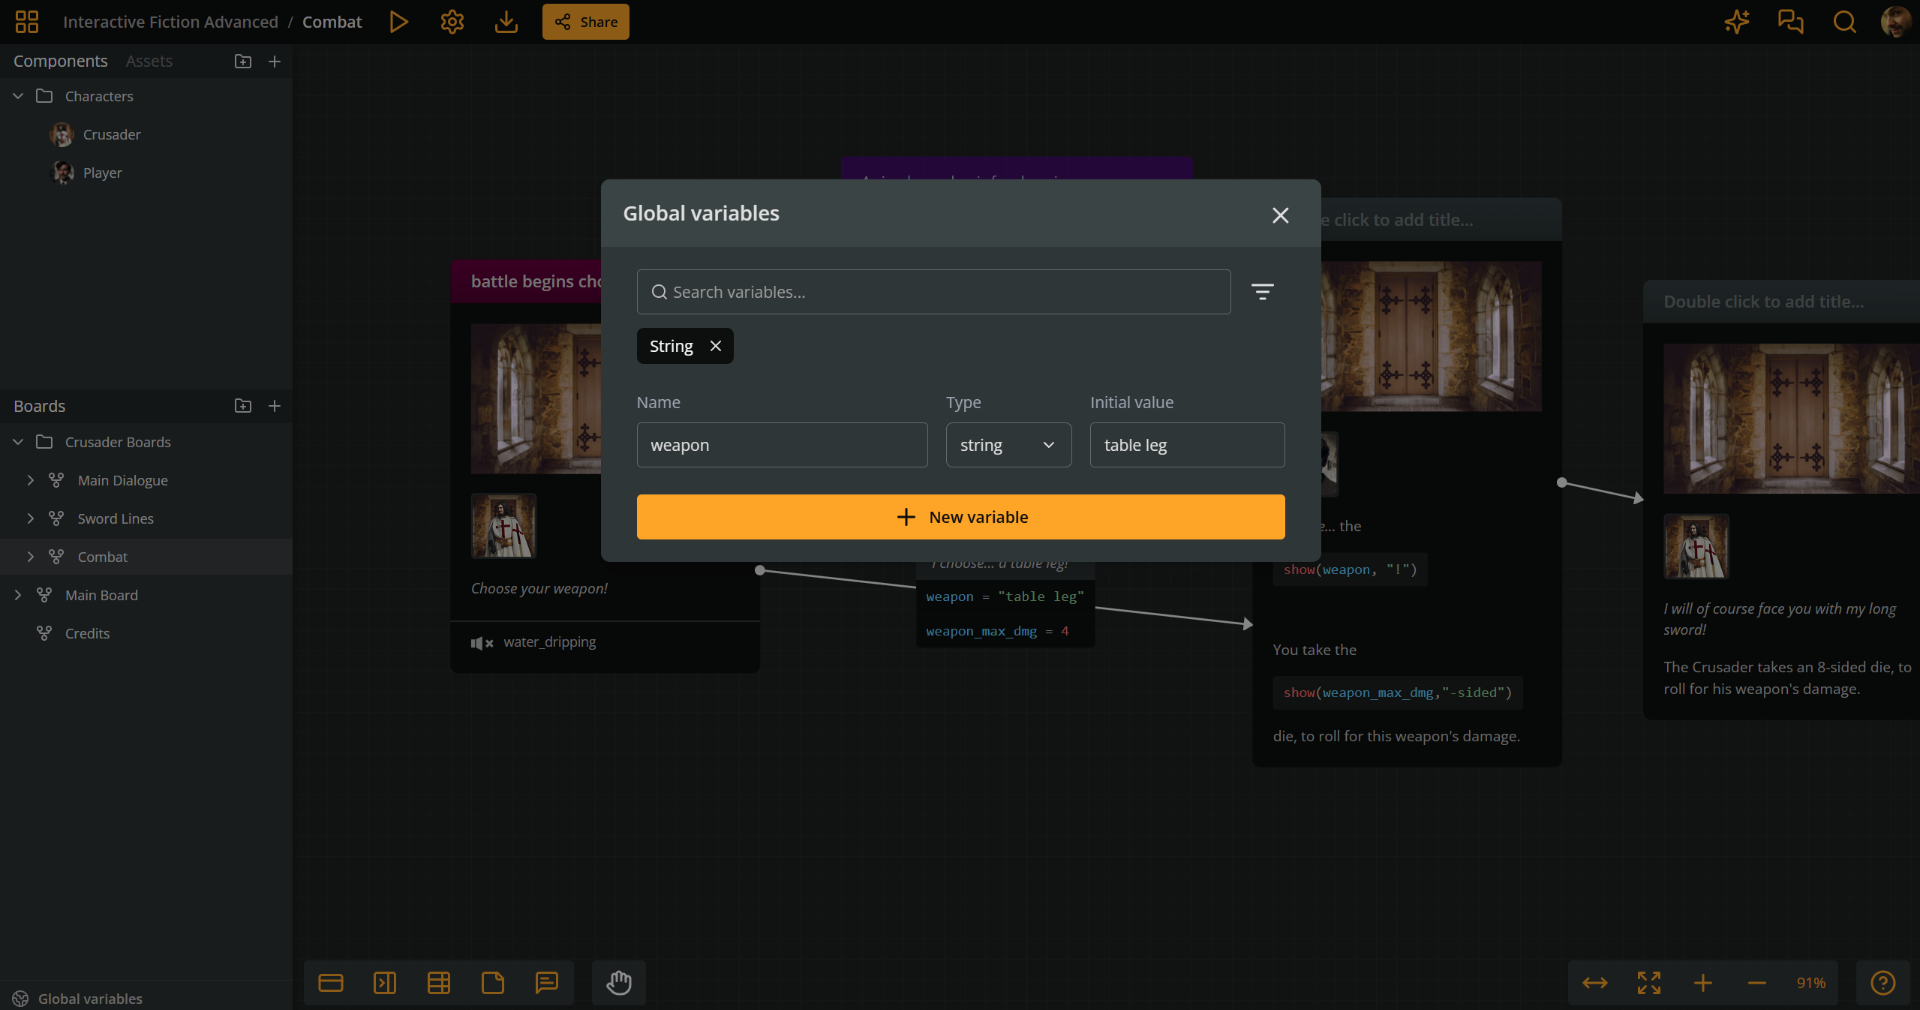
## Reorder global variables
Context: Arcweave docs > Project Items > Variables > Global variables > Reorder global variables
To reorder variables:
1. Click **Global variables** at the bottom of the sidebar to open the **Global variable dialog**.
2. Click and hold the **handle icon** at the beginning of the variable's row.
3. Drag and drop the row to the desired position.
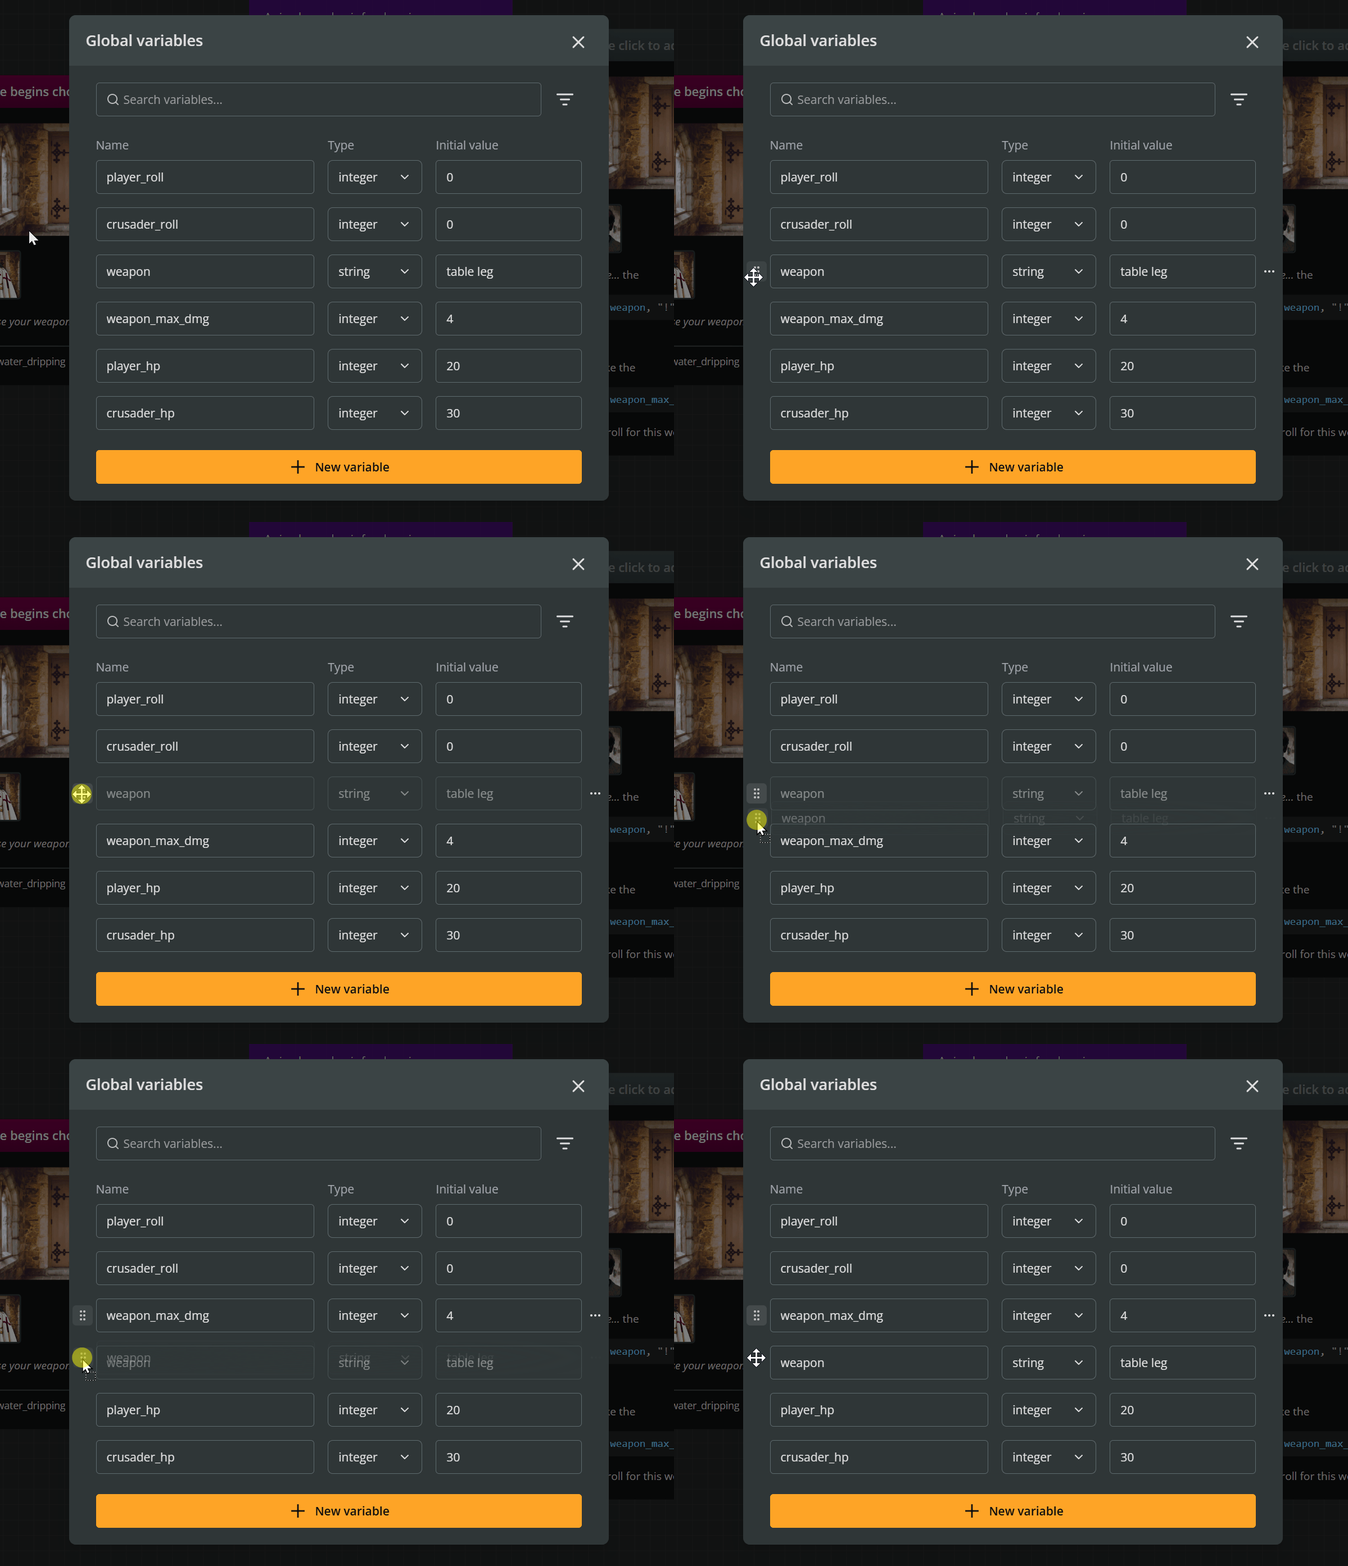
## Delete global variables
Context: Arcweave docs > Project Items > Variables > Global variables > Delete global variables
1. Click **Global variables** at the bottom of the sidebar to open the **Global variable dialog**.
2. Locate the variable in the list.
3. Click the **three dots icon** at the end of its row.
4. Select **Delete variable**.
## Global variables in Debugger
Context: Arcweave docs > Project Items > Variables > Global variables > Global variables in Debugger
When in Play Mode, you can monitor the global variables and their values in the Debugger.
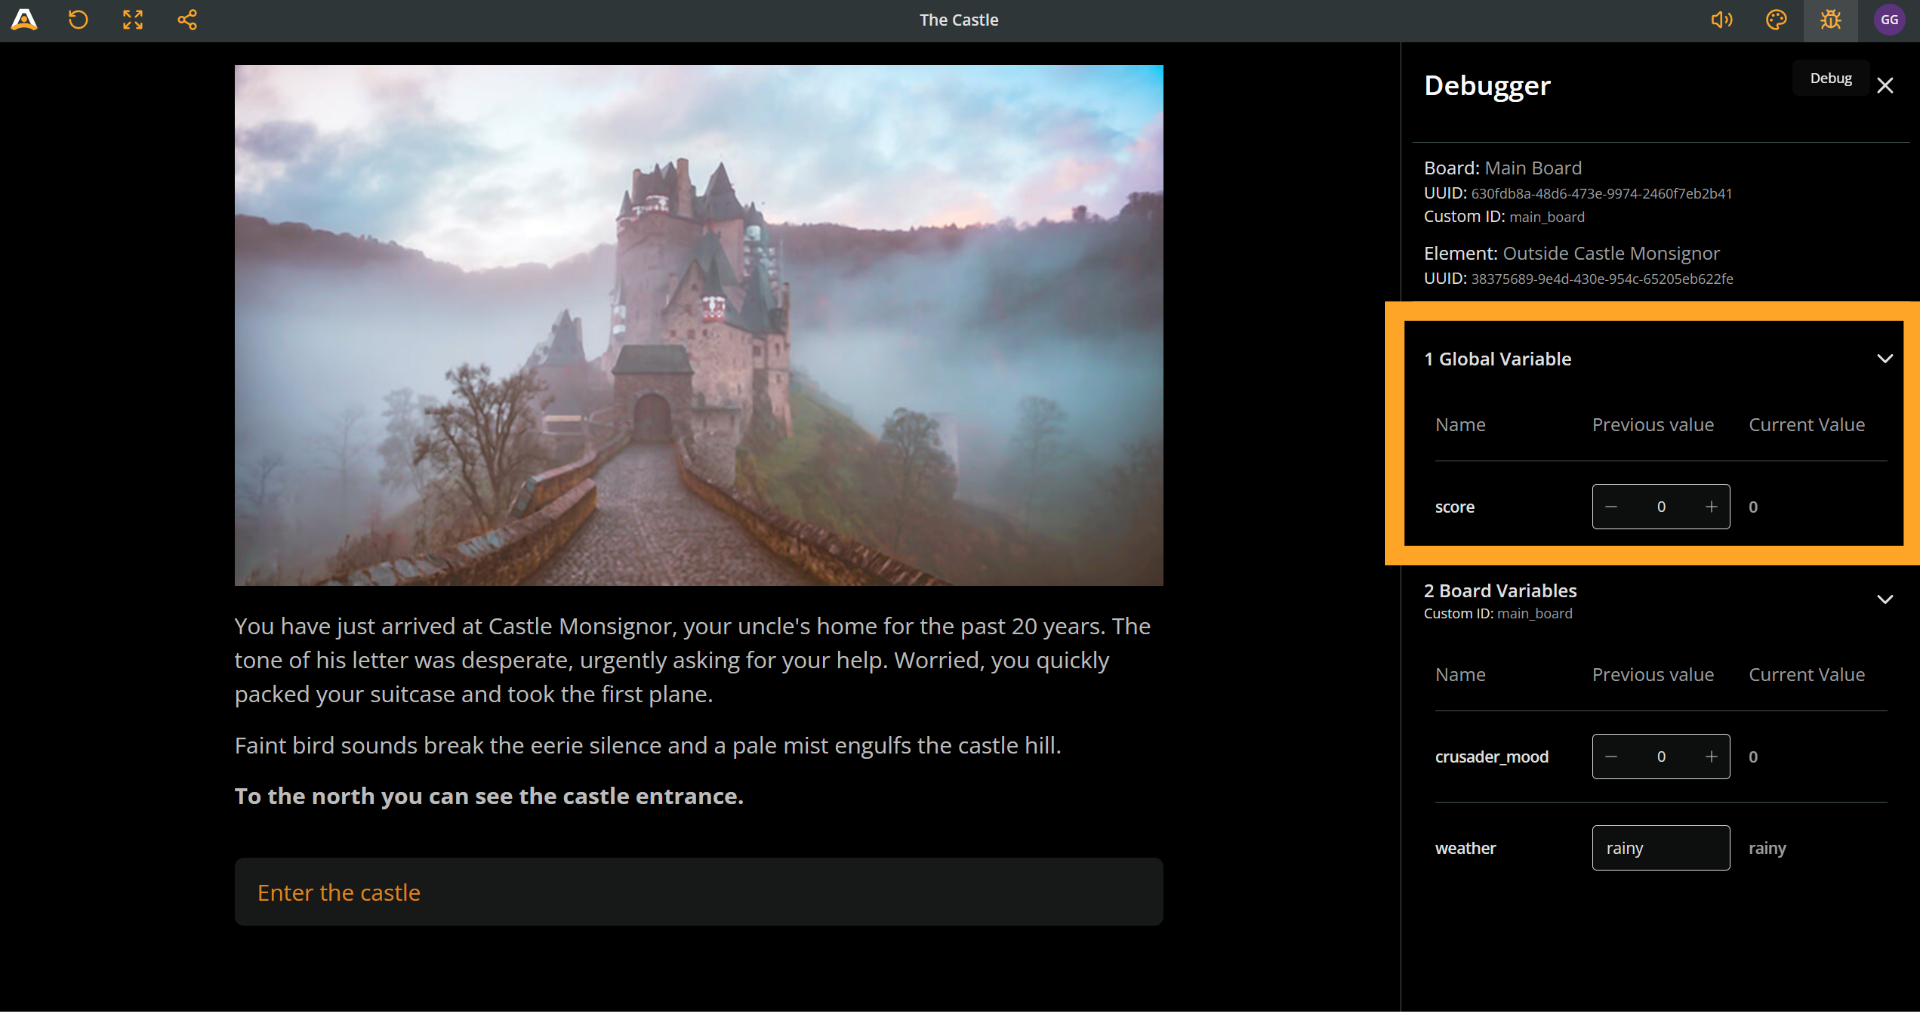
See [Play Mode](https://docs.arcweave.com/project-tools/play-mode/overview) > [Debugger](https://docs.arcweave.com/project-tools/play-mode/debugger) for full instructions.
# Board variables
Source: https://docs.arcweave.com/project-items/variables/board
Section: Project Items > Variables
Description: How to create, manage, and use board-scoped variables in Arcweave
Arcscript examples: Arcscript has no delimiters, so never wrap code in `${ }`, `{{ }}`, `<< >>` or similar markers. An `arcscript` code block contains only code: each line is one segment, and a branch condition is a single expression without `if` or `endif`. An `arcweave-html` code block is element or connection label content as Arcweave stores it, the HTML that the REST API and MCP server accept: `
` for text, `
` for an empty line, and each Arcscript segment in its own `` block, with `<` written as `<`. An element passed to `visits()` is written as element mention markup; replace `ELEMENT_ID` with the element ID.
Board variables are **String Field**, **Boolean**, **Integer**, or **Float** [attributes](https://docs.arcweave.com/project-items/attributes) added to a board. These types appear in the **Variables** group of the **Add attribute** menu because Arcscript treats them as variables scoped to that board.
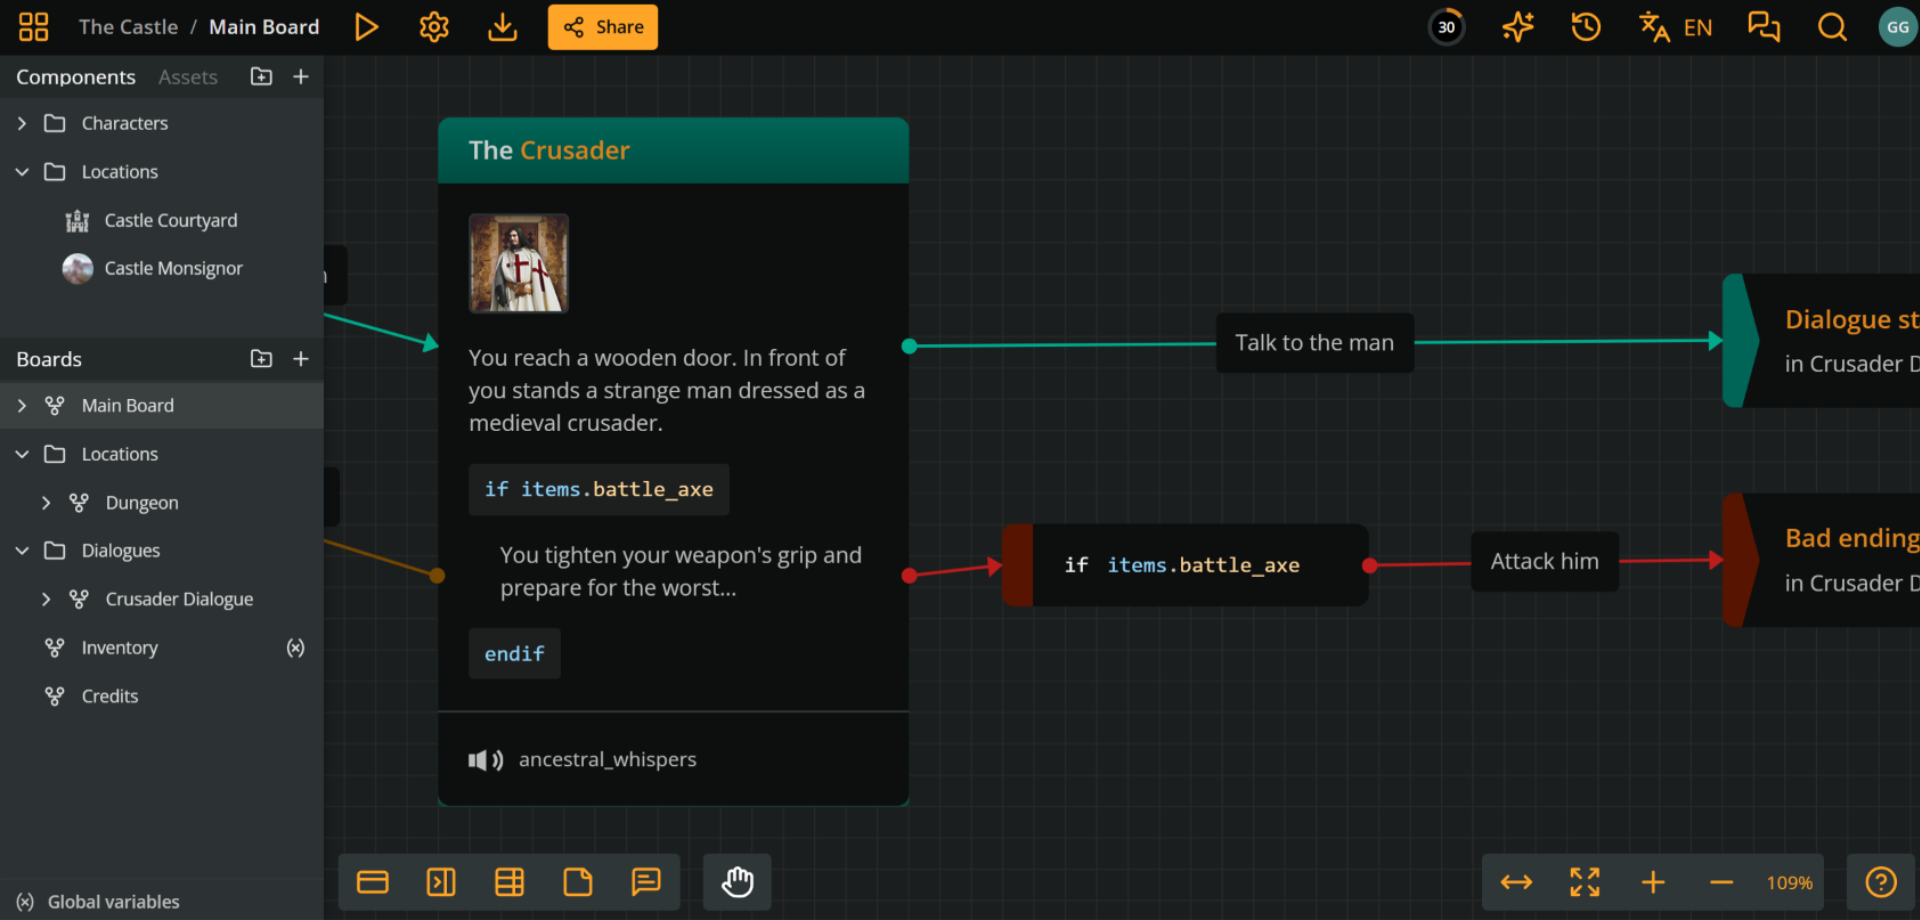
Use a board variable from anywhere in the project by joining the board's **custom ID** and the variable's **custom ID** with a dot:
```arcscript
castle.drawbridge_open = true
```
Unqualified names resolve global variables only. For example, `health` and `castle.health` can coexist and store different values.
## Create board variables
Context: Arcweave docs > Project Items > Variables > Board variables > Create board variables
1. Right-click a regular board in the **Boards** section of the sidebar.
2. Select **Attributes** to open the **Board attributes dialog**.
3. Click **Add attribute** and select **String Field**, **Boolean**, **Number > Integer**, or **Number > Float** from the **Variables** group.
4. Enter the variable's label and initial value.
The board already has a custom ID generated when the board was created. Arcweave generates the variable's custom ID from its label. Their Arcscript reference appears as `board_custom_id.variable_custom_id`.
Board folders cannot contain attributes or variables.
## Use board variables
Context: Arcweave docs > Project Items > Variables > Board variables > Use board variables
Board variables can be read and changed from anywhere in the project. Their board custom ID is a namespace, not an access restriction.
See [Common use cases](https://docs.arcweave.com/project-items/variables/overview#common-use-cases) for assignment, branch, and dynamic-text examples.
## Edit board and variable custom IDs
Context: Arcweave docs > Project Items > Variables > Board variables > Edit board and variable custom IDs
The board's custom ID appears below the title of the **Board attributes dialog**. Select it to edit the scope used by all variables on that board.
To edit a variable's custom ID, open its three-dot menu and select **Edit Custom ID**. The variable label is for people reading the project; its custom ID is the member name used in Arcscript.
Renaming either the board or attribute custom ID updates existing Arcscript references automatically. Custom IDs cannot be empty and must follow the [variable naming rules](https://docs.arcweave.com/project-items/variables/overview#variable-names-and-custom-ids).
## Manage board variables
Context: Arcweave docs > Project Items > Variables > Board variables > Manage board variables
Boards with attributes display an **attributes button** next to their name in the sidebar. Select it to open the **Board attributes dialog** directly. From there, you can:
- Search and filter attributes.
- Drag variables to reorder them.
- Rename a variable or edit its custom ID from its three-dot menu.
- Delete a variable from its three-dot menu.
See [Attributes](https://docs.arcweave.com/project-items/attributes) for full instructions.
## Find and debug board variables
Context: Arcweave docs > Project Items > Variables > Board variables > Find and debug board variables
Project [Search](https://docs.arcweave.com/project-tools/search) can find a board variable by its label or custom ID and open the **Board attributes dialog** for its owning board.
In Play Mode, the Debugger groups board variables under the board's name and custom ID and shows their current values.
See [Play Mode](https://docs.arcweave.com/project-tools/play-mode/overview) > [Debugger](https://docs.arcweave.com/project-tools/play-mode/debugger) for full instructions.
# Component variables
Source: https://docs.arcweave.com/project-items/variables/component
Section: Project Items > Variables
Description: How to create, manage, and use component-scoped variables in Arcweave
Arcscript examples: Arcscript has no delimiters, so never wrap code in `${ }`, `{{ }}`, `<< >>` or similar markers. An `arcscript` code block contains only code: each line is one segment, and a branch condition is a single expression without `if` or `endif`. An `arcweave-html` code block is element or connection label content as Arcweave stores it, the HTML that the REST API and MCP server accept: `` for text, `
` for an empty line, and each Arcscript segment in its own `` block, with `<` written as `<`. An element passed to `visits()` is written as element mention markup; replace `ELEMENT_ID` with the element ID.
Component variables are **String Field**, **Boolean**, **Integer**, or **Float** [attributes](https://docs.arcweave.com/project-items/attributes) added to a component. These types appear in the **Variables** group of the **Add attribute** menu because Arcscript treats them as variables scoped to that component.
Use a component variable from anywhere in the project by joining the component's **custom ID** and the variable's **custom ID** with a dot:
```arcscript
hero.health -= 10
```
Unqualified names resolve global variables only. For example, `health` and `hero.health` can coexist and store different values.
## Create component variables
Context: Arcweave docs > Project Items > Variables > Component variables > Create component variables
1. Find the component in the **Components** section of the sidebar.
2. Click the component to open the component editor.
3. Click **Add attribute** and select **String Field**, **Boolean**, **Number > Integer**, or **Number > Float** from the **Variables** group.
4. Enter the variable's label and initial value.
The component already has a custom ID generated when the component was created. Arcweave generates the variable's custom ID from its label. Their Arcscript reference appears as `component_custom_id.variable_custom_id`.
Component folders cannot contain attributes or variables.
## Use component variables
Context: Arcweave docs > Project Items > Variables > Component variables > Use component variables
Component variables can be read and changed from anywhere in the project. Their component custom ID is a namespace, not an access restriction.
A component variable belongs to the component itself. Attaching the component to multiple elements does not create separate copies of the variable or its value.
See [Common use cases](https://docs.arcweave.com/project-items/variables/overview#common-use-cases) for assignment, branch, and dynamic-text examples.
## Edit component and variable custom IDs
Context: Arcweave docs > Project Items > Variables > Component variables > Edit component and variable custom IDs
The component's custom ID appears beneath its name in the component editor. Select it to edit the scope used by all variables on that component.
To edit a variable's custom ID, open its three-dot menu and select **Edit Custom ID**. The variable label is for people reading the project; its custom ID is the member name used in Arcscript.
Renaming either the component or attribute custom ID updates existing Arcscript references automatically. Custom IDs cannot be empty and must follow the [variable naming rules](https://docs.arcweave.com/project-items/variables/overview#variable-names-and-custom-ids).
## Manage component variables
Context: Arcweave docs > Project Items > Variables > Component variables > Manage component variables
Open the component editor from the **Components** section or from an element where the component is attached. From there, you can:
- Drag variables to reorder them.
- Rename a variable or edit its custom ID from its three-dot menu.
- Delete a variable from its three-dot menu.
See [Attributes](https://docs.arcweave.com/project-items/attributes) for full instructions.
## Find and debug component variables
Context: Arcweave docs > Project Items > Variables > Component variables > Find and debug component variables
Project [Search](https://docs.arcweave.com/project-tools/search) can find a component variable by its label or custom ID and open the owning component.
In Play Mode, the Debugger groups component variables under the component's name and custom ID and shows their current values.
See [Play Mode](https://docs.arcweave.com/project-tools/play-mode/overview) > [Debugger](https://docs.arcweave.com/project-tools/play-mode/debugger) for full instructions.
# Comments
Source: https://docs.arcweave.com/project-items/comments
Section: Project Items
Description: Create, reply to, resolve, and filter comment threads on boards, with user mentions and comment notifications
[Workspace members](https://docs.arcweave.com/workspaces/roles#workspace-members) and [guests](https://docs.arcweave.com/workspaces/roles#workspace-guests) can use **comments** to communicate directly on [projects](https://docs.arcweave.com/workspaces/projects). Users with the above roles can add and reply to comments, as well as [mention](https://docs.arcweave.com/project-items/comments#user-mentions) each other. Moreover, they get [email notifications](https://docs.arcweave.com/project-items/comments#email-notification-settings), when new comments and replies are posted.

You can find your project's comments in both:
- The board they have been created, as **comment pins**.
- The **[comments sidebar](https://docs.arcweave.com/project-items/comments#comments-sidebar)**, as a list.
Use the [comments sidebar](https://docs.arcweave.com/project-items/comments#comments-sidebar) to do the following:
- See all your comments in the **comments list**.
- Set your **email notifications** preferences.
- Filter the comments you want to see.
- Mark all comments as read.
> ⚠️ [Project visitors](https://docs.arcweave.com/workspaces/roles#project-visitors) cannot view or create comments.
## Comments sidebar
Context: Arcweave docs > Project Items > Comments > Comments sidebar
Click the **Comments** icon in the top-right menu to open the **comments sidebar**. This panel shows all project comments in a **comments list** and allows you to set comment display preferences.
## Create comments
Context: Arcweave docs > Project Items > Comments > Create comments
To create a comment:
1. Do either of the following:
- **Right-click** an empty area of the current board and select **Create > Comment** from the menu.
- **Drag and drop** the **New comment** icon (located at the bottom menu) onto an empty area of the board.

2. Type your comment.
3. Click **Post** or press **Ctrl/Cmd + Enter**.
Creating a comment also places a **comment pin** on the board, marking the location of the comment thread. The comment pin has the form of a speech bubble icon.
## Open comments
Context: Arcweave docs > Project Items > Comments > Open comments
To open a comment and its thread (to reply, edit, or resolve the comment), do either of the following:
- Click the comment pin in its board.
- Click the comment in the comments list.

> ✅ Clicking a comment in the comments list scrolls the board to its corresponding pin and opens the comment thread.
## Reply to comments
Context: Arcweave docs > Project Items > Comments > Reply to comments
To reply to a comment:
1. [Open the comment](https://docs.arcweave.com/project-items/comments#open-comments).
2. Click the **Reply text field**, next to your [account photo](https://docs.arcweave.com/account/overview#account-photo) and type your comment.
3. Click the **Reply button**.
## Select comments
Context: Arcweave docs > Project Items > Comments > Select comments
Comment pins behave like other board entities: they can be selected and moved freely. Clicking a comment pin selects the comment and also expands the full thread of replies.
To select multiple comment pins or combine them with other items, see [Select board items](https://docs.arcweave.com/project-tools/interface/mouse-actions#select-board-items).
## Move comments
Context: Arcweave docs > Project Items > Comments > Move comments
To move a comment do either of the following:
- Drag the comment pin with your mouse.
- [Select](https://docs.arcweave.com/project-items/comments#select-comments), cut, and paste the comment elsewhere, using the shortcuts **Ctrl/Cmd + X** and **Ctrl/Cmd + V**.
## Resolve comments
Context: Arcweave docs > Project Items > Comments > Resolve comments
To mark a comment thread as resolved:
1. [Open the comment](https://docs.arcweave.com/project-items/comments#open-comments).
2. Click the **✔** (checkmark icon) at the top right of the comment.
By default, pins of resolved threads are hidden. You can [show or hide them using the settings](https://docs.arcweave.com/project-items/comments#show-resolved-comments) in the comments sidebar.
## Delete comments
Context: Arcweave docs > Project Items > Comments > Delete comments
To delete a comment, you must delete its pin. Do either of the following:
- [Select the comment pin](https://docs.arcweave.com/project-items/comments#select-comments) and press **Delete** or **Backspace**.
- Right-click the pin and select **Delete selection** from the context menu.
> ⚠️ Deleted comments cannot be restored with undo or [History](https://docs.arcweave.com/project-tools/history).
> ✅ If a comment is no longer relevant, consider [resolving](https://docs.arcweave.com/project-items/comments#resolve-comments) it instead of deleting it. Resolved comments remain in the project and can be reopened at any time.
## User mentions
Context: Arcweave docs > Project Items > Comments > User mentions
Users collaborating in a project can **mention each other in comments**.

To mention a user that already has access to a project:
1. Create a comment or comment reply.
2. Type the `@` character and continue typing the desired username.
3. Select the username from the available list.
Mentioned users get an email notification. Email notifications can be configured in the [email notification settings](https://docs.arcweave.com/project-items/comments#email-notification-settings).
## Comment notifications
Context: Arcweave docs > Project Items > Comments > Comment notifications
When a comment is added to a project:
- **Board**: The comment's pin displays an **unread comment badge** (a dot indicating it hasn't been viewed).
- **Comments list**: An **unread comment badge** also appears next to the comment.
- **Email**: Workspace and project owners, editors, and commenters receive an **email notification**. Notifications include new comments, replies, mentions, and comment resolution updates.
To adjust comment notification settings, click the **comment notifications** icon at the top-left of the comment sidebar.
### Email notification settings
Context: Arcweave docs > Project Items > Comments > Comment notifications > Email notification settings
By default, users receive email notifications for **all comments**. They can limit email notifications to **mentions and replies only**.
To change your email notification preferences:
1. Click the **Comments** icon in the top-right menu to open the comment sidebar.
2. Click the **Comment notifications** icon at the top-left of the sidebar.
3. Choose one of the following options:
- **All comments**
- **Mentions and replies only**
- **None**
> ℹ️ Users who have not yet visited the project will only receive notifications for comments in which they are mentioned.
### Mark comments as read
Context: Arcweave docs > Project Items > Comments > Comment notifications > Mark comments as read
To mark all comments as read and remove **unread comment badges**:
1. Click the **Comments** icon in the top-right menu to open the comment sidebar.
2. Click the **Comment notifications** icon at the top-left of the sidebar.
3. Click **Mark all comments as read**.
## Filters
Context: Arcweave docs > Project Items > Comments > Filters
To filter comments, click the **Filters** icon at the top-right of the comments sidebar and enable any of the following options.
### Show resolved comments
Context: Arcweave docs > Project Items > Comments > Filters > Show resolved comments
Enable this option to display resolved comments and their pins, both on the board and in the sidebar. This option is disabled by default.
### Show only comments I am involved in
Context: Arcweave docs > Project Items > Comments > Filters > Show only comments I am involved in
Enable this option to display only comments you are involved in, both on the board and in the comments list:
- Comments [created](https://docs.arcweave.com/project-items/comments#create-comments) by you
- Comments with [replies](https://docs.arcweave.com/project-items/comments#reply-to-comments) by you
- Comments that [mention](https://docs.arcweave.com/project-items/comments#user-mentions) you
### Show only current board comments
Context: Arcweave docs > Project Items > Comments > Filters > Show only current board comments
Enable this option to display only comments that exist on the current board.
# Project tools
Source: https://docs.arcweave.com/project-tools/overview
Section: Project Tools
Description: Overview of Arcweave's project tools, including the interface, settings, Play Mode, search, history, localization, AI tools, sharing, and export
As already mentioned, a [project](https://docs.arcweave.com/workspaces/projects) holds the structure and content of your interactive story. This section includes a complete guide of the [project interface](https://docs.arcweave.com/project-tools/interface/overview) and covers the tools Arcweave provides for the design, testing, and integration of your projects:
- [Keyboard shortcuts](https://docs.arcweave.com/project-tools/interface/keyboard-shortcuts): Quick access to common actions throughout the interface.
- [Project settings](https://docs.arcweave.com/project-tools/settings): Configure the grid, spell checking, input device, board renderer, and AI settings, and view project properties such as the project hash and item count.
- [Icon library](https://docs.arcweave.com/project-tools/icon-library): A built-in set of icons to use as element and component covers.
- [Rich text](https://docs.arcweave.com/project-tools/rich-text): Format text in elements, labels, notes, and rich text field attributes.
- [Mentions](https://docs.arcweave.com/project-tools/mentions): Link to components and boards from element, note, label, and rich text attribute text.
- [Play Mode](https://docs.arcweave.com/project-tools/play-mode/overview): Preview your project's flow in an interactive player.
- [Search](https://docs.arcweave.com/project-tools/search): Quickly locate boards, elements, notes, and more.
- [History](https://docs.arcweave.com/project-tools/history): View and restore previous versions of your project.
- [Localization](https://docs.arcweave.com/project-tools/localization): Translate your project into multiple languages.
- [AI tools](https://docs.arcweave.com/project-tools/ai-features/overview): Generate or refine content using built-in AI assistance.
- [Share](https://docs.arcweave.com/project-tools/share): Invite collaborators and set access permissions.
- [Export](https://docs.arcweave.com/project-tools/export): Output your project data for use in game engines or for documentation.
- [Troubleshooting](https://docs.arcweave.com/project-tools/troubleshooting): Diagnose common editor issues, such as slow board performance.
# Project interface
Source: https://docs.arcweave.com/project-tools/interface/overview
Section: Project Tools
Description: Overview of the Arcweave project interface, including the top menu, bottom menu, left sidebar, and layout on small screens
This section is a reference guide to Arcweave's project interface. It catalogs all UI areas and menus of the project environment, explaining what each one does and how it supports your workflow. You can look up what you're searching for by browsing the following interface areas:
## Top menu
Context: Arcweave docs > Project Tools > Project interface > Top menu

The [top menu](https://docs.arcweave.com/project-tools/interface/top-menu) provides access to key project actions, settings, and tools.
## Bottom menu
Context: Arcweave docs > Project Tools > Project interface > Bottom menu

The [bottom menu](https://docs.arcweave.com/project-tools/interface/bottom-menu) allows you to create project items and switch between Pan and Select mode (on the left), and to adjust your board view with zooming and access help resources (on the right).
## Left sidebar
Context: Arcweave docs > Project Tools > Project interface > Left sidebar

The [sidebar on the left side](https://docs.arcweave.com/project-tools/interface/left-sidebar) of your window provides access to important items of your project: components, assets, boards, and variables.
## Responsive interface
Context: Arcweave docs > Project Tools > Project interface > Responsive interface
On narrow screens, Arcweave rearranges these areas to leave more room for the board:
- The top menu splits into two dropdown menus, positioned on the left and right. The **Workspace** button and **Play Mode** stay visible on the left, and your profile stays visible on the far right.
- The left sidebar starts collapsed and can be opened with the chevron tab at the left edge.
- The item-creation tools open from a **+** button at the bottom left.
- The help and board-view tools expand vertically from the chevron button at the bottom right.
The same permission and plan restrictions apply in both the desktop and responsive layouts. Some desktop controls, such as the Pan/Select icon, History, and the item count, are not shown in the responsive layout.
# Project top menu
Source: https://docs.arcweave.com/project-tools/interface/top-menu
Section: Project Tools > Interface
Description: The project top menu with Play Mode, settings, export, sharing, collaborators, Design Assistant, history, localization, comments, and search

The top menu, from left to right has the following items:
## Workspace button
Context: Arcweave docs > Project Tools > Interface > Project top menu > Workspace button
Click the **Workspace** button to exit the project and return to your [workspace](https://docs.arcweave.com/workspaces/overview).
## Project & board names
Context: Arcweave docs > Project Tools > Interface > Project top menu > Project & board names
Click the name of your project or the name of the currently open [board](https://docs.arcweave.com/project-items/boards) to rename either. Renaming requires the **Edit projects** permission.
> ℹ️ You can also [rename a project from its thumbnail](https://docs.arcweave.com/workspaces/projects#rename-projects), in the Projects section and rename a board from the [Boards section](https://docs.arcweave.com/project-items/boards) in the project's left sidebar.
## Play Mode button
Context: Arcweave docs > Project Tools > Interface > Project top menu > Play Mode button
Click the **Play icon** to open the project's [Play Mode](https://docs.arcweave.com/project-tools/play-mode/overview) in a new browser tab, starting from the element set with **Play Mode > Set Play Mode start** in the element's context menu. If you are viewing a translation, Play Mode opens in the same language.
## Project Settings
Context: Arcweave docs > Project Tools > Interface > Project top menu > Project Settings
Click the **cog icon** to open the [Project Settings](https://docs.arcweave.com/project-tools/settings) menu. This control requires the **Edit projects** permission.
## Export project
Context: Arcweave docs > Project Tools > Interface > Project top menu > Export project
Click the **Export icon** to open the [Export](https://docs.arcweave.com/project-tools/export) modal. This control requires the **Export projects** permission.
## Share project
Context: Arcweave docs > Project Tools > Interface > Project top menu > Share project
Click the **Share button** to open the [Share](https://docs.arcweave.com/project-tools/share) modal.
## Collaborators
Context: Arcweave docs > Project Tools > Interface > Project top menu > Collaborators
The collaborator avatars show other users currently working in the project. Click an avatar to move to that collaborator's current board position when their cursor location is available.
## Item count
Context: Arcweave docs > Project Tools > Interface > Project top menu > Item count
In Basic workspaces, projects show how many [counted items](https://docs.arcweave.com/workspaces/billing-plans#additional-information) have been used from the 200-item limit.
Click the item count to open **Project item limit**, which shows how many items are used and how many are left. Users with the **Manage billing** permission can click **Unlock unlimited items** or **See plans** to [upgrade the workspace](https://docs.arcweave.com/workspaces/billing-plans#upgrade-workspace-plan); other users are asked to contact a workspace admin.
## Design Assistant
Context: Arcweave docs > Project Tools > Interface > Project top menu > Design Assistant
Click the **stars icon** to open the [Design Assistant](https://docs.arcweave.com/project-tools/ai-features/design-assistant).
> ℹ️ This control is shown to logged-in users who can edit the project when AI is enabled and supported for the workspace.
## History
Context: Arcweave docs > Project Tools > Interface > Project top menu > History
Click the **clock icon** to open [History](https://docs.arcweave.com/project-tools/history).
> ℹ️ History is available on Team workspaces; on other plans, the control opens an upgrade prompt. The control is shown to logged-in users with project editing permission.
## Localization
Context: Arcweave docs > Project Tools > Interface > Project top menu > Localization
Click the **languages icon** to choose a locale or manage [Localization](https://docs.arcweave.com/project-tools/localization).
> ℹ️ Team workspaces can manage locales and translations; on other plans, the control opens an upgrade prompt.
> ℹ️ Importing localization data requires project editing permission.
## Comments
Context: Arcweave docs > Project Tools > Interface > Project top menu > Comments
Click the **dialogue icon** to open the project's [Comments](https://docs.arcweave.com/project-items/comments). This control requires permission to comment on the project.
## Search
Context: Arcweave docs > Project Tools > Interface > Project top menu > Search
Click the **magnifying glass icon** to open the project's [Search](https://docs.arcweave.com/project-tools/search).
## User icon
Context: Arcweave docs > Project Tools > Interface > Project top menu > User icon
Click on the **user icon** (the user avatar) to open a menu with your email address, **My Account** (your [Account](https://docs.arcweave.com/account/overview) settings), and **Logout**. This icon is accessible from the [workspace interface](https://docs.arcweave.com/workspaces/overview) as well.
## Top menu on small screens
Context: Arcweave docs > Project Tools > Interface > Project top menu > Top menu on small screens
On narrow screens, Arcweave condenses the top menu into two dropdowns while keeping the **Workspace** button, **Play Mode**, and the profile menu visible:
- The **menu icon** on the left contains the project and board names, Project Settings, Export, and Share. The items shown still depend on your permissions.
- The **double-chevron icon** on the right contains collaborators, Design Assistant, Localization, Comments, and Search.
History and the item count are part of the desktop top menu and are not currently included in the condensed mobile dropdowns.
# Project bottom menu
Source: https://docs.arcweave.com/project-tools/interface/bottom-menu
Section: Project Tools > Interface
Description: The project bottom menu for adding elements, jumpers, branches, notes, and comments, plus pan, select, and zoom controls

The [bottom menu](https://docs.arcweave.com/project-tools/interface/bottom-menu) allows you to create project items and switch between Pan and Select mode (on the left), and to adjust your board view with zooming and access help resources (on the right).
The item icons require the **Edit projects** permission, except the comment icon, which requires permission to comment on the project.
## Element icon
Context: Arcweave docs > Project Tools > Interface > Project bottom menu > Element icon
Drag into empty board space to create a new [element](https://docs.arcweave.com/project-items/elements).
## Jumper icon
Context: Arcweave docs > Project Tools > Interface > Project bottom menu > Jumper icon
Drag into empty board space to create a new [jumper](https://docs.arcweave.com/project-items/jumpers).
## Branch icon
Context: Arcweave docs > Project Tools > Interface > Project bottom menu > Branch icon
Drag into empty board space to create a new [branch](https://docs.arcweave.com/project-items/branches).
## Note icon
Context: Arcweave docs > Project Tools > Interface > Project bottom menu > Note icon
Drag into empty board space to create a new [note](https://docs.arcweave.com/project-items/notes).
## Comment icon
Context: Arcweave docs > Project Tools > Interface > Project bottom menu > Comment icon
Drag into empty board space to create a new [comment](https://docs.arcweave.com/project-items/comments).
## Pan/Select icon
Context: Arcweave docs > Project Tools > Interface > Project bottom menu > Pan/Select icon
Click the **hand icon** to toggle between the following modes. This control is available to users with the **Edit projects** permission:
- **Pan mode**: Click and drag to move around the board.
- **Select mode**: Click to select items, or click and drag from empty board space to draw a [selection rectangle](https://docs.arcweave.com/project-tools/interface/mouse-actions#select-board-items).
## Zoom option icons
Context: Arcweave docs > Project Tools > Interface > Project bottom menu > Zoom option icons
- **Fit to screen**: Adjusts the zoom so that the selected items, or the whole board if nothing is selected, fit the window.
- **Enter full screen**: Expands the board to fill your entire screen for less distractions.
- **Zoom in**: Increases magnification for closer inspection of board details.
- **Zoom out**: Decreases magnification for a broader overview.
- **Current zoom**: Displays the current zoom percentage. Click to reset zoom to 100%.
## Info button
Context: Arcweave docs > Project Tools > Interface > Project bottom menu > Info button
Click the **Info button** (the icon with a question mark) to open a helpful menu with quick access to support and learning resources:
- **What's new**: Opens Arcweave's latest product updates.
- **Shortcuts / Help**: Opens a dialog that lists keyboard shortcuts. See [Keyboard shortcuts](https://docs.arcweave.com/project-tools/interface/keyboard-shortcuts) for the complete list.
- **Documentation**: Takes you to Arcweave's official documentation site for in-depth guides and references.
- **Video tutorials**: Opens the [Arcweave YouTube playlist](https://www.youtube.com/playlist?list=PLP2s5PcDiBdbJUFiw8gu8gK1IyFboWxFH) featuring step-by-step video tutorials.
- **Ask us on Discord**: Join the [Arcweave Discord server](https://discord.com/invite/atVXxAK) to ask questions, get support, or connect with the community.
## Bottom tools on small screens
Context: Arcweave docs > Project Tools > Interface > Project bottom menu > Bottom tools on small screens
On narrow screens, the two groups are collapsed and the Pan/Select icon is not shown:
- Tap the **+** button at the bottom left to open the item-creation tray. Drag an item icon from the tray onto the board. Tap the tray handle or swipe it down to close it.
- Tap the **chevron** button at the bottom right to show or hide Help, Fit to screen, Full screen, Zoom in, Zoom out, and the current zoom percentage.
# Project left sidebar
Source: https://docs.arcweave.com/project-tools/interface/left-sidebar
Section: Project Tools > Interface
Description: The project left sidebar with the Components and Assets tabs, the Boards section with board outlines, and global variables

The [sidebar on the left side](https://docs.arcweave.com/project-tools/interface/left-sidebar) of your Arcweave workspace gives you quick access to essential project items. It is divided into two main sections: the top part for reusable items and the bottom part for structural navigation and data.
## Sidebar top
Context: Arcweave docs > Project Tools > Interface > Project left sidebar > Sidebar top
The upper half of the left sidebar contains two tabs:
### Components
Context: Arcweave docs > Project Tools > Interface > Project left sidebar > Sidebar top > Components
The **Components** tab displays a list of all [components](https://docs.arcweave.com/project-items/components) in your project, organized in folders.
Right-click a component and select **Copy link** to share a link to its dialog. See [Copy a component link](https://docs.arcweave.com/project-items/components#copy-a-component-link).
### Assets
Context: Arcweave docs > Project Tools > Interface > Project left sidebar > Sidebar top > Assets
The **Assets** tab lists all imported media files, such as images, audio, and videos. Use this area to upload, generate, replace, organize in folders, preview, and manage references for your [assets](https://docs.arcweave.com/project-items/assets/overview) before attaching them to elements or components.
## Sidebar bottom
Context: Arcweave docs > Project Tools > Interface > Project left sidebar > Sidebar bottom
The lower half of the sidebar helps you navigate and organize your project's boards and global variables:
### Boards
Context: Arcweave docs > Project Tools > Interface > Project left sidebar > Sidebar bottom > Boards
This section shows all the [boards](https://docs.arcweave.com/project-items/boards) in your project organized in folders. Expand a board to see an outline of its contents.
Right-click a board or an element listed beneath it and select **Copy link** to share that destination. Board folders do not have this action. See [Share an item or board position](https://docs.arcweave.com/project-tools/share#share-an-item-or-board-position) for link behavior and access requirements.
#### Board contents
Context: Arcweave docs > Project Tools > Interface > Project left sidebar > Sidebar bottom > Boards > Board contents
Under each board, items are listed in this order:
1. [Elements](https://docs.arcweave.com/project-items/elements), in the board's element order. You can still drag elements to reorder them. Under each element are its outgoing [connections](https://docs.arcweave.com/project-items/connections), in output order: the order its choices appear in Play Mode.
2. [Branches](https://docs.arcweave.com/project-items/branches). Under each branch are the connections leaving its conditions, tagged `if`, `elseif`, or `else`. Conditions without an output connection are not listed.
3. [Jumpers](https://docs.arcweave.com/project-items/jumpers).
4. [Notes](https://docs.arcweave.com/project-items/notes).
Rows are named as follows:
- **Connections** show their [label](https://docs.arcweave.com/project-items/labels). An unlabelled connection shows the name of its target, in grey.
- **Branches** show their `if` condition, or **Empty condition**.
- **Jumpers** show the name of the element they point to, or **Empty jumper**.
- **Notes** show their first line of text, or **Empty note**.
- **Elements** show their title, or the start of their content if they have no title, or **Empty element**.
Click a row, or focus it and press **Enter** or **Space**, to zoom the board to that item. A connection row zooms to the connection's label.
Elements and branches with connections have a chevron for showing or hiding their connections. They start collapsed. As with boards and folders, collapse state is saved for each user, so expanding an item doesn't change what your collaborators see.
When you work in a language other than the main one, elements and labelled connections show their [translation status](https://docs.arcweave.com/project-tools/localization#translation-status). Right-click a labelled connection to [set its status](https://docs.arcweave.com/project-tools/localization#set-label-status).
### Global variables
Context: Arcweave docs > Project Tools > Interface > Project left sidebar > Sidebar bottom > Global variables
At the very bottom of the sidebar, you'll find the **Global variables** button. Clicking it opens the [**Global variable dialog**](https://docs.arcweave.com/project-items/variables/global).
## Sidebar on small screens
Context: Arcweave docs > Project Tools > Interface > Project left sidebar > Sidebar on small screens
At viewport widths of 768 pixels or less, the sidebar starts collapsed over the board. Use the chevron tab on the left edge to open or close it. Its **Components**, **Assets**, **Boards**, and **Global variables** sections work the same as in the desktop layout.
# Mouse actions
Source: https://docs.arcweave.com/project-tools/interface/mouse-actions
Section: Project Tools > Interface
Description: Mouse actions for creating, editing, selecting, panning, and zooming board items in Arcweave projects
Arcweave is designed for mouse-driven interaction. Aside from text entry, all actions in a project can be performed with the mouse.
> ✅ For efficiency, Arcweave also provides [keyboard shortcuts](https://docs.arcweave.com/project-tools/interface/keyboard-shortcuts); especially useful to avoid unnecessary back-and-forth between keyboard and mouse.
The following desktop mouse actions let you create and edit items or move around the board. See [Select board items](https://docs.arcweave.com/project-tools/interface/mouse-actions#select-board-items) for selection controls. On touch devices, dragging empty board space pans the board.
| Mouse action | Result |
| :--------------------------------------------- | :------------------------------------------------------------------------------------------------------------------ |
| Double-click in empty board area | Create element |
| Double-click element / branch / note | Edit |
| Drop end of new connection in empty board area | Open a menu to create a connected [element, jumper, or branch](https://docs.arcweave.com/project-items/connections#with-drag-and-drop) there |
| Double-click connection or its label | Add or edit the connection's [label](https://docs.arcweave.com/project-items/labels) |
| Drag the board in Pan mode | Pan the board |
| Middle-button drag | Pan the board from either cursor mode |
| Hold Space + left-button drag | Pan the board from either cursor mode |
| Mouse wheel | Zoom when [Input device](https://docs.arcweave.com/project-tools/settings#input-device) is set to Mouse; pan when it is set to Trackpad |
| Ctrl/Cmd + mouse wheel | Zoom |
| Click component | Open component for editing |
| Right-click item | Open item's context menu |
| Drag a connection's path handle | [Reshape the connection](https://docs.arcweave.com/project-items/connections#edit-connection-paths) |
| Double-click a connection's path handle | Restore the connection's automatic path |
| Right-click empty board area | Open the board menu: **Create** items, **Paste** or **Paste as jumper** at that point, or open **Board Properties** |
Creating and editing board items, except comments, requires the **Edit projects** permission. Users without it pan the board by dragging it, in either cursor mode.
Item context menus include **Copy**, which copies the selected items like **Ctrl/Cmd + C**. To paste them where you right-clicked, choose **Paste** in the empty board area's menu.
To share an element, connection, branch, jumper, or note, select that item alone, right-click it, and choose **Copy link**. See [Share an item or board position](https://docs.arcweave.com/project-tools/share#share-an-item-or-board-position) for all supported menu locations and access requirements.
## Select board items
Context: Arcweave docs > Project Tools > Interface > Mouse actions > Select board items
The same selection controls apply to [elements](https://docs.arcweave.com/project-items/elements), [connections](https://docs.arcweave.com/project-items/connections), [branches](https://docs.arcweave.com/project-items/branches), [jumpers](https://docs.arcweave.com/project-items/jumpers), [notes](https://docs.arcweave.com/project-items/notes), and [comment pins](https://docs.arcweave.com/project-items/comments#select-comments). You can include different item types in the same selection.
Click an item to replace the current selection with that item. To select multiple items one at a time, hold **Shift** or **Ctrl/Cmd** while clicking each one. Clicking an already selected item with one of these keys removes it from the selection.
To select items with a rectangle, switch to [Select mode](https://docs.arcweave.com/project-tools/interface/bottom-menu#pan-select-icon), then click and drag from empty board space. The rectangle selects every item it touches, even partially:
| Mouse action | Result |
| :------------------------- | :--------------------------------------------------------------- |
| Drag without modifier keys | Replace the selection with items touched by the rectangle |
| Shift + drag | Add items touched by the rectangle to the current selection |
| Ctrl / Cmd + drag | Remove items touched by the rectangle from the current selection |
# Keyboard shortcuts
Source: https://docs.arcweave.com/project-tools/interface/keyboard-shortcuts
Section: Project Tools > Interface
Description: Keyboard shortcuts for navigation, selection, element creation, connections, text editing, and Play Mode in Arcweave projects
Arcweave is primarily designed for [mouse-driven interaction](https://docs.arcweave.com/project-tools/interface/mouse-actions), but keyboard shortcuts help streamline common actions and reduce context switching between mouse and keyboard.
The tables below list the available keyboard shortcuts, what each one does, and which permission is needed to use them. Board shortcuts do not work while a dialog or menu is open.
## Global controls
Context: Arcweave docs > Project Tools > Interface > Keyboard shortcuts > Global controls
| Shortcut | Action | Required permission |
| :------------------- | :----------------------------------------------------------------------------------------- | :-------------------- |
| Ctrl/Cmd + Z | Undo | ✏️ Edit projects |
| Ctrl/Cmd + Shift + Z | Redo | ✏️ Edit projects |
| Ctrl/Cmd + F | [Search](https://docs.arcweave.com/project-tools/search) | 👀 View projects list |
| Ctrl/Cmd + A | Select all board items | ✏️ Edit projects |
| Ctrl/Cmd + C | Copy selected item(s) | ✏️ Edit projects |
| Ctrl/Cmd + X | Cut selected item(s) | ✏️ Edit projects |
| Ctrl/Cmd + V | Paste copied item(s) | ✏️ Edit projects |
| Ctrl/Cmd + Shift + V | Paste single copied [element](https://docs.arcweave.com/project-items/elements) as [jumper](https://docs.arcweave.com/project-items/jumpers) | ✏️ Edit projects |
| Ctrl/Cmd + Shift + F | Fit to screen | 👀 View projects list |
## Navigation & view
Context: Arcweave docs > Project Tools > Interface > Keyboard shortcuts > Navigation & view
| Shortcut | Action | Required permission |
| :------------------------------- | :------------------------------------------------------------------------------------------------------------------------------- | :-------------------- |
| + | Zoom in | 👀 View projects list |
| - | Zoom out | 👀 View projects list |
| Space + drag with mouse | Pan board | 👀 View projects list |
| Tab (no selection) | Select the item nearest to the screen center and move the view to it | ✏️ Edit projects |
| Tab (while editing element) | Switch between [editing element](https://docs.arcweave.com/project-items/elements#edit-elements) title and content | ✏️ Edit projects |
| Ctrl/Cmd + Arrow key | With one board item selected, select the nearest item in that direction; otherwise, select the item nearest to the screen center | ✏️ Edit projects |
| Esc (while editing a board item) | Exit editing mode | ✏️ Edit projects |
| Esc (no editing in progress) | Clear the selection | ✏️ Edit projects |
## Selection & movement
Context: Arcweave docs > Project Tools > Interface > Keyboard shortcuts > Selection & movement
| Shortcut | Action | Required permission |
| :------------------------------------------------- | :---------------------------------------------------------------------------------- | :-------------------- |
| Shift/Ctrl/Cmd + click board item | Add or subtract item from selection | ✏️ Edit projects |
| Shift + drag empty board space (in Select mode) | Add items to selection | ✏️ Edit projects |
| Ctrl/Cmd + drag empty board space (in Select mode) | Subtract items from selection | ✏️ Edit projects |
| Arrow key (no selection) | Pan board to arrow direction | 👀 View projects list |
| Arrow key (with selection) | Nudge selection to arrow direction | ✏️ Edit projects |
| Shift + Arrow key (with selection) | Nudge selection in larger steps (20 pixels instead of 1, unless Snap to grid is on) | ✏️ Edit projects |
| Delete/Backspace (while items are selected) | Delete selected items | ✏️ Edit projects |
## Element creation & connection
Context: Arcweave docs > Project Tools > Interface > Keyboard shortcuts > Element creation & connection
| Shortcut | Action | Required permission |
| :-------------------------------------------------------- | :------------------------------------------------------------------------- | :------------------ |
| Ctrl + Alt/Option/Cmd + Arrow key (with element selected) | Create a [connected](https://docs.arcweave.com/project-items/connections) element in that direction | ✏️ Edit projects |
## Text editing
Context: Arcweave docs > Project Tools > Interface > Keyboard shortcuts > Text editing
| Shortcut | Action | Required permission |
| :------------------------------------------------------------------------------------------------------------------------------------------------------------------------- | :----------------------------------------------------------------------------------------- | :------------------ |
| @... (while typing in rich text) | [Mention component or board](https://docs.arcweave.com/project-tools/mentions) | ✏️ Edit projects |
| @... (while typing in [Arcscript](https://docs.arcweave.com/project-items/arcscript)) | Mention element as argument of [`visits` function](https://docs.arcweave.com/project-items/arcscript#visits) | ✏️ Edit projects |
| Ctrl/Cmd + B (while editing rich text) | Bold | ✏️ Edit projects |
| Ctrl/Cmd + I (while editing rich text) | Italic | ✏️ Edit projects |
| Ctrl/Cmd + U (while editing rich text) | Underline | ✏️ Edit projects |
| Ctrl/Cmd + Shift + S (while editing rich text) | Strikethrough | ✏️ Edit projects |
| Ctrl/Cmd + Shift + B (while editing [element](https://docs.arcweave.com/project-items/elements) content or a [rich text field attribute](https://docs.arcweave.com/project-items/attributes#rich-text-field)) | Toggle blockquote | ✏️ Edit projects |
| Ctrl/Cmd + Shift + C (while editing [element](https://docs.arcweave.com/project-items/elements) content or a [label](https://docs.arcweave.com/project-items/labels)) | Toggle [Arcscript segment](https://docs.arcweave.com/project-items/arcscript#arcscript-segments) | ✏️ Edit projects |
| Enter (with one [element](https://docs.arcweave.com/project-items/elements), [branch](https://docs.arcweave.com/project-items/branches), [note](https://docs.arcweave.com/project-items/notes), or [connection](https://docs.arcweave.com/project-items/connections) selected) | Open selected item for editing (for a connection, edit its [label](https://docs.arcweave.com/project-items/labels)) | ✏️ Edit projects |
| Enter (while editing a [branch](https://docs.arcweave.com/project-items/branches) condition) | Add `else` condition to the branch | ✏️ Edit projects |
| Ctrl/Cmd + Enter (while editing a [branch](https://docs.arcweave.com/project-items/branches) condition) | Add `elseif` condition to the branch | ✏️ Edit projects |
| Tab / Shift + Tab (while editing a [branch](https://docs.arcweave.com/project-items/branches) condition) | Move to the next / previous condition | ✏️ Edit projects |
## Play Mode
Context: Arcweave docs > Project Tools > Interface > Keyboard shortcuts > Play Mode
| Shortcut | Action | Required permission |
| :------------------------------------------------------------------------------------------------------------- | :----------------------------------------------------------------------------------- | :------------------ |
| Tab (while editing in the [Style Editor](https://docs.arcweave.com/project-tools/play-mode/style-editor)) | Insert 2 spaces at the cursor, or indent all selected lines by 2 spaces | ✏️ Edit projects |
| Shift + Tab (while editing in the Style Editor) | Remove 2 leading spaces from the current line or from all selected lines | ✏️ Edit projects |
| Esc (while [editing content in Play Mode](https://docs.arcweave.com/project-tools/play-mode/using-play-mode#edit-content-in-play-mode)) | Save edits and exit edit mode | ✏️ Edit projects |
| Tab (while editing element content in Play Mode edit mode) | Move focus to the first option label | ✏️ Edit projects |
| Shift + Tab (while editing element content in Play Mode edit mode) | Move focus to the last option label | ✏️ Edit projects |
| Tab (while editing an option label in Play Mode edit mode) | Move focus to the next option label, or back to element content from the last option | ✏️ Edit projects |
| Shift + Tab (while editing an option label in Play Mode edit mode) | Move focus to the previous option label, or to element content from the first option | ✏️ Edit projects |
# Project Settings
Source: https://docs.arcweave.com/project-tools/settings
Section: Project Tools
Description: Project settings for grid, spell checking, input device, board renderer, and AI, plus project properties like hash and word count
To access your project's **settings**, click the **cog icon** (**Project Settings**) on the left side of the top menu. The cog icon is available to users who can edit the project (owners and editors).
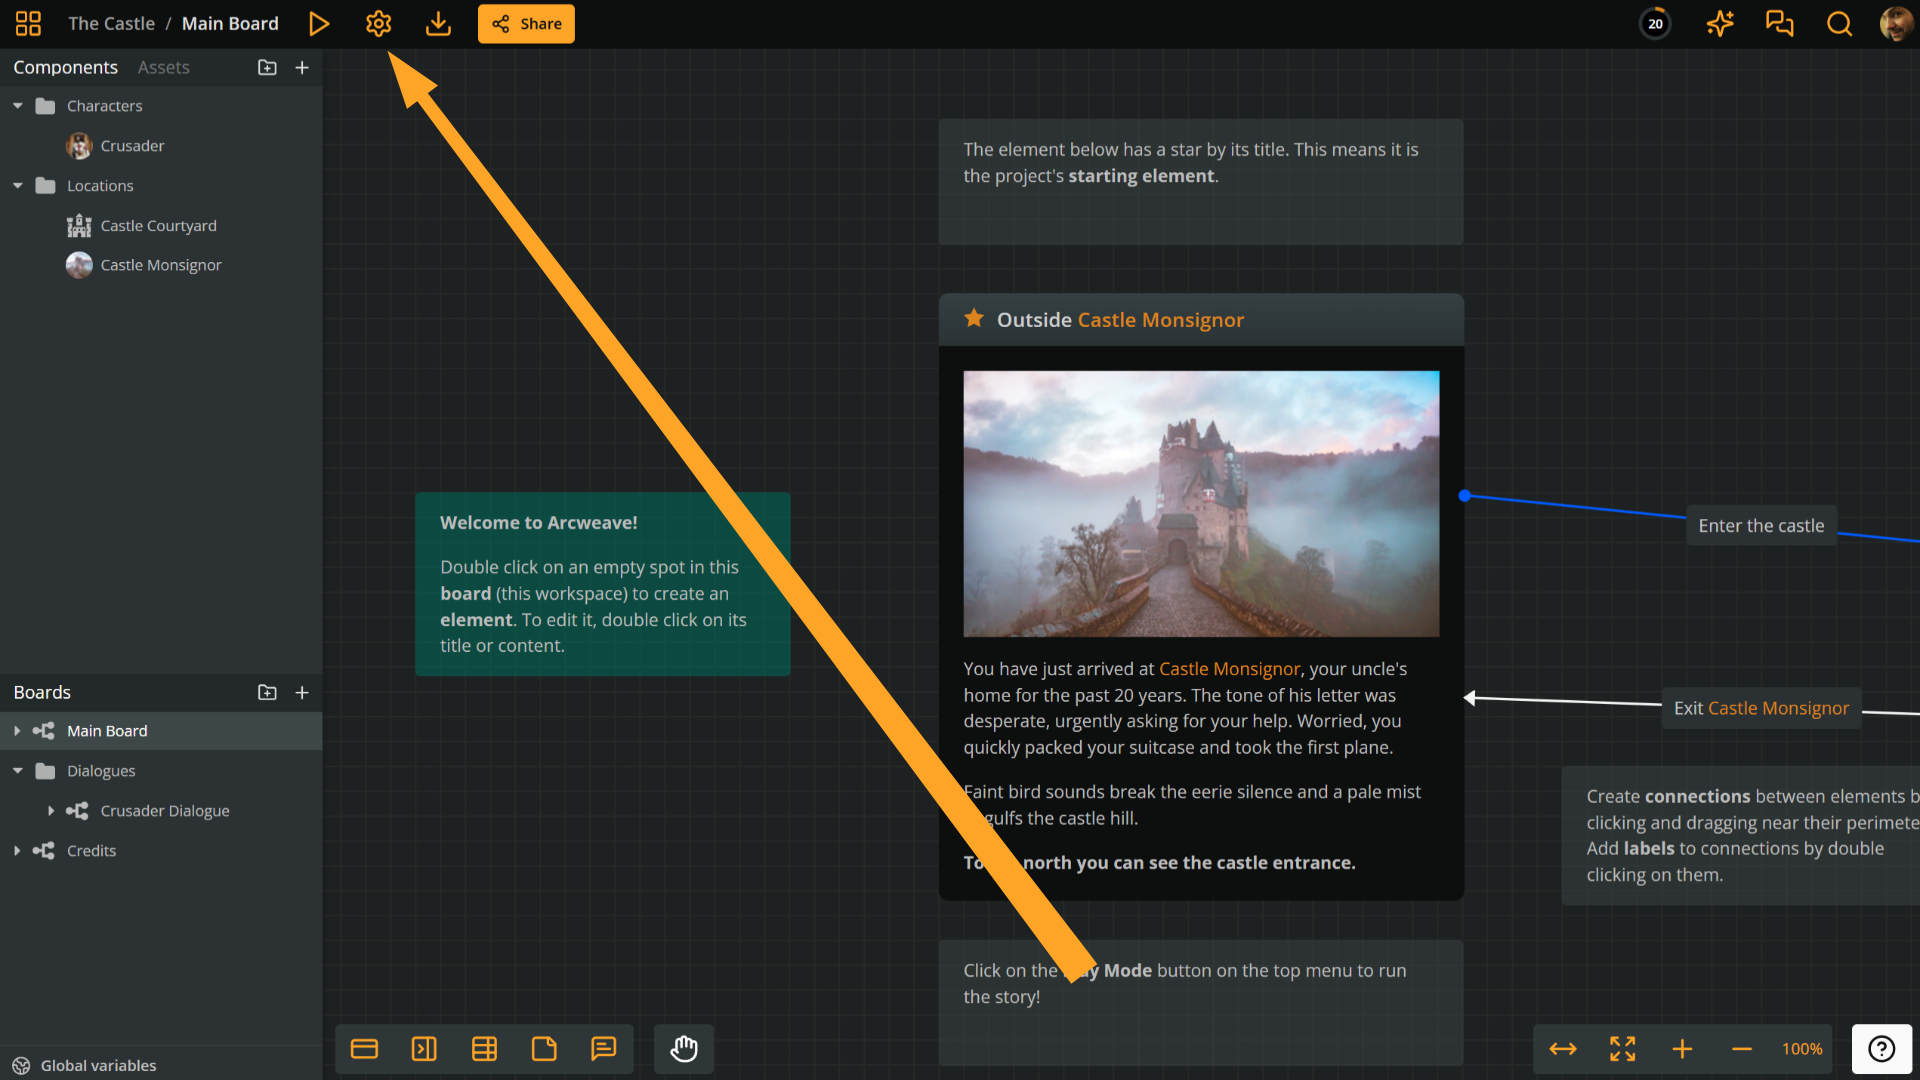
The **Project Settings** menu provides the following two sections:
- [Configurable settings](https://docs.arcweave.com/project-tools/settings#configurable-settings):
- Show grid
- Snap to grid
- Spell checking
- Input device
- Board renderer
- AI settings
- [Properties](https://docs.arcweave.com/project-tools/settings#properties)
## Configurable settings
Context: Arcweave docs > Project Tools > Project Settings > Configurable settings
Configure these settings to affect how you work inside the editor.
### Show grid
Context: Arcweave docs > Project Tools > Project Settings > Configurable settings > Show grid
Toggles a background grid of dots on the board to help visually align elements. The dots fade as you zoom out below 100% and disappear at 25% zoom.
### Snap to grid
Context: Arcweave docs > Project Tools > Project Settings > Configurable settings > Snap to grid
Toggles board item snapping to the nearest grid point, for precise placement and alignment.
> ✅ **Snap to grid** functions independently from **Show grid**: snapping can remain active even if the grid itself is hidden.
### Spell checking
Context: Arcweave docs > Project Tools > Project Settings > Configurable settings > Spell checking
Activates your browser's built-in spell checker within Arcweave, helping you identify and correct typos as you type.
> ℹ️ To use this feature, ensure spell checking is also enabled in your browser's settings.
### Input device
Context: Arcweave docs > Project Tools > Project Settings > Configurable settings > Input device
Select your input device:
- **Auto**: Automatically detects mouse-only and trackpad-only gestures, adjusting the functionality accordingly. The menu shows the currently detected device.
- **Mouse**: Optimizes for mouse input.
- **Trackpad**: Optimizes for trackpad gestures.
> ✅ If you need to scroll within a tall element, switch to **Trackpad** mode and scroll using your mouse wheel or trackpad gesture.
### Board renderer
Context: Arcweave docs > Project Tools > Project Settings > Configurable settings > Board renderer
Choose which renderer Arcweave uses for boards:
- **WebGL**: Best compatibility for most browsers and devices.
- **WebGPU**: Preferred on modern browsers with WebGPU support.
- **Canvas (Compatibility)**: May be slower; use it when GPU rendering is unavailable.
If board panning, zooming, selection, or connection editing feels slow on your current browser or device, try switching to the other GPU renderer. If the selected renderer can't run, Arcweave falls back to the other GPU renderer, then to Canvas. See [Board performance](https://docs.arcweave.com/project-tools/troubleshooting#board-performance).
> ℹ️ Refresh the page after changing the board renderer, so the new setting can take effect.
> ℹ️ Arcweave stores this preference in your current browser.
> ℹ️ For Chrome-specific performance checks, see [Troubleshooting](https://docs.arcweave.com/project-tools/troubleshooting#board-performance).
### AI settings
Context: Arcweave docs > Project Tools > Project Settings > Configurable settings > AI settings
Use **AI Settings...** to define the visual direction for all [AI-generated images](https://docs.arcweave.com/project-tools/ai-features/image-generator) in the project. This option appears when the workspace's plan includes AI features and AI is enabled for the workspace.
The **AI Settings** panel includes two optional ways to guide generated images:
- **Image Generation Guidelines**: Enter up to 1,000 characters of instructions describing the desired style, tone, medium, or visual characteristics you want Arcweave to apply to generated images across the project.
- **Attached Style References**: Drag image assets from the **Assets** sidebar into this list to use them as visual references. Arcweave uses them to guide palette, mood, lighting, texture, and rendering style.
> ℹ️ Attached style references act as style guides by default. They are not reproduced literally unless your prompt explicitly asks for the details shown in them.
> ℹ️ If you add attached style references, you can mention one by name in your prompt to guide the result more precisely.
## Properties
Context: Arcweave docs > Project Tools > Project Settings > Properties
Select **Properties** to open the **Project properties** dialog. It gives access to the following key project information used for integration, sharing, and project management.
### Project hash
Context: Arcweave docs > Project Tools > Project Settings > Properties > Project hash
#### What is the project hash?
Context: Arcweave docs > Project Tools > Project Settings > Properties > Project hash > What is the project hash?
The project hash is the unique identifier of a project.
You need a project's hash in the following cases:
- When [integrating](https://docs.arcweave.com/integrations/overview) with another platform through Arcweave's REST API.
- When [embedding](https://docs.arcweave.com/project-tools/share) the project's Play Mode in a webpage.
#### Copy the project hash
Context: Arcweave docs > Project Tools > Project Settings > Properties > Project hash > Copy the project hash
To access and copy the project hash:
1. Click the **Settings icon** (the cog) on the left side of the top menu.
2. Select **Properties**.
3. Locate the **Project hash** and click the **clipboard icon**.
Your project's hash is now copied to your system's clipboard.
### Project item count
Context: Arcweave docs > Project Tools > Project Settings > Properties > Project item count
Shows the total number of each item type within your project:
- Boards
- Jumpers
- Notes
- Assets
- Elements
- Branches
- Components
- Comments
### Total words
Context: Arcweave docs > Project Tools > Project Settings > Properties > Total words
Calculates the total number of words across all boards, using element titles, element content, and connection labels. Arcscript blocks are not counted. In localized projects, this count uses the current language.
### Total characters
Context: Arcweave docs > Project Tools > Project Settings > Properties > Total characters
Calculates the total number of characters across all boards, using element titles, element content, and connection labels. Arcscript blocks are not counted. In localized projects, this count uses the current language.
### Project storage limit
Context: Arcweave docs > Project Tools > Project Settings > Properties > Project storage limit
Displays the total storage capacity available for your project and the current usage.
# Arcweave's icon library
Source: https://docs.arcweave.com/project-tools/icon-library
Section: Project Tools
Description: Use Arcweave's built-in library of over 4,000 game icons as element and component covers
Arcweave includes a built-in library of **4,000+ game icons** sourced from [game-icons.net](https://game-icons.net). You can freely use these icons as cover images for your elements and components.

## Element covers
Context: Arcweave docs > Project Tools > Arcweave's icon library > Element covers
To set an icon as an element cover:
1. Right-click the element and select **Cover > Set cover**.
2. In the cover picker that opens, go to the **Icon Library** tab.
3. Browse by category or use the search bar to find the icon you want.
## Component covers
Context: Arcweave docs > Project Tools > Arcweave's icon library > Component covers
To set an icon as a component cover:
1. In the **Components** section of the sidebar, click a component to open it.
2. Hover over the current cover image and click **Change cover** in the top-right corner.
3. In the cover picker that opens, go to the **Icon Library** tab.
4. Browse or search to select an icon.
# Rich text
Source: https://docs.arcweave.com/project-tools/rich-text
Section: Project Tools
Description: Rich text formatting in Arcweave elements, labels, notes, and rich text attributes
[Elements](https://docs.arcweave.com/project-items/elements), [labels](https://docs.arcweave.com/project-items/labels), [notes](https://docs.arcweave.com/project-items/notes), and [rich text field attributes](https://docs.arcweave.com/project-items/attributes#rich-text-field) support **rich text formatting**. The available formatting depends on the field.
## Supported formatting
Context: Arcweave docs > Project Tools > Rich text > Supported formatting
| Field | Bold, italic, underline, strikethrough | Links | Blockquotes | Arcscript segments |
| ------------------------- | -------------------------------------- | ----- | ----------- | ------------------ |
| Element title | Yes | Yes | No | No |
| Element content | Yes | Yes | Yes | Yes |
| Connection label | Yes | Yes | No | Yes |
| Note content | Yes | Yes | No | No |
| Rich text field attribute | Yes | Yes | Yes | No |
[Arcscript segments](https://docs.arcweave.com/project-items/arcscript#arcscript-segments) are code blocks used for story logic. Inline code formatting is not supported in any of these fields. Plain **String Field** attributes contain unformatted text and do not support the formatting above.
For integrations, see [Rich text in the REST API](https://docs.arcweave.com/rest-api/rich-text).
## Formatting menu
Context: Arcweave docs > Project Tools > Rich text > Formatting menu
The formatting menu appears above or below the rich text field and displays **context-dependent formatting buttons**.
The picture below shows the formatting menu appearing when editing the content of an **element**:

And this is the formatting menu appearing when editing an **element's title**:
Same, when editing a **label**:
When editing a **note**:

Finally, this is the formatting menu appearing when editing a **rich text field attribute**:
### Bold, italic, underline, and strikethrough
Context: Arcweave docs > Project Tools > Rich text > Formatting menu > Bold, italic, underline, and strikethrough
Available in: **element title**, **element content**, **label**, **note**, **rich text field attribute**
After selecting your text, click the **Bold**, **Italic**, **Underline**, or **Strikethrough** button in the formatting menu to apply the desired style.
### Blockquote
Context: Arcweave docs > Project Tools > Rich text > Formatting menu > Blockquote
Available in: **element content**, **rich text field attribute**
Place your cursor in a paragraph and click the **Blockquote** button in the formatting menu to format the paragraph as a blockquote. This helps the text stand out as a quote or callout.
### Link
Context: Arcweave docs > Project Tools > Rich text > Formatting menu > Link
Available in: **element title**, **element content**, **label**, **note**, **rich text field attribute**
Select text and click the **Link** button in the formatting menu, then type or paste a URL and press **Enter** to turn the text into a link. The button is disabled when no text is selected or inside Arcscript segments.

### Arcscript
Context: Arcweave docs > Project Tools > Rich text > Formatting menu > Arcscript
Available in: **element content**, **label**
Place the cursor in a paragraph and click the **Arcscript** button in the formatting menu to convert the paragraph into an Arcscript segment.

### Translatable
Context: Arcweave docs > Project Tools > Rich text > Formatting menu > Translatable
Available in: **element content**, **label**
When [localization](https://docs.arcweave.com/project-tools/localization#translate-arcscript-segments) is available (Team workspaces), it toggles whether the current Arcscript segment is translatable. The button is enabled only while the cursor is in an Arcscript segment and the project's default language is selected.
## Format rich text
Context: Arcweave docs > Project Tools > Rich text > Format rich text
To format rich text:
1. Edit an element, note, label, or rich text field attribute.
2. Select some text.
3. Click one of the [formatting menu](https://docs.arcweave.com/project-tools/rich-text#formatting-menu) buttons (or use Arcweave's [keyboard shortcuts](https://docs.arcweave.com/project-tools/interface/keyboard-shortcuts)).
## Markdown formatting
Context: Arcweave docs > Project Tools > Rich text > Markdown formatting
Arcweave's rich text content supports limited Markdown syntax:
- **Italic**: Wrap text in \*_single asterisks_\* or \__single underscores_\_ and it will automatically transform to italic text.
- **Bold**: Wrap text in \*\***double asterisks**\*\* or \_\_**double underscores**\_\_ and it will transform to bold text.
- **Strikethrough**: Wrap text in \~\~~~double tildes~~\~\~ and it will transform to struck-through text.
- **Blockquote**: In fields that support blockquotes, type `>` followed by a space at the start of a paragraph.
- **Arcscript segment**: In fields that support Arcscript segments, type ` ``` ` or `~~~` followed by a space at the start of a paragraph.
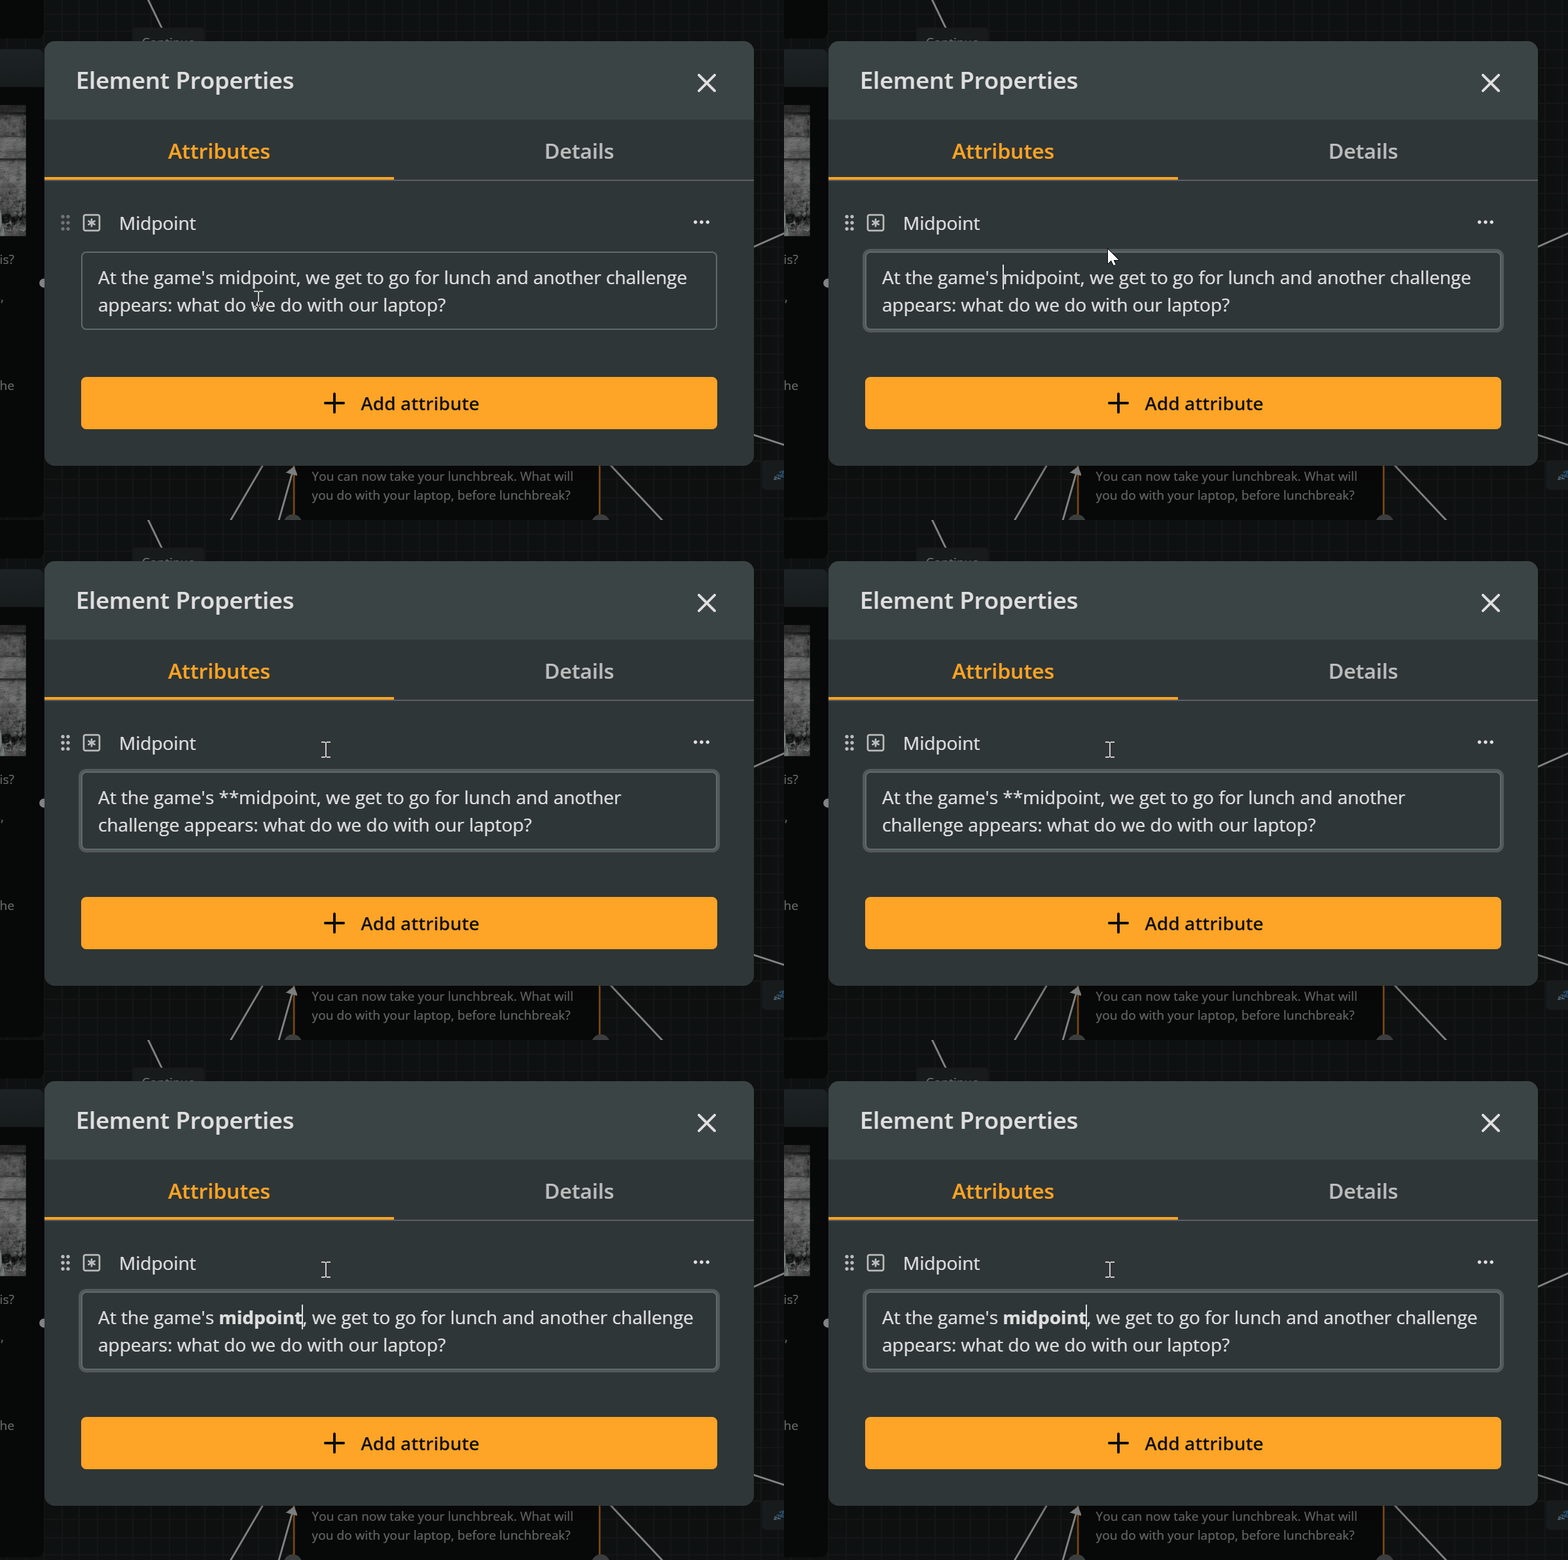
> ✅ By the way, [Pro and Team](https://docs.arcweave.com/workspaces/billing-plans) workspaces support [exporting your project in Markdown](https://docs.arcweave.com/project-tools/export#export-as-markdown).
# Mentions
Source: https://docs.arcweave.com/project-tools/mentions
Section: Project Tools
Description: Mention components and boards in rich text to link them, and create new components directly from a mention
Mentions are **links to components and boards** within your Arcweave project.

You can insert mentions while typing in the following fields:
- Title or content of [elements](https://docs.arcweave.com/project-items/elements)
- [Notes](https://docs.arcweave.com/project-items/notes)
- [Rich text attributes](https://docs.arcweave.com/project-items/attributes)
- [Connection labels](https://docs.arcweave.com/project-items/labels)
In the board, component mentions appear as **orange text** and board mentions as **gold text**.
> ℹ️ Inside [Arcscript segments](https://docs.arcweave.com/project-items/arcscript#arcscript-segments) and [branch](https://docs.arcweave.com/project-items/branches) conditions, typing `@` lists **elements** instead, so you can use them as arguments of the [`visits` function](https://docs.arcweave.com/project-items/arcscript#visits).
> ℹ️ Mentions are not visually styled in Play Mode; they appear as regular text.
> ⚠️ Not to be confused with [user mentions in comments](https://docs.arcweave.com/project-items/comments#user-mentions).
## Benefits of mentions
Context: Arcweave docs > Project Tools > Mentions > Benefits of mentions
Mentions offer several advantages that improve project navigation and consistency:
- **Quick navigation**: Clicking on a mention instantly opens the referenced component or board.
- **Auto-updating**: If the referenced item is renamed, all related mentions are automatically updated.
- **Distraction-free writing**: You can [create and reference new components](https://docs.arcweave.com/project-tools/mentions#create-new-components) on the fly without breaking your writing flow.
## Create a mention
Context: Arcweave docs > Project Tools > Mentions > Create a mention
To mention an existing component or board:
1. While typing, type the **`@`** character.
2. Start typing the name of the component or board.
3. Click the correct item in the dropdown list, or move to it with the arrow keys and press **Enter**.
> ℹ️ The `@` character opens the list only at the start of a paragraph or after a space or an opening parenthesis `(`.
> ⚠️ The **Create "..."** option is highlighted first in the list. Pressing **Enter** without moving to another item creates a new component, even if an existing component matches your text.

## Create new components
Context: Arcweave docs > Project Tools > Mentions > Create new components
Mentions also allow you to create new components as you write.
To create one, type `@` followed by the desired name and press **Enter**. Arcweave will automatically create and mention the new component without interrupting your writing flow.
> ⚠️ This method creates only components; not boards.
> ℹ️ To include spaces in the name, use underscores (`_`). For example, typing `@bronze_key` will create a component named **bronze key**.
# Play Mode
Source: https://docs.arcweave.com/project-tools/play-mode/overview
Section: Project Tools
Description: Emulate the player's experience in Arcweave's built-in Play Mode
Play Mode runs your Arcweave project as a choose-your-path game, emulating the player's experience. It loads one element per turn and the story progresses choice-by-choice.
This process enables structured testing, debugging, and refinement of the narrative flow.
> ✅ Story edits update Play Mode. For CSS saved through the REST API or MCP, reload an existing Play Mode tab or open a new one from the editor; see [Save and verify styles](https://docs.arcweave.com/project-tools/play-mode/styling-reference#save-and-verify-styles).
## Breakdown
Context: Arcweave docs > Project Tools > Play Mode > Breakdown
The following steps describe how Play Mode functions:
1. The game begins at the defined [starting element](https://docs.arcweave.com/project-tools/play-mode/using-play-mode#set-play-mode-start).
2. At each turn, Arcweave renders the content of the current [element](https://docs.arcweave.com/project-items/elements).
3. The current element's [cover](https://docs.arcweave.com/project-items/elements#element-covers) is displayed at the top of the Play Mode window.
4. The [covers](https://docs.arcweave.com/project-items/components#cover) of the current element's components are shown below the element cover.
5. The textual content of the current element appears beneath the components.
6. Arcweave evaluates [branch conditions](https://docs.arcweave.com/project-items/branches) and [label Arcscript](https://docs.arcweave.com/project-items/labels#arcscript-in-labels) to determine the available options. Each option uses the last label on its path that produces text, while the Arcscript of every label on the path is evaluated. See [Labels across branches](https://docs.arcweave.com/project-items/labels#labels-across-branches).
7. Available options appear as clickable **option buttons**. If an option has no label text, the button uses the target element's title, or the beginning of its content if it has no title.
8. If **only one option is available** and its labels produce **no text**, a **blinking arrow** appears instead of an option button. This is checked after branch and label evaluation, so an element with several outgoing connections can also show the arrow.
9. The player progresses the story by clicking an option button or clicking anywhere within the content area, in the case of the blinking arrow.

> ℹ️ To let people who are not project collaborators play your project, [make the project or its Play Mode public](https://docs.arcweave.com/project-tools/share#make-a-project-public).
## Play Mode access
Context: Arcweave docs > Project Tools > Play Mode > Play Mode access
Depending on their role, users fall into two primary role-based categories with respect to Play Mode access and functionality:
- Commenters & Visitors
- Owners & Editors
### Commenters & Visitors
Context: Arcweave docs > Project Tools > Play Mode > Play Mode access > Commenters & Visitors
Workspace commenters, project commenters, and project visitors have limited access to Play Mode. They can do the following:
- Play through the story
- Restart the session
- Adjust audio settings
- Choose story language (if [translations](https://docs.arcweave.com/project-tools/localization) are available)
For each of these features, see [Using Play Mode](https://docs.arcweave.com/project-tools/play-mode/using-play-mode) (next page).
> ✅ For a quick overview of roles, see [workspace and project roles](https://docs.arcweave.com/workspaces/roles).
### Owners & Editors
Context: Arcweave docs > Project Tools > Play Mode > Play Mode access > Owners & Editors
Workspace and project owners and editors enjoy the following Play Mode features:
- [Debugger](https://docs.arcweave.com/project-tools/play-mode/debugger): Ability to inspect variable changes and force assign values for testing.
- [Style Editor](https://docs.arcweave.com/project-tools/play-mode/style-editor): Ability to change the CSS of the story's Play Mode.
- [Edit content in Play Mode](https://docs.arcweave.com/project-tools/play-mode/using-play-mode#edit-content-in-play-mode): Ability to edit the current element's text and its option labels while playtesting, without leaving Play Mode.
- [Reorder option buttons](https://docs.arcweave.com/project-tools/play-mode/using-play-mode#reorder-options): Ability to reorder the option buttons of any element.
- [Quickstart Play Mode from any element](https://docs.arcweave.com/project-tools/play-mode/using-play-mode#quickstart-play-mode-from-here): Directly playtest any part of the story.
## Style Play Mode
Context: Arcweave docs > Project Tools > Play Mode > Style Play Mode
Use the [Style Editor](https://docs.arcweave.com/project-tools/play-mode/style-editor) to preview and save custom CSS, or update it through the [REST API](https://docs.arcweave.com/rest-api/css) or [MCP tools](https://docs.arcweave.com/integrations/mcp#style-play-mode). The [Play Mode styling reference](https://docs.arcweave.com/project-tools/play-mode/styling-reference) describes the shared DOM, selectors, defaults, and verification workflow.
# Using Play Mode
Source: https://docs.arcweave.com/project-tools/play-mode/using-play-mode
Section: Project Tools > Play Mode
Description: Play your story in Play Mode, set the starting element, choose options, edit content, restart, and change audio and language
This page explains how to use **Play Mode**.
Access to Play Mode and its features depends on a user's role within the project. For a quick overview of roles, see [Workspace and project roles](https://docs.arcweave.com/workspaces/roles).
Unless otherwise noted, all instructions apply to project or workspace owners and editors, who have full access to the project.
## Set Play Mode start
Context: Arcweave docs > Project Tools > Play Mode > Using Play Mode > Set Play Mode start
Before running your project in Play Mode, you must define a starting element. To set a starting element:
1. Right-click the desired element.
2. Select **Play Mode > Set Play Mode start**.
You can change the starting element at any time by repeating the same action on a different element.
> ⚠️ A project can have only one starting element.
> ℹ️ There is no option to unset the starting element; setting another element as the Play Mode start replaces it. If you delete the starting element, the project has no starting element until you set a new one.
## Enter Play Mode
Context: Arcweave docs > Project Tools > Play Mode > Using Play Mode > Enter Play Mode
To enter Play Mode, click the **Play Mode** button on the top-left of the menu bar. Play Mode opens in a new browser tab.

If you are working in a [translation](https://docs.arcweave.com/project-tools/localization), Play Mode starts in that language.
> ⚠️ Project visitors without access to the board can only enter Play Mode via a **public link**. This occurs when a project has been shared publicly for Play Mode access only. See [Share your project](https://docs.arcweave.com/project-tools/share).
## Quickstart Play Mode from here
Context: Arcweave docs > Project Tools > Play Mode > Using Play Mode > Quickstart Play Mode from here
Workspace and project owners and editors can also start Play Mode from any element in the project, ignoring the starting element. To do this:
1. Right-click an element.
2. Select **Play Mode > Quickstart Play Mode from here**. Play Mode opens in a new browser tab, starting from that element.
> ⚠️ Quick-starting from an element skips all variable changes and element visits that would normally occur when reaching that element through standard play.
## Continue to the next element
Context: Arcweave docs > Project Tools > Play Mode > Using Play Mode > Continue to the next element
Select an option button to continue the story. Arcweave determines the available options by evaluating [branch conditions](https://docs.arcweave.com/project-items/branches) and [label Arcscript](https://docs.arcweave.com/project-items/labels#arcscript-in-labels).
If **only one option is available** and its labels produce **no text**, a blinking arrow appears instead of a button. Click the element's content area to continue. This can happen even with several outgoing connections if branch conditions leave only one option.
To show a button for a single option, give its path a label that produces text, such as **Continue**. Variable assignments alone do not produce option text. For paths through branches, Arcweave uses the [last label that produces text](https://docs.arcweave.com/project-items/labels#labels-across-branches).
## Reorder options
Context: Arcweave docs > Project Tools > Play Mode > Using Play Mode > Reorder options
Workspace and project owners and editors can **reorder an element's clickable options** in Play Mode while [Edit content](https://docs.arcweave.com/project-tools/play-mode/using-play-mode#edit-content-in-play-mode) mode is enabled.
To reorder an element's options:
1. Right-click the element on the board.
2. Select **Play Mode > Quickstart Play Mode from here**.
3. Once in Play Mode, press **Edit content** (the **pencil** icon in the top menu).
4. Drag an option by the grip handle on its left, or by its border, to reorder it. Changes are saved automatically.
## Play Mode menu
Context: Arcweave docs > Project Tools > Play Mode > Using Play Mode > Play Mode menu
### Open Play Mode menu
Context: Arcweave docs > Project Tools > Play Mode > Using Play Mode > Play Mode menu > Open Play Mode menu
**On desktop**:
To open the Play Mode menu, hover your cursor near the top of your browser window. The menu hides a few seconds after your cursor leaves it. To keep it visible, select **Lock Toolbar** from the menu icon (☰) at its left.
**On mobile**:
In browser windows narrower than 768 pixels, the Play Mode menu is always visible. On other touch screens, tap the top of the screen to show it.
### Functionality
Context: Arcweave docs > Project Tools > Play Mode > Using Play Mode > Play Mode menu > Functionality
The Play Mode menu provides access to the following tools and options:
- [Restart story](https://docs.arcweave.com/project-tools/play-mode/using-play-mode#restart-story): Resets everything and restarts the story.
- **Full screen**: Enters or exits full-screen view.
- [Share](https://docs.arcweave.com/project-tools/play-mode/using-play-mode#share-project): Lets you share your project and control its public access.
- [Audio](https://docs.arcweave.com/project-tools/play-mode/using-play-mode#control-audio-volume): Controls the playback volume of your project's audio.
- [Localization](https://docs.arcweave.com/project-tools/play-mode/using-play-mode#choose-language): Select the story's language (if [Localization](https://docs.arcweave.com/project-tools/localization) is available).
- [Edit content](https://docs.arcweave.com/project-tools/play-mode/using-play-mode#edit-content-in-play-mode): Lets you edit the current element's text and option labels while playtesting.
- [Style Editor](https://docs.arcweave.com/project-tools/play-mode/style-editor): Lets you style Play Mode's appearance through direct CSS editing.
- [Debug](https://docs.arcweave.com/project-tools/play-mode/debugger): Opens the Debugger, where you can inspect the current board, current element, and variable changes.
- **Menu** (☰): **Lock Toolbar** keeps the Play Mode menu visible, and **Go to Editor** opens the project's boards in the same tab.
**Edit content**, **Style Editor**, and **Debug** are available only to owners and editors. On desktop, the menu icon (☰) and **Share** are hidden from [project visitors](https://docs.arcweave.com/workspaces/roles#project-visitors). On narrow screens, the menu icon (☰) is available to everyone and contains **Restart**; **Edit content**, **Share**, and **Open in Editor** appear according to your permissions.
## Edit content in Play Mode
Context: Arcweave docs > Project Tools > Play Mode > Using Play Mode > Edit content in Play Mode
Workspace and project owners and editors can edit story content directly in Play Mode, without switching back to the board. This is useful when playtesting reveals wording you want to fix on the spot.

While editing, the top menu shows an **Editing** indicator next to the project name. Story navigation is paused: option buttons are not clickable, and the single-path advance arrow does not progress the story until you finish editing.
### Enter edit mode
Context: Arcweave docs > Project Tools > Play Mode > Using Play Mode > Edit content in Play Mode > Enter edit mode
To start editing the current element:
1. Click the **Edit content** button (pencil icon) in Play Mode's top menu, or
2. Double-click the element's text content.
The button is disabled when no element is loaded. On smaller screens, use the mobile menu to access **Edit content**.
### What you can edit
Context: Arcweave docs > Project Tools > Play Mode > Using Play Mode > Edit content in Play Mode > What you can edit
In edit mode you can change:
- The current element's [rich text](https://docs.arcweave.com/project-tools/rich-text) content.
- The [labels](https://docs.arcweave.com/project-items/labels) of the element's outgoing connections (the option buttons shown in Play Mode).
- The order of option buttons, by dragging the handle on the left of each option (same behavior as [reorder options](https://docs.arcweave.com/project-tools/play-mode/using-play-mode#reorder-options)).
Edits use the same [rich text](https://docs.arcweave.com/project-tools/rich-text) toolbar as on the board, including formatting and [@mentions](https://docs.arcweave.com/project-tools/mentions). If the project uses [localization](https://docs.arcweave.com/project-tools/localization), changes apply to the language currently selected in Play Mode.
When an option has no label text, Play Mode shows the target element's title as option text, or the beginning of its content if it has no title.
### Move between fields
Context: Arcweave docs > Project Tools > Play Mode > Using Play Mode > Edit content in Play Mode > Move between fields
Use **Tab** and **Shift + Tab** to move focus between the element content and option labels. From the last option, **Tab** returns to the element content; from the element content, **Shift + Tab** moves to the last option.
### Save and exit edit mode
Context: Arcweave docs > Project Tools > Play Mode > Using Play Mode > Edit content in Play Mode > Save and exit edit mode
To save your changes and return to normal playtesting:
- Press **Esc**, or
- Click outside the content and option areas, or
- Click the **Edit content** button again.
**Restart** and [**Undo last choice**](https://docs.arcweave.com/project-tools/play-mode/debugger#undo-last-choice) save your edits and exit edit mode before they run.
> ℹ️ Changes are saved to the project immediately and are visible on the board and in future Play Mode sessions.
## Restart story
Context: Arcweave docs > Project Tools > Play Mode > Using Play Mode > Restart story
To restart the story, click the **Restart** button on the left side of the Play Mode top menu. The button is disabled while the story is at the element it restarts from.

This resets all [variables](https://docs.arcweave.com/project-items/variables/overview) and element [visits](https://docs.arcweave.com/project-items/arcscript#visits), and restarts the story from the project's [starting element](https://docs.arcweave.com/project-tools/play-mode/using-play-mode#set-play-mode-start).
> ℹ️ If you entered Play Mode using [Quickstart Play Mode from here](https://docs.arcweave.com/project-tools/play-mode/using-play-mode#quickstart-play-mode-from-here), restarting will restart the story from that element, not the project's starting element.
## Control audio volume
Context: Arcweave docs > Project Tools > Play Mode > Using Play Mode > Control audio volume
If you attach [audio assets](https://docs.arcweave.com/project-items/elements#audio-attachments) to elements, these files will automatically play during transitions between elements in Play Mode.
Play Mode follows each attachment's [audio reference settings](https://docs.arcweave.com/project-items/assets/audio#audio-reference-settings), including its behavior, volume, **Delay**, **Fade in**, **Fade out**, and **Auto-stop on element exit**.
The Play Mode interface includes audio controls on the top menu:
1. Click the **audio icon** to access volume controls.
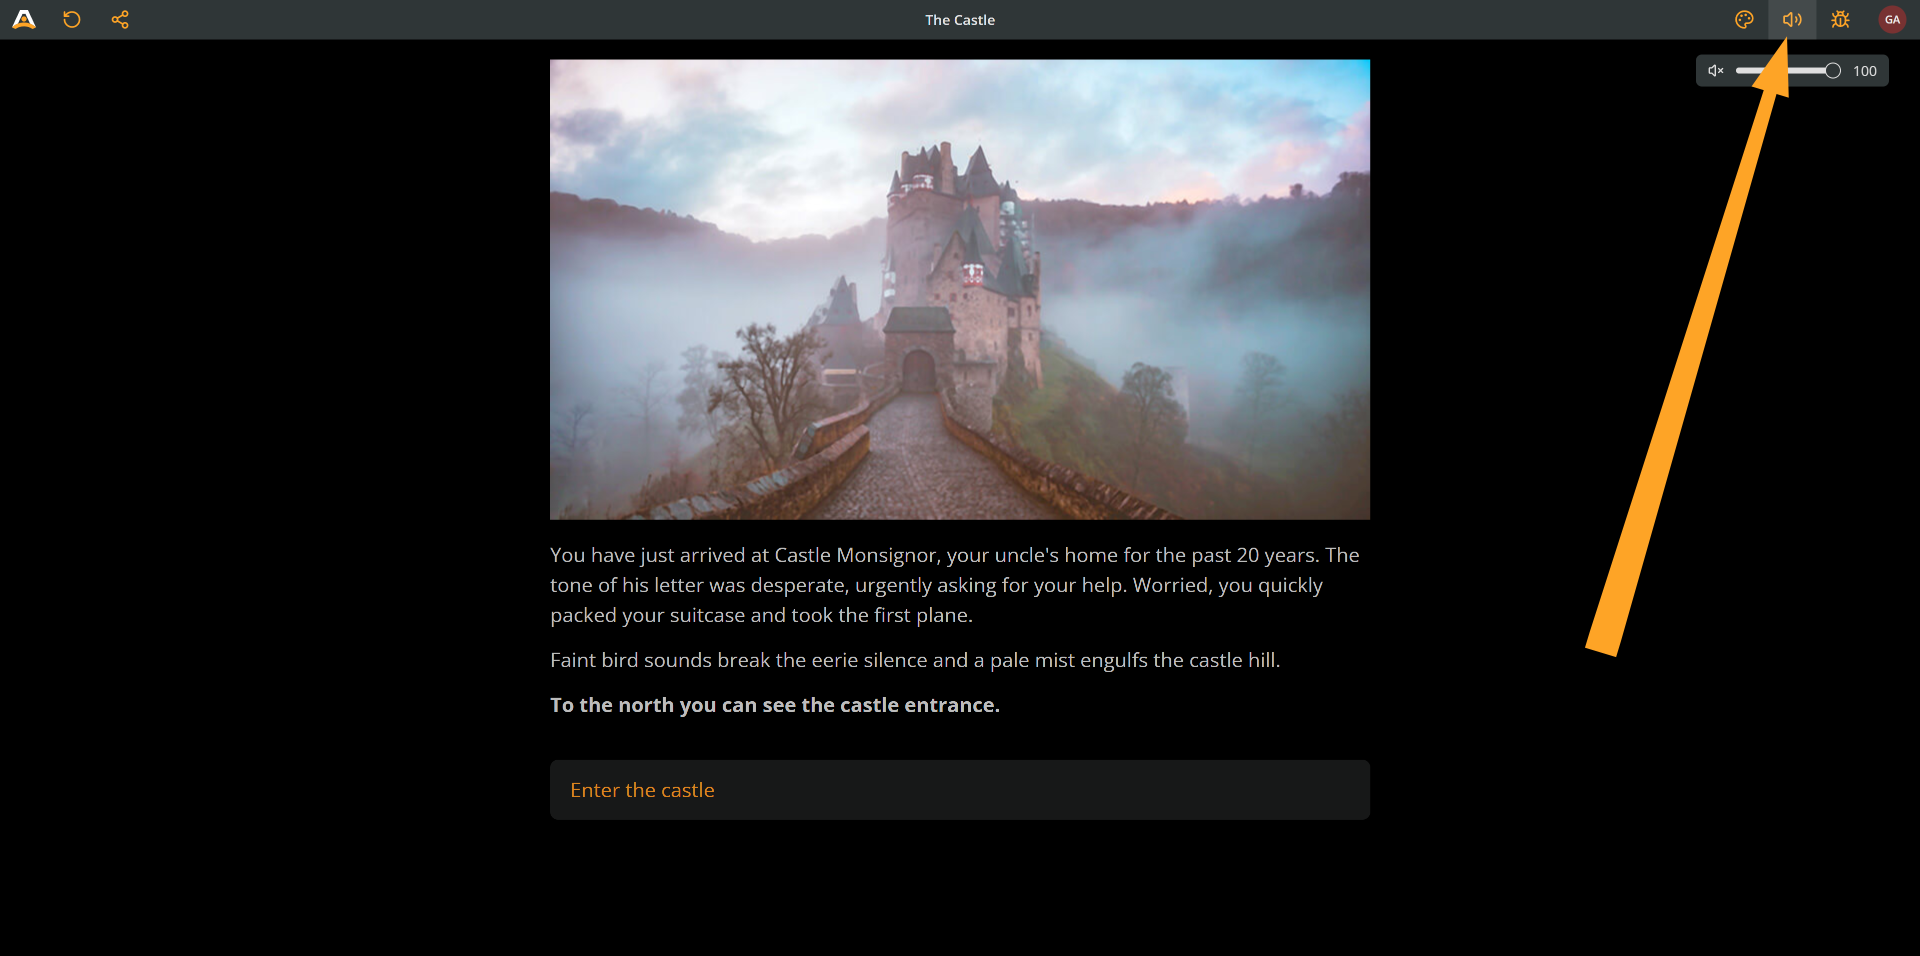
2. Adjust the volume slider to set your preferred audio level.
3. Click the **mute icon** to toggle audio on or off.
## Choose language
Context: Arcweave docs > Project Tools > Play Mode > Using Play Mode > Choose language
The Play Mode interface includes a menu that lets you select the story's language. This option is useful when a project uses Arcweave's [localization](https://docs.arcweave.com/project-tools/localization) feature and includes multiple languages.

To change the story's language:
1. Click the **Localization icon** to open the list of available story languages.
2. Choose the desired language.
## Share project
Context: Arcweave docs > Project Tools > Play Mode > Using Play Mode > Share project
For all users except [project visitors](https://docs.arcweave.com/workspaces/roles#project-visitors), the **Play Mode** interface includes a **Share** button, located on the left side of the top menu.
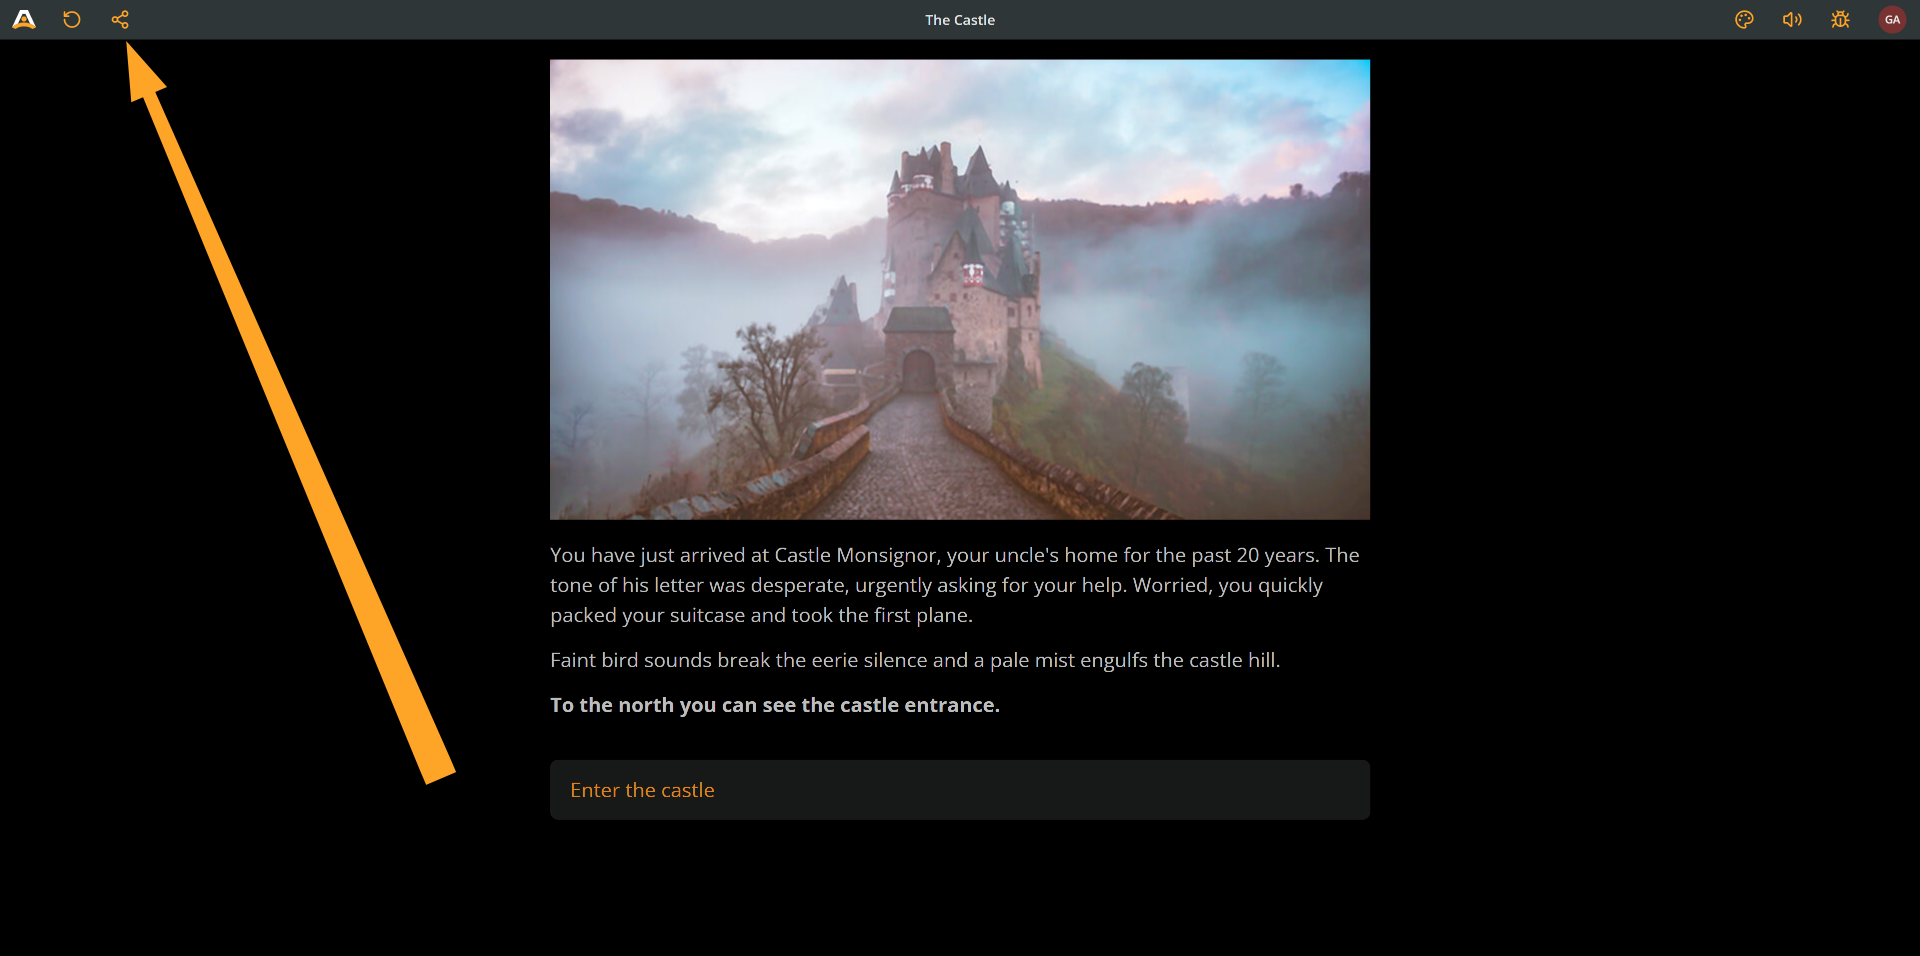
This button functions identically to the project's main [Share](https://docs.arcweave.com/project-tools/share) button: it opens the **Share panel**, where you can manage project collaborator and visitor access. The available sharing options and permissions depend on the user's assigned role within the project.
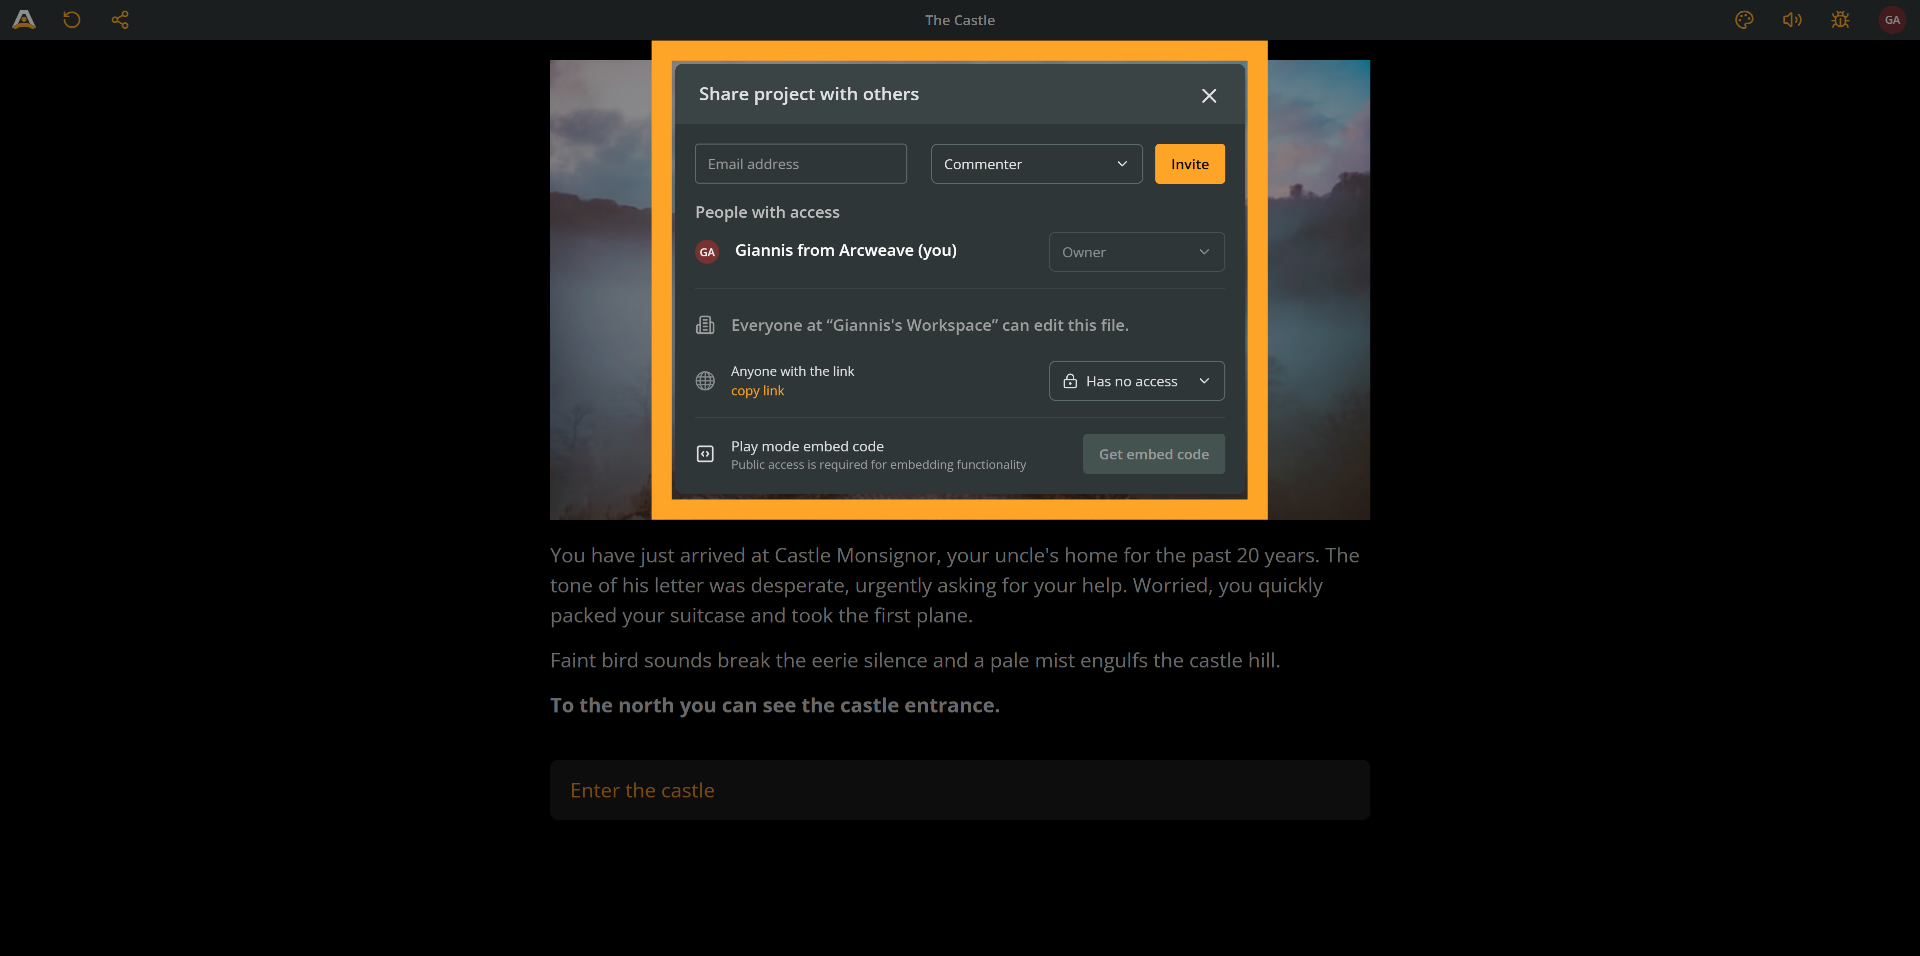
For a detailed description of the Share panel, see [Share your project](https://docs.arcweave.com/project-tools/share).
# Debugger
Source: https://docs.arcweave.com/project-tools/play-mode/debugger
Section: Project Tools > Play Mode
Description: Playtest your project using Play Mode's debugging features
Project owners and editors can use the Debugger to track variables and playtest the project.

> ⚠️ Debug info is visible only to owners and editors; see [Roles](https://docs.arcweave.com/workspaces/roles) in the Workspaces section of this documentation.
## Access the Debugger
Context: Arcweave docs > Project Tools > Play Mode > Debugger > Access the Debugger
To open the Debugger:
1. [Open the Play Mode menu](https://docs.arcweave.com/project-tools/play-mode/using-play-mode#open-play-mode-menu) at the top of the window.
2. Click the **Debug** icon (bug icon). The icon is disabled if the project has no [starting element](https://docs.arcweave.com/project-tools/play-mode/using-play-mode#set-play-mode-start) and you did not [quickstart](https://docs.arcweave.com/project-tools/play-mode/using-play-mode#quickstart-play-mode-from-here) from an element.
To resize the Debugger, drag its left edge. To close it, click its **X** button or the **Debug** icon again.
## Undo last choice
Context: Arcweave docs > Project Tools > Play Mode > Debugger > Undo last choice
After you make a choice in Play Mode, **Undo last choice** appears beside the **Debugger** heading. Click it to return to the previous element.
Undo restores the variable values, element visit counts, and rendered content saved before that choice. It also restores the Debugger's Previous and Current values. The previous element's Arcscript does not run again.
You can undo repeatedly until you reach the start of the current playthrough. The button disappears when there are no choices left to undo. Restarting the story clears this choice history.
## Identifiers display
Context: Arcweave docs > Project Tools > Play Mode > Debugger > Identifiers display
The top part of the Debugger displays information on the current board and element:
- Current board:
- [Board name](https://docs.arcweave.com/project-items/boards#rename-boards-folders)
- [Board UUID](https://docs.arcweave.com/project-items/boards#board-id)
- [Board custom ID](https://docs.arcweave.com/project-items/boards#custom-id)
- Current element:
- [Element title](https://docs.arcweave.com/project-items/elements#edit-elements)
- [Element UUID](https://docs.arcweave.com/project-items/elements#element-id)
Click the **ID** button next to the current board or element to display its identifiers. Use the copy button next to an identifier to copy it to your clipboard.
> ℹ️ Uses of board and element UUIDs include accessing the items in the project's [JSON](https://docs.arcweave.com/integrations/json), as well as targeting the element for CSS styling in the [Style Editor](https://docs.arcweave.com/project-tools/play-mode/style-editor); see the [CSS basics guide](https://docs.arcweave.com/tutorials/style-editor/css-basics#style-specific-elements).
## Track variables
Context: Arcweave docs > Project Tools > Play Mode > Debugger > Track variables
The area beneath the identifiers panel displays a list of the project's [variables](https://docs.arcweave.com/project-items/variables/overview), providing real-time tracking and debugging during playthrough. Use **Search variables and values** to filter the list by variable name, Previous value, or Current value.
Variables appear in collapsible groups: one for global variables and one for each board or component that owns scoped variables. Each group heading shows its number of variables. Board and component groups also display the item's name and custom ID.
Each row in the list includes:
- **Name**: The global variable name or the custom ID of a board/component variable attribute. Scoped variables are grouped under their owning board or component and its custom ID. Hover over a name to see the variable's type.
- **Previous value** (editable): The variable's value _before_ loading the current element.
- **Current value**: The variable's value _after_ loading the current element.
> ℹ️ When Arcweave loads an element that contains [Arcscript segments](https://docs.arcweave.com/project-items/arcscript), those segments execute sequentially in their defined order. If any segment assigns a new value to a variable, the update appears in the **Current value** column.
The Previous value field's type depends on the variable's type, as defined in the **Global variable dialog** or the owning board or component's attributes.
Editing a variable's **Previous value** allows you to test the logic of the current element. Updating this field immediately recalculates:
- The variable's **Current value**
- The values of any other variables updated by code within the current element
- Text content that depends on the variable (e.g., via `if` expressions)
- Available options that depend on the variable (e.g., via branch logic)
### Color indicators
Context: Arcweave docs > Project Tools > Play Mode > Debugger > Track variables > Color indicators
The Debugger uses **orange color** to flag variable values that either:
- Are manually edited by you during the playthrough.
- Have different Previous and Current values.
An orange dot in a group heading indicates that the group contains at least one variable whose Previous and Current values differ.
# Style Editor
Source: https://docs.arcweave.com/project-tools/play-mode/style-editor
Section: Project Tools > Play Mode
Description: Customize Play Mode's appearance using custom CSS
Arcweave allows you to customize the appearance of the Play Mode interface using custom CSS via the **Style Editor**.

> ✅ The **Tutorials** section includes two tutorials on CSS: [Arcweave CSS basics](https://docs.arcweave.com/tutorials/style-editor/css-basics) and [Visual novel CSS](https://docs.arcweave.com/tutorials/style-editor/css-visual-novel).
## Access the Style Editor
Context: Arcweave docs > Project Tools > Play Mode > Style Editor > Access the Style Editor
To access the Style Editor:
1. Enter Play Mode by clicking the **Play Mode** button in the project's top menu.
2. Click the **Style Editor icon** (palette icon) in Play Mode's top bar.
The Style Editor is available to project owners and editors. To close it, click its **X** button or the palette icon again.
## Use the Style Editor
Context: Arcweave docs > Project Tools > Play Mode > Style Editor > Use the Style Editor
The Style Editor panel provides a dedicated environment for writing and managing your custom CSS:
1. **Interface:** The editor features CSS syntax highlighting and line numbers for easier code readability and navigation. The panel itself is resizable; you can drag its left edge to adjust the width.
2. **Writing CSS:** Enter your custom CSS rules in the editor.
3. **Real-time Validation:** As you type, the editor automatically validates your CSS.
- If errors are detected, an alert icon and the error count (for example, **2 errors - view details**) appear at the bottom of the panel.
- Clicking the error count displays each error with its line number (e.g., "Line 5: ...").
- The **Save changes** button will be disabled until all validation errors are resolved.
4. **Live Preview:** Valid CSS rules are reflected in the Play Mode window in real-time, allowing you to see the effects of your changes instantly. The preview applies only to your current browser tab; unsaved changes are lost when you reload or leave Play Mode.
5. **Saving:** Once you are satisfied and there are no validation errors, click the **Save changes** button to persist your custom styles. Your styles will be applied whenever you or others run this project in Play Mode.
## Keyboard Shortcuts
Context: Arcweave docs > Project Tools > Play Mode > Style Editor > Keyboard Shortcuts
The following keyboard shortcuts are available within the Style Editor:
| Shortcut | Action |
| :---------- | :---------------------------------------------------------------------- |
| Tab | Insert 2 spaces at the cursor, or indent the selected lines by 2 spaces |
| Shift + Tab | Remove 2 spaces from the start of the current or selected lines |
## Available CSS Selectors
Context: Arcweave docs > Project Tools > Play Mode > Style Editor > Available CSS Selectors
See the [Play Mode styling reference](https://docs.arcweave.com/project-tools/play-mode/styling-reference) for the DOM structure, selectors, layout defaults, CSS variables, media variants, and edit-mode behavior. It includes working examples for both manual editing and AI agents using the REST API or MCP.
For story text, start with `.prototype__text .editor .editor-content`. For choices, use `.prototype__option`; these are clickable `div` elements. Scope rules to the story to avoid changing other application UI.
## Example
Context: Arcweave docs > Project Tools > Play Mode > Style Editor > Example
Here's the built-in preset from the Style Editor. To load it, click **apply a preset** at the top of the Style Editor panel. This replaces the CSS in the editor; click **Save changes** to keep it. You can use this as a starting point for your own customizations:
```css
@import url('https://fonts.googleapis.com/css2?family=Lora:ital,wght@0,400..700;1,400..700&display=swap');
.prototype__wrapper {
padding-top: 0px;
}
.prototype__content {
display: flex;
flex: 1;
flex-flow: row-reverse;
max-width: 100%;
padding: 0;
}
.prototype__header {
display: flex;
flex-basis: 50%;
}
.prototype__body {
flex: 1;
padding: 2rem;
font-family: 'Lora', serif;
}
.prototype__text .editor .editor-content {
font-size: 22px;
}
.prototype__media {
flex-flow: column;
flex: 1;
}
.prototype__media img {
object-fit: cover;
width: 100%;
height: 100%;
}
.prototype__components {
grid-gap: 0;
height: 100%;
}
.prototype__components--pushed {
display: none;
}
.prototype__components.single > .comp {
background: #1d1f1f;
}
.prototype__option {
--prototype-option-background: transparent;
--prototype-option-background-hover: transparent;
border-radius: 0;
border: 1px solid #292d2d;
background: none;
}
@media (max-width: 767px) {
.prototype__wrapper {
padding-top: 40px;
}
.prototype__content {
flex-flow: column;
}
.prototype__body .editor .editor-content {
padding: 0 0 40px;
}
.prototype__header {
flex-basis: 0;
}
}
```
## Target elements
Context: Arcweave docs > Project Tools > Play Mode > Style Editor > Target elements
Each displayed element's root has the DOM ID `el-` followed by its element UUID. Copy the UUID from **Properties → Details → Element ID**, or use the element ID returned by the REST API or MCP. See [Target one element](https://docs.arcweave.com/project-tools/play-mode/styling-reference#target-one-element) for the mapping and its limits.
```css
/* Replace this UUID with the element's UUID. */
#el-38375689-9e4d-430e-954c-65205eb622fe
.prototype__text
.editor
.editor-content {
font-family: 'Courier New', monospace;
font-size: 18px;
}
#el-38375689-9e4d-430e-954c-65205eb622fe .prototype__option {
--prototype-option-background: darkred;
--prototype-option-background-hover: #b22222;
}
```
Browser developer tools can help investigate a rule that does not behave as expected. You do not need browser inspection to construct an element selector from its UUID.
## Update styles through the API or MCP
Context: Arcweave docs > Project Tools > Play Mode > Style Editor > Update styles through the API or MCP
The [CSS REST API](https://docs.arcweave.com/rest-api/css) and [MCP CSS tools](https://docs.arcweave.com/integrations/mcp#style-play-mode) edit the same custom stylesheet. They replace its complete contents. Reload an already-open Play Mode tab to fetch externally saved changes, or click Play in the editor to open a new tab with fresh settings. Restarting the story does not refresh the stylesheet.
The latest save wins; an old Style Editor tab can overwrite externally saved CSS. Retain unsaved local edits before reloading, then reapply them to the fresh stylesheet before saving.
Follow [Save and verify styles](https://docs.arcweave.com/project-tools/play-mode/styling-reference#save-and-verify-styles) to preserve existing rules, keep a rollback copy, and check the result. A successful API/MCP response does not perform the Style Editor's CSS validation or visual verification.
# Play Mode styling reference
Source: https://docs.arcweave.com/project-tools/play-mode/styling-reference
Section: Project Tools > Play Mode
Description: Play Mode DOM structure, CSS selectors, layout defaults, and working examples for the Style Editor, REST API, and MCP
This reference describes Play Mode's HTML structure, CSS selectors, and default styles. The [Style Editor](https://docs.arcweave.com/project-tools/play-mode/style-editor), [REST API](https://docs.arcweave.com/rest-api/css), and [MCP server](https://docs.arcweave.com/integrations/mcp#style-play-mode) all use the same project stylesheet. Reading that stylesheet returns only your custom rules, not Arcweave's built-in CSS.
The structure and examples below let you author styles without browser inspection. Use a browser to verify the rendered result, especially after changing layout or targeting a particular playback state.
## Start with a small theme
Context: Arcweave docs > Project Tools > Play Mode > Play Mode styling reference > Start with a small theme
This example changes the background, story text, and choices while keeping the default layout:
```css
.prototype {
background: #060c13;
}
.prototype__content {
background: #111e28;
}
.prototype__text .editor .editor-content {
color: #d4dedc;
font-family: Georgia, serif;
font-size: 22px;
line-height: 1.6;
}
.prototype__option {
--prototype-option-background: #1b2d37;
--prototype-option-background-hover: #293b42;
color: #e1bc79;
border: 1px solid #415962;
}
```
Preserve any existing custom CSS when applying a new theme. A REST or MCP update replaces the complete custom stylesheet; see [Save and verify styles](https://docs.arcweave.com/project-tools/play-mode/styling-reference#save-and-verify-styles).
## Page structure
Context: Arcweave docs > Project Tools > Play Mode > Play Mode styling reference > Page structure
This browser capture shows the default styling on a Castle demo scene with two attached components. Cyan callouts identify the regions listed below; they are annotations, not built-in borders.
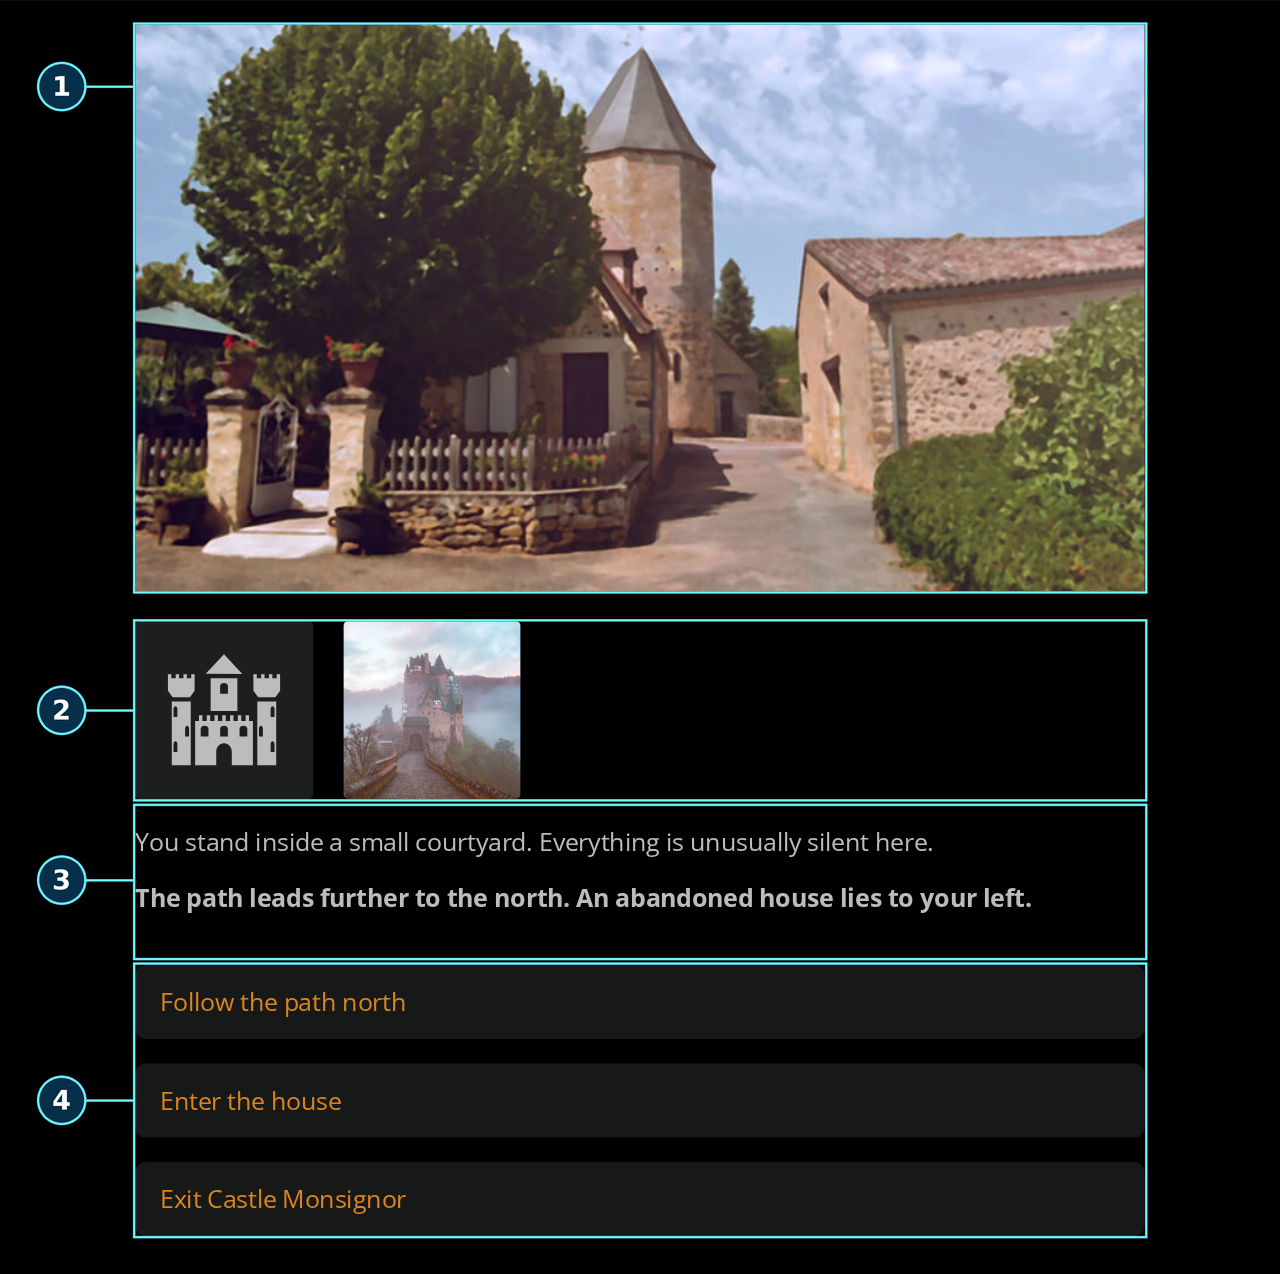
| Callout | Region | Selectors |
| ------- | ------ | --------- |
| 1 | Element image cover | `.prototype__media img.single` |
| 2 | Attached components | `.prototype__components`; individual covers use `.comp--icon` or `.comp--image`. |
| 3 | Story text | `.prototype__text`; style its text with `.prototype__text .editor .editor-content`. |
| 4 | Choices | `.prototype__options` contains the individual `.prototype__option` choices. |
The following is a simplified example of normal playback with an image cover and two choices. Utility classes and rich-text wrappers are omitted where marked. Navigation, the debugger, and the Style Editor sit outside the story root.
```html

The story text.
```
Use descendant selectors such as `.prototype__root .prototype__wrapper`. Do not assume the wrapper is a direct child of the root: the scrollbar library adds wrappers at runtime. Treat library and utility classes as implementation details; prefer the named story classes below.
### Main selectors
Context: Arcweave docs > Project Tools > Play Mode > Play Mode styling reference > Page structure > Main selectors
| Selector | Target |
| ------------------------------------------ | -------------------------------------------------------------------------------------------------------------------------------------------------------- |
| `.prototype` | Outer Play Mode page, including surrounding controls. Useful for the page background. |
| `.prototype__main` | Player area. |
| `.prototype__root` | Scrollbar host for the current story element; also carries `id="el-"`. |
| `.prototype__wrapper` | Centers the story and supplies top spacing. |
| `.prototype__content` | Story panel containing the header and body. |
| `.prototype__header` | Element cover and attached component covers. |
| `.prototype__body` | Story text and choices. |
| `.prototype__text` | Text region; may also have `has-cover`, `showArrow`, or `play-mode-editing`. |
| `.prototype__text .editor .editor-content` | Text box with explicit color, font size, line height, and padding. |
| `.prototype__text .editor .ProseMirror` | Rich-text content, containing paragraphs, headings, links, and formatting tags. |
| `.prototype__options` | Available choices. Hidden when there are no displayed choices. |
| `.prototype__option` | A clickable **`div`**, not a native `button`. Normal playback puts label HTML directly inside it. |
| `.prototype__option.visited` | A choice leading to an element already visited in the current playthrough. |
| `.prototype__option.gold` | A choice with the corresponding connection color theme; see [all theme classes](https://docs.arcweave.com/tutorials/style-editor/css-basics#style-connections-of-specific-color). |
Use `.prototype__option` to style choice text, or `.prototype__option p` for its paragraphs. There is no separate label class in normal playback.
### Media and components
Context: Arcweave docs > Project Tools > Play Mode > Play Mode styling reference > Page structure > Media and components
The element cover appears inside `.prototype__media` in one of these forms:
| Cover | Rendered target | Styling notes |
| -------------- | ------------------------------------------------------------- | ------------------------------------------------------------------------------------------------------------------- |
| Image | `img.single` | `.prototype__media img.single` selects only the element cover. |
| Uploaded video | `video.video-cover-player` | The class is on the video itself; `.video-cover-player video` matches nothing. |
| YouTube | `.embeded-youtube` containing an `iframe` | Keep the spelling `embeded-youtube`. Size the wrapper and iframe as needed. |
| Icon | `.prototype__media > .svg-icon-container` containing an `svg` | Use the direct child selector to exclude component icons inside `.prototype__media` when there is no element cover. |
Attached component covers use `.prototype__components` grids. Their placement depends on the element cover:
- **No element cover:** the visible grid is inside `.prototype__media`. A single component adds `.single` to this grid.
- **Image cover:** the visible grid is a sibling after `.prototype__media`, with `.prototype__components--pushed`.
- **Icon or YouTube cover:** the sibling grid has `.prototype__icon-pushed`.
- **Video cover:** the sibling grid has `.prototype__components` without either modifier.
An unused grid can remain in the DOM with inline `display: none`. Do not force hidden grids to display with `!important`.
Image components render as `![]() `. Icon components render as `